Adding Users
To add users as an admin:
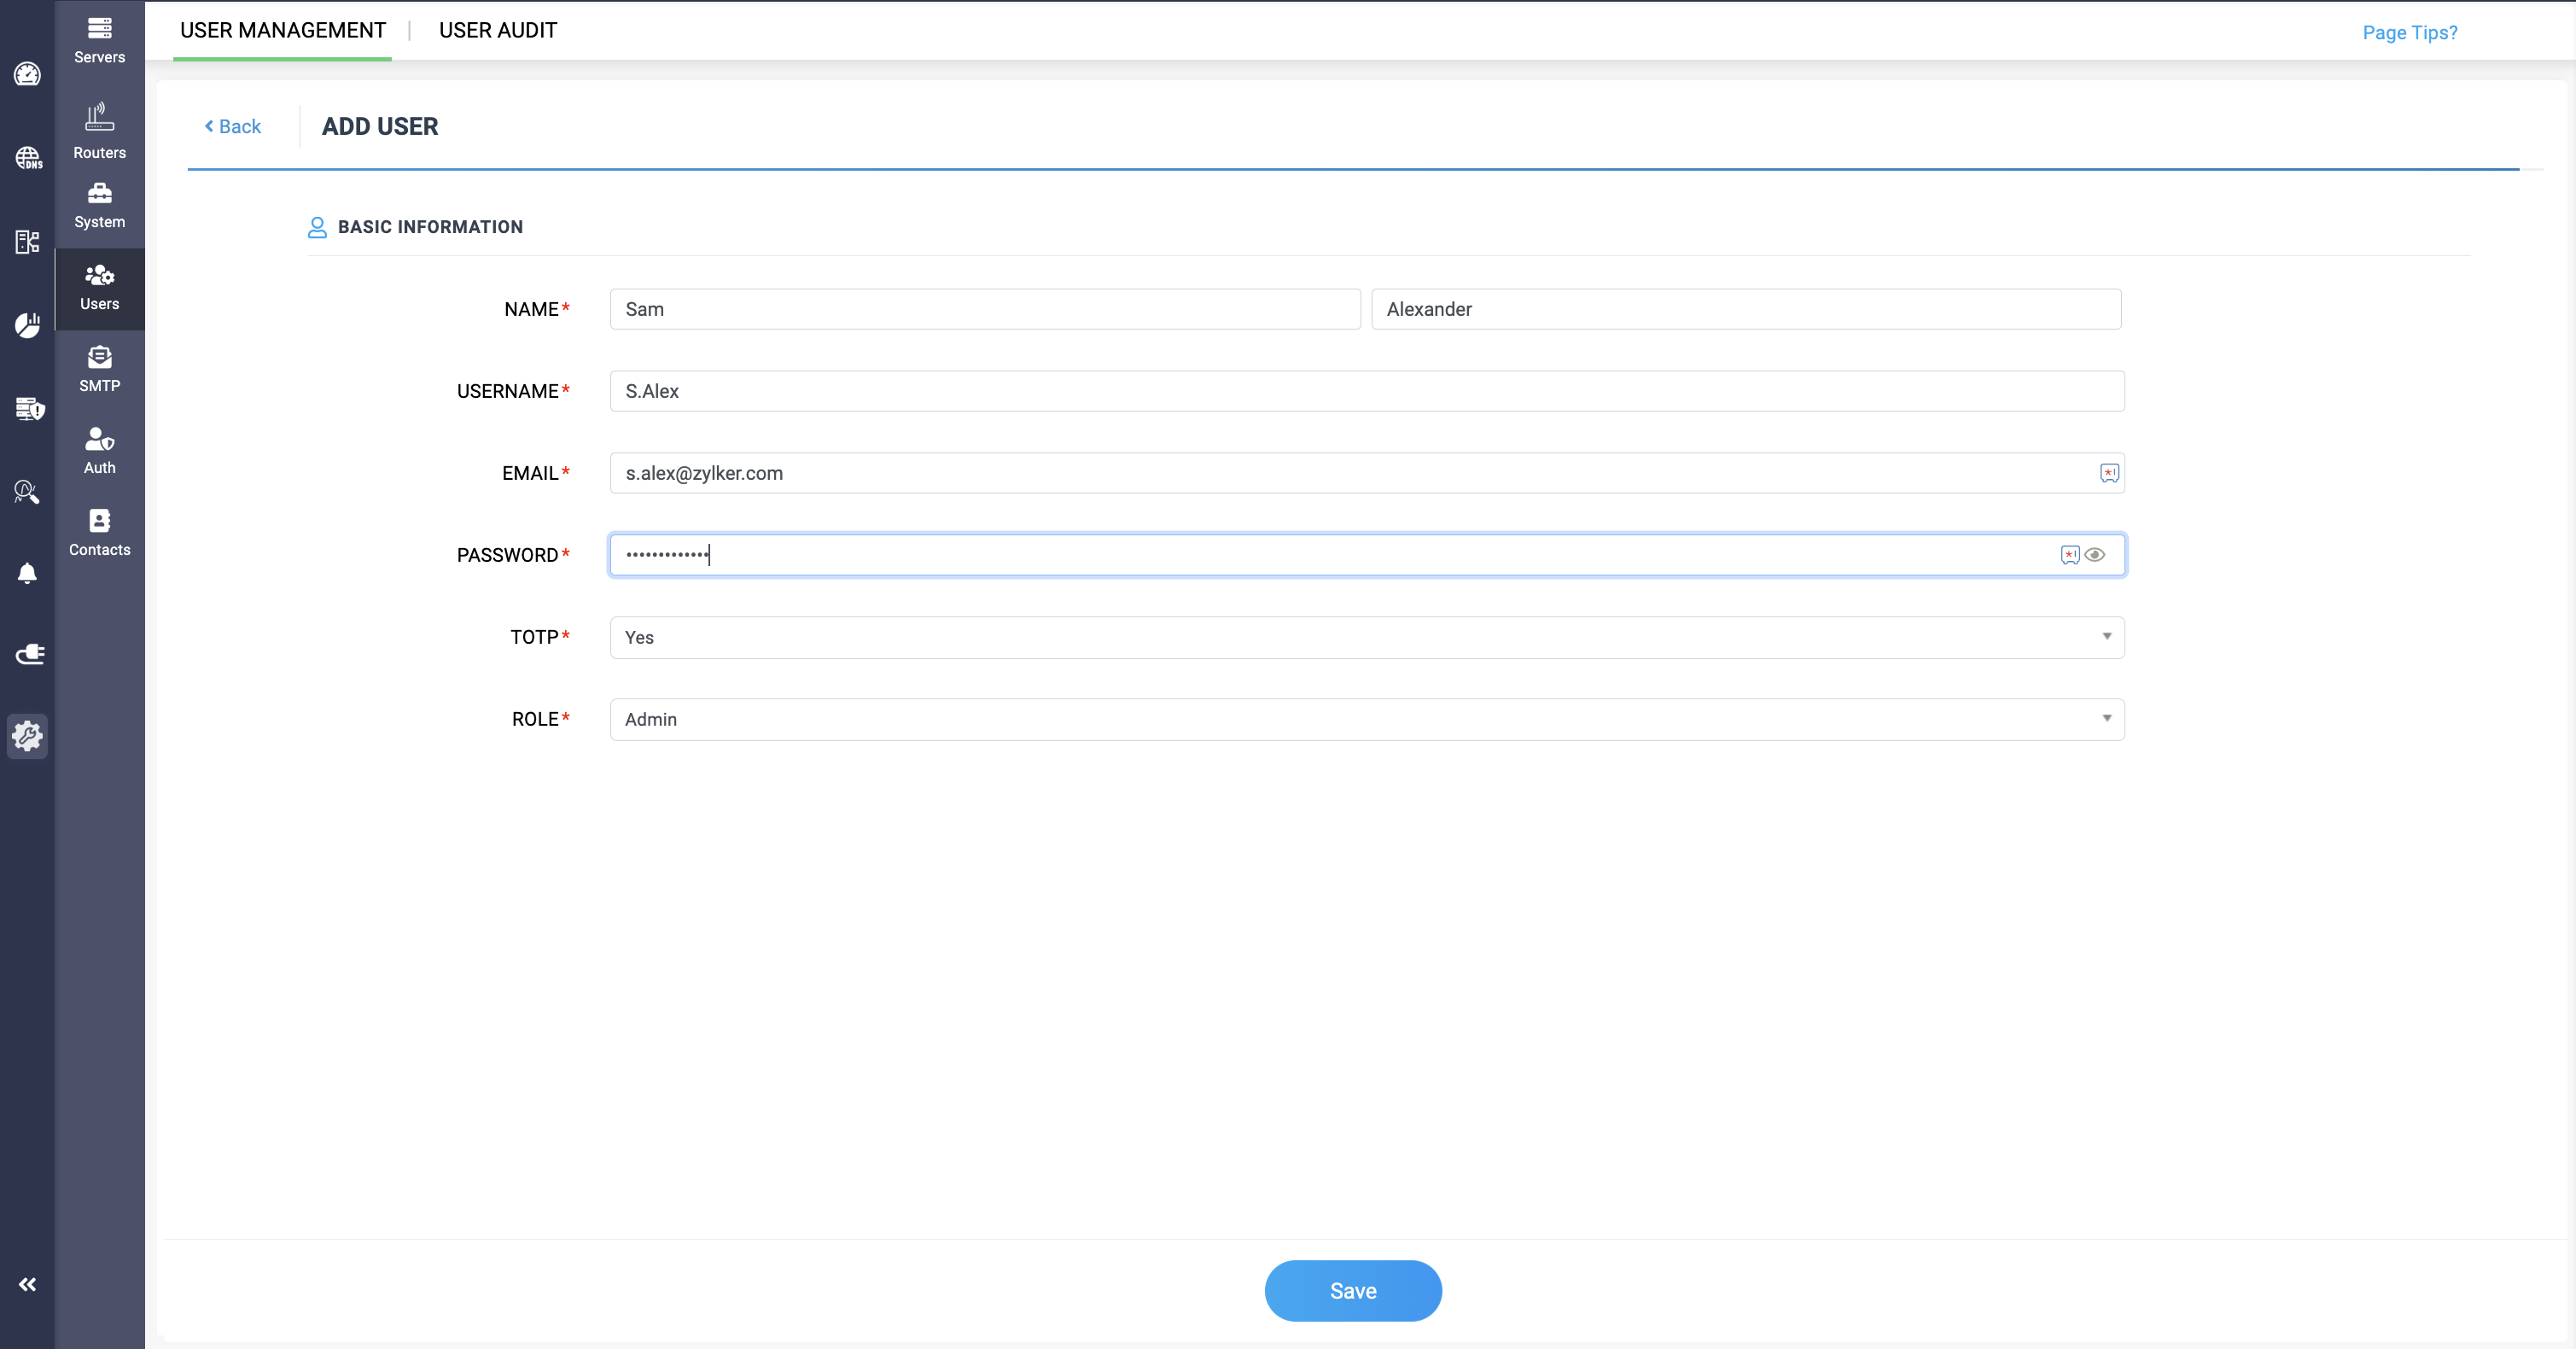
- Select Settings->Users.
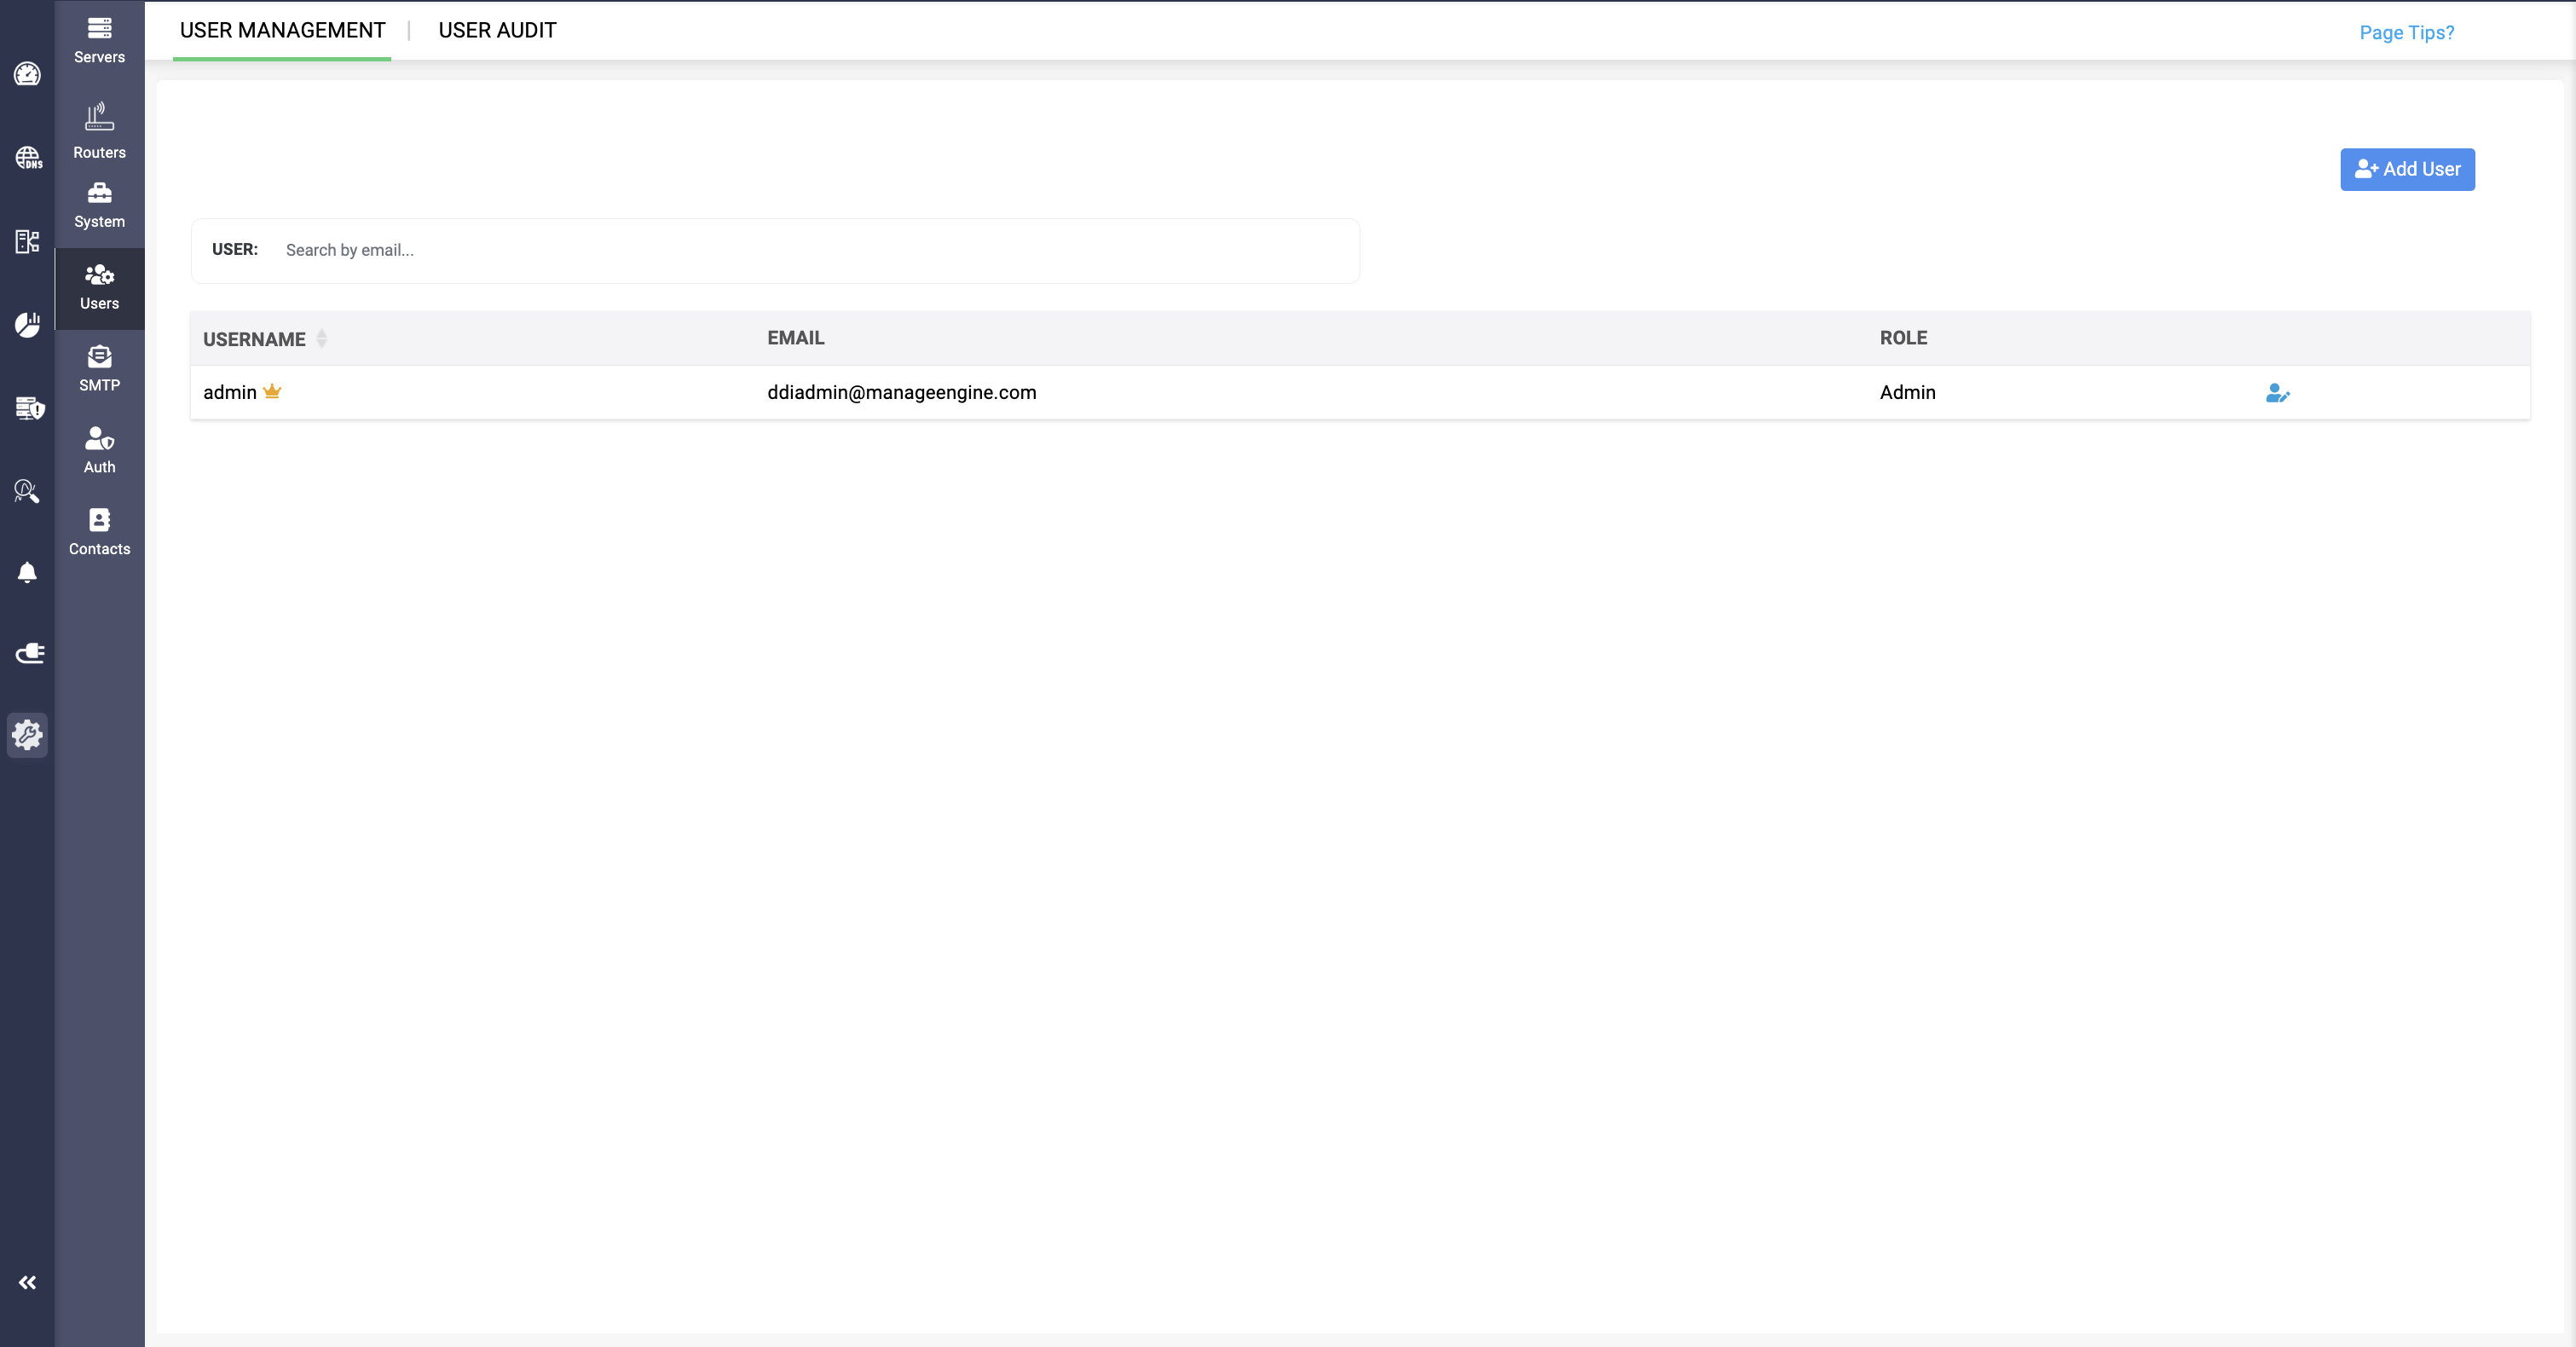
- Under the User Management tab, click on the Add User button in the right corner.
- Enter the essential details of the user, including Name, Username, email, and password. You can enable or disable the login for this particular user. Set Yes to enable the login. Enable the TOTP login for the user to add an extra layer of security.
- Finally, Assign the appropriate role for the user.
- DDI provides only two roles: Admin and Operator. The Admin role has unrestricted access, while the Operator role has limited access, which can be extended by granting specific permissions for each cluster or zone as needed.
- Click Save.
- Provide the Username, Password, and URL for the other users you've added. Make sure they login using the URL from their web browser.
- Once they login they'll be prompted to reset their password and log into the DDI Central application.
Note: It is mandatory for every user logging into DDI Central for the first time to reset their password and set their email to an active email ID. By default, DDI Central comes with a dummy username, password, and email as placeholders.
If users, in their haste to set up the environment, forget to reset these credentials, they will not be able to access the application.
Users with the Operator role do not have permission to configure DHCP failover on the server. Only users with the Admin role can create, update, or delete failover configurations.
Enabling Two-factor authentication for the users
DDI Central enhances user account security by mandating two-factor authentication (2FA) for all users associated with your organization. This additional security layer requires verification through a time-sensitive code generated by a compatible mobile authenticator application. The following steps outline the 2FA process.
- Users need a mobile device capable of running a TOTP-enabled authenticator mobile app.
- DDI Central is compatible with various mobile authenticator apps, including Google Authenticator, Zoho's OneAuth, Authy, and others.
- Install your chosen authenticator app on your smartphone.
Link DDI Central to the authenticator app either by scanning the QR secret code displayed on the DDI Central login page or by entering the code manually. This is a one-time process.
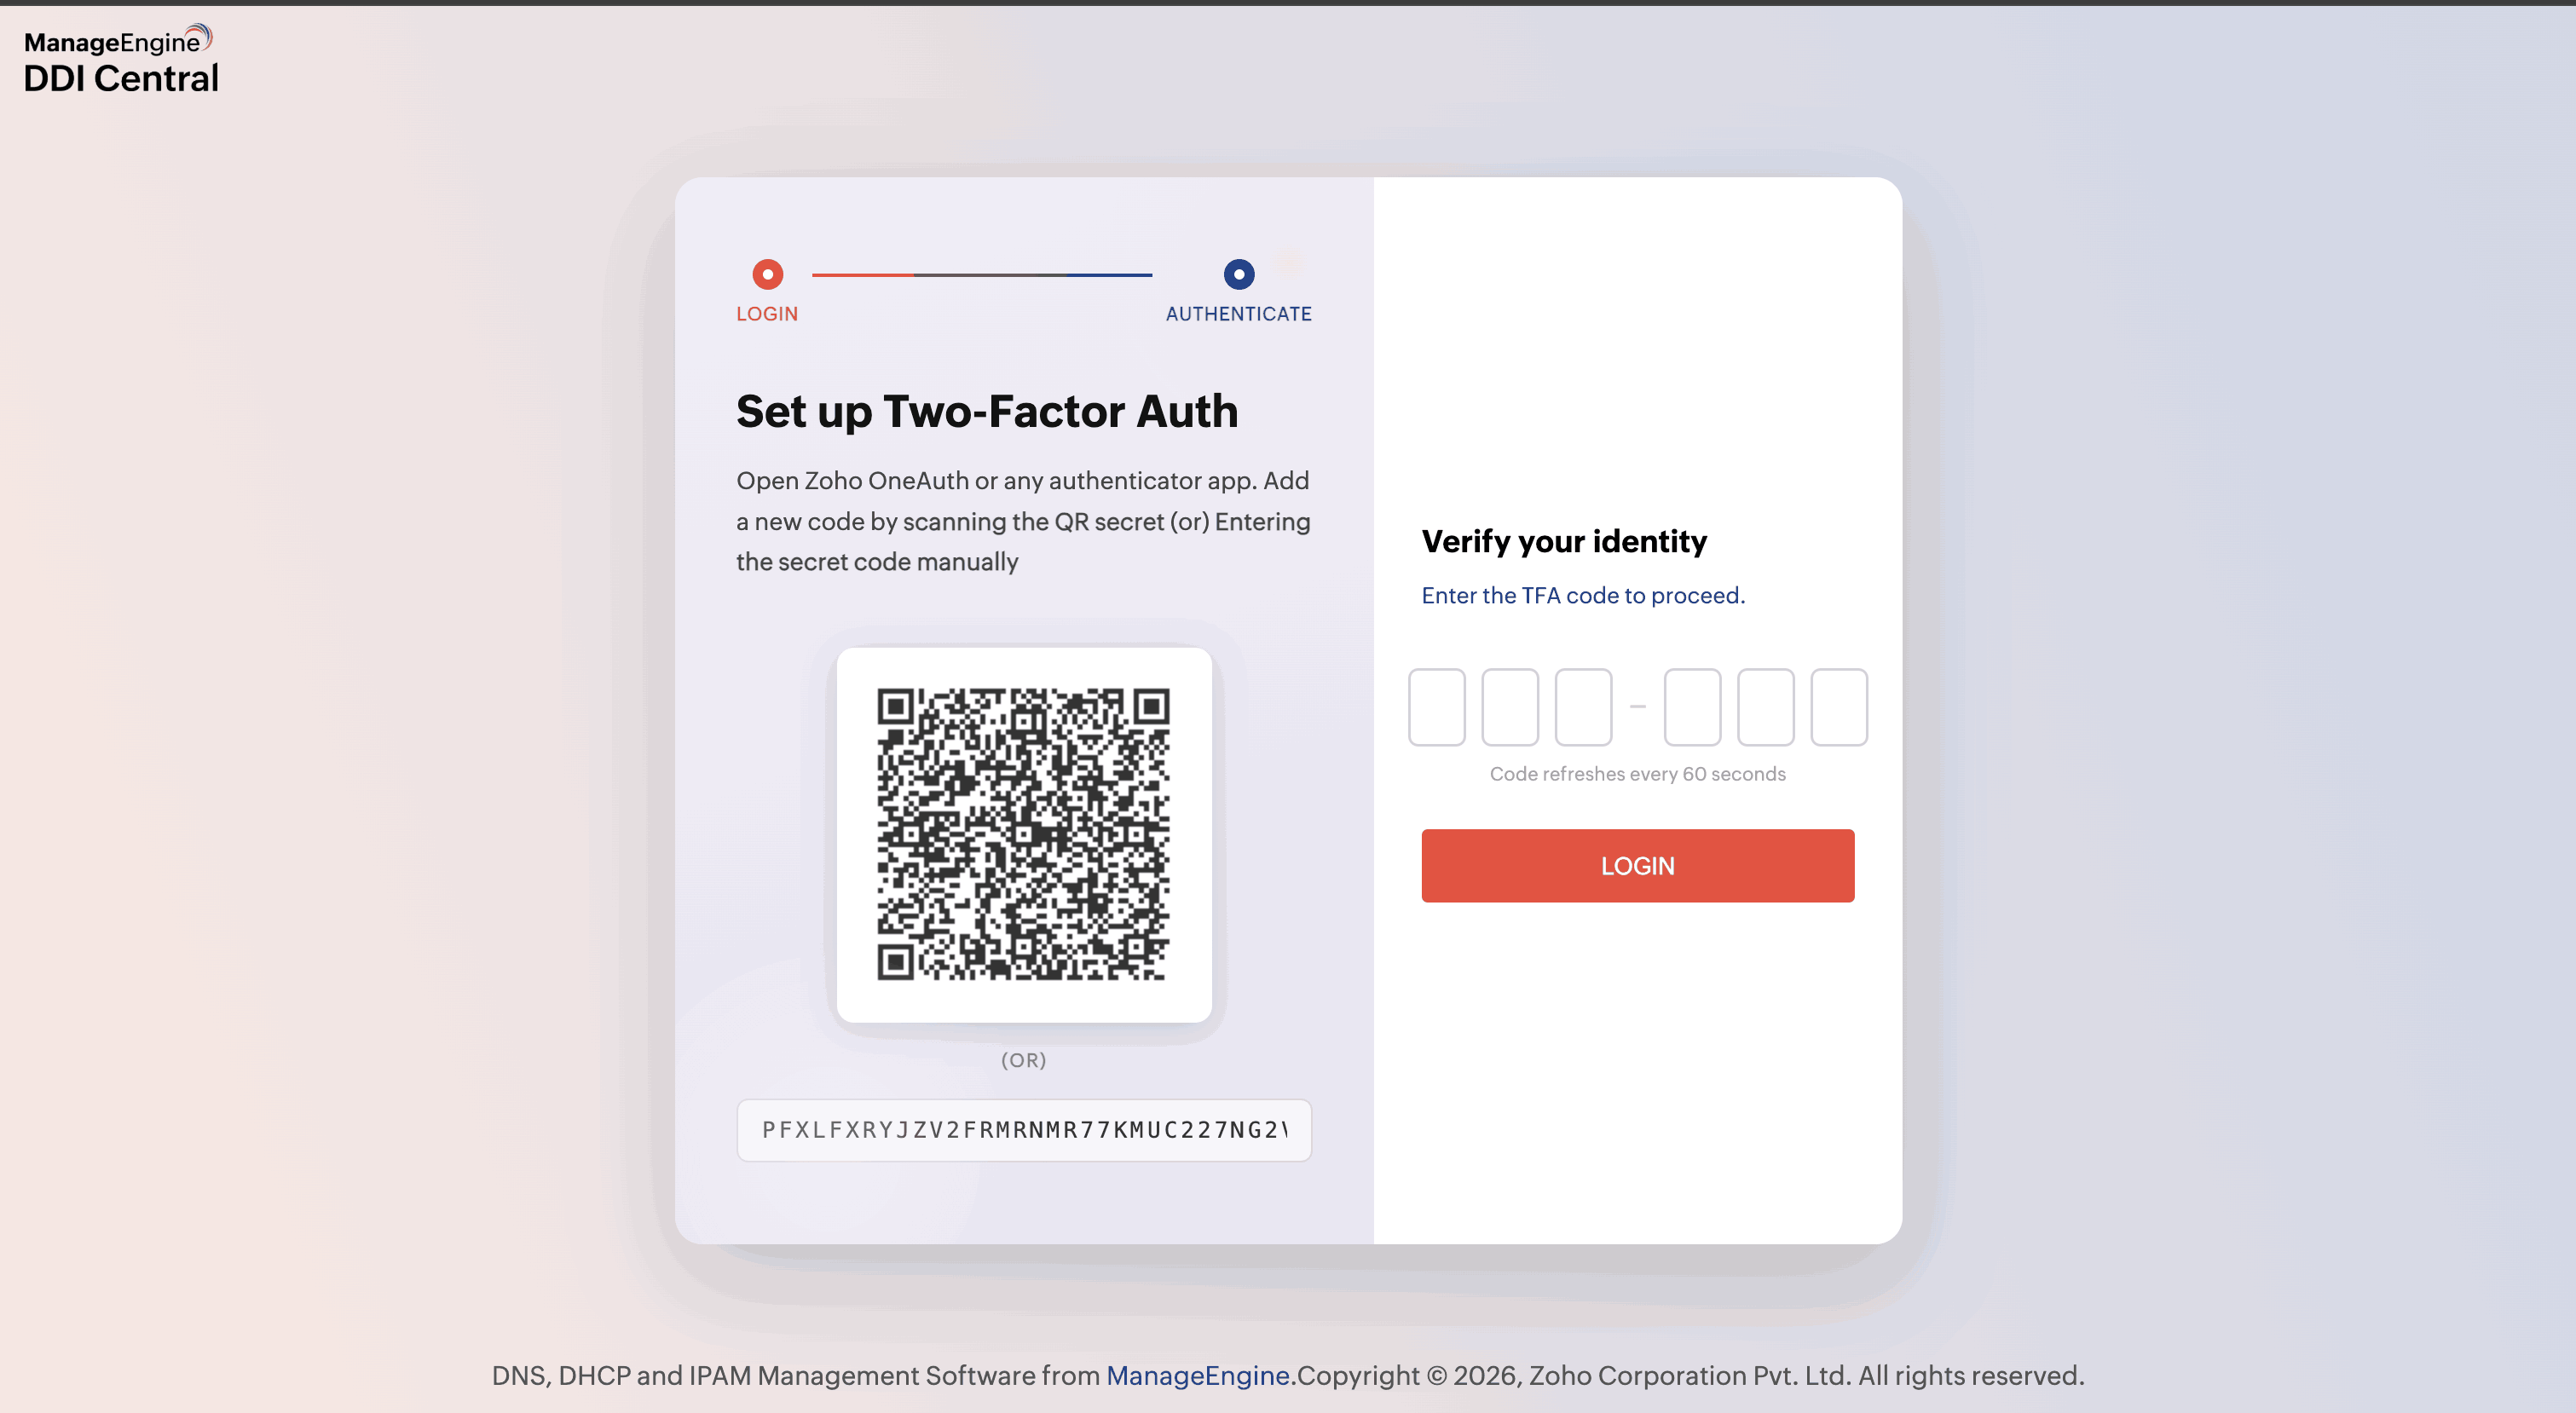
- On subsequent logins, enter the TOTP displayed in your authenticator app. The OTP adds an extra layer of security and can be generated without an internet connection.
- Upon first accessing DDI Central, all users including the Admin who managed the installation process will need to reset their password.
This two-factor authentication approach ensures that access to your DDI Central account is secure, combining something the user knows (their password) with something they have (a TOTP from the authenticator app).
User permissions
| Admin can | Operator can |
|---|---|
| Create, update, and delete user | - |
| Add, update, and delete zones | Update zone if operator has zone permission |
| Create update and delete cluster | - |
| Giving cluster and zone permission to the operator | - |
| Add, update, and delete servers | - |
| Add SMTP details | - |
| Able to see login and logout details of the user | - |
| Able to see DHCP and DNS audit report | - |
| Reset client credentials | Reset client credentials |
| Enable TOTP for an user | - |
| Delete TOTP device | - |
| Add, update, and delete records in zone | Add, update, and delete records in zone if the operator has zone permission |
| Add, update, and delete named options | Add, update, and delete named options if the operator has cluster permission |
| Add, update and delete dhcp options | Add, update and delete dhcp options if operator has cluster permission |
| Add, update, and delete custom options | Add, update, and delete custom options if the operator has cluster permission |
| Add, update, and delete subnet, shared network, client class, host, host group and vlan | Add, update and delete subnets, shared network, client classes, host, host group and vlan if the operator has cluster permission |
| Add, update and delete supernet | Add, update and delete supernet if operator has cluster permission |
| Add, update, and delete failover configurations | Add, update, and delete failover if the operator has cluster permission |
| Enable, add, update, and delete named views | update named_view if operator has cluster permission |
| Add, update and delete DHCP Zone | Add, update, and delete DHCP Zone if operator has cluster permission |
| Add, update, and delete records in views | Update view if operator has zone permission |
The Superadmin, the first mover, or the first user who installs the product must replace the default email address, "ddiadmin@manageengine.com," with their preferred or official email address under their user profile within the DDI Central app immediately after logging in. This is essential because DDI Central sends notifications only via email. Registering their email address ensures they receive timely notifications.
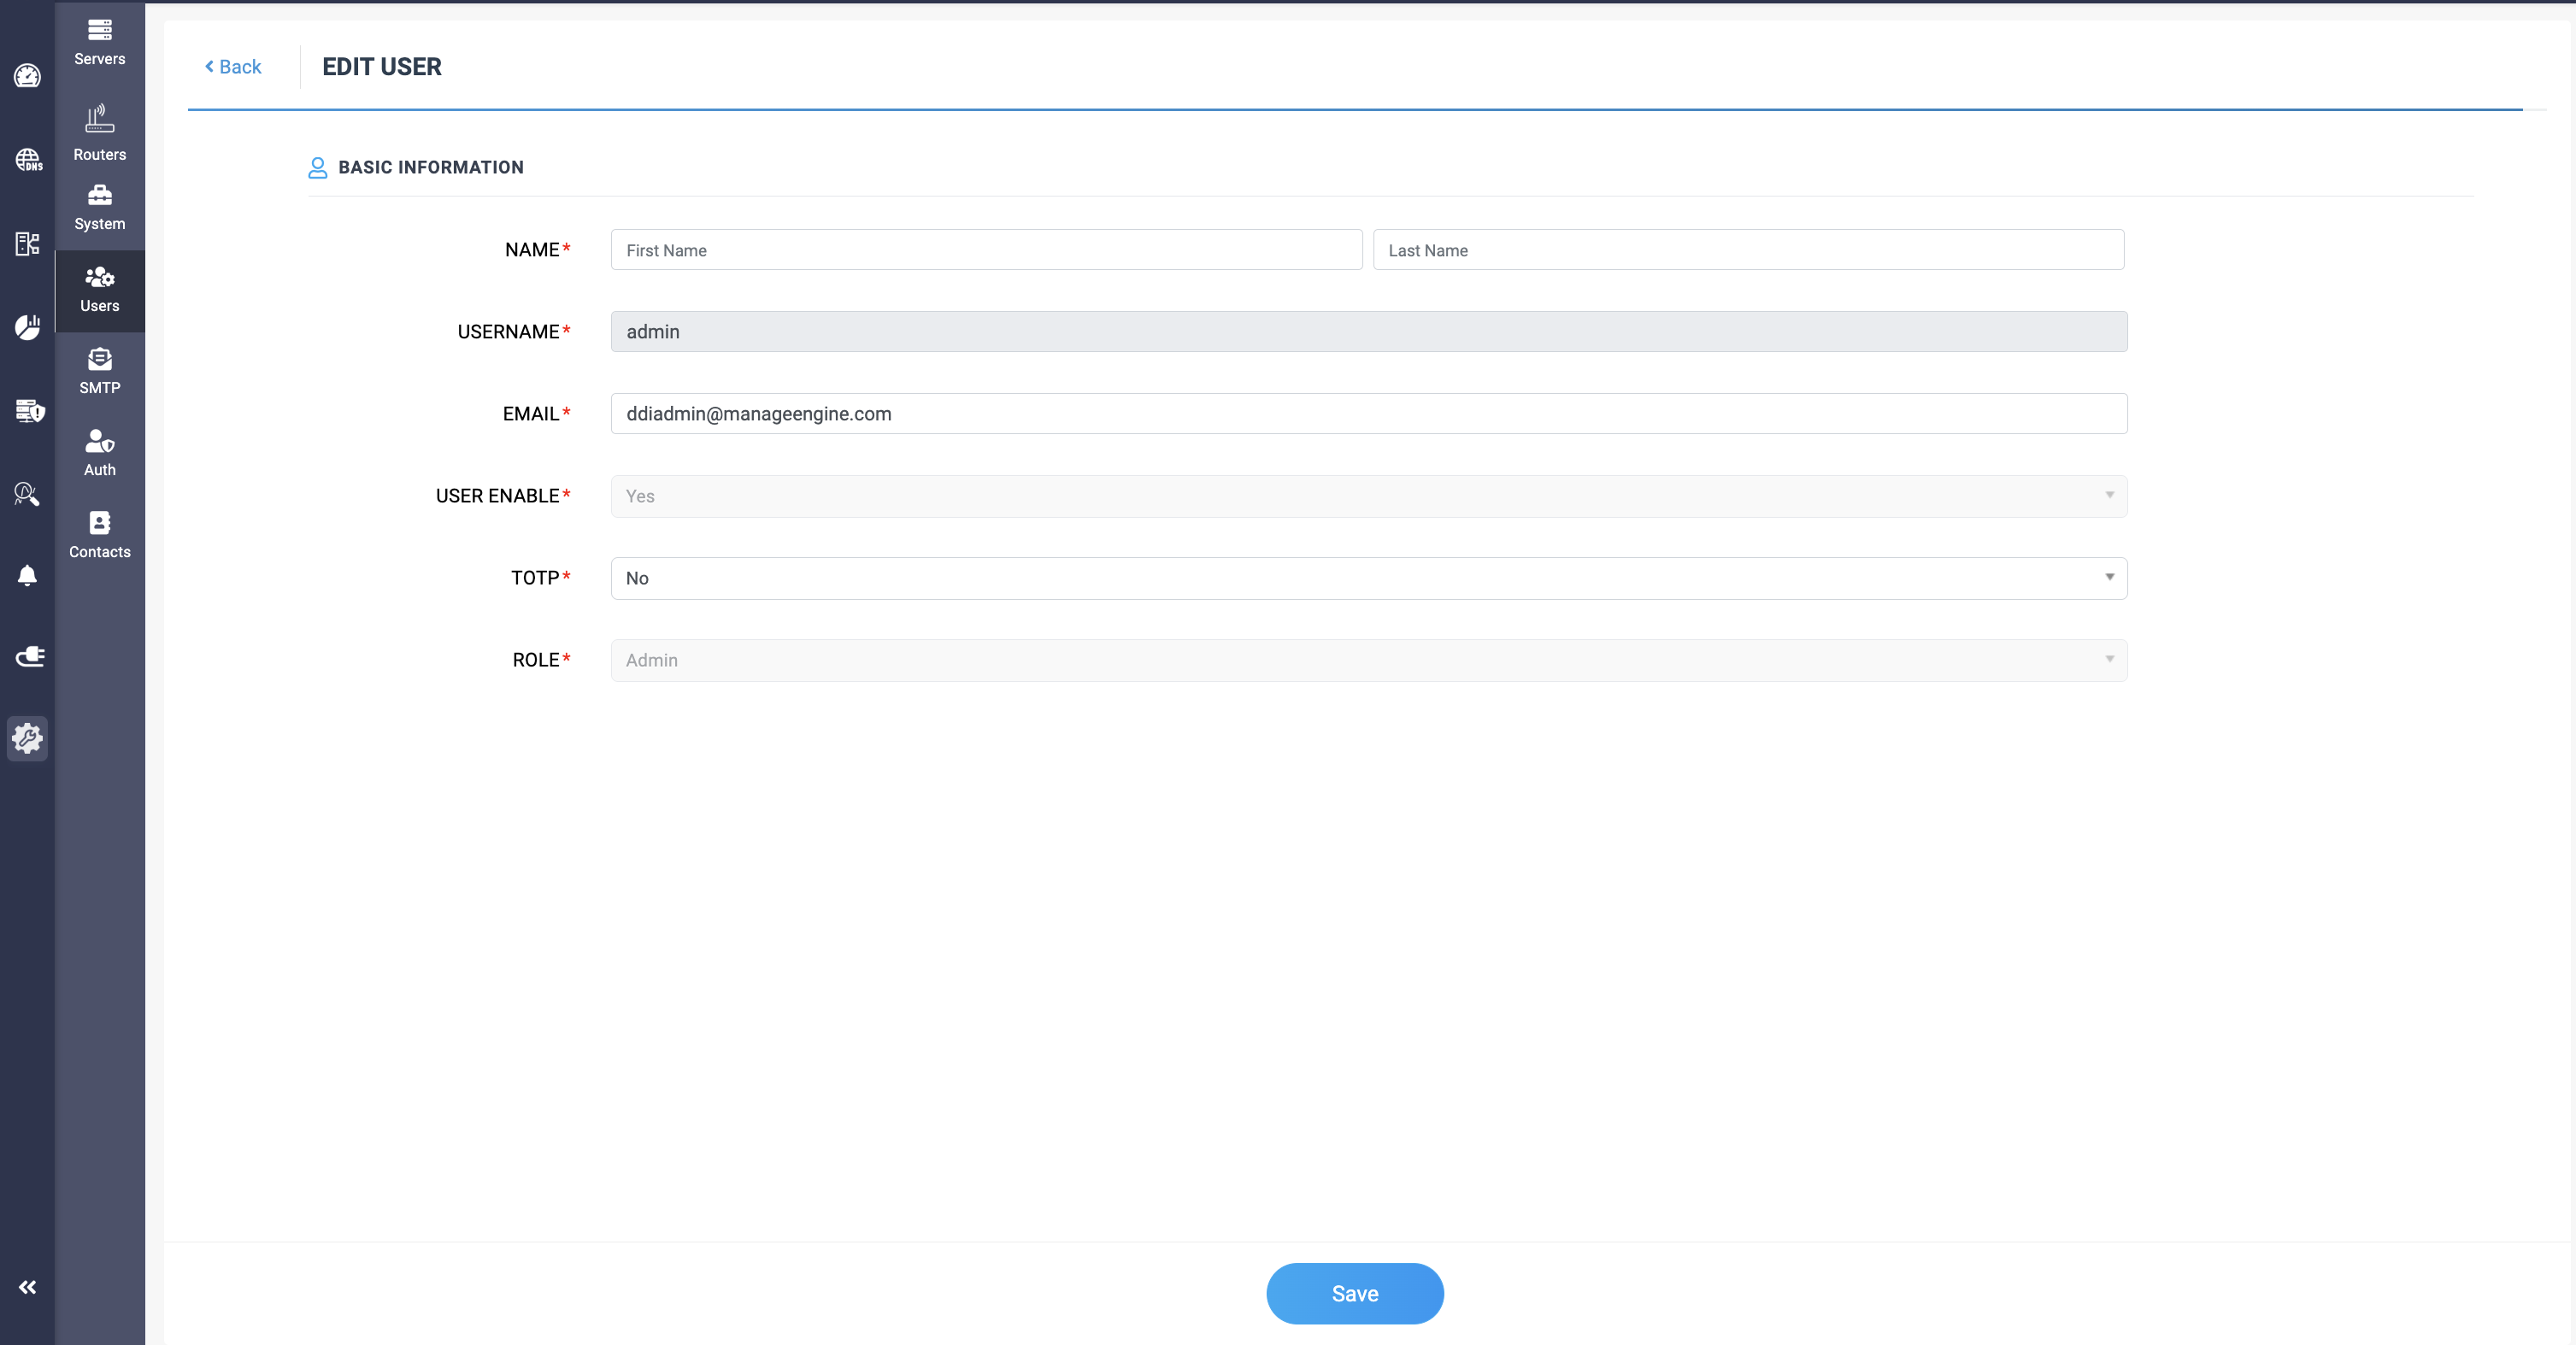
The Superadmin steps into DDI Central with the default username "admin" and password "admin" during the installation process. Therefore, it is mandatory for this user to not avoid DDI Central's prompts to reset their password to continue accessing the app.
If TOTP authentication is configured instead of SAML, the TOTP login session is valid for only two minutes. If the login is not attempted within this time, the user must re-enter their login credentials to avoid potential attacks.
Note:
When a user has been added and granted an admin role in the application, a small supervisor icon appears next to the username in the User Management section.
Supplementary User Roles in DDI Central
DDI Central also has supplementary user roles with different visibility and permissions for accessing network resources of your organization's network. This way, the administrators can add these roles to have more visibility on the network activities and also limit their access to a certain boundary.
They are,
- Guest
- Auditor
Guest
Guest user type allows the user only to view and monitor network activities in the DNS and DHCP clusters, and they won't have access to configure the settings and policies. This helps the administrators add more individual users to have visibility on the network services and review them.
Auditor
The Auditor role enables the user to view only the audits of the networks services in the DNS and DHCP clusters, and they won't have access to view the network activities, and can't configure the settings. This helps in reviewing the actions executed on each of the clusters added in DDI Central.
The Guest role is available in both Professional and Essential editions, whereas the Auditor user role is only available in the Professional edition.
Both these user roles help with the auditing and compliance purposes. Higher officials and supervisors can effortlessly review the network activities and audit logs in the respective DDI clusters, by adding them as Guest or Auditor in the DDI Central application.
Enabling other stakeholders to review prevents errors and misinformation in the network data, and administrators can be alerted for troubleshooting the network error. This also helps provide an all around visibility to other teams like the compliance team to have verification over the network data in case anything is misplaced or missed.
User Audits
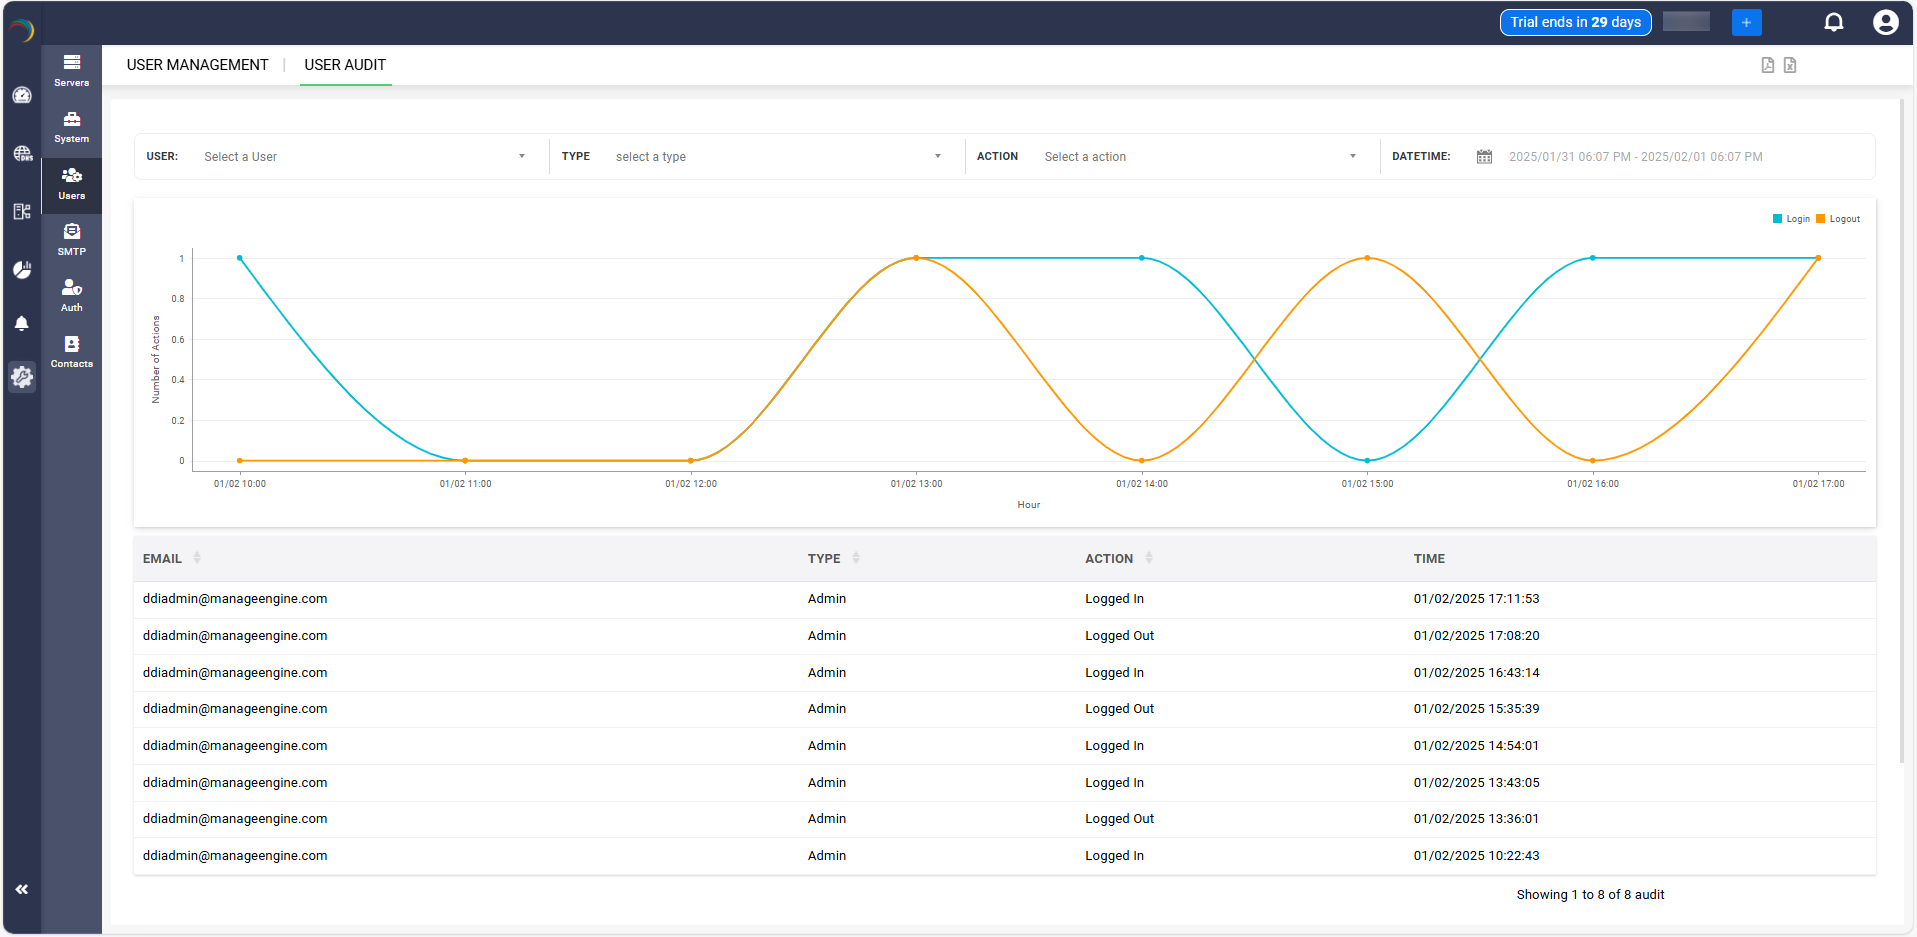
The User Audit tab can be accessed by selecting the Audit menu from the left menu bar. The User audit tab helps you monitor your users' login activities by capturing the username, date, and timestamp of the latest login activities.