What is NTP? How to configure an NTP server in DDI Central?
NTP (Network Time Protocol) is a networking protocol designed to synchronize the clocks of computers and network devices across a network. It ensures that all participating systems, devices, and applications within an organization are operating on the exact same time regardless of their location or underlying hardware.
How does NTP work?
- NTP uses a hierarchical system of time sources, known as "stratum levels."
- At the top, Stratum 0 devices (like atomic clocks or GPS clocks) provide the most accurate time.
- NTP servers (Stratum 1, 2, etc.) communicate with each other and distribute time down the chain, correcting even millisecond differences.
- Devices running NTP periodically check with their configured NTP servers to adjust their local system clocks.
Why do you need NTP servers in DDI Central?
In DDI Central, you manage critical infrastructure components like DNS and DHCP servers. Precise and consistent time synchronization is crucial for these systems because:
- Accurate logs and auditing: DNS and DHCP servers generate logs for every transaction, update, and event. Time-stamped logs are vital for troubleshooting, forensics, and compliance.
- Coordinated network operations: Many network protocols and services depend on accurate time to avoid conflicts, prevent errors, and maintain seamless communication between devices.
- Security and trust: Authentication, DNSSEC, and other security measures often rely on time-based mechanisms. Out-of-sync clocks can cause failures or security gaps.
- Event correlation: When diagnosing issues or tracking changes across servers, synchronized clocks allow you to accurately correlate events from multiple sources.
Onboarding and managing NTP servers in DDI Central ensures that your DNS, DHCP, and all network infrastructure operate reliably, securely, and in full coordination—minimizing errors, reducing troubleshooting time, and improving overall network health.
How to onboard NTP Servers in DDI Central

- Go to the Servers page
- Navigate to Settings → Servers in your DDI Central console.
- Start adding a new server
- Click Add Server button in the top right corner. On the Create Server page that appears, start entering the essential details like SERVER NAME
- Choose server type
- In the Type (Server Type) dropdown, select NTP.
- Select or create a configuration
- For Configuration, either:
- Select an existing configuration from the dropdown, or
- Click the add (+) icon to create a new NTP configuration during onboarding. This will redirect you to Create NTP Configuration page where you can create a NTP configuration for the NTP server you intend to onboard.
- Click Save to finalize the configurations
Enabling NTP for other server types (DNS/DHCP/Both)

- Select Server type
- If onboarding any server other than NTP (e.g., DNS, DHCP, or both), you can easily synchronize it with an onboarded NTP server.
- Enable NTP synchronization
- While onboarding any DNS/DHCP/Both, just turn on the Enable NTP toggle.
- Choose an NTP configuration
- Immediately, DDI Central will prompt you to select an existing NTP configuration from a dropdown menu.
- Save configuration
- Once you’ve chosen an NTP configuration, click save to finalize the configuration.
What happens next?
- The server you’re onboarding will be linked to the selected NTP configuration.
- Time synchronization will be automatically configured for accurate network operations.
- You’ll be able to monitor and manage the NTP association from the server details page.
- All future logs and audits for this server will reflect its NTP status and sync health.
Note: Once onboarded, the main dashboard of the DDI Central Management UI Console provides real-time visibility into the operational status of all onboarded NTP servers.
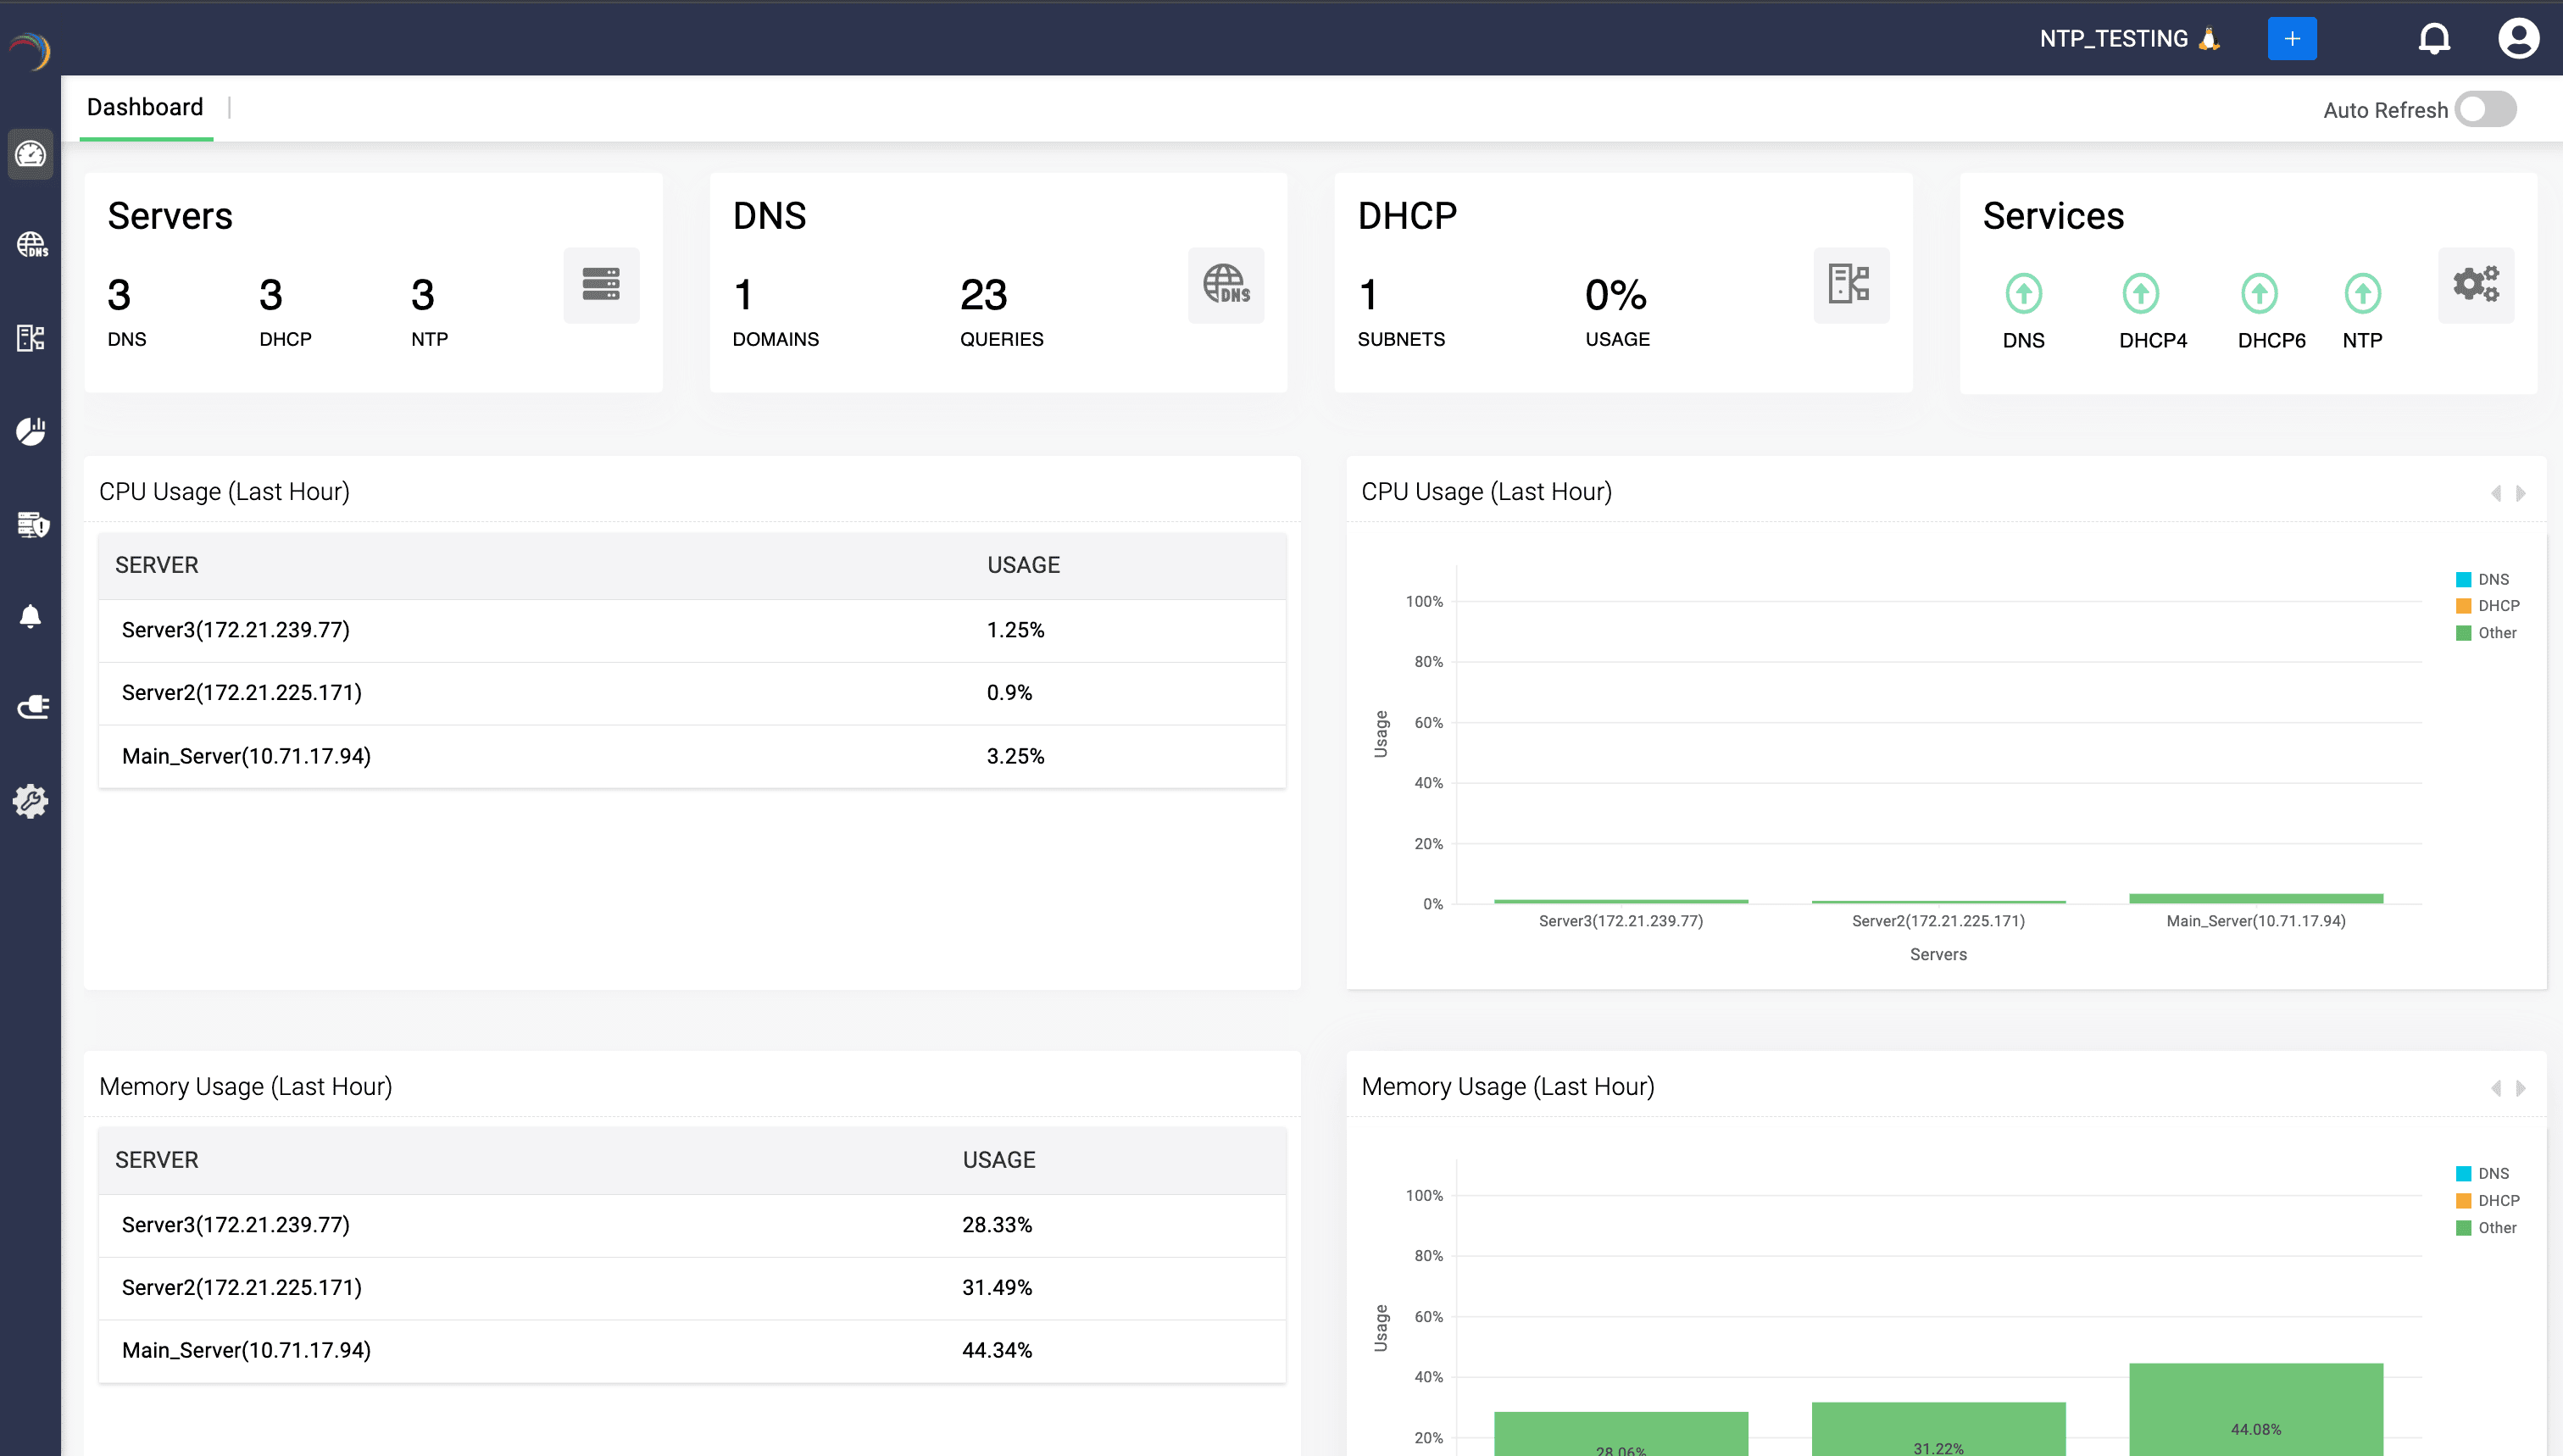
Info:To access NTP-specific performance breakdowns DDI Central offers a detailed stats page.
How to create NTP configuration in DDI Central
- Log in to your DDI Central management console with administrator credentials.
- Go to Settings -> Servers. On the Servers page, navigate to the NTP Configuration tab and click on the Add NTP Configuration button in the top right corner.
- Add a new NTP configuration: On the Create NTP Configuration page that appears, enter the details below:

- Enter the essential details below:
- NAME: Specify a unique identifier for your NTP configuration. This mandatory field helps you easily locate a specific configuration from a list of entries.
- SERVERS: Enter the IP addresses or hostnames of the NTP servers that you want your system to synchronize time with.
Note: When configuring an NTP server using a Fully Qualified Domain Name (FQDN), if the FQDN resolves to both A and AAAA records but your resolver ignores the AAAA record, use the server’s IP address instead of its FQDN to ensure reliable synchronization. - KEY: Select a security key (if available from the list displayed in the extreme right corner) used for authentication with the specified NTP servers.
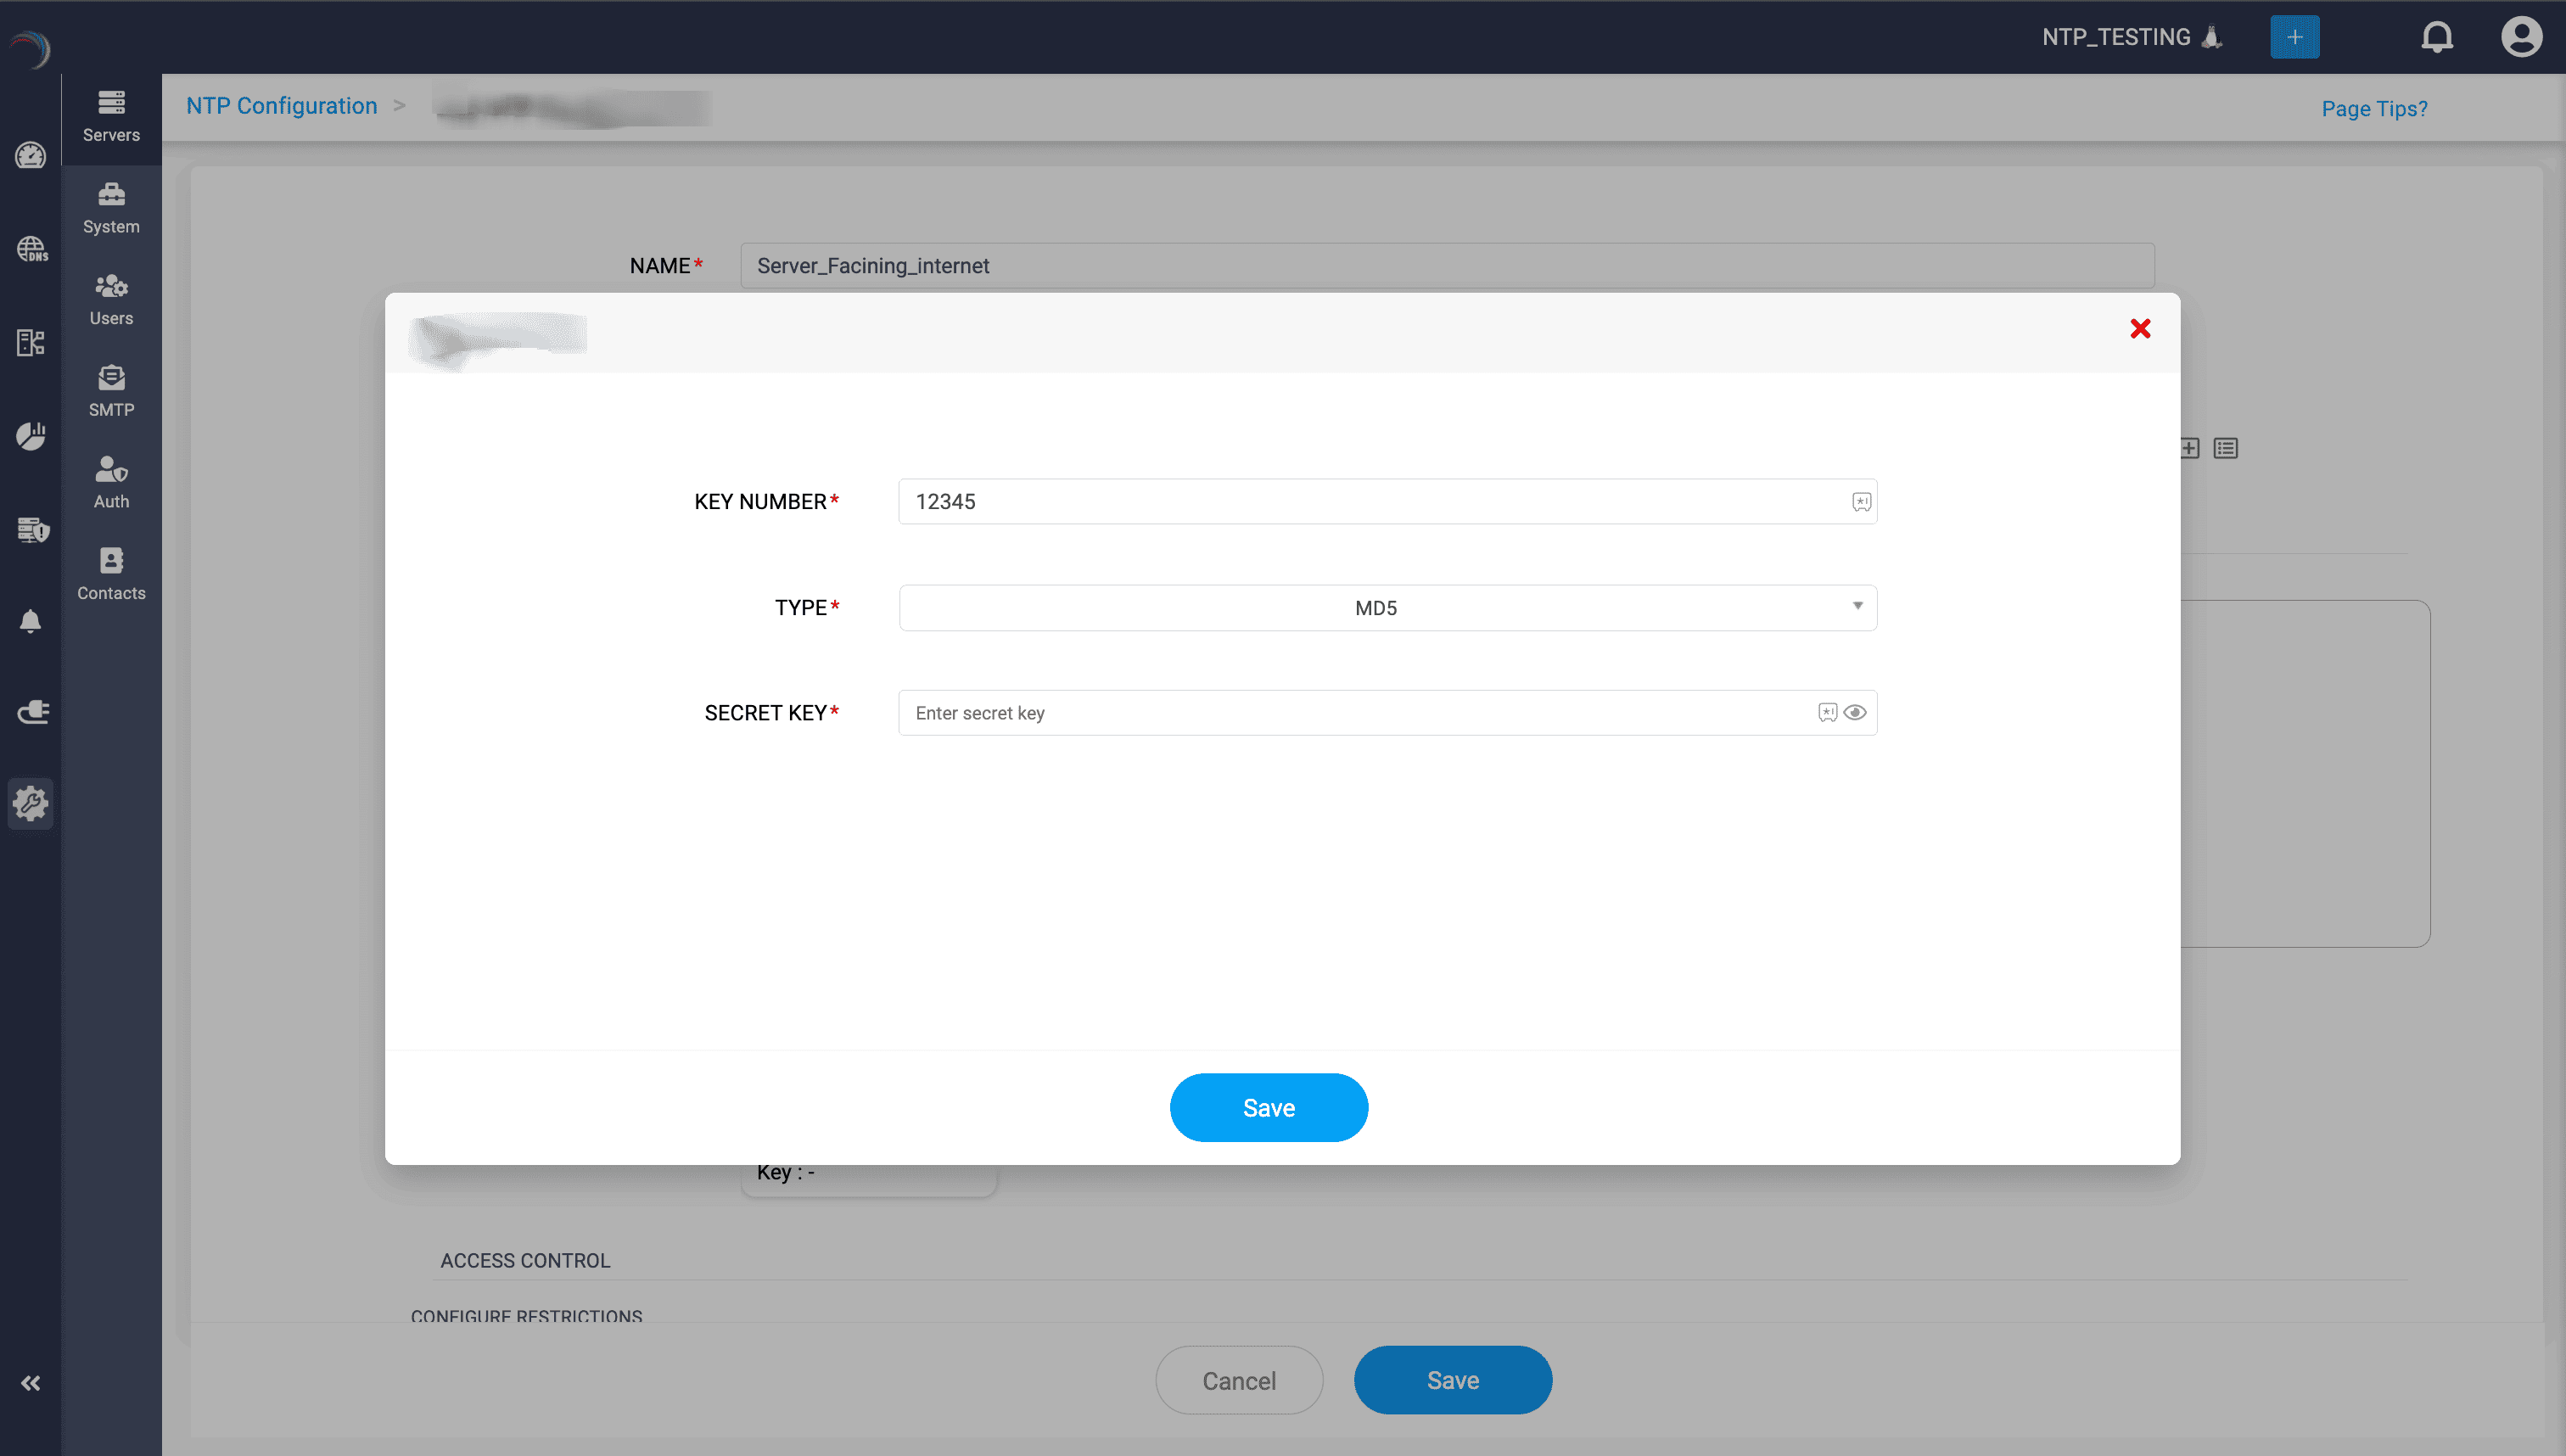
- Create a key by clicking the Add (+) icon in the right corner.
- On the Add NTP window that appears fill in NTP key details like:
- Key Number: Enter a unique identifier for the key.
- Type: Choose a hashing algorithm from the dropdown list (e.g., MD5, SHA1, SHA256, SHA384, SHA512, or RMD160).
- Secret Key: Enter the shared secret string used for authentication. You can generate this secret externally using tools like openssl rand or online key generators.
Peer Servers configuration
- SERVER: Enter the IP address or hostname of a peer NTP server to configure symmetric active/passive synchronization.
- SYNC BEHAVIOR: Choose the synchronization behavior:
- iburst: Sends an initial burst of packets to speed up synchronization when first connecting.
- burst: Sends periodic bursts of packets, maintaining accuracy.
- prefer: Marks this server as a preferred peer, used preferentially for synchronization.
- KEY: Select an authentication key used for secure synchronization with the peer server.
- PEER SERVERS: Click Add after each entry. This will immediately display a summary of the just configured peer server along with synchronization behaviors and associated keys.
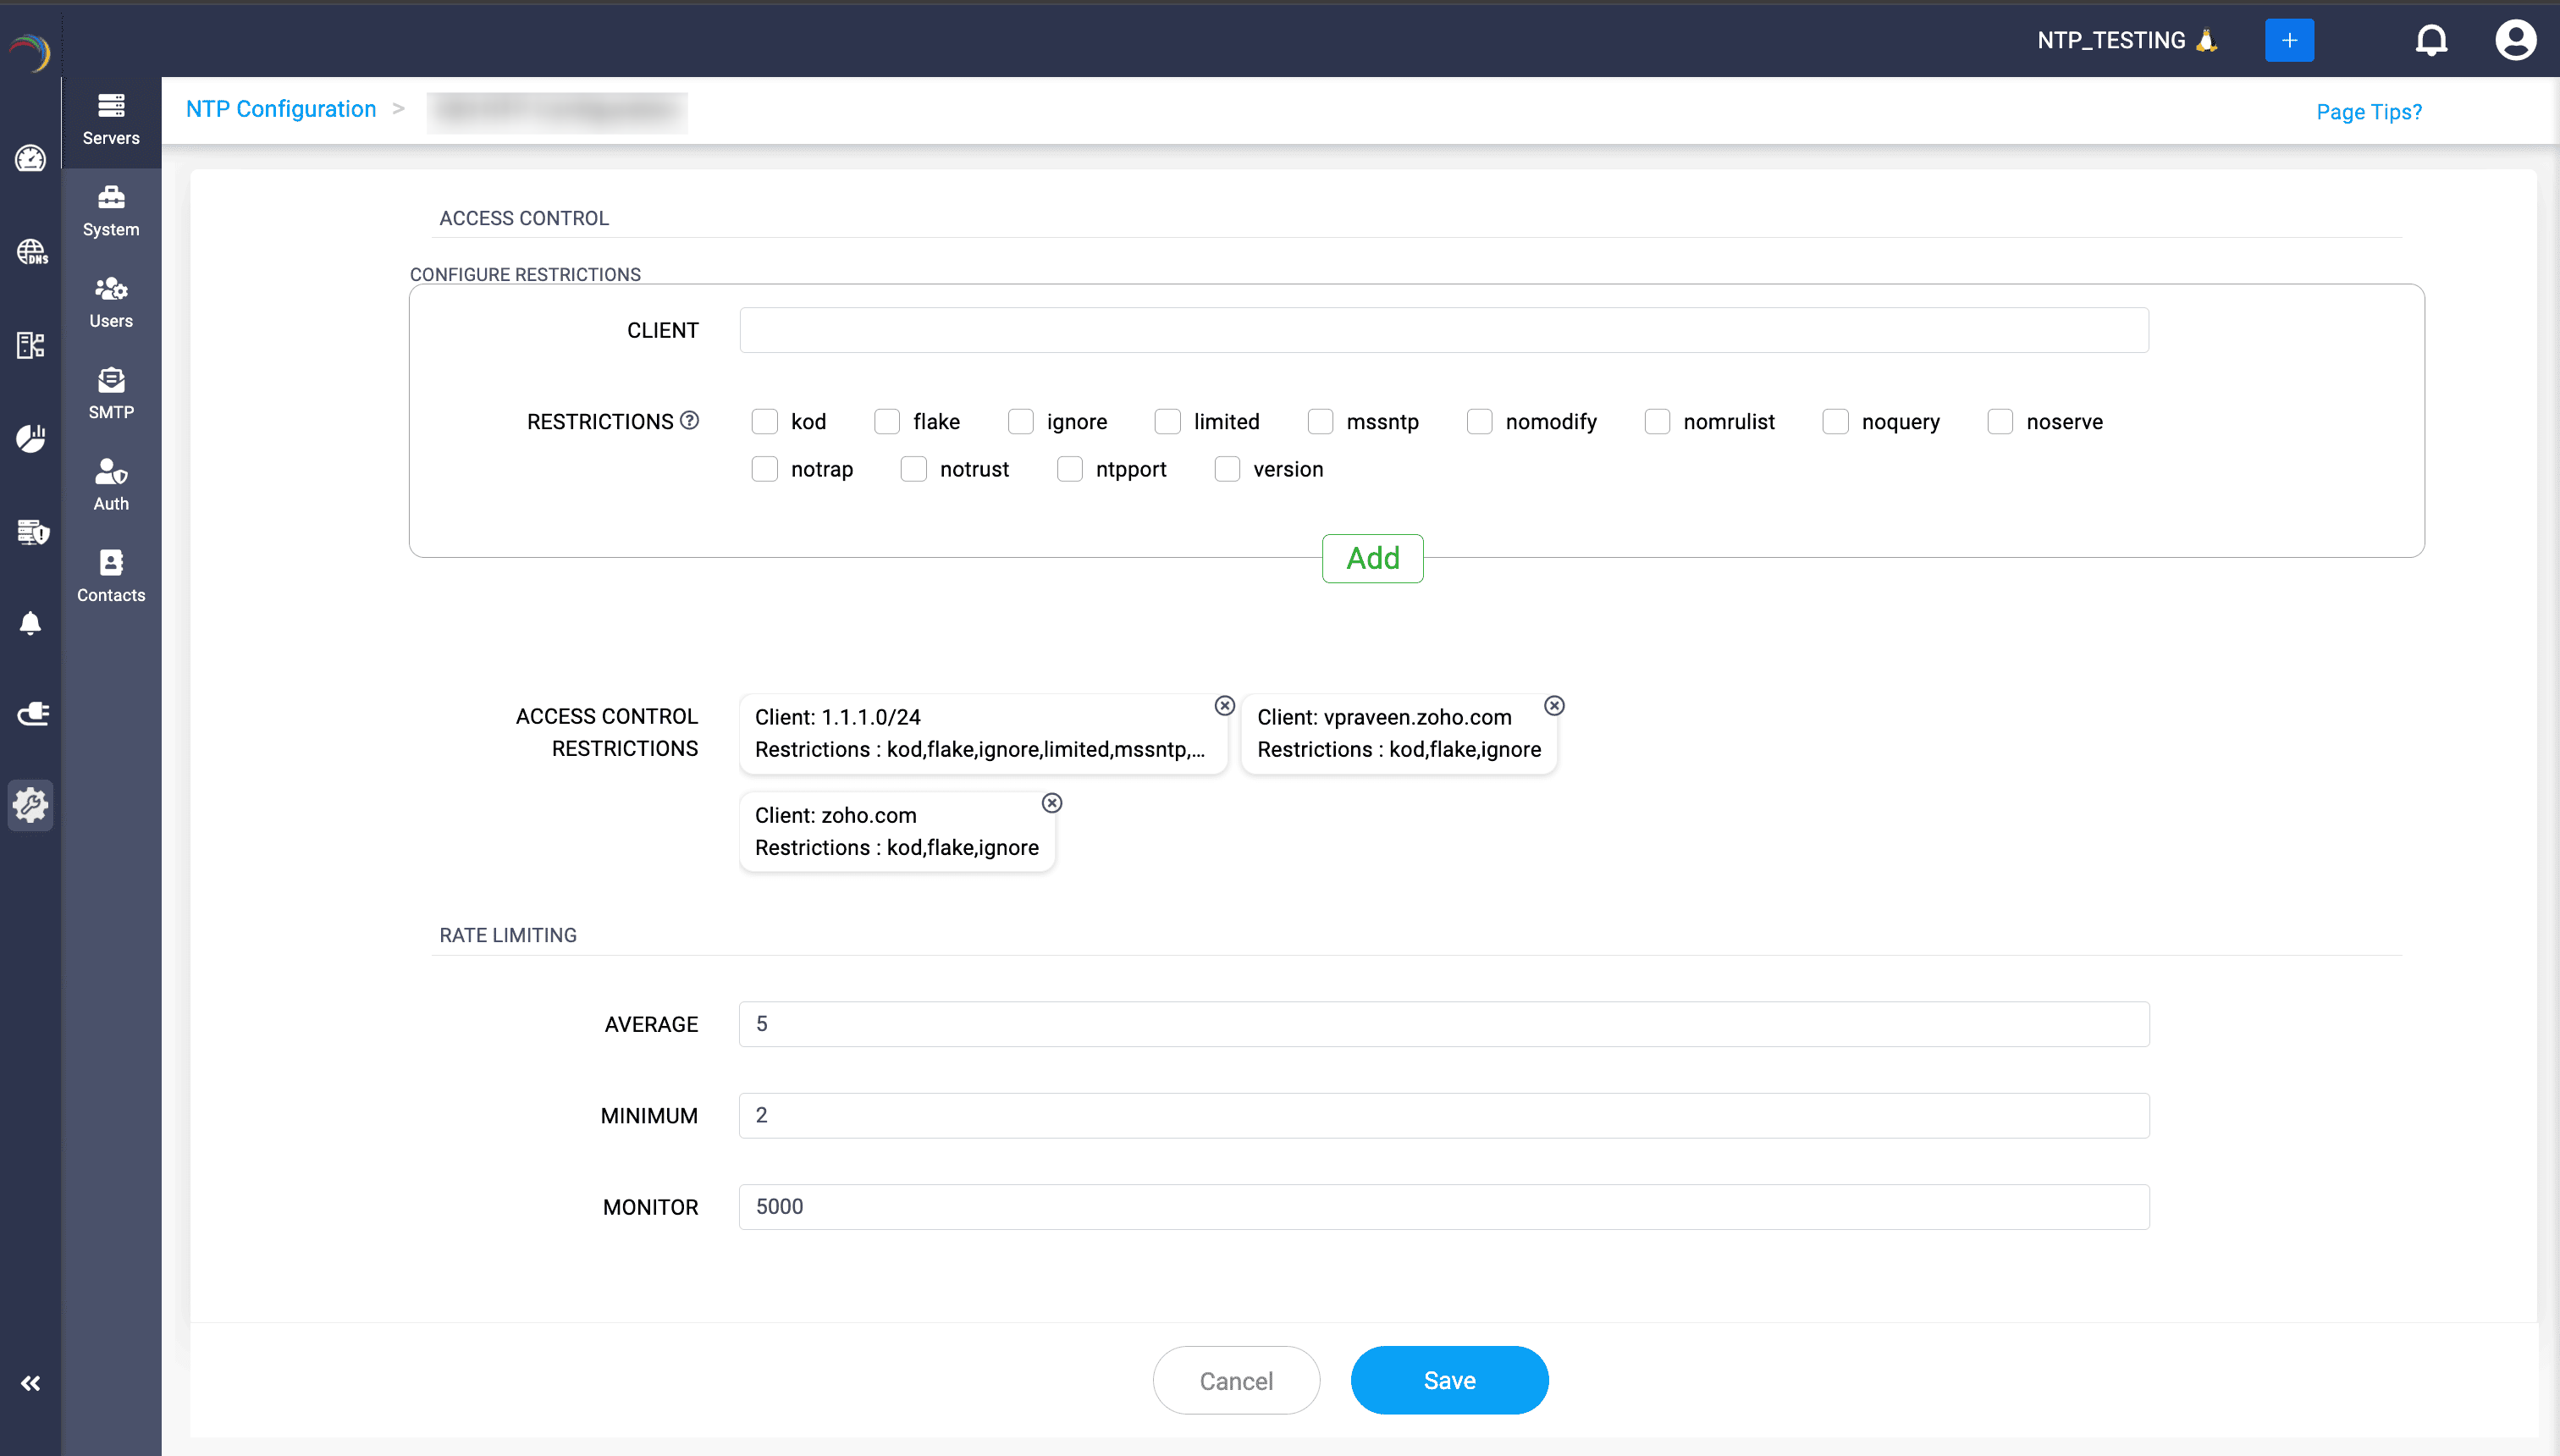
- CLIENT: Specify the IP address range (CIDR notation) or domain name of clients to which access restrictions will apply.
- RESTRICTIONS: Select applicable access control restrictions:
- kod (Kiss-of-death): Sends a denial-of-service warning to misbehaving clients.
- flake: Limits replies to packets from remote hosts, reducing traffic from flaky or unstable hosts.
- ignore: Ignores all packets from specified clients.
- limited: Implements rate-limiting to prevent abuse or overload.
- msntp: Restricts clients to simple NTP mode (SNTP) only.
- nomodify: Prevents remote modification of NTP configurations.
- nomrulist: Prevents remote querying of MRU (Most Recently Used) lists.
- noquery: Disallows clients from querying NTP server status.
- noserve: Denies clients from synchronizing time from this server.
- notrap: Prevents remote logging or control traps (mode 6 control message trap service) to matching hosts.
- notrust: Rejects clients that lack valid cryptographic authentication.
- ntpport: Permits synchronization only if client source port is the standard NTP port (123).
- version: Restricts synchronization requests to current NTP version.
- Click Add after each entry.
- ACCESS CONTROL RESTRICTIONS: Lists configured clients with corresponding access restrictions in order to provide a quick summary of the configurations added.
- AVERAGE: Sets the average permitted number of NTP packets per second, controlling traffic to the server.
- MINIMUM: Defines the minimum permitted packet rate before enforcing rate limiting, ensuring responsiveness during lower traffic periods.
- MONITOR: Determines the number of packets monitored for evaluating and enforcing the rate-limiting thresholds.
- Click Save to finalize the configurations.
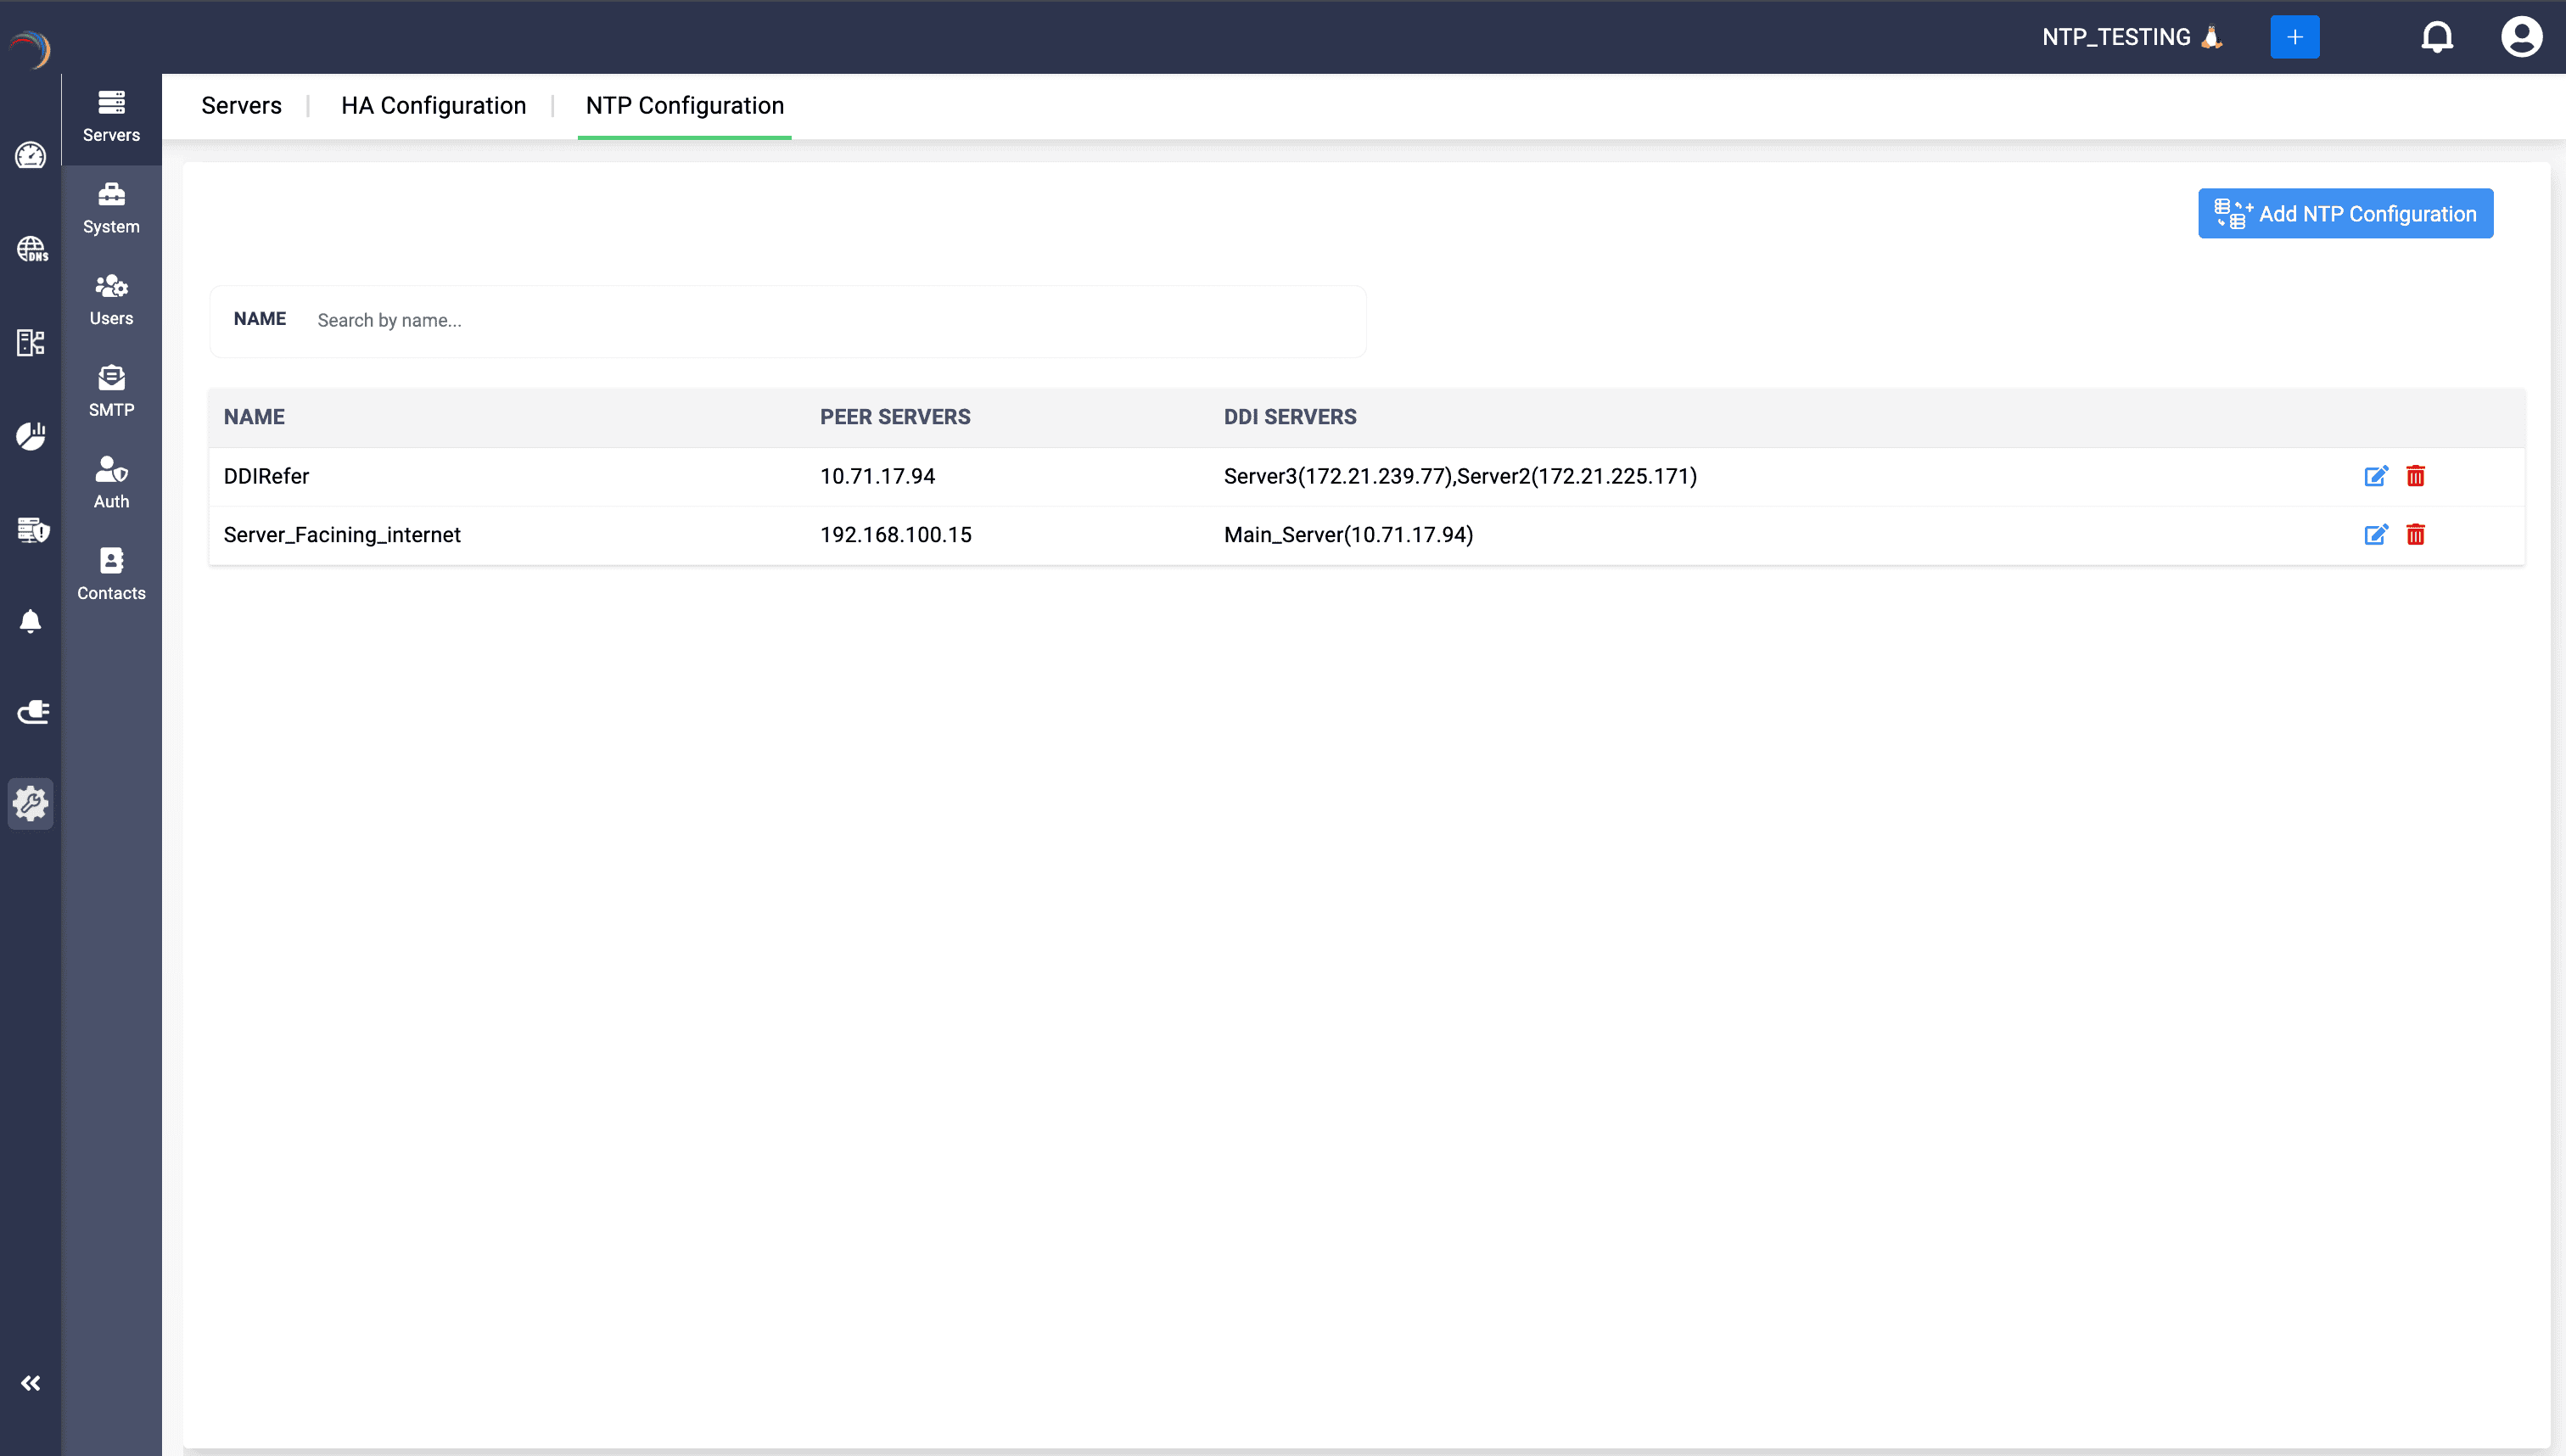
- View existing NTP entries:
- Go to Settings->Servers->NTP Configuration. The table lists each NTP profile by Name, its Peer Server(s) (upstream NTP sources), and the DDI Servers that will synchronize their clocks to those peers.
- Use the Search box above to filter entries by “Name”.
- To edit an existing configuration:
- In the table row for the NTP profile, click the pencil icon.
- Update any fields (Name, Peer Servers, or DDI Servers) and click Save.
- To delete an NTP profile:
- Click the trash icon in the row for the profile you wish to remove.
- Confirm the deletion when prompted.