Connection settings
Last updated on:
In this page
- Overview
- What is SSL?
- Certificates and Certifying Authority (CA)
- SSL Certificate
- Certifying Authority
- Keystore
- CSR
- The Usual SSL Issuance Process
- Configuring the SSL settings
- General settings
- Connection Type
- General Settings
- SSL Certification Tool
- Case 1: Apply Certificate
- Case 2: Generate Certificate
- Proxy Settings
- Extracting EventLog Analyzer SSL Certificate
- SSL Troubleshooting Tips
These settings are used for general configuration related to product connections, such as access permissions, certificates, and proxy settings. These configurations enable secure access to the product server.
Overview
The SSL Settings page lets you configure secure communication between the product and client systems. By enabling SSL and managing certificates, you can ensure encrypted data transfer, prevent unauthorized access, and comply with security standards. The configuration options include selecting the connection type (HTTP/HTTPS), managing certificates through the built-in SSL Certification Tool, setting up a proxy server, and extracting EventLog Analyzer certificates when required.
What is SSL?
Acronym for Secure Socket Layer, SSL is an encryption technology to secure the data exchange between a website and its visitor's web browser. Normally, when a user communicates with a website, say submits his credit card information, the data travels to the server as plain text, which is susceptible to data theft!
On the other hand, if this data is encrypted, then no eavesdropper can read it! Thus, it's really very important to secure a website with SSL!
Certificates and Certifying Authority (CA)
SSL Certificate:
This is a digital identity of a company, which ensures that a visitor is talking only to its intended website, and whatever data he submitted to the site is encoded and reaches only the intended site. This system is analogous to banks recognizing their customers by their signatures. In this case, the browsers (thereby the end-users) are programmed to trust these CA presented certificates.
Certifying Authority:
- Regulatory organizations, who, with the help of standard policies, issue certificates to a domain, declaring them trustworthy. Every certificate they generate is unique to the company they are certifying, which makes identification easy.
- CAs secure all necessary information about a company before issuing a certificate for it and also keep updating it in their records, which adds to the trustworthiness.
- Some of the popular CAs are Verisign, Comodo & GoDaddy etc.
Keystore
Keystore is specifically designed to store various kinds of encryption information.
CSR
- In order for a CA to generate an SSL certificate for a company, it first collects the information about the company and other identifiers such as public key (digital signature), and then binds them all with its certificate (which could be a piece of encrypted token or something similar). In doing so, it generates a unique identifier for the company.
- Thus every certificate issuance process begins with a "certificate request" from the company. CAs refer to this process as "Certificate Signing Request" (CSR). The CAs accept the company information and digital signatures in a special form of file - the ".csr" file.
The usual SSL issuance process
It involves 3 steps:
- First you generate a CSR and submit it to CA.
- CA binds this CSR with its digital signatures and returns it.
- Now, you bind all this with your company domain.
Configuring the SSL settings
- In the product console, navigate to the Settings tab and click on Connection Settings listed under System Settings as shown in the below image.
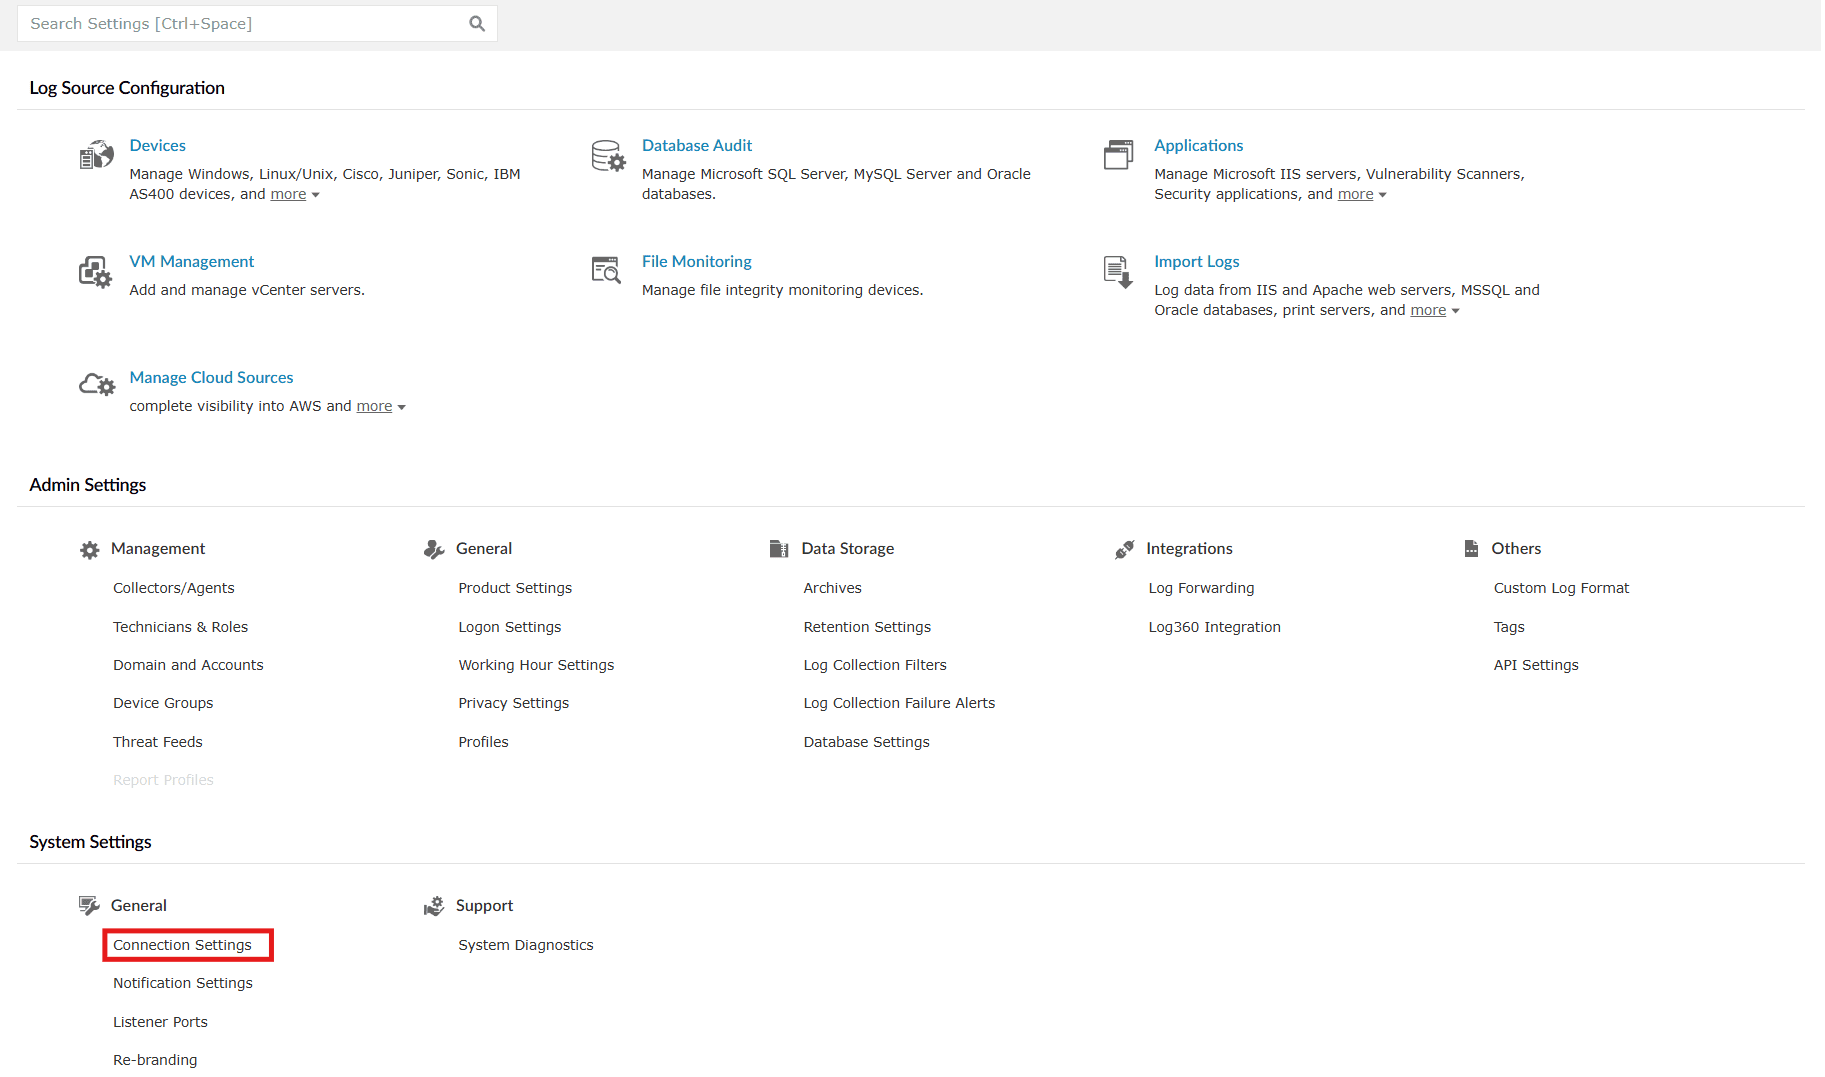
Image 1: Configuring connection settings via the settings tab NOTE You can also access these settings via the Enforce HTTPS configuration in the Security Hardening module. Refer to the Product Settings help document to learn more.
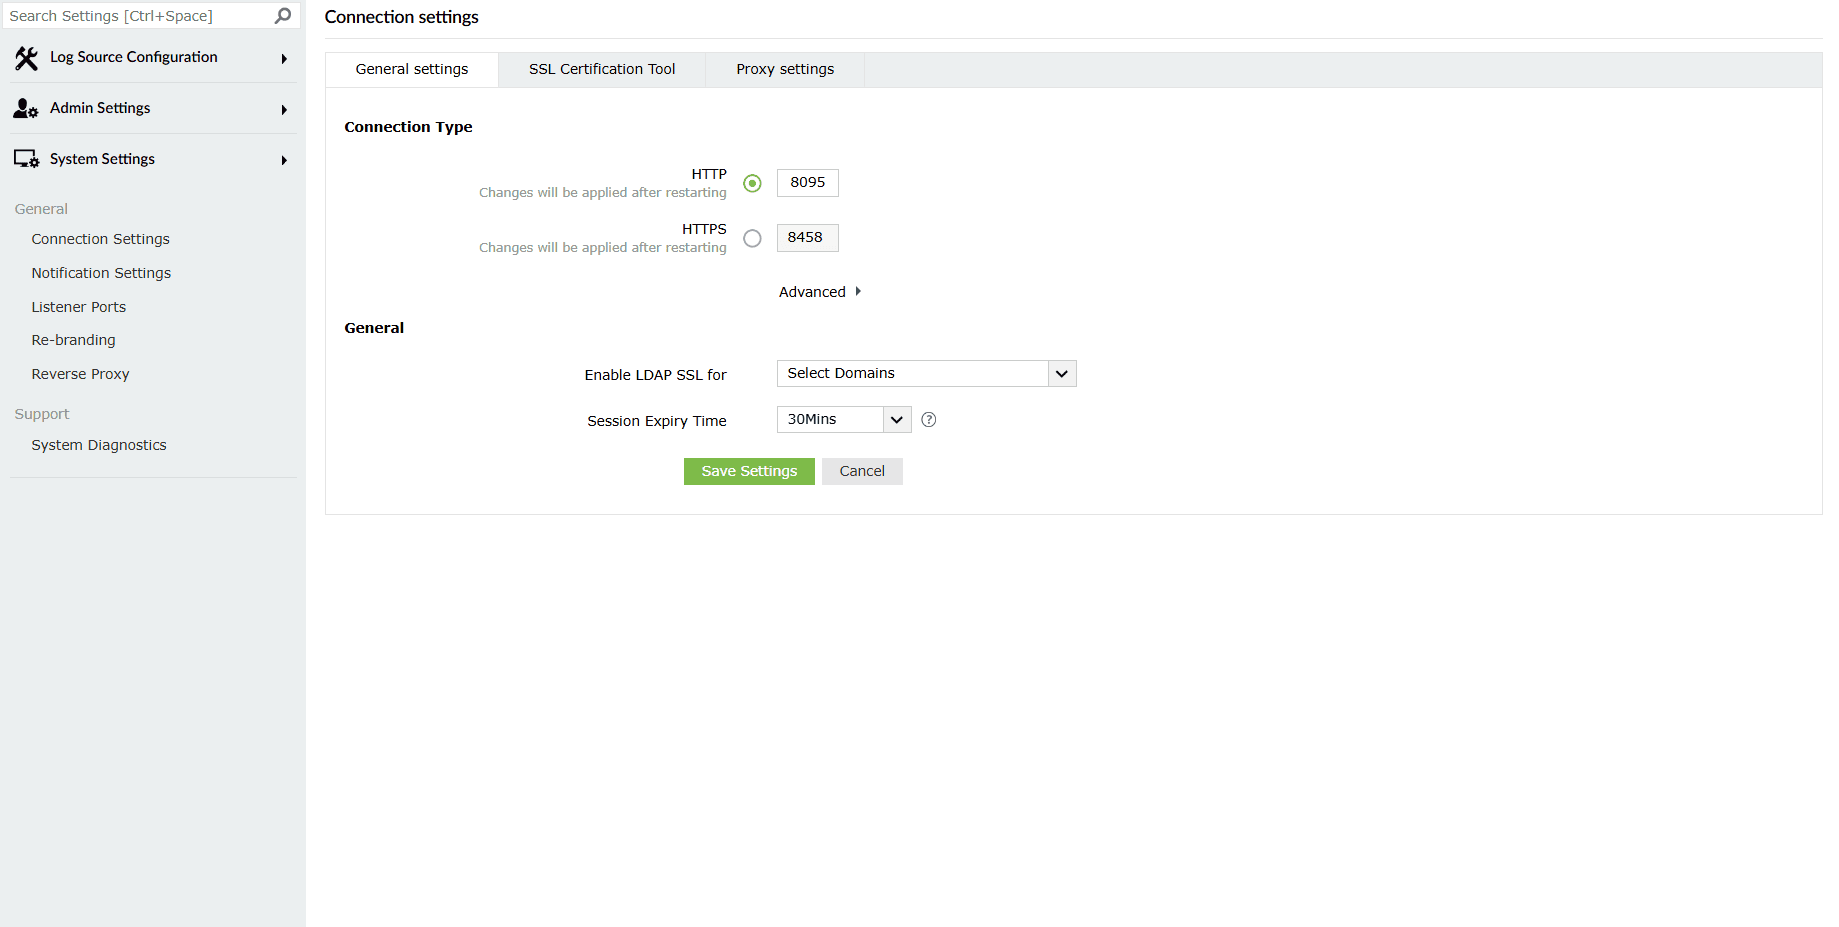
- The Connection Settings module will be displayed on the screen consisting of three sub-tabs:
- General settings
- SSL Certification Tool
- Proxy settings

Image 2: Connection settings configurations
Read further to know how to configure these settings.
General settings
This tab covers the general product settings, including options to configure the web server port, supported protocols, TLS, and session expiry time.
Connection Type
- Choose your connection type. You can choose to use either HTTP or HTTPS.
- Specify the port number of your choice after choosing the type of connection.
NOTE The HTTP and HTTPS port numbers should be different from each other.
The default ports are- HTTP: 8095, HTTPS: 8458.
- Click on Advanced for advanced settings.
Case 1: HTTP
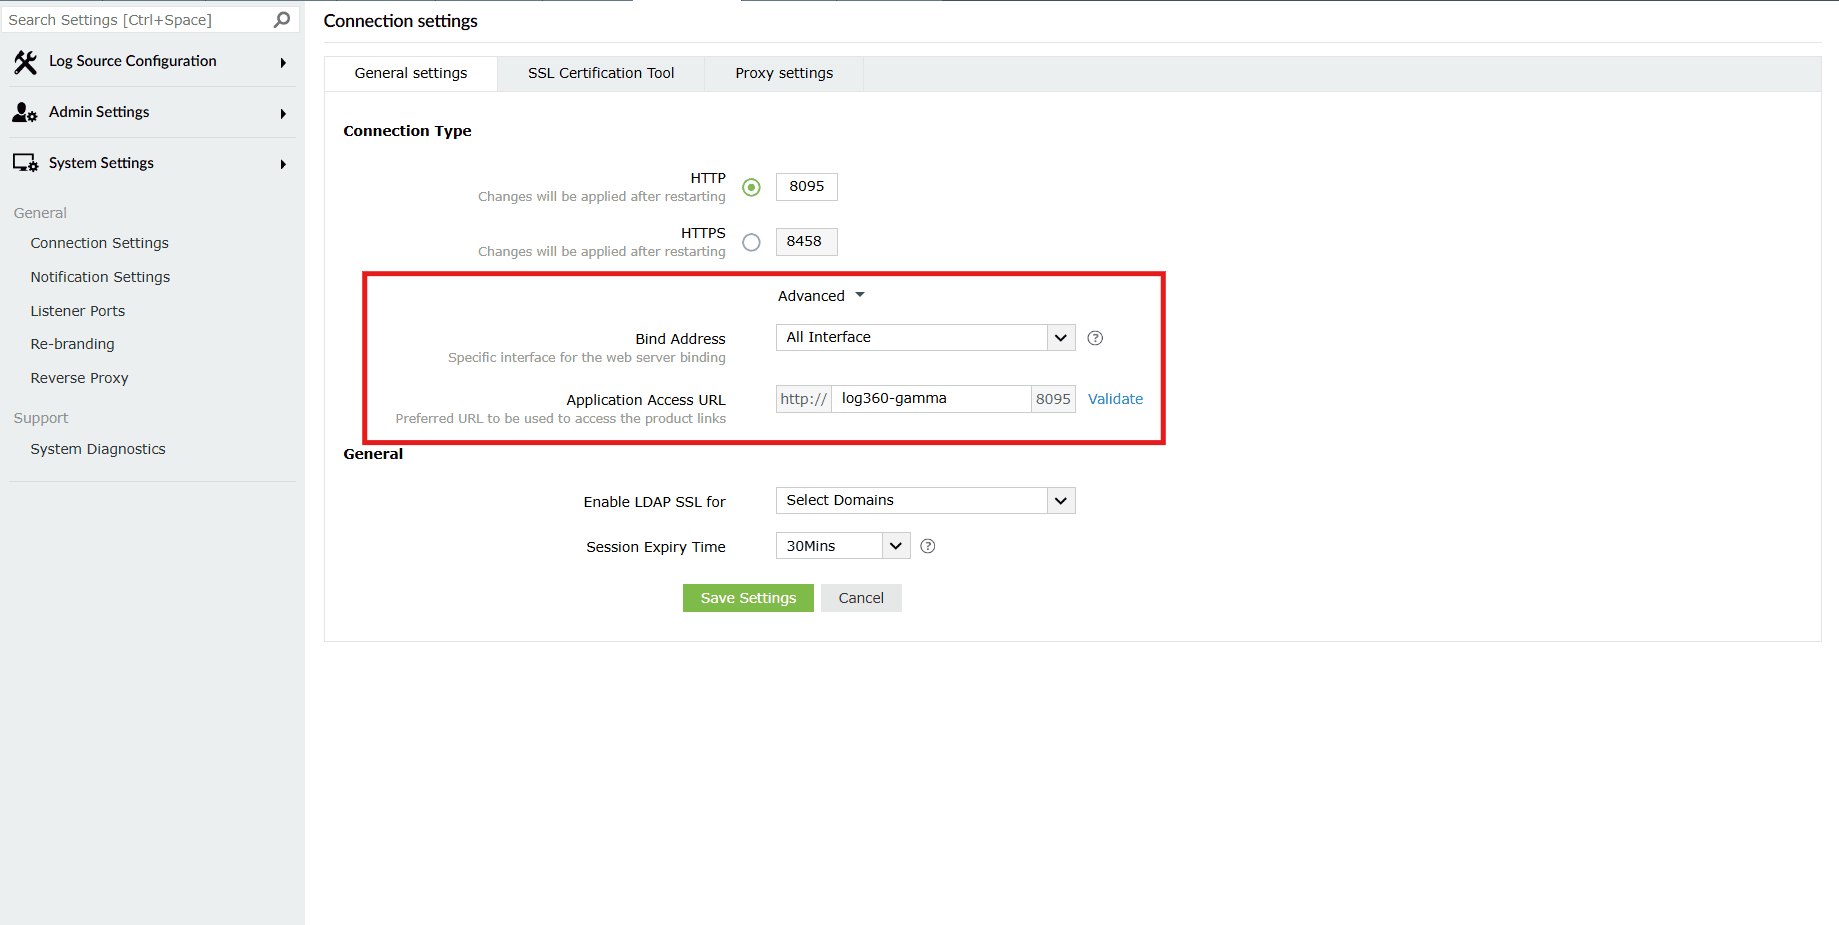
Image 4: Configuring connection type in general settings tab Configure the advanced options for HTTP:
- Bind Address : Select the IP address to which the product's web port and its underlying listeners should be bound with. You can choose 10.71.24.153. You can choose from the bind addresses that are provided in the drop-down.
- Application Access URL : Specify the DNS (Domain Name System) host name using which network communication would take place between agents. Click on Validate. After a successful validation, the result will be visible as
 Success.
Case 2: HTTPS
In the case of HTTPS, there is an additional field called Keystore Password. If you require the keystore password to be encrypted, enable this option and provide the required password. The keystore password will be encrypted and stored. The field becomes available for editing once you click on its corresponding checkbox.
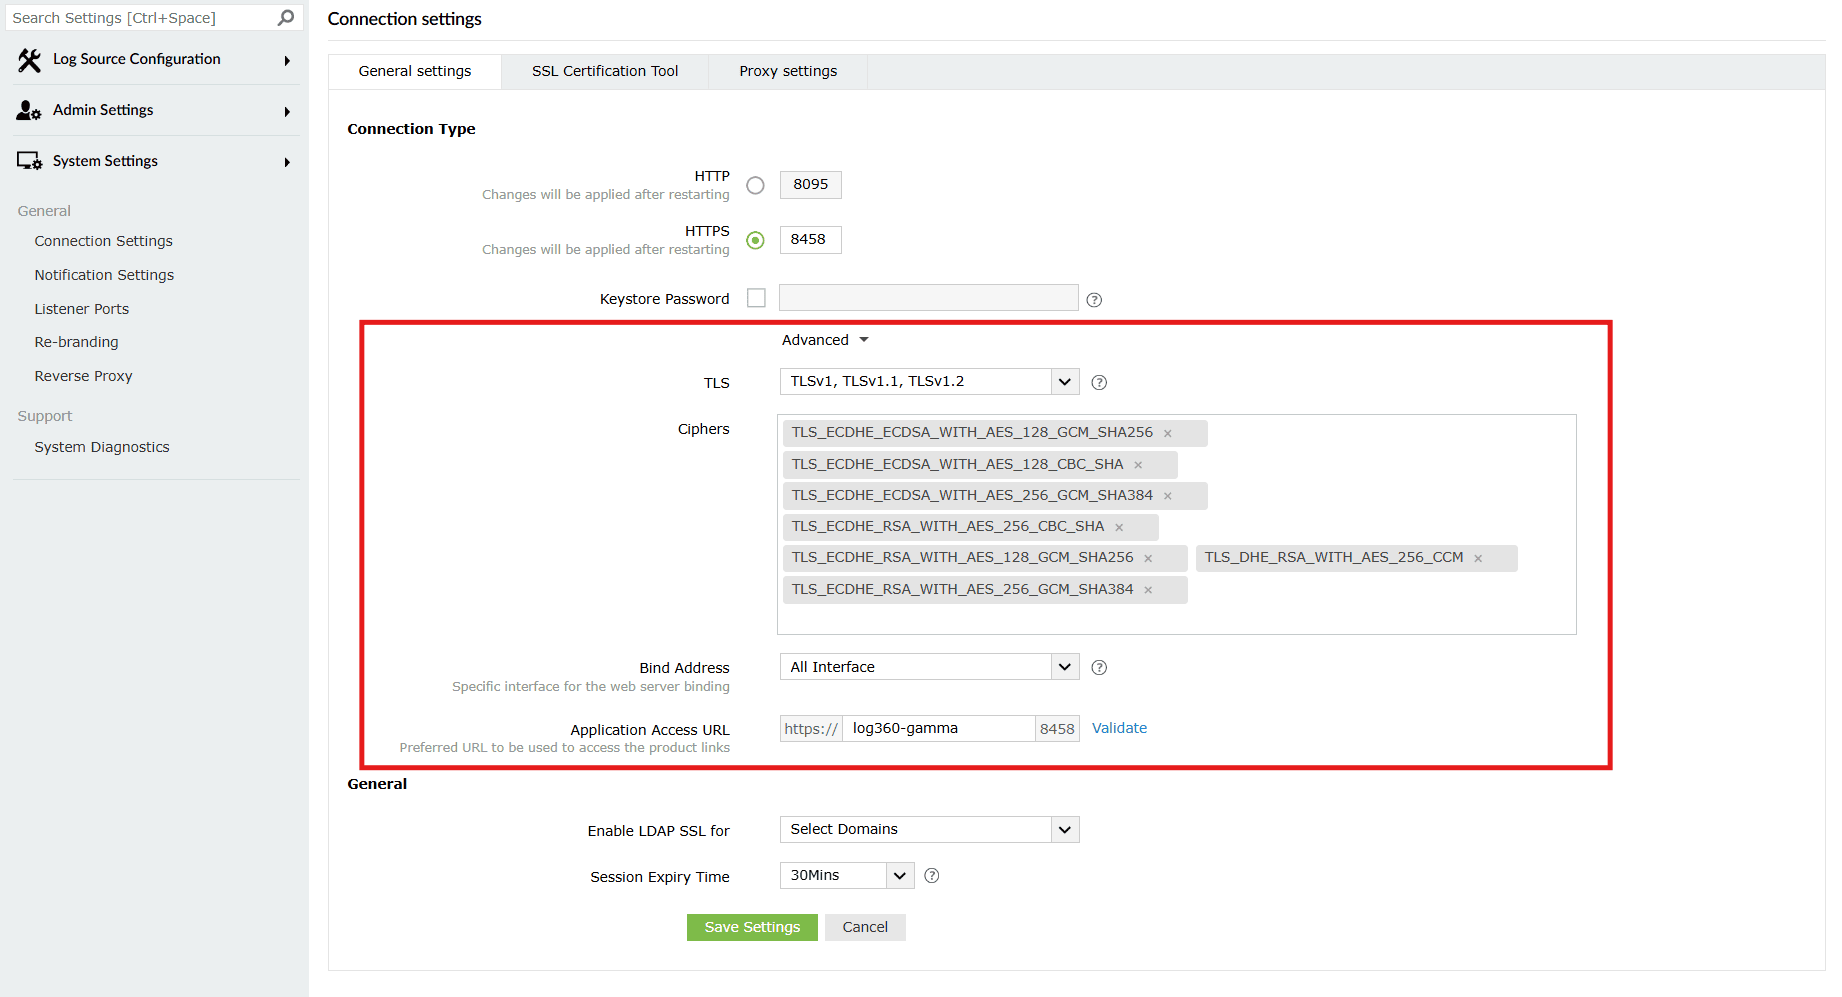
Image 5: Configuring connection type in general settings tab Configure the advanced options for HTTPS:
- TLS: From the drop-down available choose any/multiple TLS (Transport Layer Security) protocols to bound with the product's server.
- Ciphers: Select the respective cipher suites compatible with the Above selected TLS version. The list of default ciphers supported in Log360 and EventLog Analyzer are:
- TLS_ECDHE_ECDSA_WITH_AES_128_GCM_SHA256
- TLS_ECDHE_ECDSA_WITH_AES_128_CBC_SHA
- TLS_ECDHE_ECDSA_WITH_AES_256_GCM_SHA384
- TLS_ECDHE_RSA_WITH_AES_256_CBC_SHA
- TLS_ECDHE_RSA_WITH_AES_128_GCM_SHA256
- TLS_DHE_RSA_WITH_AES_256_CCM
- TLS_ECDHE_RSA_WITH_AES_256_GCM_SHA384
- Bind Address : Select the IP address to which the product's web port and its underlying listeners should be bound with. You can choose from the bind addresses that are provided in the drop-down.
- Application Access URL : Specify the DNS host name using which network communication would take place between agents. Click on Validate. After a successful validation, the result will be visible as Success.
- Click on Save Settings. For the updated configurations to come into effect, the product must be restarted. A Confirm Action pop-up appears for the same. Click on Yes.
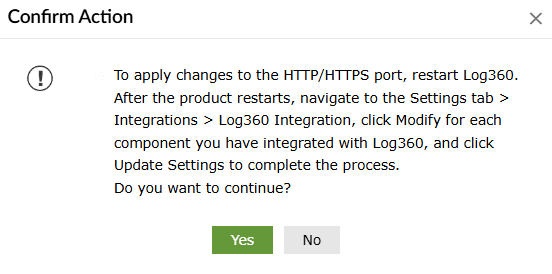
- Upon successful completion of action, the below pop-up appears.

General
- Enable LDAP SSL for: To configure LDAP SSL (Lightweight Directory Access Protocol over Secure Sockets Layer), click on the drop-down to view the list of domains to enable this setting for by ticking the checkbox.
- Session Expiry Time: Select the, maximum duration for which a user session can stay idle, following which it expires. The available time intervals are 15Mins, 30Mins, 45Mins, 1Hrs, 2Hrs, 3Hrs and Never. For the updated configurations to come into effect, the product must be restarted.
- Click on Save Settings to store the configured settings.
- Upon successful completion of action, the below pop-up appears.

- For the updated configurations to come into effect, the product must be restarted.
SSL Certification Tool
This tab allows you to apply SSL certificates, either by generating a self-signed certificate or by importing your own certificate.
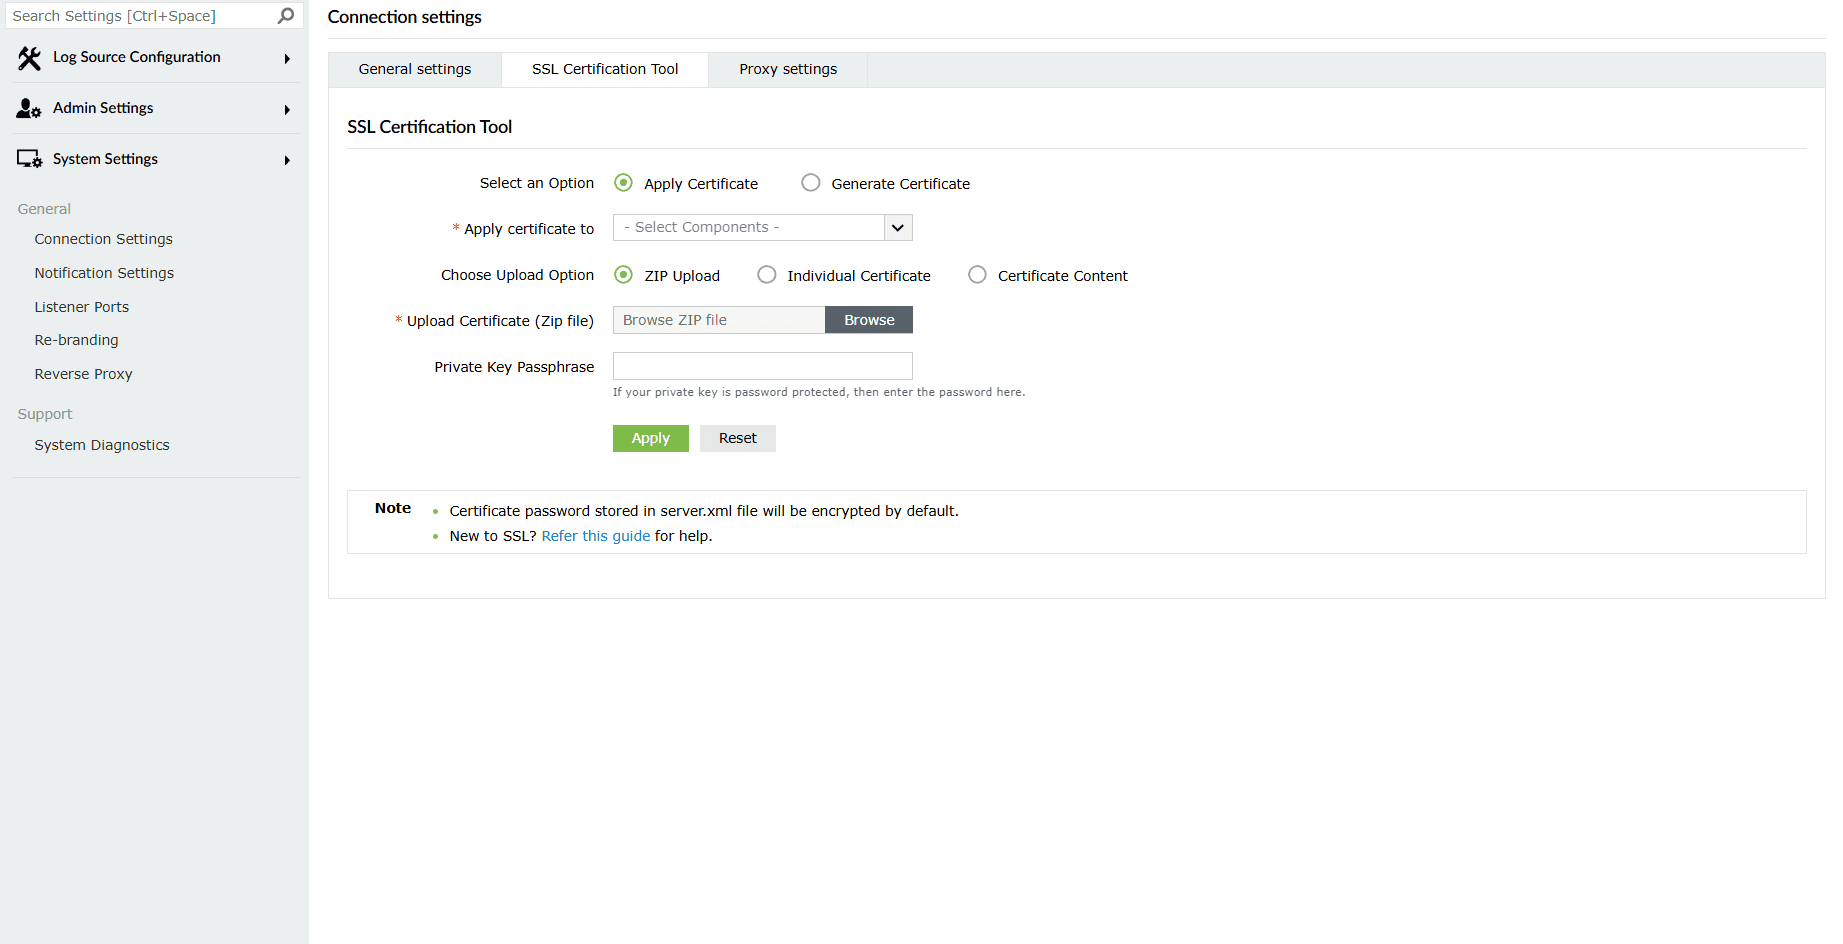
The Select an Option field contains options based on two cases:
- Apply Certificate: Click on this option in the case where you already have an SSL certificate.
- Generate Certificate: In the case where you do not have an existing certificate, click on this option to generate an SSL certificate upon completion of which, you can follow the steps from the Apply Certificate option.
Case 1: Apply Certificate
If you already have a SSL certificate, follow the steps listed below to apply it.
- Apply certificate to: In the drop-down, select the component for which you want to apply the SSL certificate.
- Choose Upload Option: Choose an upload option based on the certificate file type.
- ZIP upload:
- If your CA has sent you a ZIP file, then select ZIP Upload, and upload the file.
- If your CA has sent you individual certificate files—user, intermediary, and root certificates, then you can put all these certificate files in a ZIP file and upload them.
- Individual Certificate:
- If your CA has sent you just one certificate file (PFX or PEM format), then select Individual Certificates, and upload the file.
- If your CA has sent the certificate content, then paste the content in a text editor and save it as a CER, CRT, or PEM format, and upload the file.
- Certificate Content:
- If your CA has sent just the certificate content, then choose this option and paste the entire content in the Paste Certificate Content field.
- ZIP upload:
- Upload Certificate/Paste Certificate Content: Based on the upload option, upload your certificate in this field.
- Private Key Passphrase: If the certificate contains a password-protected private key, enter the password in this field.
NOTE : Only Triple DES encrypted private keys are currently supported.
- Click on Apply. The below pop-up appears briefly.

- Finally, restart the product.
Case 2: Generate Certificate
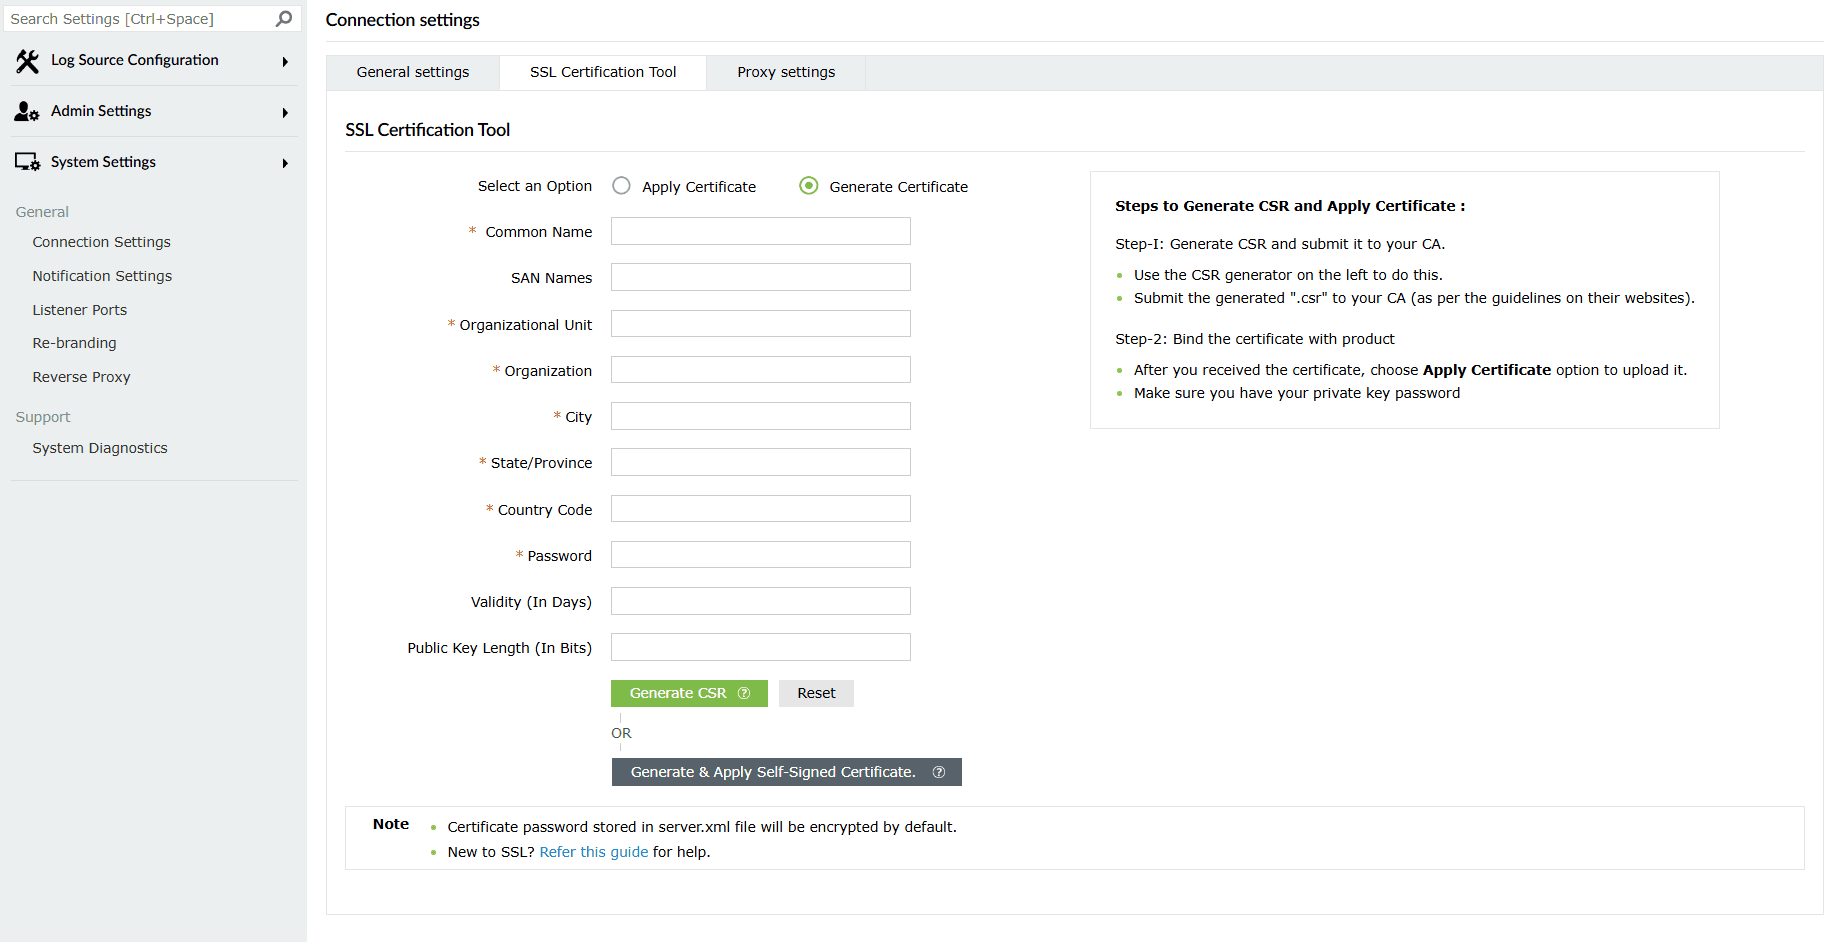
If you don't have an SSL certificate, select the Generate Certificate option and fill the required fields as listed below:
- Common Name: Enter the name of the server. Example: For the URL https://servername:9251, the common name is servername.
- SAN Names: Subject Alternative Name (SAN) allows you to specify additional host names for a single SSL certificate. Use a comma to separate multiple values.
- Organizational Unit: Enter the department's name which you want to be displayed in the certificate.
- Organization: Enter the legal name of your organization.
- City: Enter the name of the city as provided in your organization's registered address.
- State/Province: Enter the name of the state or province as provided in your organization's registered address.
- Country Code: Enter the two letter code of the country where your organization is located.
- Password: Enter a password to secure the keystore. It should be at least 6 characters. You will be asked to enter this password while installing the signed certificates. For self-signed certificates, by default, the password is encrypted.
- Validity (In Days): Specify the number of days for which the SSL certificate will be considered valid.
NOTE When no value is entered, by default, the certificate will be considered to be valid for 90 days.
- Public Key Length (In Bits): Specify the size of the public key. Larger the size, the stronger the key. Default size is 2048 bits, which can only be incremented in multiples of 64.
NOTE The default value is 2048 bits and its value can only be incremented in multiples of 64.
- After all values have been entered, you can select either of these two options:
- Generate CSR: This method allows you to generate the CSR file and submit it to your CA (Certificate Authority). Using this file, your CA will generate a custom certificate for your server.
- Click Download CSR or manually get it by going to the <Install_dir>\Certificates folder.
- Once you have received the certificate files from your CA, follow the steps listed under Apply Certificate to apply the SSL certificate.
- Generate & Apply Self-signed Certificate: This option allows you to create a self-signed certificate and apply it instantly to the product. However, self-signed SSL certificates come with a drawback. Anyone accessing the product secured with a self-signed SSL certificate will be shown a warning telling them that the website is not trusted, which may cause concern.

- Generate CSR: This method allows you to generate the CSR file and submit it to your CA (Certificate Authority). Using this file, your CA will generate a custom certificate for your server.
- After completion of this process, you can follow the steps under Apply Certificate.
Proxy settings
This setting allows you to configure a proxy server for accessing the product server.
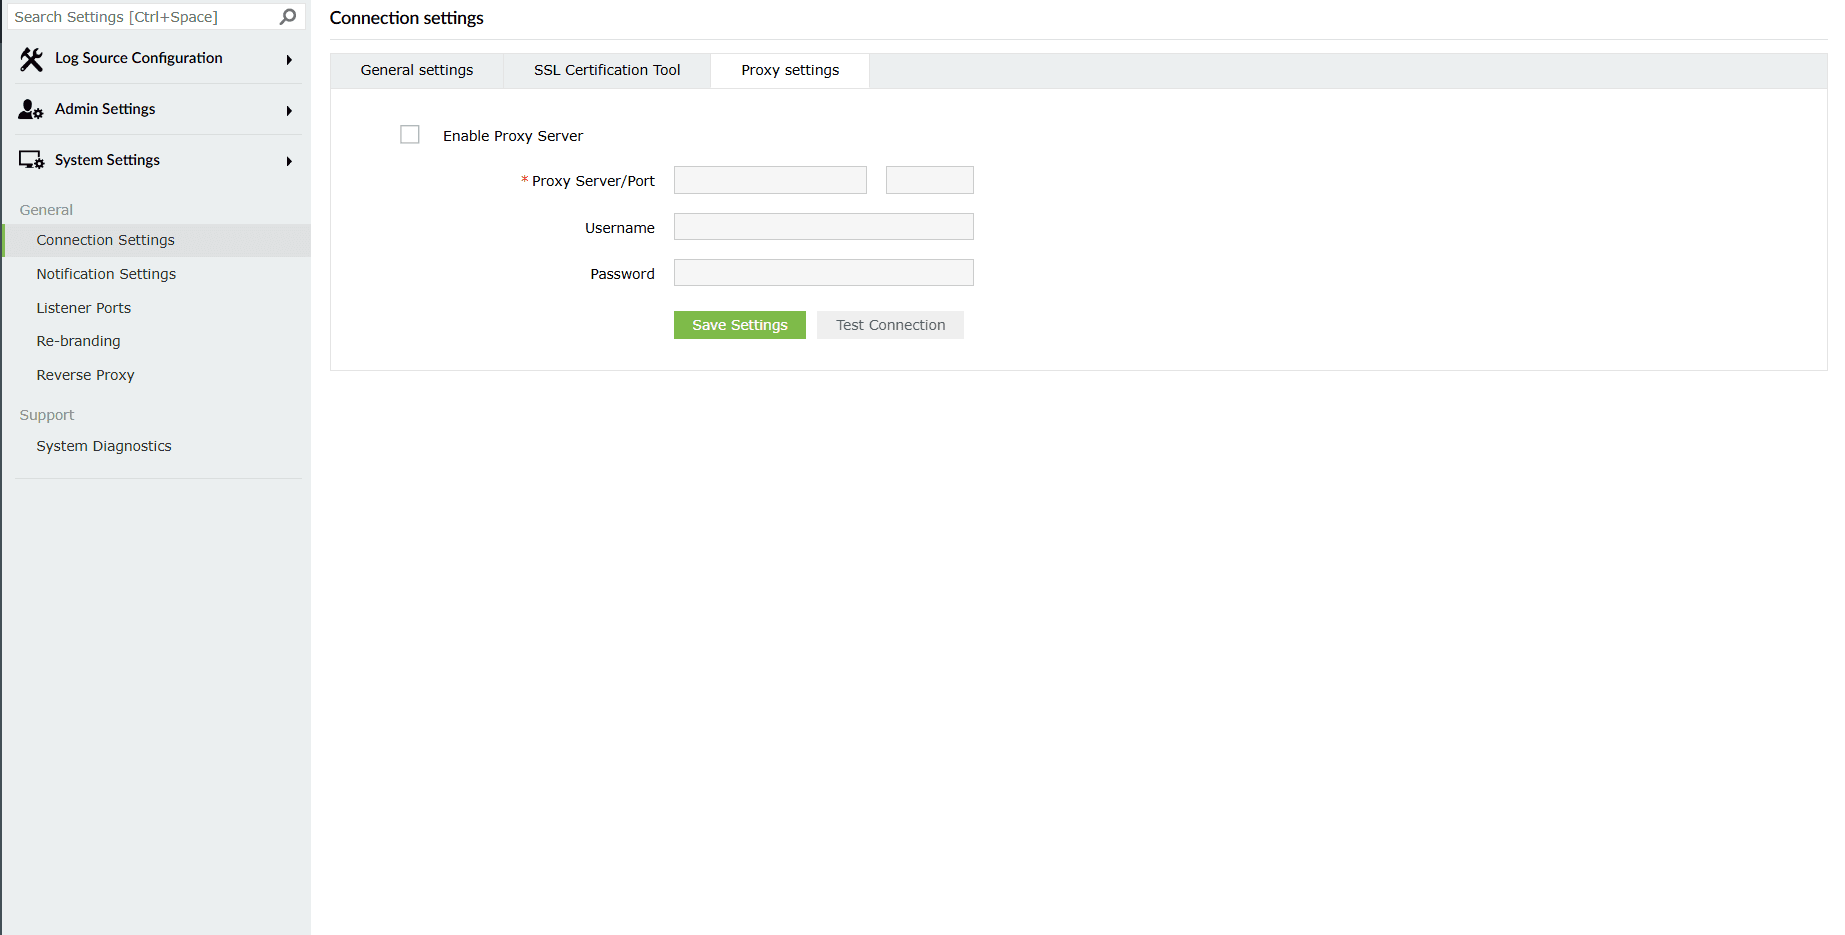
- Select the Enable Proxy Server check box. The required fields will then be marked as available to edit/configure.
- Configure the server by entering Proxy Server Name/Port, Username, and Password in the provided fields.
- Click on Save Settings to save the configured proxy server.
- Click on the Test Connection button for a verification if the proxy server is able to connect from the product server
Extracting EventLog Analyzer SSL certificate
This guide provided in this section is specific for only EventLog Analyzer console
If you are currently using the Log360 component EventLog Analyzer and if it utilizes a self-signed certificate, proceed as follows to extract the certificate in the desired format.
If a self-signed certificate hasn't been generated through EventLog Analyzer's certification tool, begin by generating the certificate through the tool, then continue with the subsequent steps.
PRODUCT_LOCATION/jre/bin/keytool -exportcert -keystore PRODUCT_LOCATION/conf/server.p12 -storetype PKCS12 -storepass STOREPASS -alias ALIAS -file CERTIFICATE.crt
Replace the placeholders accordingly:
- STOREPASS: Password used during self-signed certificate generation.
- ALIAS: Common name used during self-signed certificate generation.
- CERTIFICATE: Desired name for the certificate file.
Import SSL Certificate into EventLog Analyzer trust store:
Use the following command to import the certificate into the trust store of the desired product.
PRODUCT_LOCATION/jre/bin/keytool -import -noprompt -trustcacerts -alias ALIAS -file CERTIFICATE.crt -keystore PRODUCT_LOCATION/jre/lib/security/cacerts -storepass changeit
Replace the placeholders accordingly:
- ALIAS: Suitable alias for the certificate.
- CERTIFICATE: Certificate to be imported.
SSL Troubleshooting Tips
This section helps you troubleshoot SSL server certificate–related issues that you might encounter in the product console.
1. Blocked Content
Description:
This problem arises when the product console is configured to use HTTPS under connection settings while an integrated component is still configured to use HTTP. As a result, the component cannot be accessed from the apps pane.
Resolution:
If the product console uses HTTPS, all integrated components must also be configured to use HTTPS (SSL) for successful access.
2. Certificate Name Mismatch
Description:
This error occurs when the common name of the SSL certificate does not exactly match the hostname of the server hosting the product console.
Resolution:
Obtain a new SSL certificate for the current hostname of the server.
3. Hostname Mismatch
Description:
This error occurs when the SSL certificate of a component is issued for a hostname that differs from the hostname of the product console. For example, the console could be installed on a parent domain while a component runs on a child domain.
Resolution:
Configure a valid SSL wildcard certificate and apply it to both the product console and the component.
4. Invalid Certificate
Description:
This error occurs when the SSL certificate configured with the product console is invalid (for example, expired or improperly issued).
Resolution:
Reconfigure the product console to use a valid SSL certificate.
5. Problem Trusting the Security Certificate
Description:
This error occurs when a component integrated with the product console is running on an older build.
Resolution:
Upgrade all integrated components to the latest build.
6. Certificate Not Trusted by JVM (Advanced Scenario)
Description:
This exception occurs when you configure an SMTP mail server or web server with SSL in the product console and the server uses a self-signed certificate. The Java Runtime Environment (JRE) bundled with the console does not trust self-signed certificates unless explicitly imported.
Resolution:
You need to import the self-signed certificates used by the server in the JRE package used by the product console. Follow the steps given below:
Step 1: Download the certificate
For SMTP servers:
To download the certificate used by SMTP server, you must have OpenSSL installed. You can download it from here.
Open the command prompt and change to the bin folder in the OpenSSL installed location.
Now run the following command,
openssl.exe s_client -connect SMTPServer: Portno -starttls smtp > certificatename.cer
- For example, openssl.exe s_client -connect smtp.gmail.com:587 -starttls smtp > gmailcert.cer
For Web Servers:
- Open the web URL in a browser.
- Click the padlock icon on the address bar.
- Click More Information. This opens the Certificate Viewer window showing the certificate used by that web server.
- Click View Certificate.
- When the Certificate window showing Certificate Information Authority opens, click the Details tab.
- Click Copy to File.
- In the Certificate Export Wizard that opens, click Next.
- Select the format as DRE encoded binary X.509 (.CER) and click Next.
- Enter the path where you wish to save the file and click Finish.
Step 2: Import the certificates in JRE package of the product console.
- Open a command prompt and change to the \jre\bin folder. For example: C:\ManageEngine\product console name\jre\bin.
- Run the following command,
Keytool -importcert -alias myprivateroot -keystore ..\lib\security\cacerts -file
- For example: Keytool -importcert -alias myprivateroot -keystore ..\lib\security\cacerts -file C:\smtpcert.cer
- Enter changeit when prompted for a password.
- Enter y when prompted Yes or No.
- Close the command prompt and restart the product.
For certificates signed by Public Certificate Authority
If the certificate is signed by Public Certificate Authority, follow the steps below:
- Open browser settings
- Open Privacy / Privacy and Security Tab
- Under Security Tab, click on Manage Certificates.
- Please make sure the CA certificate is not under Untrusted Publishers.
- If the certificate is not under Untrusted Publishers, open the Trusted Root Certification Authorities tab to check if the Public Certification Authority you signed is available.
- If it is not available, please import the Certification Authority certificate and restart the browser.
For certificates signed by a Local Certificate Authority or it is self signed
If the web client is accessed under Domain machine, Please follow the below steps.
- Start the Group Policy Management snap-in.
- Right-click the respective GPO, and then click Edit.
- Open Computer Configuration\Policies\Windows Settings\Security Settings\Public Key Policies, right-click Trusted Root Certification Authorities, and then click Import.
- On the Welcome to the Certificate Import Wizard page, click Next.
- On the File to Import page, choose the certificates, and then click Next.
- On the Certificate Store page, click Place all certificates in the following store, and then click Next.
- On the Completing the Certificate Import Wizard page, verify that the information you provided is accurate, and then click Finish.
If the web client is accessed under a Non-domain machine, Please follow the below steps.
- Open Browser settings
- Open Privacy / Privacy and Security Tab
- Under Security Tab, click on Manage Certificates.
- In the Certificates popup, open Trusted Root Certification Authorities.
- Please import the Certification Authority certificate and restart the browser.
Read also
This document explained how to configure SSL settings in Log360 and EventLog Analyzer, including connection types, certificate management, proxy configuration, and extracting certificates. For more information, refer to the following pages: