Backup settings
To create a new backup schedule for your Exchange Online mailboxes:
- Log in to M365 Manager Plus and click the Auditing & Monitoring tab.
- Navigate to Backup > Exchange Online > Backup Settings.
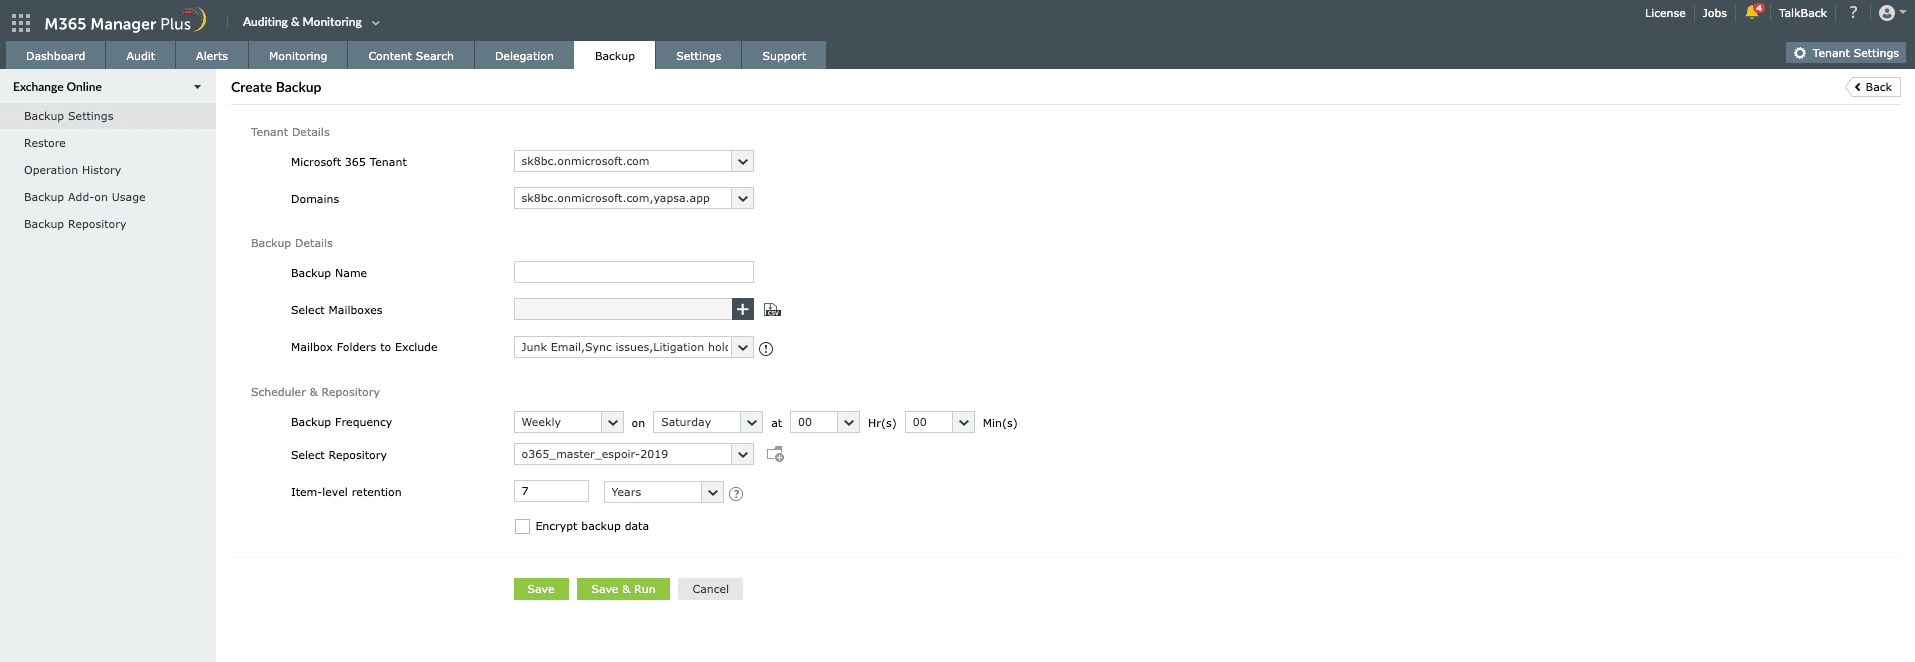
- Click the Create Backup option in the top-right corner.
- Choose the tenant for which you wish to create a backup schedule from the Microsoft 365 Tenant drop-down menu.
- Choose specific domains or virtual tenants from the Domains drop-down menu if required.
- In the Backup Details section, provide a name for the backup schedule.
- Select the mailboxes that you wish to back up by clicking the + icon in the Select Mailboxes field or you can import the mailboxes that you wish to back up from CSV files by clicking the import icon
 .
.
Note: You can back up a mailbox only if it has an active Microsoft 365 license.
- You can select all the mailboxes by selecting the check box adjacent to the Display Name text. To search for individual mailboxes, use the search icon
 .
.
- After you've selected all the mailboxes that you wish to back up, click OK.
- If you want to exclude certain mailbox folders, like Junk or Spam, choose these folders from the Mailbox Folders to Exclude drop-down menu.
- In the Scheduler & Repository section, select the desired frequency at which the schedule must run from the options available in the Backup Frequency drop-down menu.
- Daily: Scheduler will run once every day at the scheduled time.
- Weekly: Scheduler will run once every week on the specified day and time.
- Monthly: Scheduler will run once a month on the specified date and time.
- Select the repository in which you wish to store the backups from the Select Repository drop-down menu.
- In the Item-Level Retention field, enter the number of days/months/years for which Exchange Online backups should be stored. Backups older than the specified age will be discarded. If you've set the item-level retention to be 30 days, when the backup schedule runs on the 31st day, the backups taken on the first day will be discarded. To learn more about the item-level retention period, refer to this help document.
You can also configure M365 Manager Plus to store your Exchange Online backups forever, in which case backups will not be discarded.
Note: The minimum item-level retention for Exchange Online backups is 30 days.
- If you wish to encrypt your backup data, check the Encrypt Backup Data check box and provide the Encryption Key.
- Click Save to save the schedule. The backup will run at the specified time.
- Click Save & Run to save the scheduler and trigger the first backup process immediately.
- Click Cancel to exit the configuration screen.
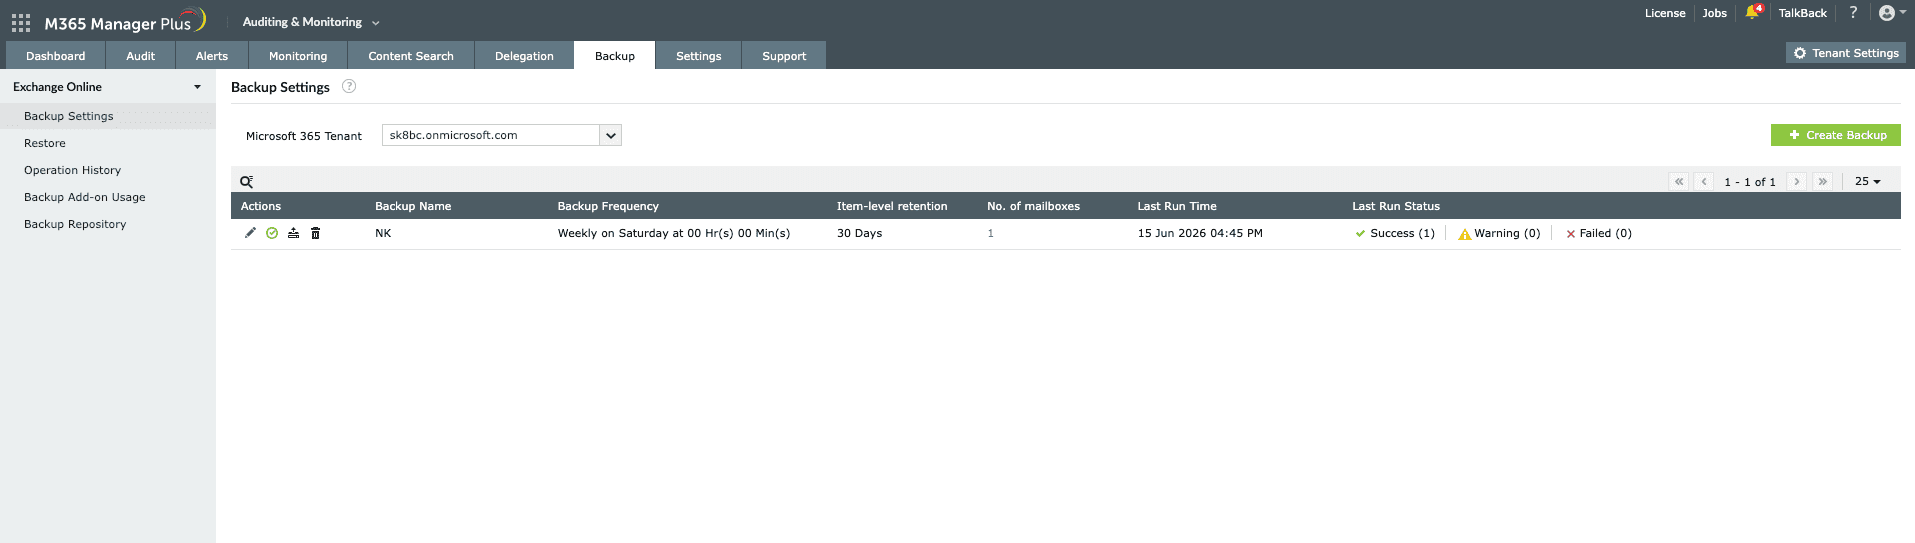
Note: The list of all configured schedules will be displayed on the Backup Settings page. The status of the last backup can be viewed by clicking the View Details option corresponding to a particular schedule.
Once you've configured a backup schedule, you can perform the following actions:
Editing the backup schedule
To edit the backup schedule, click the edit icon  under the Actions column corresponding to the backup schedule you wish to edit. Make changes to the required fields, and click Update.
Enabling/disabling the backup schedule
Click the enable icon  and disable
  icon under the Actions column corresponding to the backup schedule that you wish to disable or enable, and click OK.
Manually triggering a backup
Click the back up now icon  under the Action column of the backup schedule to trigger a backup.
Deleting the backup schedule
Click the delete icon  under the Action column of the backup schedule that you wish to delete.
 ADManager Plus
 ADAudit Plus
 ADSelfService Plus
 M365 Manager Plus
 Previous Topic