×![]()
×
×![]()
×
×
Integrate with Splunk Enterprise
When Endpoint Central is integrated with Splunk, both vulnerability data and audit logs are forwarded to Splunk, giving administrators a consolidated view of detected vulnerabilities and console activity for monitoring, compliance, and security reporting.
Overview
Splunk's analytics can be used to monitor forwarded events, identify patterns or anomalies, and generate reports and dashboards for auditing, compliance, and security monitoring purposes.
Note
- Currently, only Vulnerability data and Action Log Viewer data from Endpoint Central are posted to Splunk.
- Vulnerability data is applicable only for the Endpoint Central server with Security edition or Vulnerability Add-On purchased, and version 11.3.2430.01 and above.
- Action Log Viewer data is applicable for Endpoint Central version 11.4.2533.01 and above.
Installing the ManageEngine Endpoint Central Add-On in Splunk
- Navigate to the Splunk Home page.
- In the header menu, click Apps.
- Select Find More Apps to be redirected to Splunk's Marketplace.
- Search for the ManageEngine Endpoint Central Add-On app.
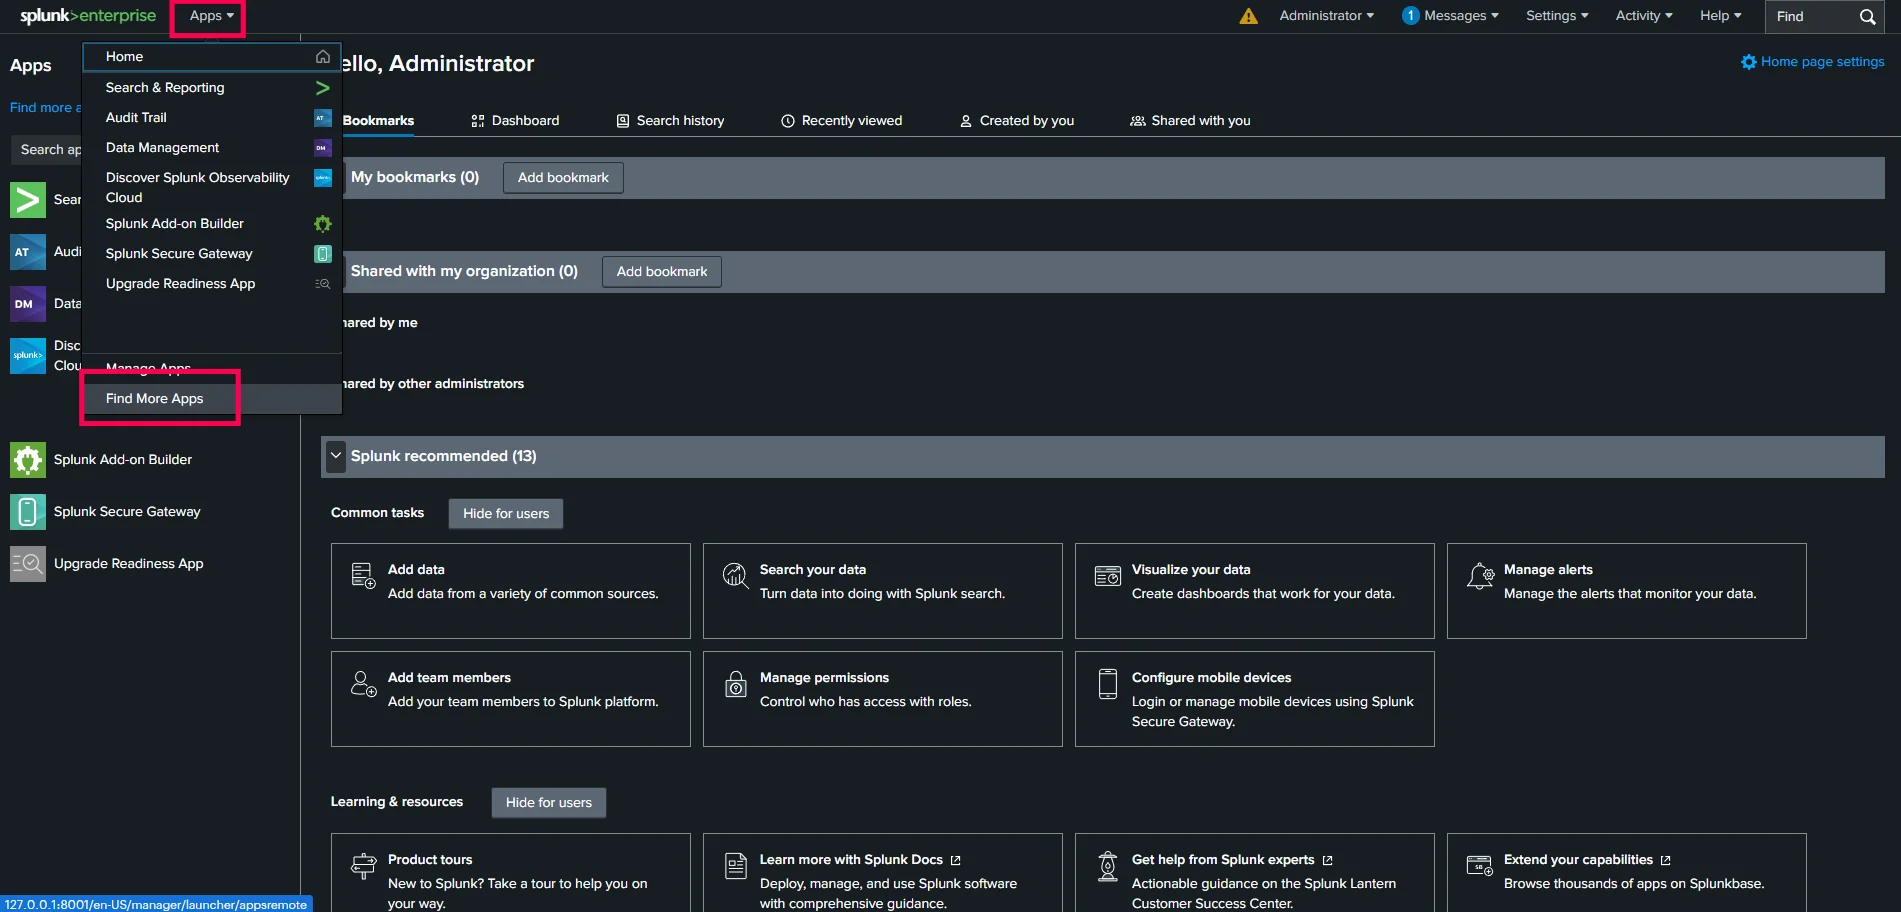
Splunk Apps menu showing the Find More Apps option. 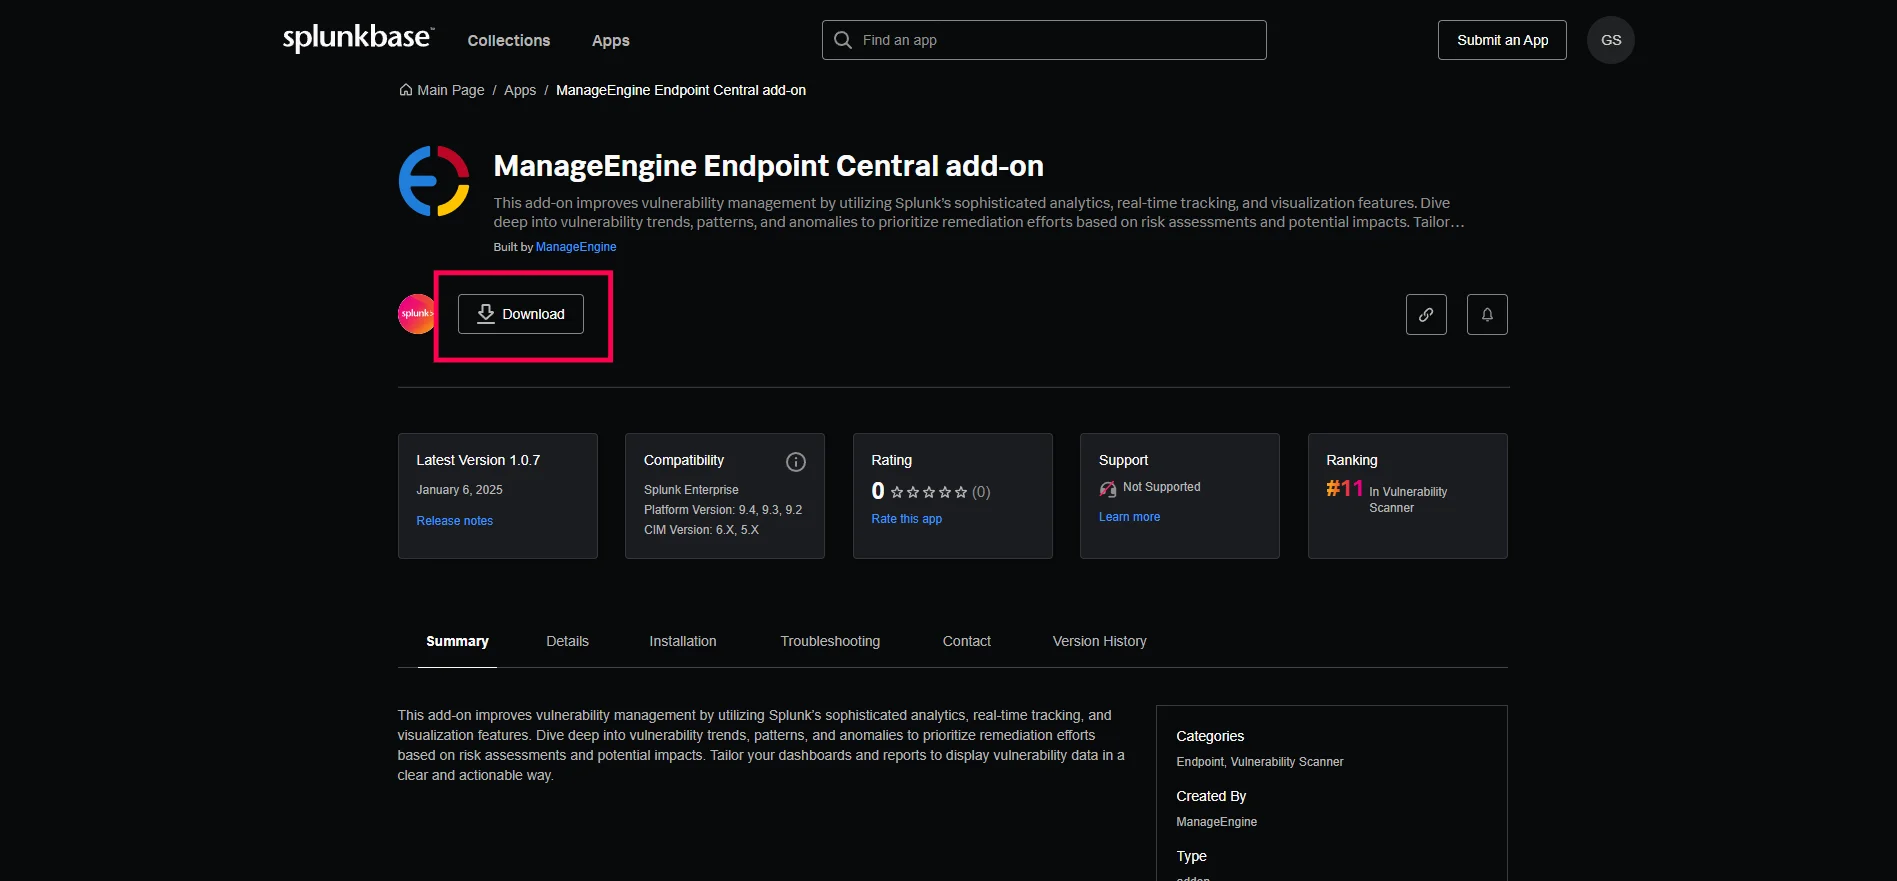
ManageEngine Endpoint Central Add-On in Splunk's Marketplace. - Click Download and enter your username and password.
- Click Agree and Install. The application will now be accessible from the Splunk home page or the Apps menu.
Creating a CA-Bundle (Certificate Authority Bundle) for SSL Validation
- Navigate to the Endpoint Central server installation directory and go to %EC Home Dir% → nginx → conf.
- Open the server.crt file with a text editor and copy the contents of the certificate file.
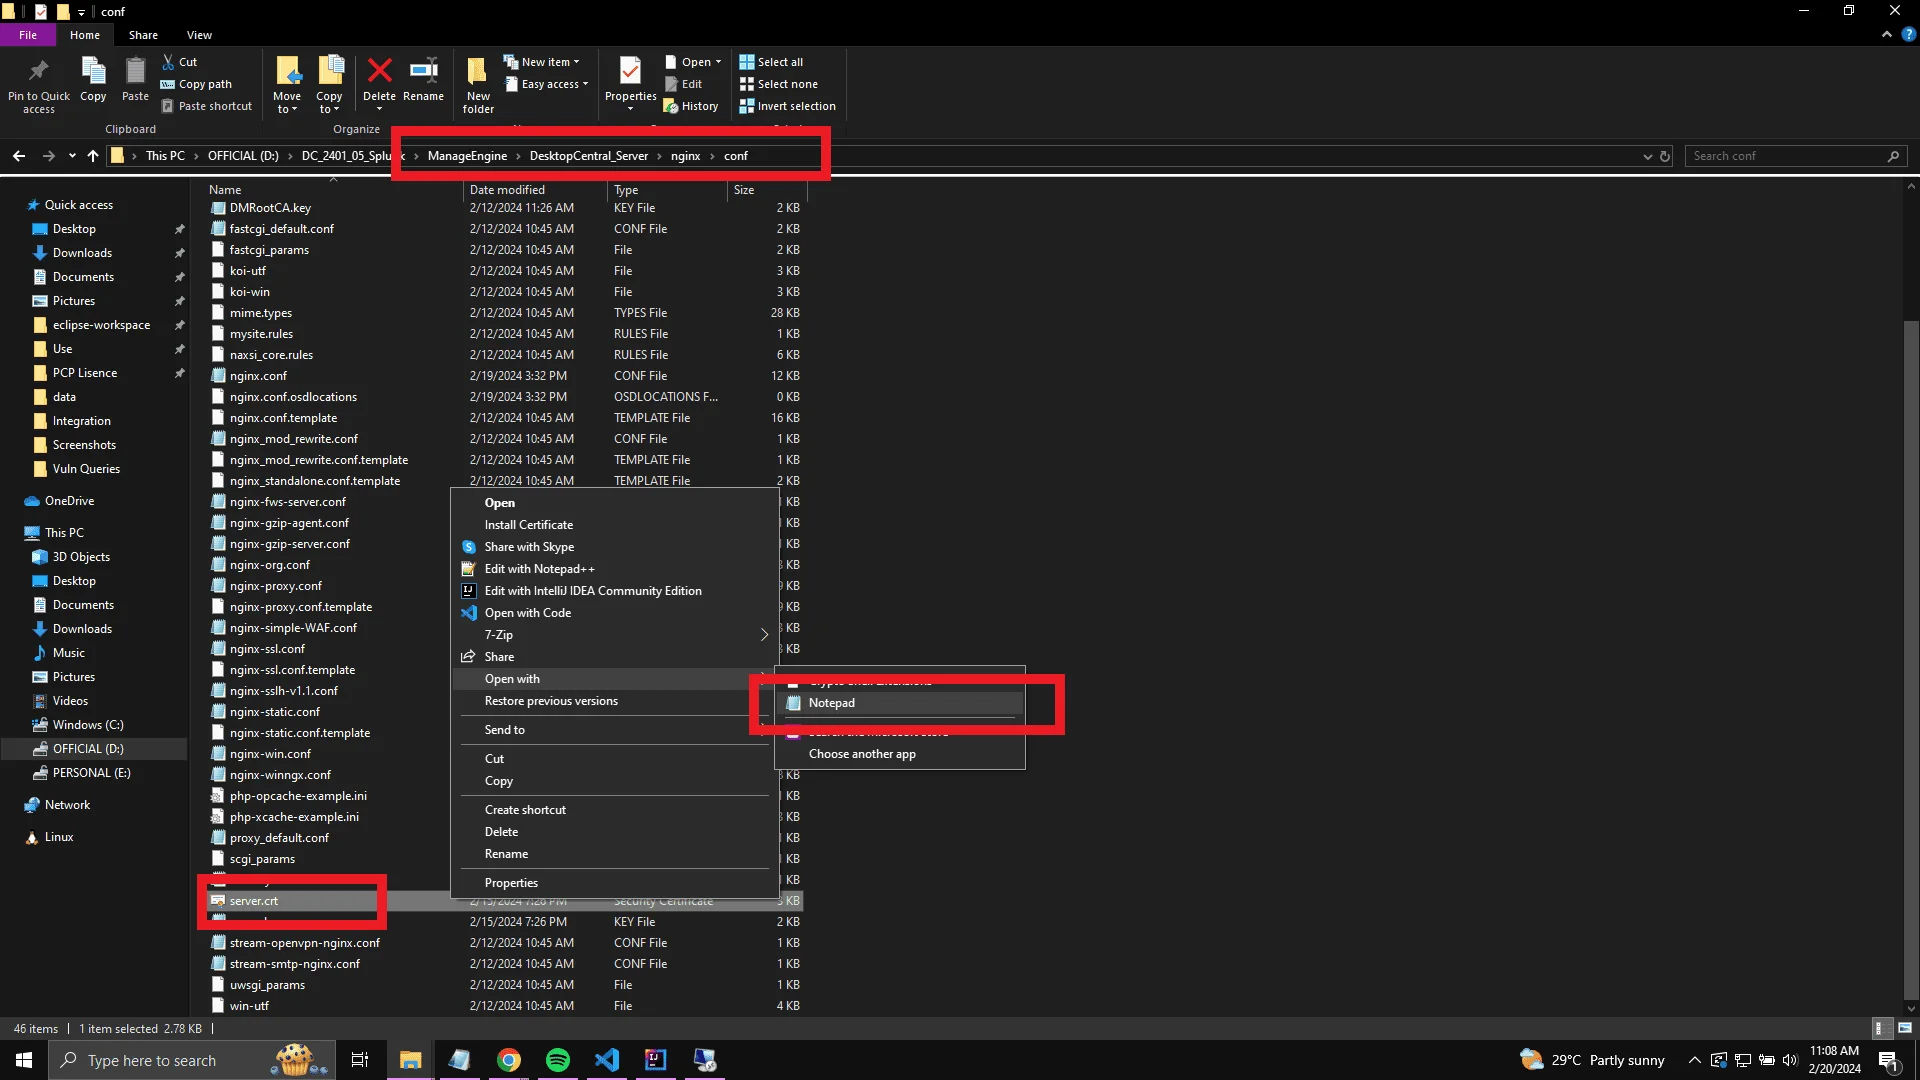
Endpoint Central nginx/conf directory showing the server.crt file. 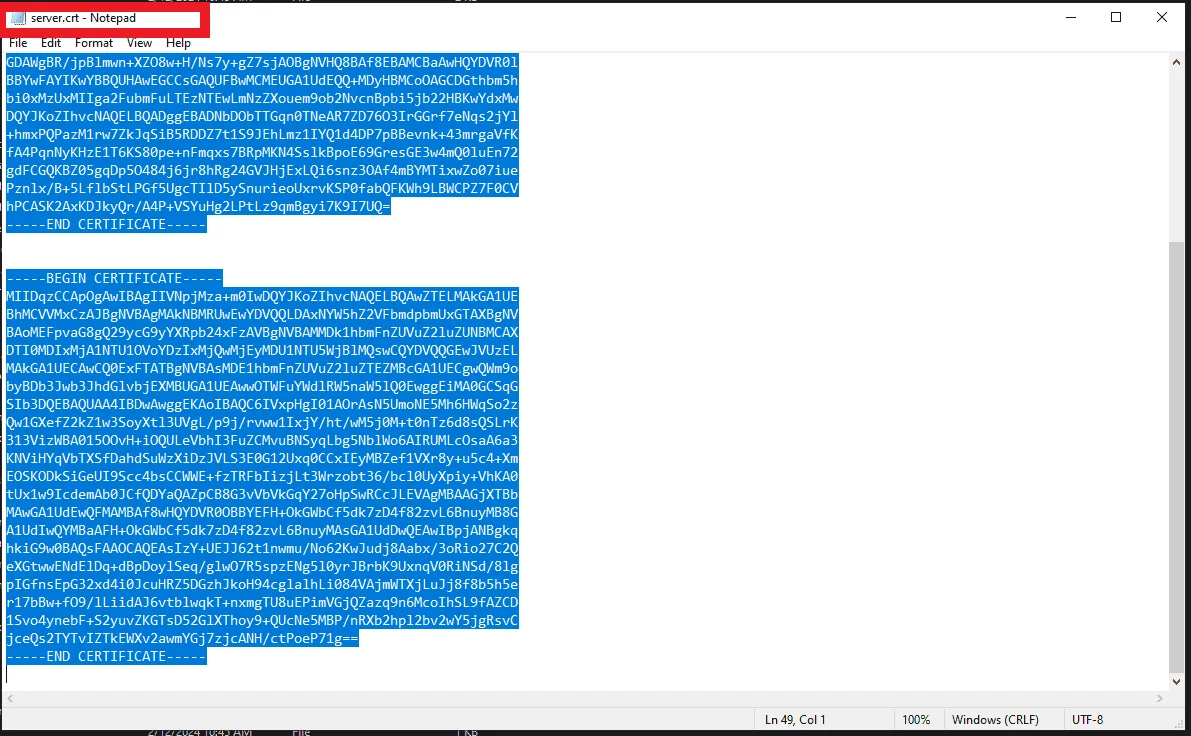
server.crt file open in a text editor — copy all contents. - Navigate to the Splunk installation directory and go to %Splunk Home Dir% → etc → apps → TA-manageengine-endpoint-central-add-on.
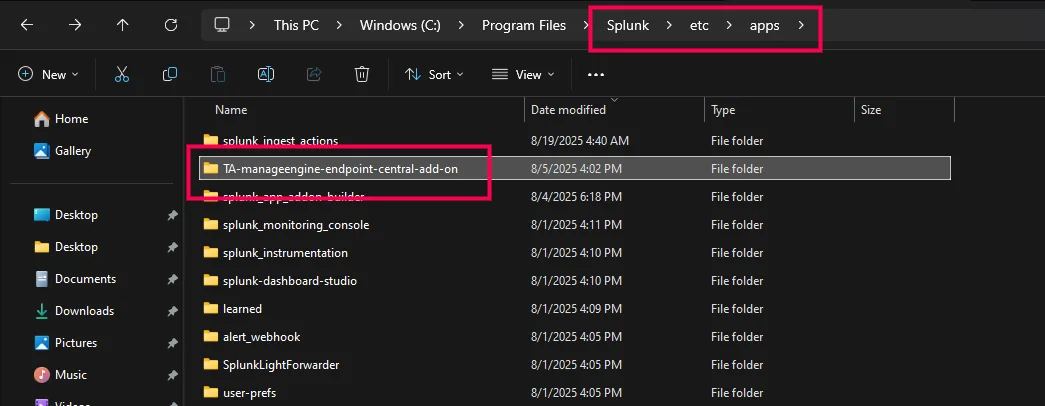
Splunk directory path to the TA-manageengine-endpoint-central-add-on folder. - Within the TA-manageengine-endpoint-central-add-on folder, create a new folder named certificates.
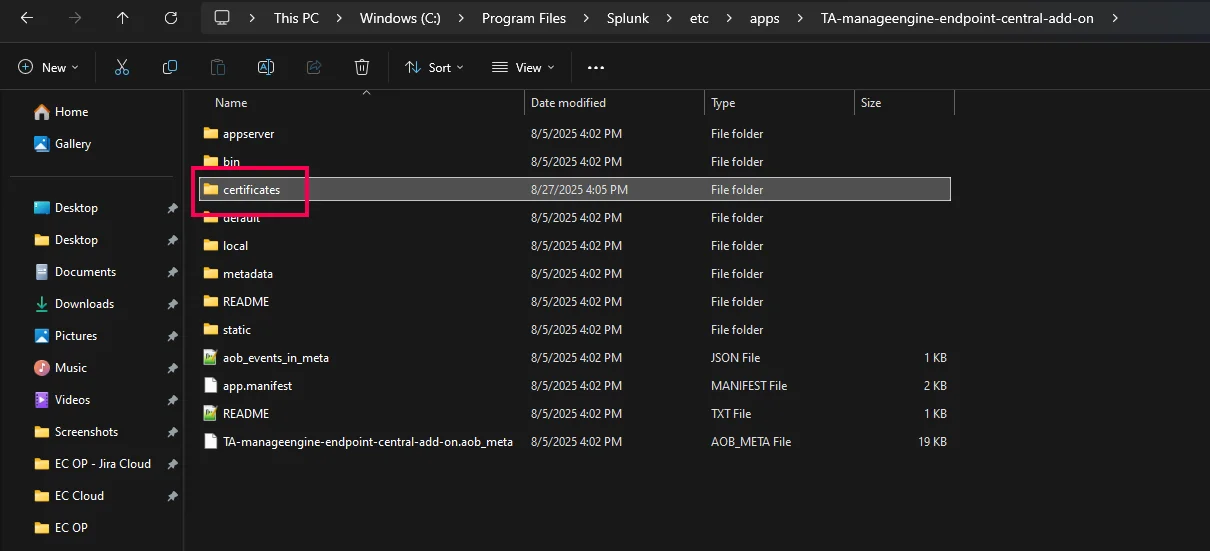
New certificates folder created inside the add-on directory. - Inside the certificates folder, create a new text file and rename it to ec.ca-bundle.
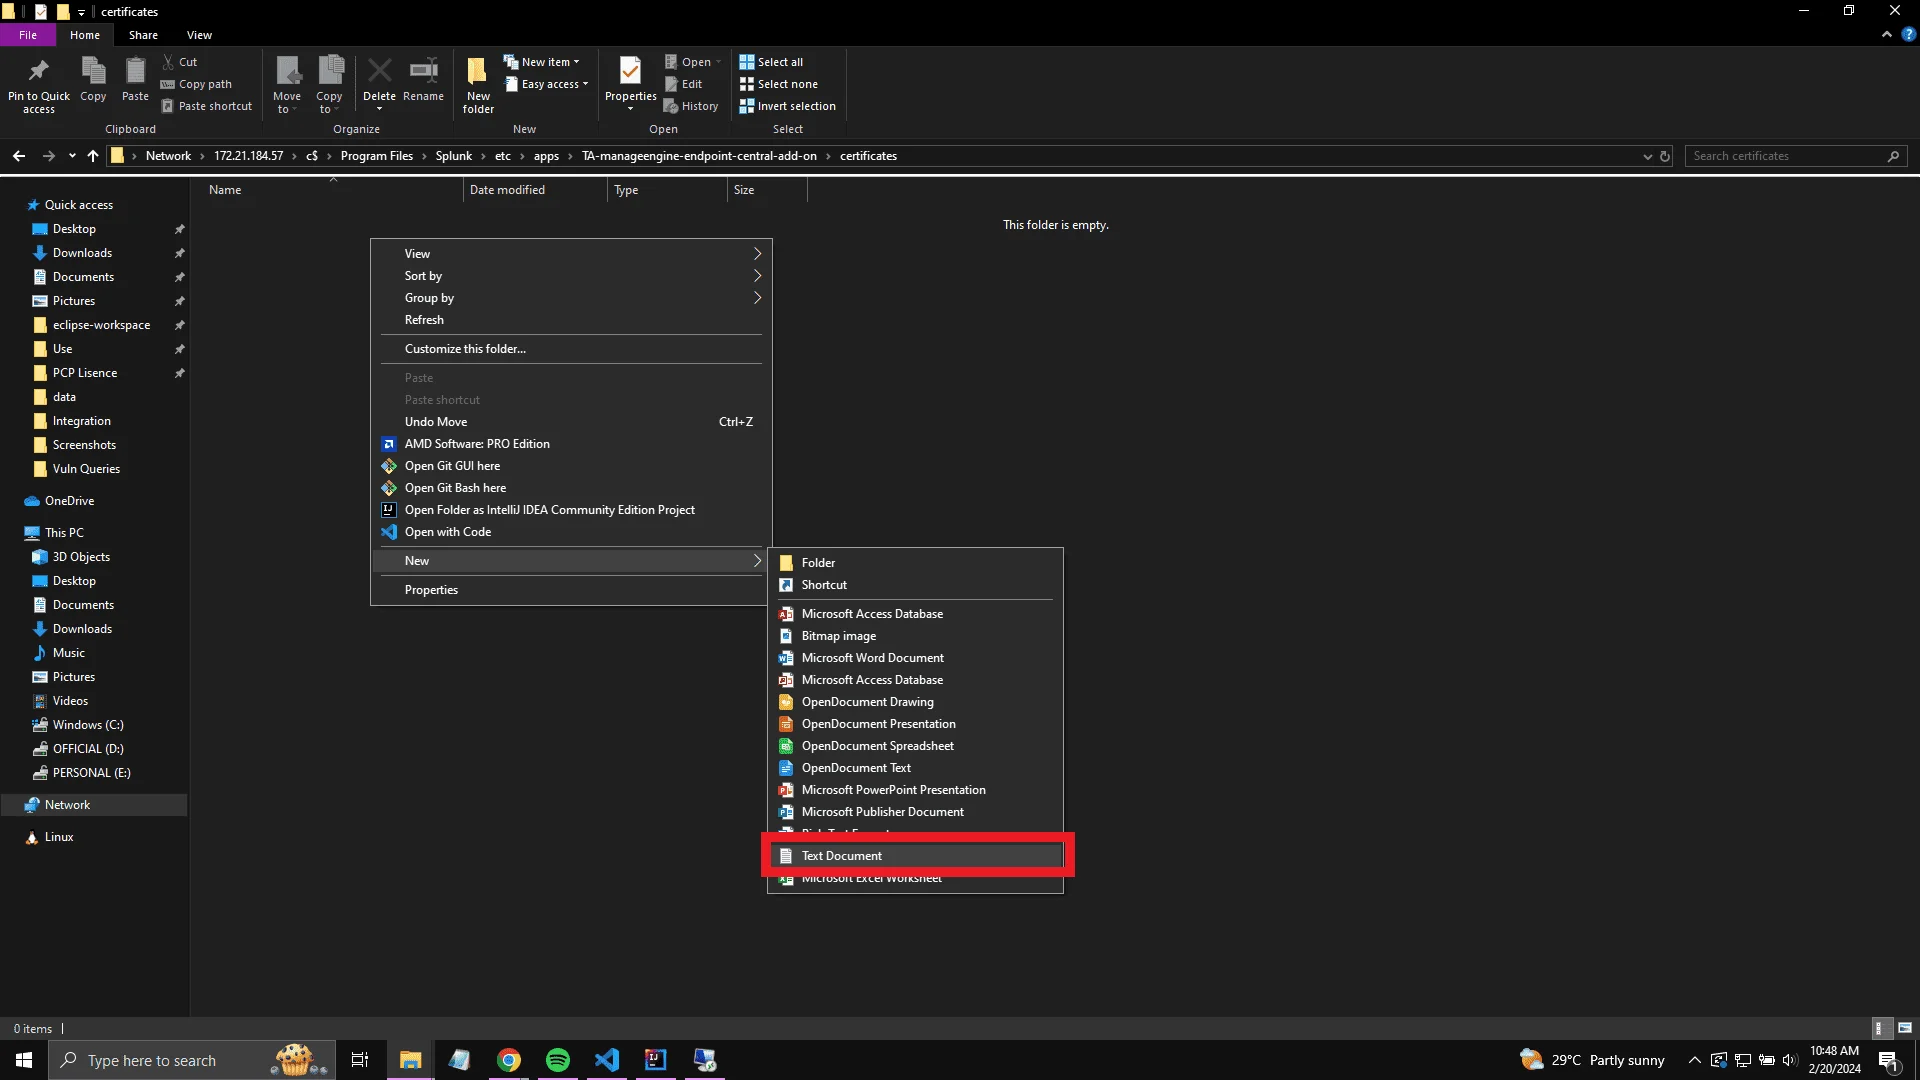
Creating a new file inside the certificates folder. 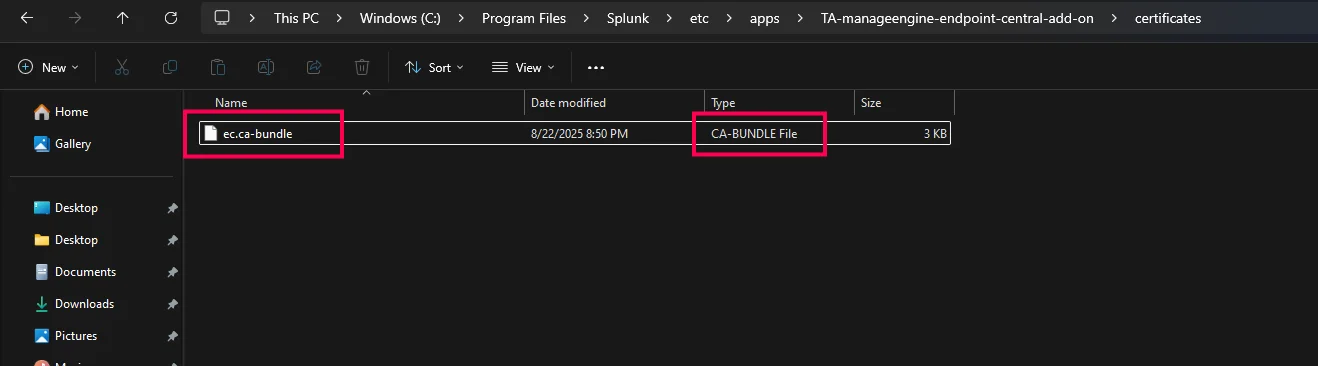
File renamed to ec.ca-bundle inside the certificates folder. - Open ec.ca-bundle with a text editor, paste the contents of the server.crt file copied from Endpoint Central, and save the file.
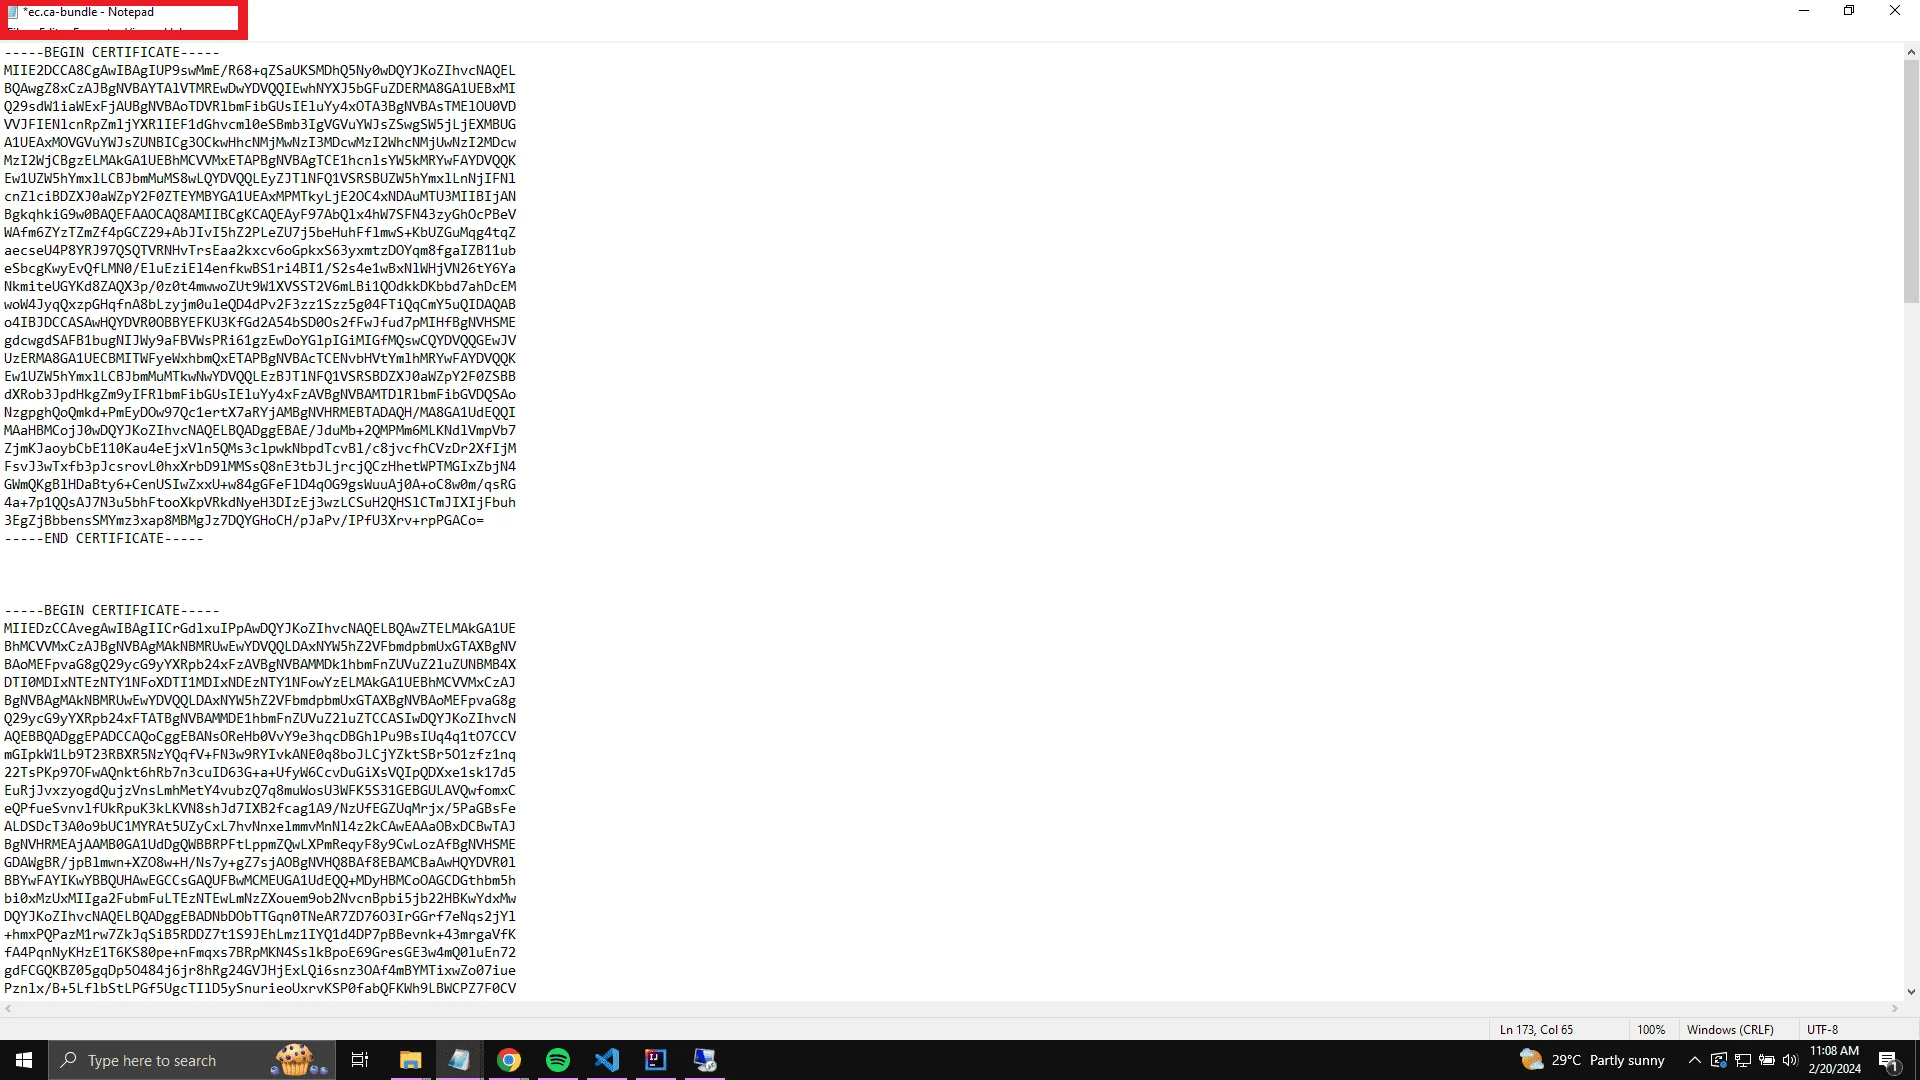
ec.ca-bundle file with server.crt contents pasted — ensure the file is saved with the CA-BUNDLE file type.
Generating an API Key in Endpoint Central
- In the Endpoint Central console, navigate to Admin → API Key Management and click Generate Key.
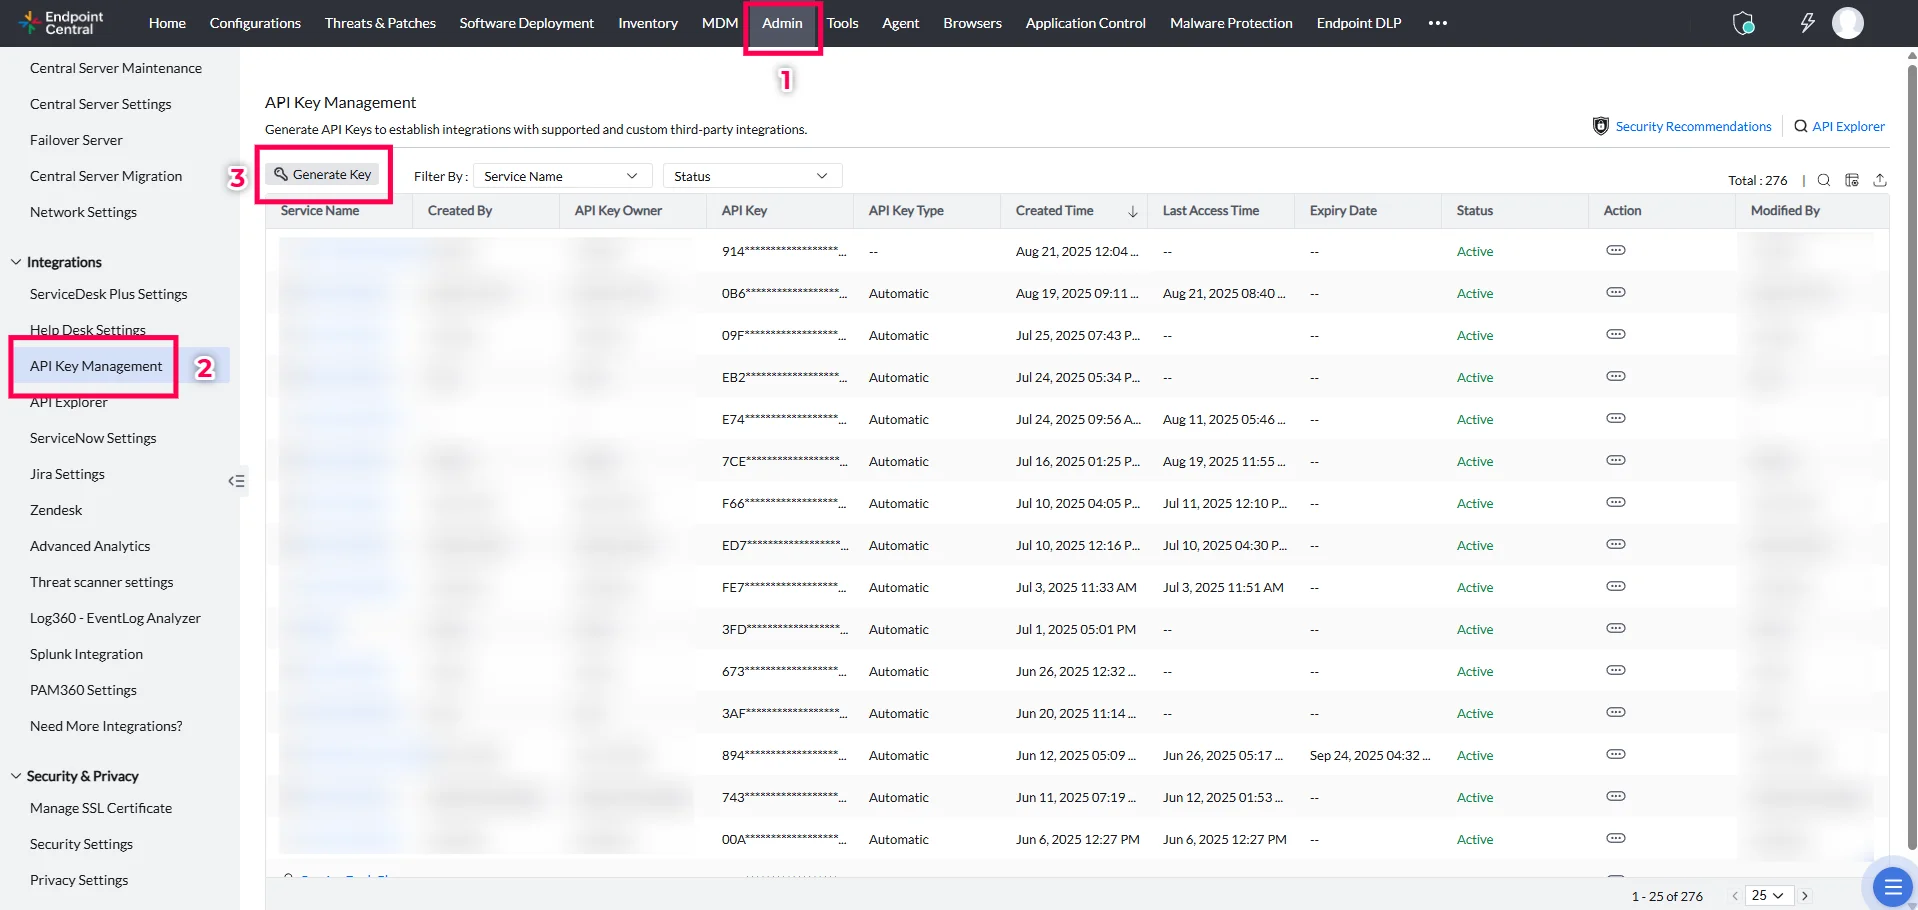
API Key Management page in Endpoint Central. - Select Splunk from the Application menu and click Generate Key.
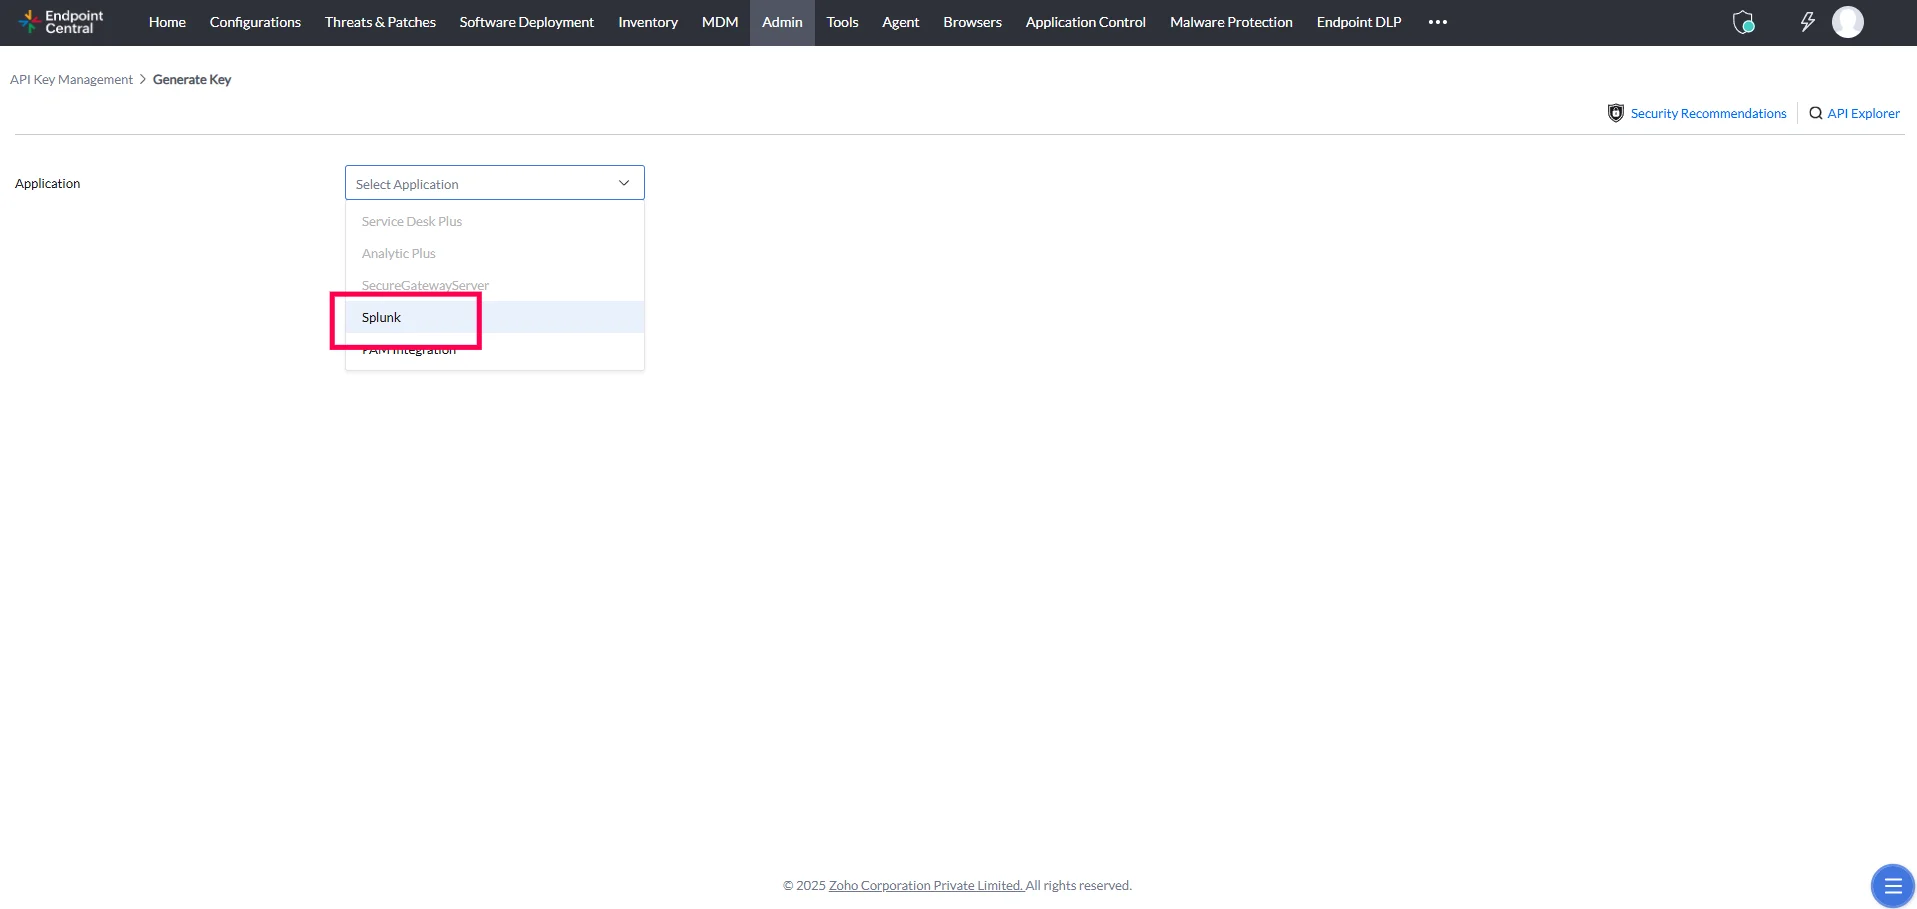
Generate Key dialog with Splunk selected as the application. - Copy your API key.
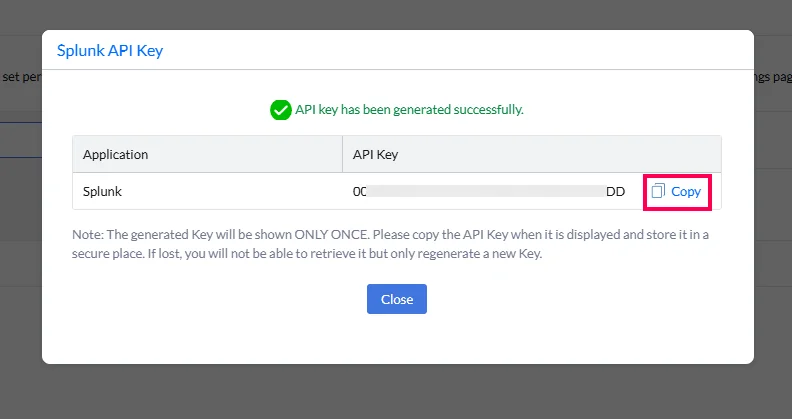
Generated API key ready to be copied.
Warning
The generated key will be shown only once. Copy the API key when it is displayed and store it in a secure place. If lost, it cannot be retrieved — only a new key can be regenerated.
Configuring the App in Splunk for Endpoint Central
- Navigate to the Splunk home page, click Apps in the header menu, and select the ManageEngine Endpoint Central Add-On app.
- Within the app, navigate to the Configurations page and click the Add button.
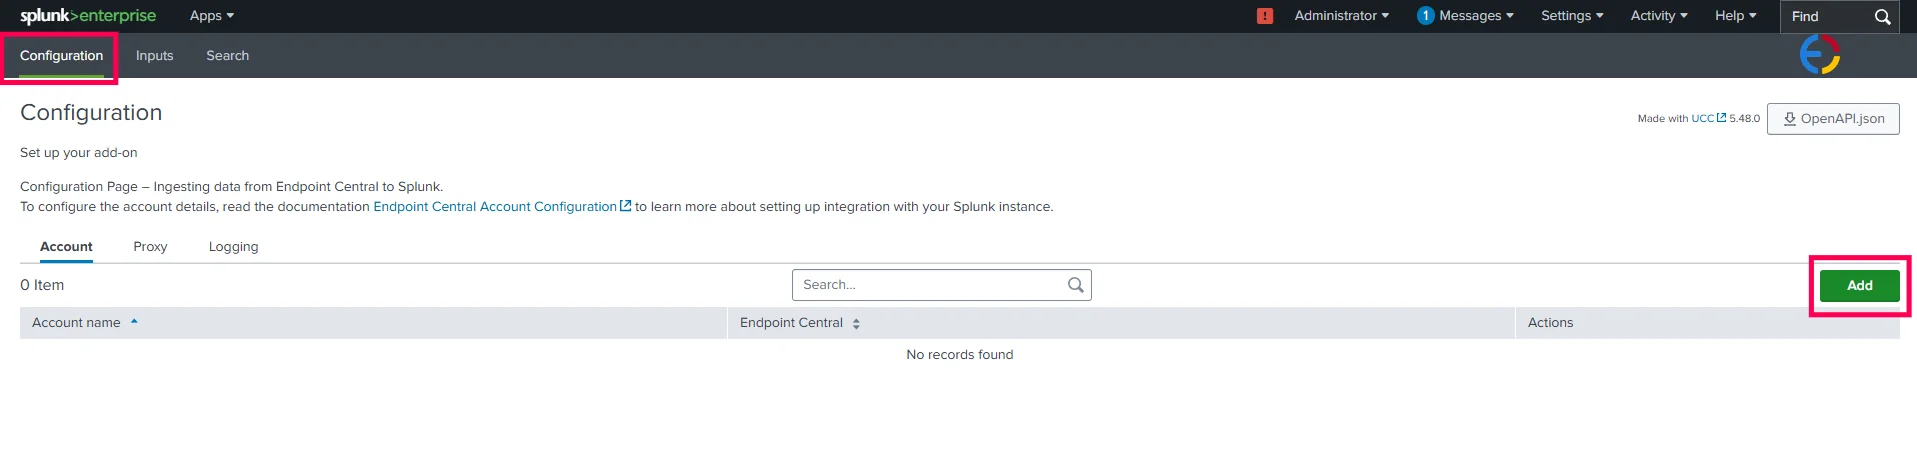
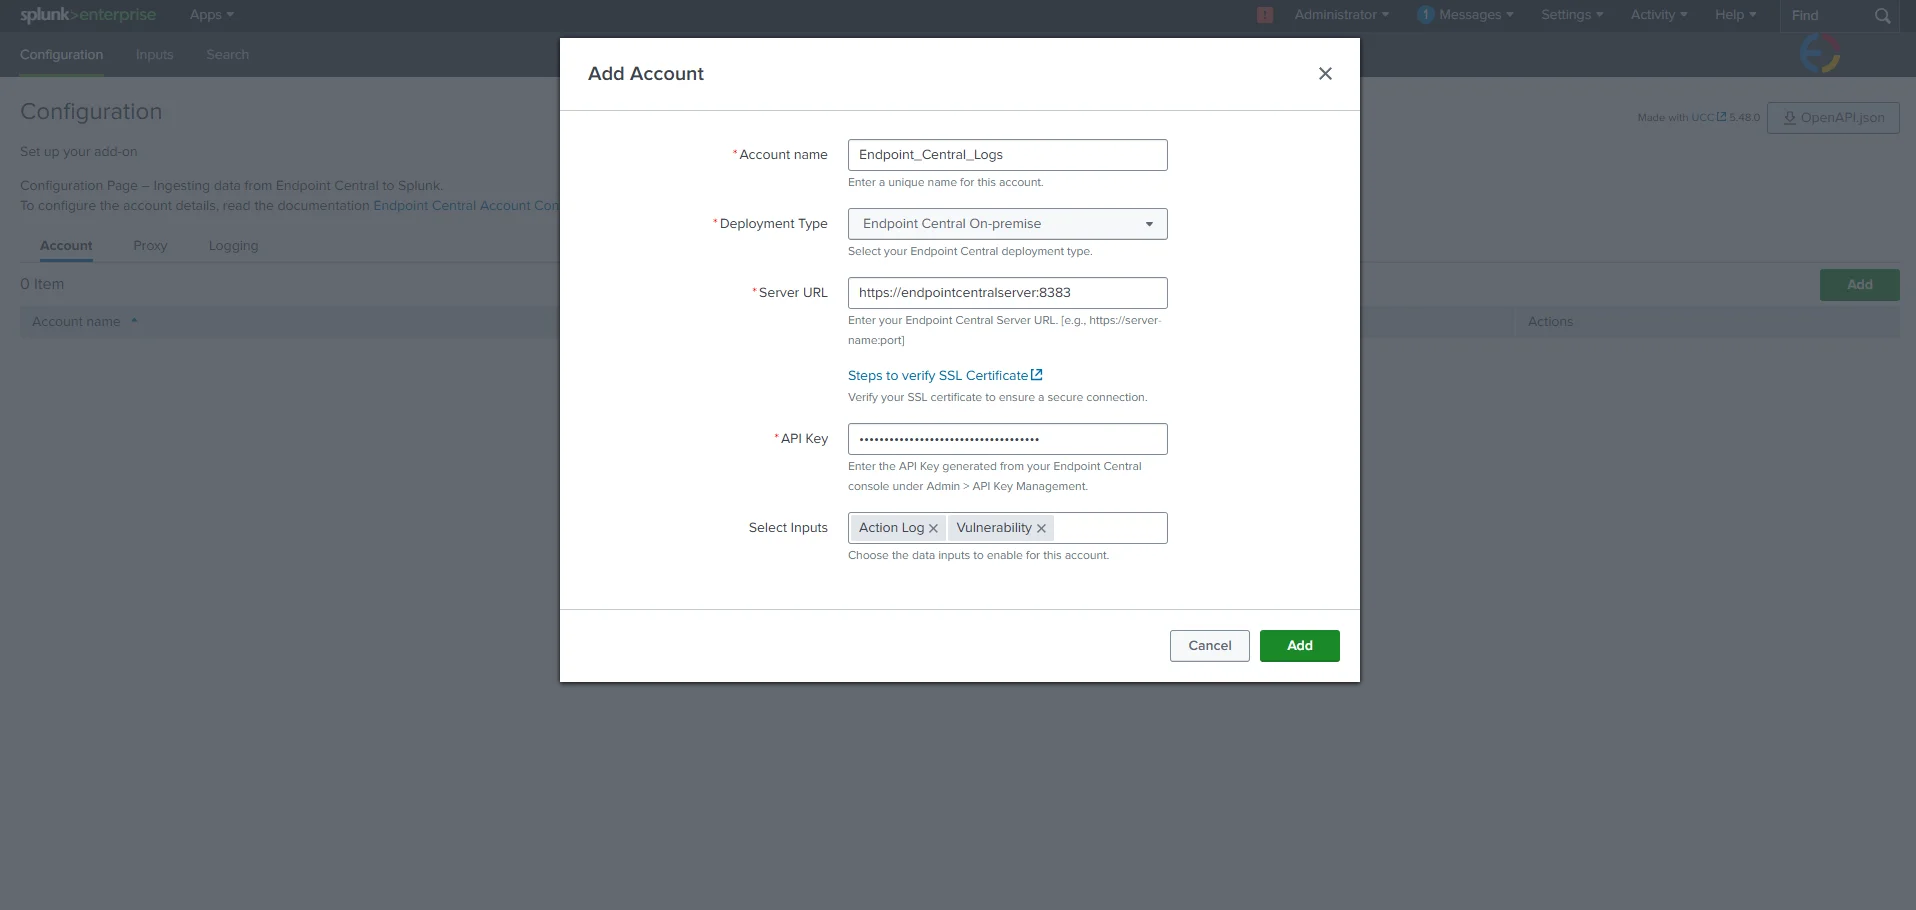
Configurations page in the Splunk add-on showing the Add button. - In the pop-up, choose Endpoint Central On-premise from the Deployment Type and complete all required fields.
- Paste the API key copied from Endpoint Central.
- Click Add. If all information is correct, the configuration will be validated successfully.
Valid inputs for the configuration:
- Account Name: Must be unique and without spaces.
- Deployment Type: Must be Endpoint Central On-premise.
- Server URL: URL with the scheme https://. This URL must be accessible from the machine hosting Splunk. If using a proxy, configure proxy settings before adding configuration details.
- API Key: Use the API key generated from Endpoint Central without any modifications.
- Select Inputs: Select the required log inputs based on your needs. These can also be configured or modified later from the Inputs Configuration section.
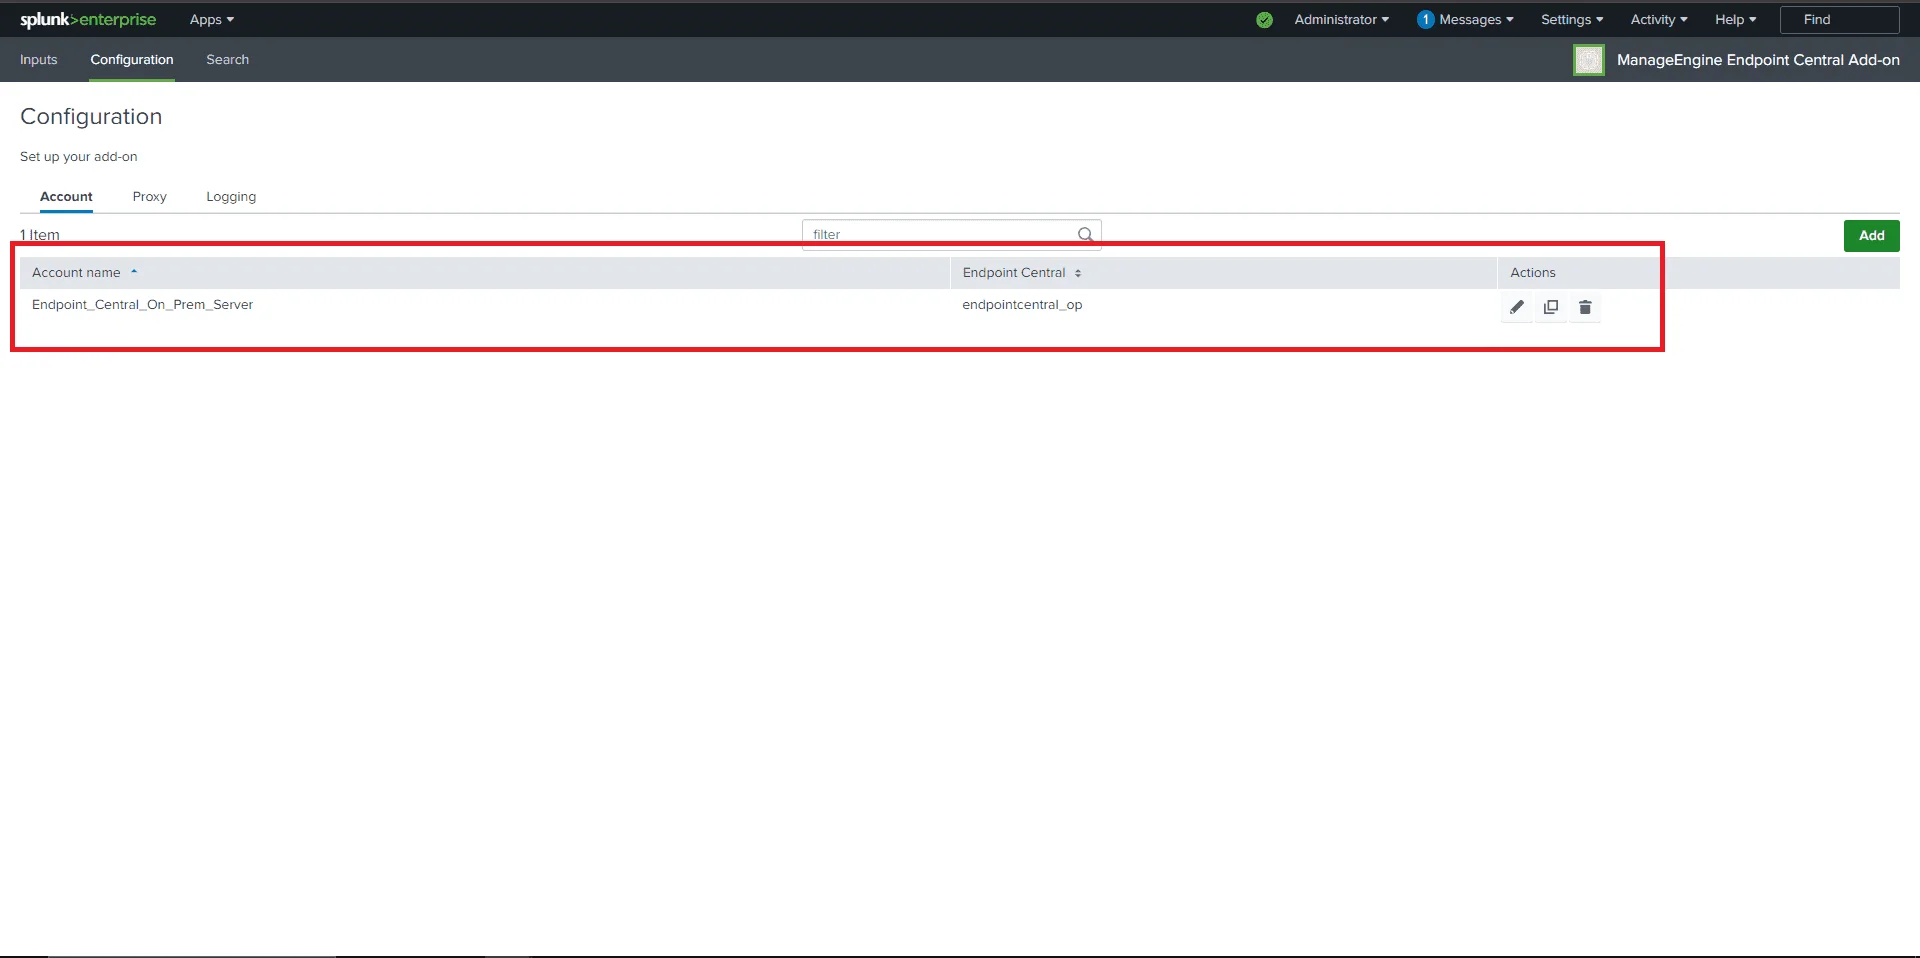
The added configuration will appear in the Accounts section.
Creating an Input with the Endpoint Central Configuration
- Navigate to the Inputs tab in Splunk, click Create New Input, and select the log data you need from Endpoint Central.
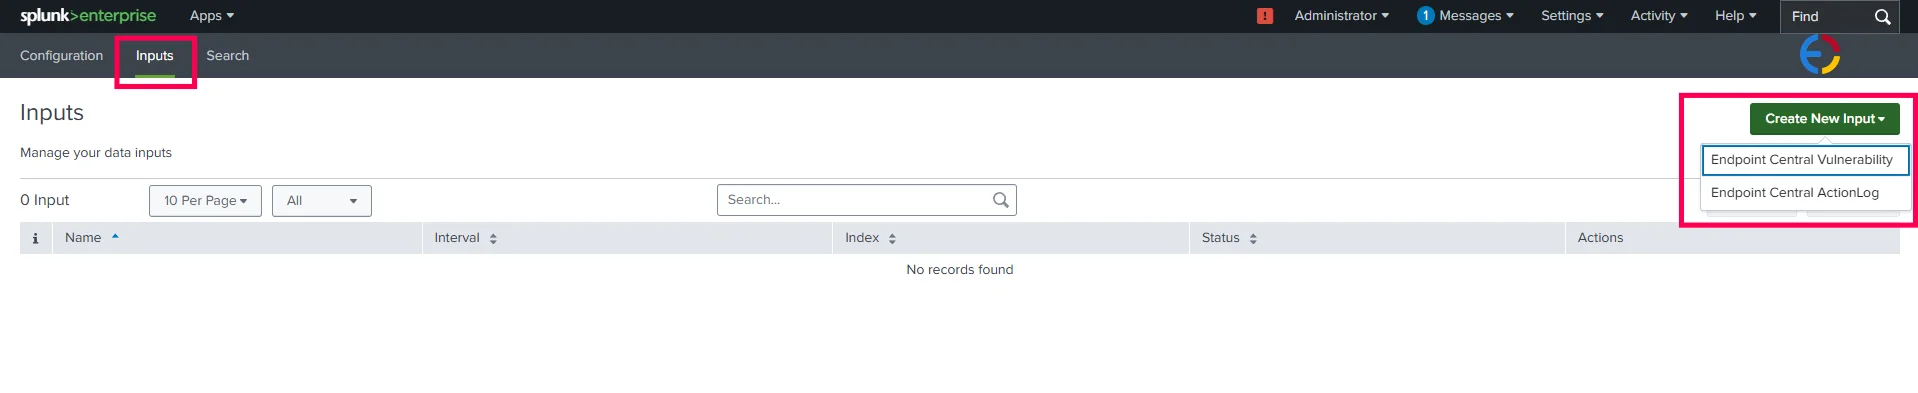
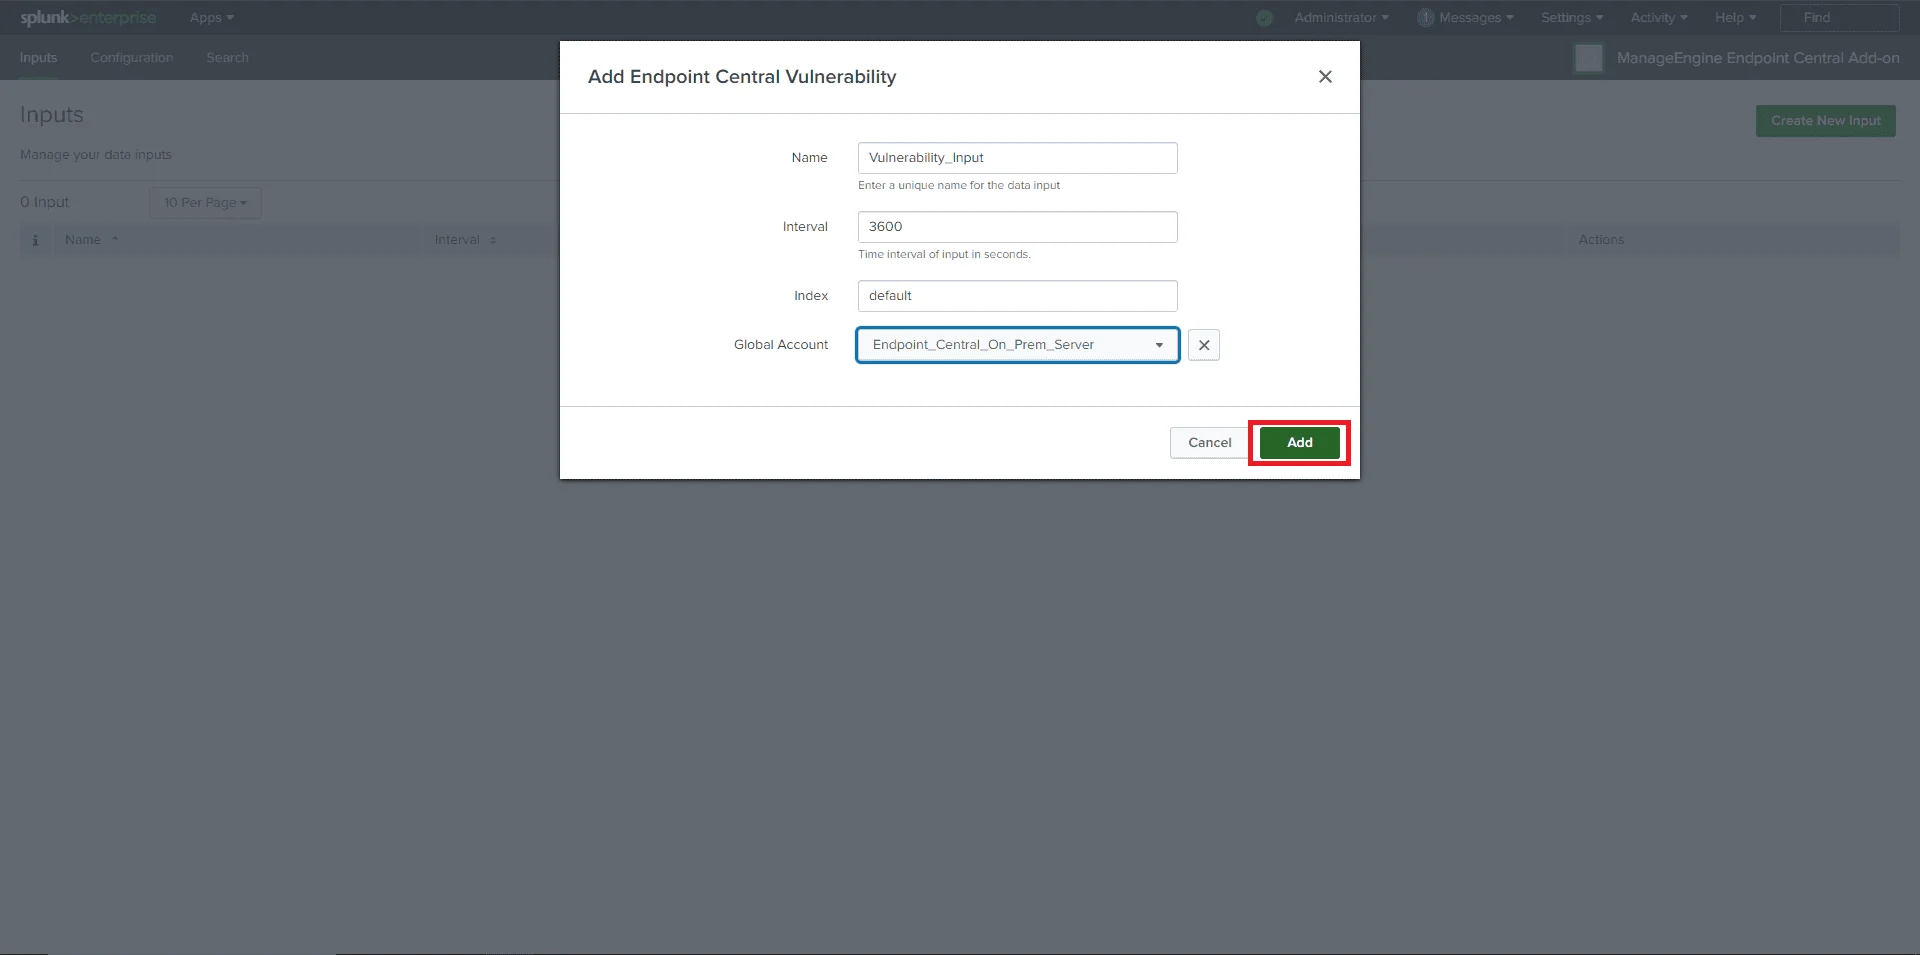
Splunk Inputs tab showing the Create New Input option. - In the pop-up window, enter all required information. From the Global Account dropdown, select the account configured for Endpoint Central.
- Click Add. If all inputs are valid, the input will be added successfully.
Valid inputs:
- Name: Unique name without any white spaces.
- Interval: Must be in seconds.
- For Vulnerability data: Between 3600 seconds (1 hour) and 86400 seconds (24 hours).
- For Action Log Viewer data: Between 300 seconds (5 minutes) and 86400 seconds (24 hours).
- Index: Default.
- Global Account: Account created for Endpoint Central in the configuration section.
Viewing Data in Splunk
- Once an input is configured, synchronization with the Endpoint Central server will begin.
- Navigate to the Search tab in the app.
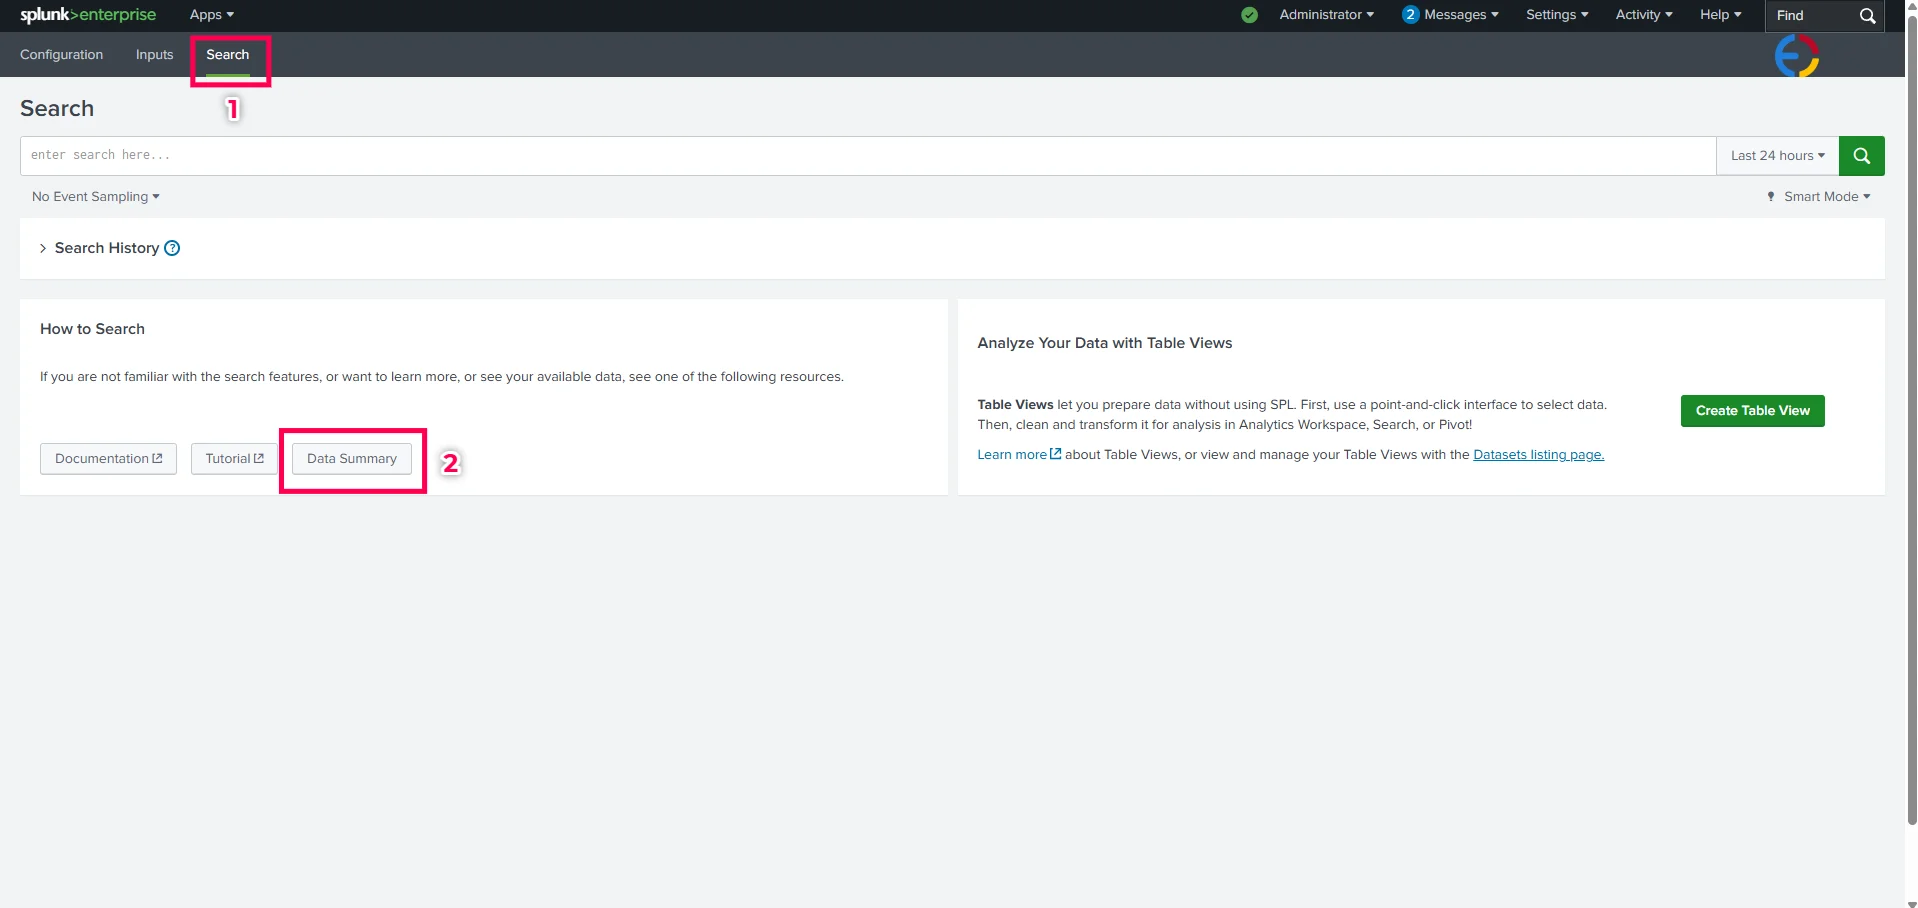
Search tab in the ManageEngine Endpoint Central Add-On app. - Click Data Summary and navigate to the Sourcetypes tab.
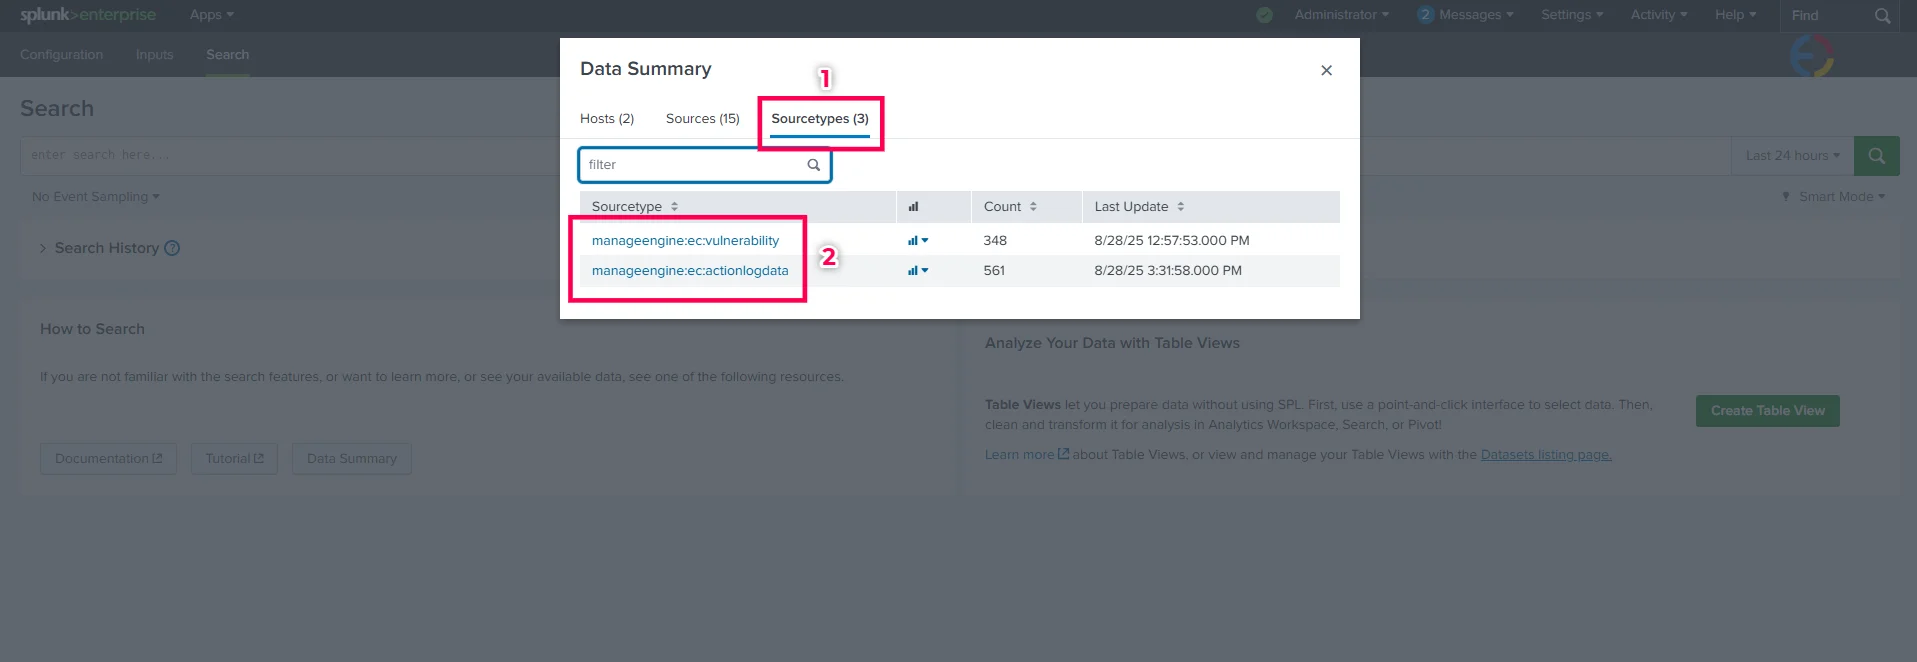
Splunk Data Summary showing the Sourcetypes tab. - Search for the required sourcetype and click on it to view the data:
- Vulnerability data sourcetype:
manageengine:ec:vulnerability - Action Log Viewer data sourcetype:
manageengine:ec:actionlogdata
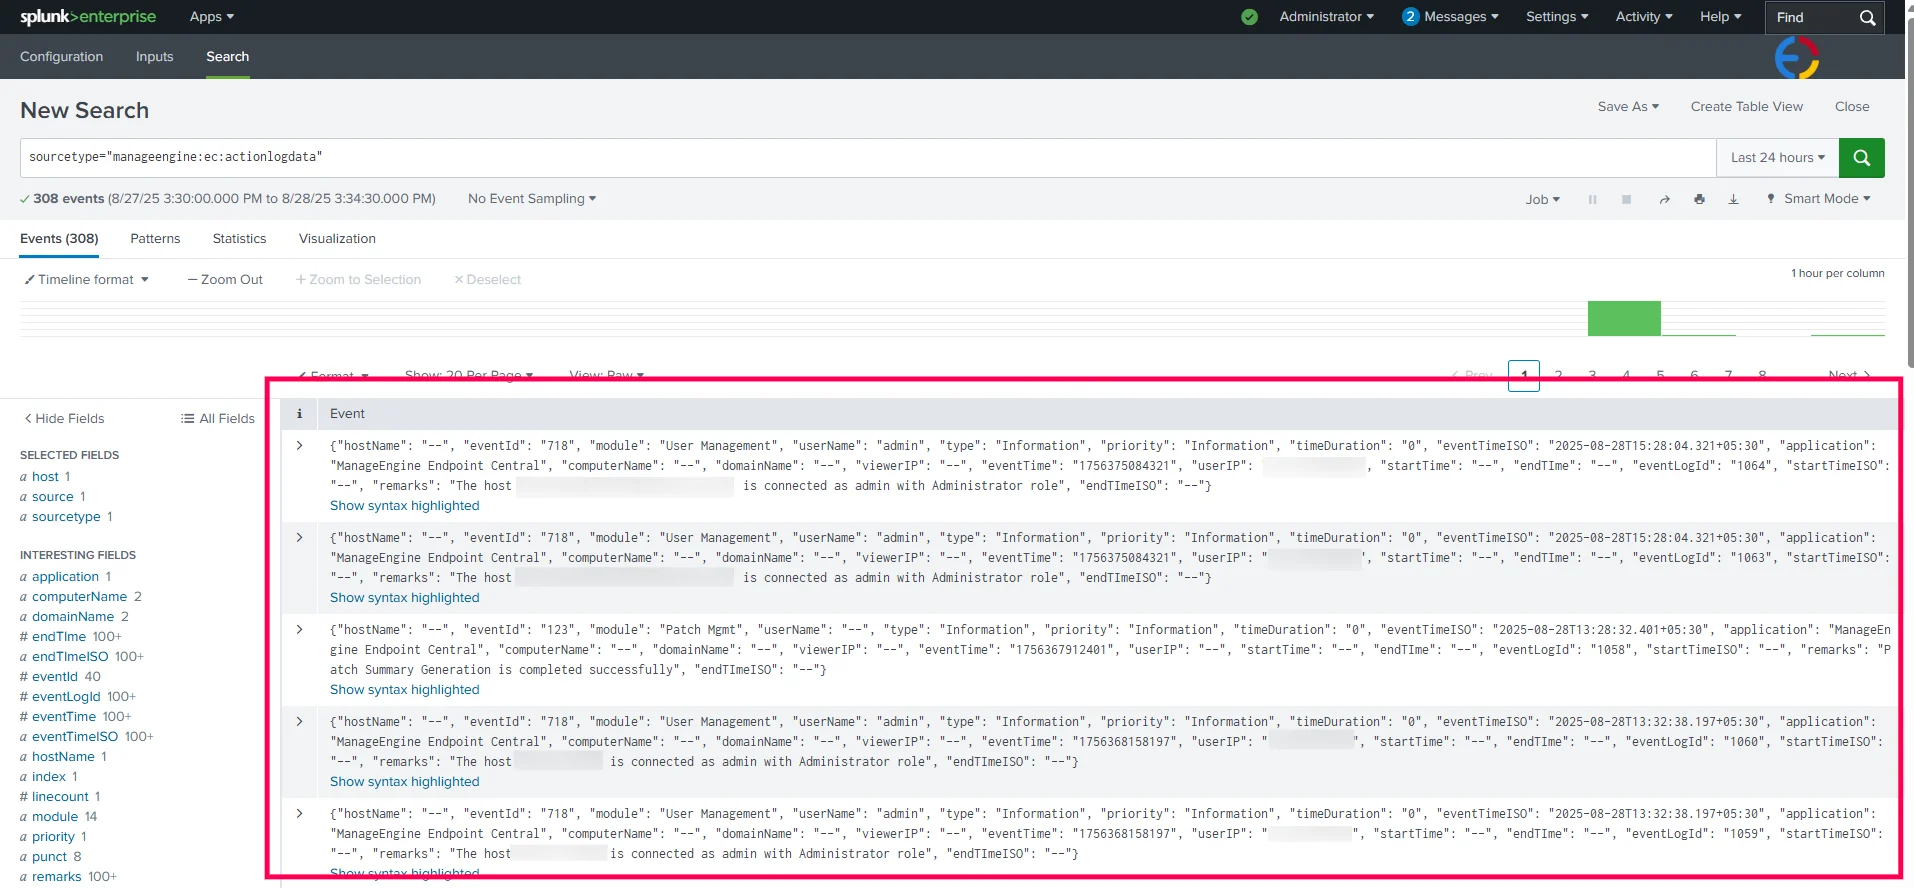
Splunk search results showing Endpoint Central vulnerability and action log data. - Vulnerability data sourcetype:
Initiating Full Sync
- Navigate to %Splunk Home Dir% → etc → apps → TA-manageengine-endpoint-central-add-on → default.
- Create a file named custom.conf.
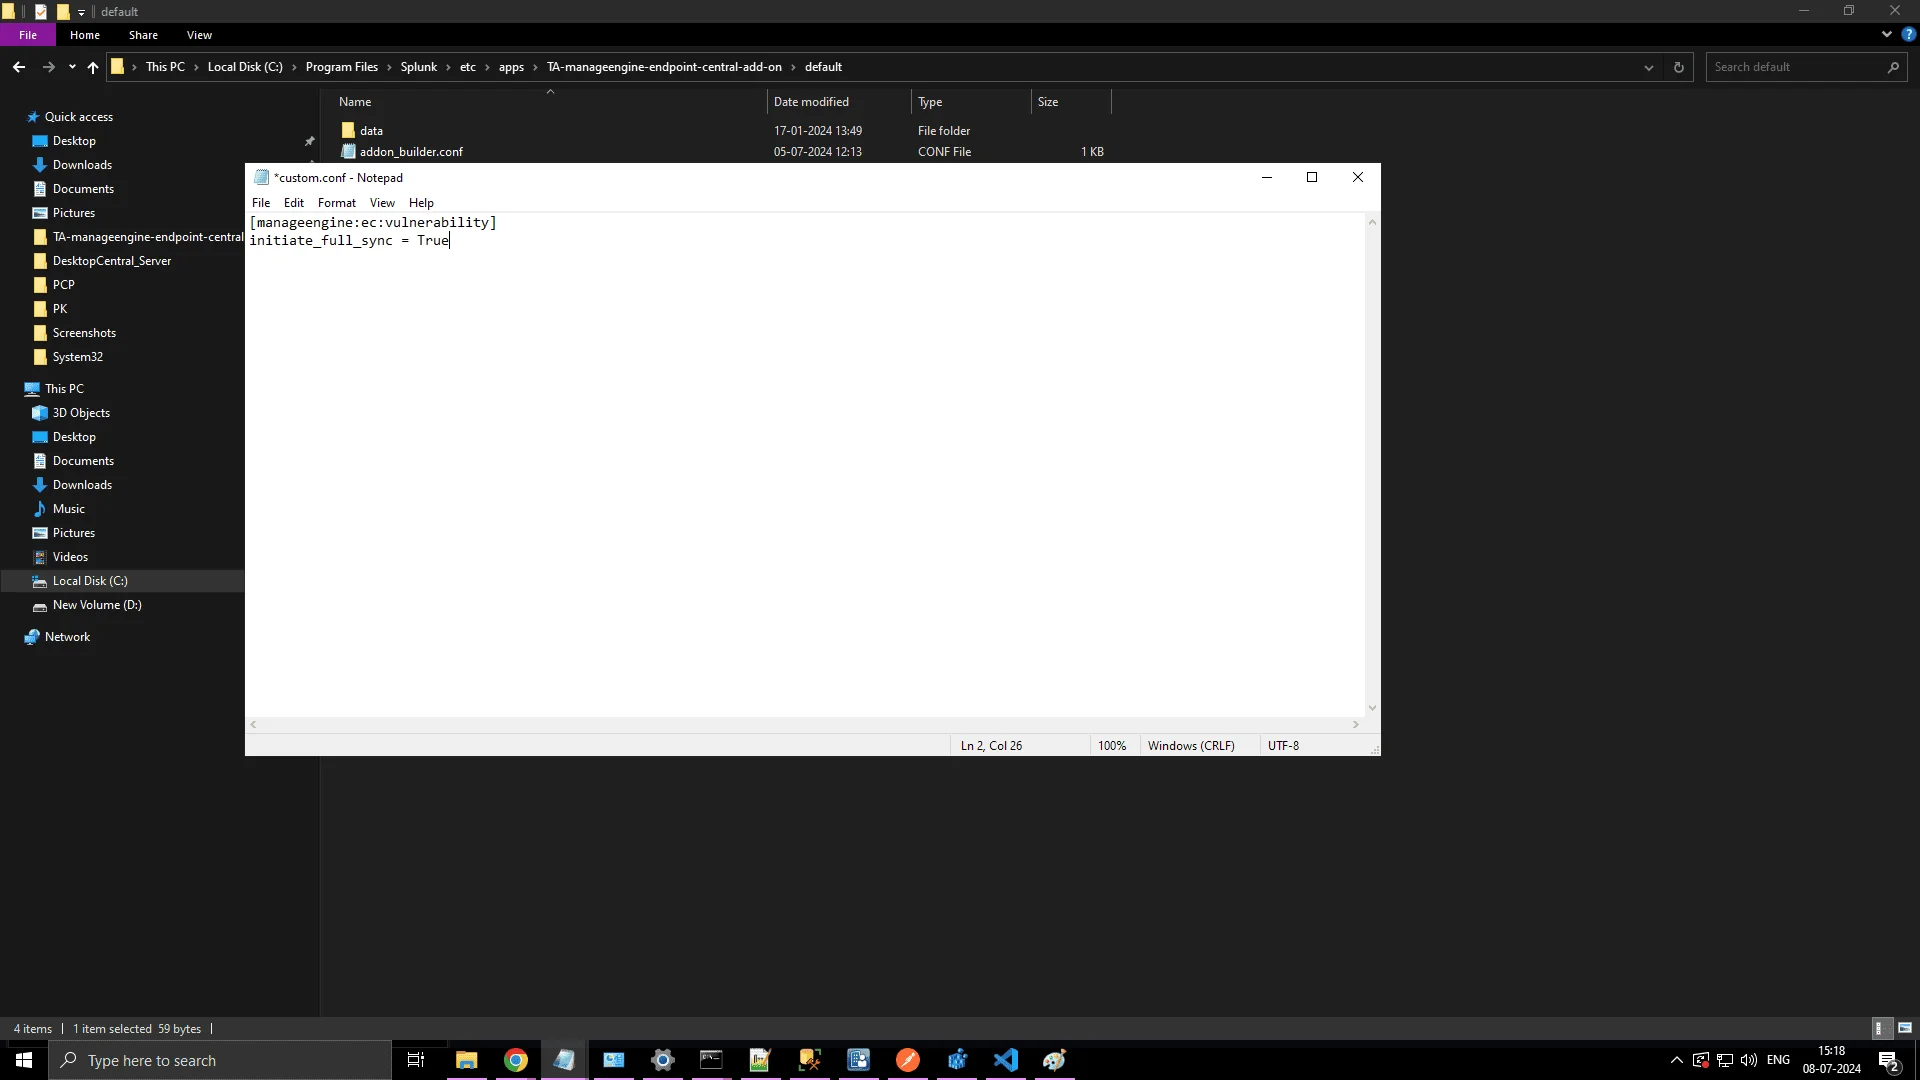
custom.conf file created in the Splunk add-on default directory. - Add the following entry to the file:custom.conf
[manageengine:ec:vulnerability] initiate_full_sync = True - Save the file to trigger the full sync. During the next sync, a full sync will be initiated.
Configuring Multiple Endpoint Central Servers in Splunk
- Whenever you add a new On-Premises Endpoint Central server in Splunk, include the contents of its server.crt file in the existing ec.ca-bundle file.
- Refer to the steps in Creating a CA-Bundle for SSL Validation to copy the contents of the server.crt file.
- Append the copied contents to the end of the already created ec.ca-bundle file.
- Follow the instructions in Configuring the App in Splunk for Endpoint Central to complete the configuration.