Configuring the Failover Server
- Go to Admin > Server Settings > Failover Server in the Endpoint Central console.
- Primary Server IP: Enter the IP addresses of Endpoint Central Server.
- Secondary Server IP: Enter the IP address of Failover Server.
- Set up the Virtual IP for the agents to communicate with the correct server.
- Configure the Secondary Server FQDN if servers are in different subnets.
- Save the configurations.
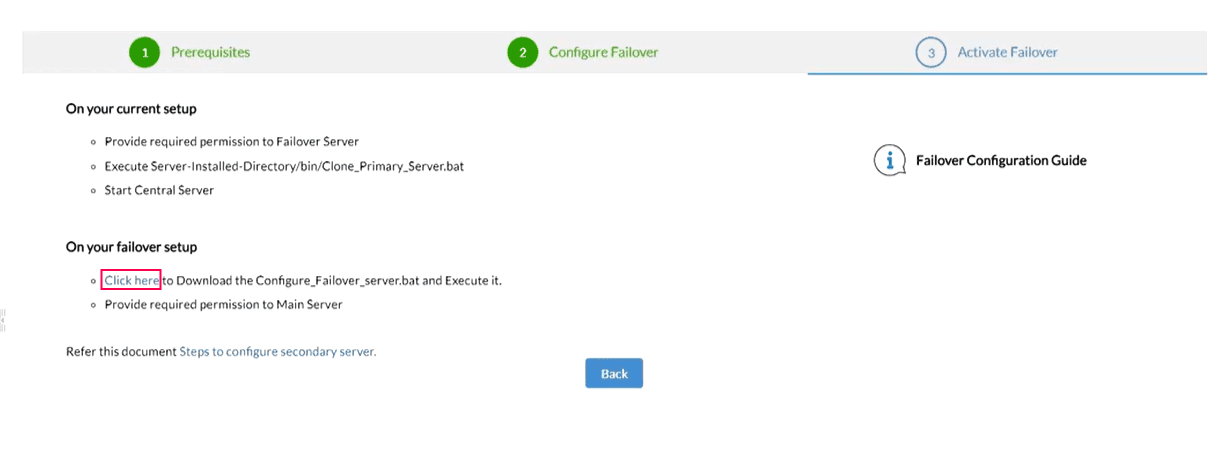
- Download the Configure_Failover-server.bat and save it to any folder in the failover server machine.
Note: You do not need to manually install the Endpoint Central EXE on the failover server machine. Simply download the above mentioned BAT file and execute it to configure the failover server.
Note: A single IP address cannot be used to access the server in scenarios where you are utilizing the failover server across different subnets. Furthermore, only one server IP can be employed for integration, as there is no provision for a shared IP when utilizing the failover server across different subnets. A shared IP address cannot be utilized because some network mechanisms cannot function across subnet boundaries.
Cloning Server Components
To clone server components, follow these steps:
- Stop the Endpoint Central service on the primary server.
- Open the command prompt in administrator mode and navigate to
<ServerInstalled_Directory>\UEMS_CentralServer\bin.
- Execute the Clone_Primary_Server.bat script to create a backup of server components.
- Once it is executed a new zip file "Product.zip" will be created in the
<ServerInstalled_Directory>\UEMS_CentralServer folder.
Configuring Share Permissions
Note:Ensure that the the secondary server do have permissions to synchronize the data from the primary server and vice versa.
To configure, enable the following settings
- Access the computer where the Endpoint Central Primary Server is installed.
- Right click on the primary server folder and click Properties to add the system user of the secondary server as shown in the steps below.
IMPORTANT NOTE: Make sure that the share permissions for "everyone" is turned OFF in both primary server and secondary server as it may lead to security vulnerabilities. Also ensure that you login as a domain user while configuring the failover server.
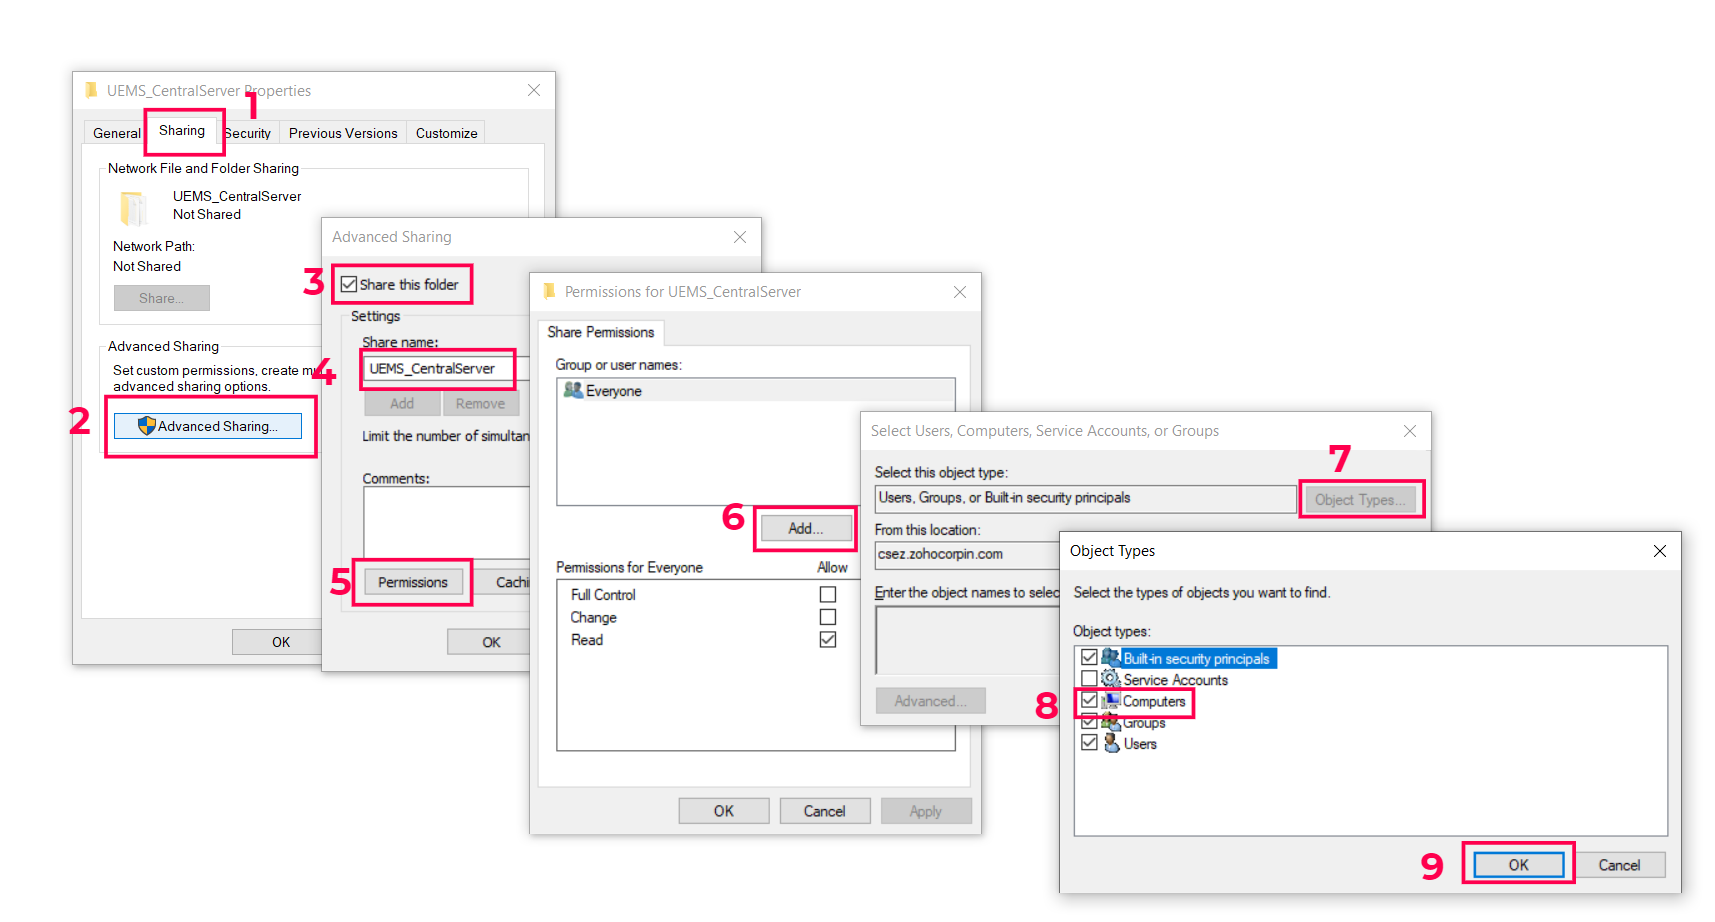
- Right click on the folder choose Sharing tab > Click Advanced Sharing > Enable Share this Folder
- Specify the name as UEMS_CentralServer
- Click Permissions > Add > Object Types > Computers > Ok
- Under Enter Object Name, specify the secondary server name and the user name with Admin privileges
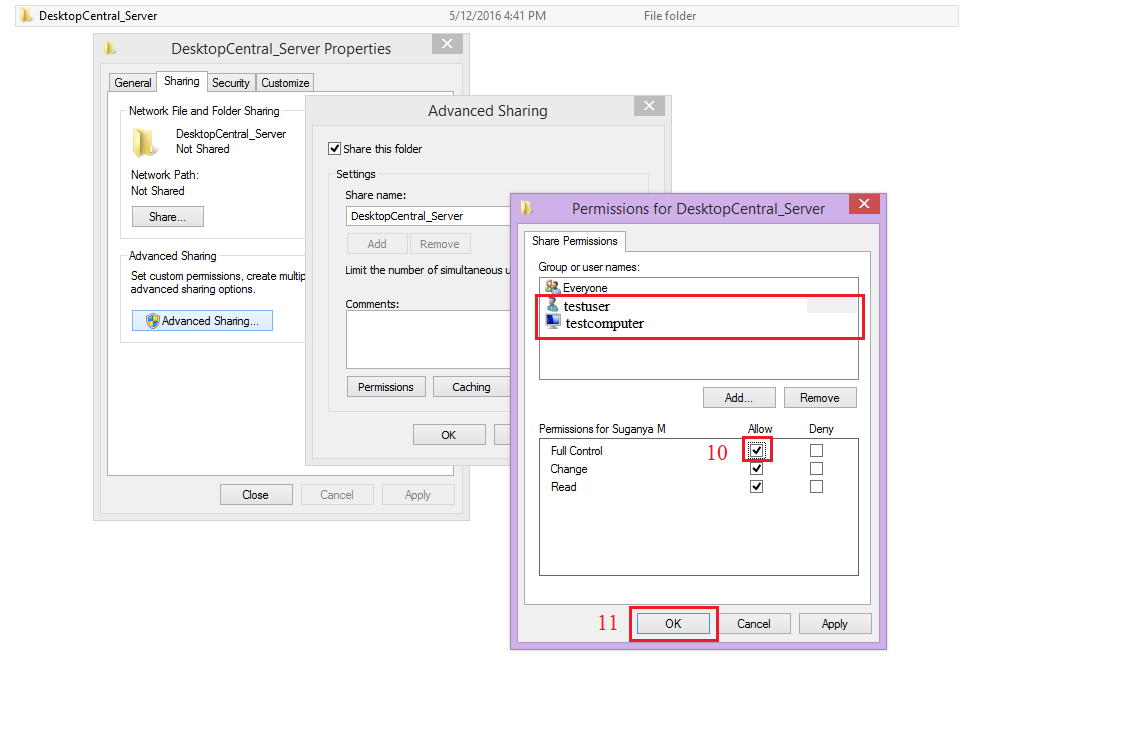
- Click share permission and select user and computer and ensure that Full Control is enabled
- Navigate to Security tab and Click Edit.
- Click Add to open the Select Users or Groups window. Click Object Types, select Computers, and click OK.
- Enter the username and computer name, click Check Names, and click OK.
- Select Full Control for both the user and computer.
- Click Apply, then OK to save the changes.

Activate Failover Server
Perform the below mentioned step on the computer where the Secondary server is installed:
- Start the primary server and proceed after it has started completely.
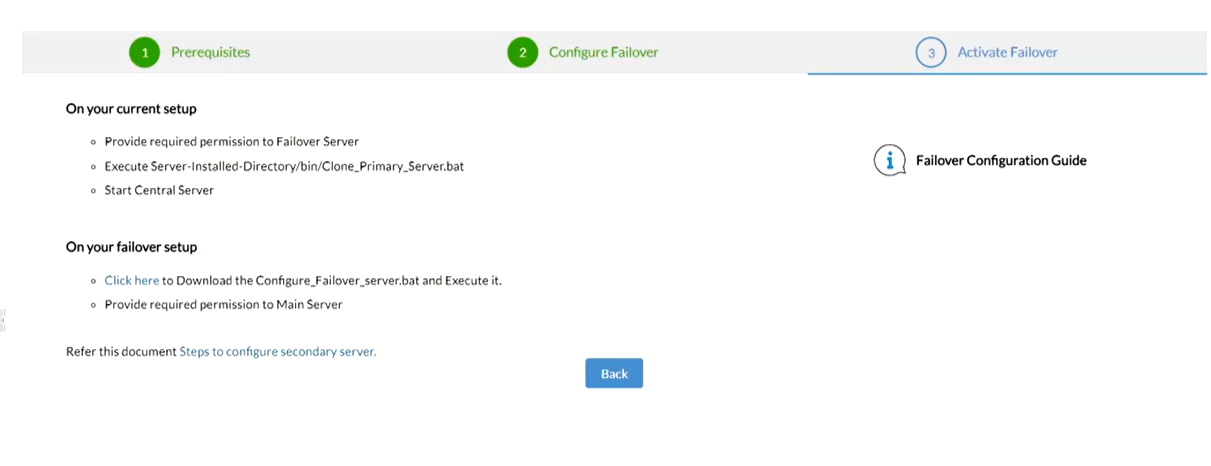
- Open Command Prompt as an administrator in the secondary server and navigate to the location where you have downloaded or placed the .bat file (the .bat file can be downloaded from the Endpoint Central Server console as shown in the image above) and execute Configure_Failover_Server.bat {PrimaryServer_IP}
- After executing the command, product.zip will be automatically extracted from the primary server to secondary server.
- Repeat the steps for sharing, as mentioned above on the secondary server and ensure that you provide name of the computer, where the primary server is installed, in step 10.
Configuring the Failover Server
- Go to Admin > Server Settings > Failover Server in the Endpoint Central console.
- Primary Server IP: Enter the IP addresses of Endpoint Central Server.
- Secondary Server IP: Enter the IP address of Failover Server.
- Set up the Virtual IP for the agents to communicate with the correct server.
- Configure the Secondary Server FQDN if servers are in different subnets.
- Provide the Secondary Server machine name which is used to share UEMS_CentralServer directory and assign permissions for that machine.
- Save the configurations.
Note: A single IP address cannot be used to access the server in scenarios where you are utilizing the failover server across different subnets. Furthermore, only one server IP can be employed for integration, as there is no provision for a shared IP when utilizing the failover server across different subnets. A shared IP address cannot be utilized because some network mechanisms cannot function across subnet boundaries.
Cloning Server Components
To clone server components, follow these steps:
- Stop the Endpoint Central service on the primary server.
- Open the command prompt in administrator mode and change the directory to
<ServerInstalled_Directory>\UEMS_CentralServer\bin.
- Execute the Clone_Primary_Server.bat script to create a backup of server components.
- Once it is executed a new zip file "Product.zip" will be created in the
<ServerInstalled_Directory>\UEMS_CentralServer.
- Start the Endpoint Central Server
Configuring Share Permissions
The permission will be configured automatically in the Primary server.
Activate Failover Server
- On the secondary server, create a folder that mirrors the primary server's installation path.
- Extract the generated "Product.zip" file into newly created folder. For example, if the primary server is installed in C://Program Files/UEMS_CentralServer, Create a similar path and extract the generated "Product.zip".
- Open the command prompt in administrator mode and Run the file named "Activate_Secondary.bat" in the bin folder.

