
License management of Log360 Cloud
Last updated on:
In this page
About license settings
The License page (Settings → General → License) gives you a consolidated view of your Log360 Cloud subscription. It shows the components covered under your plan, how much of each component is currently in use, and your available storage capacity.
Log360 Cloud uses Infrastructure-based licensing. Rather than a fixed infrastructure bundle, you license each component type independently—Log Sources, Domain Controllers, File Servers, Cloud Accounts, and Endpoints—based on the number of assets you want to monitor. This allows you to scale each dimension of your deployment separately.
The top of the License page displays four summary fields:
| Field | Description |
|---|---|
| Licensed to | The organization name the subscription is registered under. |
| License Type | Infrastructure-based — each component type is licensed independently. |
| Edition | Your current plan: Free, Professional, or Enterprise. This determines which features are available and the limits on detection rules, alert profiles, storage tiers, and scheduled exports. |
| Expires On | The end date of your current subscription term. |
Using License settings
- Log in to your Log360 Cloud account.
- Go to the Settings tab and select Admin.
- In the left pane, navigate to General and click License.
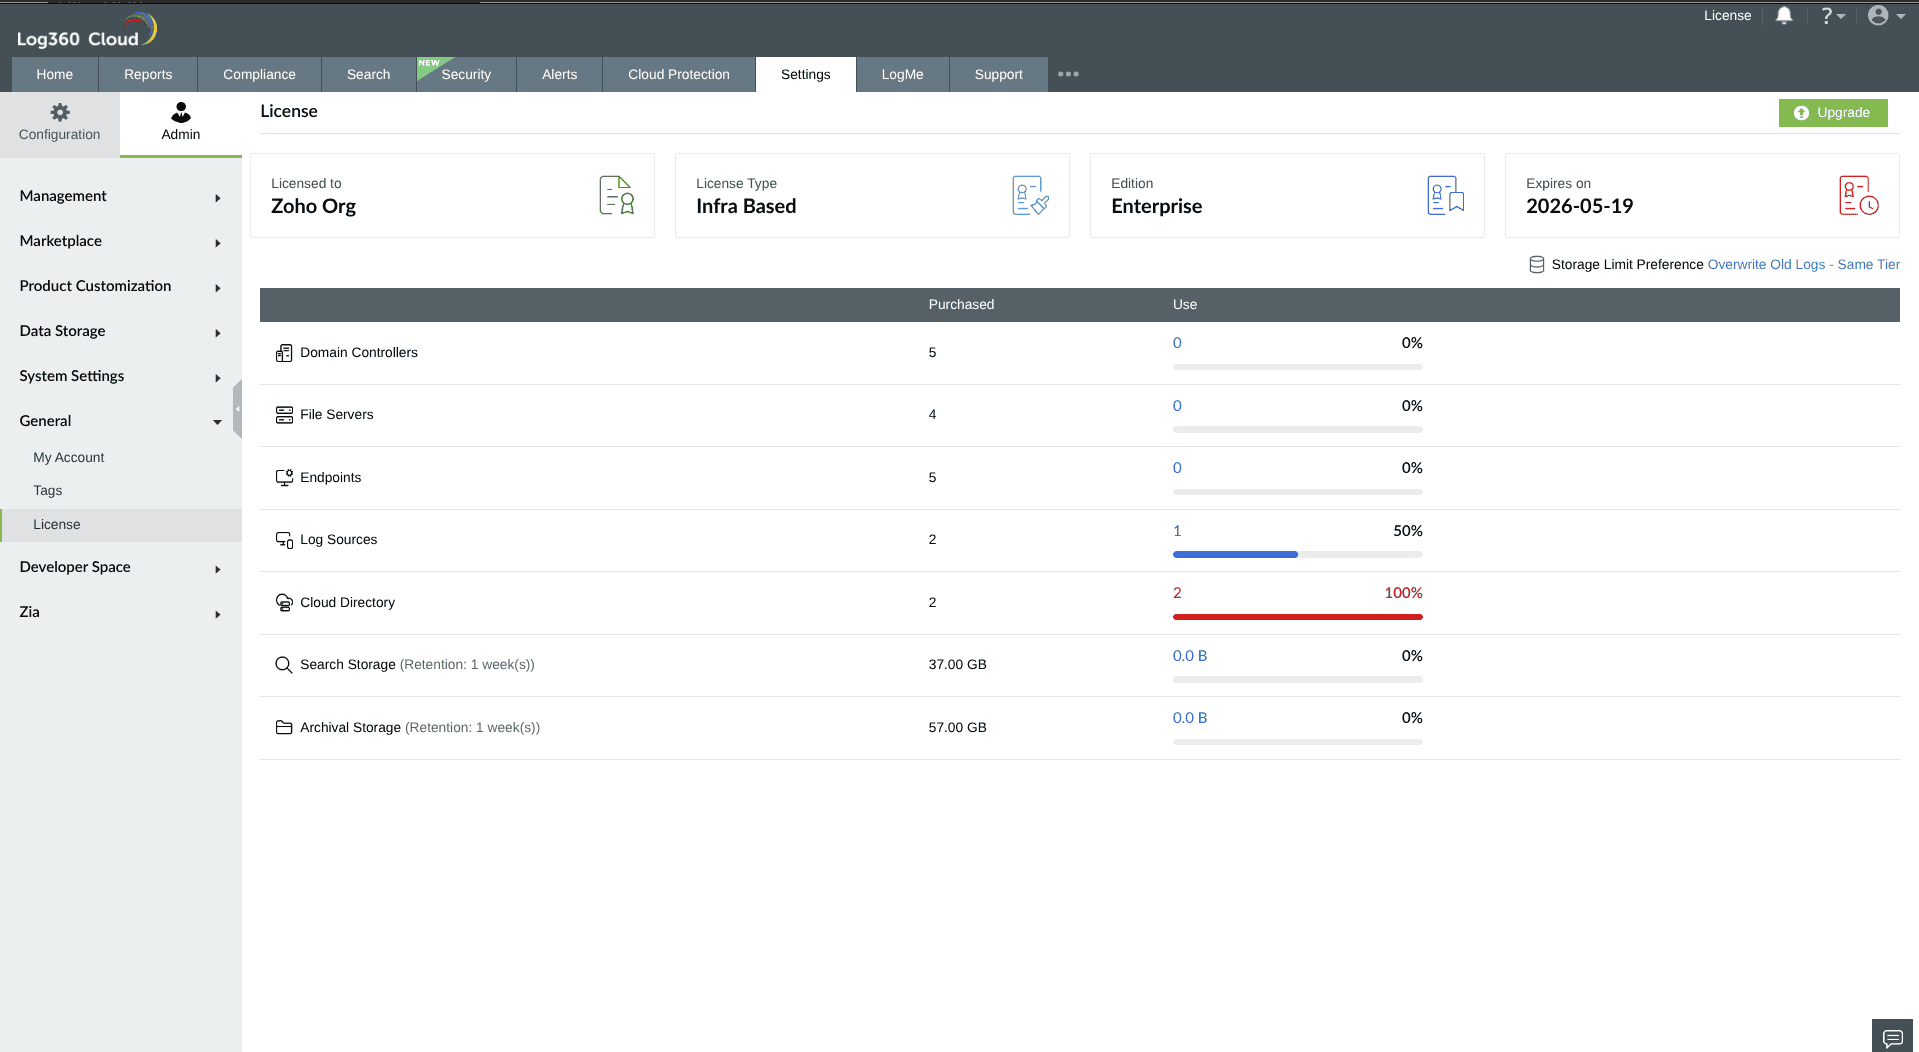
Figure 1: Viewing License details in ManageEngine Log360 Cloud
Component usage
The main table lists each licensed component with three columns: Purchased (the quantity you've licensed), In Use (what's currently consuming the license), and a usage bar showing the percentage utilized.
The components shown are:
- Domain Controllers — the number of domain controllers sending logs to Log360 Cloud.
- File Servers — the number of file servers being monitored.
- Endpoints — the number of endpoint devices sending logs.
- Log Sources — the total number of distinct log sources configured across all source types.
- Cloud Accounts — the number of cloud platform accounts (AWS, Azure, Google Cloud, etc.) being monitored.
When a component reaches 100% utilization, it is highlighted in red. New assets of that type cannot be added until you either remove or disable an existing one or upgrade the component count. Log collection from already-configured sources continues unaffected.
Storage usage
Below the component rows, the License page shows your two storage allocations:
Search Storage is hot storage. Logs here are fully indexed and immediately searchable for investigation, alerting, and correlation. The Purchased column shows both the base allocation included in your plan and any storage add-ons purchased separately (for example, 800 GB (700 GB included + 100 GB add-on)). Retention period is shown in parentheses next to the label (for example, Retention Period: 90 Days) and is configurable via Storage Tiers.
Archival Storage is cold storage. Logs here are compressed and retained for long-term compliance purposes. Archived logs are not directly searchable; they must be reloaded into Search Storage first via Settings → Data Storage → Reload Archive Logs. Retention period is fixed at the plan level (for example, Retention Period: 10 Years) and is shown next to the label.
Storage Limit Preference
When your Search Storage reaches capacity, you can configure how Log360 Cloud responds. To set this up:
- On the License page, click the icon next to Storage Limit Preference.
- From the Action dropdown, choose one of the following:
- Stop Log Collection — Halts log ingestion entirely when the storage limit is reached. Existing data is preserved and administrators are notified. Recommended for compliance environments where incomplete log coverage is unacceptable.
- Overwrite Old Logs — Older logs are overwritten to accommodate incoming logs, keeping collection continuous. Suitable for operational monitoring scenarios where recency matters more than full historical retention.
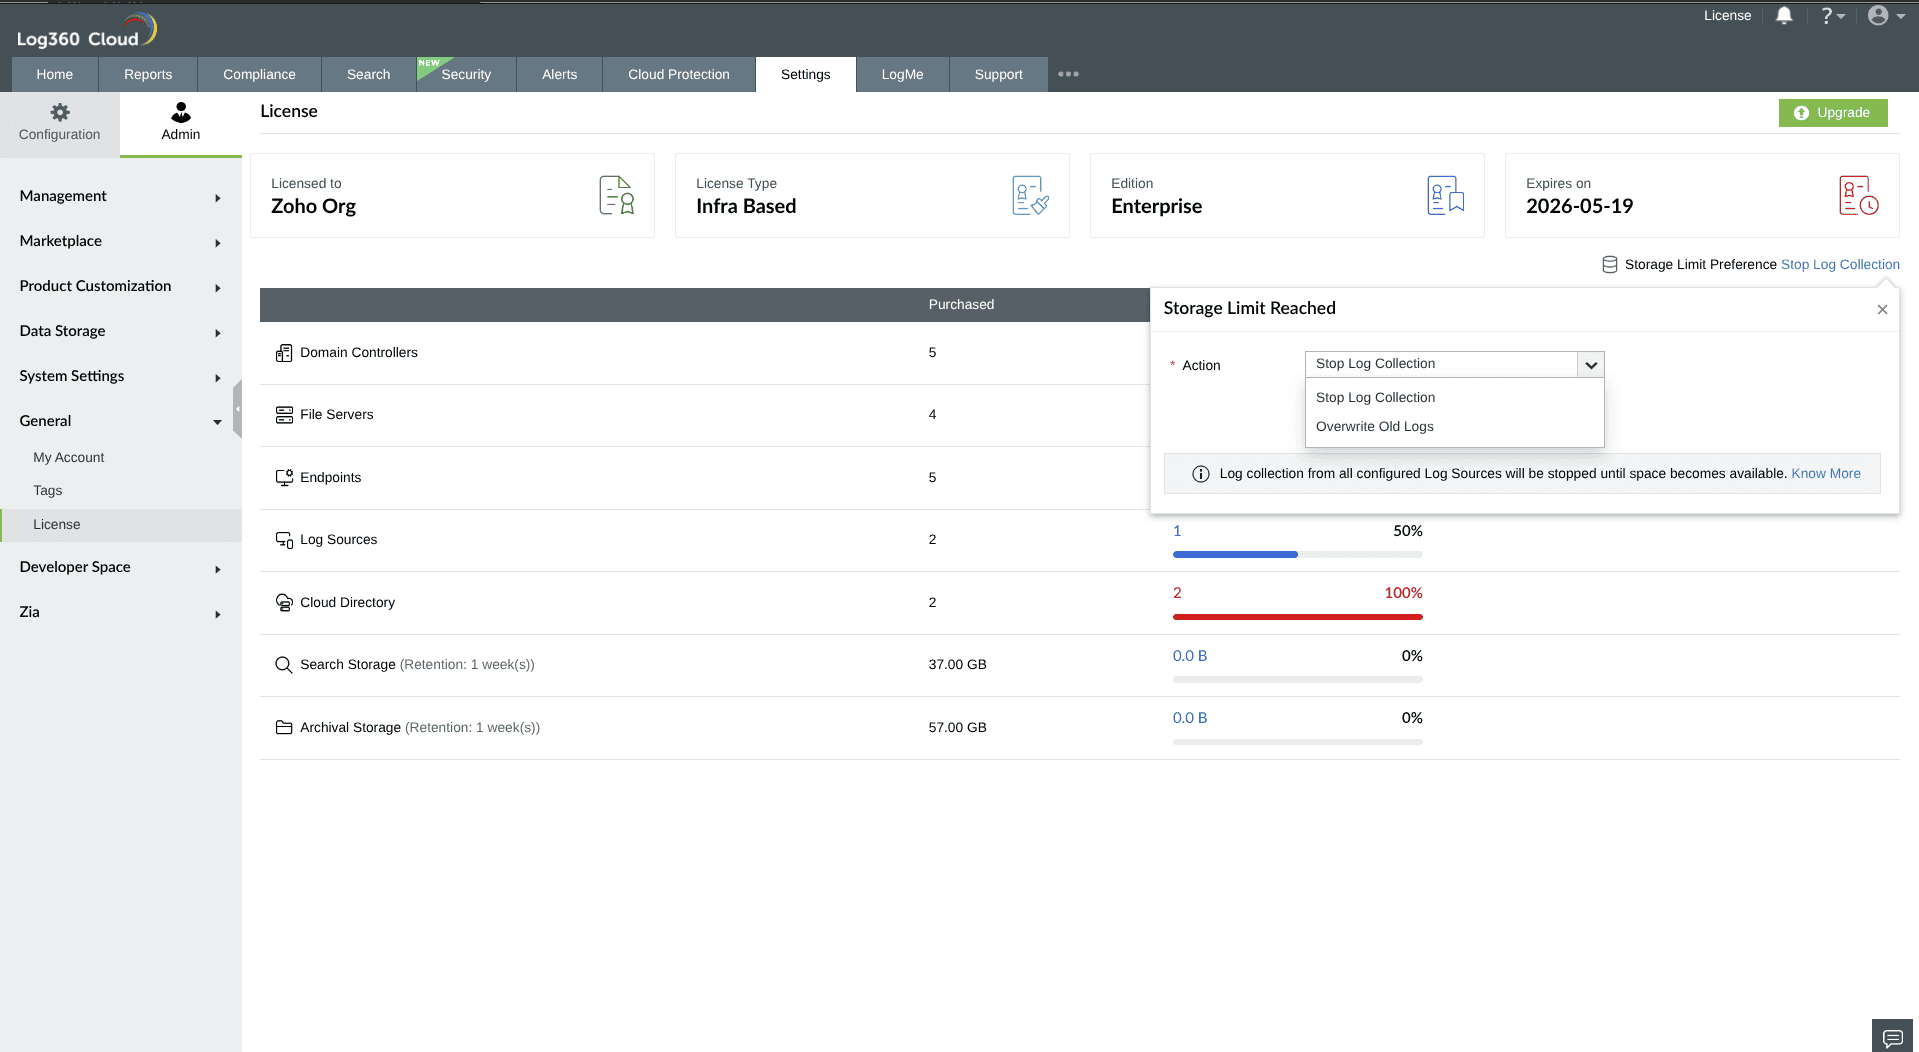
Figure 2: Configuring Storage Limit Preference - If you select Overwrite Old Logs, under the Target dropdown, select one of the following:
- Same Tier — Overwrites older logs within the same storage tier first.
- Low Priority Tier — Overwrites logs from the lowest priority tier first.
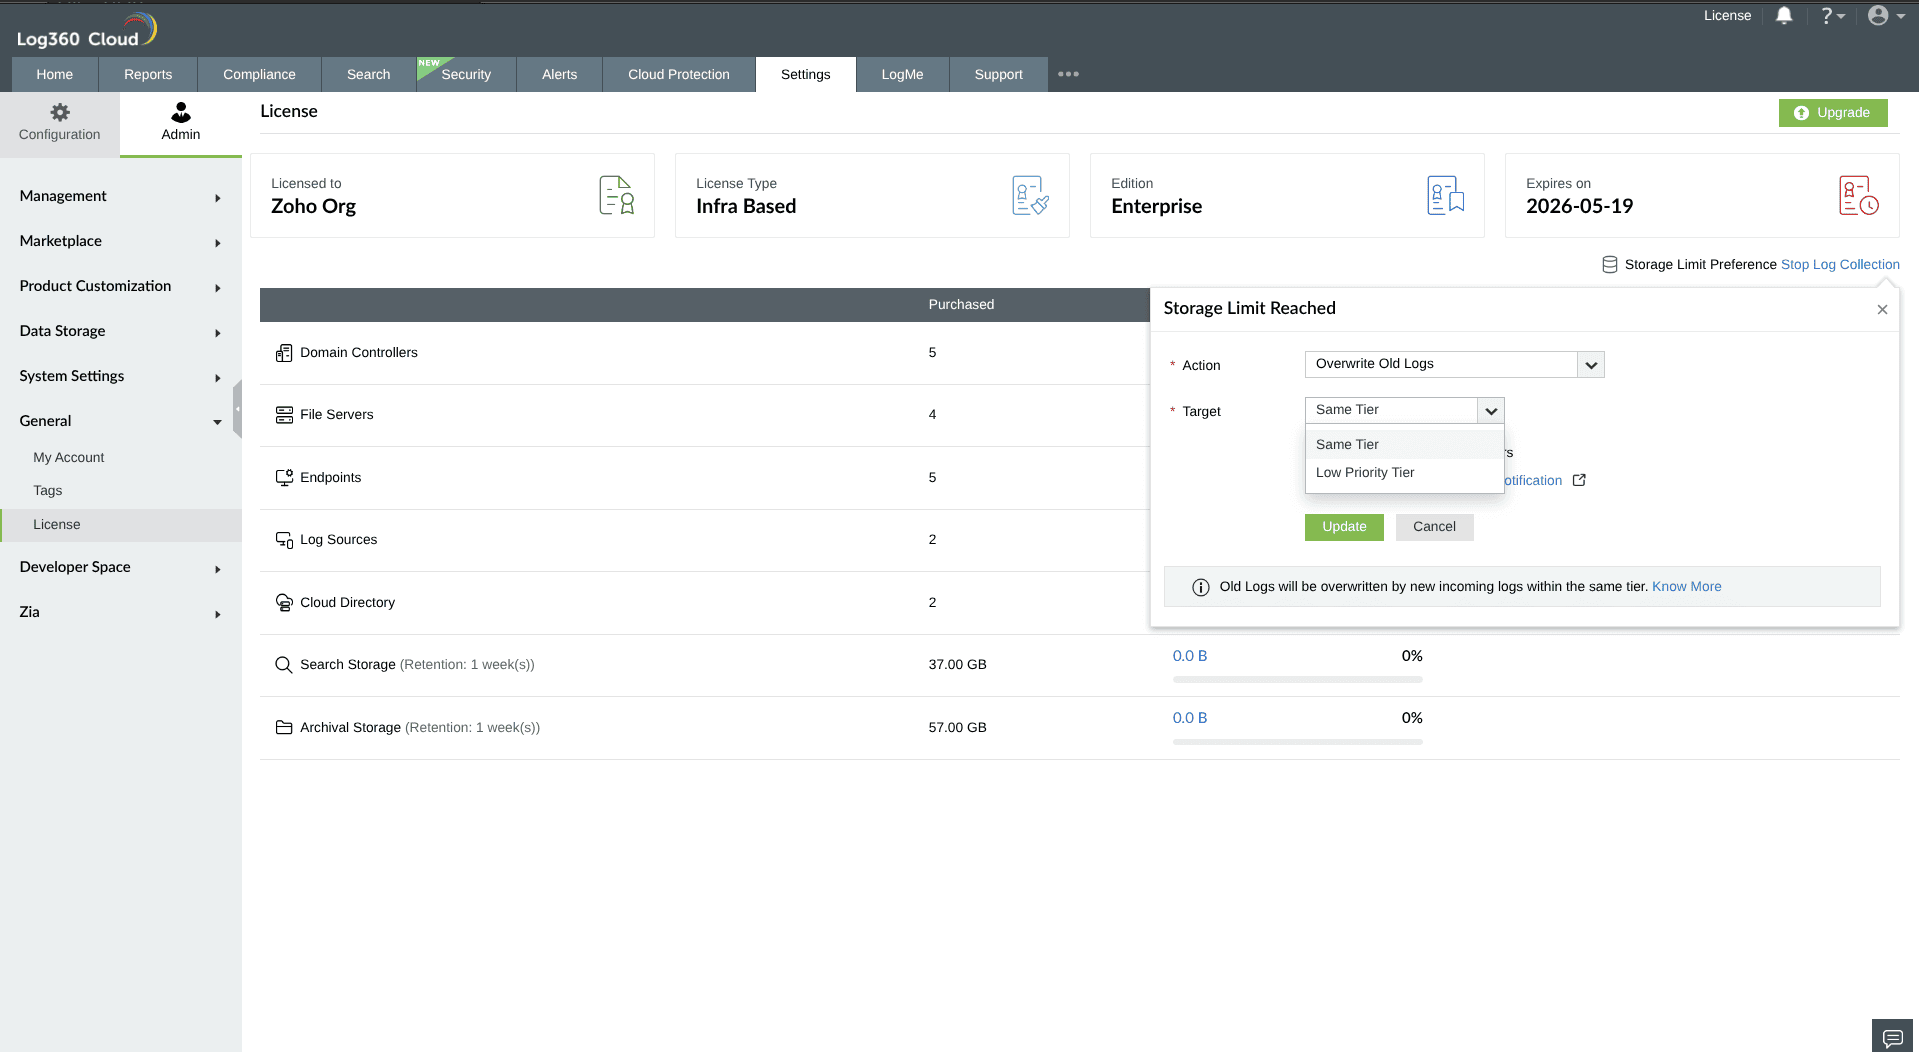
Figure 3: Configuring overwrite settings - (Optional) Enable the checkbox to receive overwrite summary notifications.
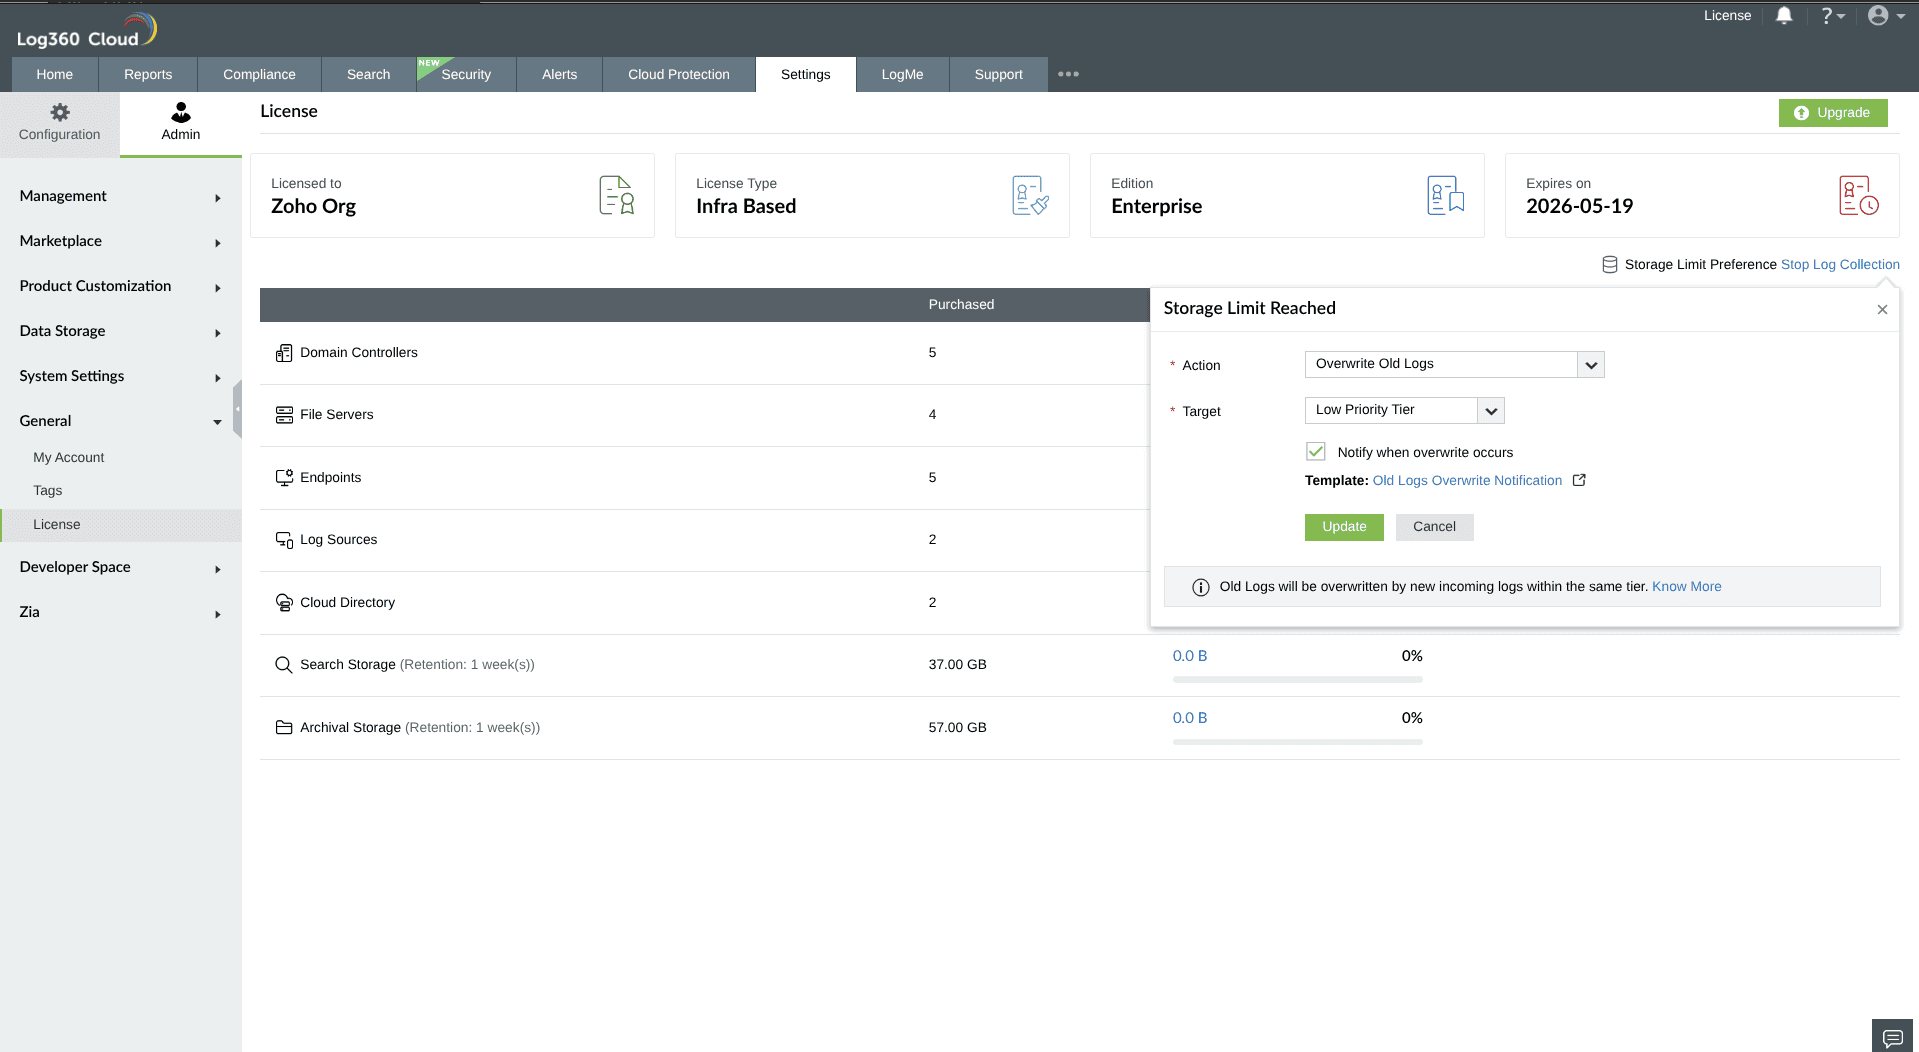
Figure 4: Configuring overwrite settings - Click Update to save your changes.
- Click Old Logs Overwrite Notification to view and configure the notification template settings.
Note If you navigate to the notification template without first clicking Update, your overwrite settings will not be saved.
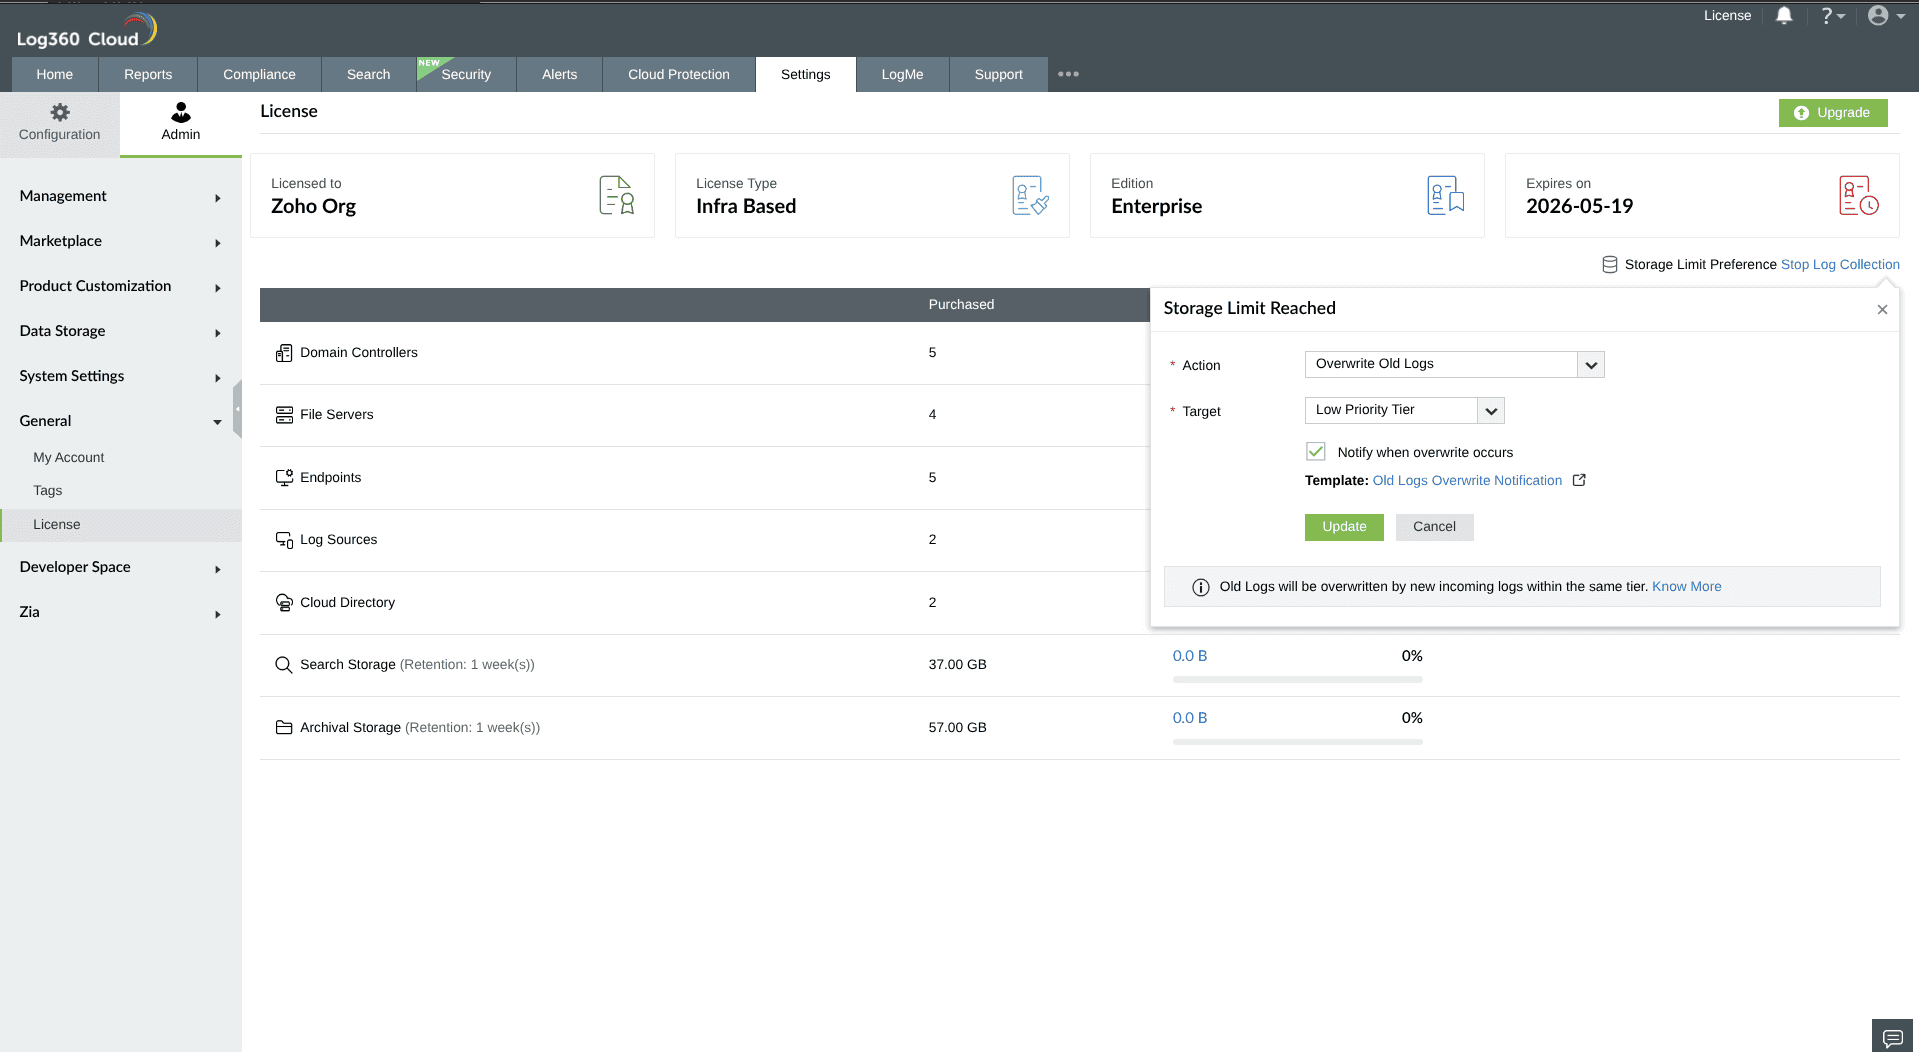
Figure 5: Notification template settings - In the pop-up that appears, click Proceed.
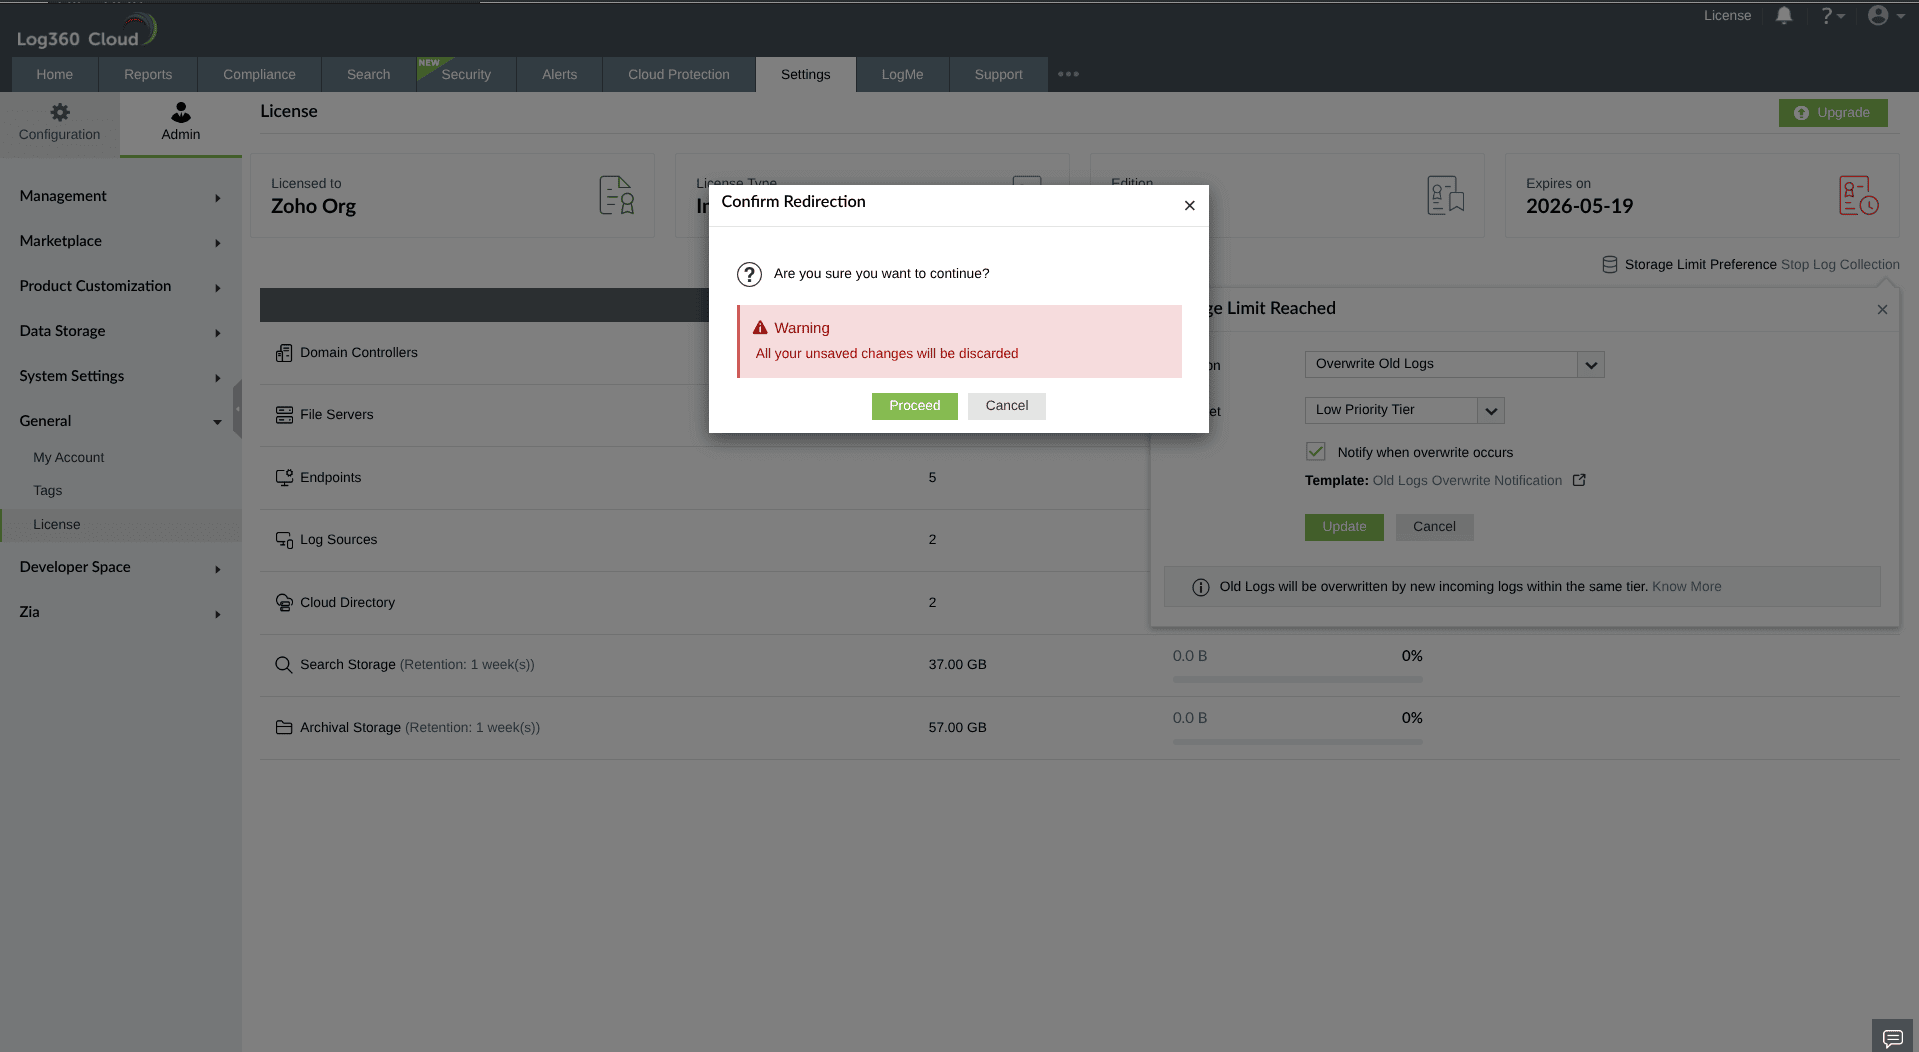
Figure 6: Notification template settings - Click the icon to open the notification template preview.
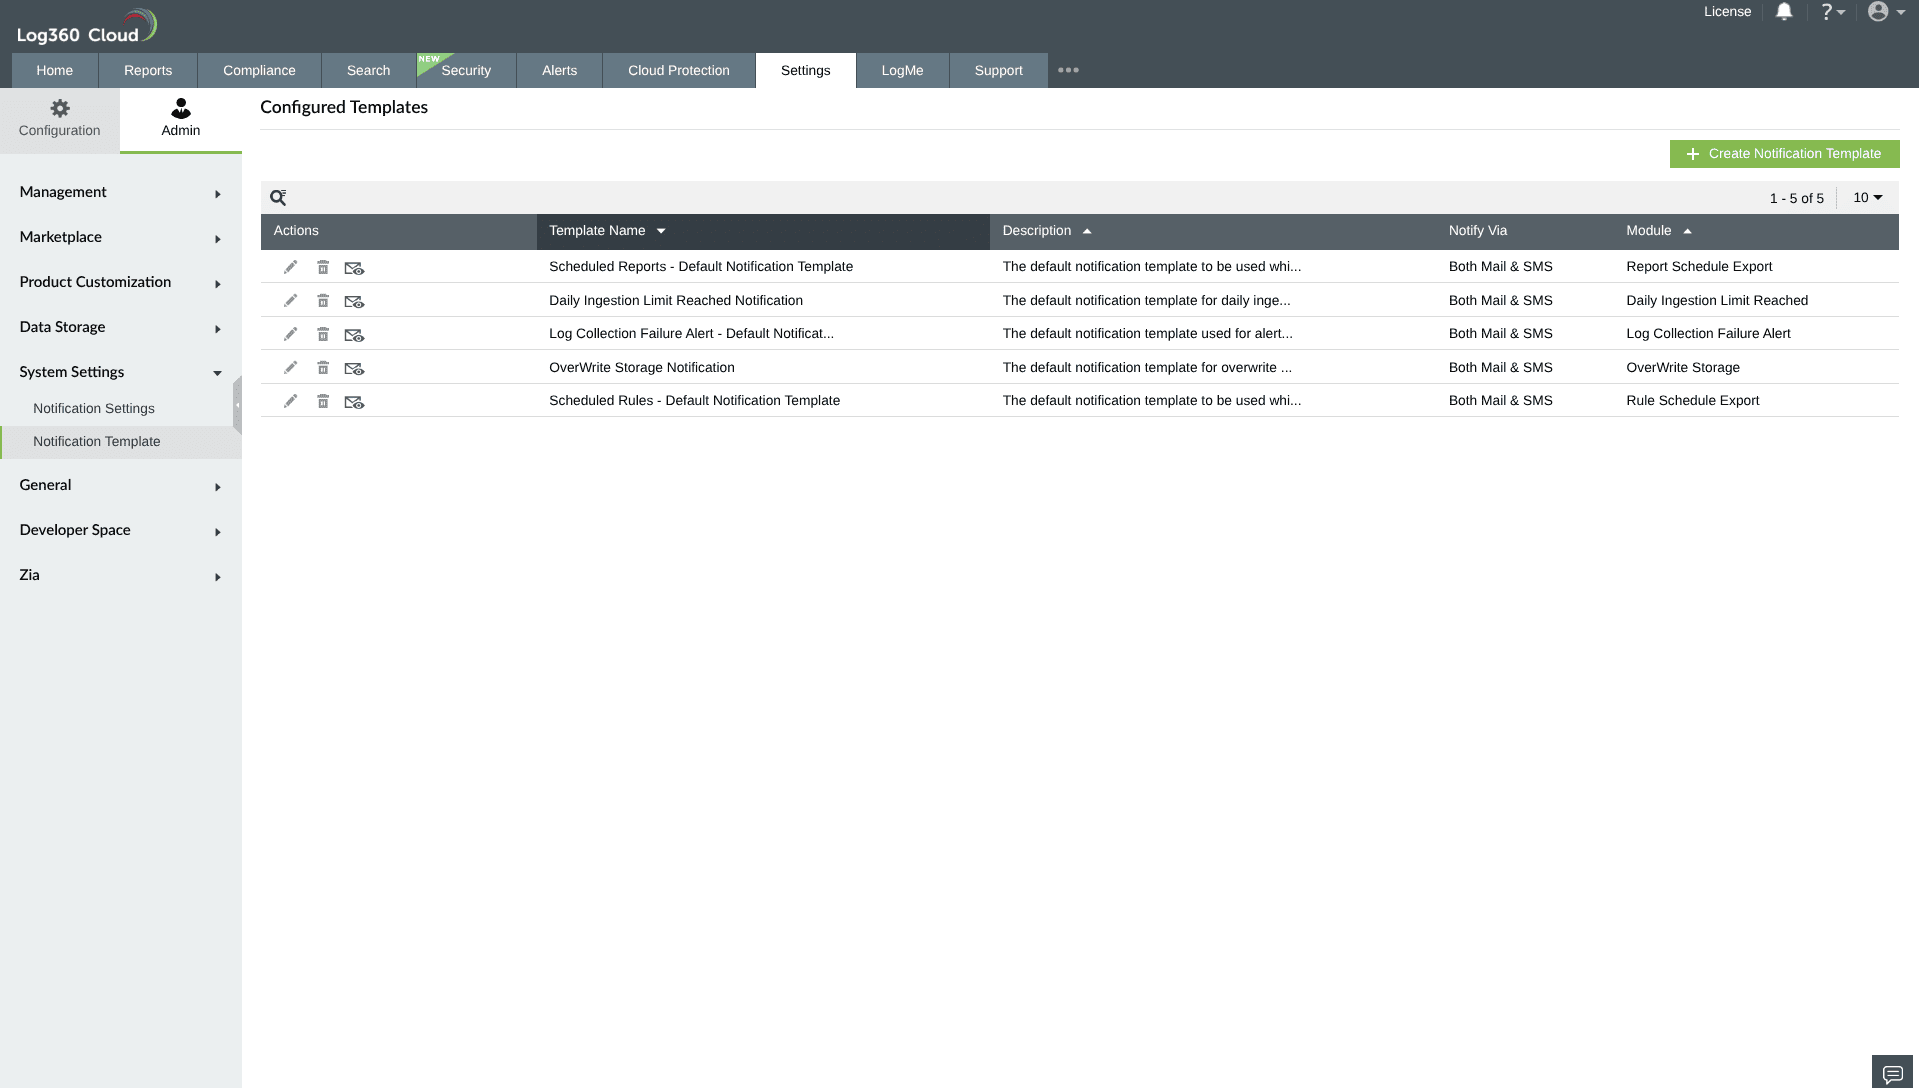
Figure 7: Opening the notification template preview - Review the notification templates under their respective SMS and Email tabs.
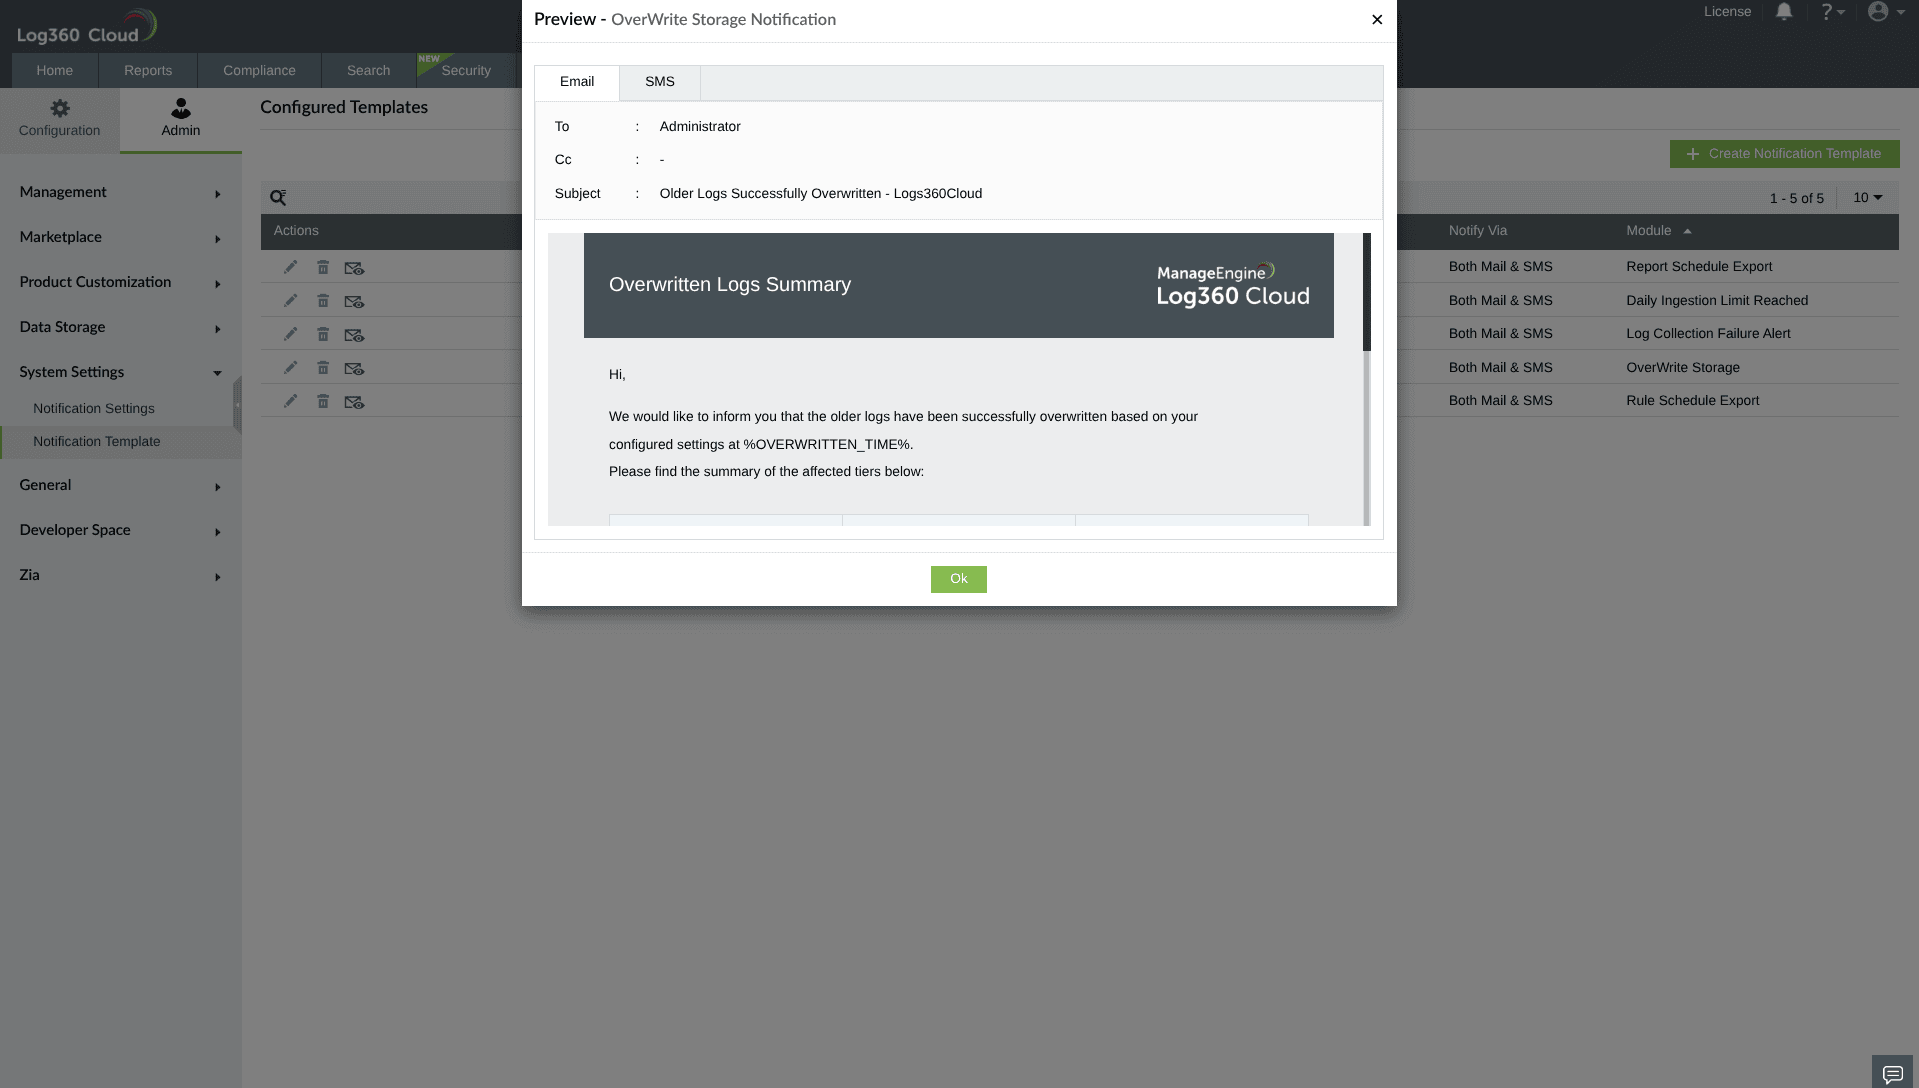
Figure 8: Viewing SMS and Email templates