Amazon Web Services (AWS)
Last updated on:
In this page
Manage AWS environment for On-premise version
To monitor your AWS environment, Log360 requires a valid IAM user with necessary permissions. The solution will use the designated IAM user to collect logs from your AWS environment.
Creating a new IAM user in the AWS console
An IAM user is an entity that you create in AWS to represent the person or service that uses it to interact with AWS.
To create a new IAM user, follow these steps.
- Login to the AWS console.
- Navigate to IAM
- Go to AWS Services → Security, Identity and Compliance → IAM.
- Create a new user:
- Select Users from the Left pane and click on Create User.
- Enter an appropriate User name and click Next.
- Attach Policies
- Click on Attach policies directly and then Click on Create Policy.
- A new tab named Create Policy will open. Select JSON.
- Depending on whether you want to manually or automatically configure CloudTrail, copy and paste the inline policies accordingly.
- Auto-configuration: For automatic CloudTrail configuration by Log360, copy and paste the provided inline policy.
- Manual configuration: For manual CloudTrail configuration, copy and paste the provided inline policy.
You can find the inline policy in the highlighted section of the image below.
- Click Next.
- Fill in the Policy Name field and click Create Policy.
- Return to the previous tab, refresh the policy table, select the newly created policy, and click Next.
- Finalize the user creation
- Verify the details and click Create user.
- Create security credentials
- Click on the created User.
- Go to Security Credentials and click on Create access key under the Access keys section.
- Choose Third-party service and check the confirmation box.
- Click Next and then click Create access key.
- Download the .csv file to save the Access key and Secret access Key.
The generated access key and secret key pair should be used inside Log360 to configure the AWS account.
Enter AWS credentials in Log360
- Go to the Log360 console.
- Click on Log360 Account Settings
- Click on Add Account
- Select the Cloud Type as AWS.
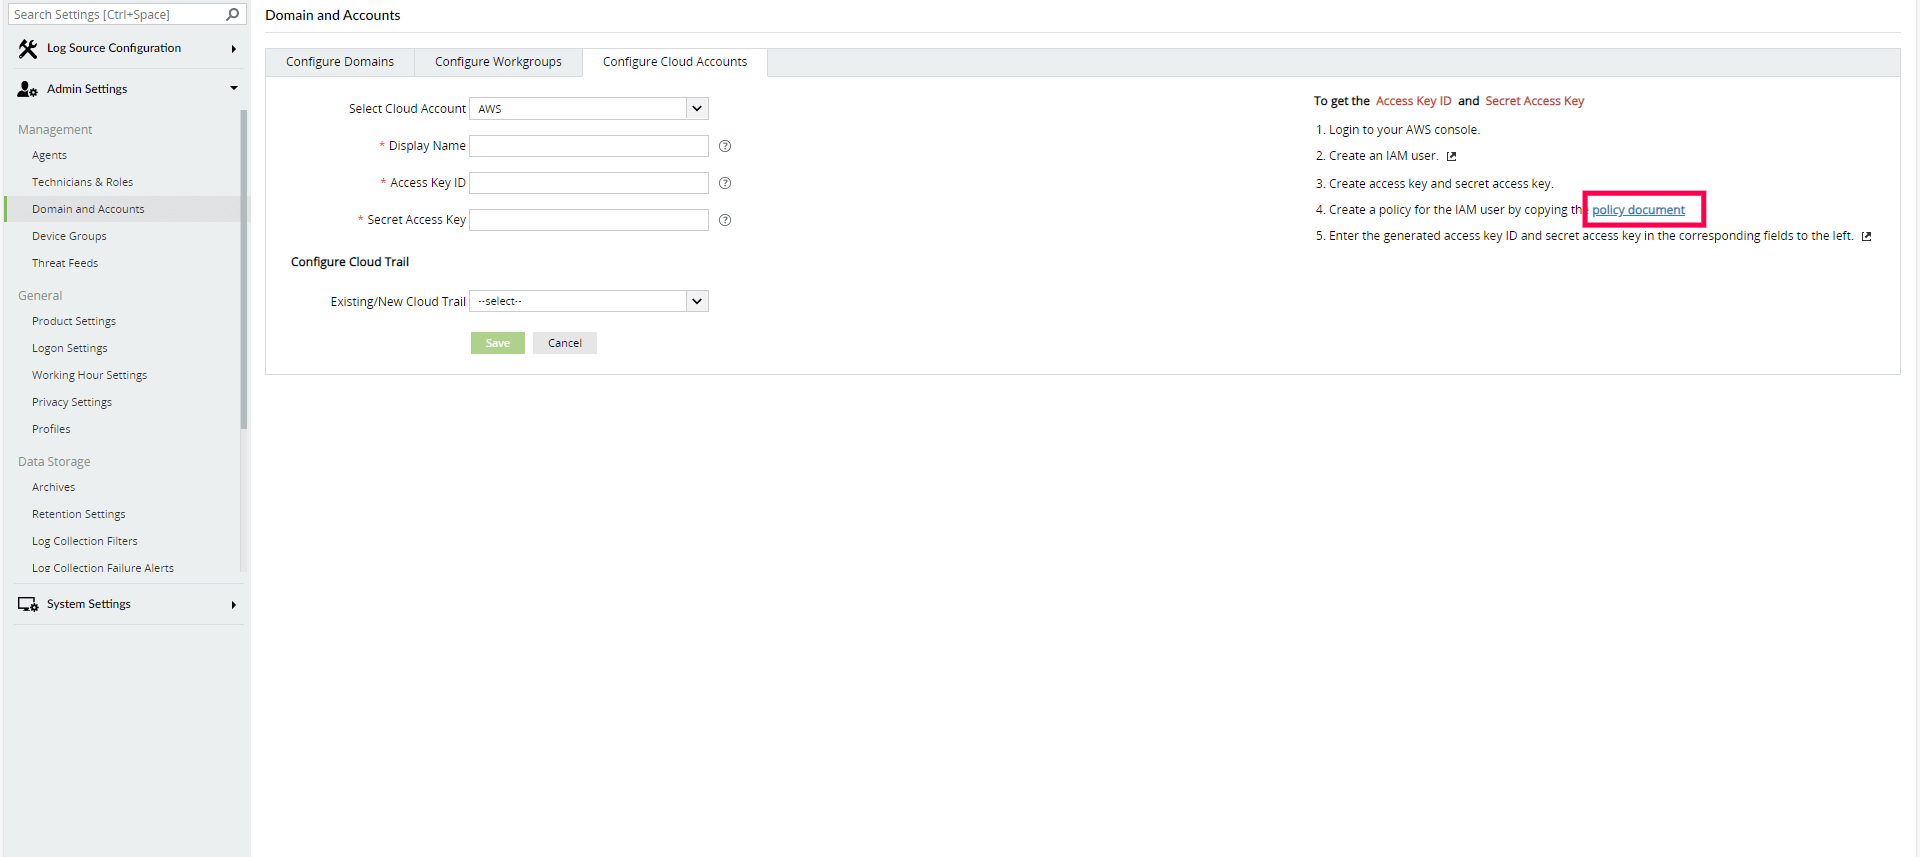
- Enter a Display name in the given box.
- Enter the Access Key ID and Secret Access Key of the IAM user in the given fields.
- Add CloudTrail.
- Auto-configuration: Select the Region. Log360 automatically creates and configures CloudTrail. Click Save.
Note: Log360 will create the following resources:
- S3 bucket: (accountnumber)-cloudtraillogs-(region)
- SNS topic: cloudtrailtopic
- SQS queue: cloudtrailqueue
- CloudTrail: cloudtrail
- Manual configuration: Click Connect an existing CloudTrail and follow the steps given in the Logging setup for AWS CloudTrail.
- Auto-configuration: Select the Region. Log360 automatically creates and configures CloudTrail. Click Save.
To setup logging for your AWS environment, refer S3 server access logging and ELB access logging.
Manage AWS environment for On-demand version
Manage Cloud Sources:
- Logging setup: Amazon CloudTrail Logs
- Logging setup: Amazon S3 server access logs
- Logging setup: Amazon ELB access logs
Logging setup: Amazon CloudTrail Logs
CloudTrail is an API log monitoring web service offered by AWS. It enables AWS customers to record API calls and sends these log files to Amazon S3 buckets for storage. The service provides details of API activity such as the identity of the API caller, the time of the API call, the source IP address of the API caller, the requests made and response elements returned by the AWS service. In addition, it captures a few non-API events (AWS service events and AWS console sign-in events).
CloudTrail can also be configured to publish a notification for every log file that is delivered, allowing users to take action upon log file delivery.
(I) Enable CloudTrail
- Login to the AWS console.
- Go to AWS Services → Management Tools → CloudTrail.
- Click Add new trail.
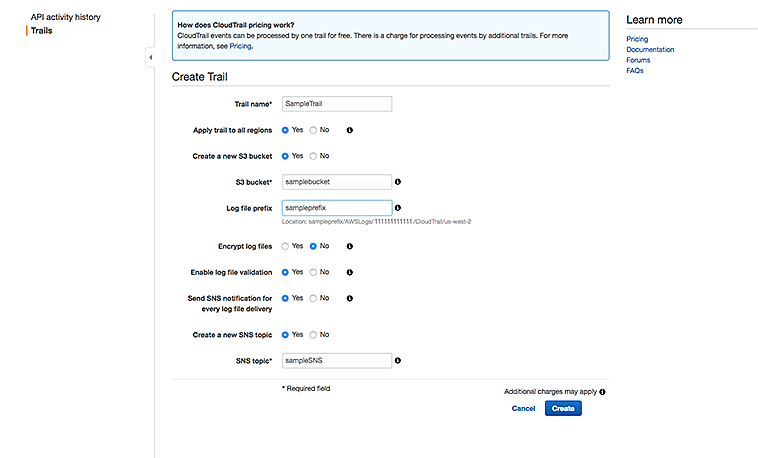
- Click Advanced and fill in the missing information.
(II) Configure an SNS topic
Create an SNS topic. Select the following options: Apply trail to all regions → Yes Create a new S3 bucket → Yes S3 bucket → Provide a new name Log file prefix → Provide the prefix Encrypt log fies → No Enable log file validation → Yes Send SMS notification for every log file delivery → Yes Create a new SNS topic → Yes New SNS topic → Name the topic Select → Create
(III) Create an SQS queue and subscribe to the SNS topic created in Step II
- Go to AWS Services → Messaging → Simple Queue Service (SQS).
- Click Create New Queue and fill in the necessary information.
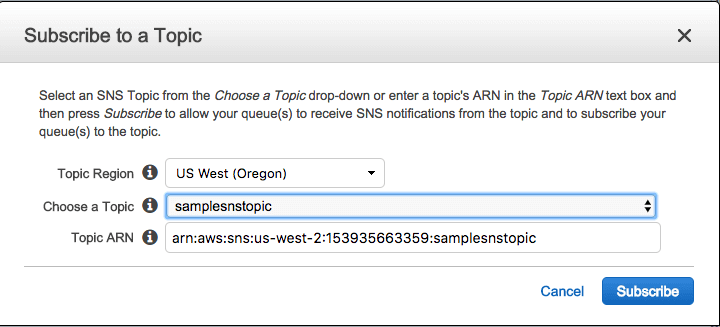
- Now, this SQS queue must be subscribed to the SNS Topic created when you enabled CloudTrail. Follow the below given steps.
- Select the SQS queue created.
- From the Queue Action drop down menu, select Subscribe Queue to SNS Topic.
Note Amazon SNS raw message delivery needs to be disabled.
(IV) Add the created SQS queue as a data source in Log360
- Login to the Log360 console.
- Go to Settings and click on Manage Data Source.
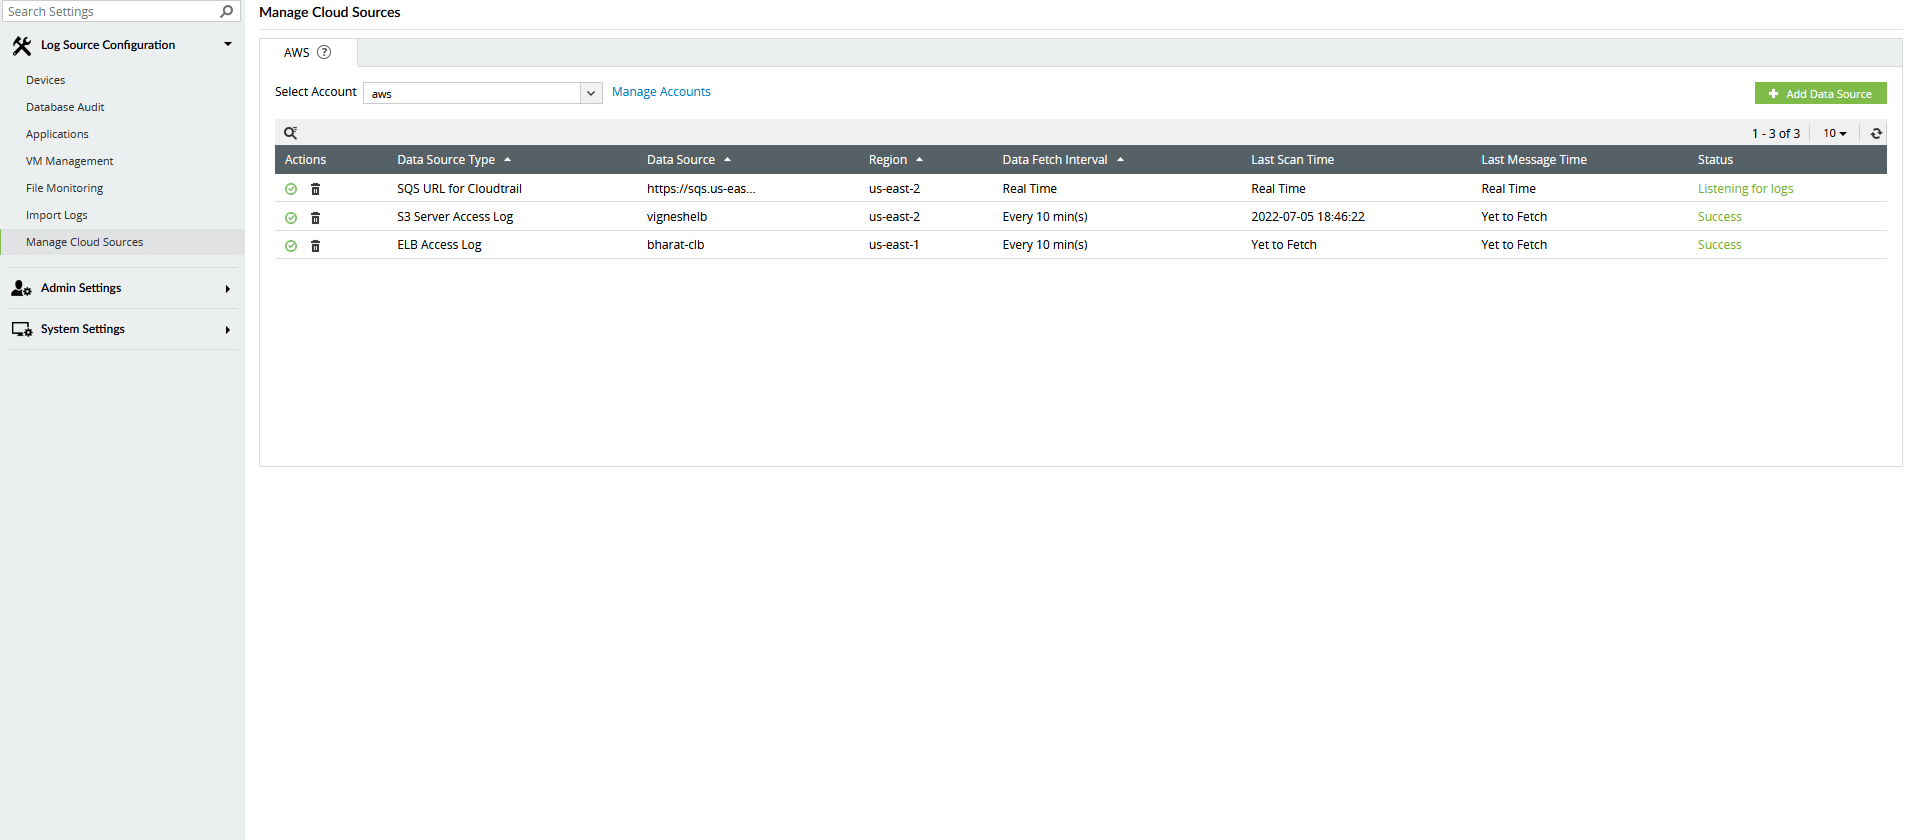
- Select CloudTrail from the Data source drop-down menu.
- Choose the AWS region, the trail and the SQS queue.
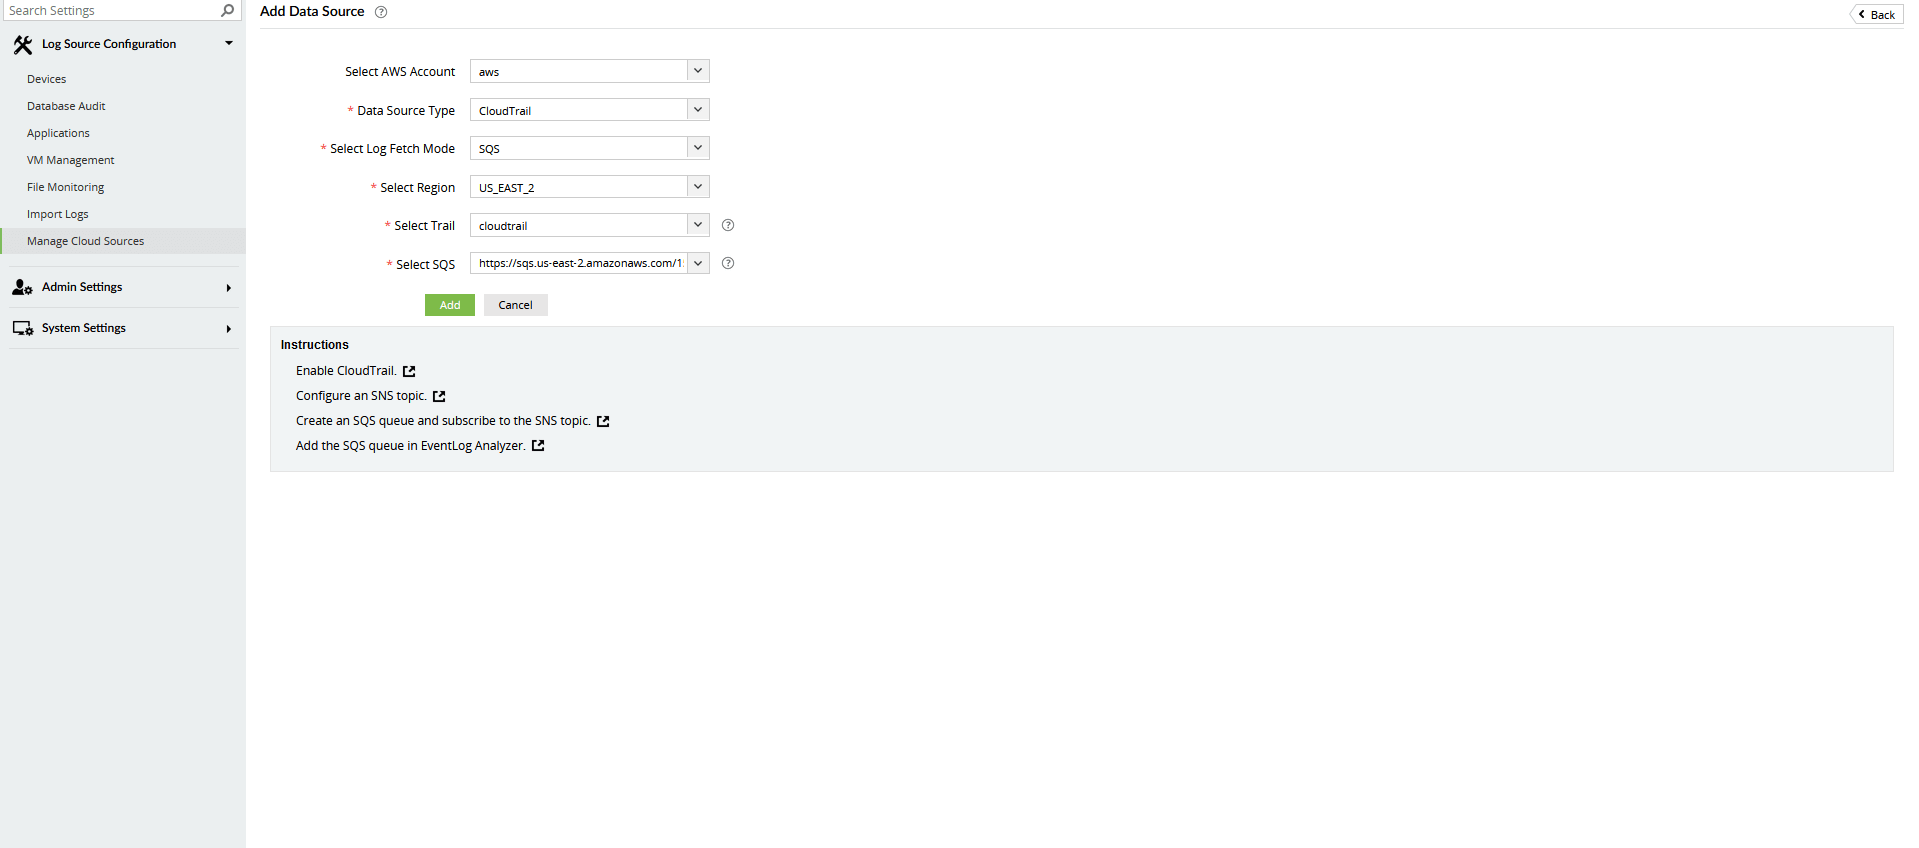
- Click Save.
Logging Setup: Amazon S3 server access logs
What is S3 server access logging?
Requests to access S3 bucket can be tracked via access logging. Each access log record provides details about a single access request, such as the requester, bucket name, request time, request action, response status, and error code, if any. This access log information can be useful in identifying the nature of traffic.
Follow the below given steps to add Amazon S3 server access logs as a data source in Log360.
- Login to the Log360 console.
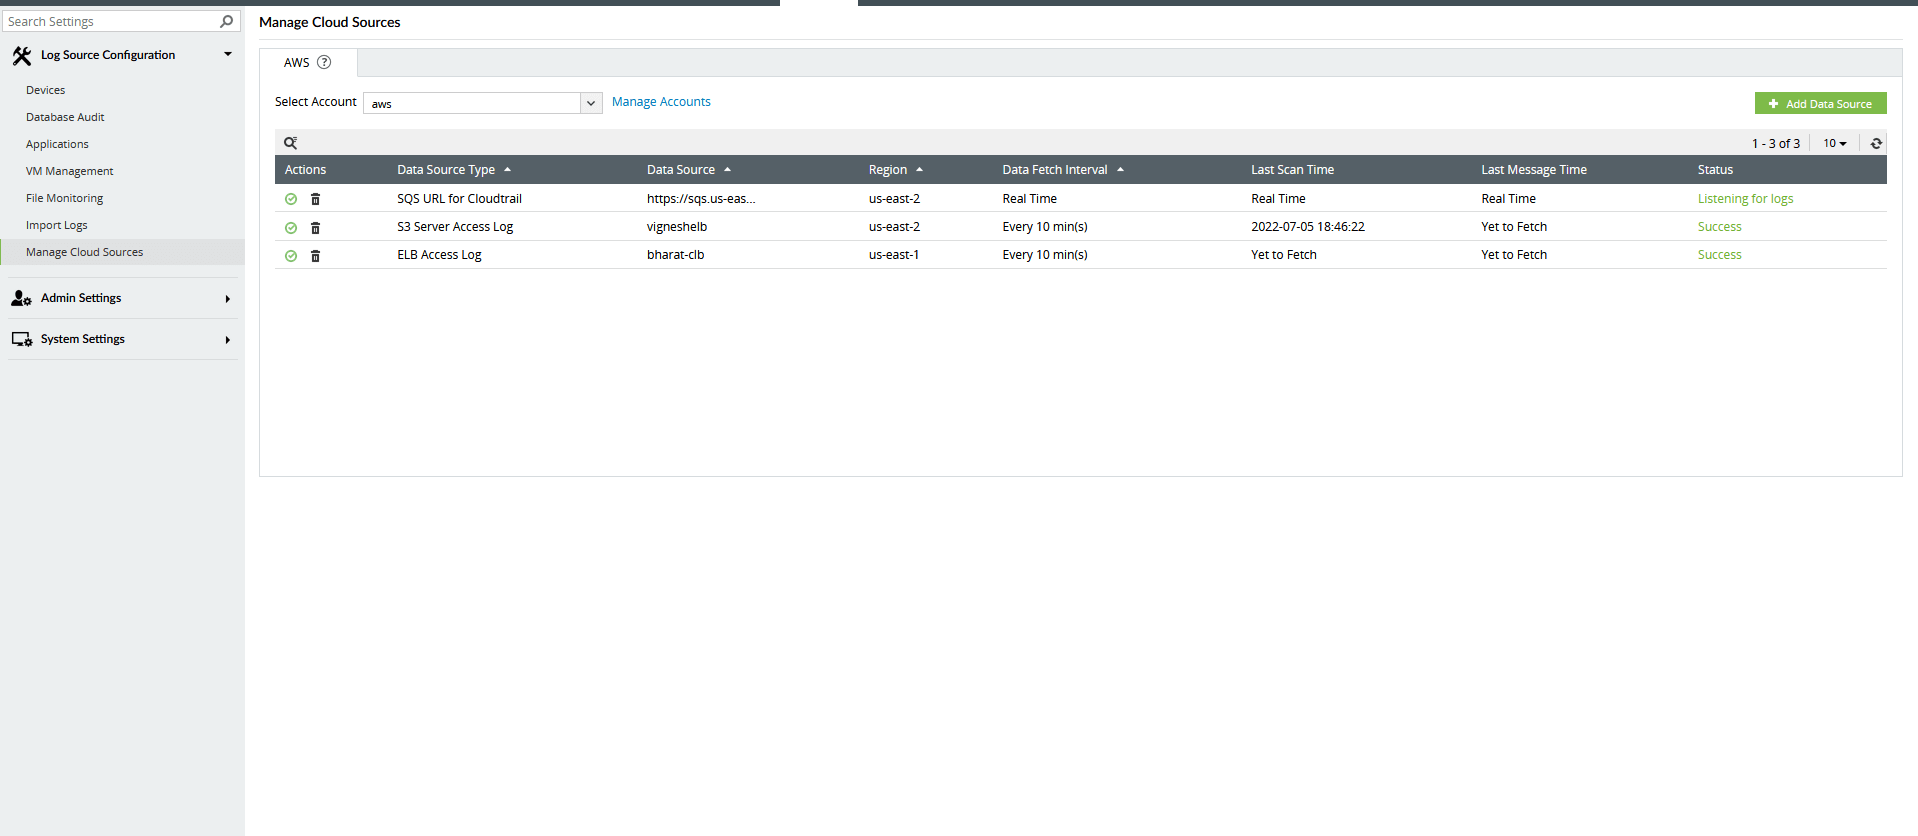
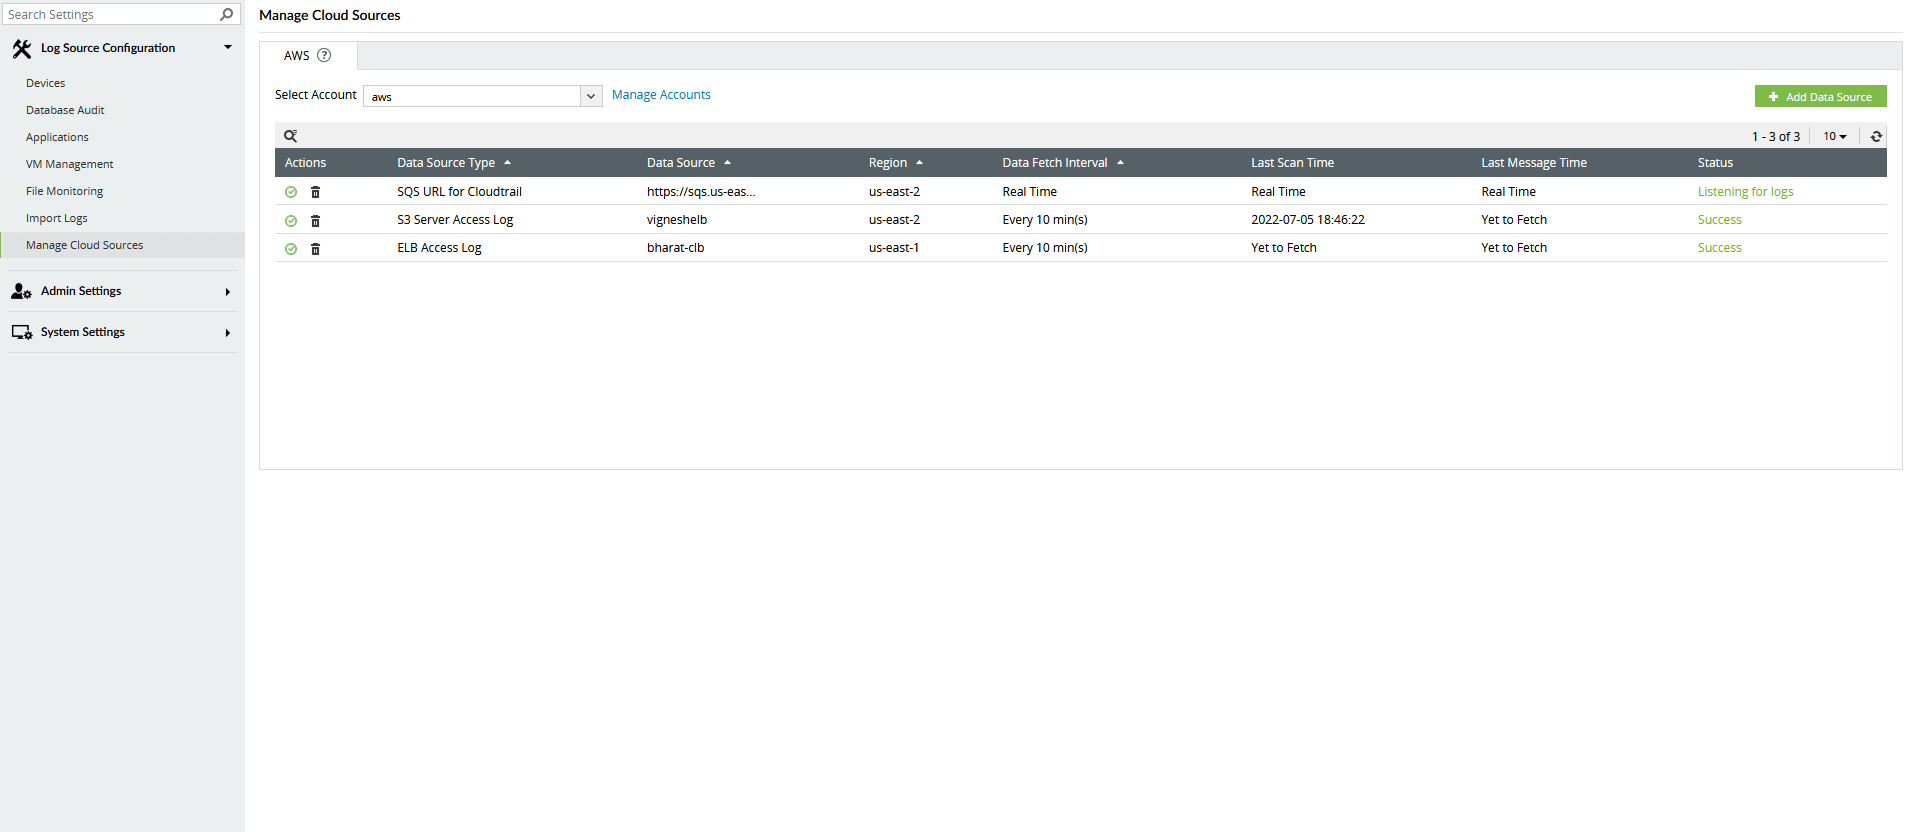
- Go to Settings > Configuration > Manage Cloud Sources and click on Add Data Source.
- Select S3 Server Access Logs from the Data source drop-down menu.
- Select the S3 Bucket for which you want to enable access logging.
- Click Configure..
Logging setup: Amazon ELB access logs
Elastic Load Balancer access logs capture information about requests made to load balancers and can be used to analyze traffic patterns and troubleshoot issues. These logs contain details such as the time the request was received, the client's IP address, latencies, request paths, and server responses.
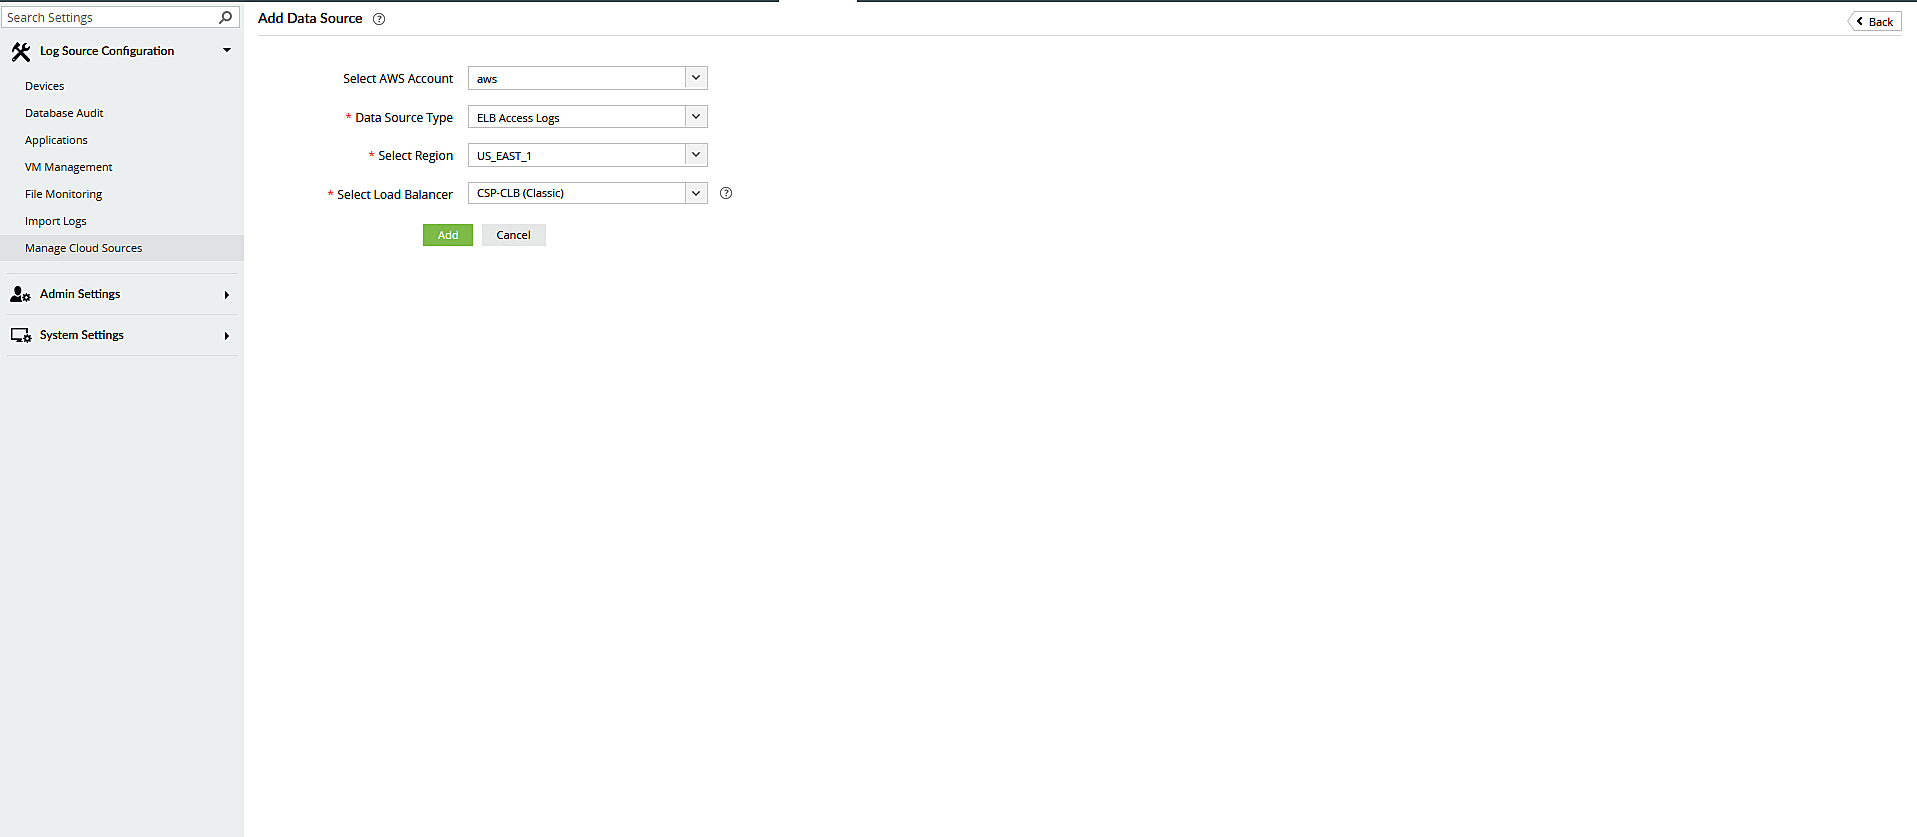
Follow the below given steps to add Amazon ELB access logs as a data source in Log360
- Login to the Log360 console.
- Go to Settings > Configuration > Manage Cloud Sources and click on Add DataSources.
- Select ELB Access Logs from the Data source drop-down menu.
- Select the Region and Load Balancer for which you want to enable access logging.
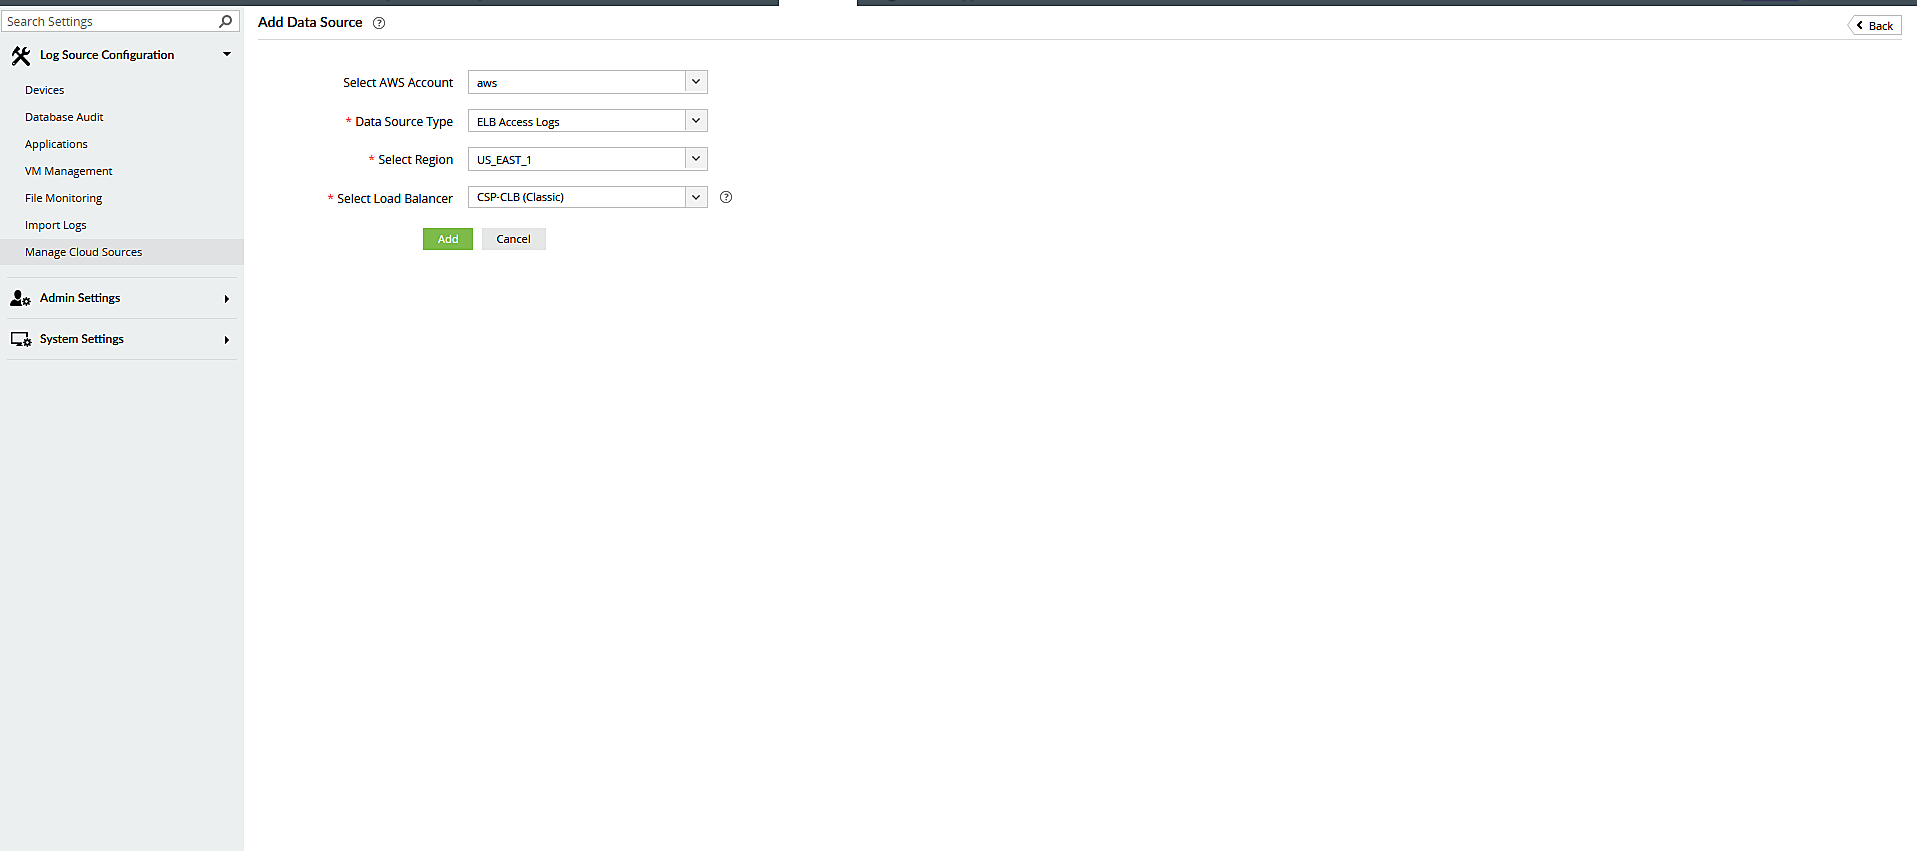
- Click Configure.