Configuring and Managing
Last updated on:
Tenant Configuration
In this section:
- Overview
- Pre-requisites
- Automatic tenant configuration
- Registering an application in Entra ID
- Manual tenant configuration
Overview
The product console enables administrators to configure and manage Microsoft 365 tenants for centralized monitoring, reporting, and alerting. This includes both manual and automatic setup methods to connect tenant accounts securely and synchronize Microsoft 365 data for accurate reporting. This page explains the steps for configuring tenants in both manual and automatic modes.
Pre-requisites
Before configuring a Microsoft 365 tenant in the product console, ensure the following:
- A Microsoft 365 subscription to provide access to services such as Exchange Online, SharePoint, OneDrive, and Teams.
- Trial subscription s to Microsoft 365 can be used to get started if you do not have paid subscriptions.
- Entra ID Premium license: Users with an Entra ID Premium license can access additional details for logon events, including location, applied policies, and other relevant information. This also applies to risk detection events. An Entra ID Premium license is required to view these details.
- For manual tenant configuration, you must register an application in Entra ID and grant the required API permissions.
- Unified audit logging: To access data through the Microsoft 365 Management Activity API, unified audit logging must be enabled by turning on the Microsoft 365 audit log. For instructions, see Turn Microsoft 365 audit log search on or off.
Automatic tenant configuration
- In the Domain and Accounts page, go to the Configure Cloud Accounts tab and click Add Cloud Account in the top-right corner.
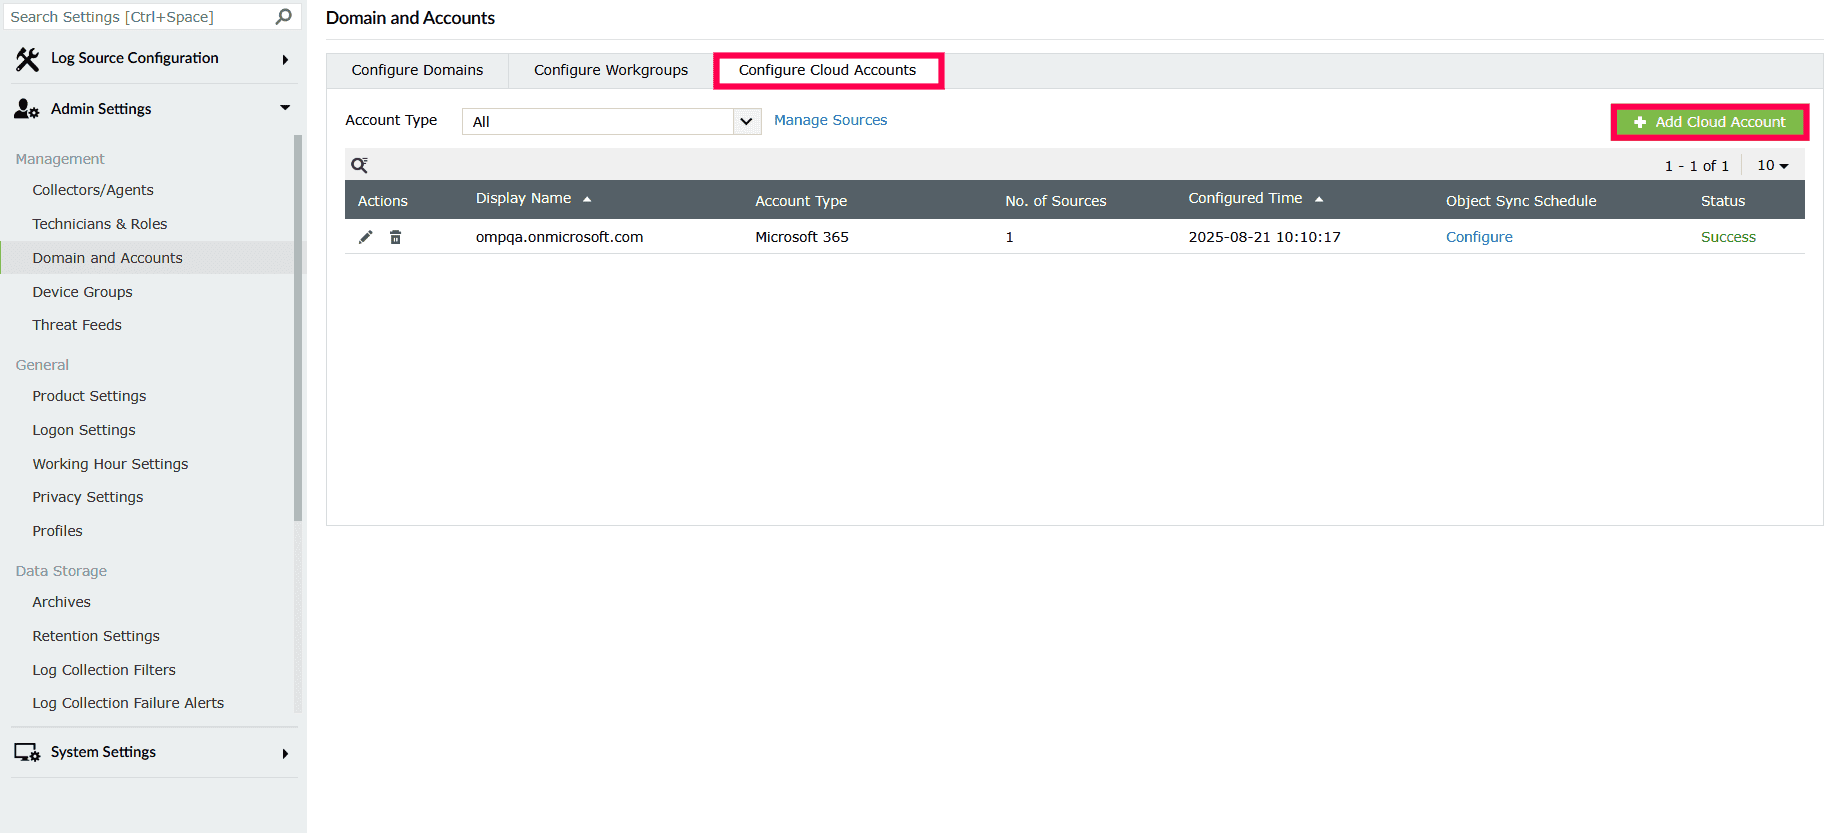
Figure 1: Adding a cloud account - From the Select Cloud Account drop-down, choose Microsoft 365.
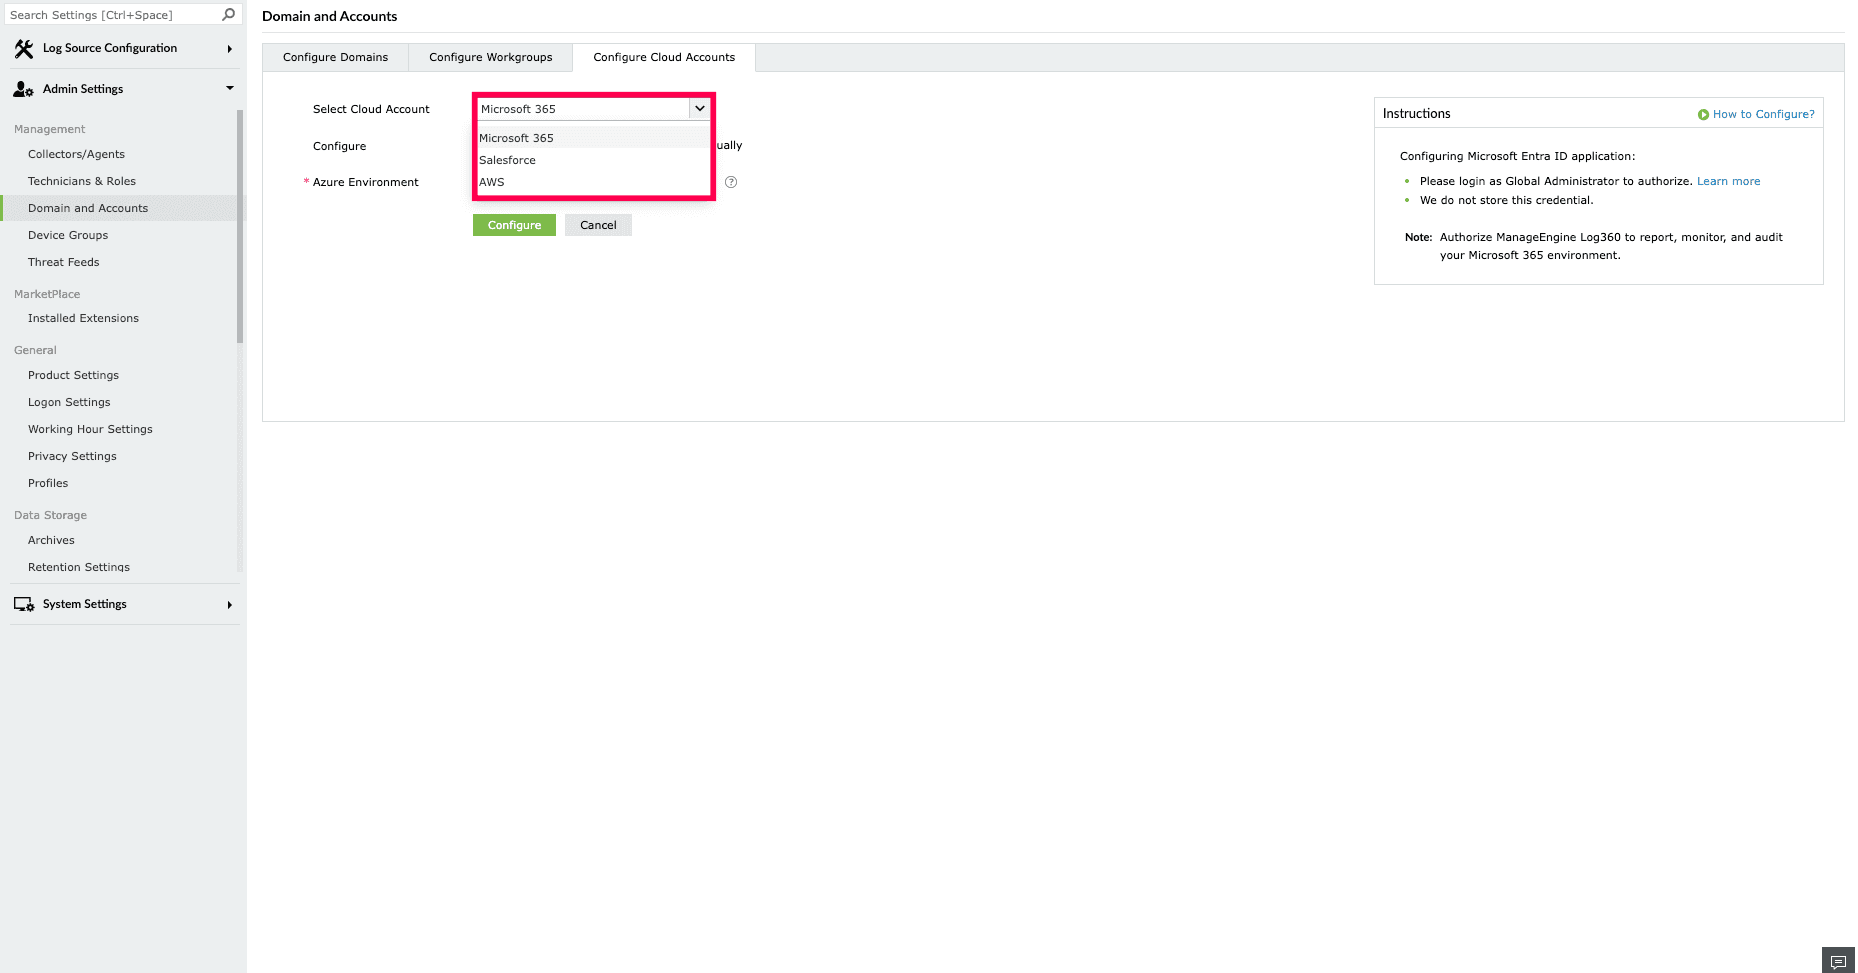
Figure 2: Selecting a cloud account - Select Using Microsoft Login beside the Configure options

Figure 3: Selecting configure options - Click Advanced Configuration and select the environment from the Azure Environment drop-down.
NOTE Choose the environment based on where your tenant is hosted.
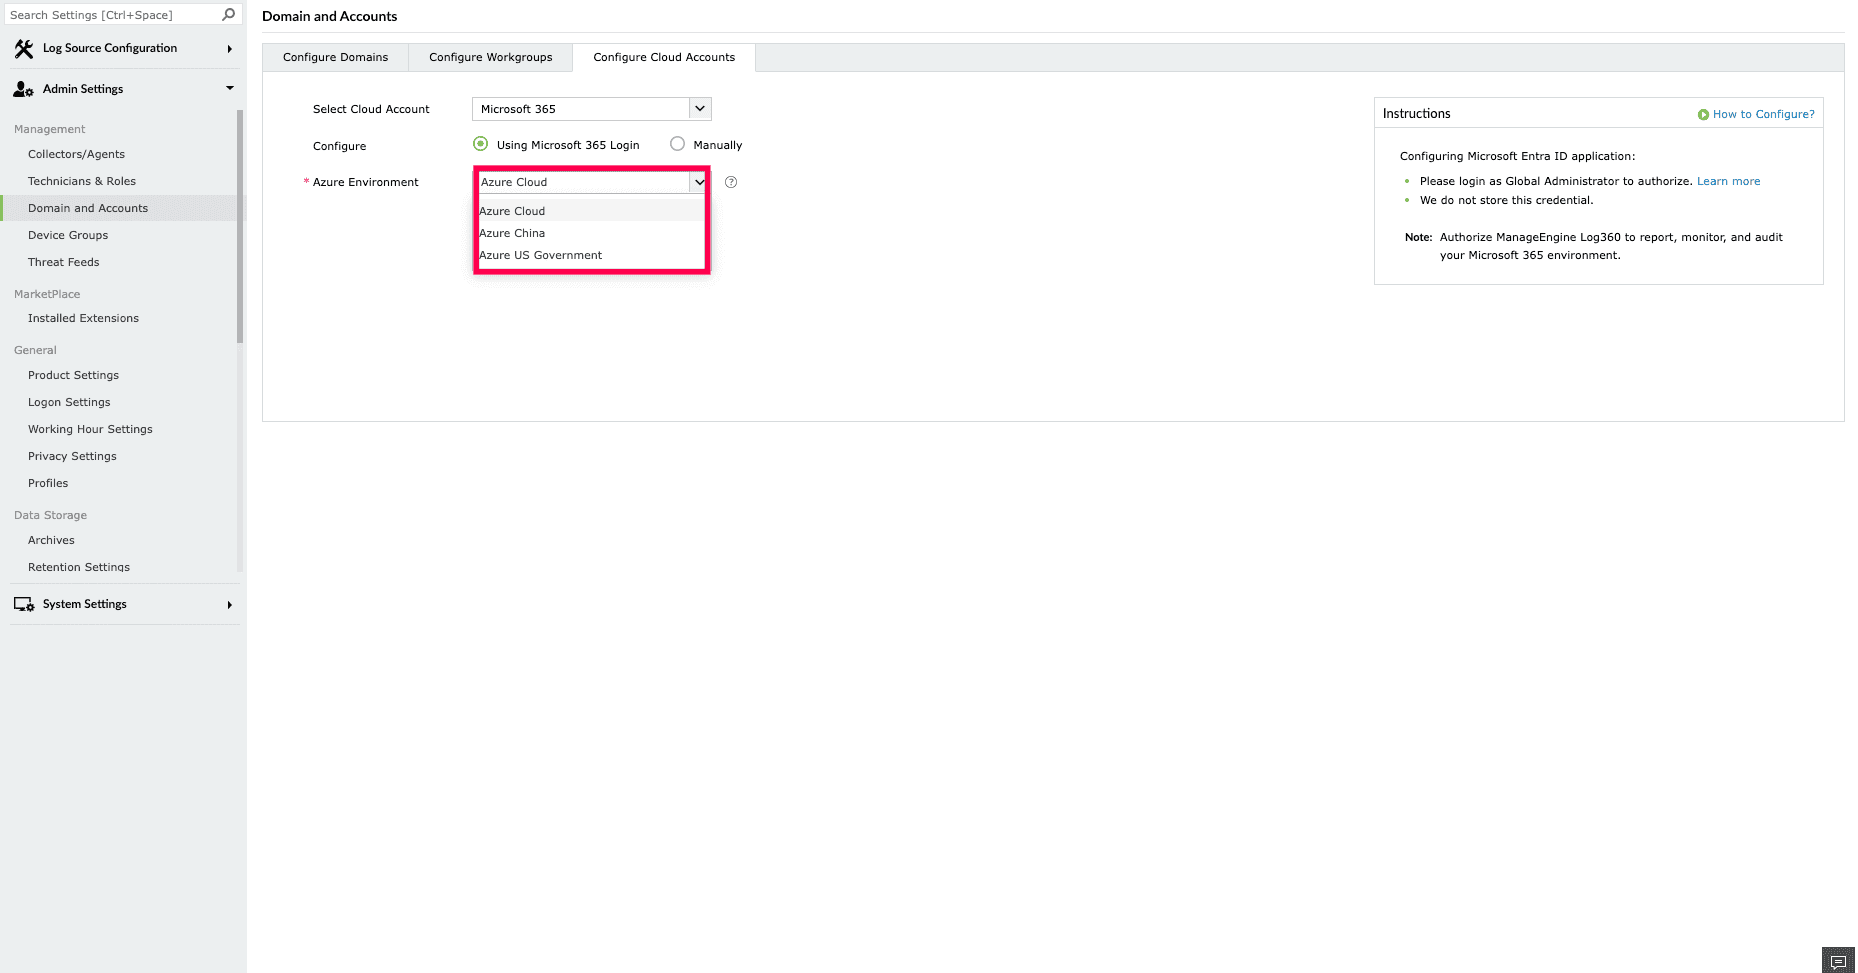
Figure 4: Selecting Azure Environment - Click Configure to save the account.
- You will be redirected to the Microsoft 365 login portal. Sign in with a Global Administrator account and click Accept.
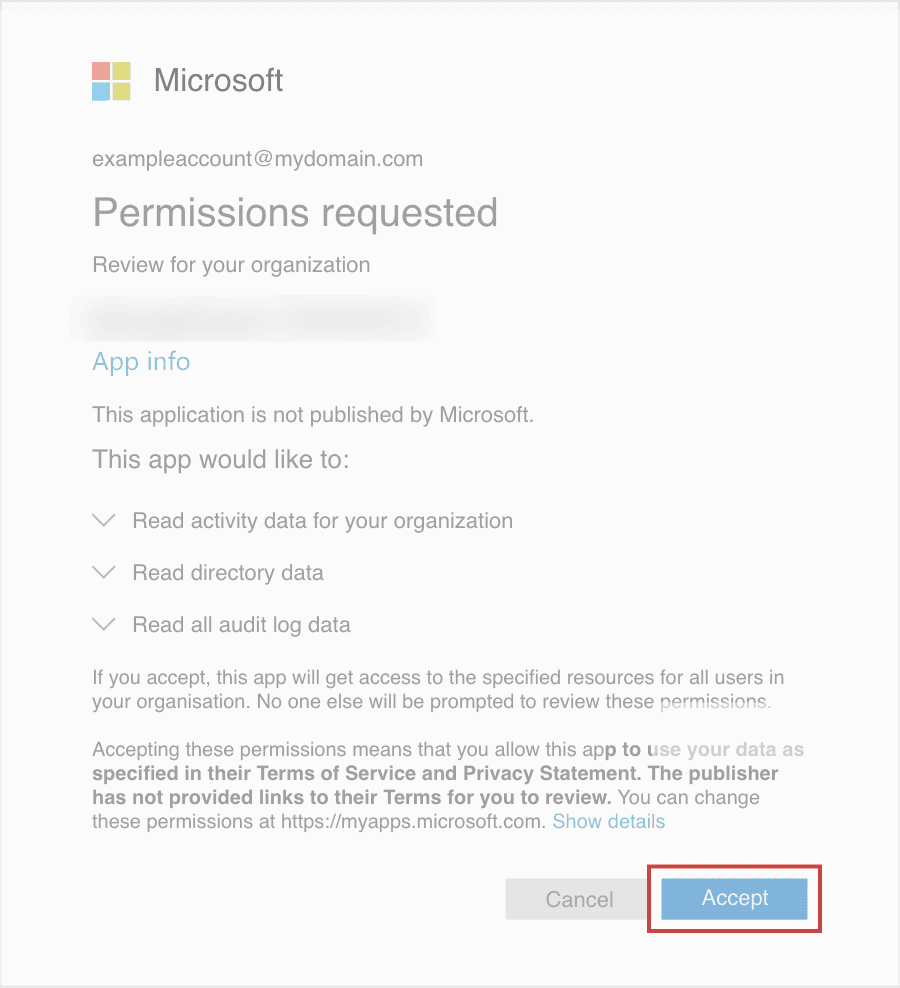
Figure 5: Signing into the M365 portal - An application for the product will be created automatically. You will then see a page displaying the list of permissions required by the application.
- Review the permissions and click Accept. You will be redirected back to the product console, indicating a successful tenant configuration.
Registering an application in Entra ID
NOTE Skip this section if you plan to use automatic tenant configuration.
Follow the steps below to register and configure the Log360 application in Microsoft Entra.
- Register the application
- Configure Redirect URI
- Add API permissions
- Grant admin consent
- Generate client secret
- Collect application details
Register the application
- Sign in to the Microsoft Entra admin center using the credentials of a Global Administrator account.
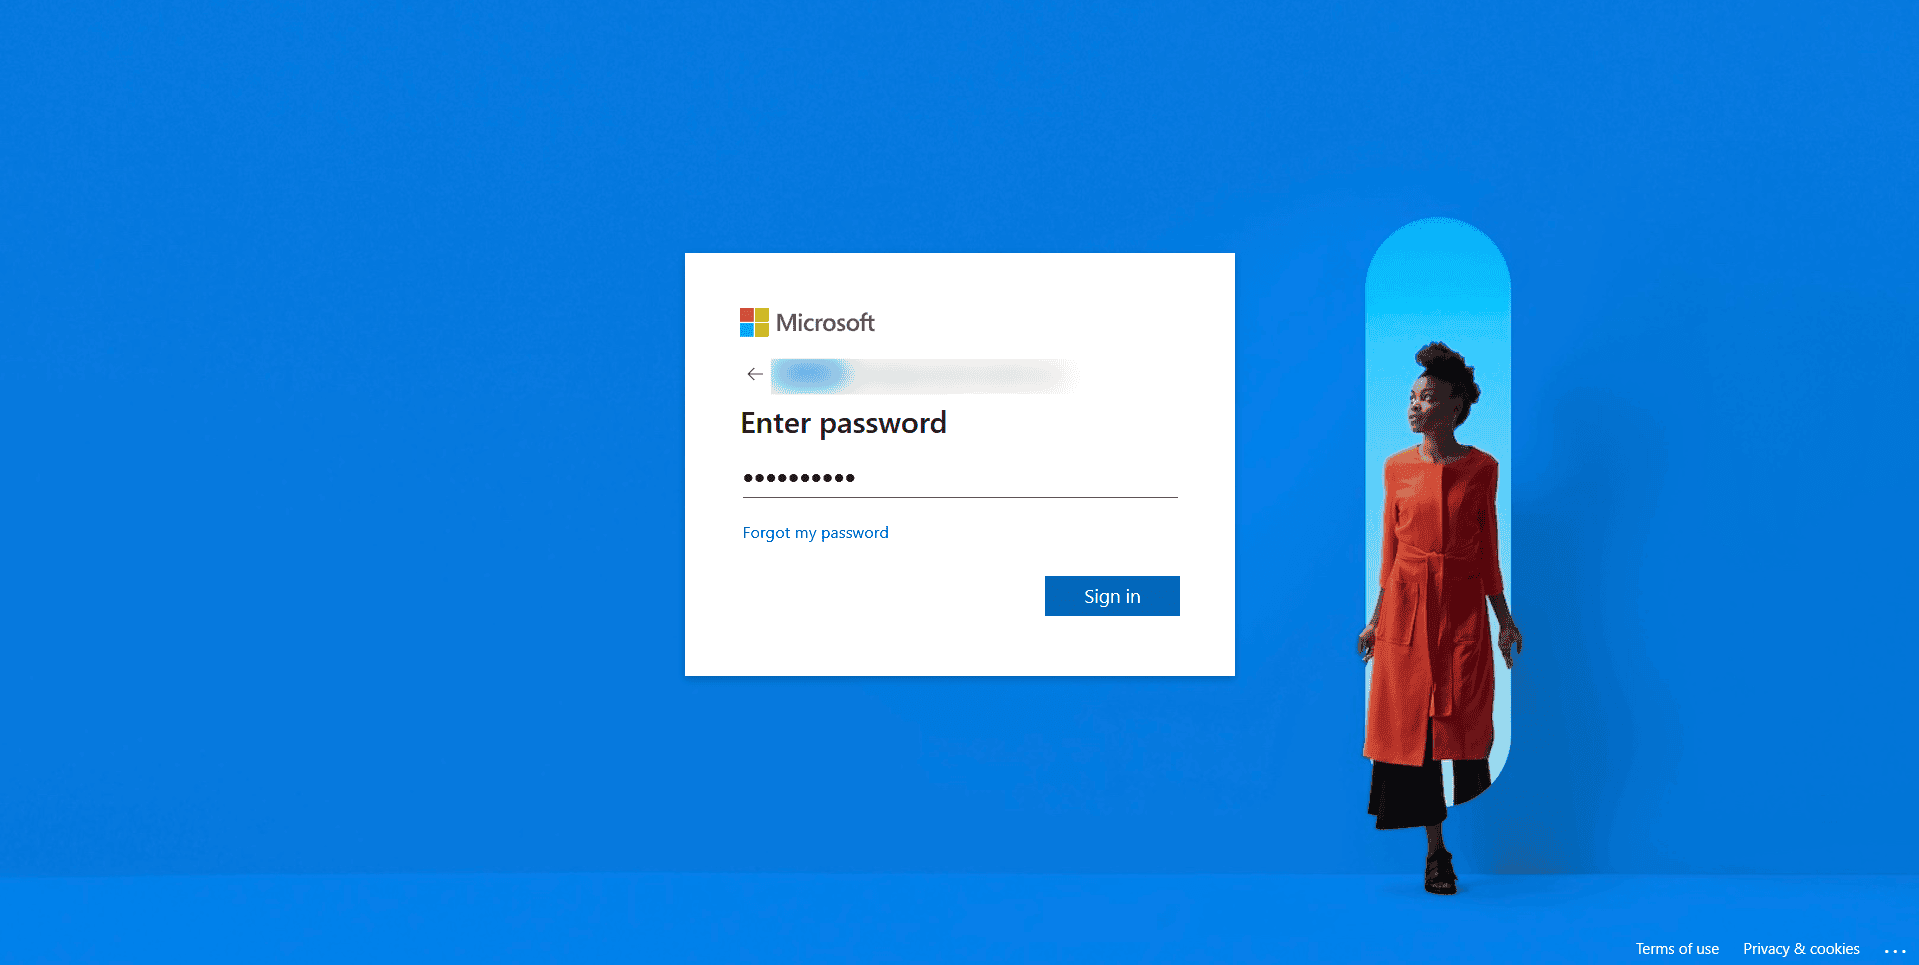
Figure 6: Signing in to the Microsoft Entra admin center - In the left pane, click App registrations.
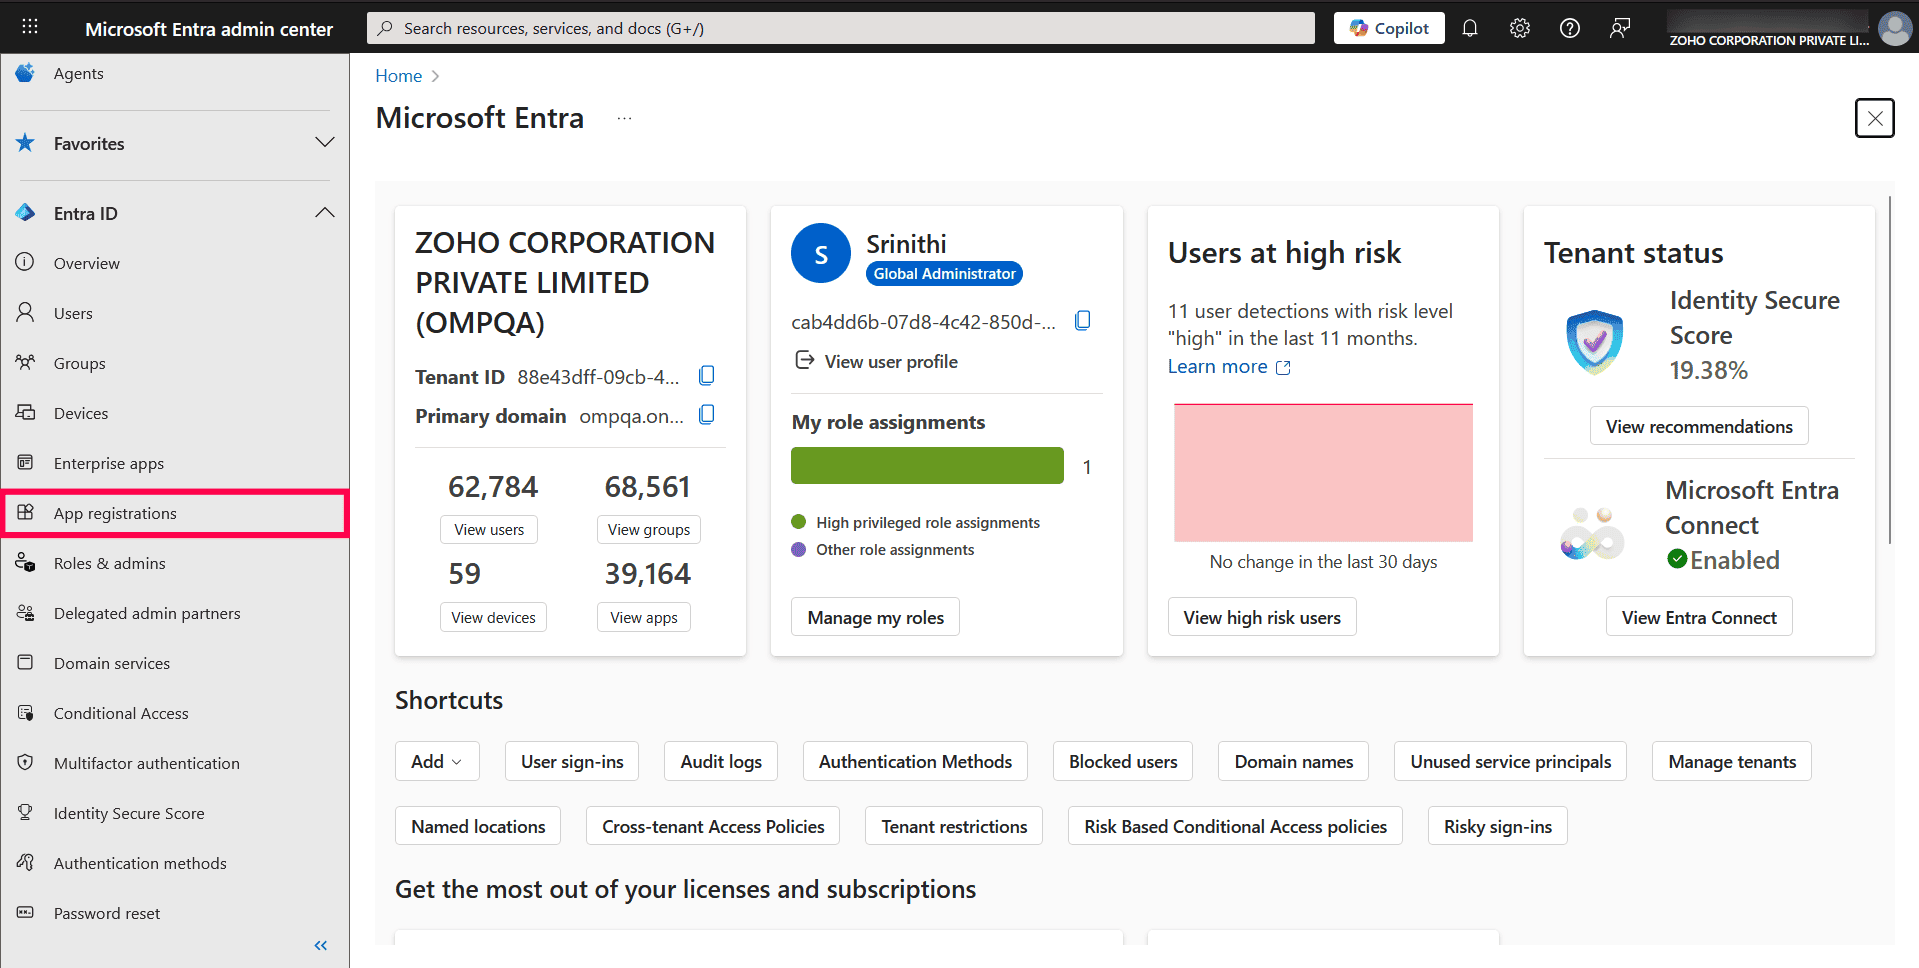
Figure 7: Navigating to App registrations - In the App registrations page, click New registration.

Figure 8: Creating a new registration - Provide a Name for the Log360 application to be created.
- Select a supported account type based on your organizational needs.
NOTE Choose Single Tenant if your application will only be accessed by users and guests within your own organization. This provides improved security by restricting access to internal accounts only, reducing exposure to external users.
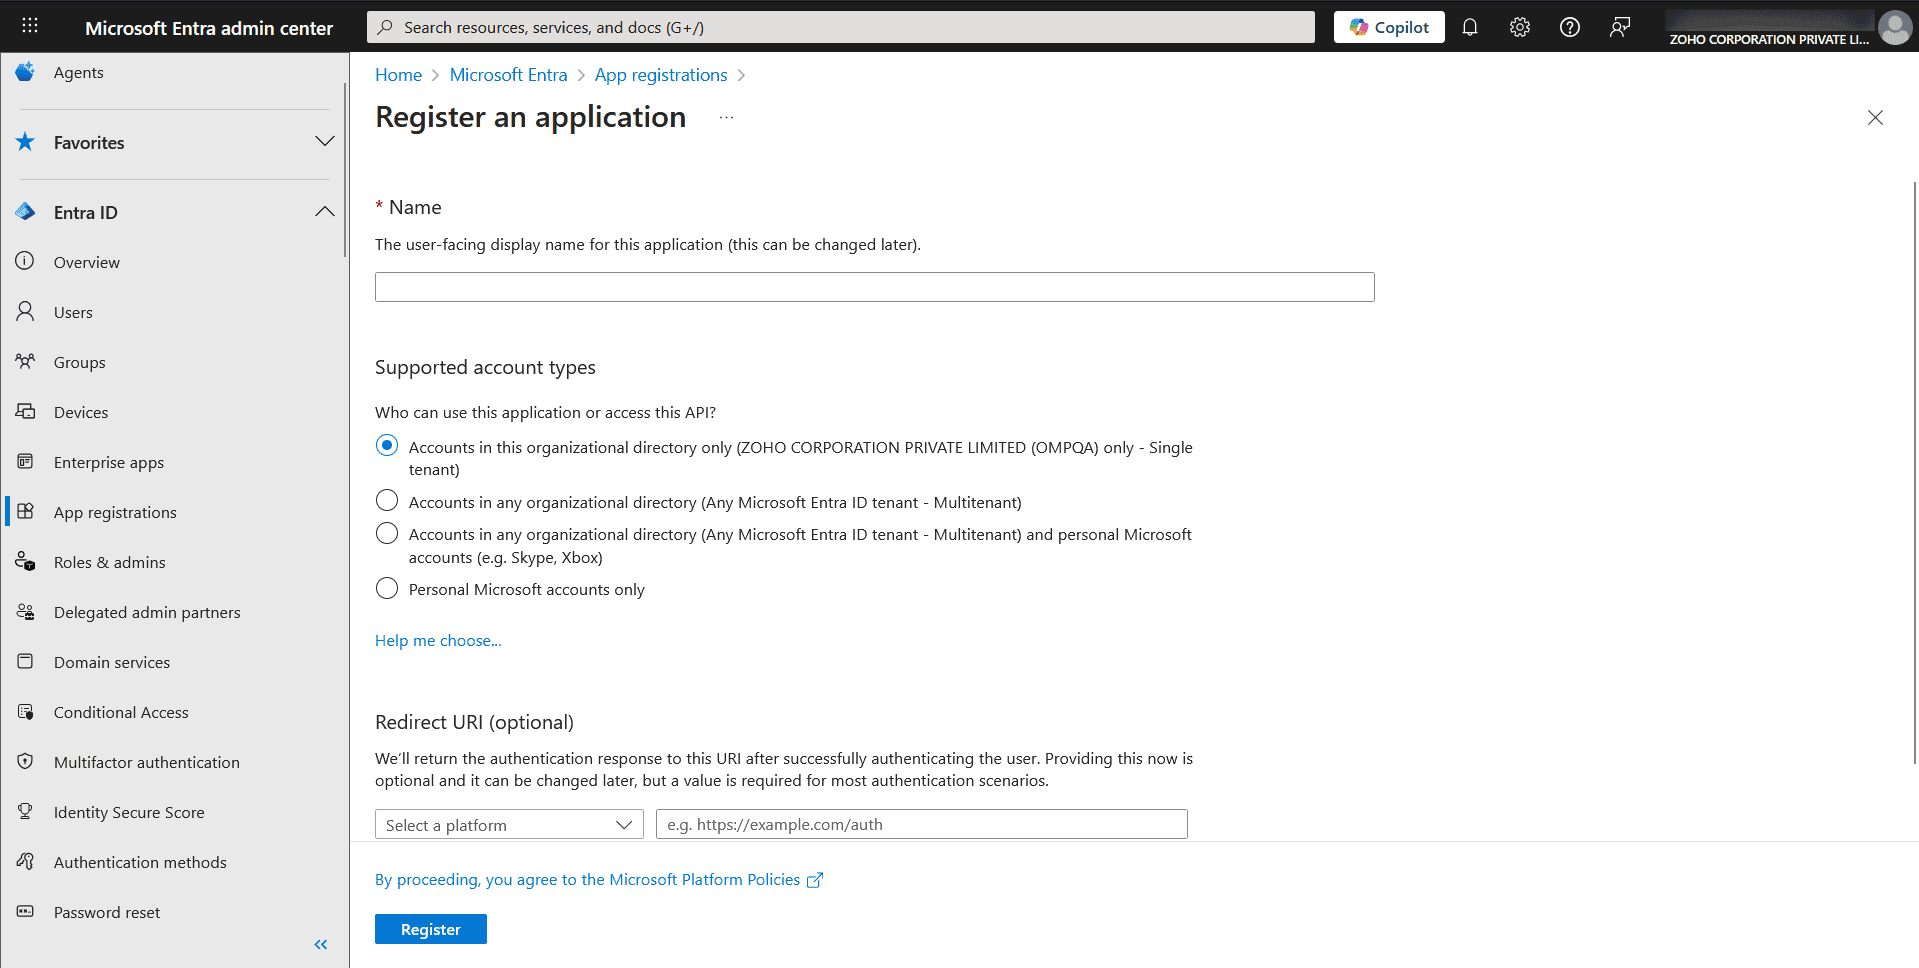
Figure 9: Configuring registration details - Leave the Redirect URI field blank for now.
- Click Register to complete the initial app registration.
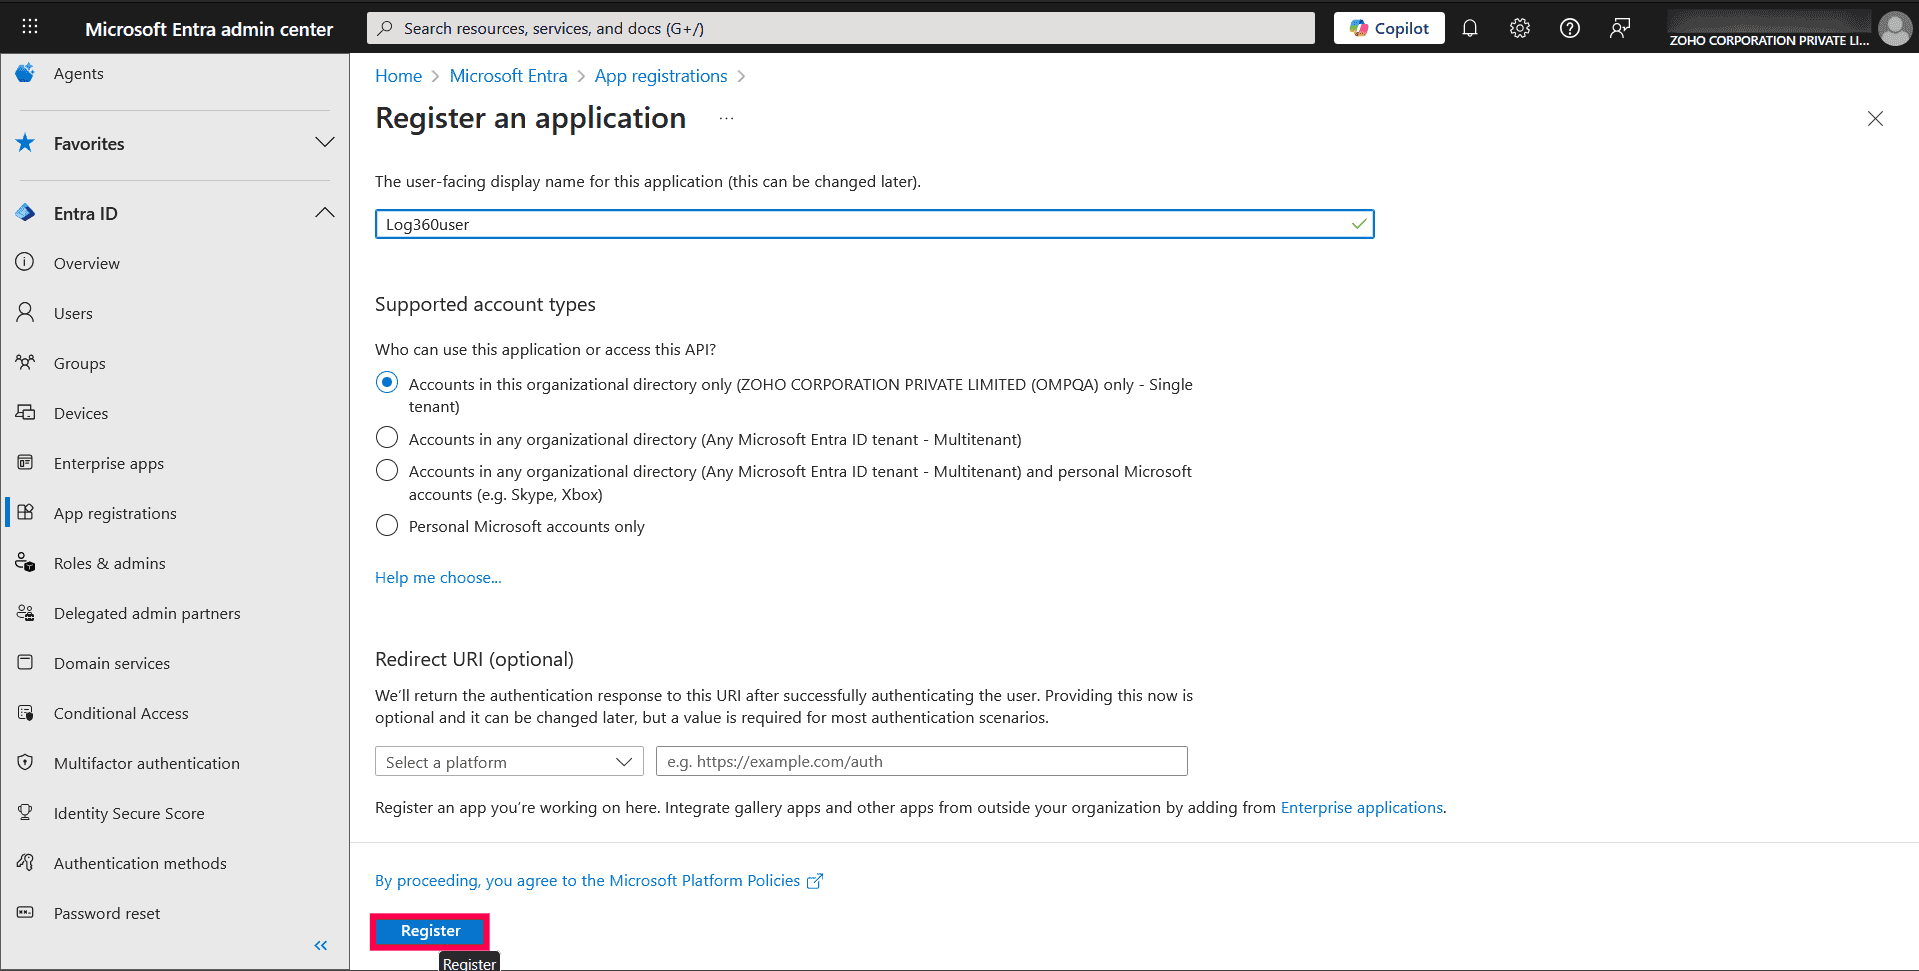
Figure 10: Registering a new application - Once created, you will be redirected to the Overview page of the application.
Configure Redirect Uniform Resource Identifier (URI)
- In the app registrations page, click Authentication (Preview).
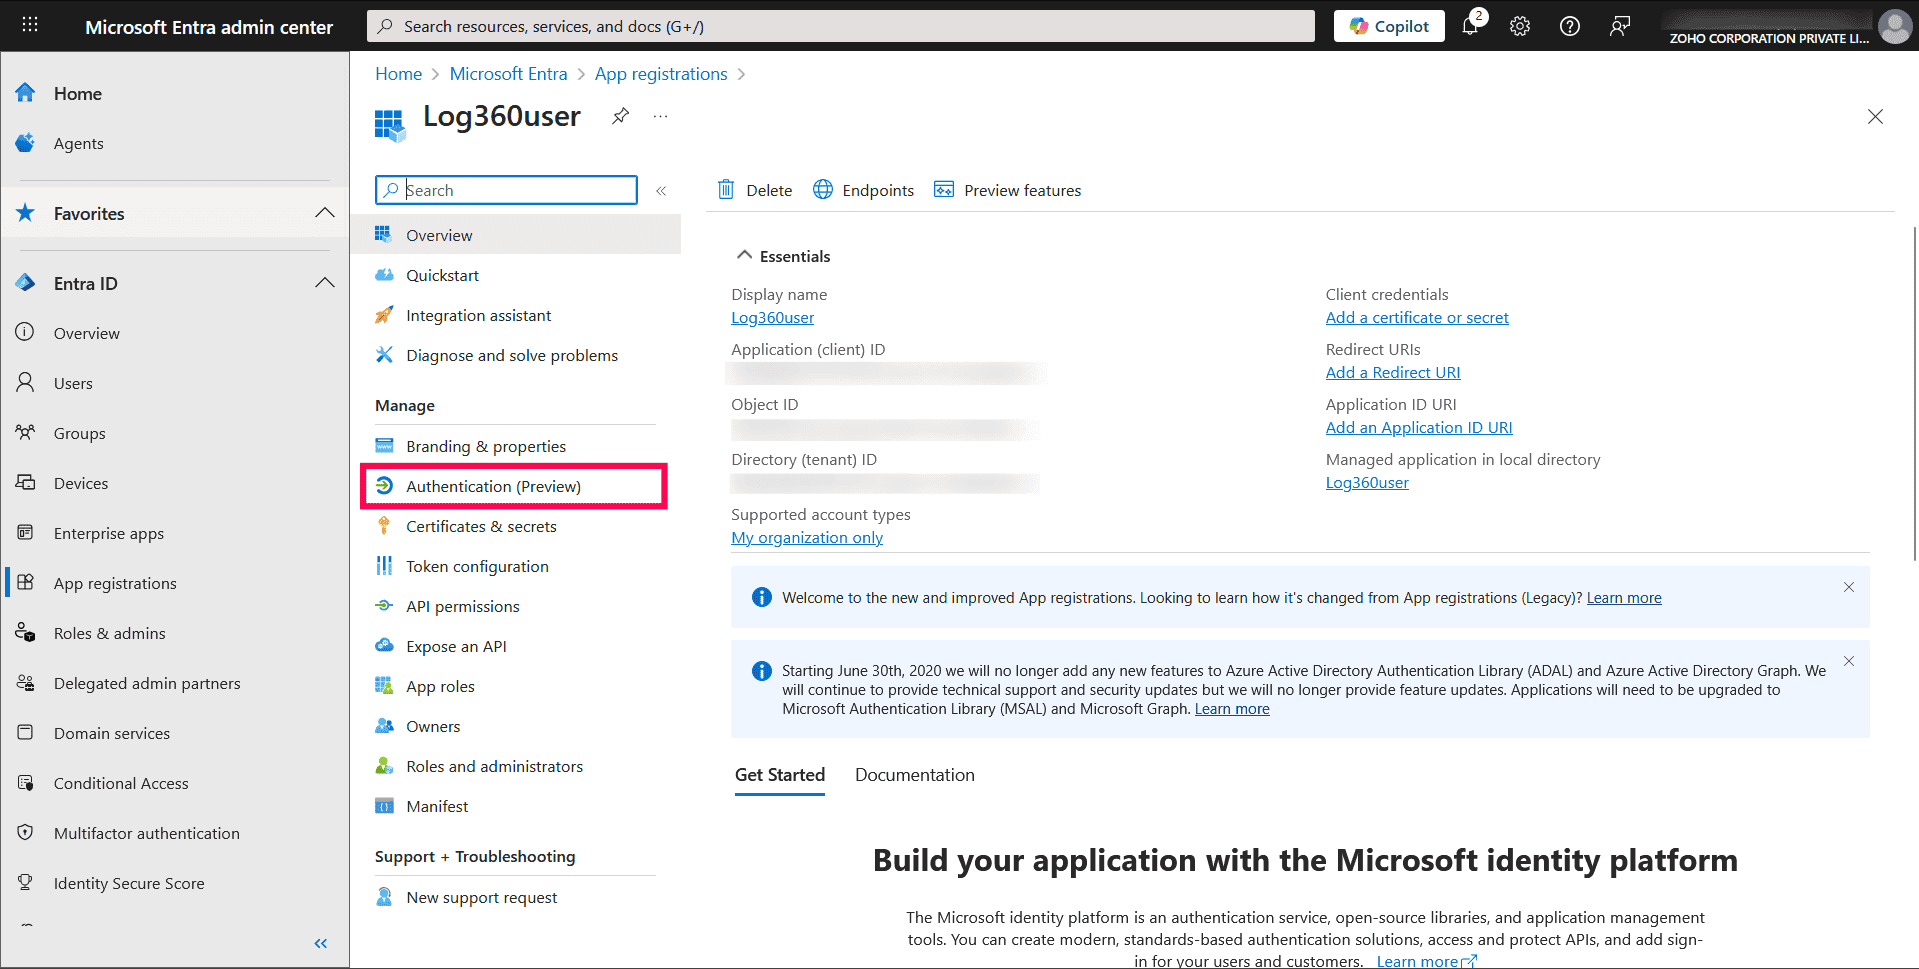
Figure 11: Accessing Authentication (Preview) - Click Add Redirect URI.
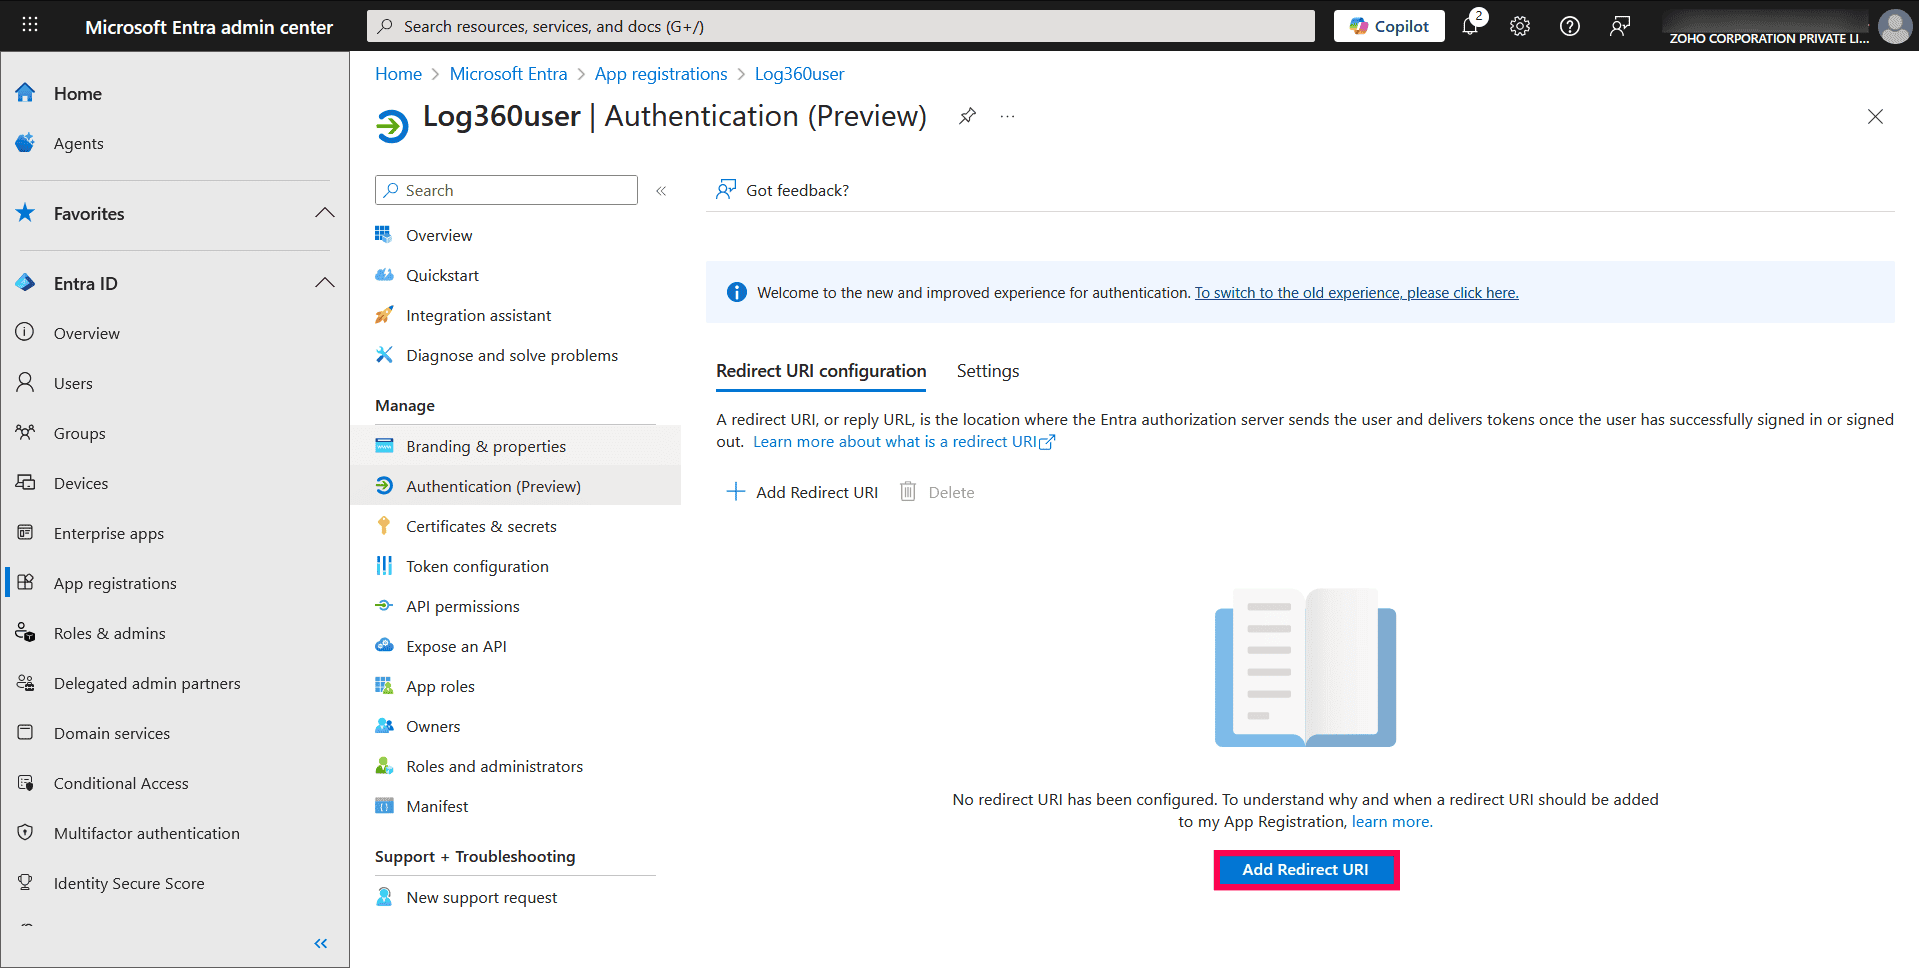
Figure 12: Adding Redirect URI - In the pop-up that appears, select Web.
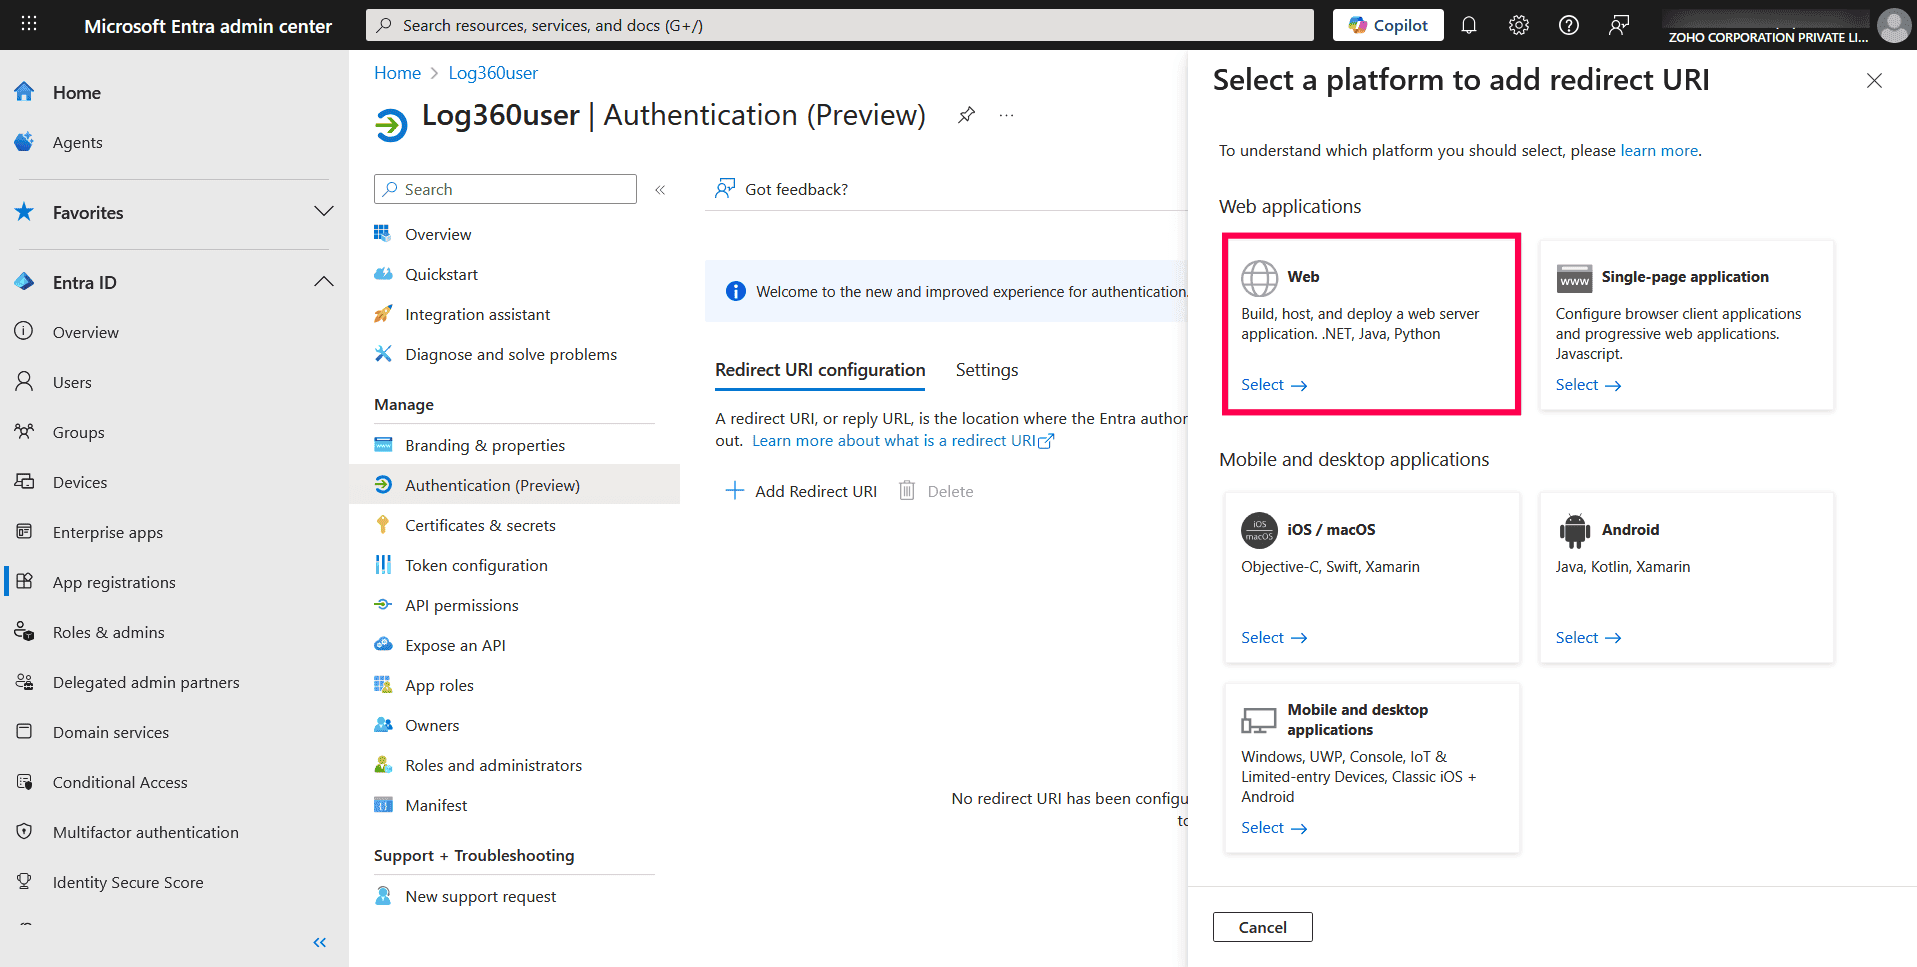
Figure 13: Selecting a platform - Enter the following value in the Redirect URI field: https://identitymanager.manageengine.com/api/public/v1/oauth/redirect
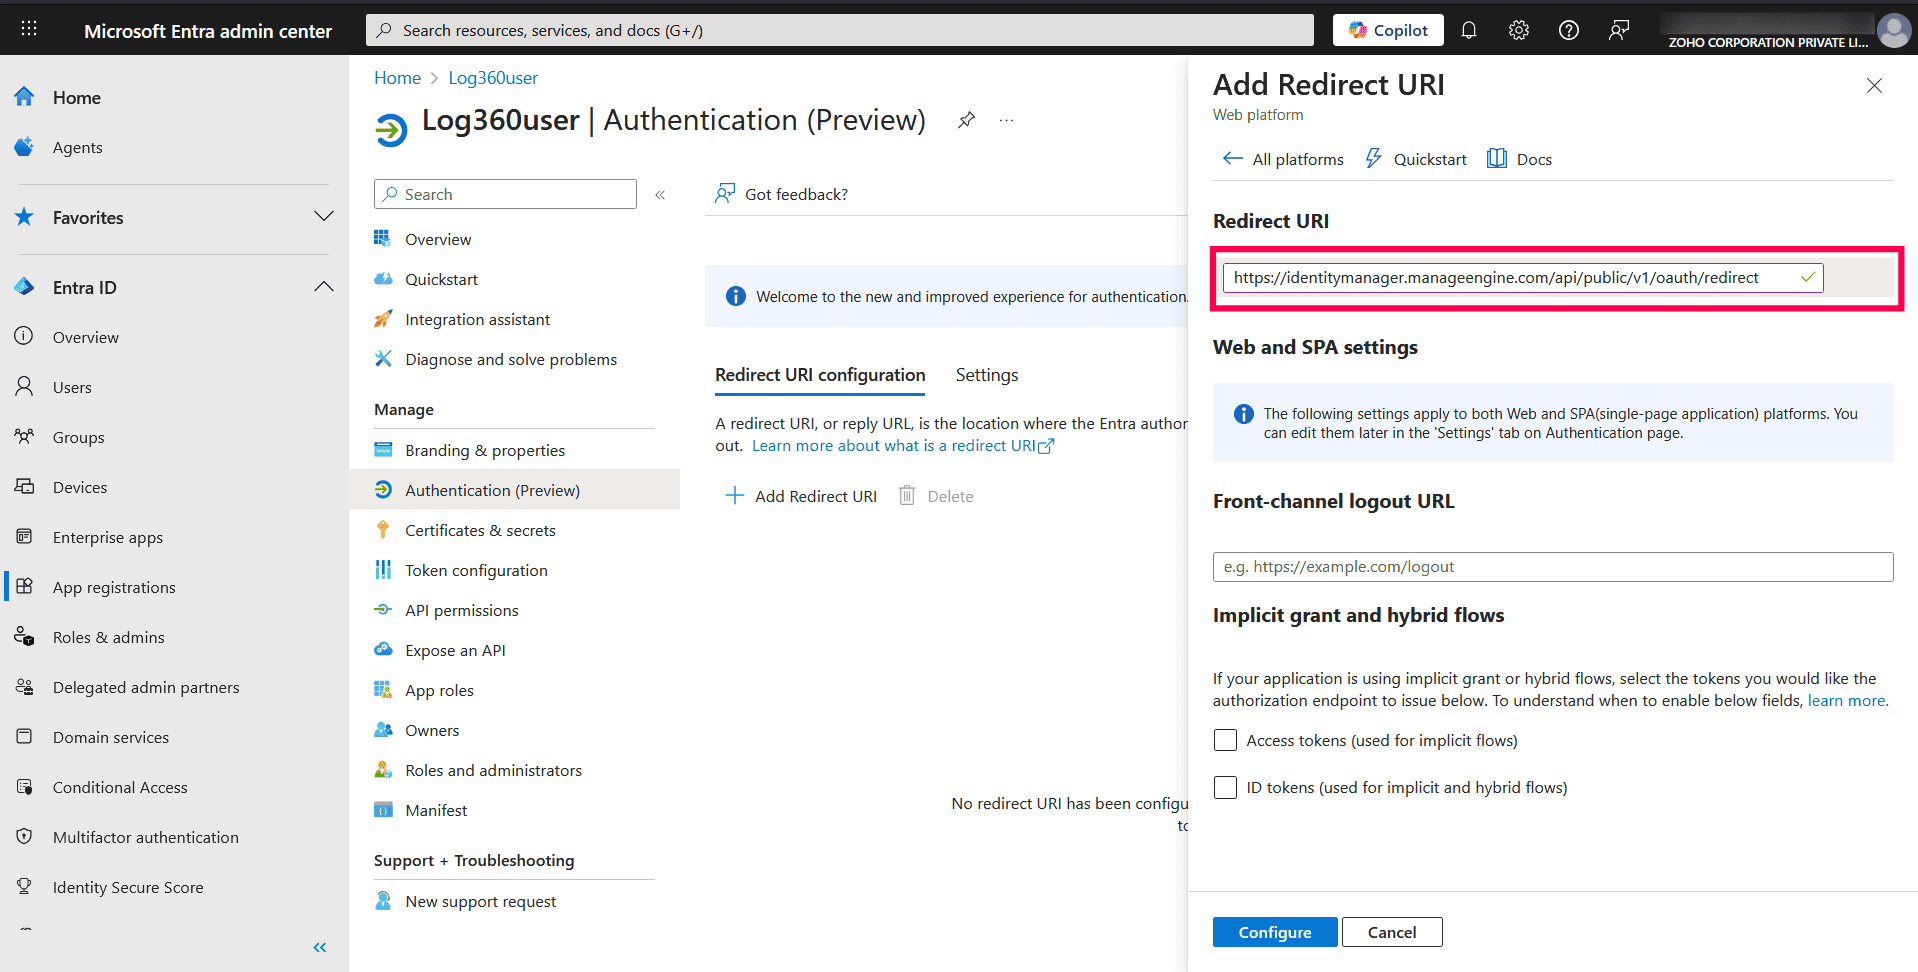
Figure 14: Entering redirect URI - Leave the Logout URL and Implicit grant options blank.
- Click Configure.
Add API permissions
NOTE If you want to modify the permissions manually, skip this step and follow the instructions in this section.
- From the left pane, select Manifest.
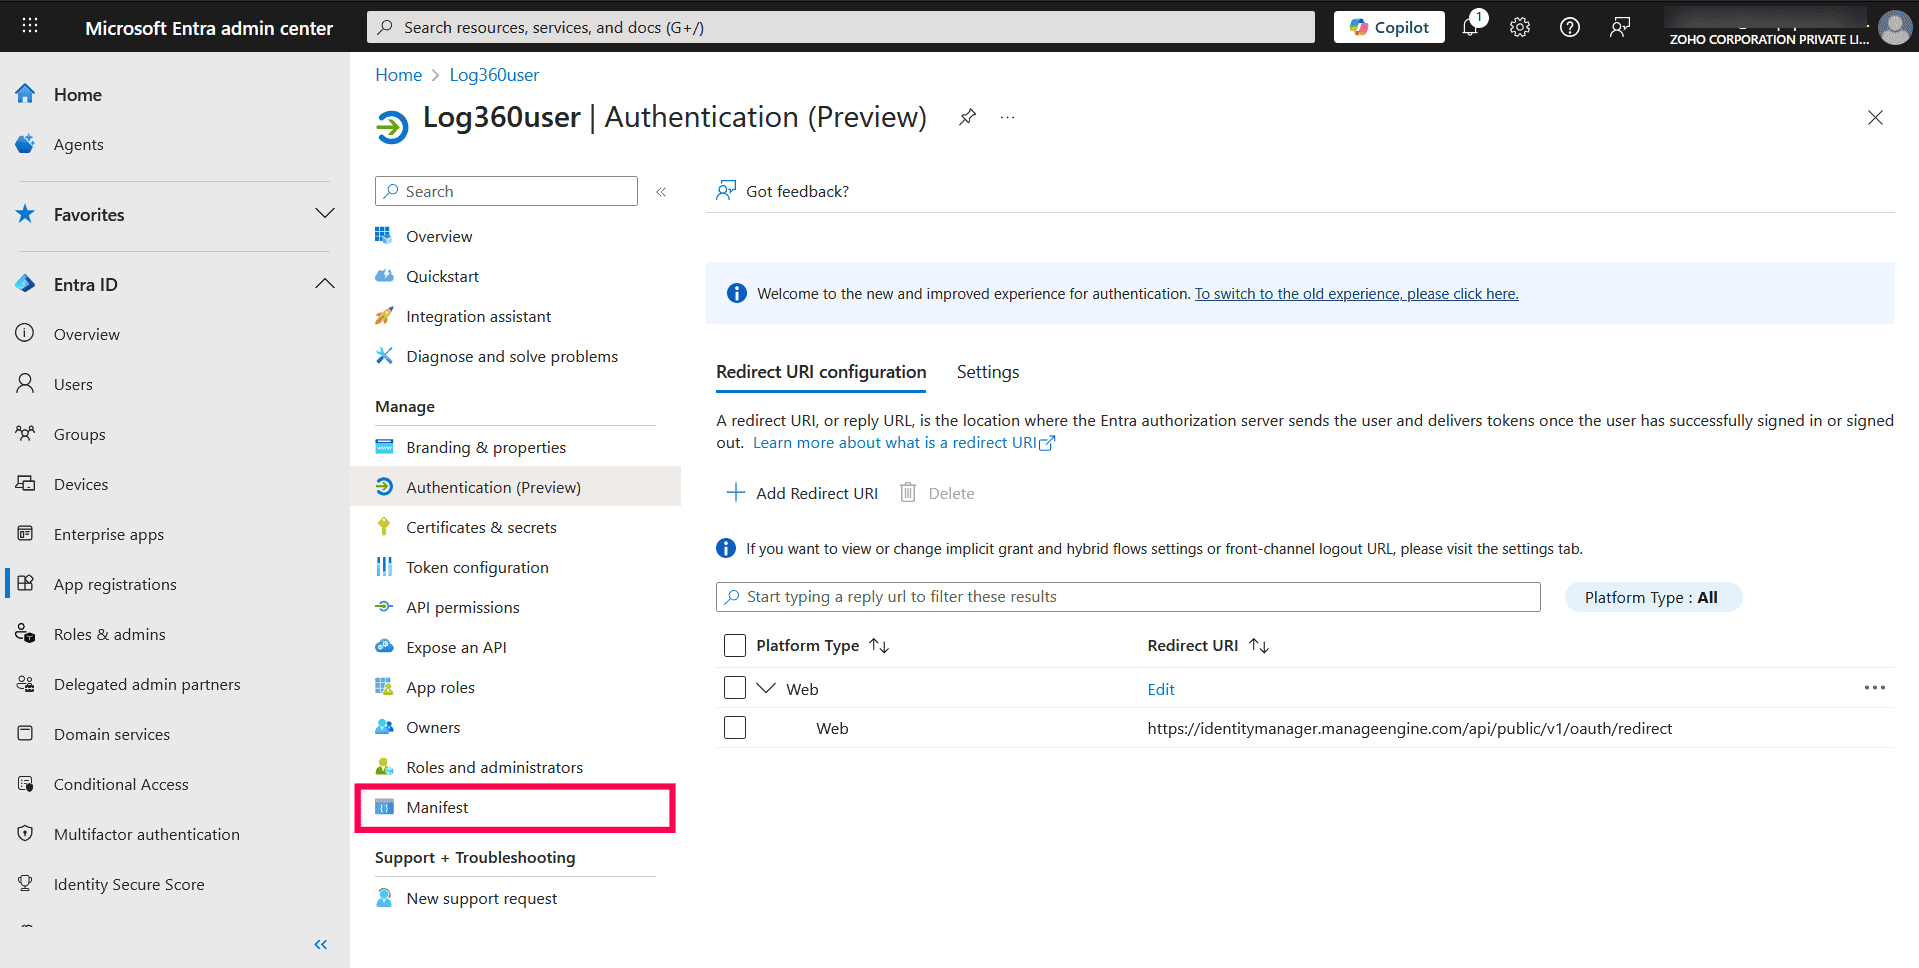
Figure 15: Adding API permissions - Locate the requiredResourceAccess array in the JSON code.
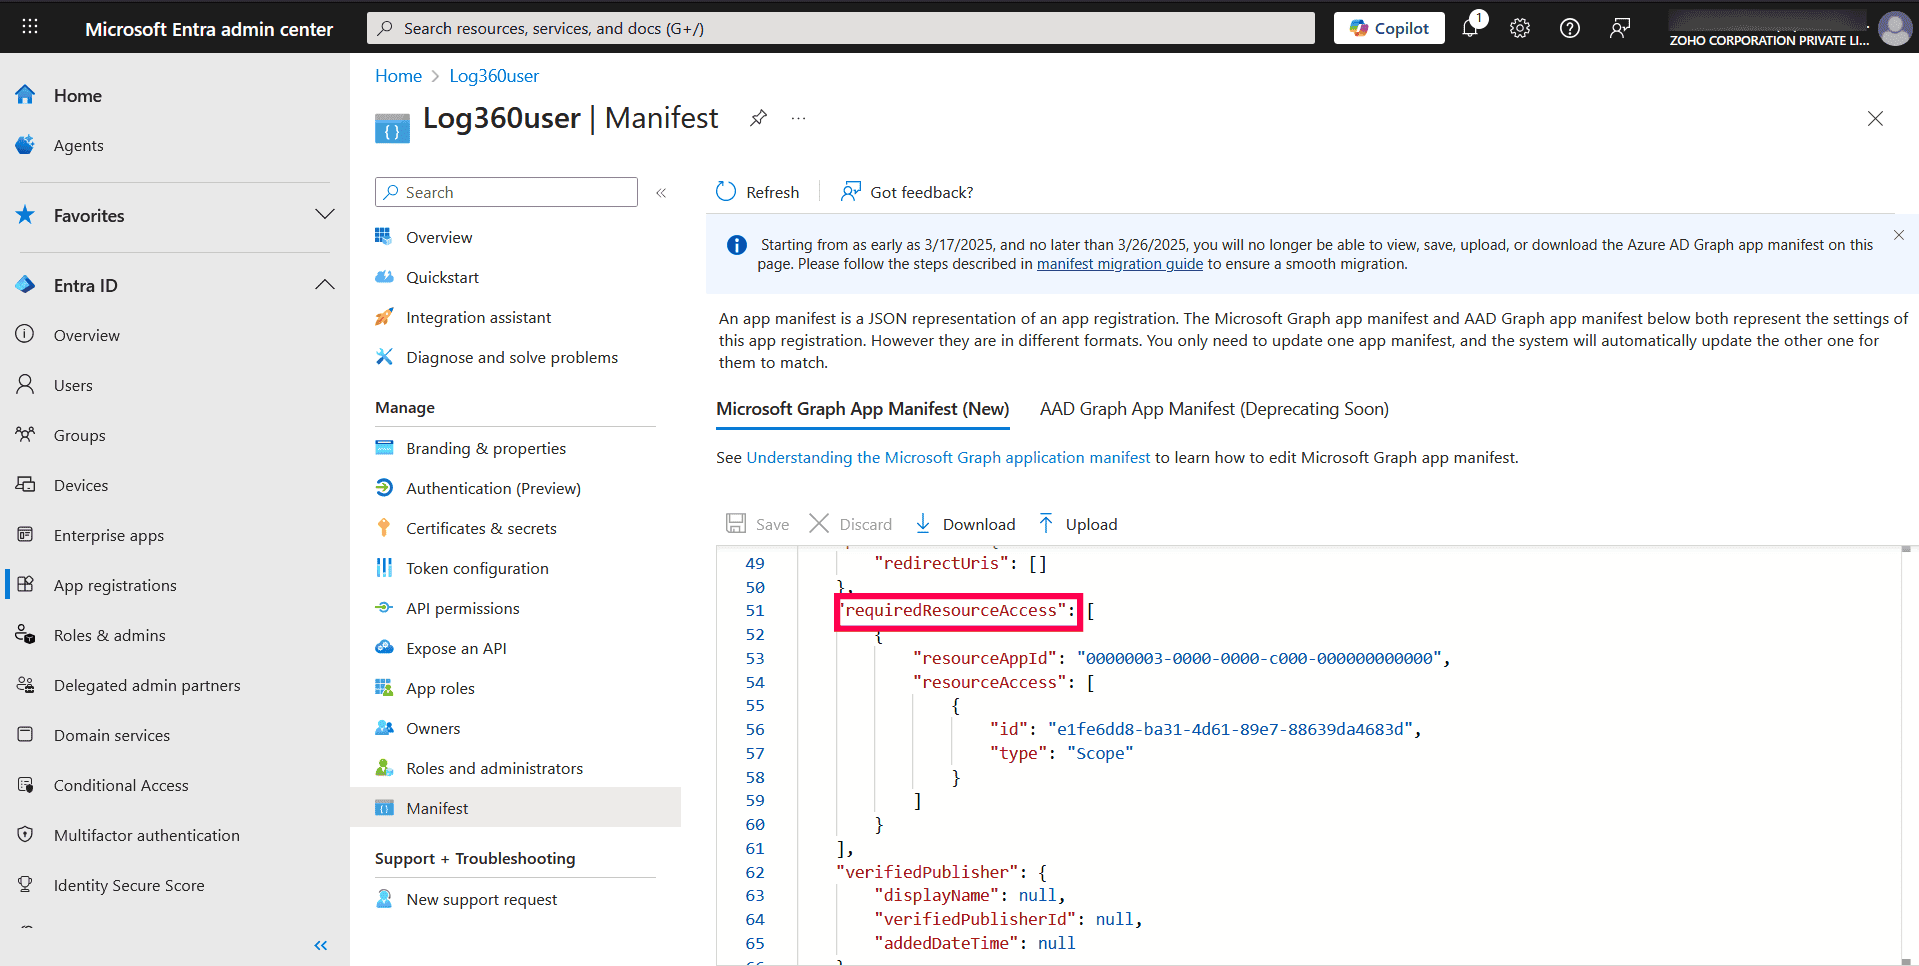
Figure 16: Locating requiredResourceAccess array - Copy the content from this file and paste the content into the highlighted section as shown in the image below.
NOTE The file contains all the required permissions:
- Microsoft Graph permissions:
- Directory.Read.All
- AuditLog.Read.All
- Domain.Read.All
- IdentityRiskEvent.Read.All
- Policy.Read.All
- Office 365 Exchange Online permissions:
- Exchange.ManageAsApp
- Office 365 Management APIs permissions:
- ActivityFeed.ReadDlp
- ActivityFeed.Read
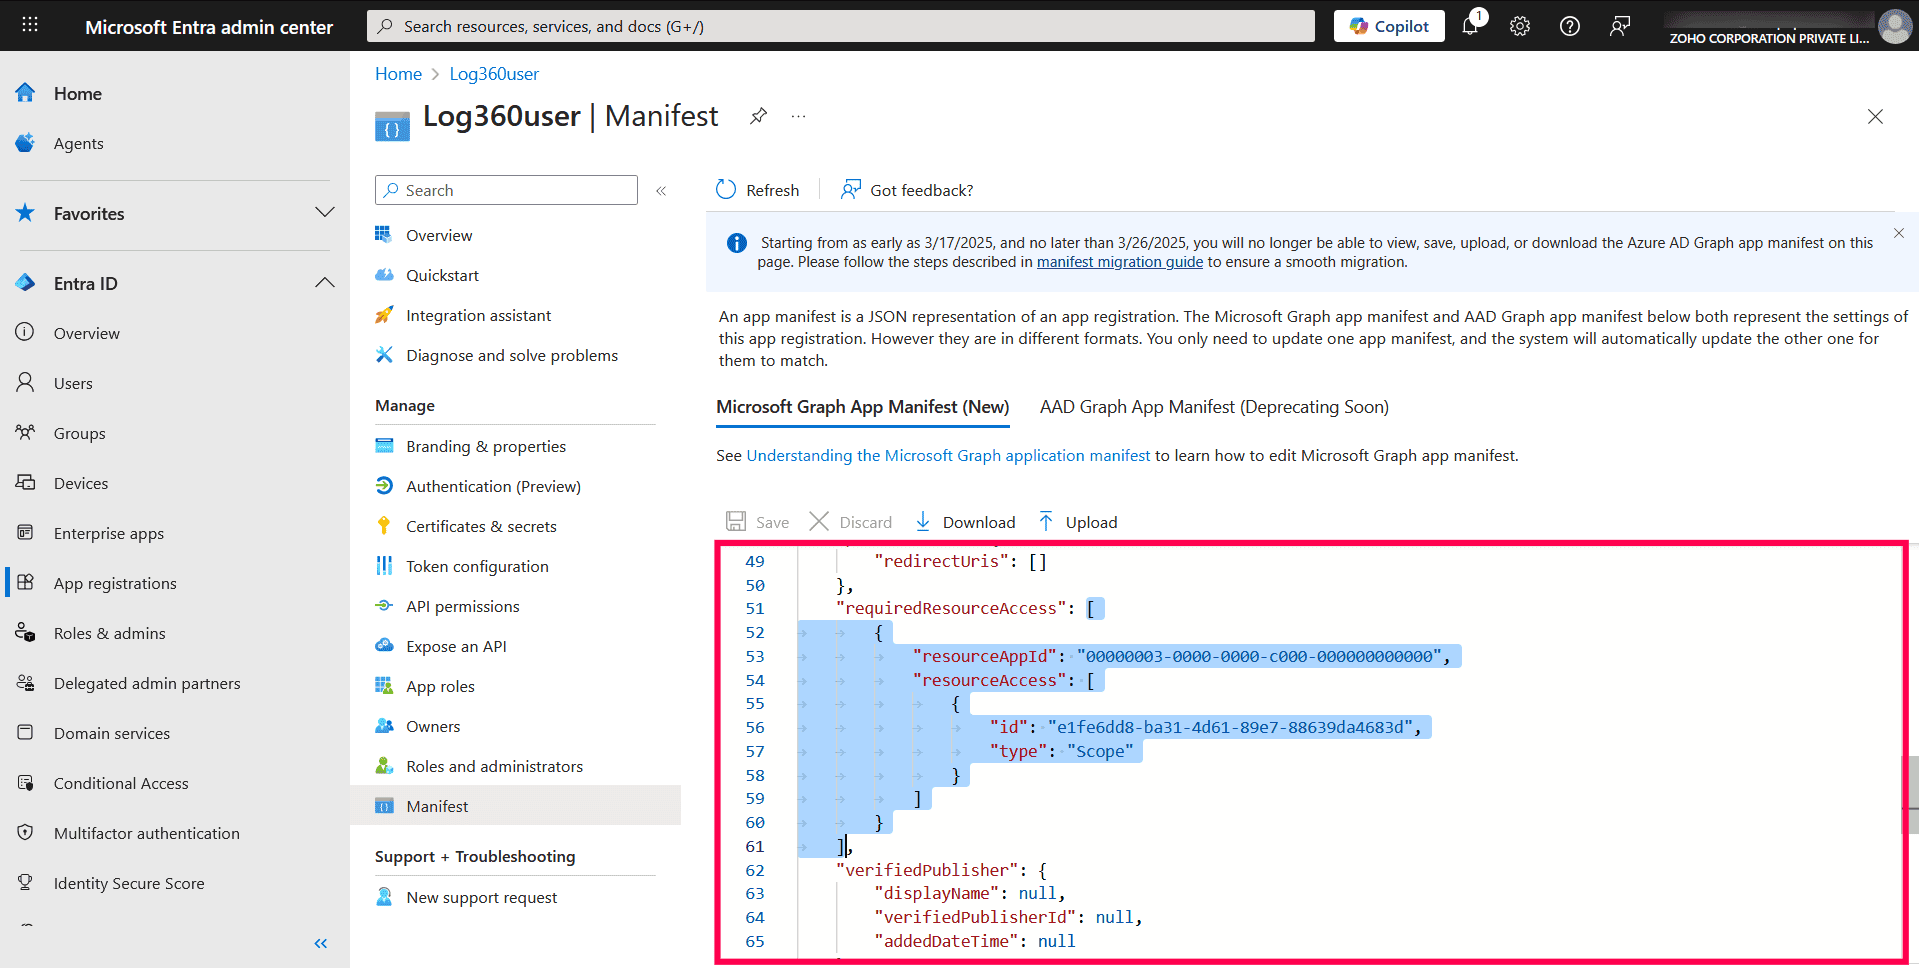
Figure 17: Adding required API permissions - Microsoft Graph permissions:
- Copy the content from the opening square bracket [ to the closing square bracket ], and replace the existing content with it. Ensure all punctuation is retained.
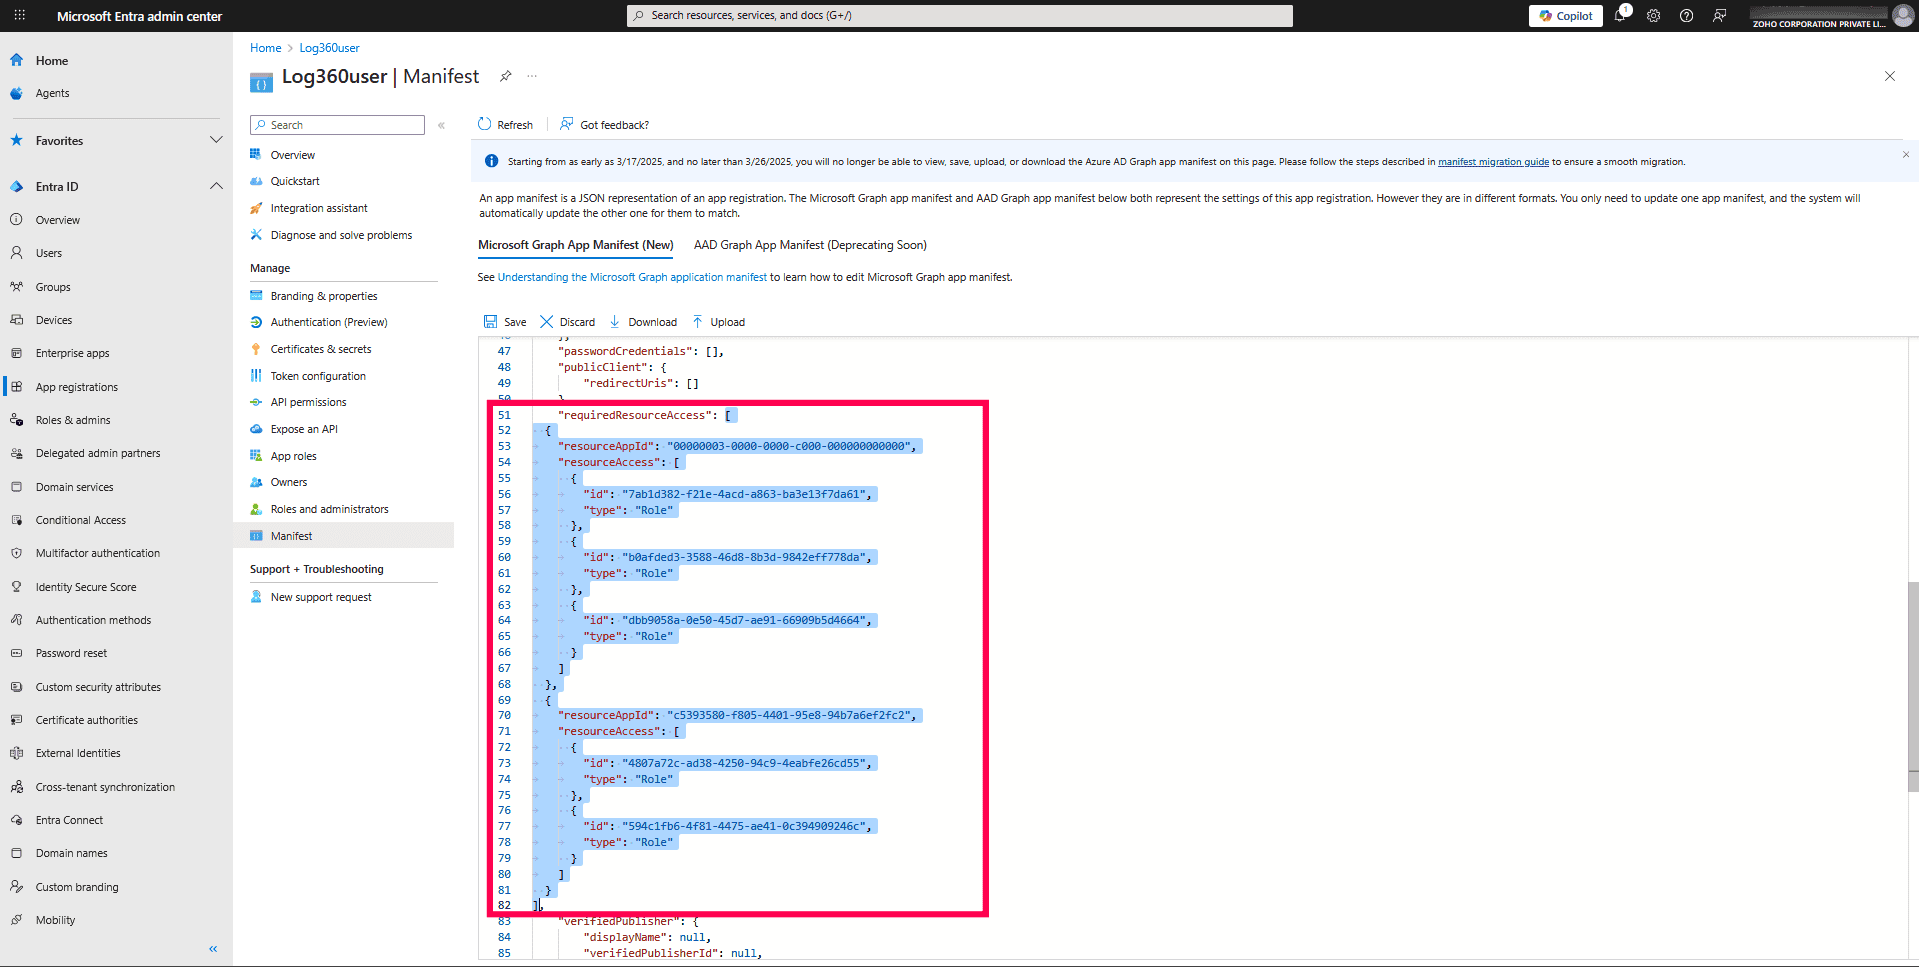
Figure 18: Adding required API permissions - Click Save to add the API permissions.
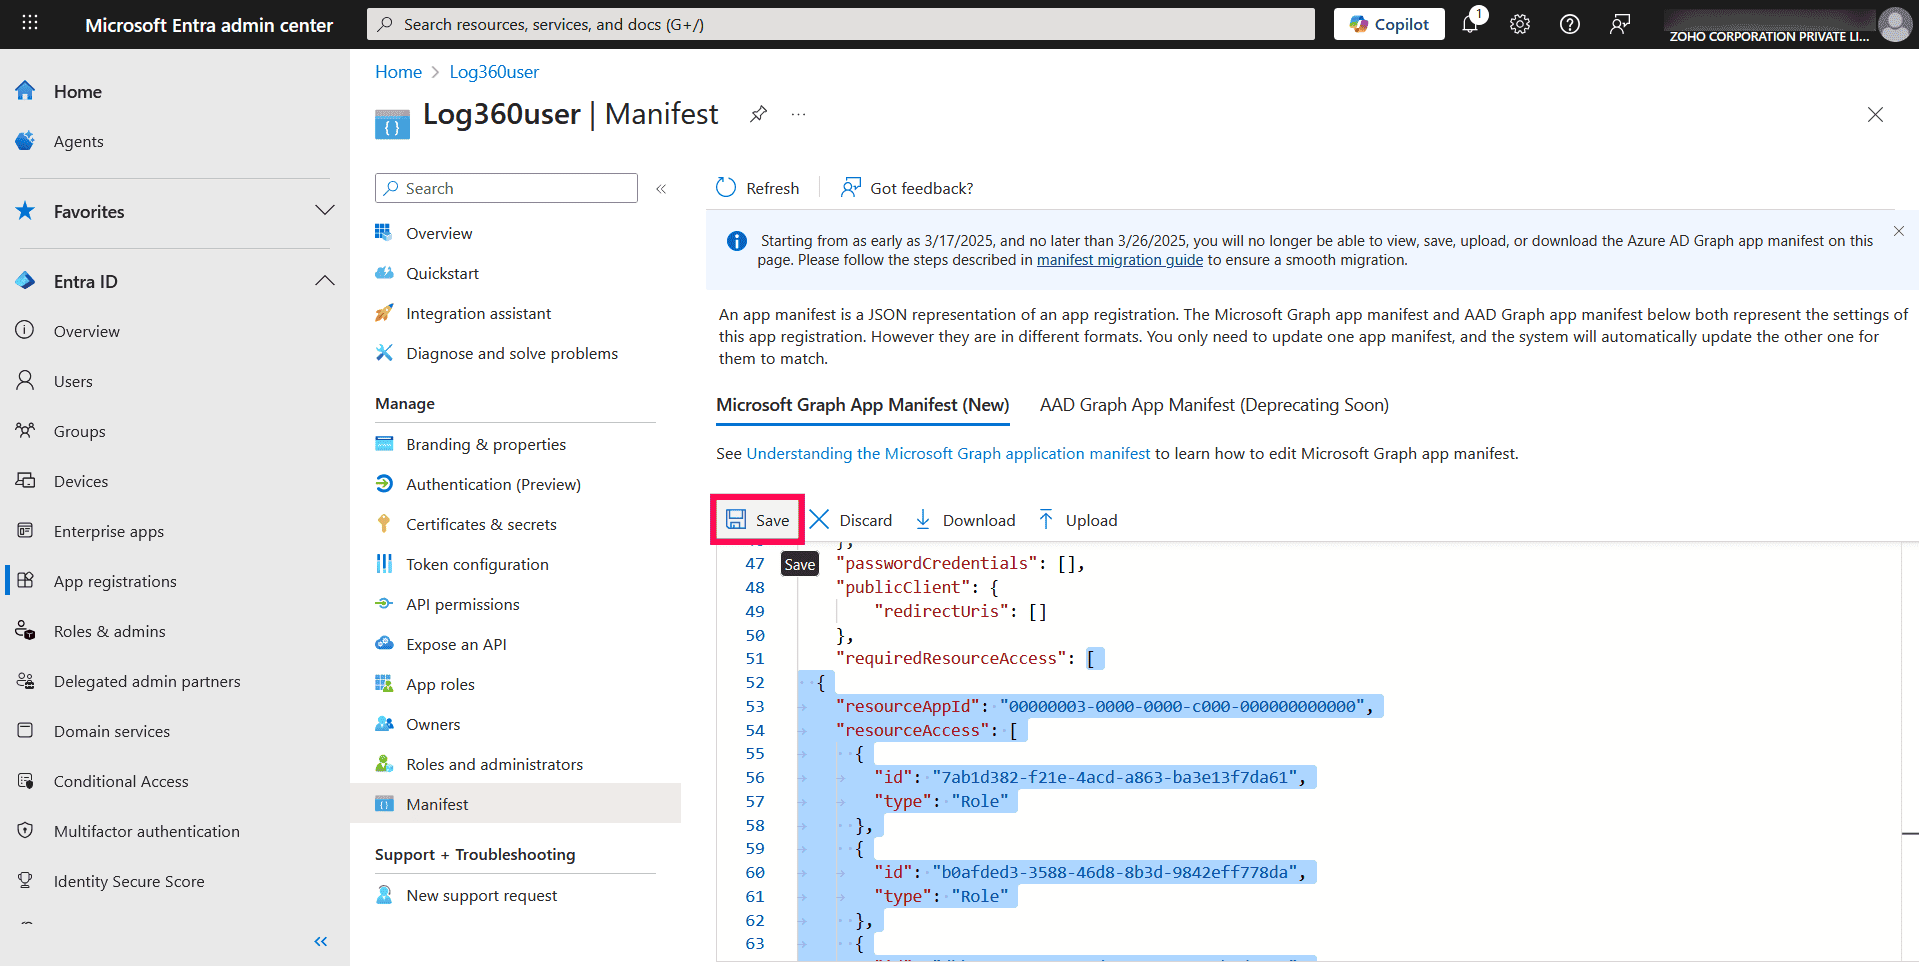
Figure 19: Saving the added API permissions
Grant admin consent
- In the left pane, select API permissions.
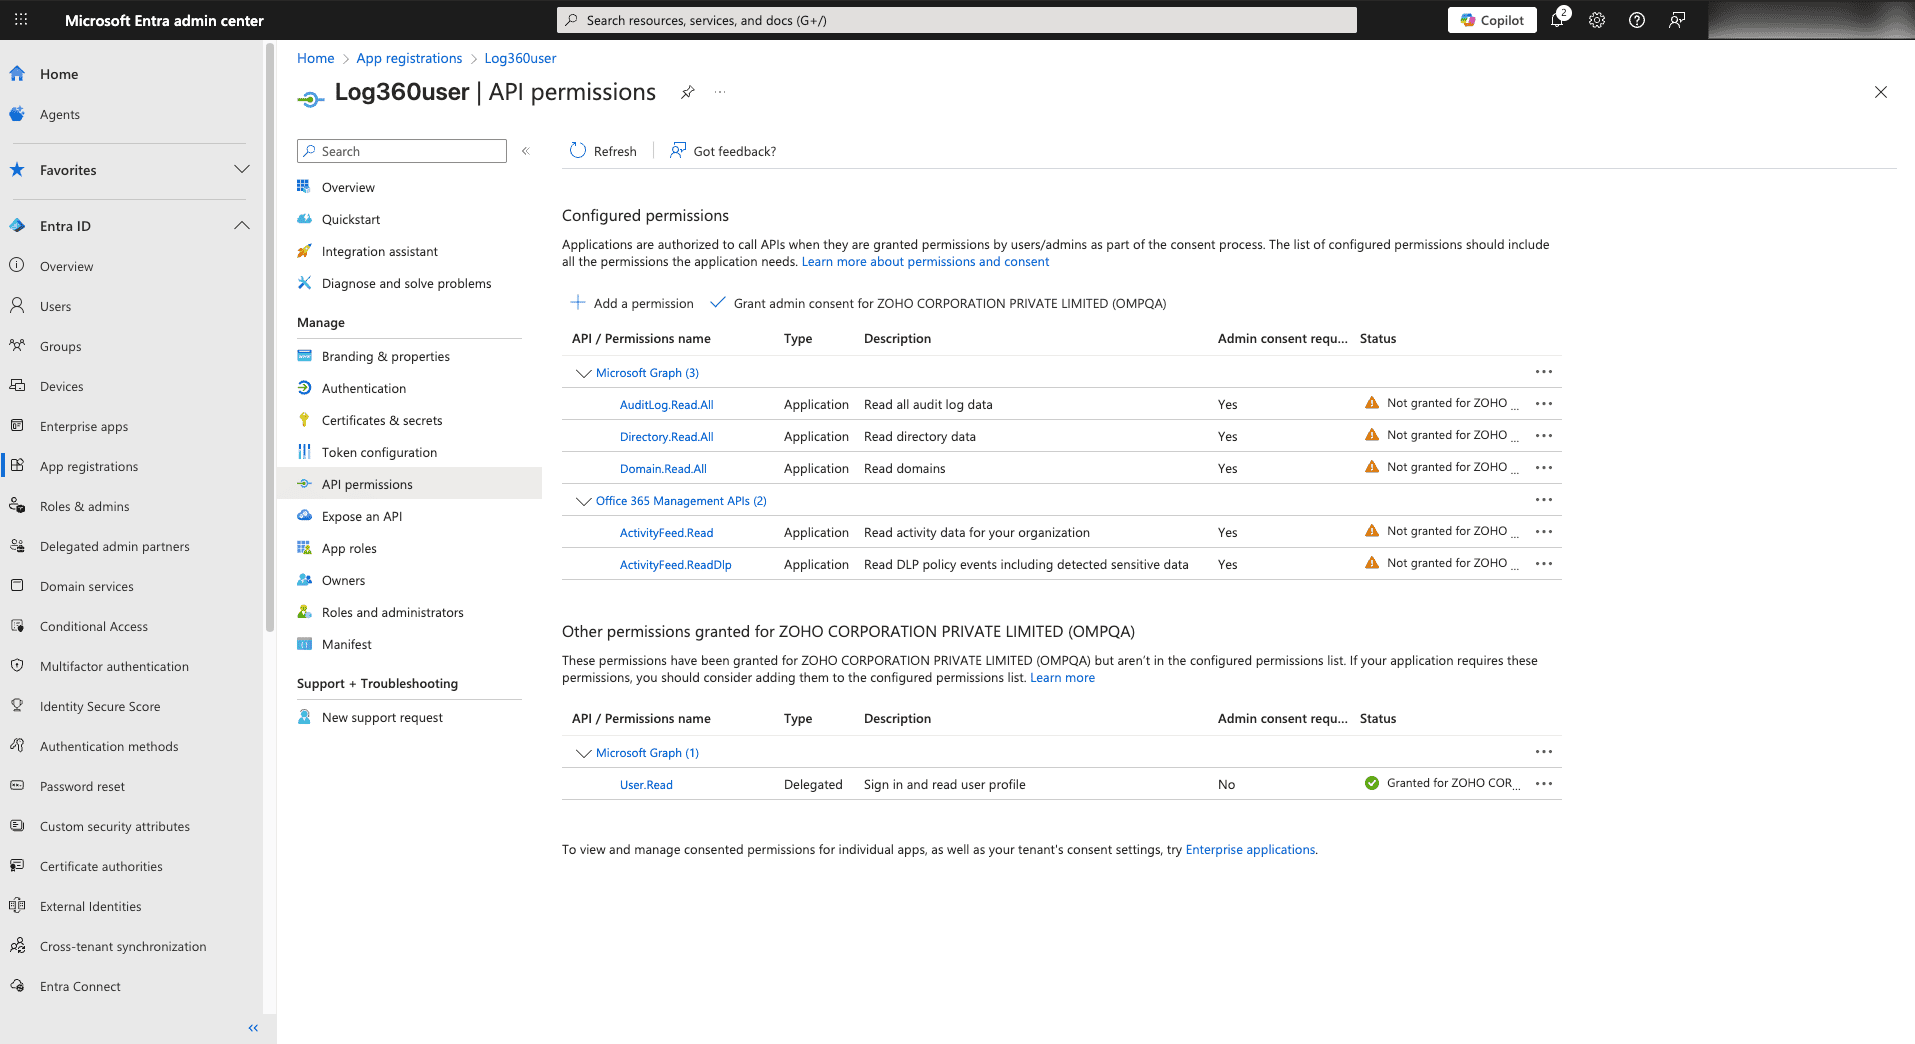
Figure 20: Navigating to API permissions - Under Configured permissions, click Grant admin consent.

Figure 21: Granting admin consent - Confirm by clicking Yes in the pop-up.
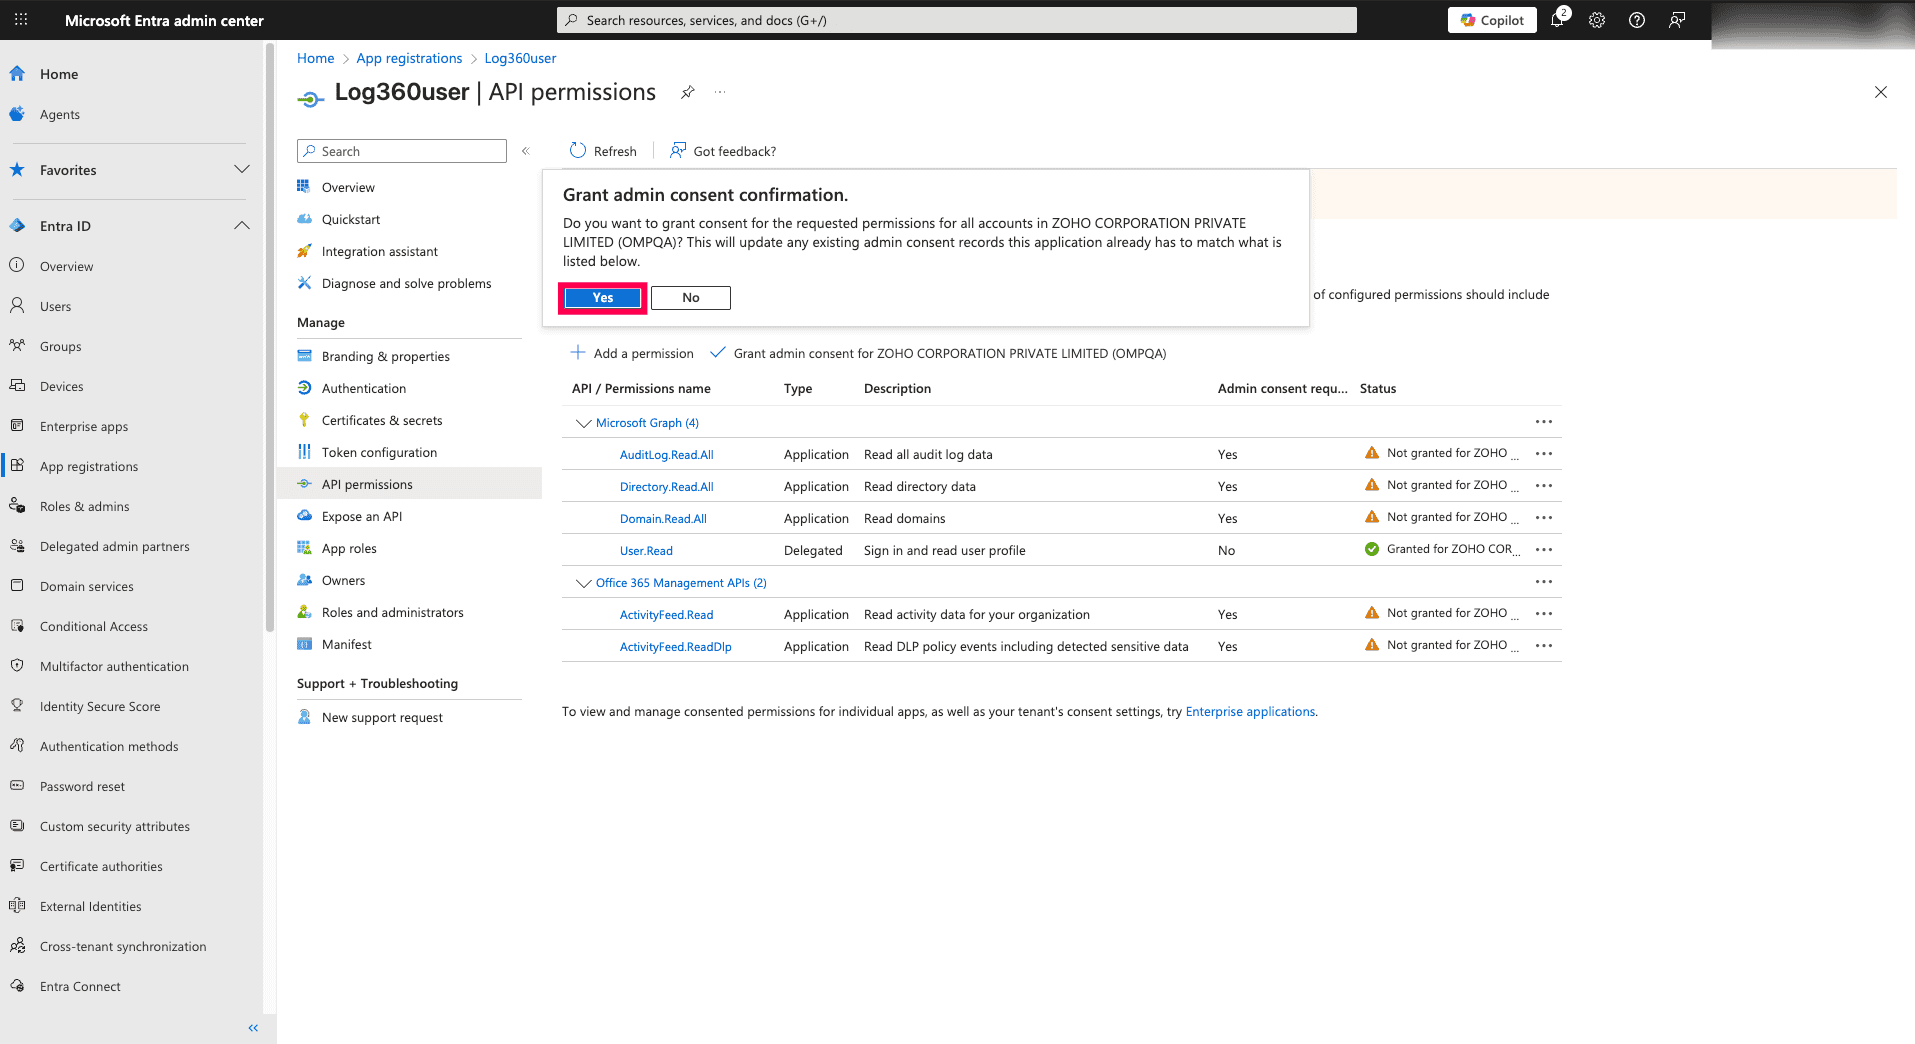
Figure 22: Granting admin consent
Generate client secret
- From the left pane, go to Certificates & secrets.
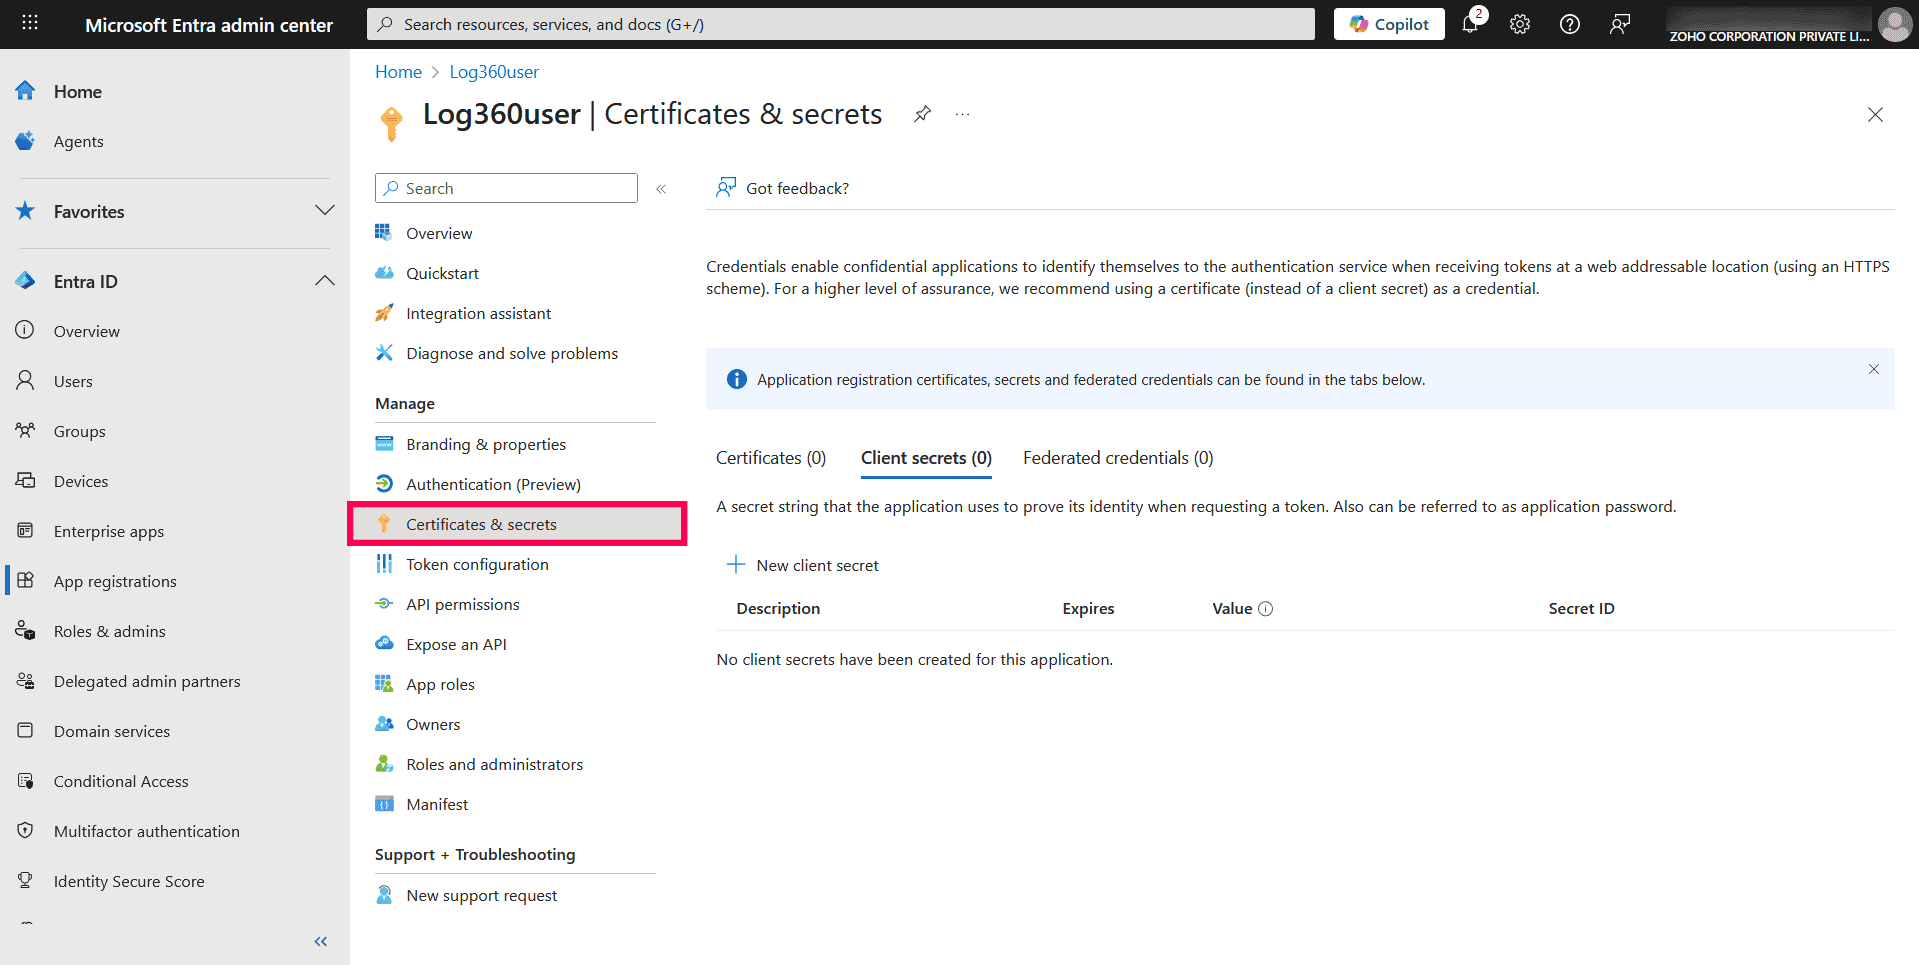
Figure 23: Accessing certificates and secrets - Under Client secrets, click New client secret.
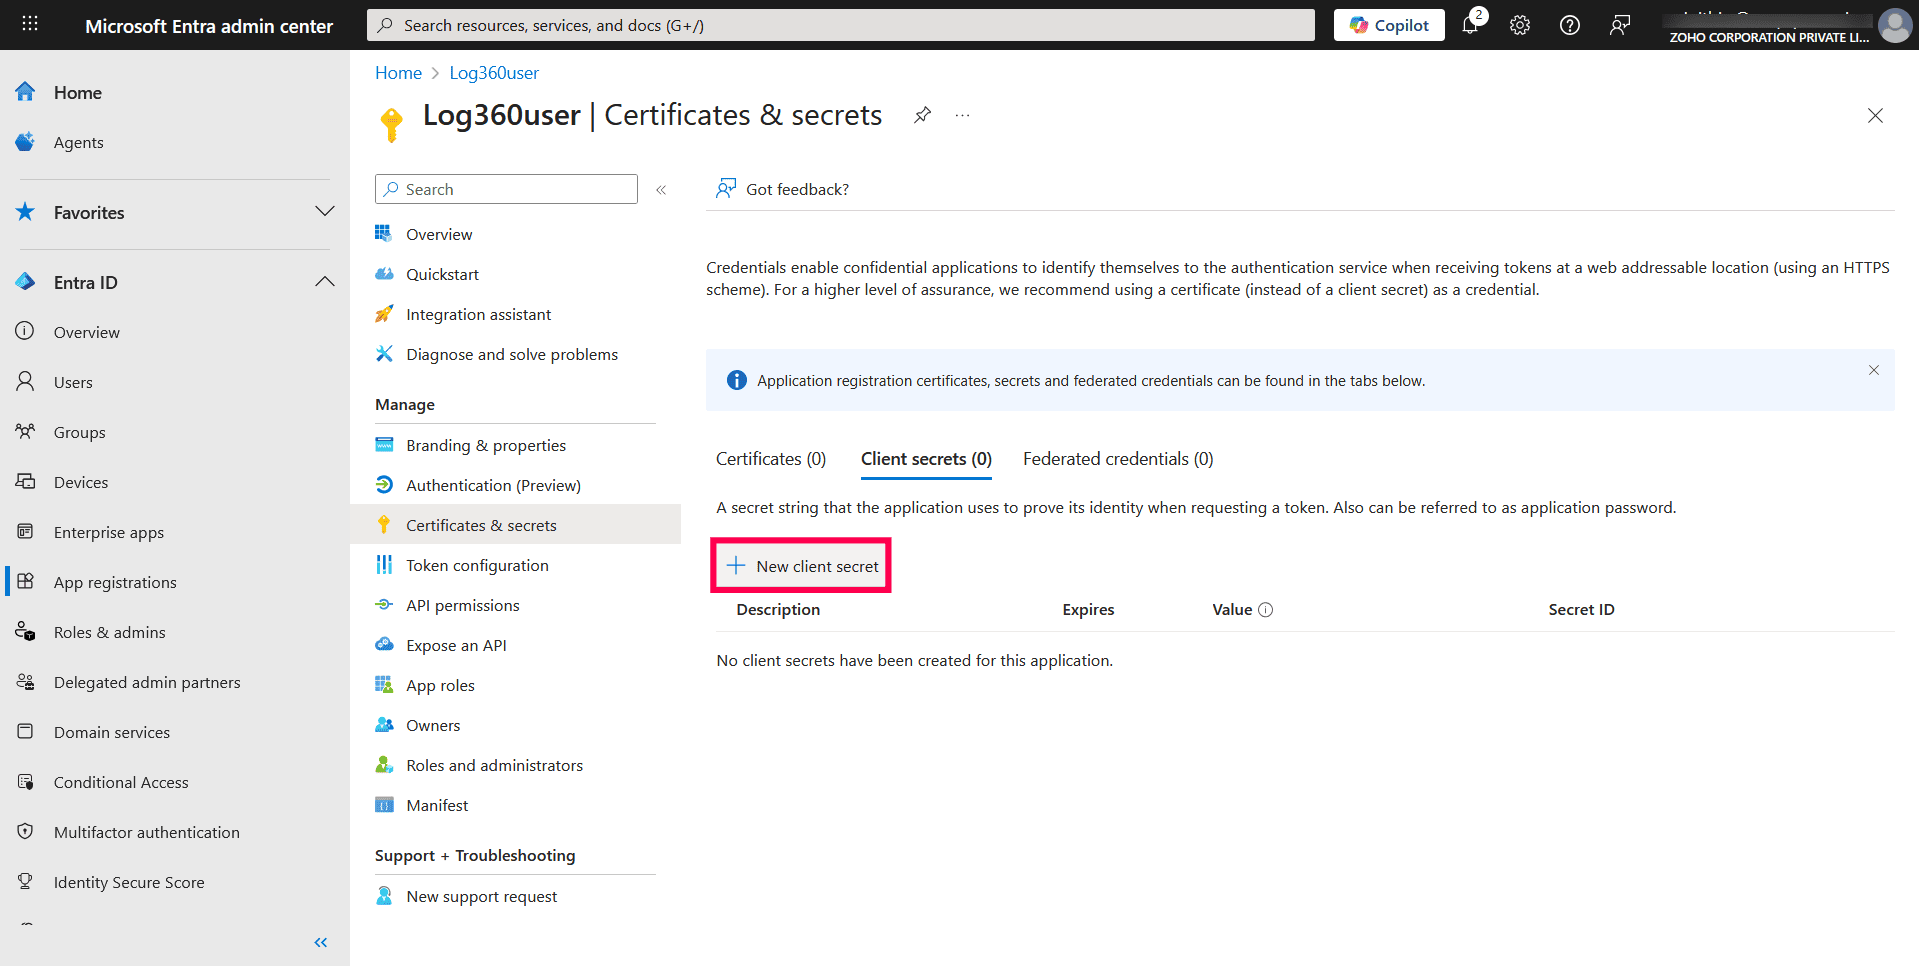
Figure 24: Creating a new client secret - In the pop-up, enter a description to identify the app.
- Select an expiry duration from the Expires drop-down.
- Click Add.
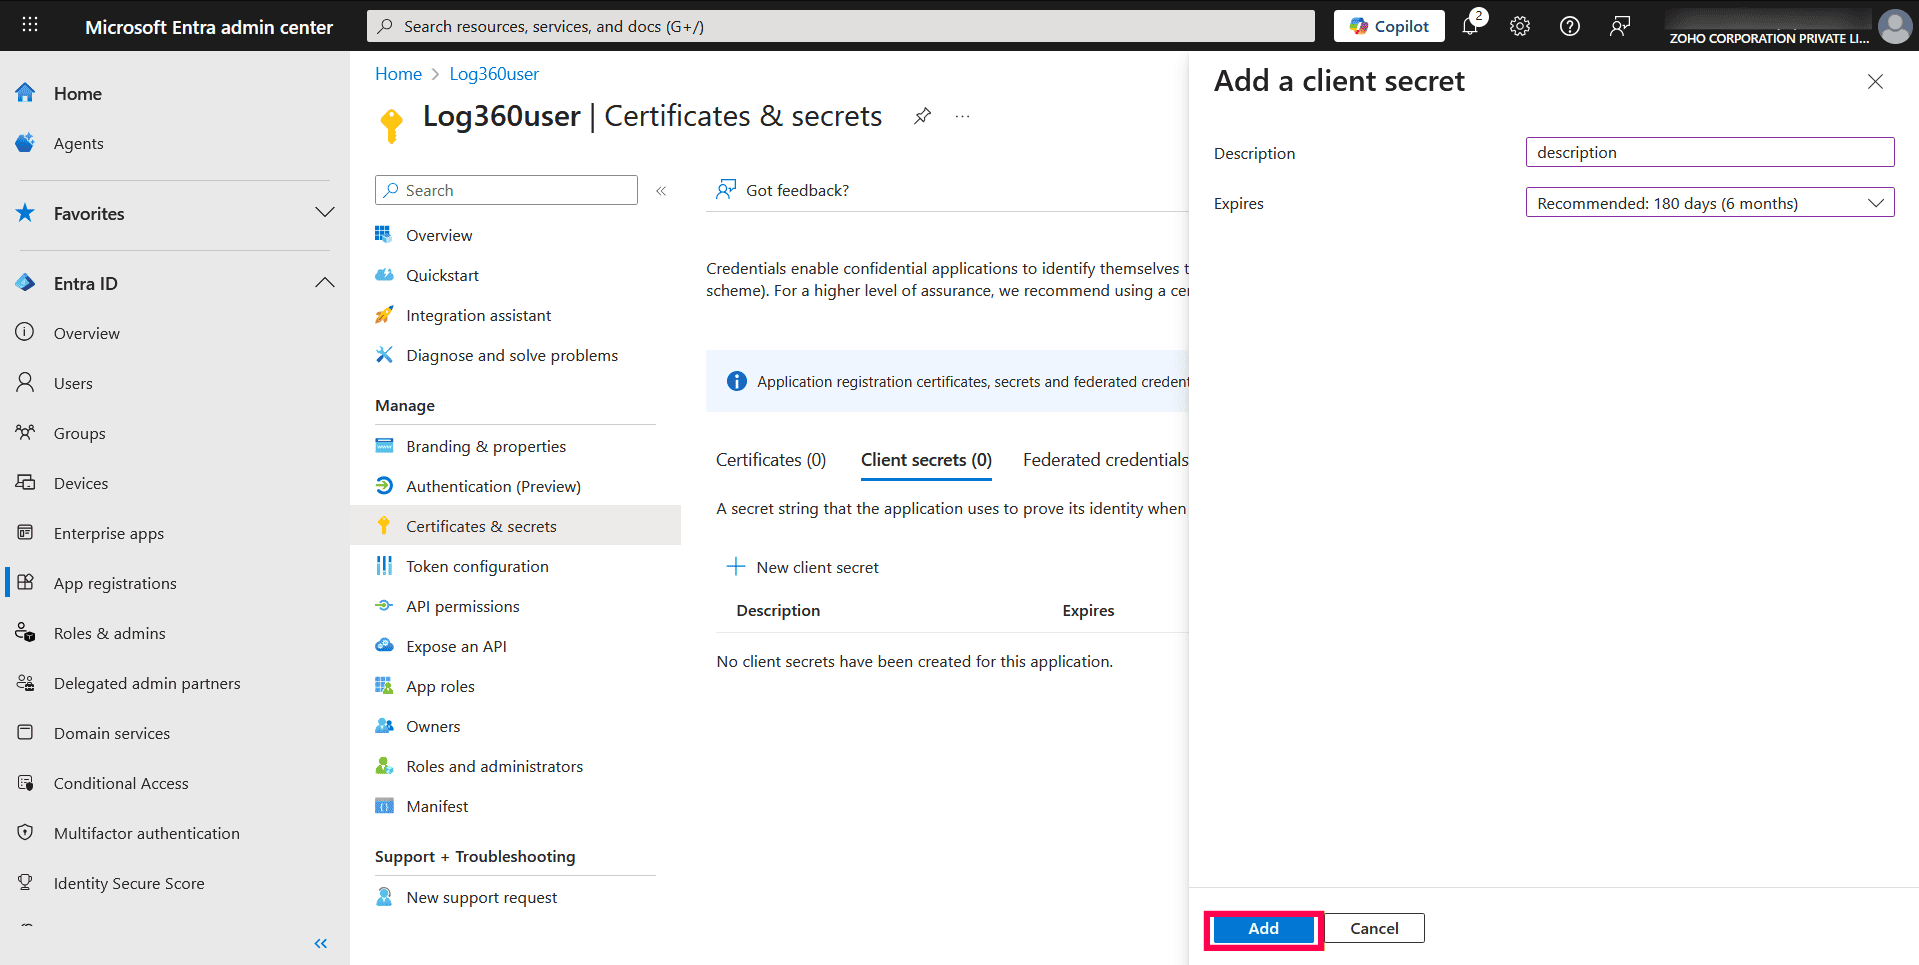
Figure 25: Adding a client secret - Copy the string under Value and store it securely.
NOTE You will need the Application Secret to complete the tenant configuration in the product console.
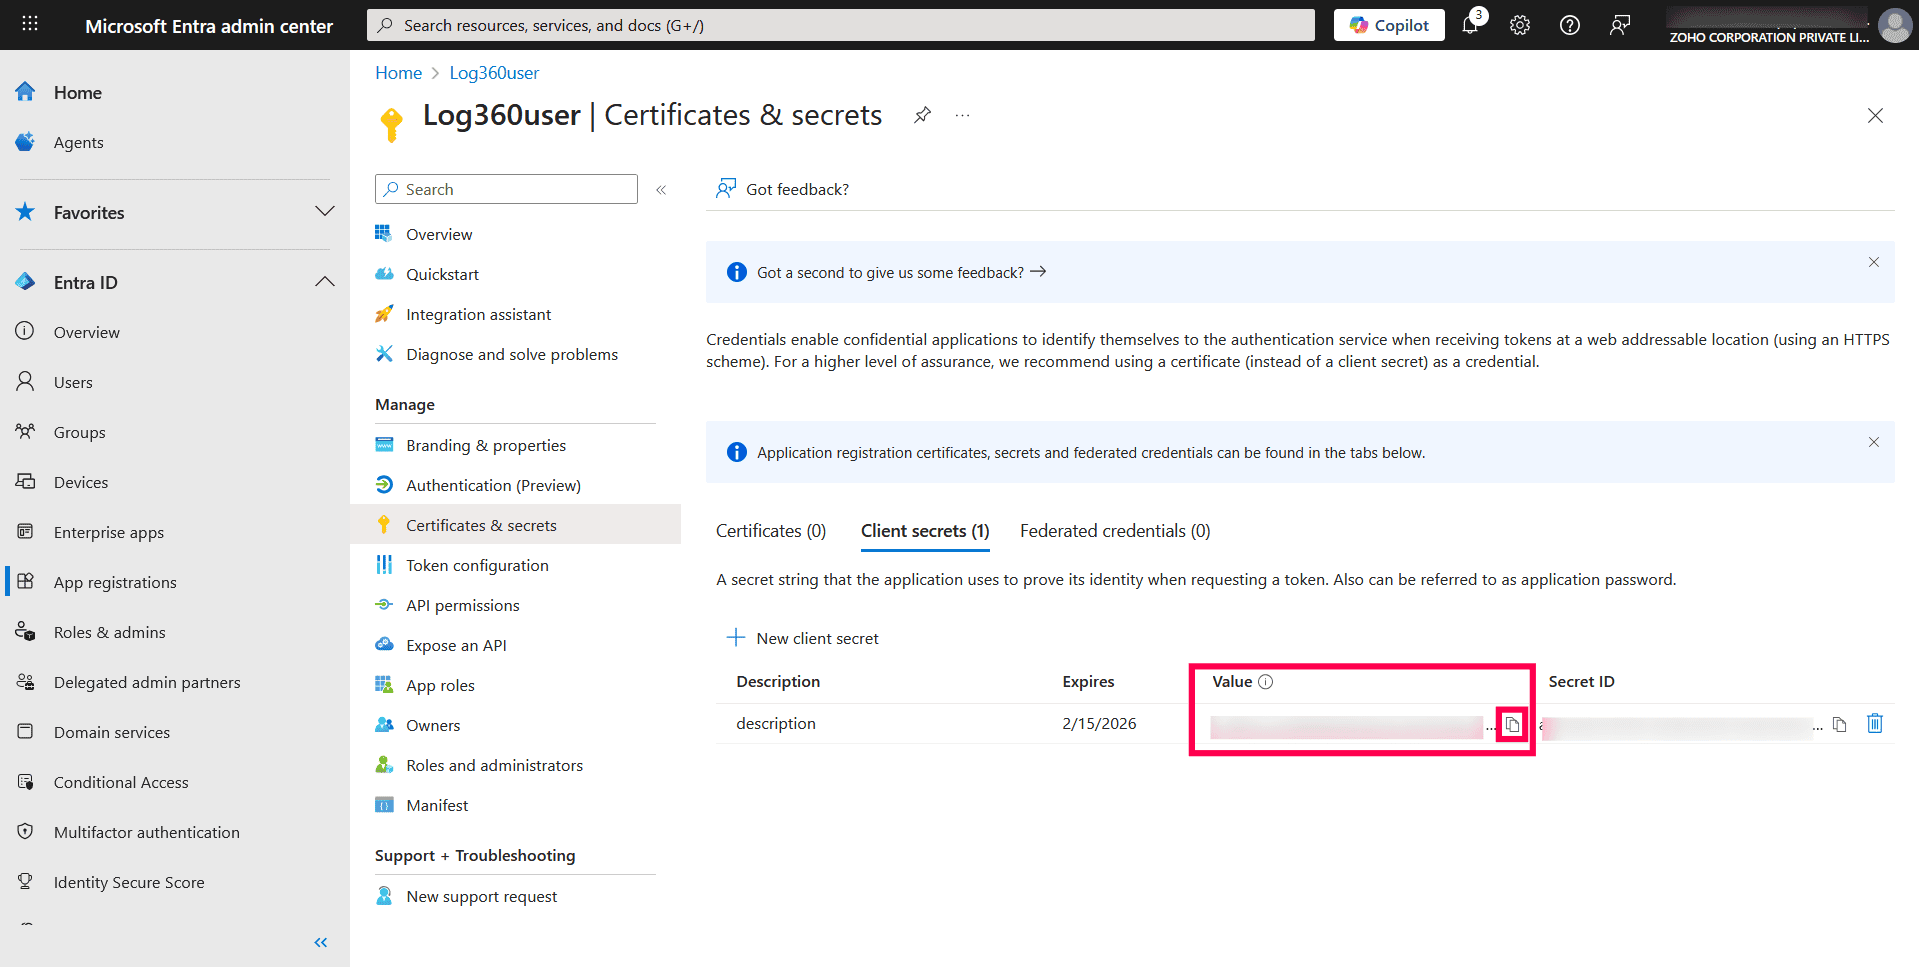
Figure 26: Copying the Application Secret value
Collect application details
- Go to the Overview section of the registered application.
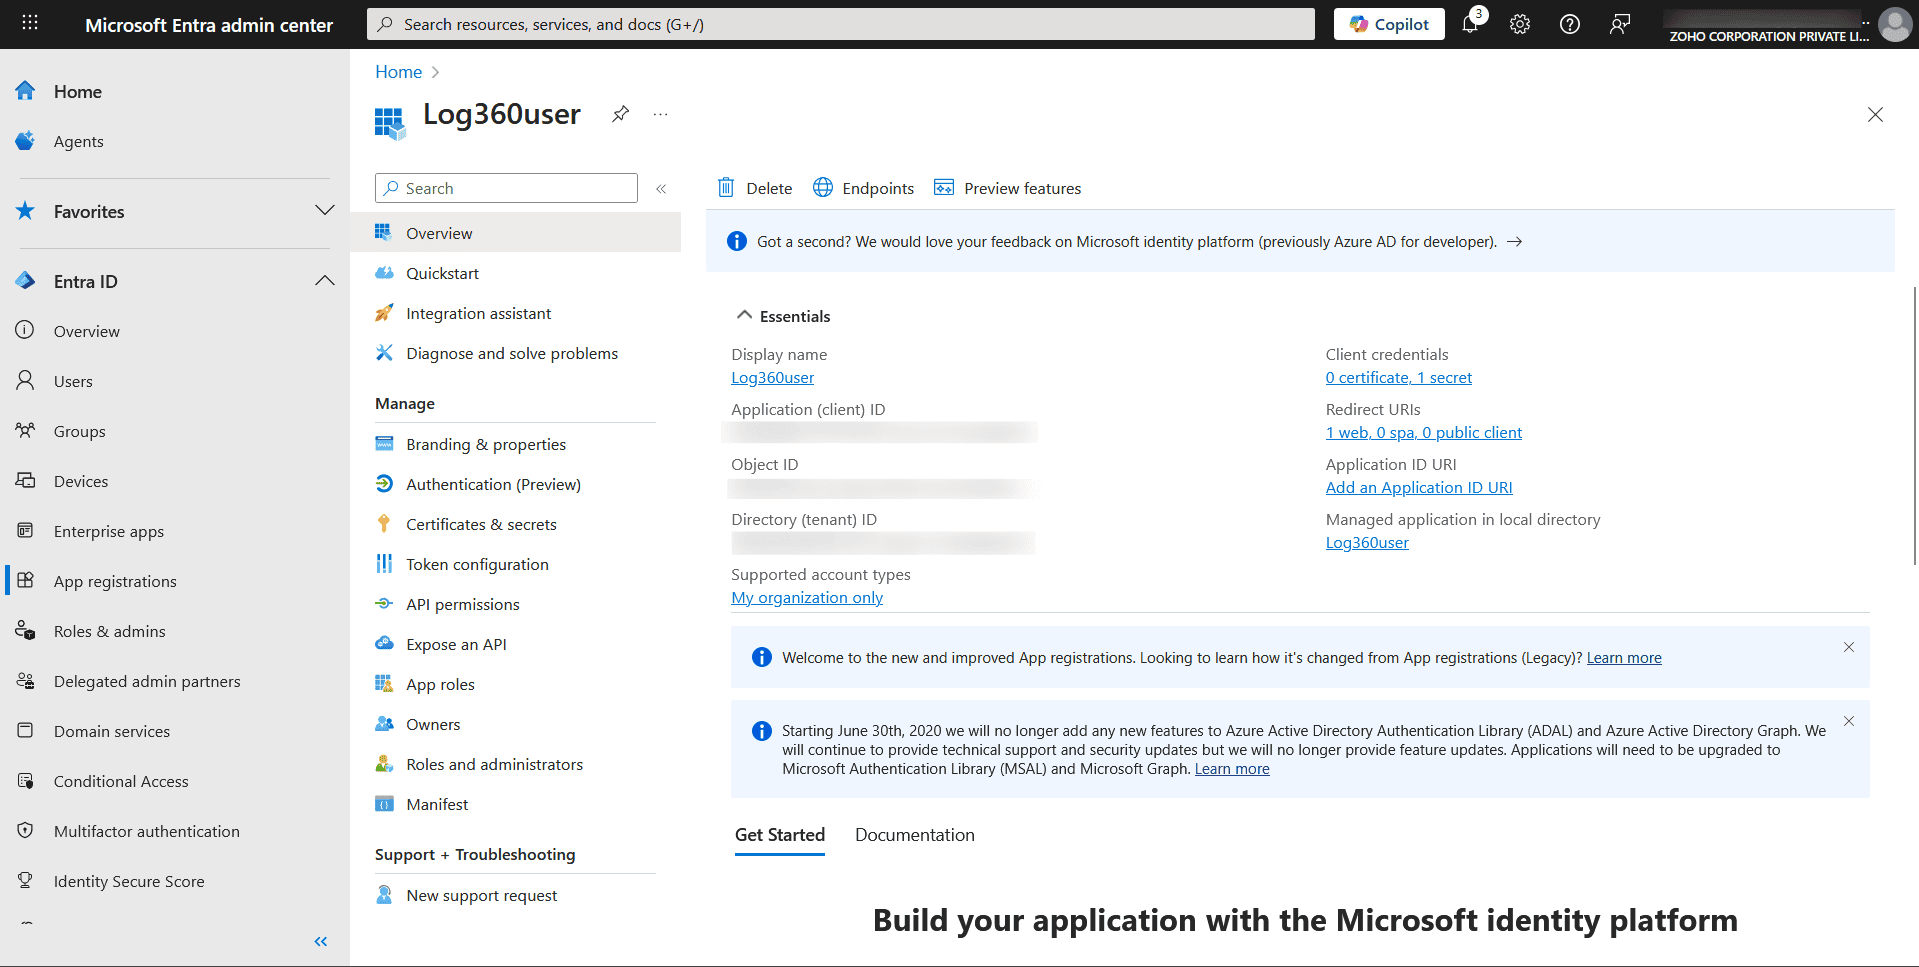
Figure 27: Accessing Overview - Copy and save the Application (client) ID.

Figure 28: Copying the Application (client) ID - These values will be required to configure the Microsoft 365 tenant in the product console.
Manual tenant configuration
- In your product console, navigate to the Settings tab.
- Under Management, select Domain and Accounts.

Figure 29: Navigating to Domain and Accounts - Go to the Configure Cloud Accounts tab on the Domain and Accounts page and click Add Cloud Account in the top-right corner.
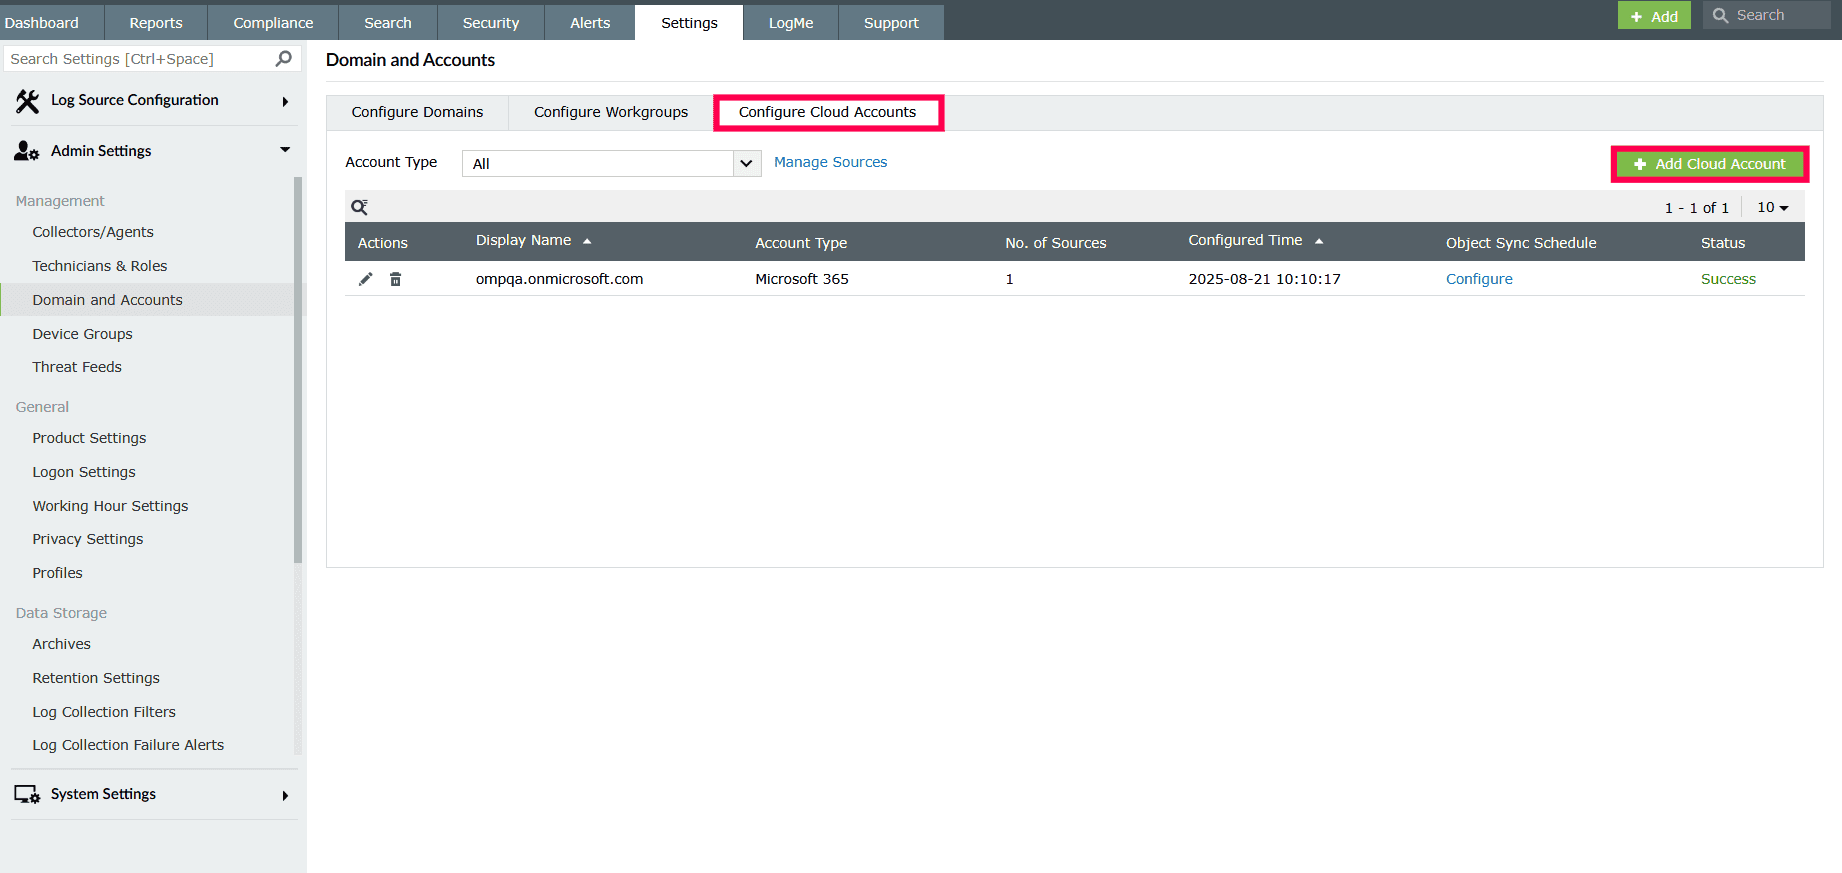
Figure 30: Adding a cloud account - From the Select Cloud Account drop-down, choose Microsoft 365.
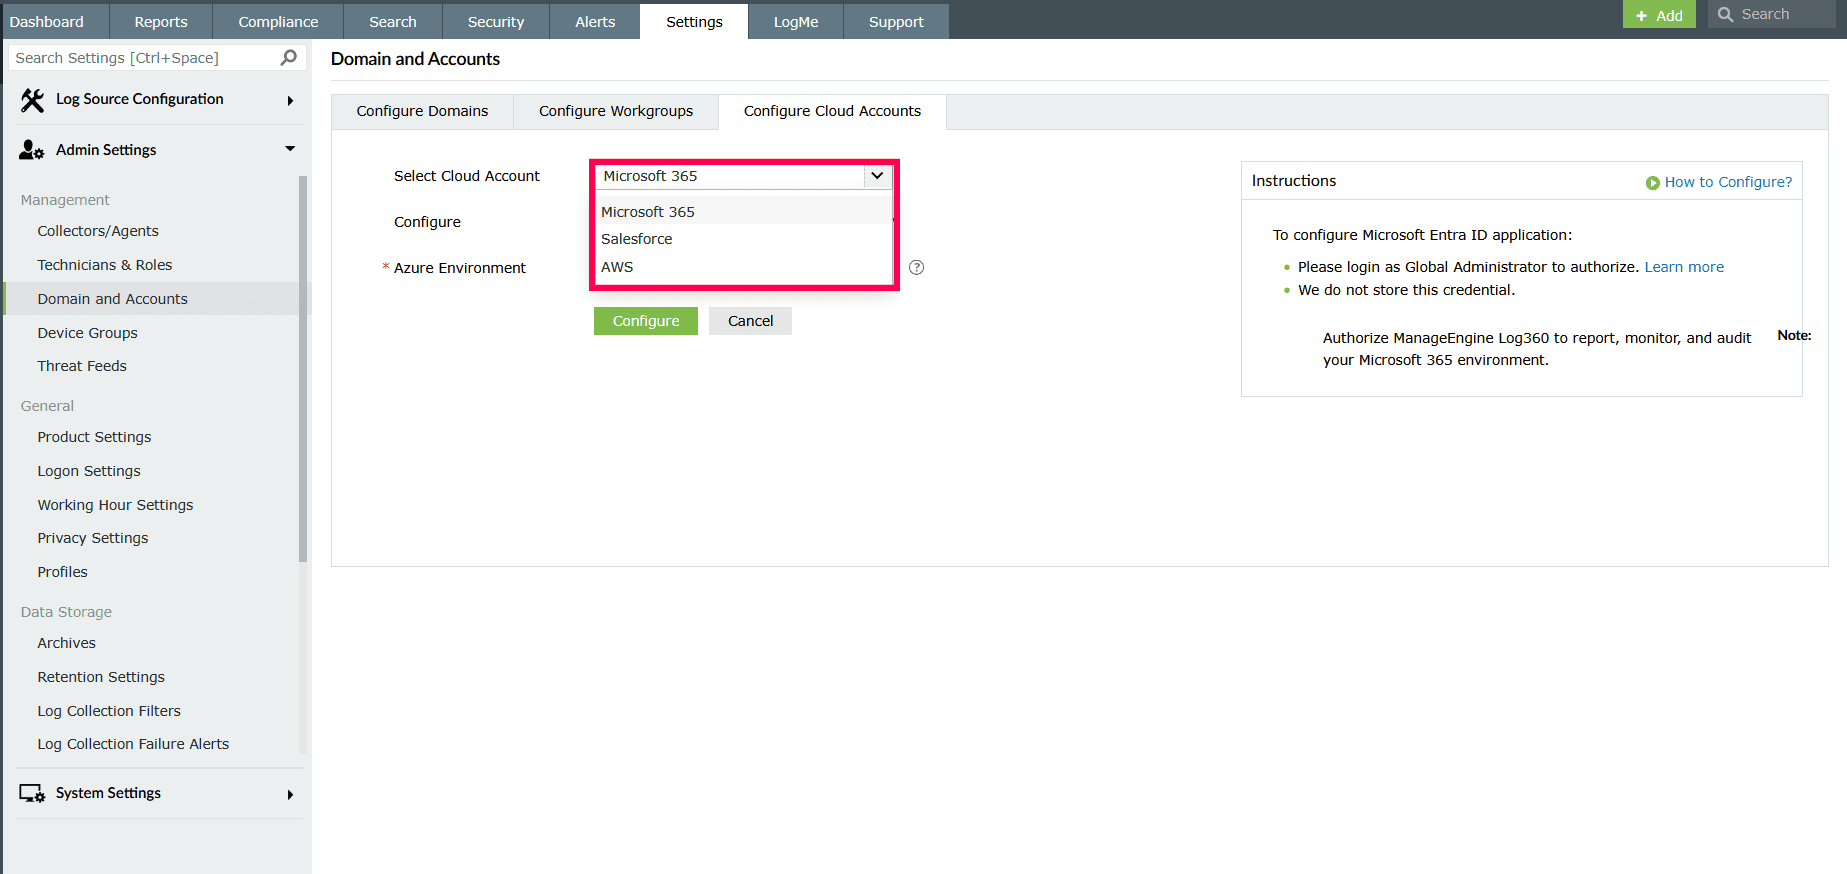
Figure 31: Selecting a cloud account - Select Manually beside the Configure options.
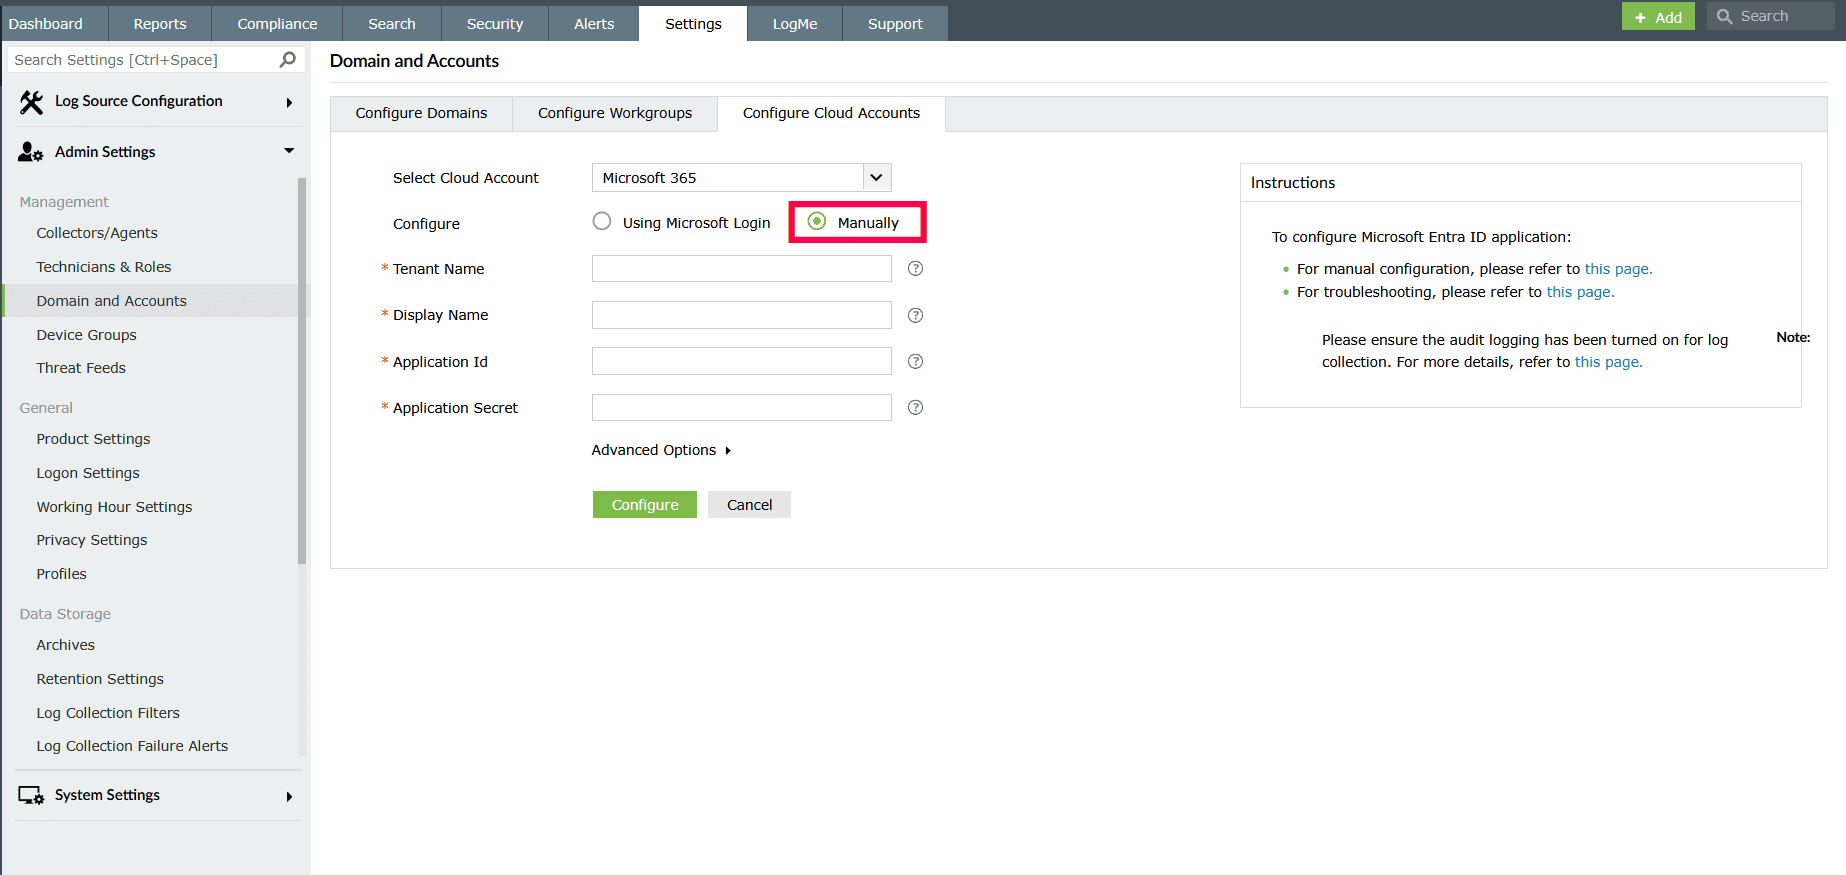
Figure 32: Selecting configure options - Fill in the following fields:
- Tenant Name
- Display Name
- Application ID
- Application Secret
NOTE Use the same Tenant Name as registered in the Entra portal, and enter the Application ID and Application Secret as obtained during registration. Display name can be a unique name representing the tenant, preferably the tenant name itself.
- Click Advanced Configuration and select the environment from the Azure Environment drop-down.
Note Choose the environment based on where your tenant is hosted.
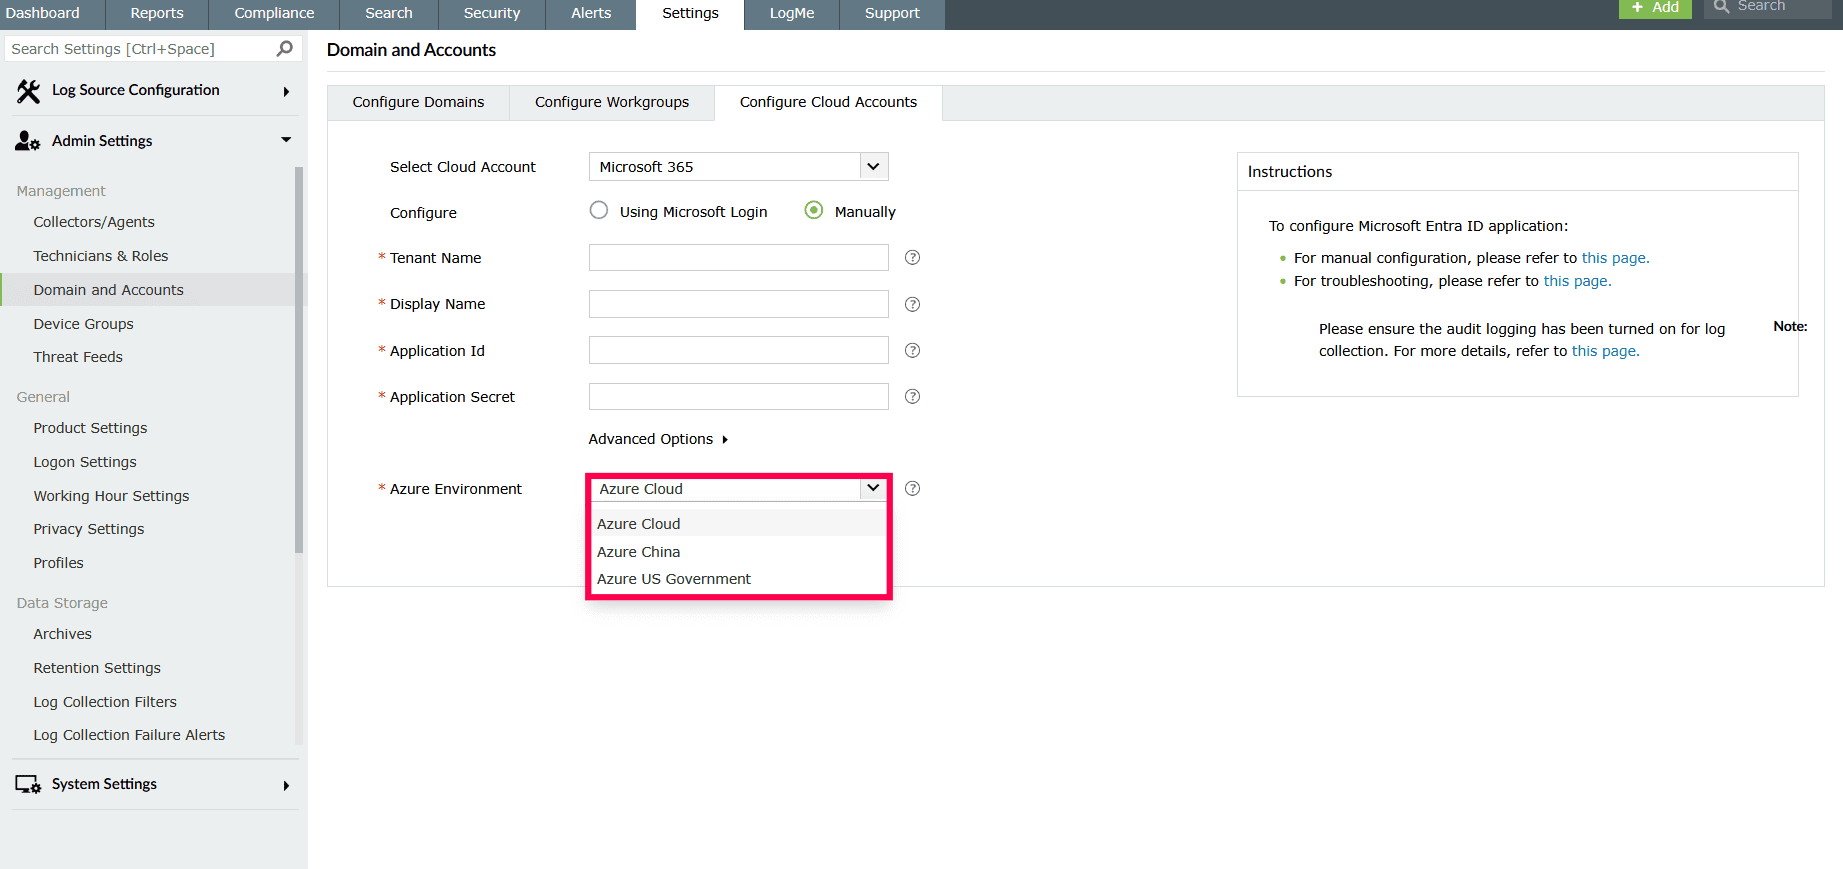
Figure 33: Configuring advanced options - Click Configure to save the account, then sign in with a Global Administrator account to complete the setup and grant the required permissions.
Managing M365 accounts
In this page:
- Overview
- Viewing configured cloud accounts
- Editing a cloud account
- Deleting a cloud account
- Syncing tenant objects
- Configuring the sync schedule
- Editing the sync schedule
Overview
This section elaborates on managing Microsoft 365 accounts in the product console. It guides administrators on how to view, edit, and delete accounts, synchronize tenant objects, and configure sync schedules.
Viewing configured cloud accounts
- In your product console, navigate to the Settings tab.
- Under Log Source Configuration, select Domain and Accounts.

Figure 34: Navigating to Domain and Accounts - Go to the Configure Cloud Accounts tab on the Domain and Accounts page.
- The page displays all configured accounts with the following details:
- Display name: The name given to the account.
- Account type: Identifies whether the account is Microsoft 365, or another supported cloud service.
- Number of sources: Displays the total number of data sources linked to the account.
- Configured time: Records when the account was last set up or modified.
- Object sync: Displays whether object synchronization is enabled or disabled for the account.
- Status: Indicates whether the account is active, inactive, or if the configuration has failed.
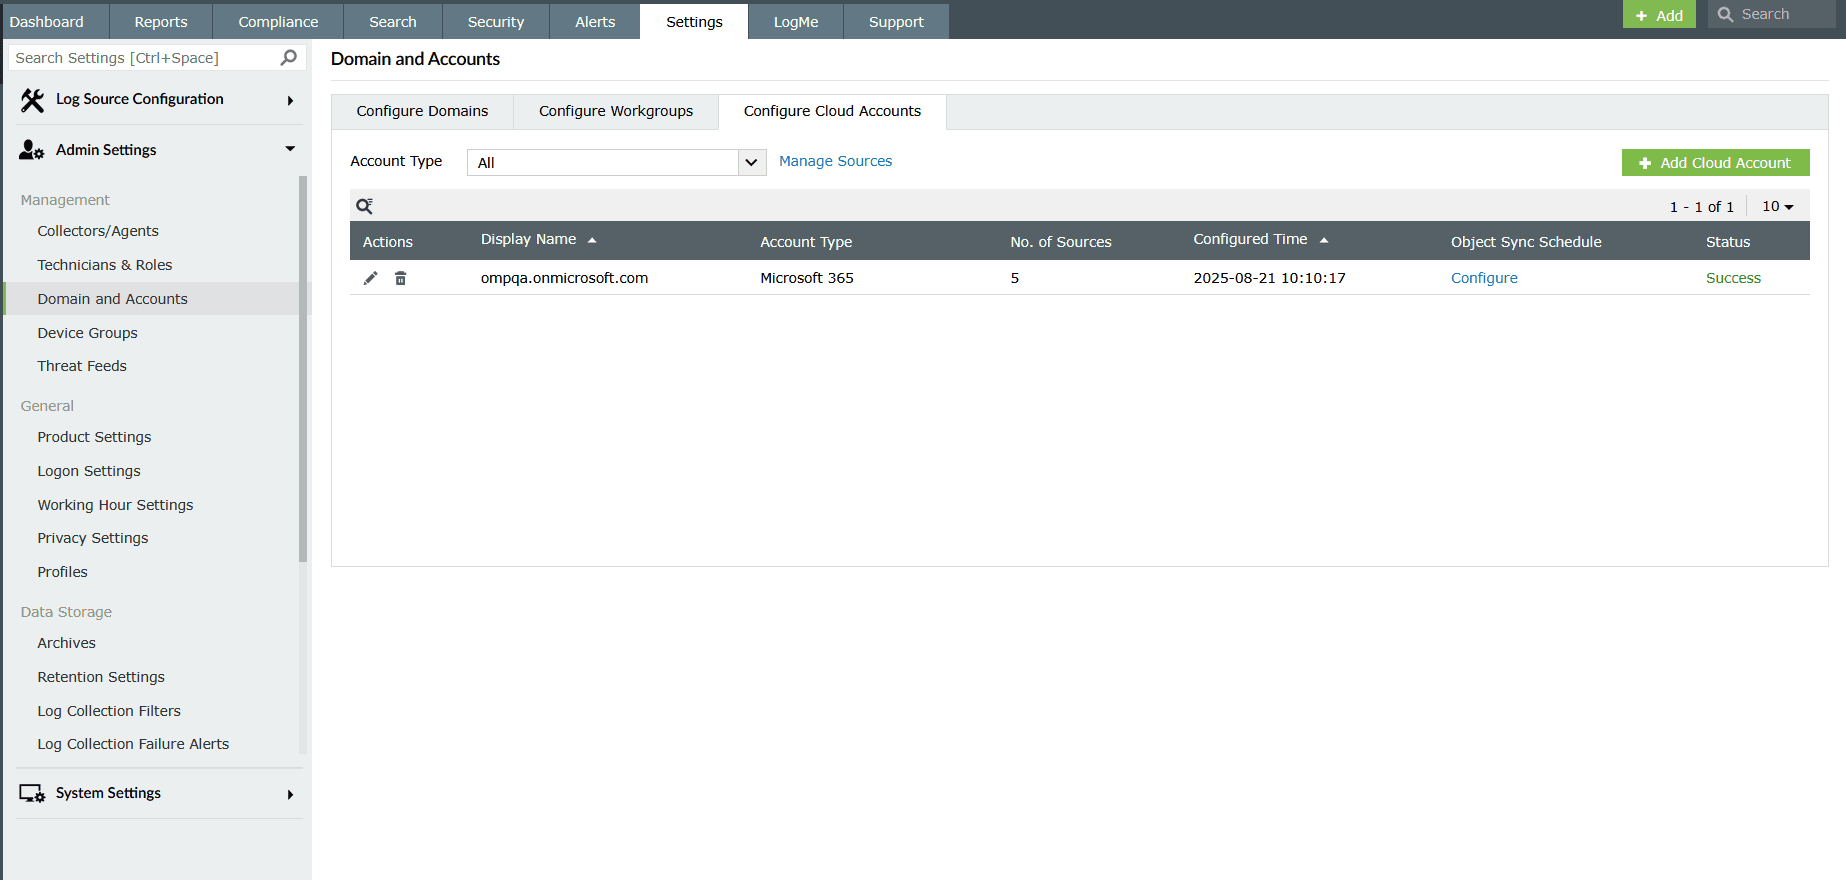
Figure 35: Viewing all configured cloud accounts - Use the
 icon to find accounts by their display name.
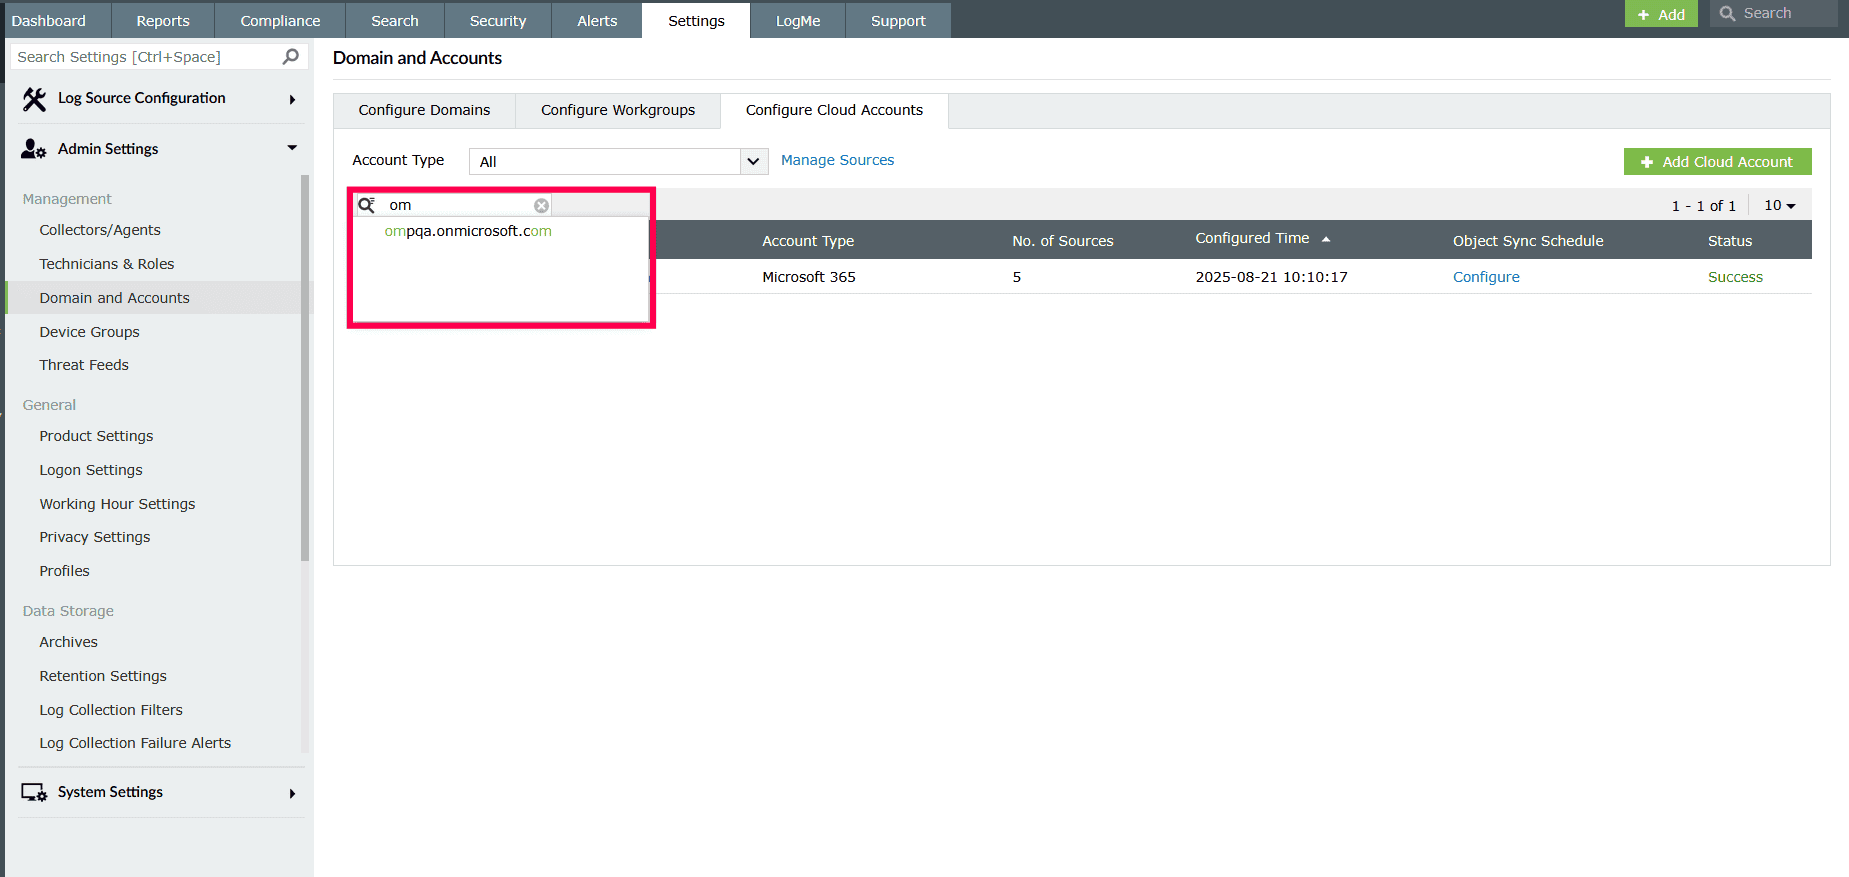
Figure 36: Using the search icon - Filter accounts by using the account type drop-down, where you can select all tenants or only Microsoft 365 accounts.
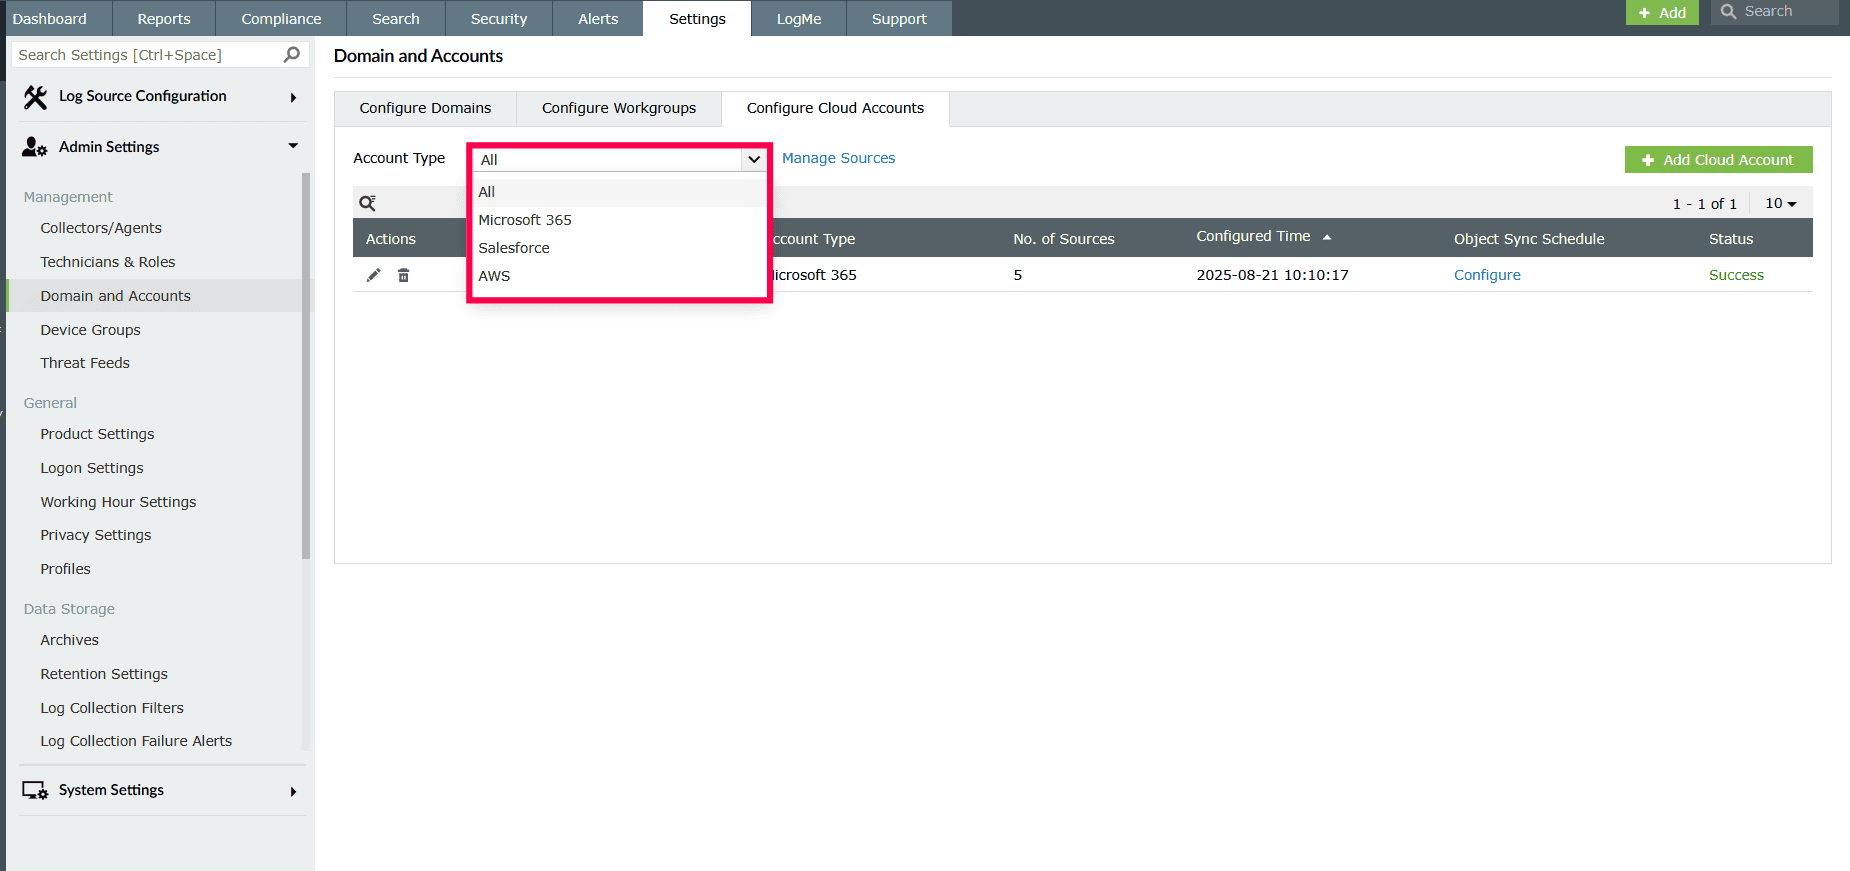
Figure 37: Filtering accounts
Editing a cloud account
You can edit the credentials of an already configured cloud account if there are changes in the tenant details or application information.
- In the Configure Cloud Accounts page, click the
 icon next to the account you want to modify.
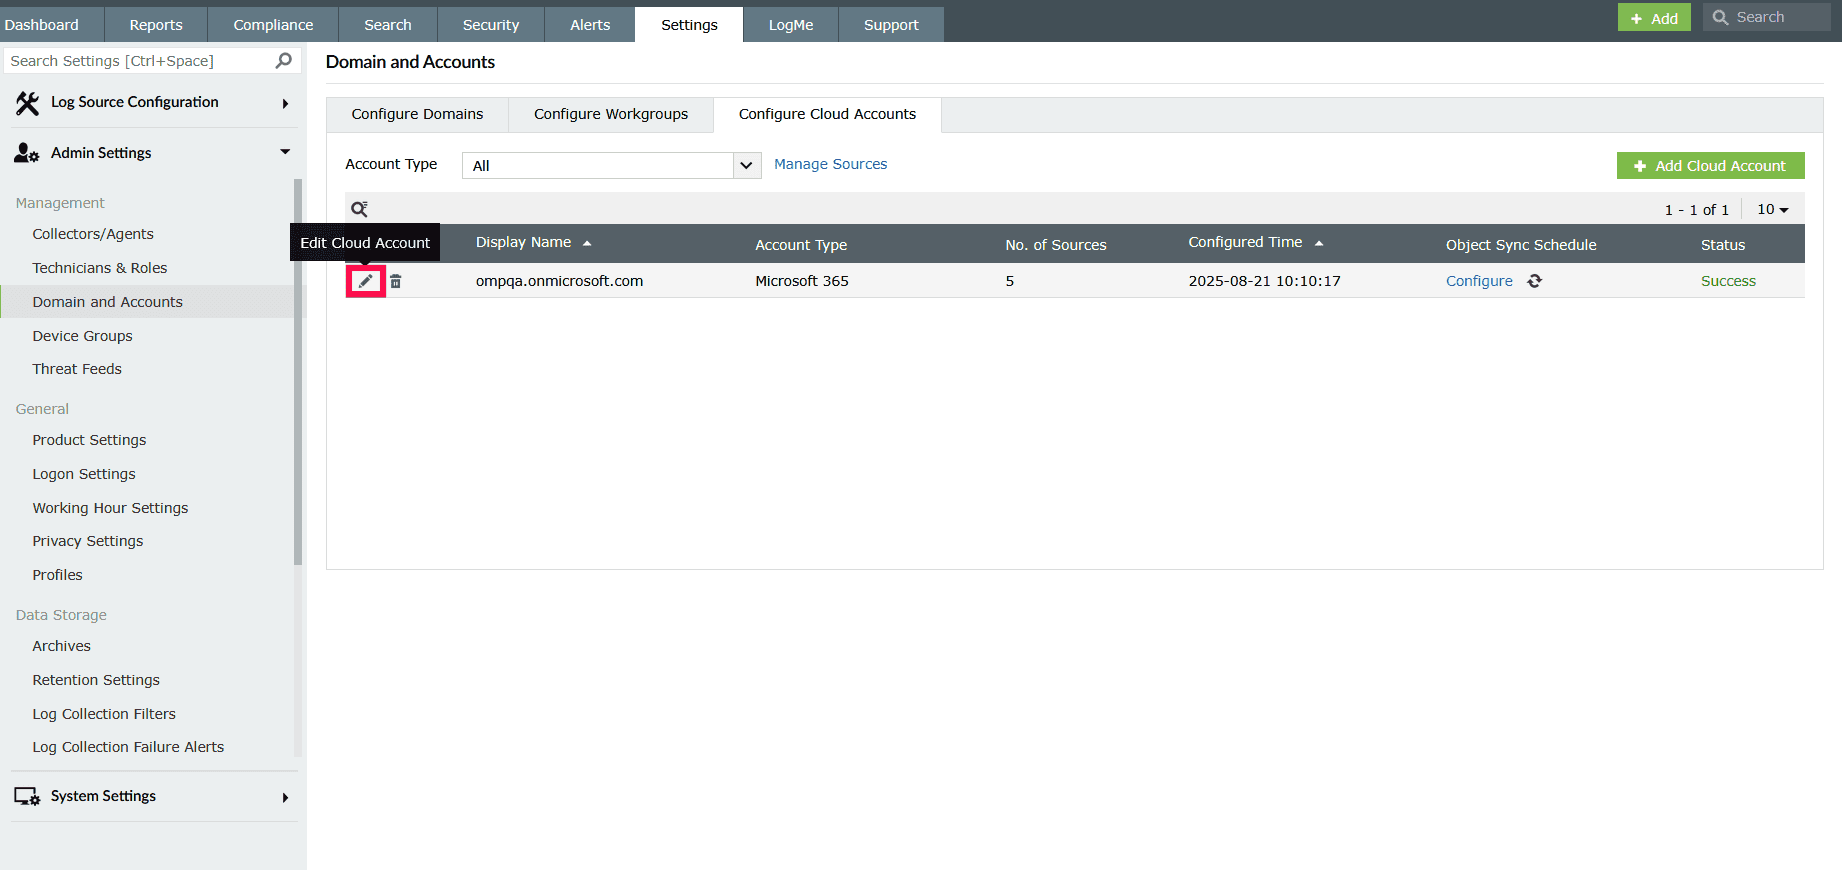
Figure 38: Editing a cloud account - In the pop-up window, update the required details:
- Application ID: The client ID of the registered application in Microsoft Entra ID.
- Application Secret: The client secret key generated in the Azure portal.

Figure 39: Updating credentials - Once the details are entered, click Save to update the account configuration.
Deleting a cloud account
- In the Account Management page, locate the account you want to delete.
- Click the
 under the Actions column.

Figure 40: Deleting an account - A confirmation dialog will appear. It states that deleting the account will also remove all associated:
- Configured data sources
- Import log configurations
- Log forwarding policies
- Click Yes to delete the account permanently.
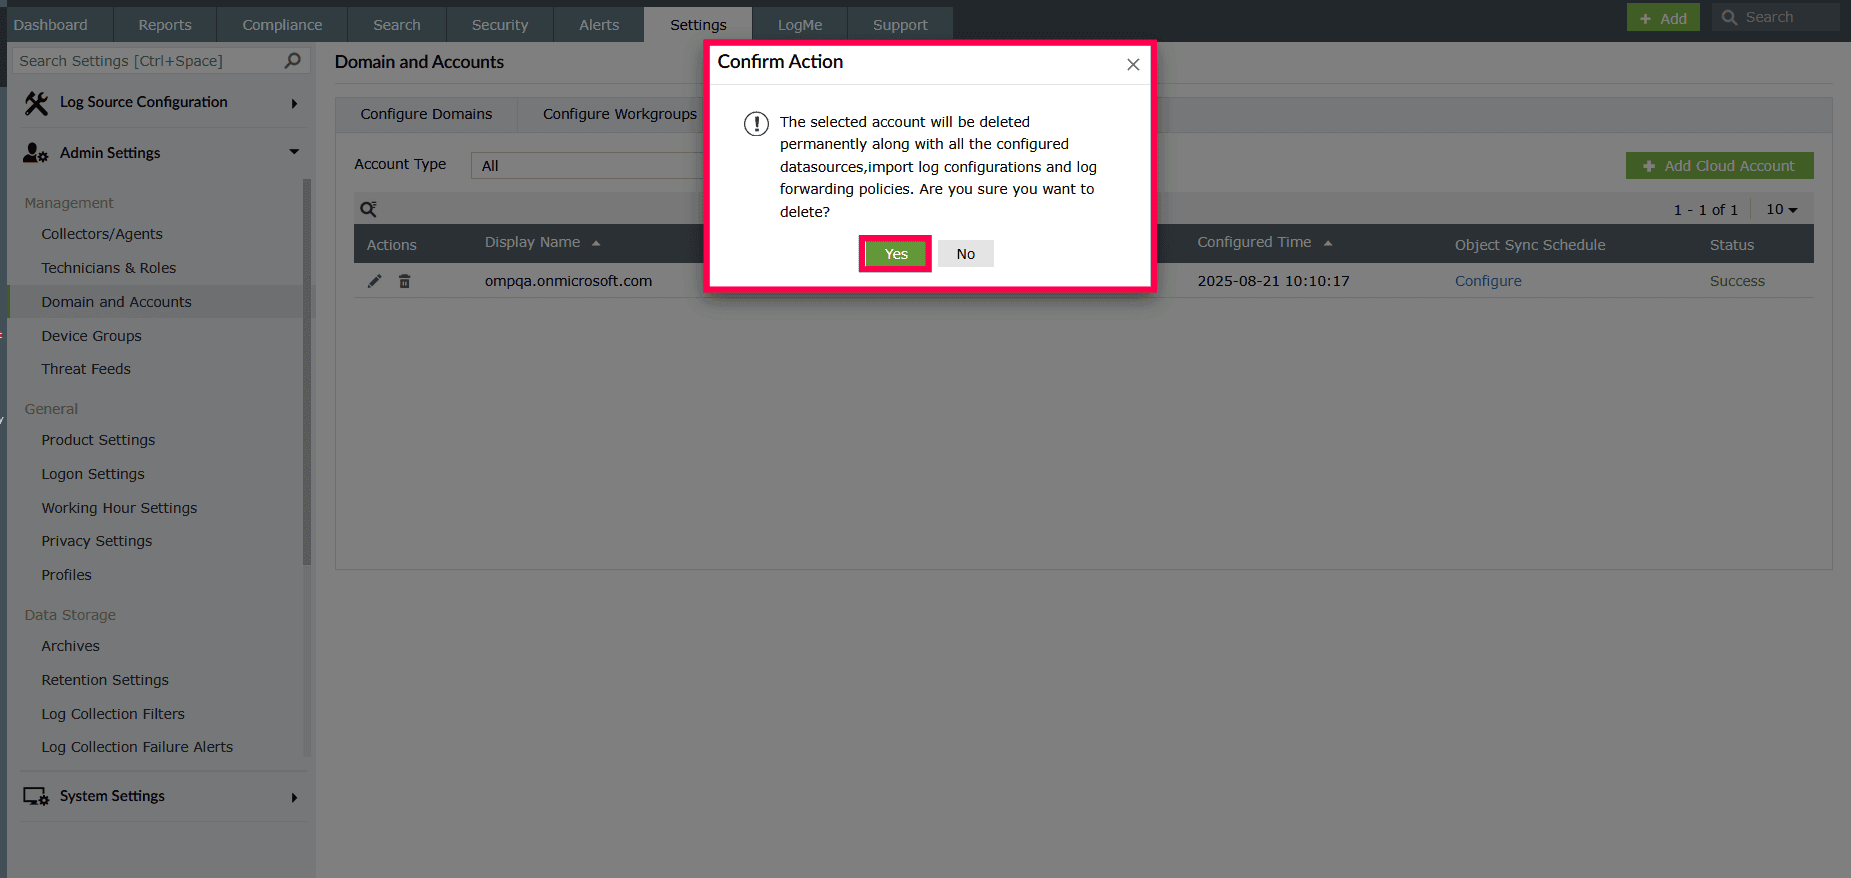
Figure 41: Confirming the deletion of an account
Configuring the sync schedule
- In the Configure Cloud Accounts tab, click Configure under the Object sync schedule column.
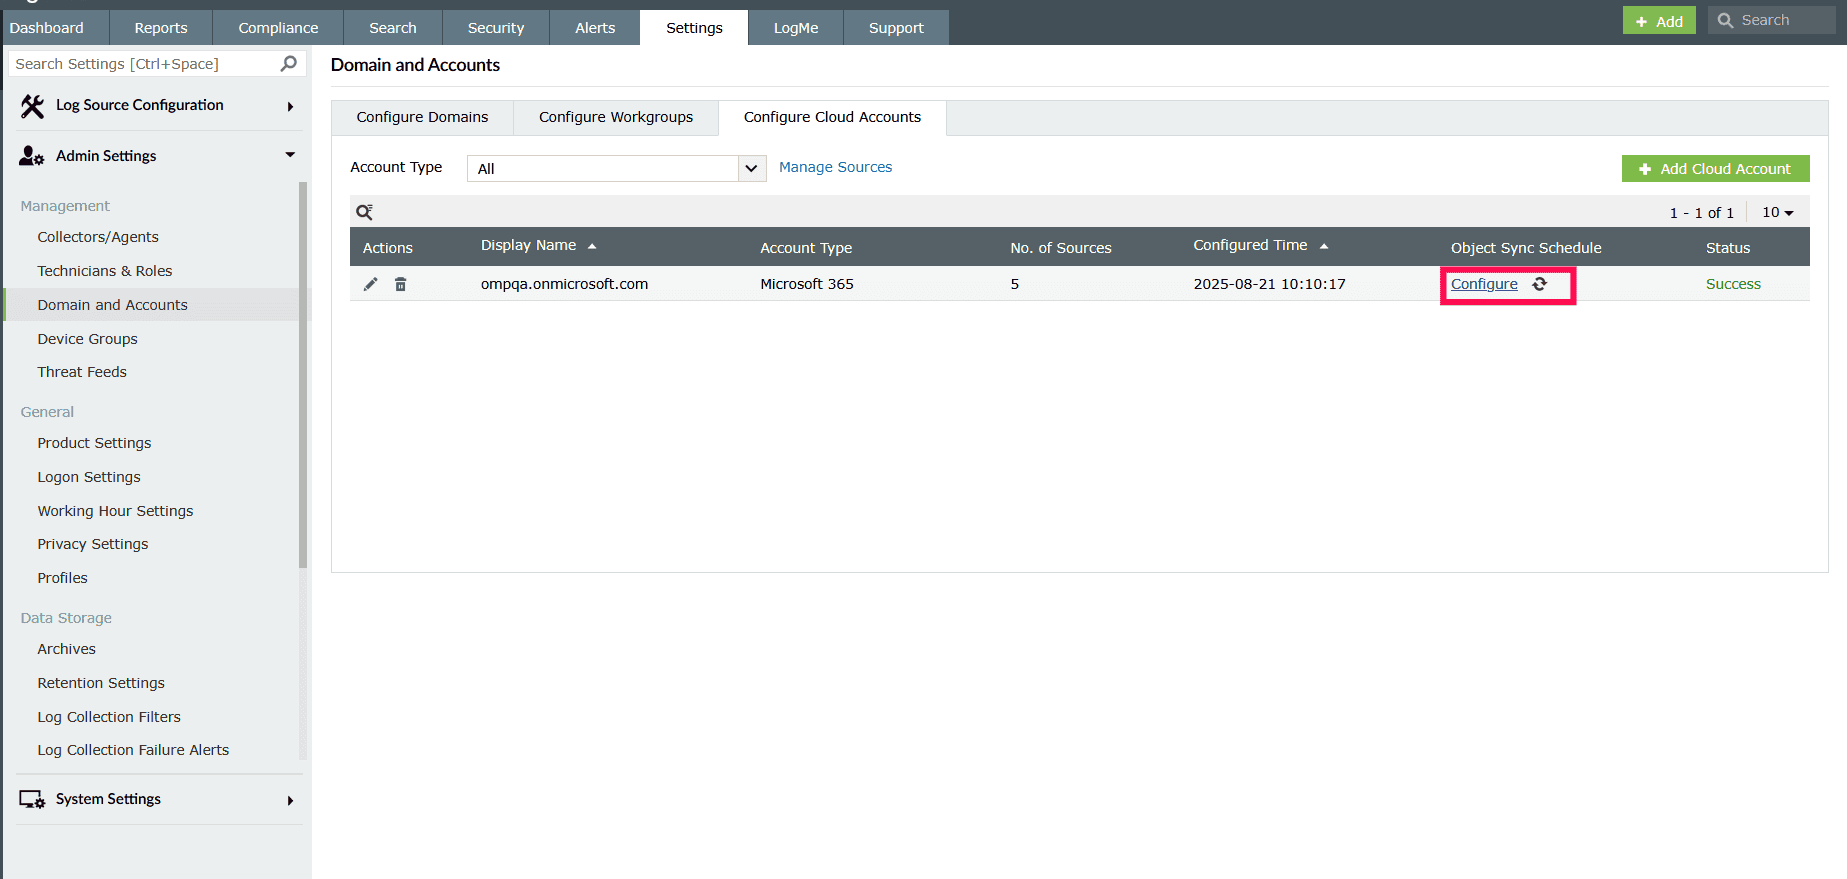
Figure 42: Syncing tenant objects - In the Schedule Tenant Object Sync window, enable the Schedule Sync toggle and select the objects you want to sync.
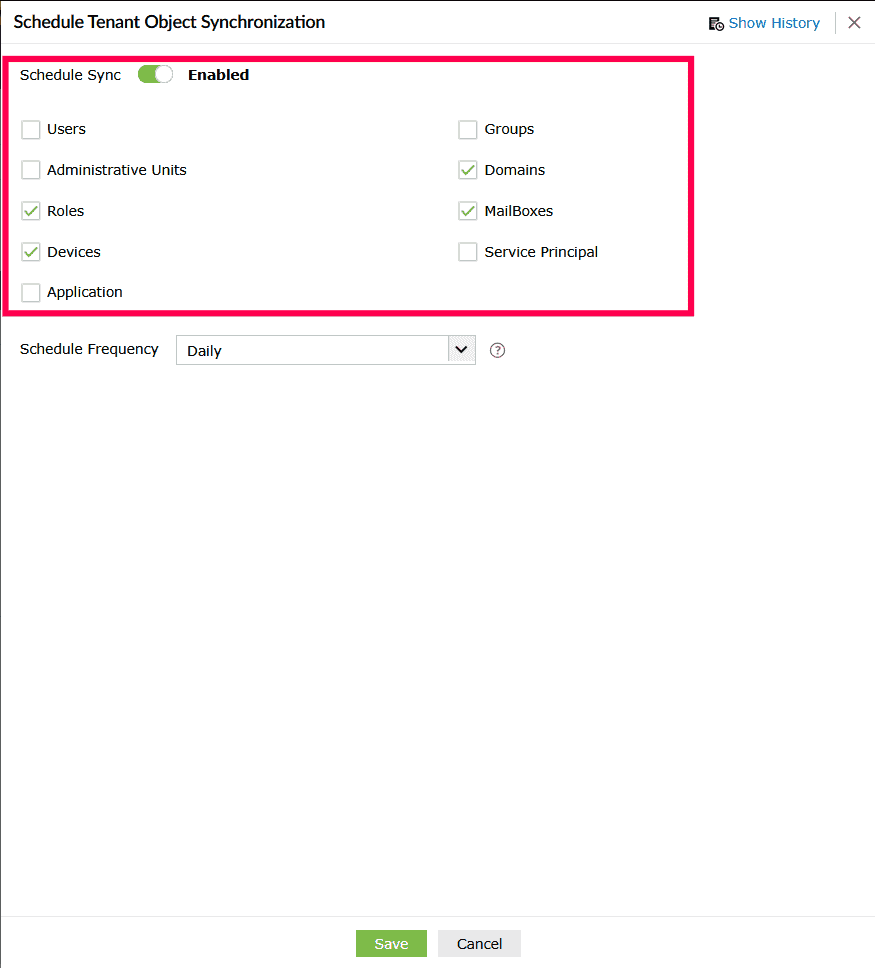
Figure 43: Selecting tenant objects - In the Schedule Frequency dropdown, select how often you want the sync to run: Daily, Weekly, or Monthly.
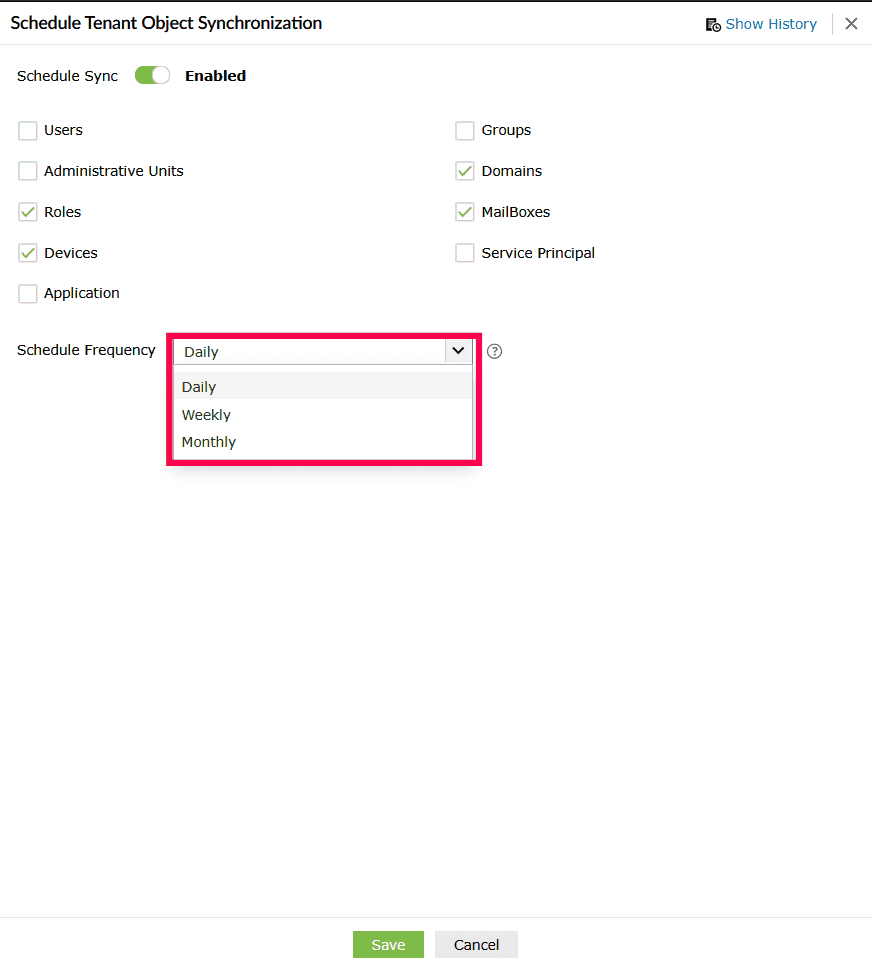
Figure 44: Configuring schedule tenant object sync settings - Click Save to add the selected objects.
Syncing tenant objects
To sync tenant objects immediately, follow these steps:
- In the Configure Cloud Accounts tab, hover under the Object sync schedule column next to the account and click the
 icon.
icon.
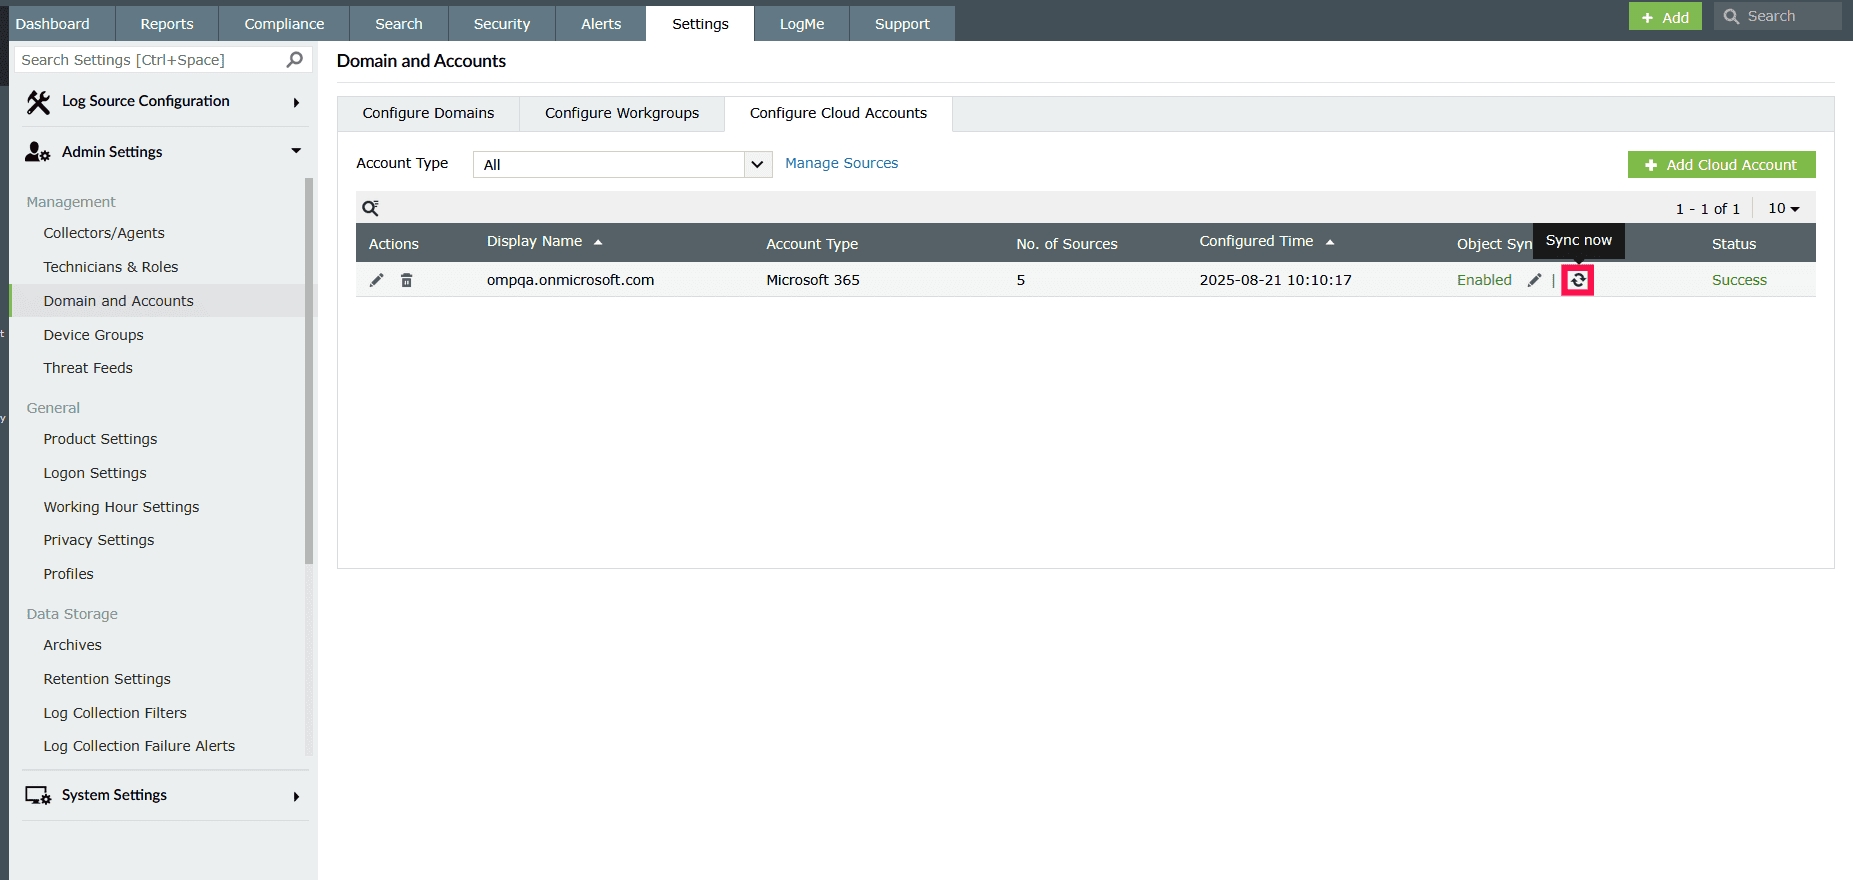
Figure 45: Syncing tenant objects - In the Sync tenant objects window, select the objects you want to sync.
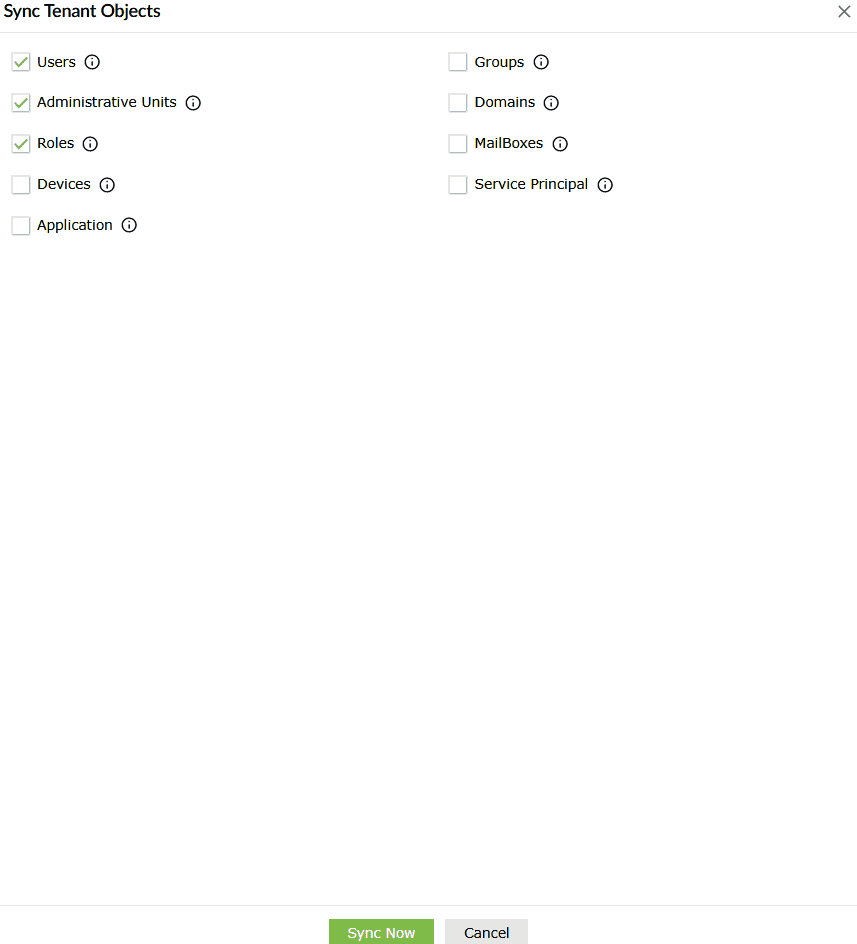
Figure 46: Selecting tenant objects - Click Sync Now to start synchronization immediately.
- To check details, click the
 icon next to an object to view its status and the last sync time.

Figure 47: Viewing object status
Editing sync schedule
- In the Configure Cloud Accounts tab, hover under the Object sync schedule column next to the account and click the icon.
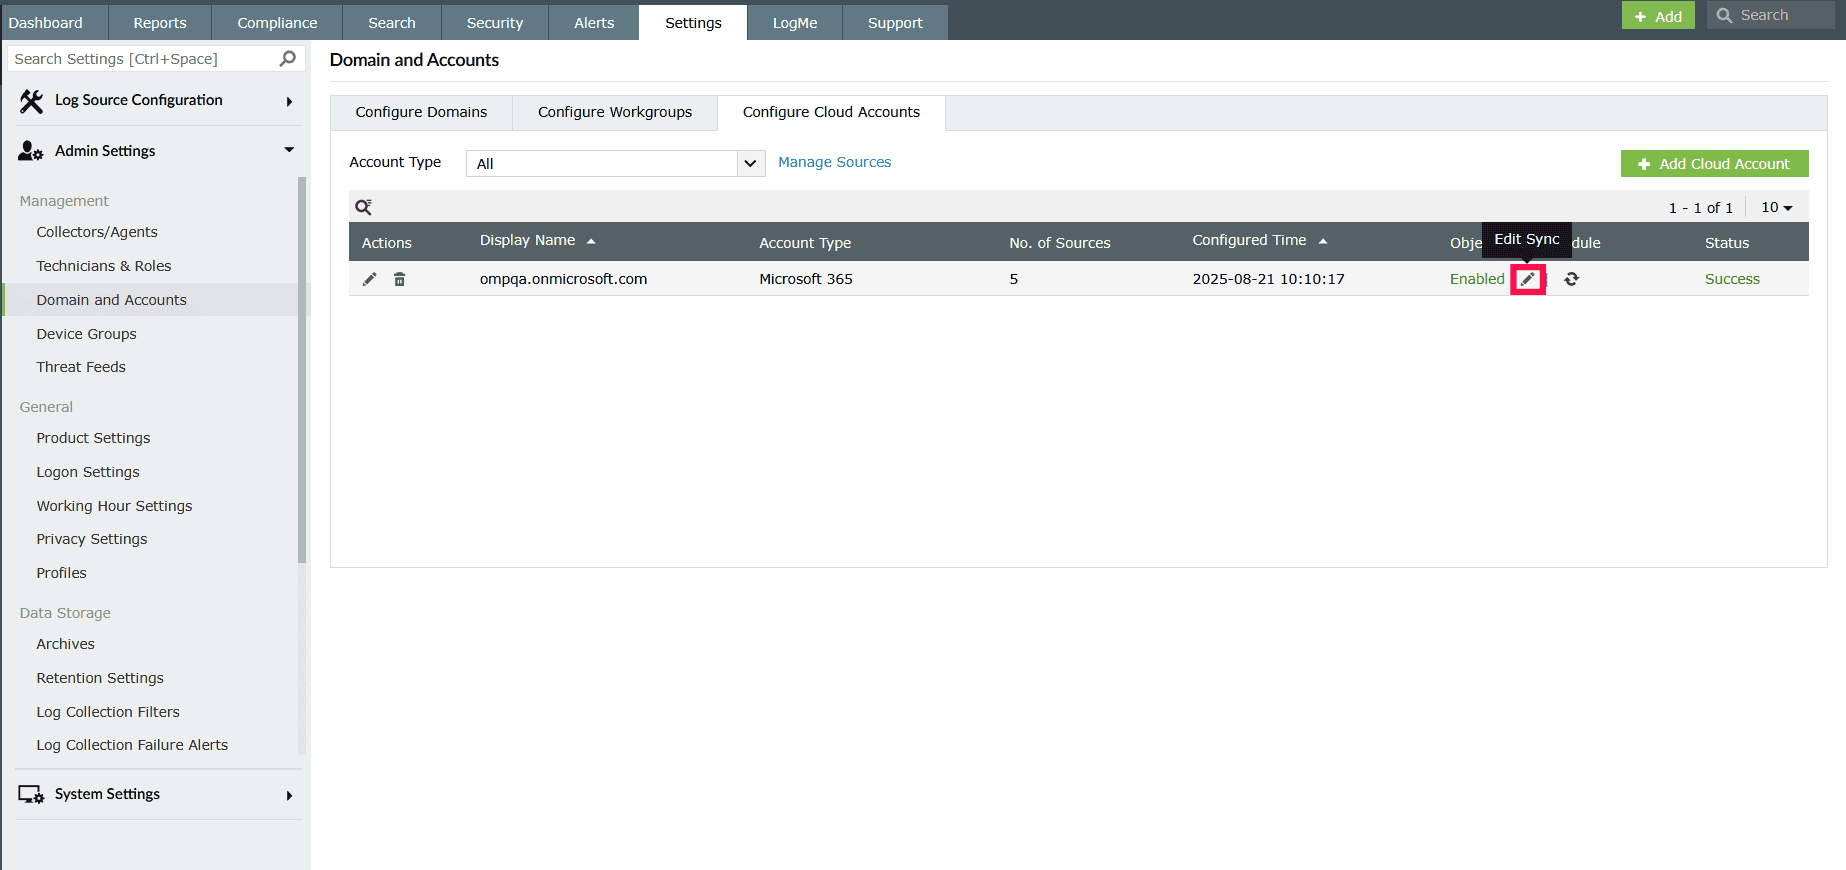
Figure 48: Editing the sync schedule - Select the objects that you want to sync.
- In the Schedule Frequency dropdown, select how often you want the sync to run: Daily, Weekly, or Monthly.
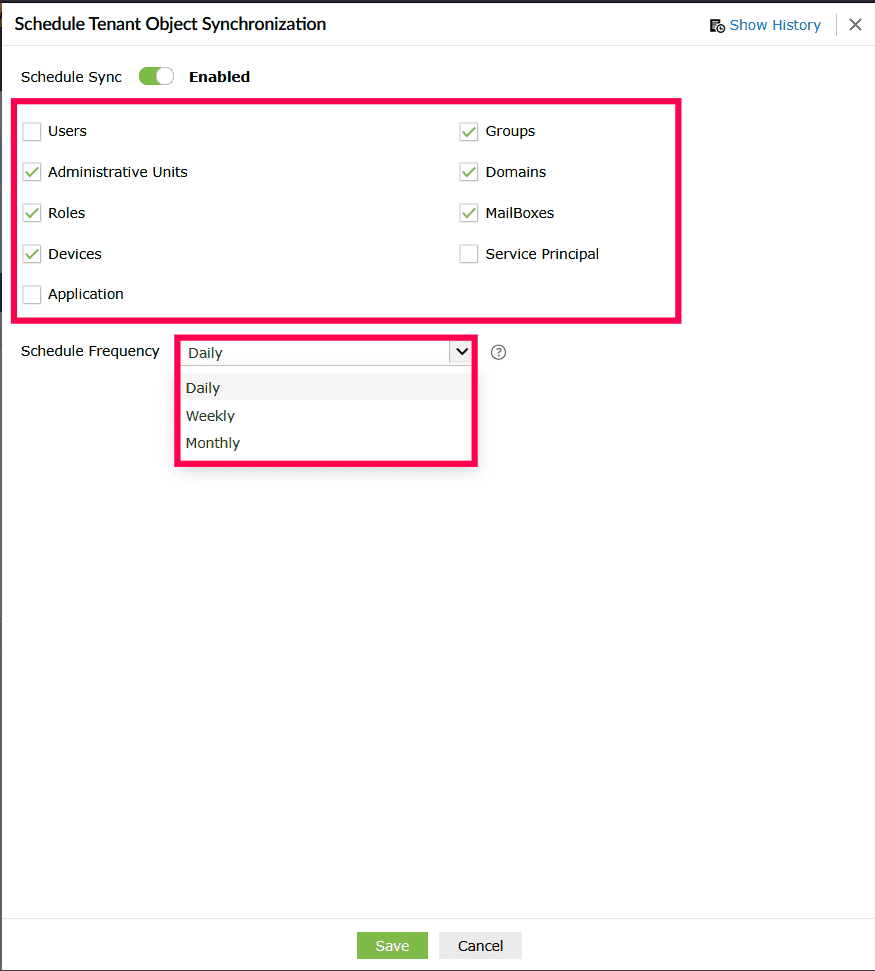
Figure 49: Configuring schedule tenant object sync settings - To view past synchronization details, click the Show History in the top-right corner.
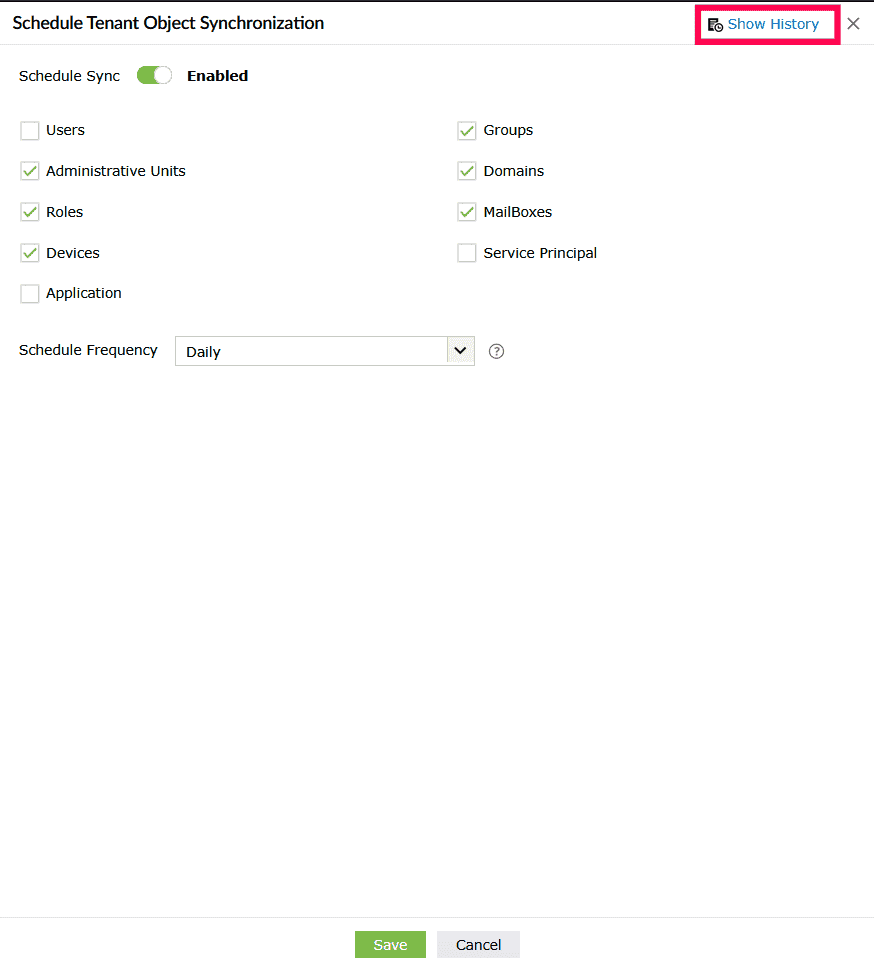
Figure 50: Viewing sync history - The Sync History page displays a table with:
- Sync date and time
- Sync status
- Details
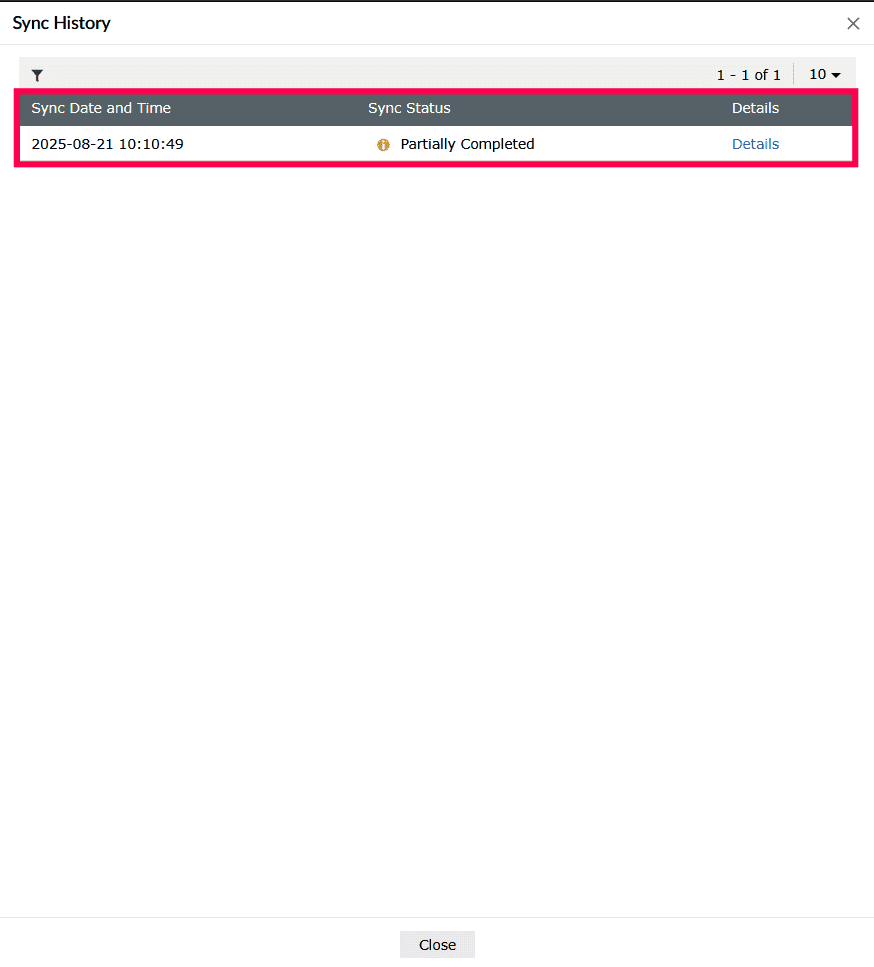
Figure 51: Viewing sync history - Click Details beside an entry to view specific objects and their corresponding statuses.
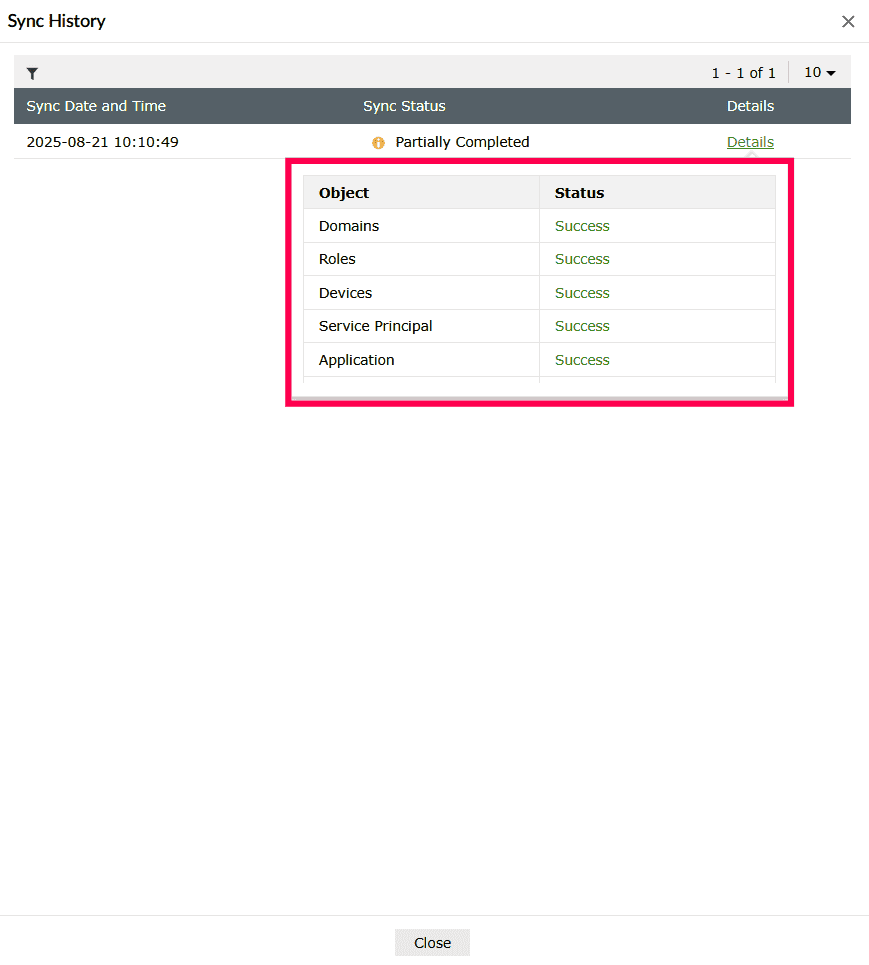
Figure 52: Viewing object status - You can also use the
 icon to refine results by status: All, Running, Completed, Partially Synced, or Failed.
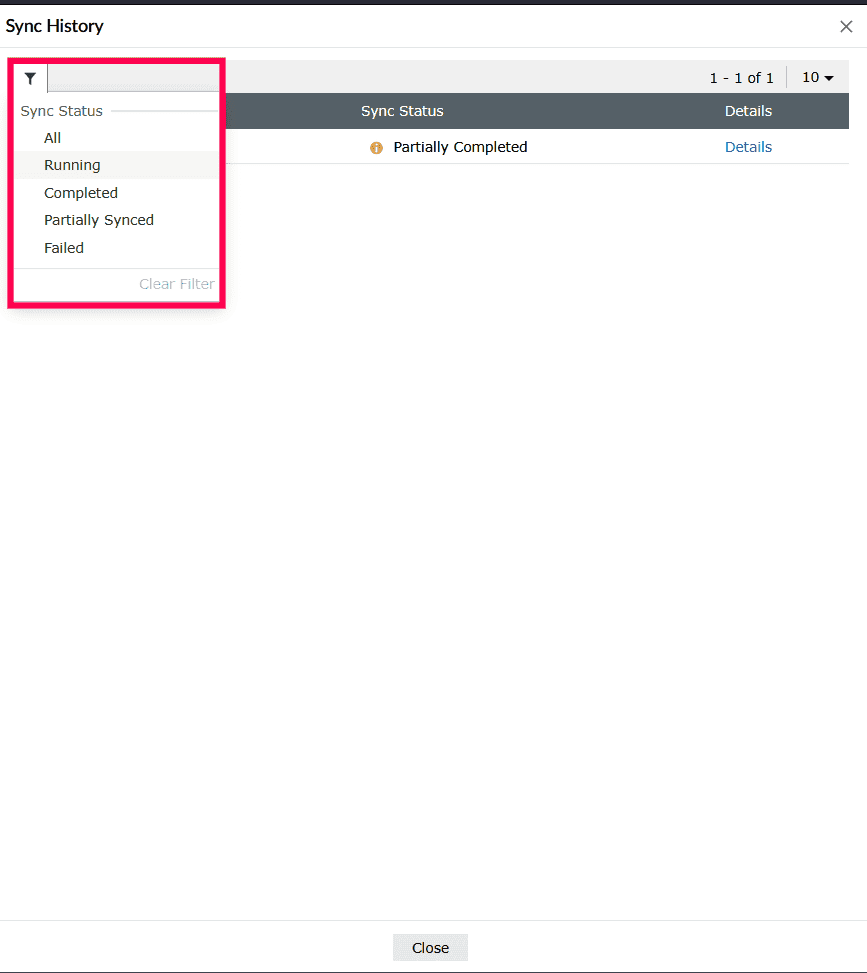
Figure 53: Filtering objects by status - Click Close to return to the schedule page.
- In the Schedule Tenant Object Synchronization window, click Save to apply the changes.
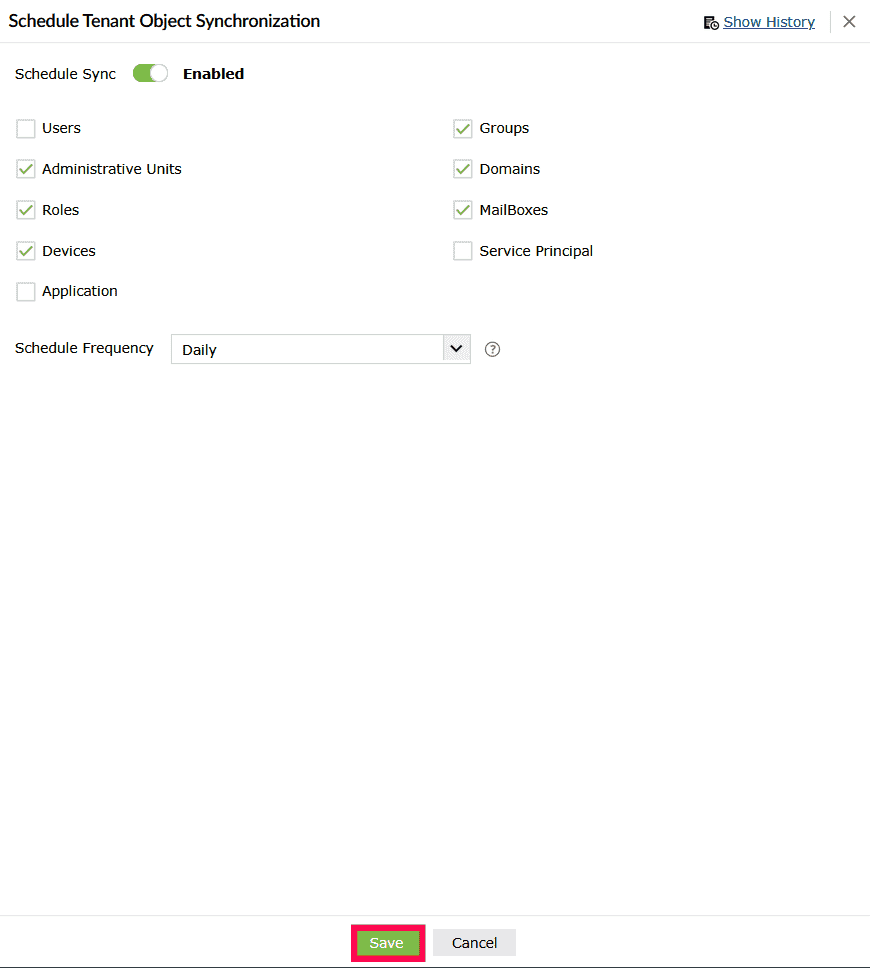
Figure 54: Saving the schedule sync configurations
Managing cloud sources
In this page:
- Overview
- Viewing configured data sources
- Enabling or disabling data source
- Configuring category filters
- Deleting a data source
Overview
This section elaborates on managing cloud data sources. It explains how to view configured sources, monitor their status, enable or disable them, apply category filters to specify which logs are collected, and delete sources that are no longer required.
Viewing configured data sources
- In your product console, navigate to the Settings tab.
- Under Log Source Configuration, select Manage Cloud Sources.
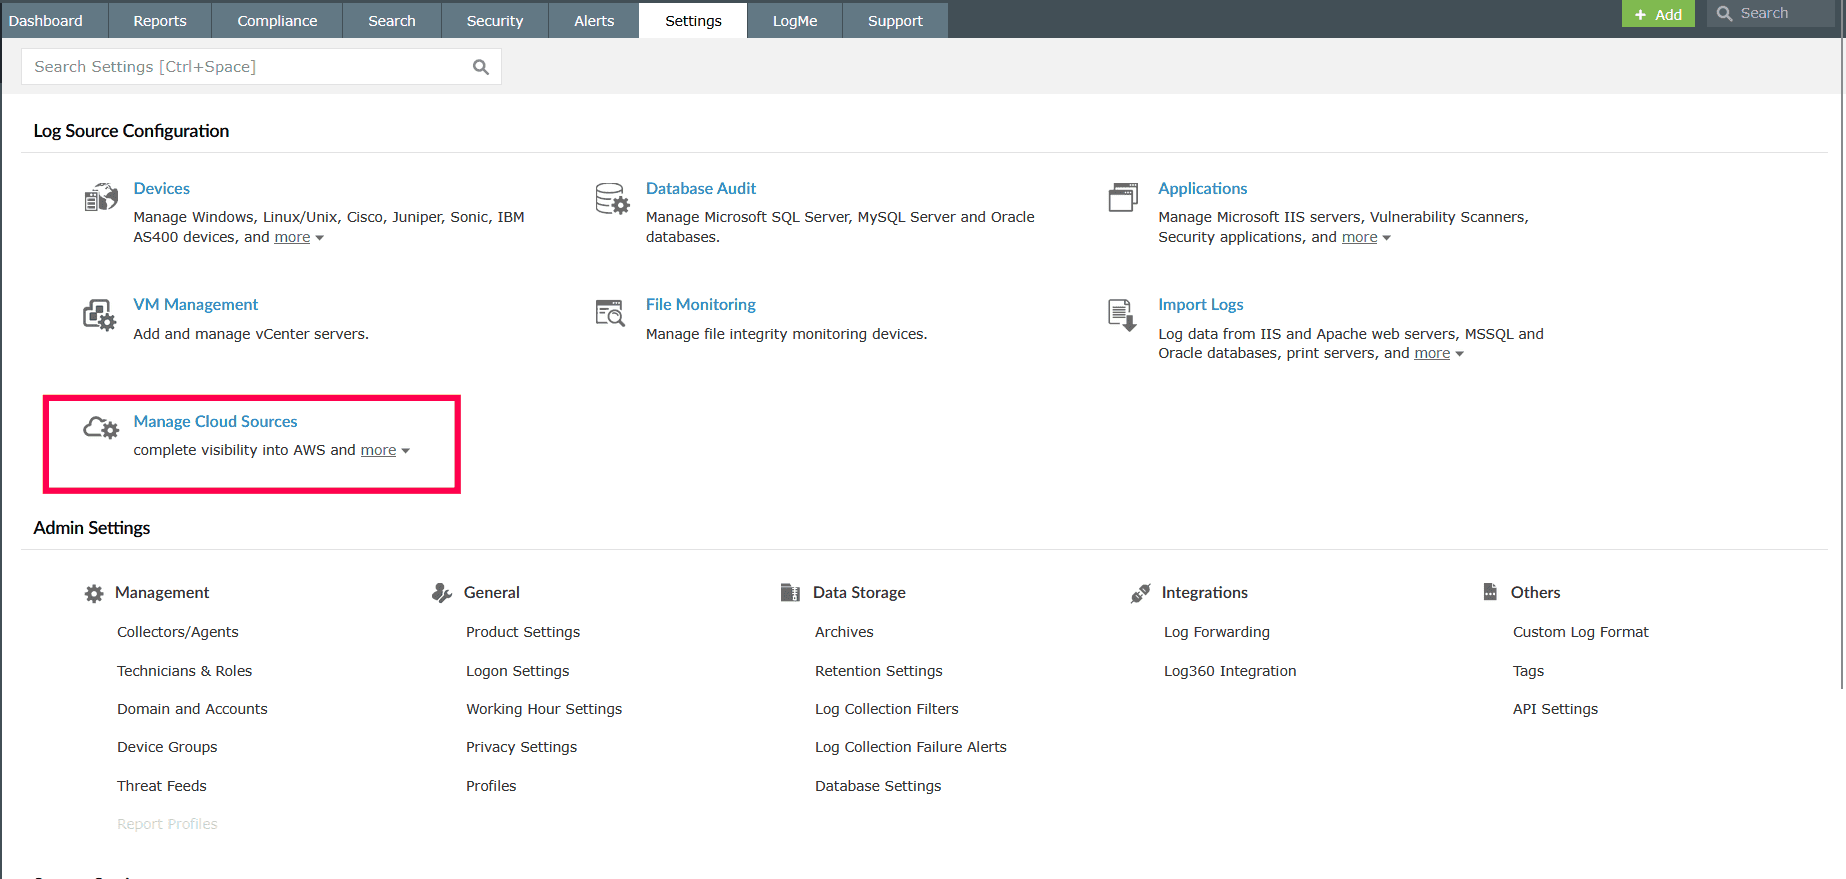
Figure 55: Navigating to Manage Cloud Sources - The page lists all the data sources linked to the selected account. Each data source is displayed with the following details:
- Data source type - The type of cloud service being monitored, such as Microsoft Entra ID, SharePoint Online, Microsoft 365 General.
- Tenant - The account or tenant name associated with the data source.
- Data fetch interval - The frequency at which logs are collected from the source.
- Last scan time - The most recent time the system attempted to scan the source.
- Last message time - The timestamp of the most recent log received from the source.
- Status - The current state of the data source, such as Success, Disabled, or error message if the data source fails.
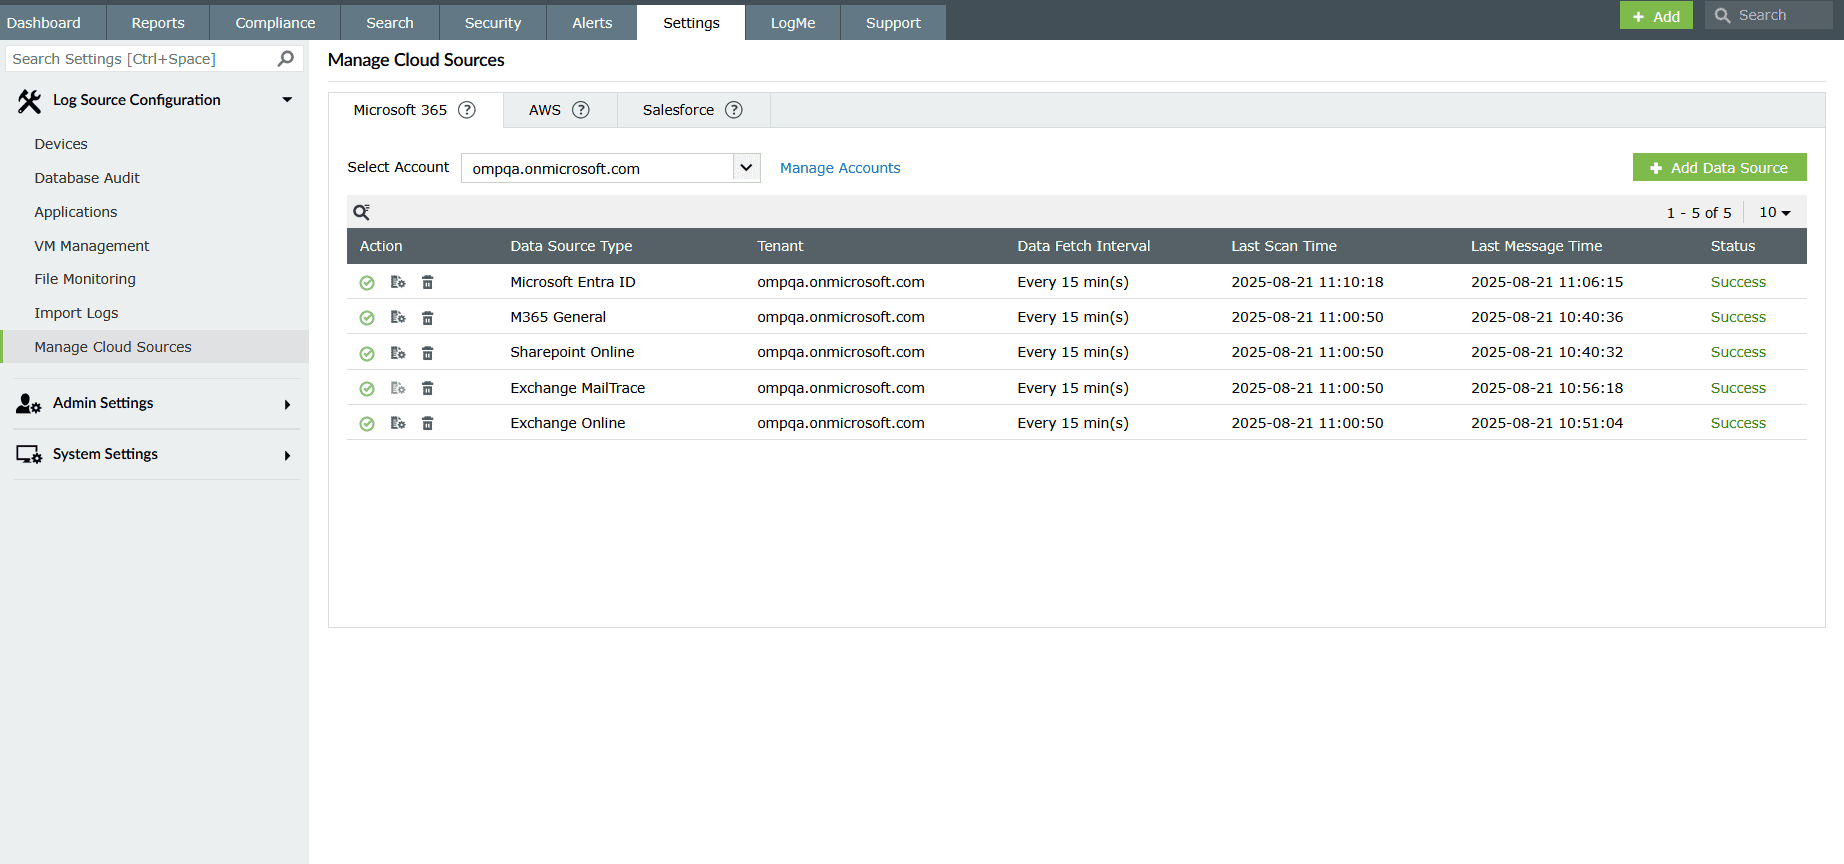
Figure 56: Viewing configured data sources - Use the icon to locate a data source by its name.
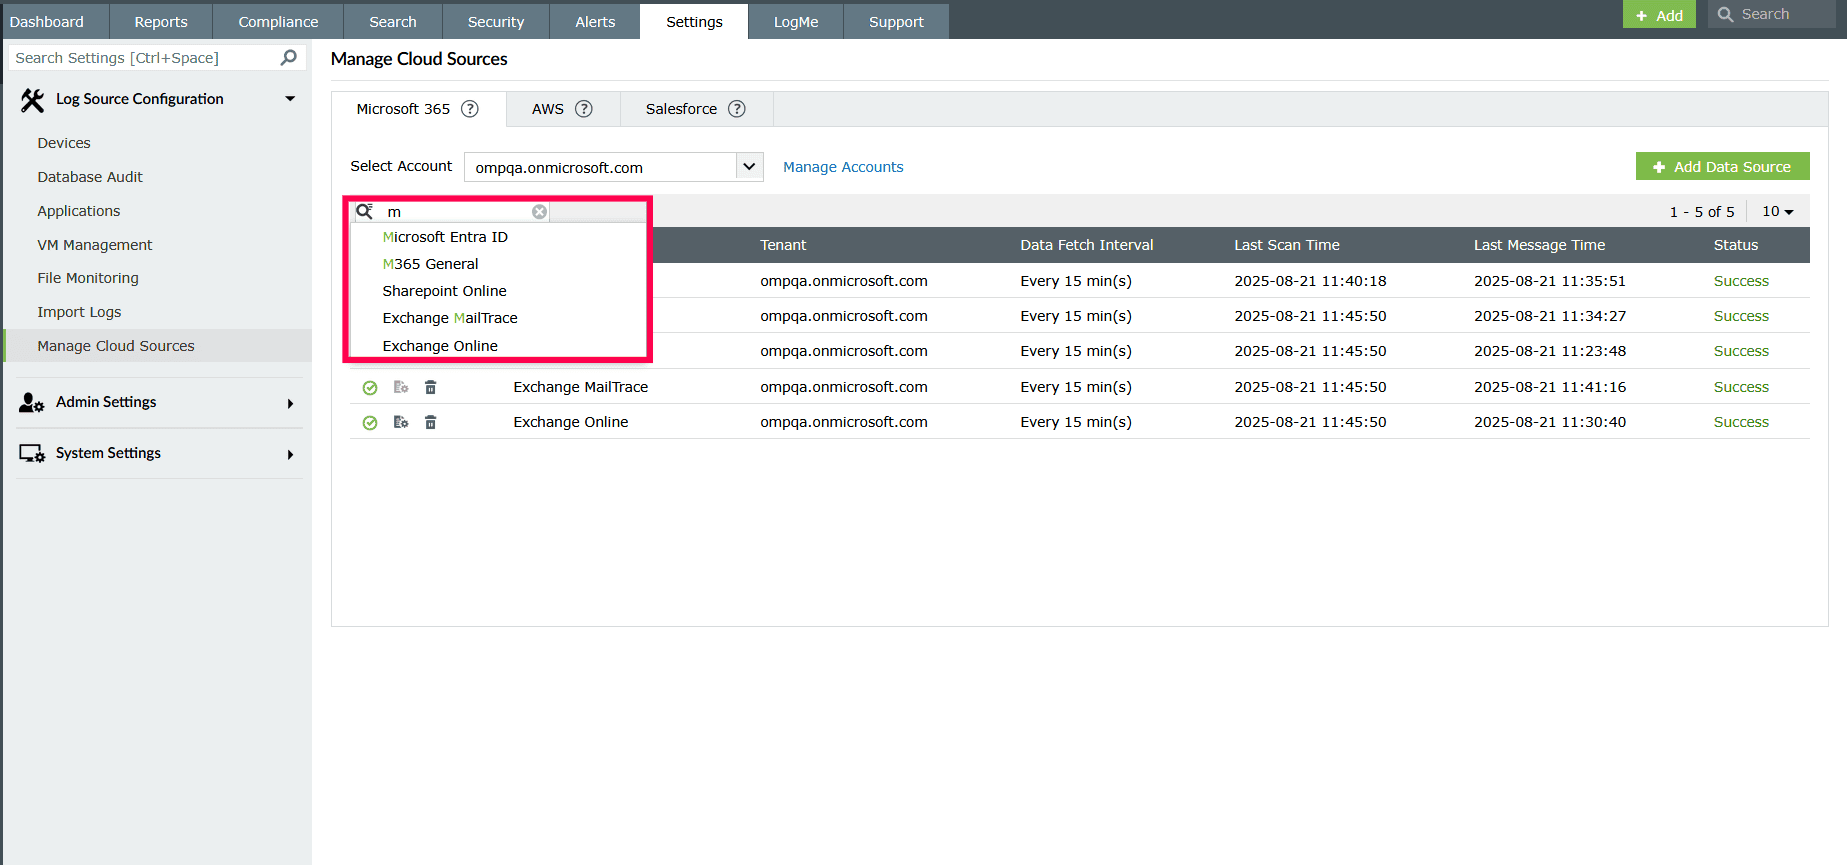
Figure 57: Using the search icon - The Select Account drop-down can be used to display data sources from all tenants or from a specific tenant.
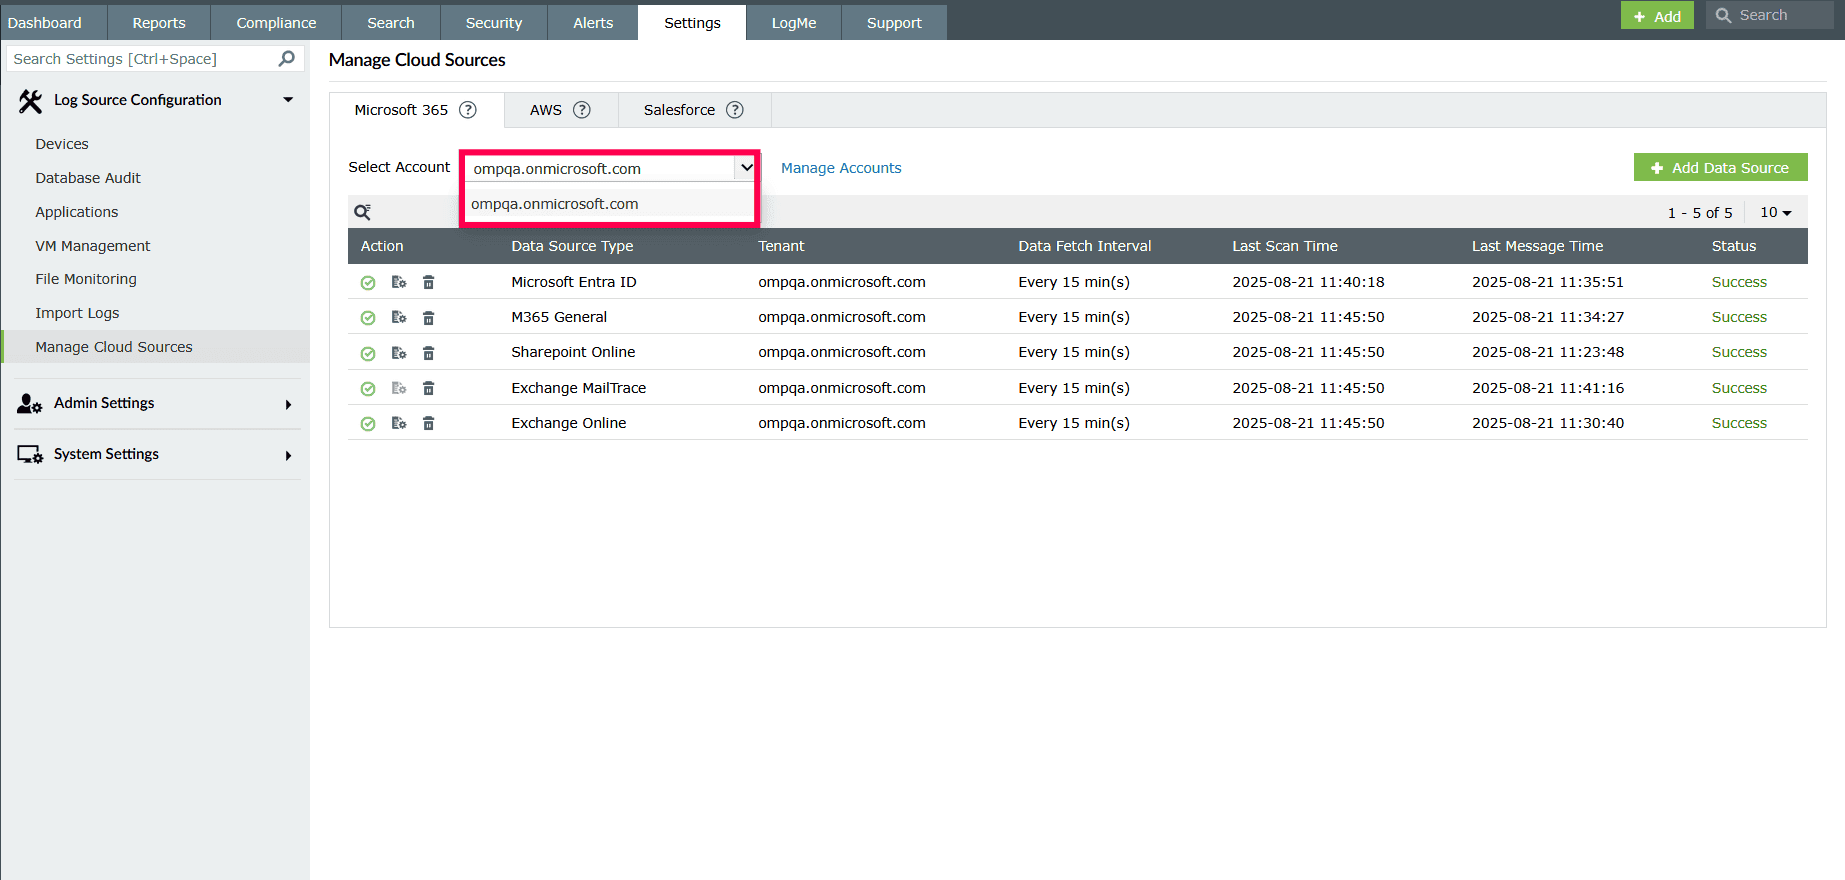
Figure 58: Selecting tenants
Enabling or disabling data source
- In the Manage Cloud Sources page, click the
 icon next to the required data source you want to disable.
 - To re-enable it, click the
 icon.
icon.
Configuring category filters
- In the Manage Cloud Sources page, under the Action column, click the
 icon next to a data source.
 - In the Manage Audit Categories window, select the checkboxes for the audit categories you want to collect data from.
NOTE Only data from the selected audit categories will be stored.
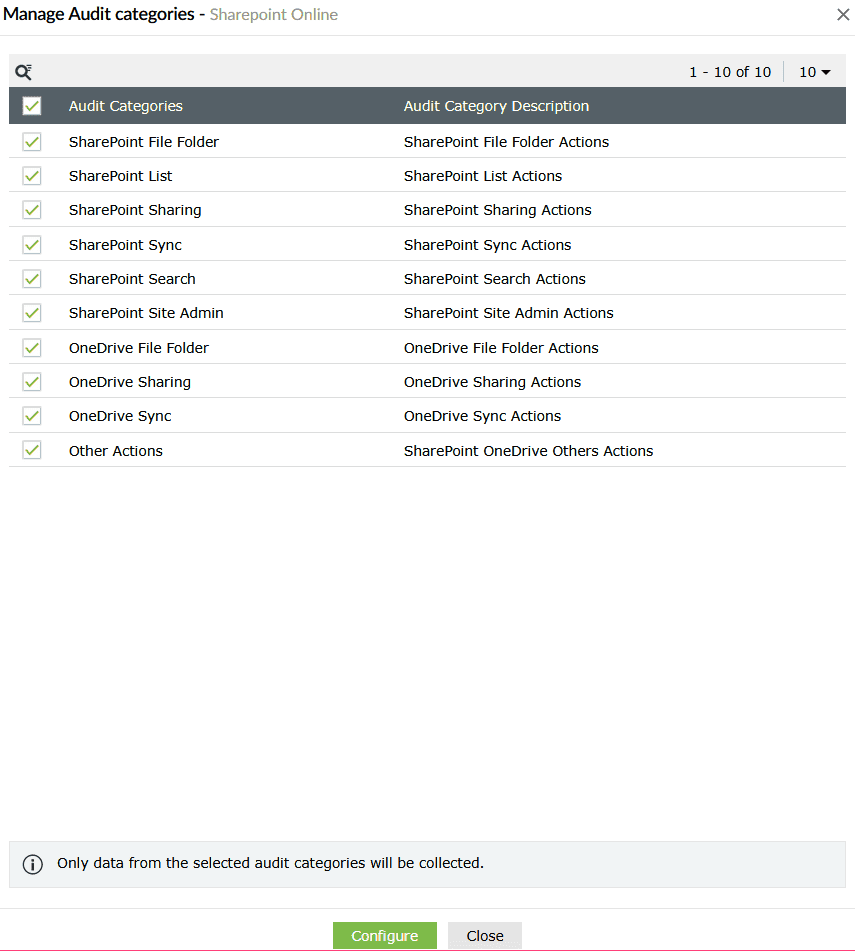
Figure 59: Managing audit categories - Click Configure to save the changes.
Deleting a data source
NOTE Data source deletion is restricted only while log collection is in progress. To delete a data source, wait for the collection to complete or disable it first.
- In the Manage Cloud Sources page, under the Action column, click the icon next to the data source you want to delete.
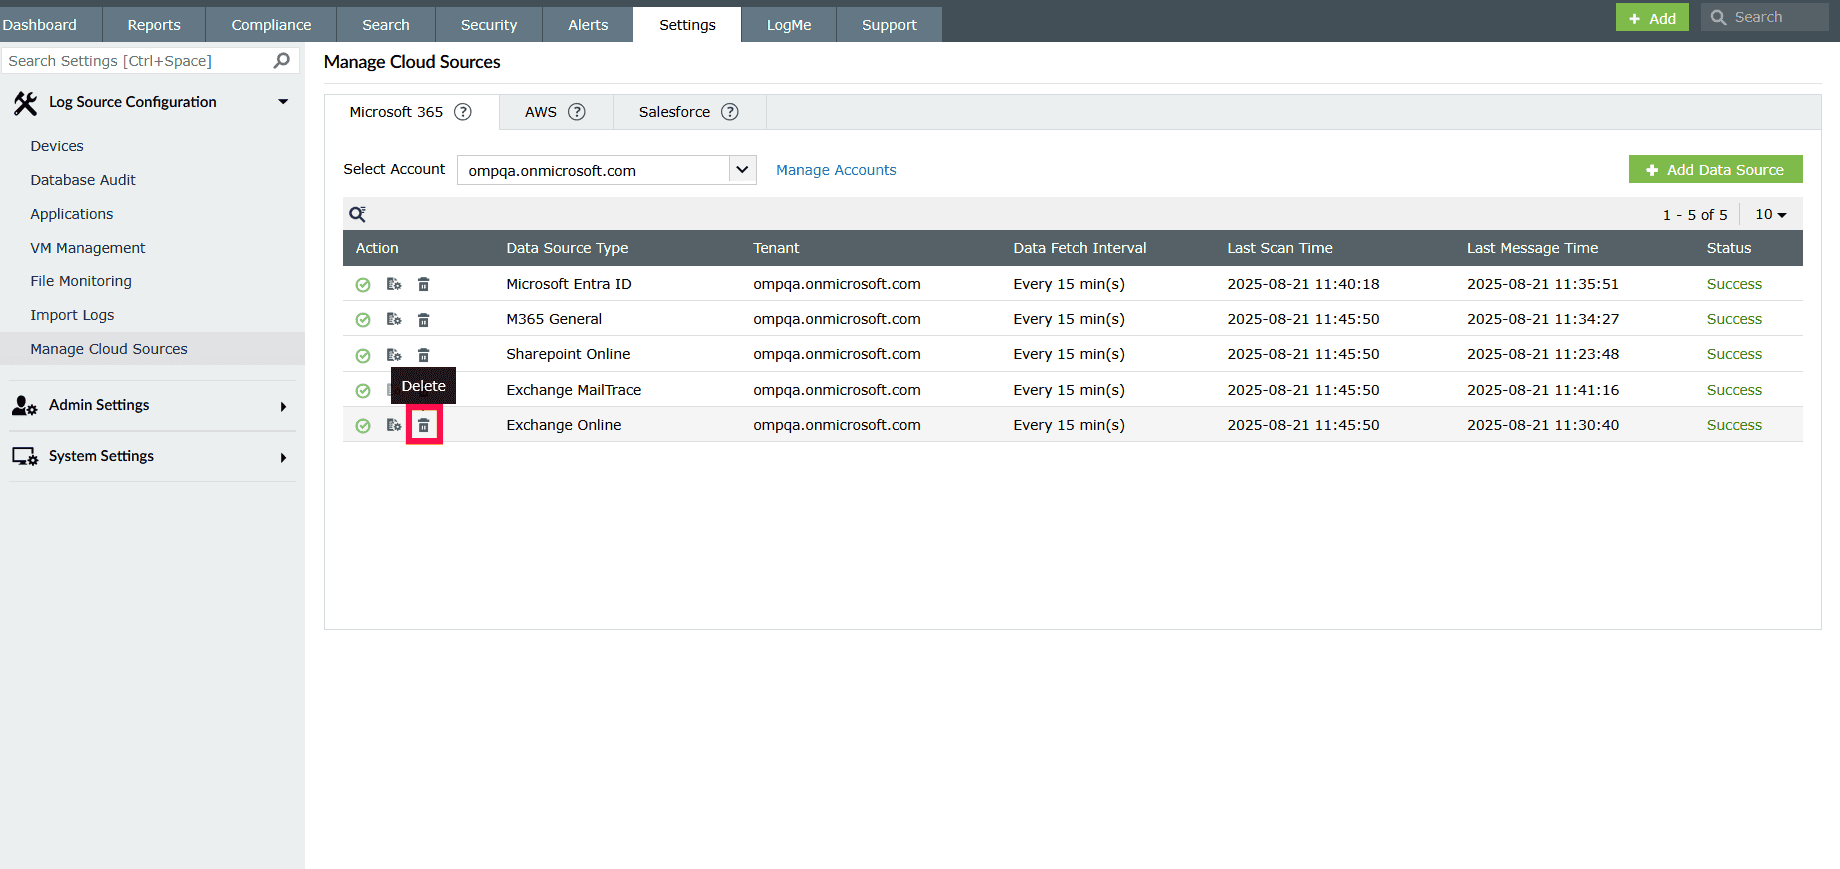
Figure 60: Deleting a data source - A confirmation dialog appears. Click Yes to delete the data source permanently.
NOTE Once deleted, the data source will no longer collect logs.
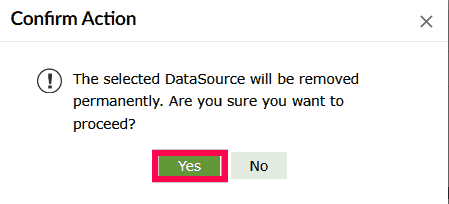
Figure 61: Confirming deletion of data source
Read also
This page detailed how to configure tenants and manage Microsoft 365 accounts and cloud sources in the product console. To learn more about related configurations, see the articles below: