
Listener ports overview
Last updated on:
In this page
- Overview
- Prerequisites
- Need for listener port configuration
- Key functionalities
- Configuring Syslog listener ports
- Accessing Syslog listener ports
- Manage Syslog listener ports
- Adding a Syslog listener port
- Manage default Syslog listener port
- Deleting a Syslog listener port
- Enable/disable a Syslog listener port
- Enable/disable a Syslog listener port for selective collectors/agents
- Edit a syslog listener port
- Collector/agent selection
- Update agents for an existing syslog port
- Agent-side TLS certificate installation
Overview
The Listener Port console provides an interface for configuring and managing ports used to receive incoming logs and messages. Log360 supports both Syslog listener ports (UDP/TCP/TLS) and SNMP Traps listener ports (UDP) for receiving logs. With these ports, external devices and applications send logs and traps to the collector/agent.
Prerequisites
- Port availability: Ensure that the configured ports are not used by any other applications or services on the Log360 server.
- Firewall and antivirus rules:
- Allow all incoming traffic on the specified ports on the agent/machine running the Log360 server's firewall.
- Some antivirus software may block unknown or custom ports by default. Ensure that your antivirus tool is also configured to permit traffic on the configured listener ports.
- Network devices configuration: Configure the external devices to send Syslog messages/SNMP Traps to the server's IP address and the designated port.
Need for listener port configuration
Without properly configured listener ports, the server cannot receive, process, or analyze the incoming log data.
Key functionalities
- Seamless log collection: Logs from the network devices can be received only when the appropriate ports are open and listening.
- Protocol flexibility: You can configure multiple ports for different protocols (UDP, TCP, TLS) based on your network's security and reliability requirements.
- Security and access control: By selectively enabling or disabling ports per collector/agent, you can restrict log intake to trusted sources and minimize your attack surface.
Configuring Syslog listener ports
The Listener Ports module lets you manage the ports used to receive incoming logs from external devices. You can assign protocols (UDP, TCP, TLS), configure default Syslog ports, and control which collectors or agents listen on specific ports. This section explains how to access the configuration interface for the Syslog listener ports and perform actions like adding new Syslog listener ports, editing existing ones, and managing port-to-collector/agent mappings to streamline log intake.
Accessing Syslog listener ports settings
- If you are using the On-Premise version, in the product console, navigate to the Settings tab and click on Listener ports listed under System Settings. If you are using the On-Demand version, you can navigate to: Settings > Admin > Management > Listener Ports.
- The Listener Ports module for Syslog ports configuration provides you with:
- Port: Displays the port number
- Action: Option to enable/disable, edit, delete or make default the listener port(s).
- Protocol: Displays the operating protocol for that particular port.
- Associated Collectors/Agents: Displays all the collectors/agents associated with the corresponding port number.
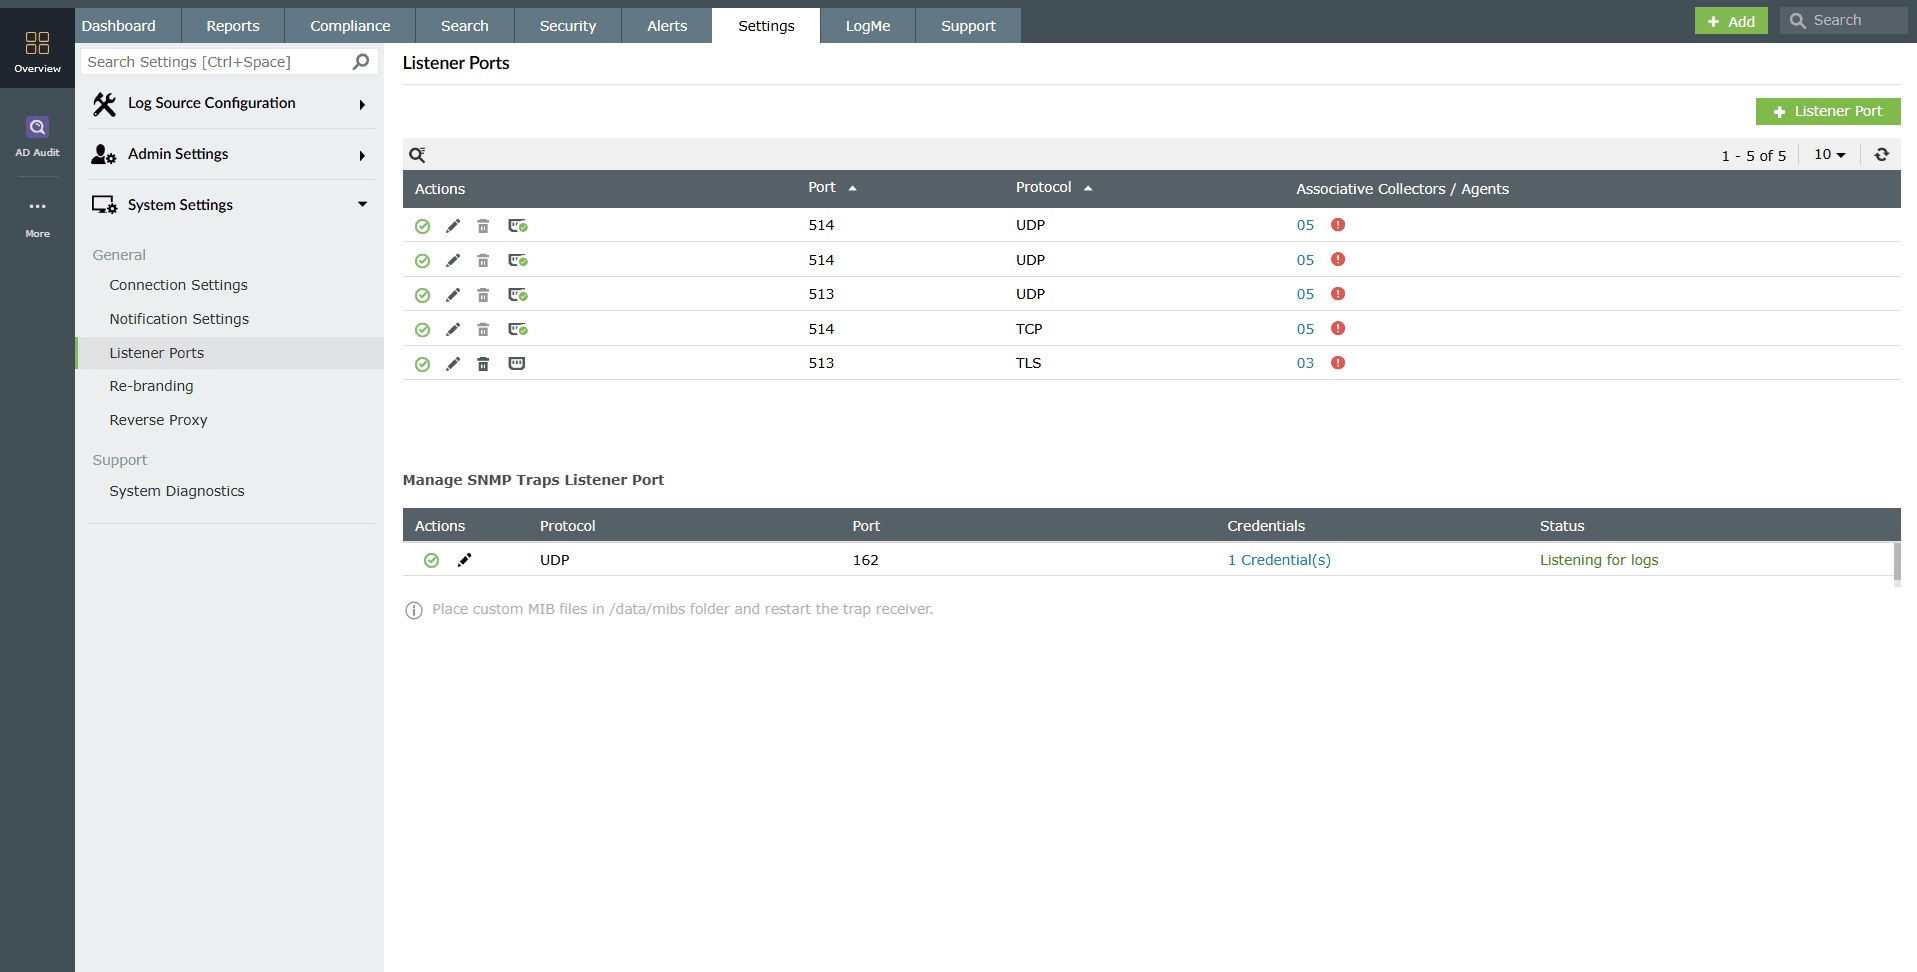
Image 1: Listener ports configuration via the Settings tab
Manage Syslog listener ports
The following are the available actions for the syslog ports under listener port configuration:
- Add a Syslog port
- Manage default Syslog port
- Delete a Syslog port
- Enable/disable a Syslog port
- Enable/disable a Syslog port for selective collectors/agents
- Edit an existing Syslog port
Adding a Syslog port
- Navigate to the Listener Ports module in the product console and click on the +Listener Port button as highlighted below.
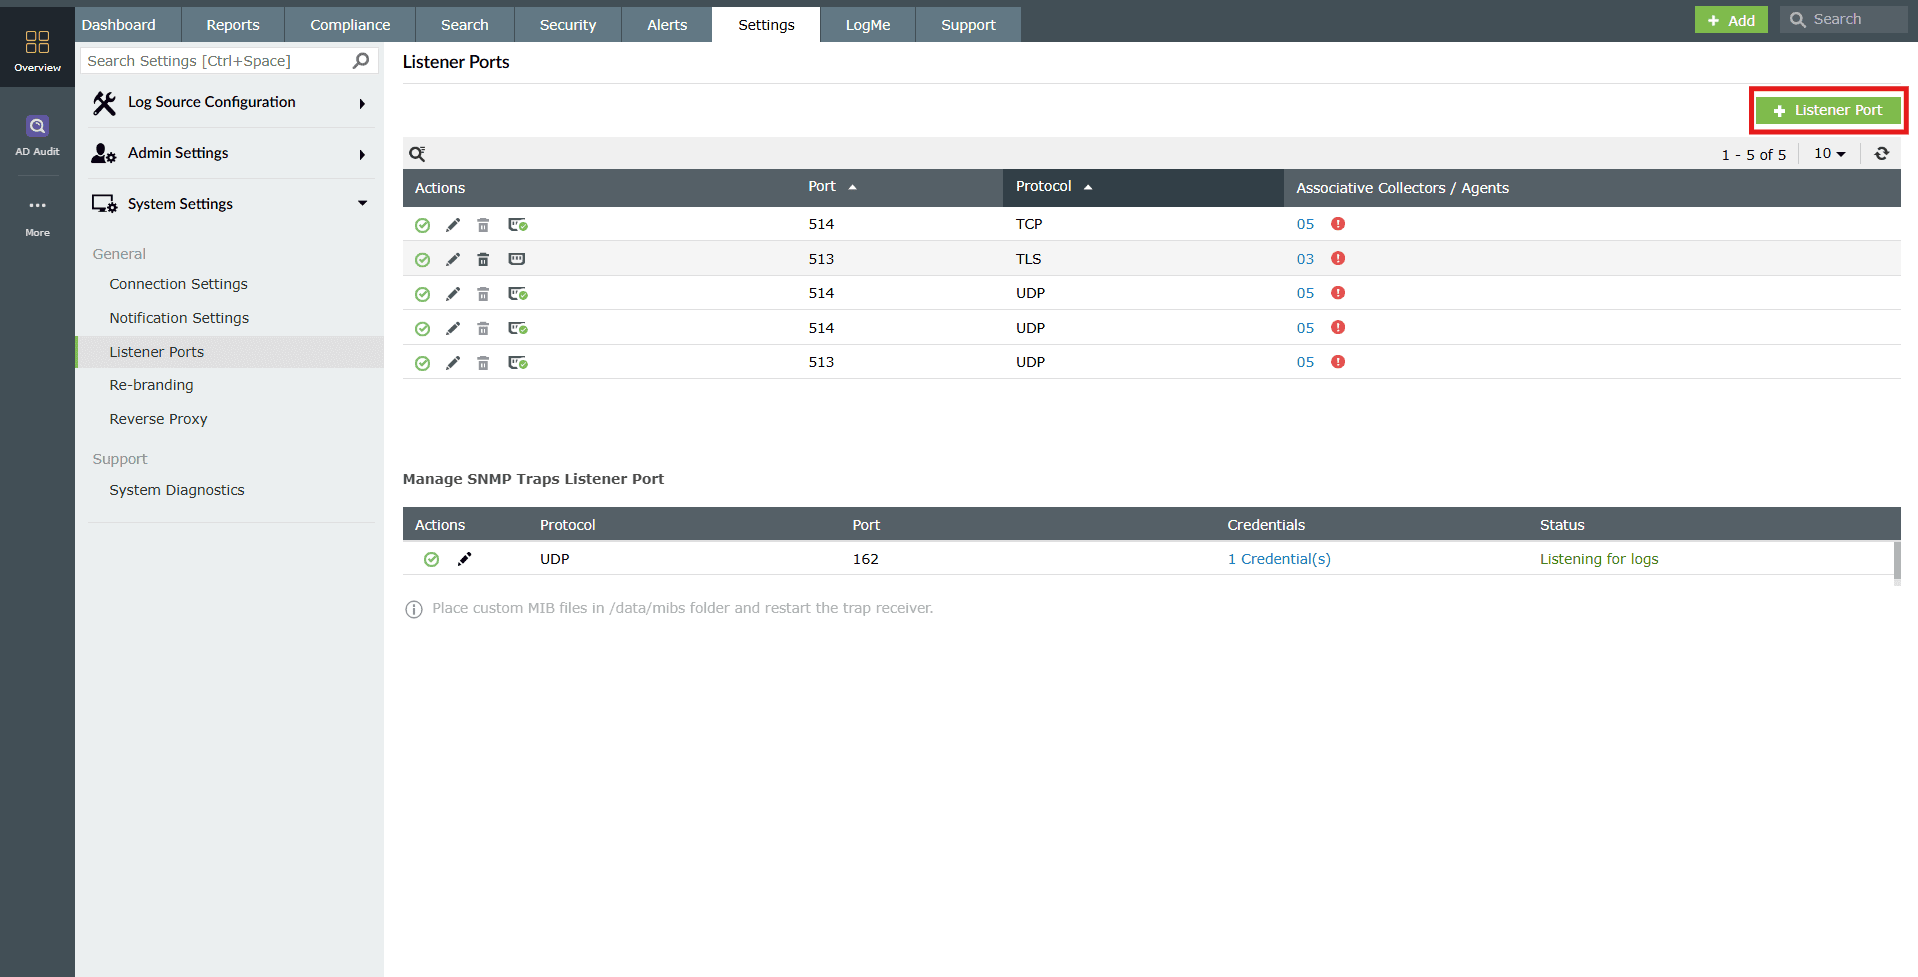
Image 2: Adding a listener port via the Settings tab - The Add Listener Port pop-up slides in.
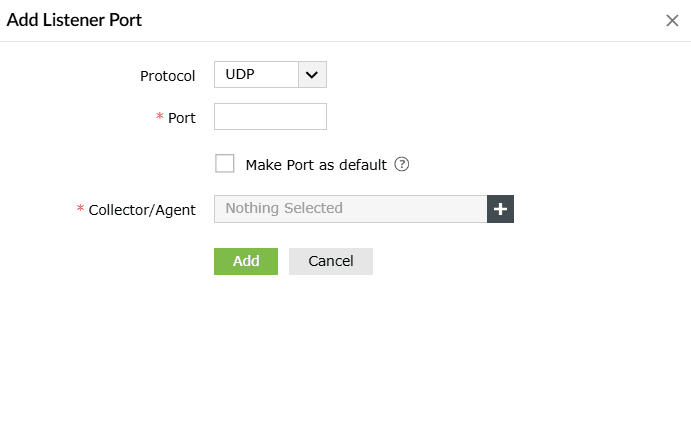
- Fill in the required fields:
- Protocol: Select the protocol from the drop-down.
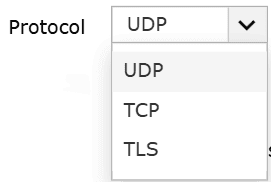
- Port: Specify the port number for log collection.
- Fill in the check-box provided if you wish to make that specific port the default port number that will be automatically associated to newly added collector/agents in future configurations. Ensure the pre-requisites are met before filling in the port number.
- Add Collector/Agent: Select the Collector/Agent(s) on which this port can be enabled.
- Protocol: Select the protocol from the drop-down.
- The Select Collector/Agent option will be visible only if a remote collector/agent has been added in the server.
- For each protocol, you can add only 6 ports.
- Click on Add.
- Upon successful completion of the action, the below pop-up appears.

Manage default Syslog listener port
- To make a port as a default port for syslog collection, click the
 icon under the Actions tab.
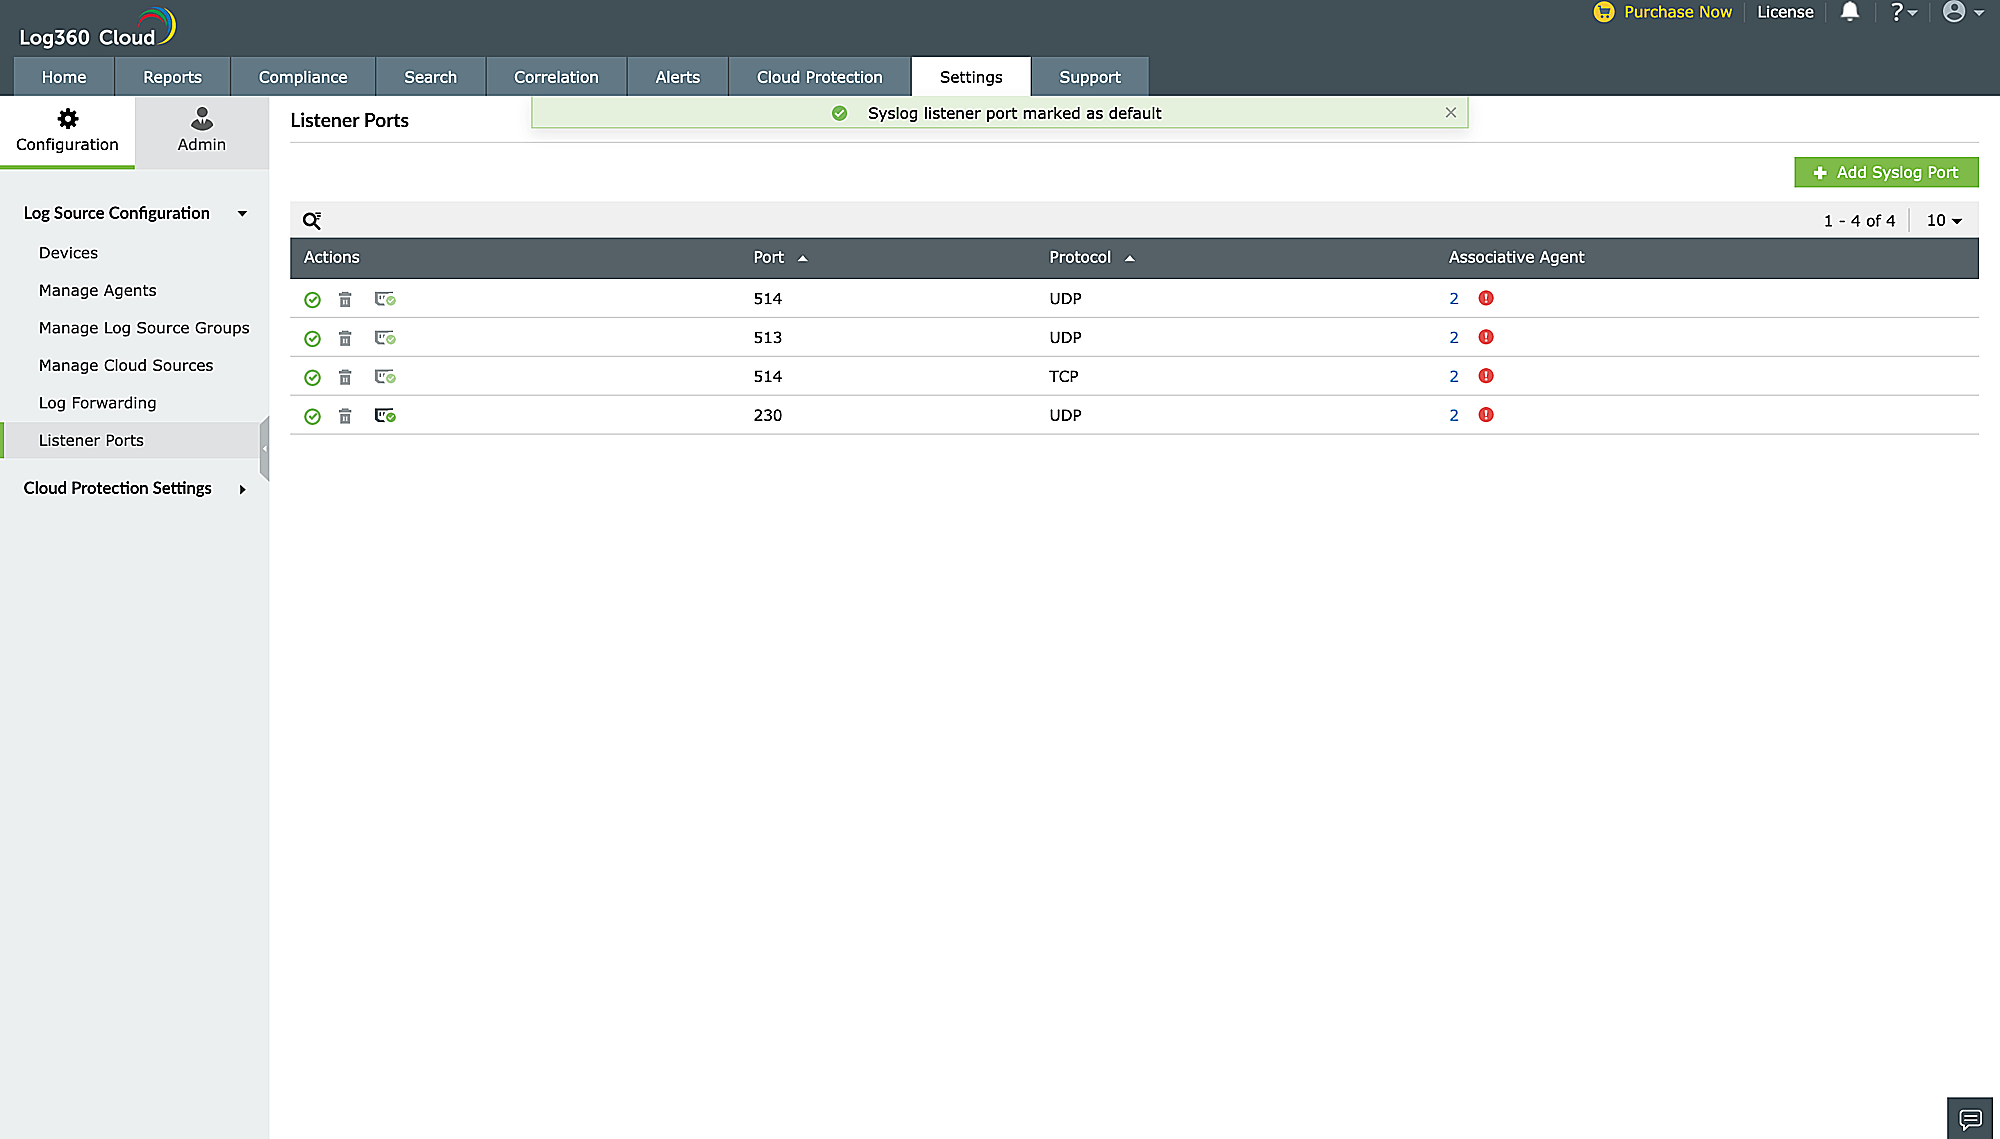
 - Upon successful completion of the action, the below pop-up appears.

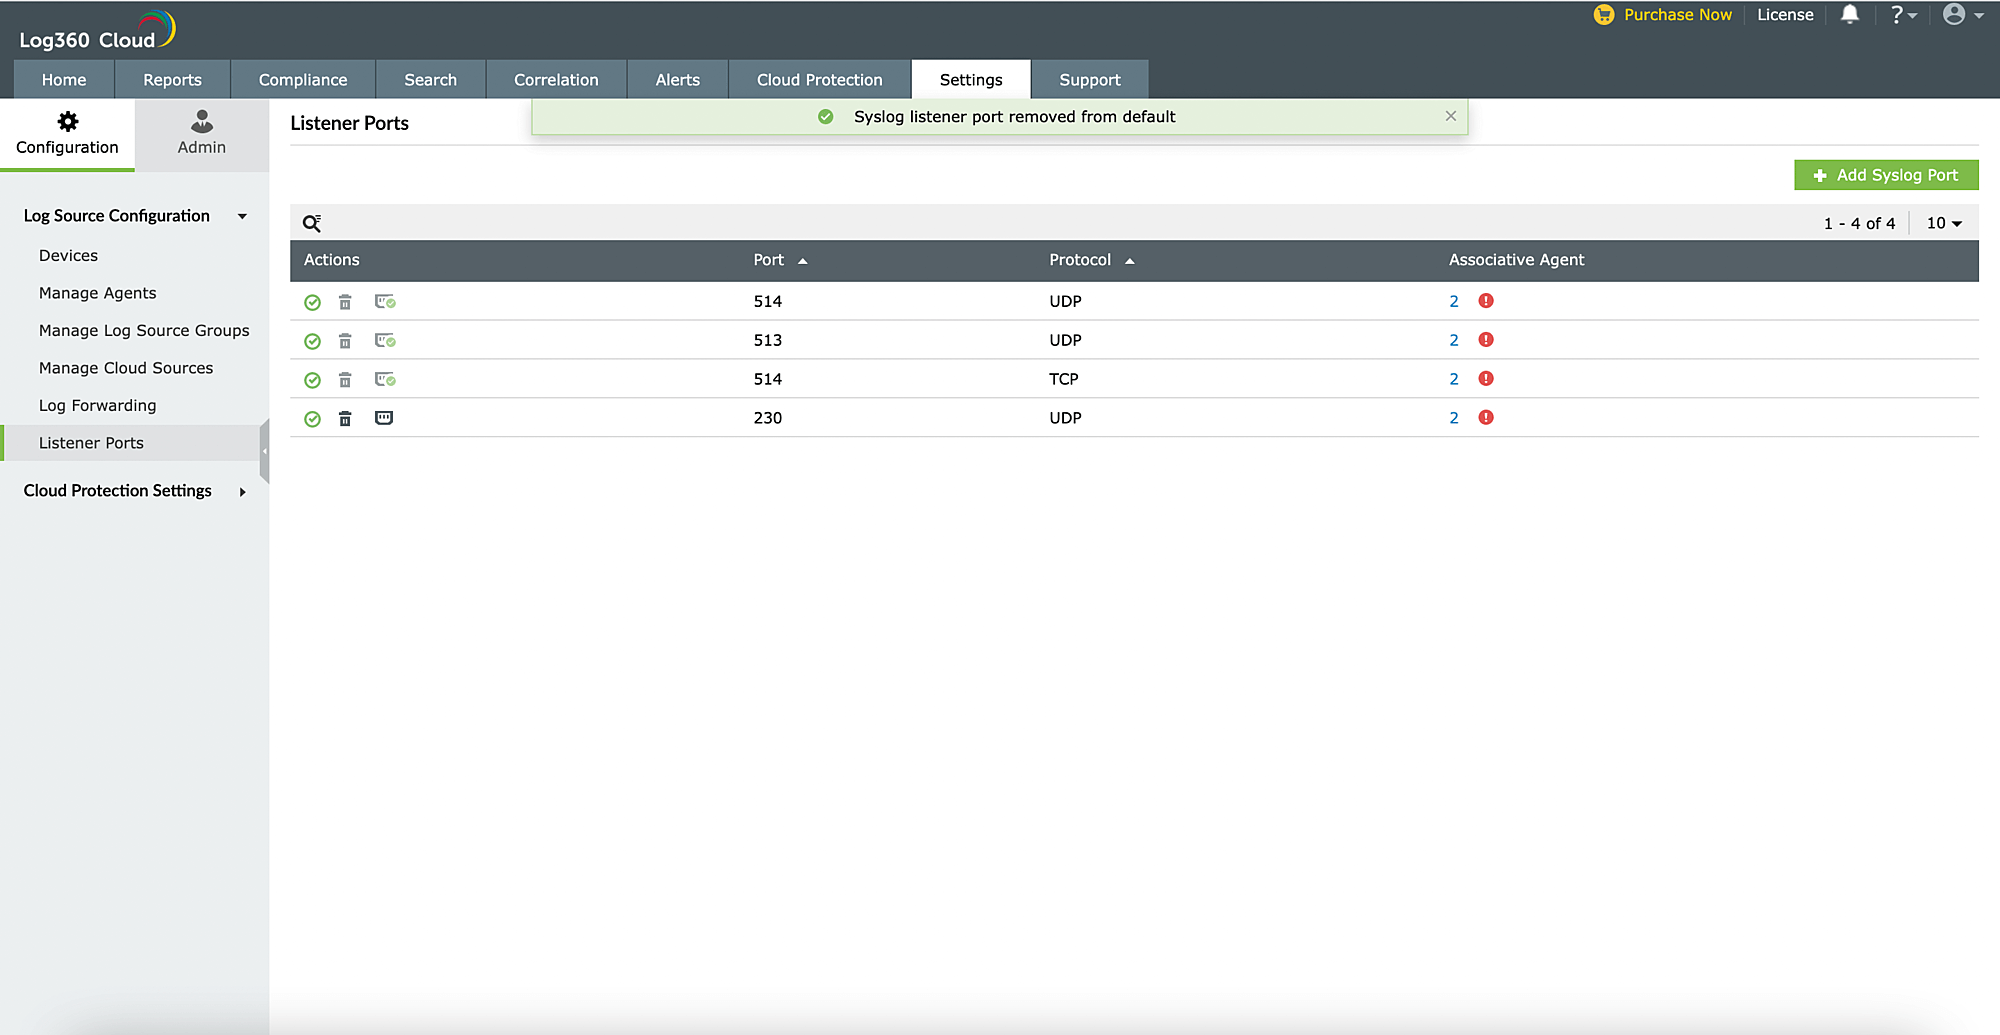
- Similarly, to remove a port from being default, click on the remove as default port icon
 .
. - Upon successful completion of the action, the below pop-up appears.

Once you make the port default, all collector/agent(s) will listen through that specific port.
Deleting a Syslog port
- Click on the Delete icon
 under the Actions column to delete a listener port.
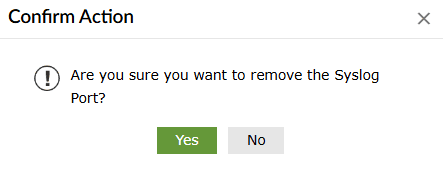
 - A Confirm Action pop-up appears. Click on Yes.
- Upon successful completion of the action, the below pop-up appears.

Enable/disable a Syslog listener port
Enabling a Syslog listener port
- Click on the currently disabled icon
 under the Actions column to enable the port.
 - As soon as you perform this action, the icon indicates that the port is now enabled
 and the below pop-up message appears briefly.

Disabling a Syslog listener port
- Click on the currently enabled icon under the Actions column to disable the port.
- As soon as you perform this action, the icon indicates that the port is now disabled and the below pop-up message appears briefly.

Enable/disable a Syslog listener port for selective collectors/agents
- Click on the corresponding number in the Associated Collectors/Agents column for the port you wish to view the associated collectors/agents for.
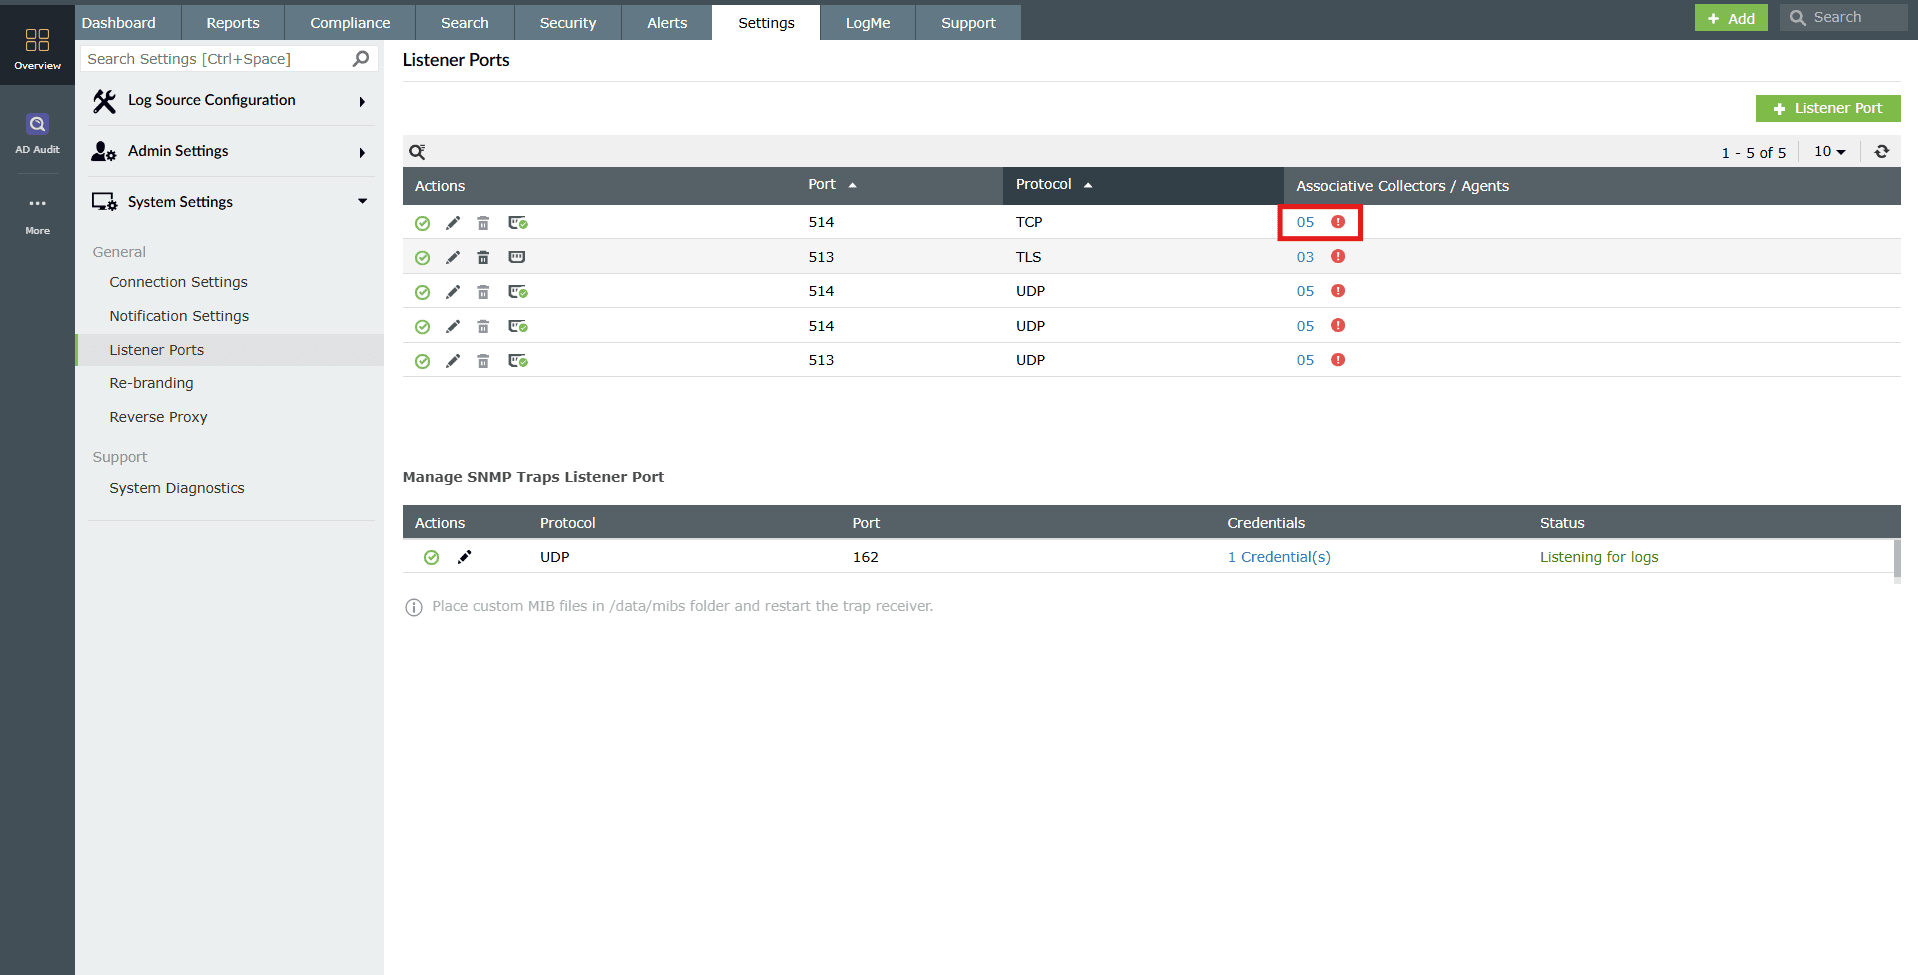
Image 3: Associated collectors/agents for the syslog listener ports - This will open the list of Collectors/Agents and their status along with a troubleshooting link , in the case of an error.
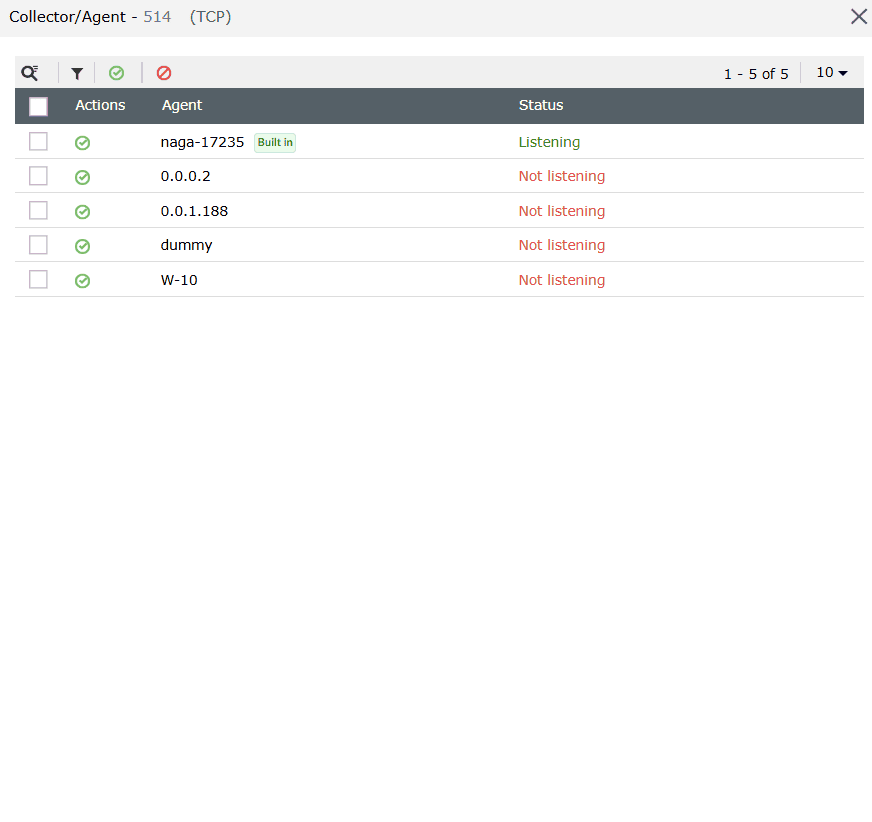
Image 4: Associated collectors/agents for the syslog listener ports
To enable:
- Click on the currently disabled icon under the Actions column to enable the port for that specific collector/agent.
- As soon as you perform this action, the icon indicates that the port is now enabled for that particular collector/agent, and the below pop-up message appears briefly.
To disable:
- Click on the currently enabled icon under the Actions column to disable the port for that specific collector/agent.
- As soon as you perform this action, the icon indicates that the port is now disabled for that particular collector/agent, and the below pop-up message appears briefly.
To enable/disable a port for multiple collectors at once:
- Select the desired collectors by clicking on the checkboxes provided and click on the enable/disable icon at the top.
- Upon successfully enabling, the below pop-up appears.

- Upon successfully disabling, the below pop-up appears.

Edit a Syslog listener port
- Click on the Edit icon
 under the Actions column to edit the respective port.
 - The Edit Listener Port box will be displayed. Make the necessary edits and click on Save.
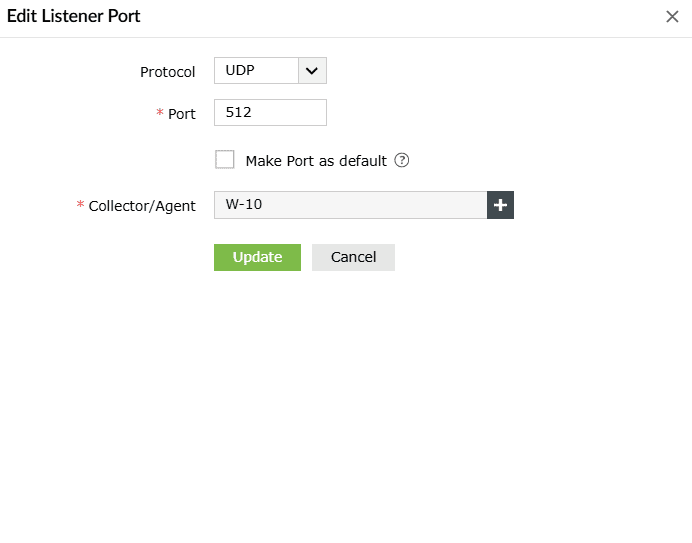
- The changes are updated instantly. Upon successful completion of the action, the below pop-up appears.

Associating a collector/agent for a device
Use this interface to select a collector or agent while configuring the device/application or the listener port(s).
- In the product console, navigate to the Settings tab and click on Devices.
- Click on the +Add Device(s) button as highlighted below.
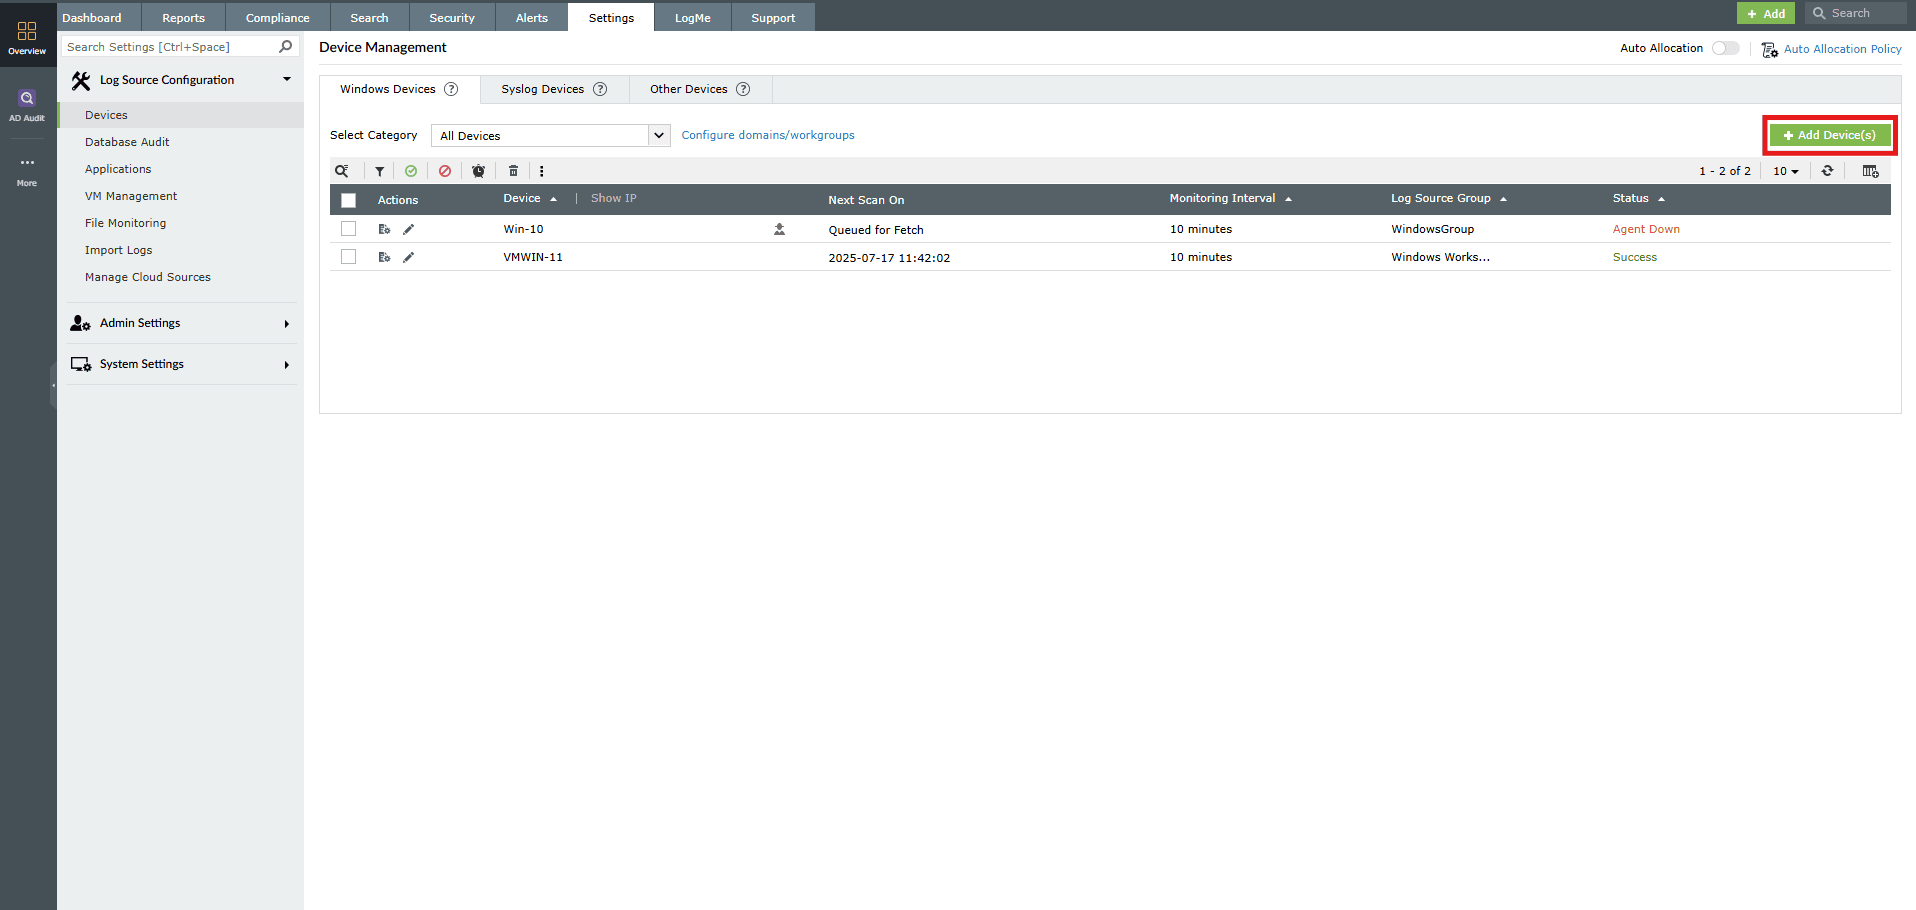
Image 5: Adding a device to a listener port configuration - The Add device pop-up box appears. In the Collector/Agent field as highlighted below, click the plus + icon to display the list of available collectors/agents.
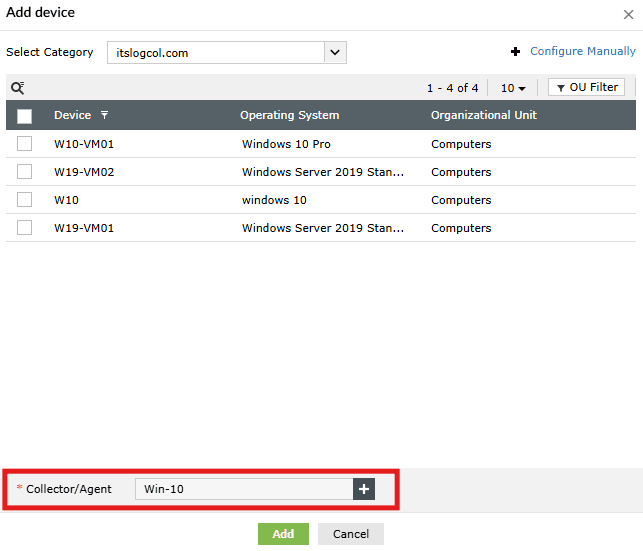
- Select the appropriate collector/agent from the list that appears on the screen.
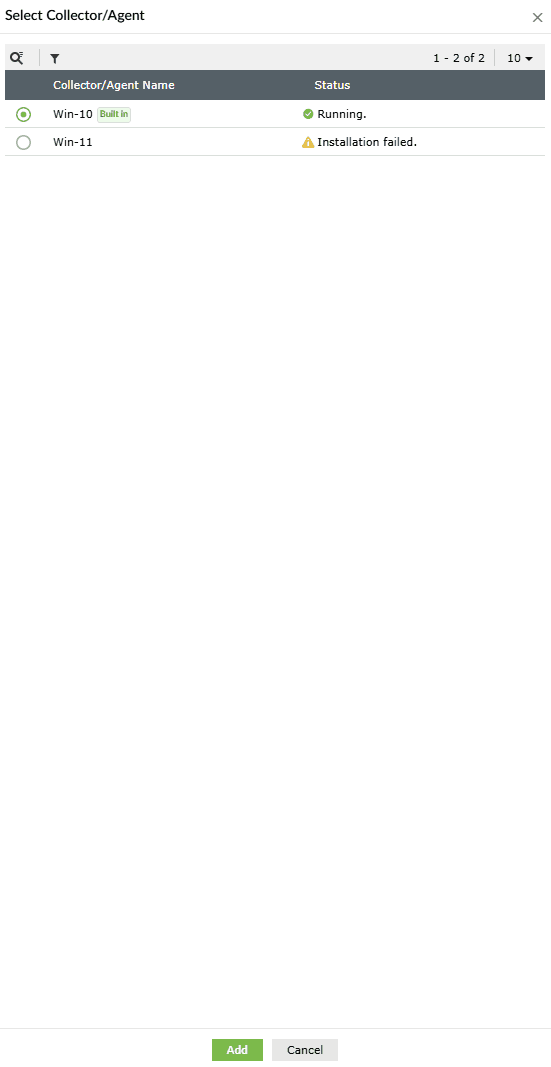
- Click on Add to confirm your choice and proceed.
Update agents for an existing syslog port
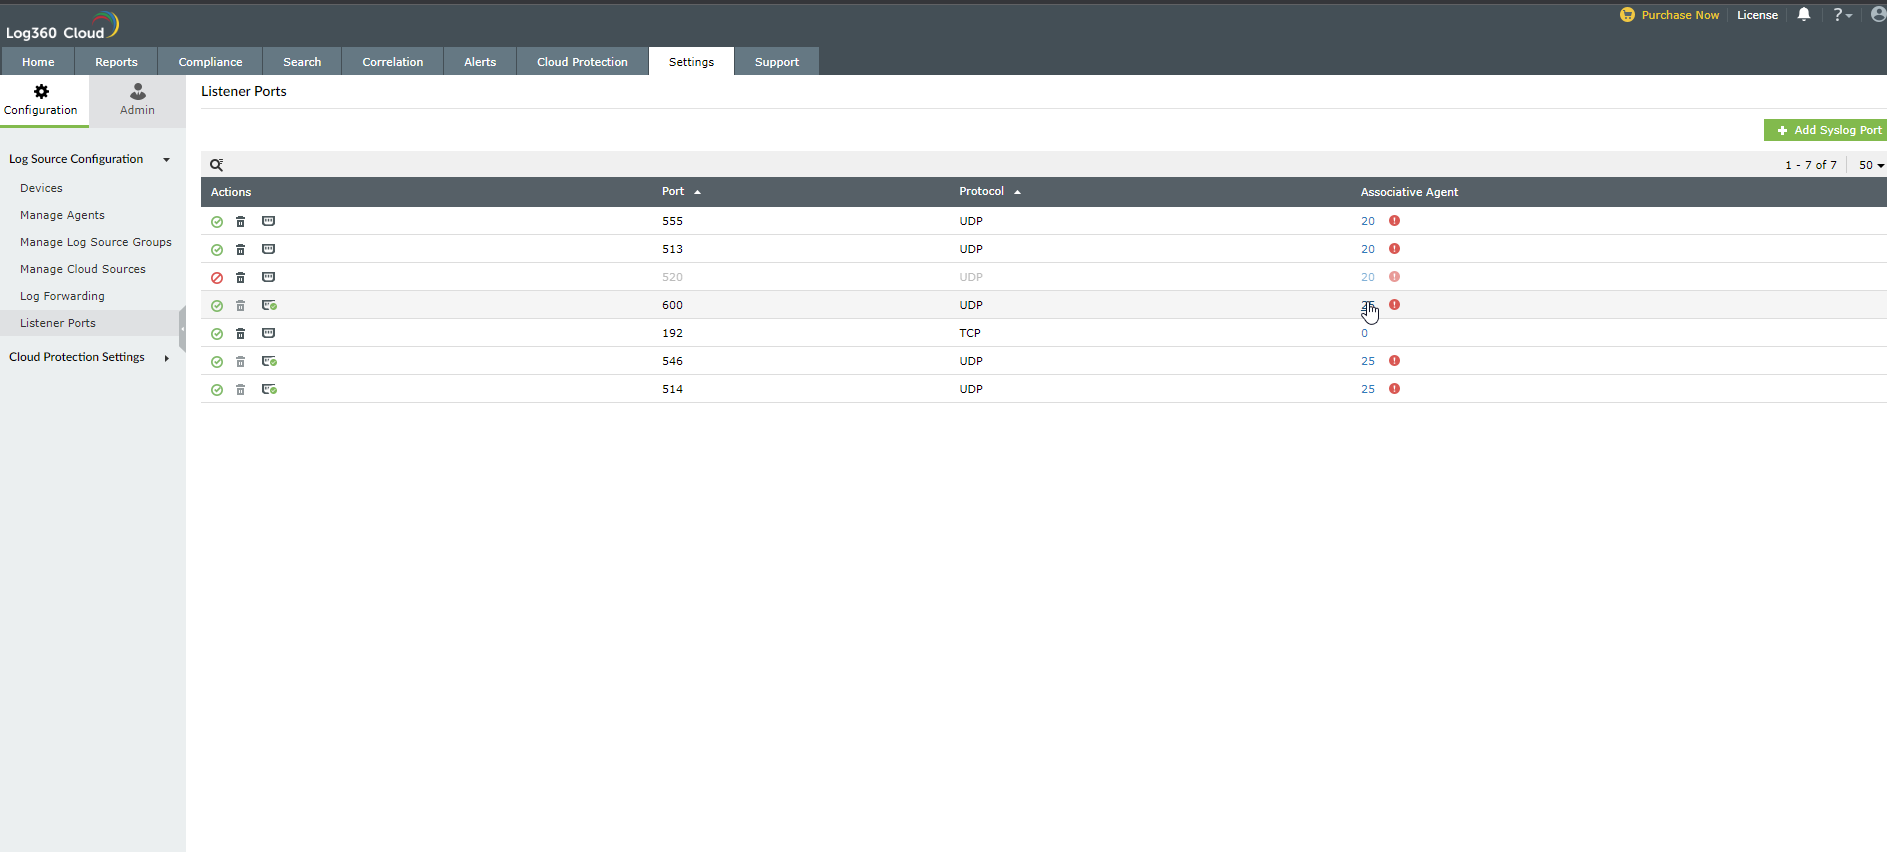
- Go to Settings > Admin > Management > Listener Ports.. The listener ports are displayed as shown.
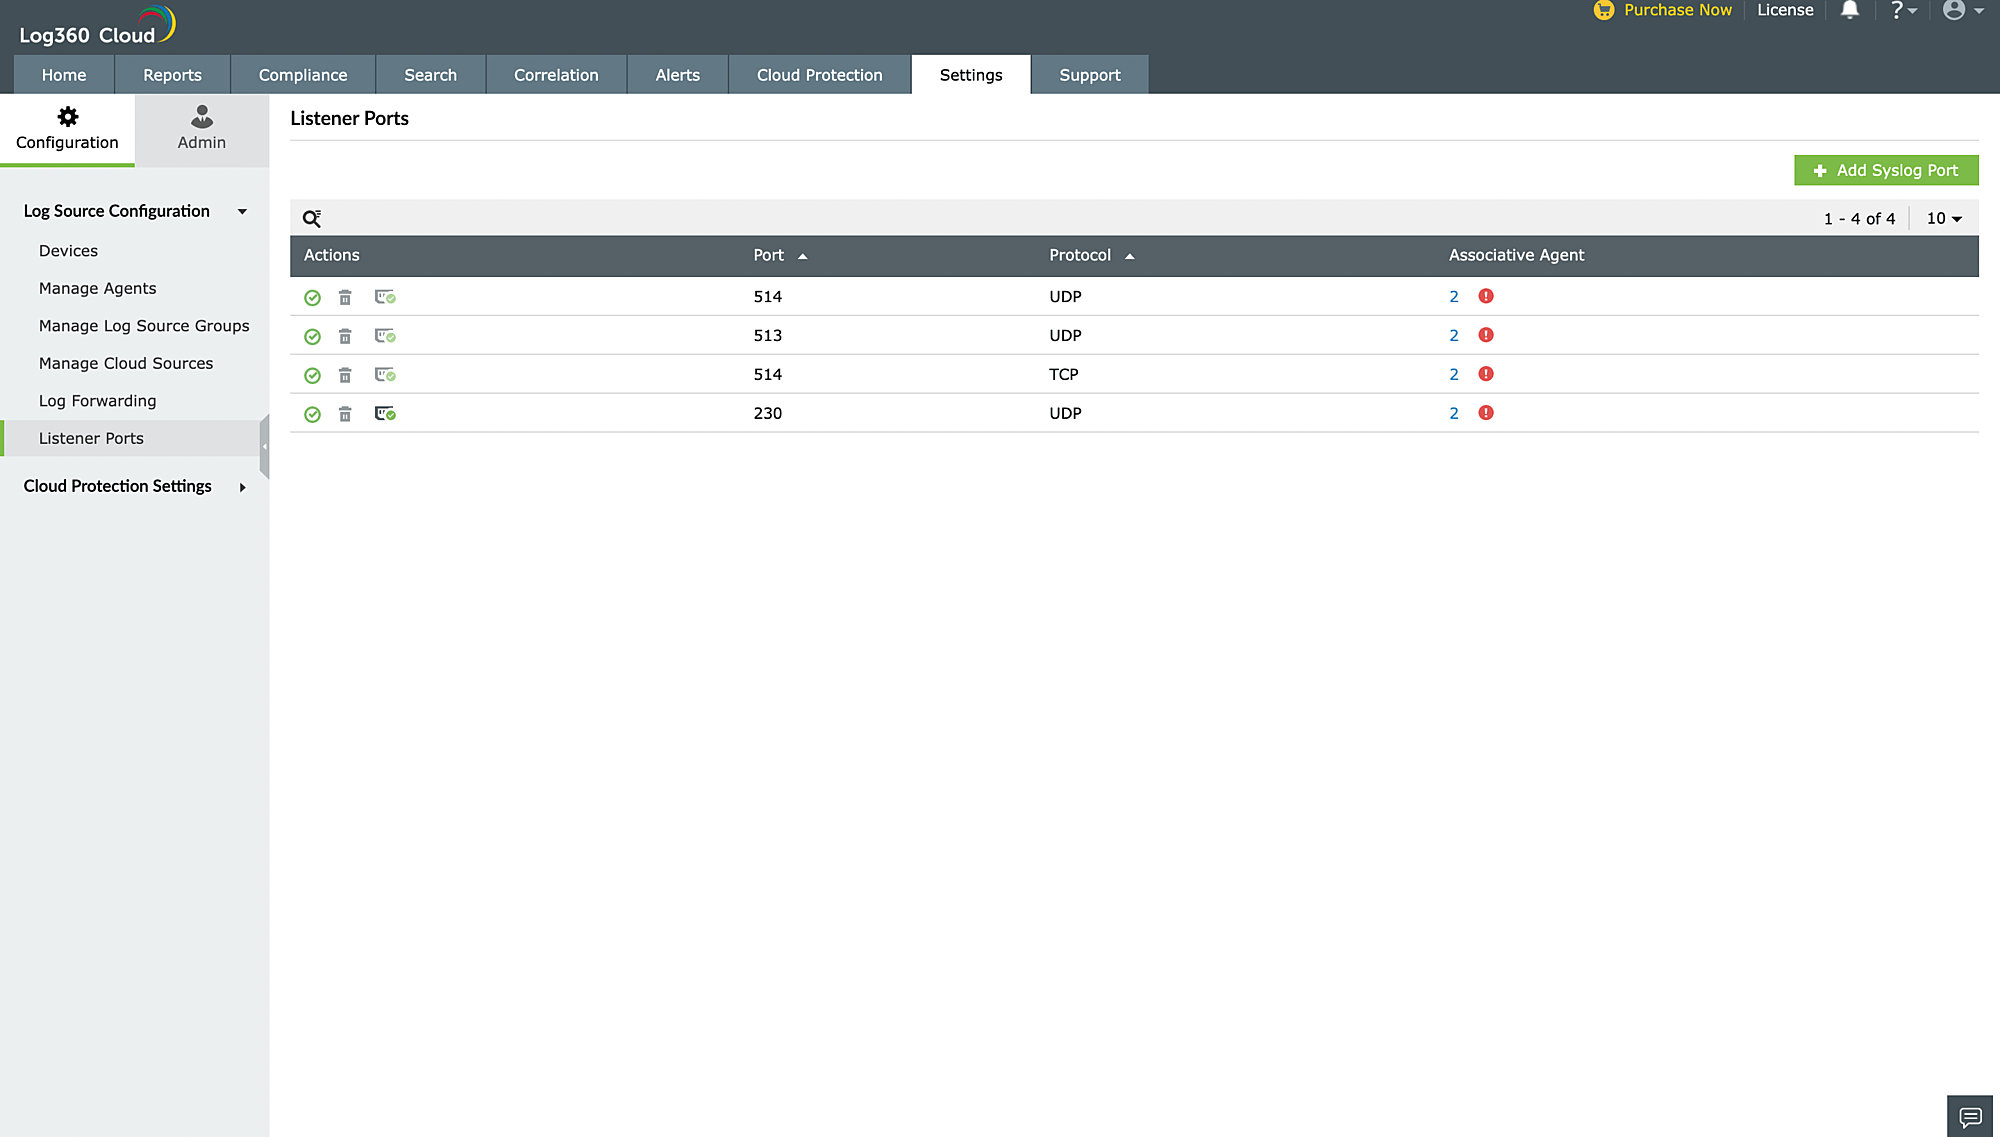
- The Attention icon in the above screenshot is indicative of agents that are not listening. To check this or update an existing port, click on the corresponding number in the Associative Agents column.
- This will open the list of agents and their status with a troubleshoot link in case of an error. Proceed to select or unselect the required agents by checking the checkboxes.
- You can change views of agents being shown through the Showing drop-down that provides Unassociated Agents, Associated Agents and All options.
- Once you've selected the agents, click Update.
Agent-side TLS certificate installation
- Click Install with your TLS Certificate.
Through the install wizard
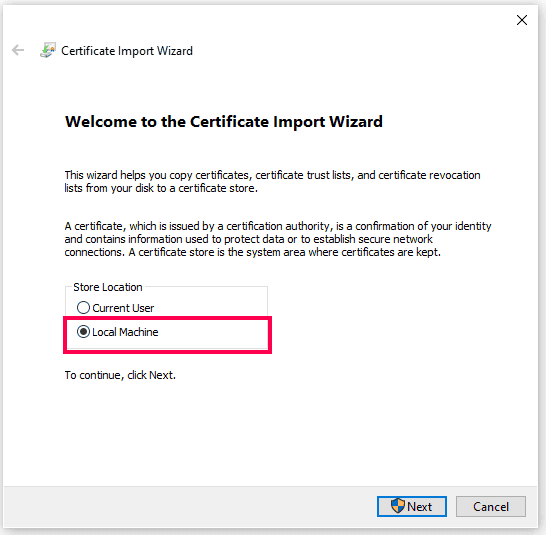
- Select Store Location as Local Machine and click Next.
- Verify the file name and click Next.

- Enter the certificate password and click Next.

- In Certificate Store, select Place all certificates in the following store. Click Browse, select the ManageEngineLog360 store, and click OK. Then click Next.


- Finally, verify the store and certificate.


Verify the certificate on the local machine
- Run certlm.msc and navigate to the ManageEngineLog360 store to verify your certificate.

Through command prompt:
- Run the Command Prompt as Administrator.
- Execute the following command:
certutil -f -p "<PASSWORD>" -importpfx "ManageEngineLog360" <PFX CERTIFICATE PATH>

Adding certificates through GPO with script
- Place your certificate on a network share path.
- Create a script file in the Netlogon shared folder on the domain controller to run this command:
certutil -p "<PASSWORD>" -importpfx "ManageEngineLog360" "<PFX_SHARE_CERTFICATE_PATH>" - Open Group Policy Management Console (GPMC). Right-click the Group Policy Object you want to edit and click Edit.
- Navigate to Scripts (Startup/Shutdown):
Computer Configuration\Policies\Windows Settings\Scripts (Startup/Shutdown) - Double-click Startup.
- In the Startup Properties dialog box, click Add.
- In the Add a Script dialog box, enter the path to the script or browse to the script file in the Netlogon shared folder on the domain controller.
- After installing the certificate, restart the agent. Refer here to restart the agent.