Managing billing operations manually - from customer records to product catalogs - can drain your resources and create inconsistencies. The MSP Central integration with Zoho Billing helps address this by automatically syncing your customer, product and usage-based data - letting you set up flexible service plans and subscriptions for the services you offer. This reduces setup time, and lets your team focus on customer service delivery.
Prerequisite
Before setting up the integration, you must have an active Zoho Billing account. If you do not have one, follow these steps:
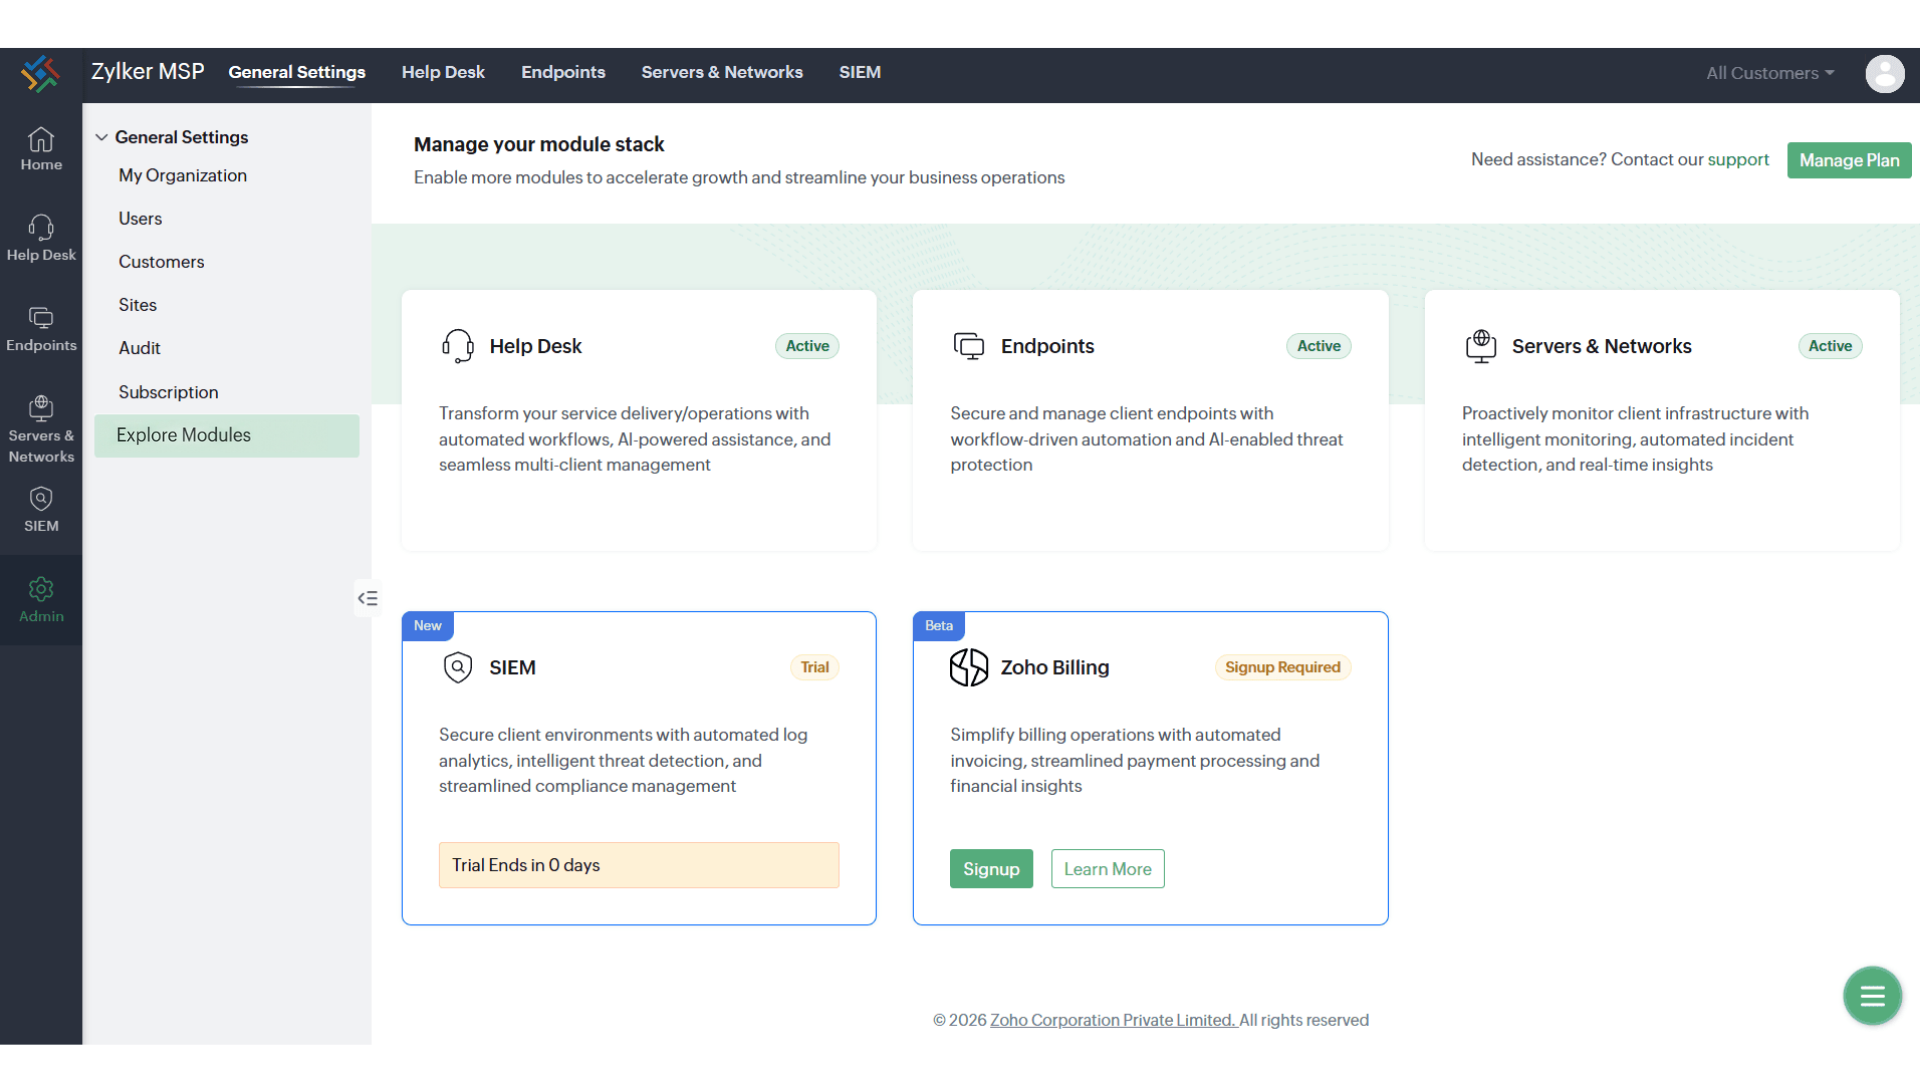
- In MSP Central, navigate to the Admin > General Settings > Explore Modules > Zoho Billing and click Sign Up.
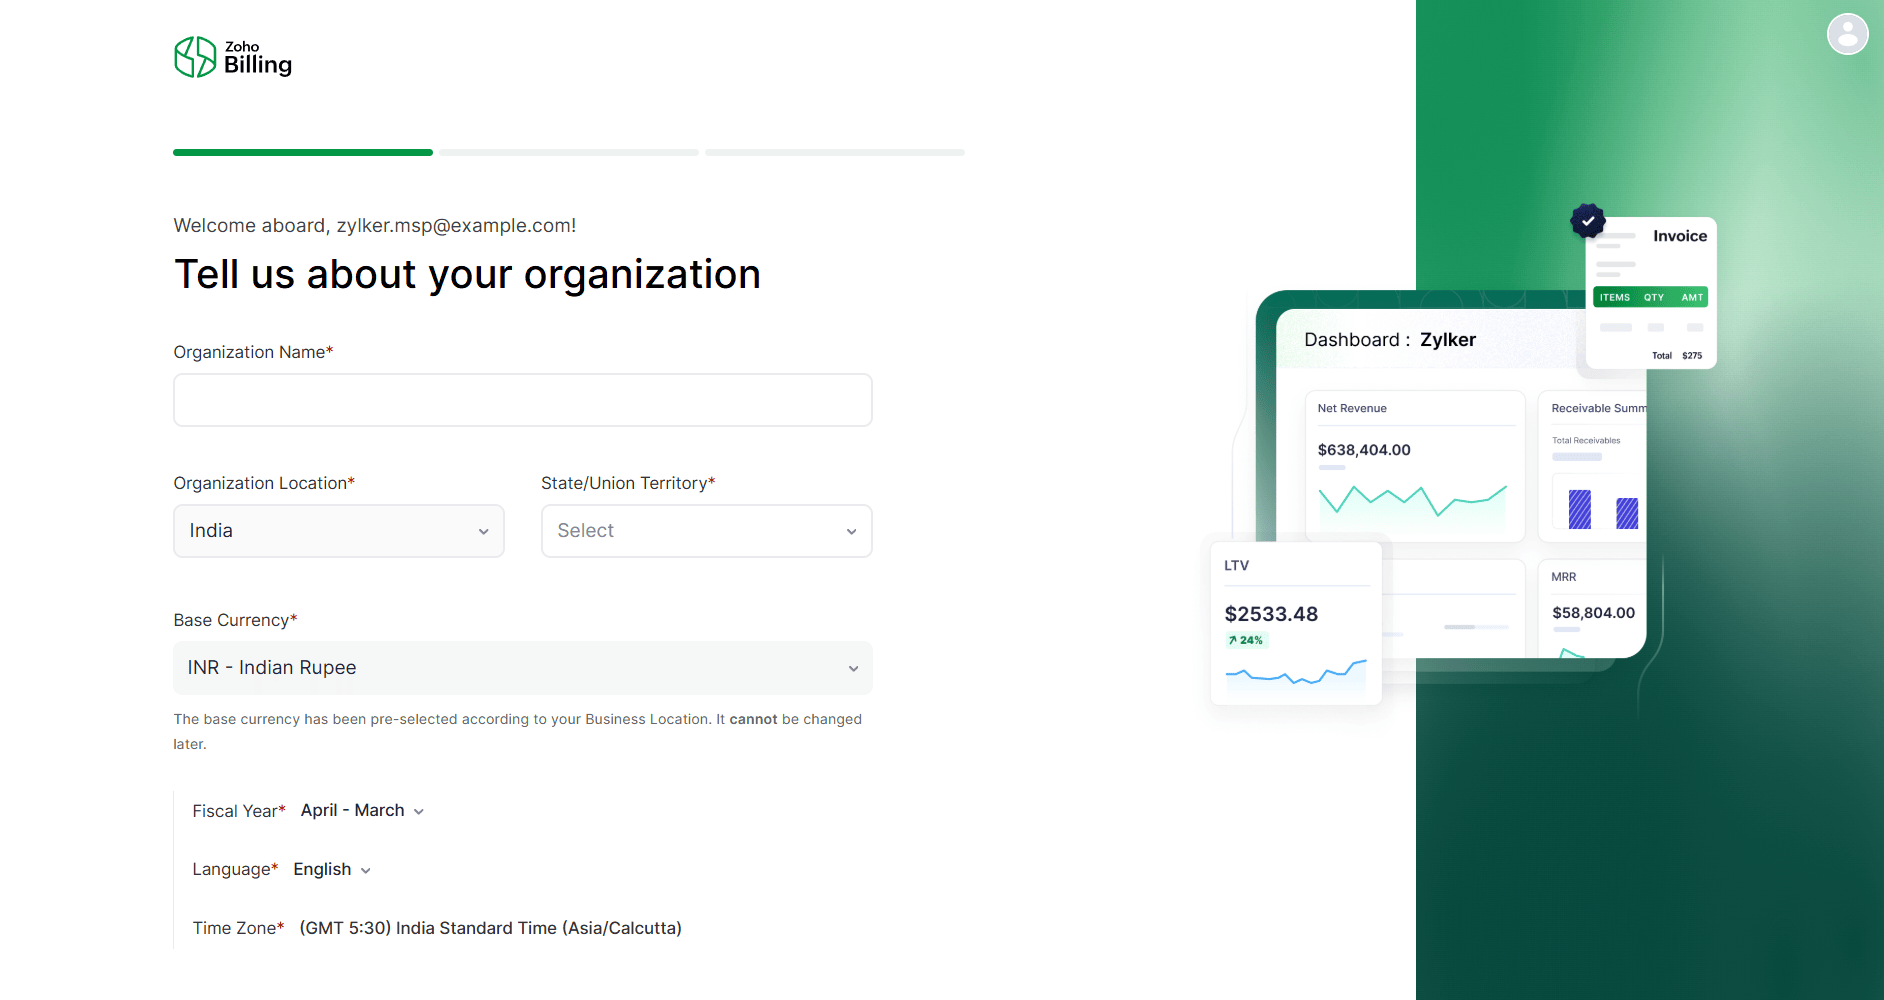
- You will be redirected to the Zoho Billing Sign Up page. Fill out your basic firm details like Organization Name, Location, Base Currency, Fiscal Year, Language, and Time Zone. Click on Save and Continue.
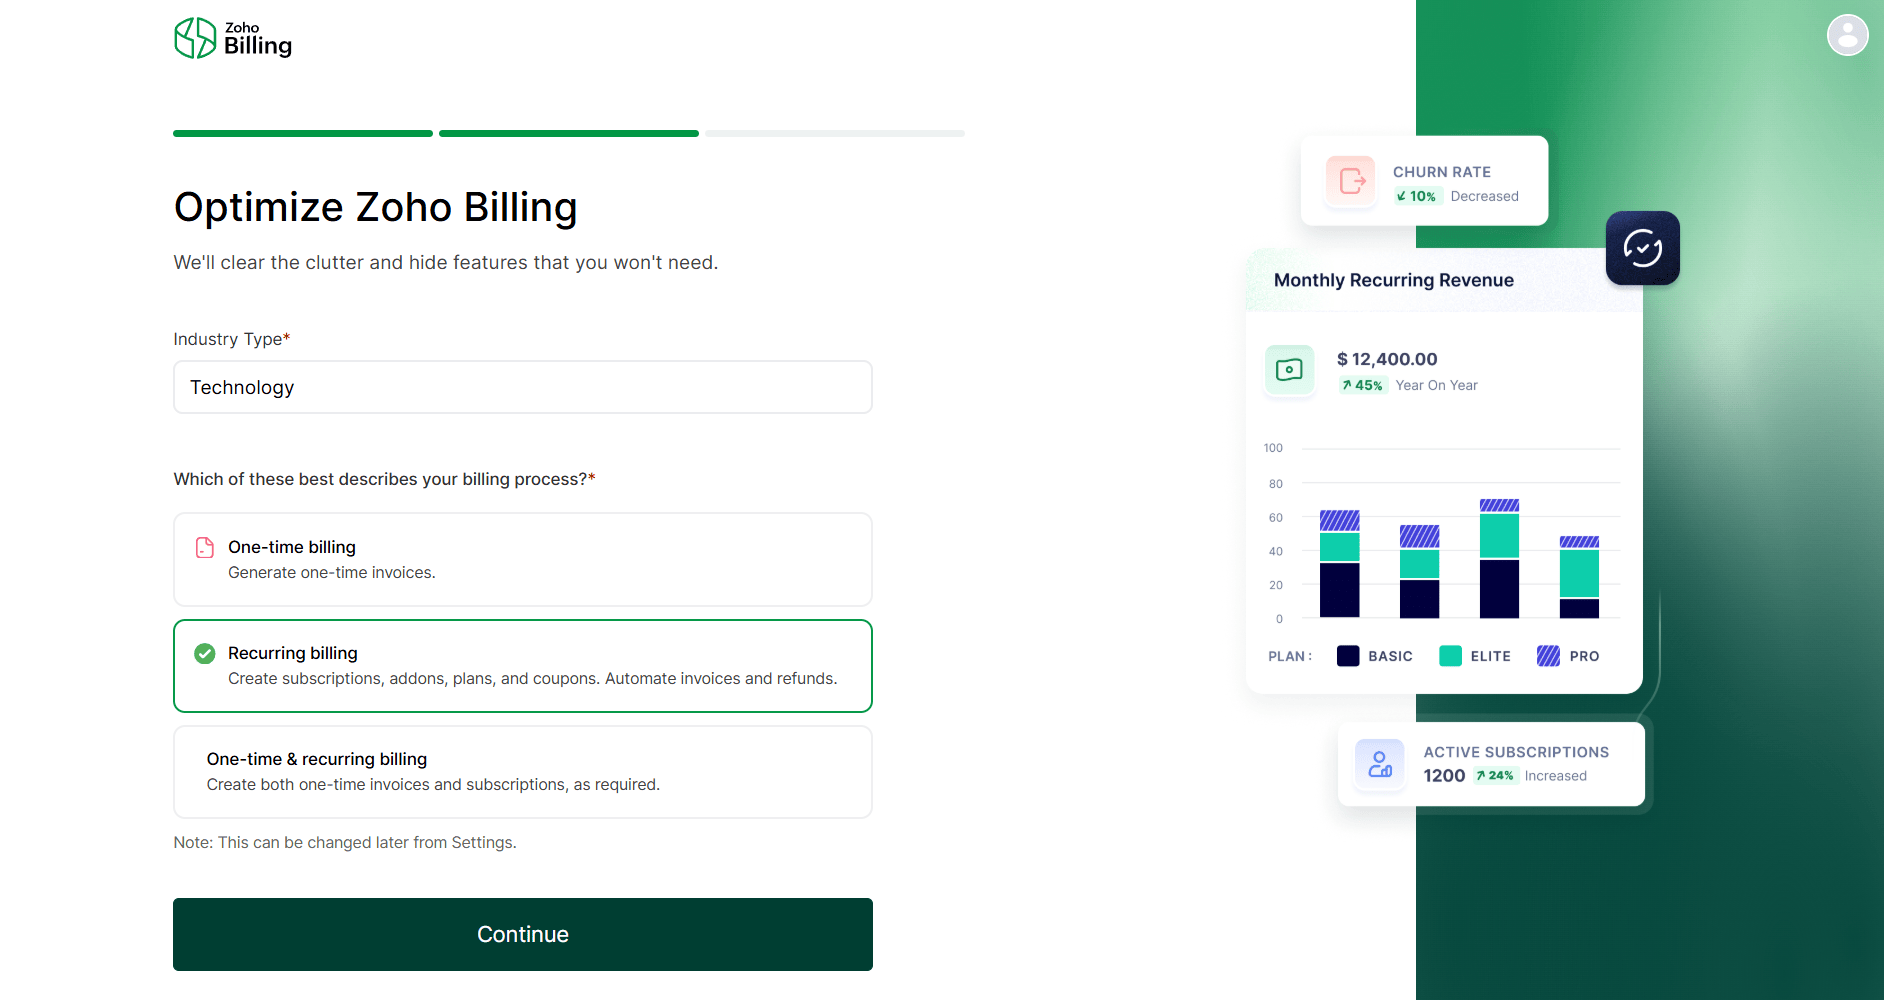
- You will be redirected to select your Industry Type and which billing type best suits you: one-time, recurring, or one-time and recurring.
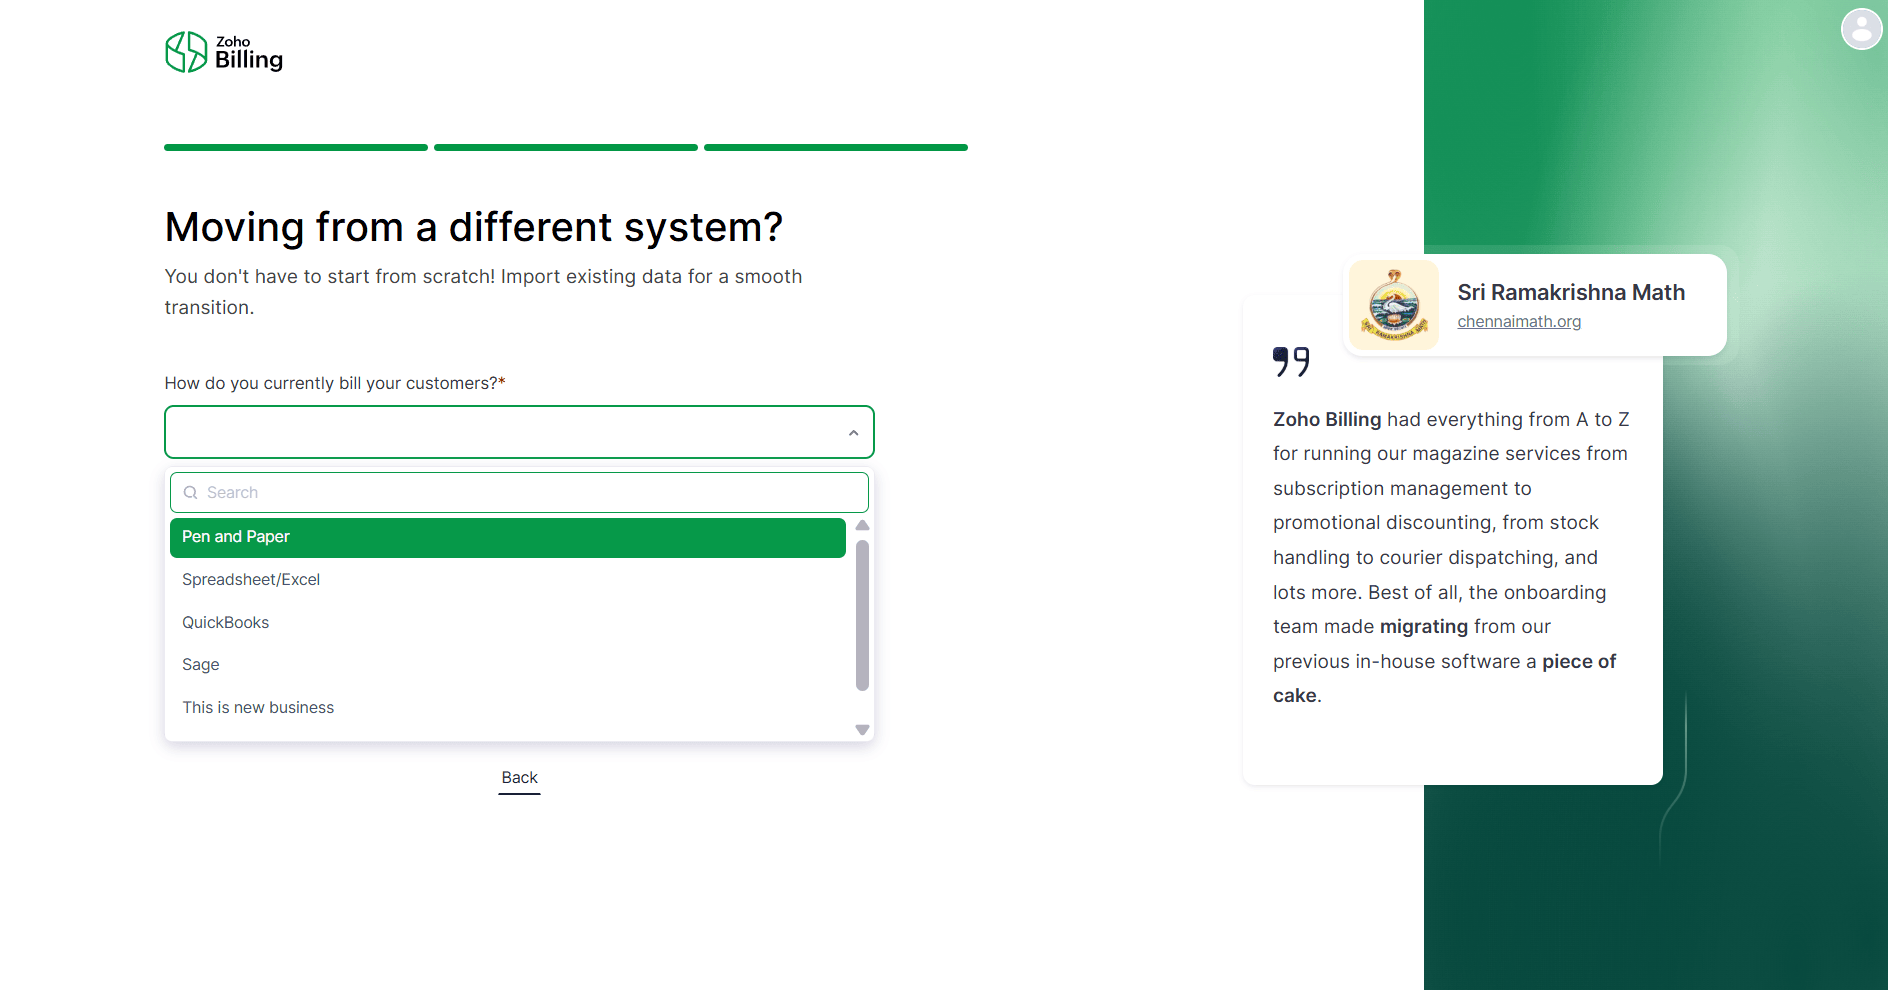
- As a final step, enter how you currently bill your customers. You can even import existing data if you want to, or you can choose to import it later.
- You have now successfully created the account in Zoho Billing.
Part 1: Initial Integration & Synchronization
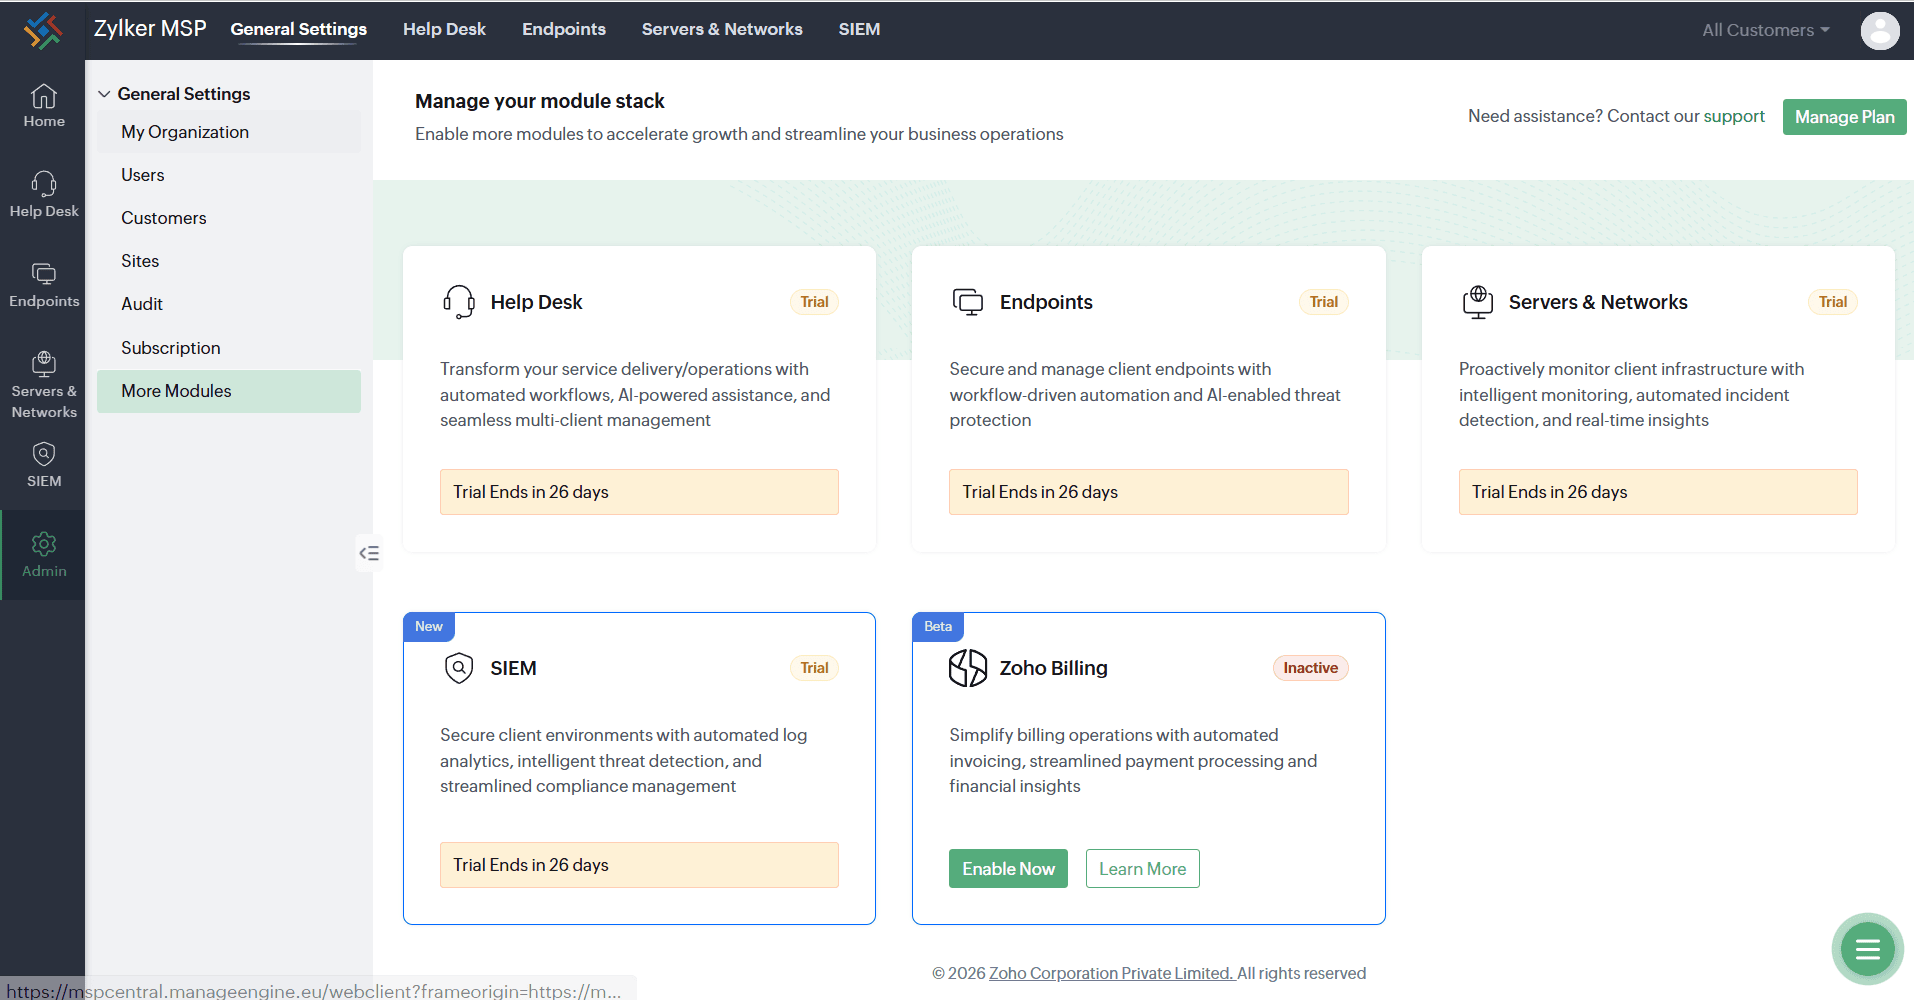
- In MSP Central, navigate to Admin > General Settings > More Modules > Zoho Billing and click Enable Now.
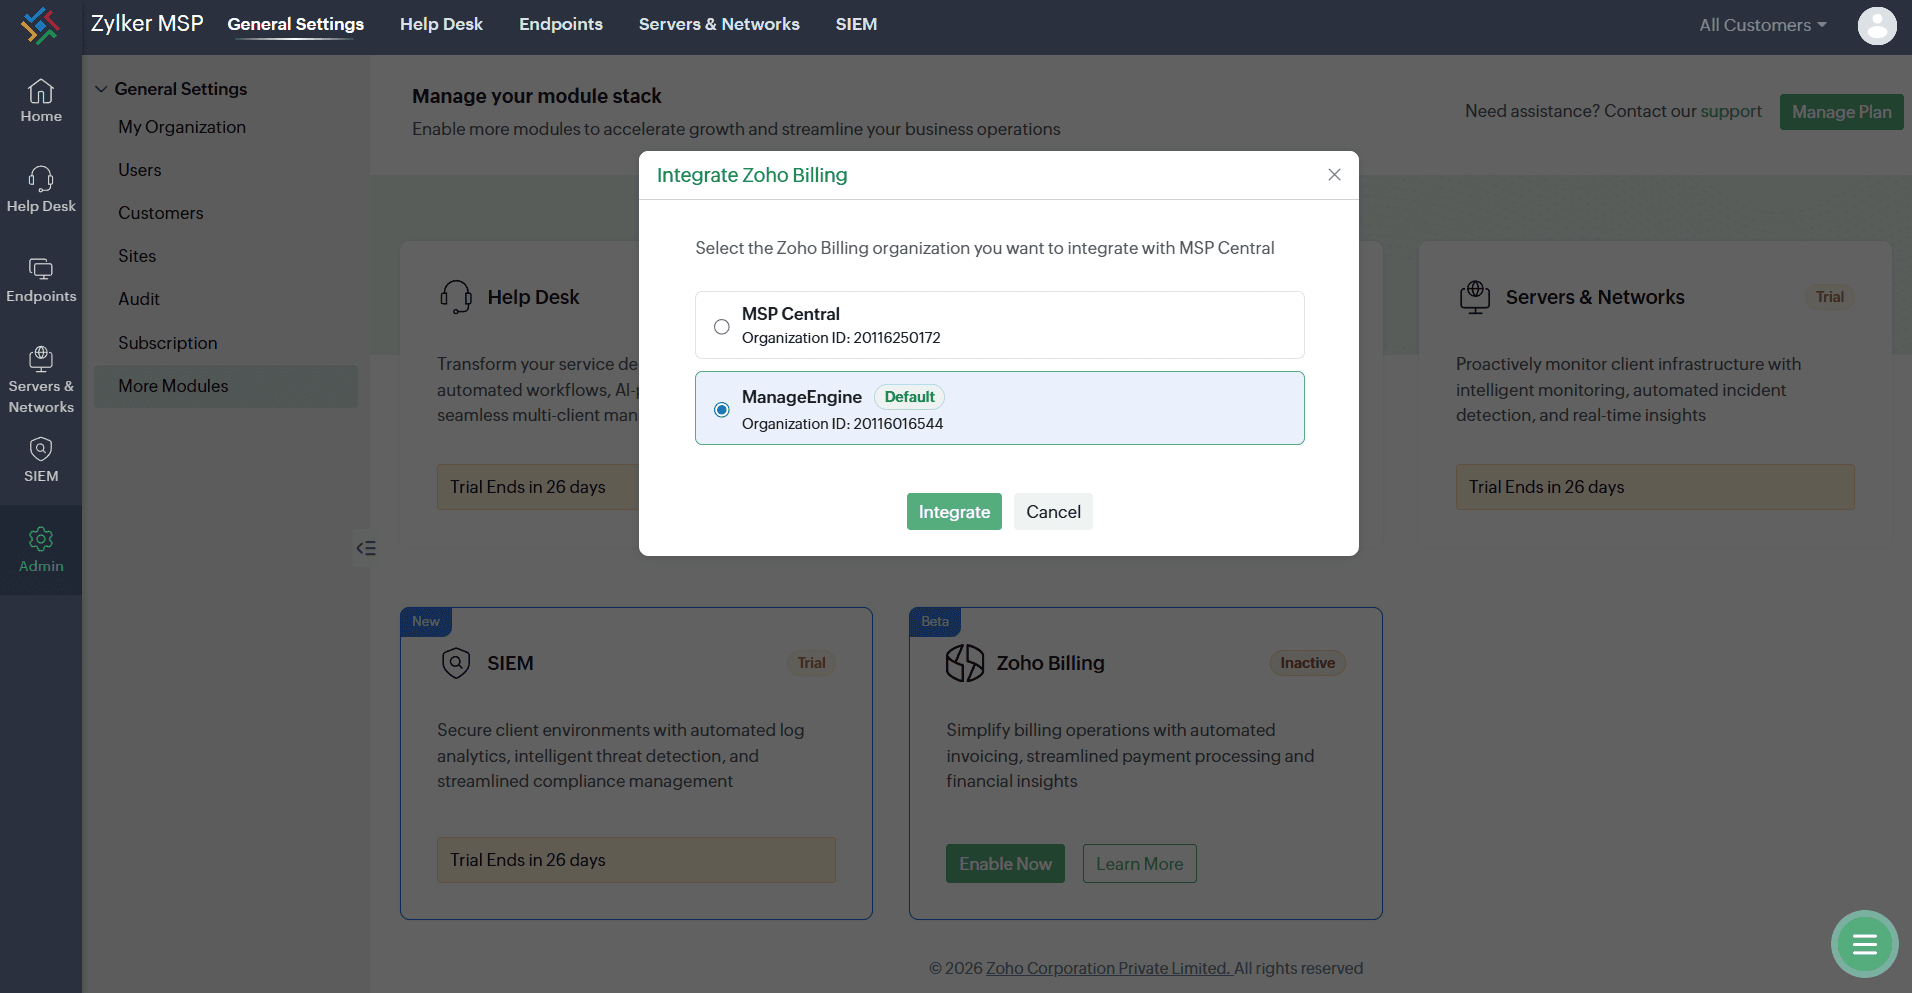
- A popup will appear if the user is associated with multiple Zoho Billing organizations. Select your designated Zoho Billing organization from the dropdown and click Integrate.
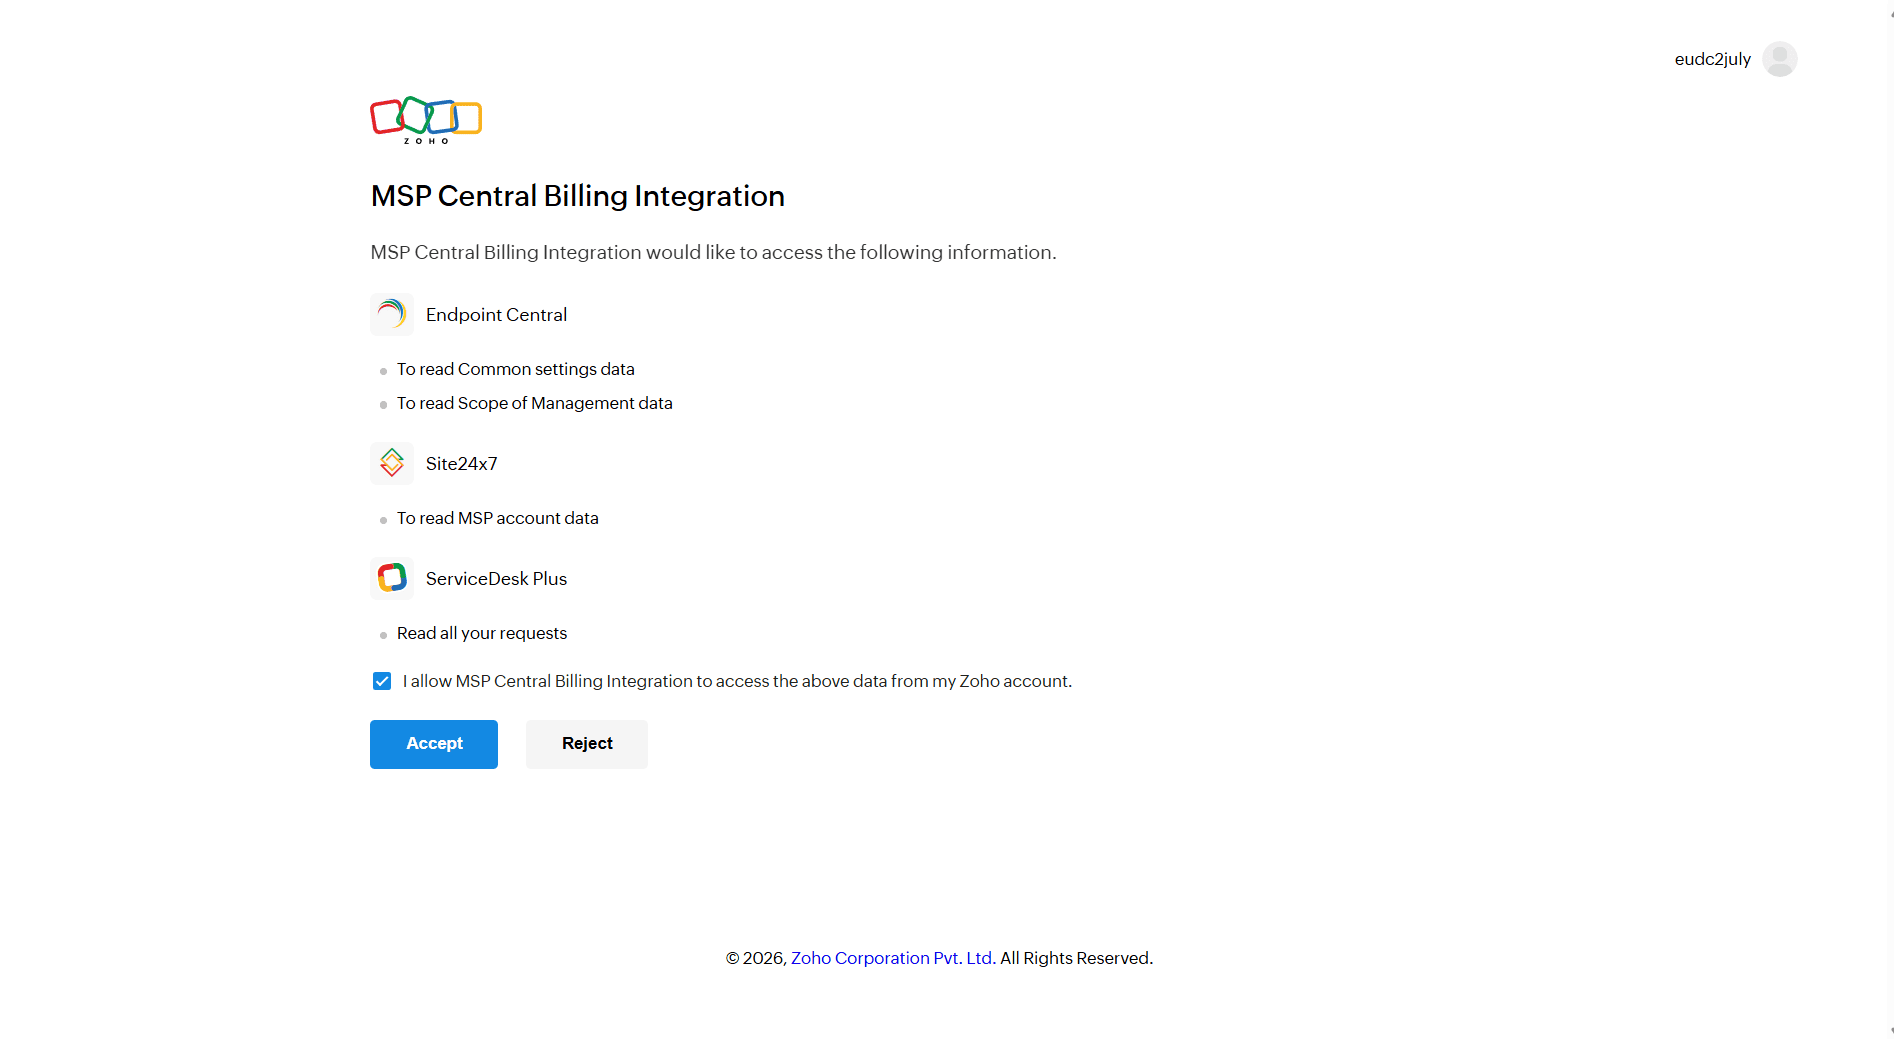
- You will be redirected to an authorization page. Review the requested permissions and click Accept.
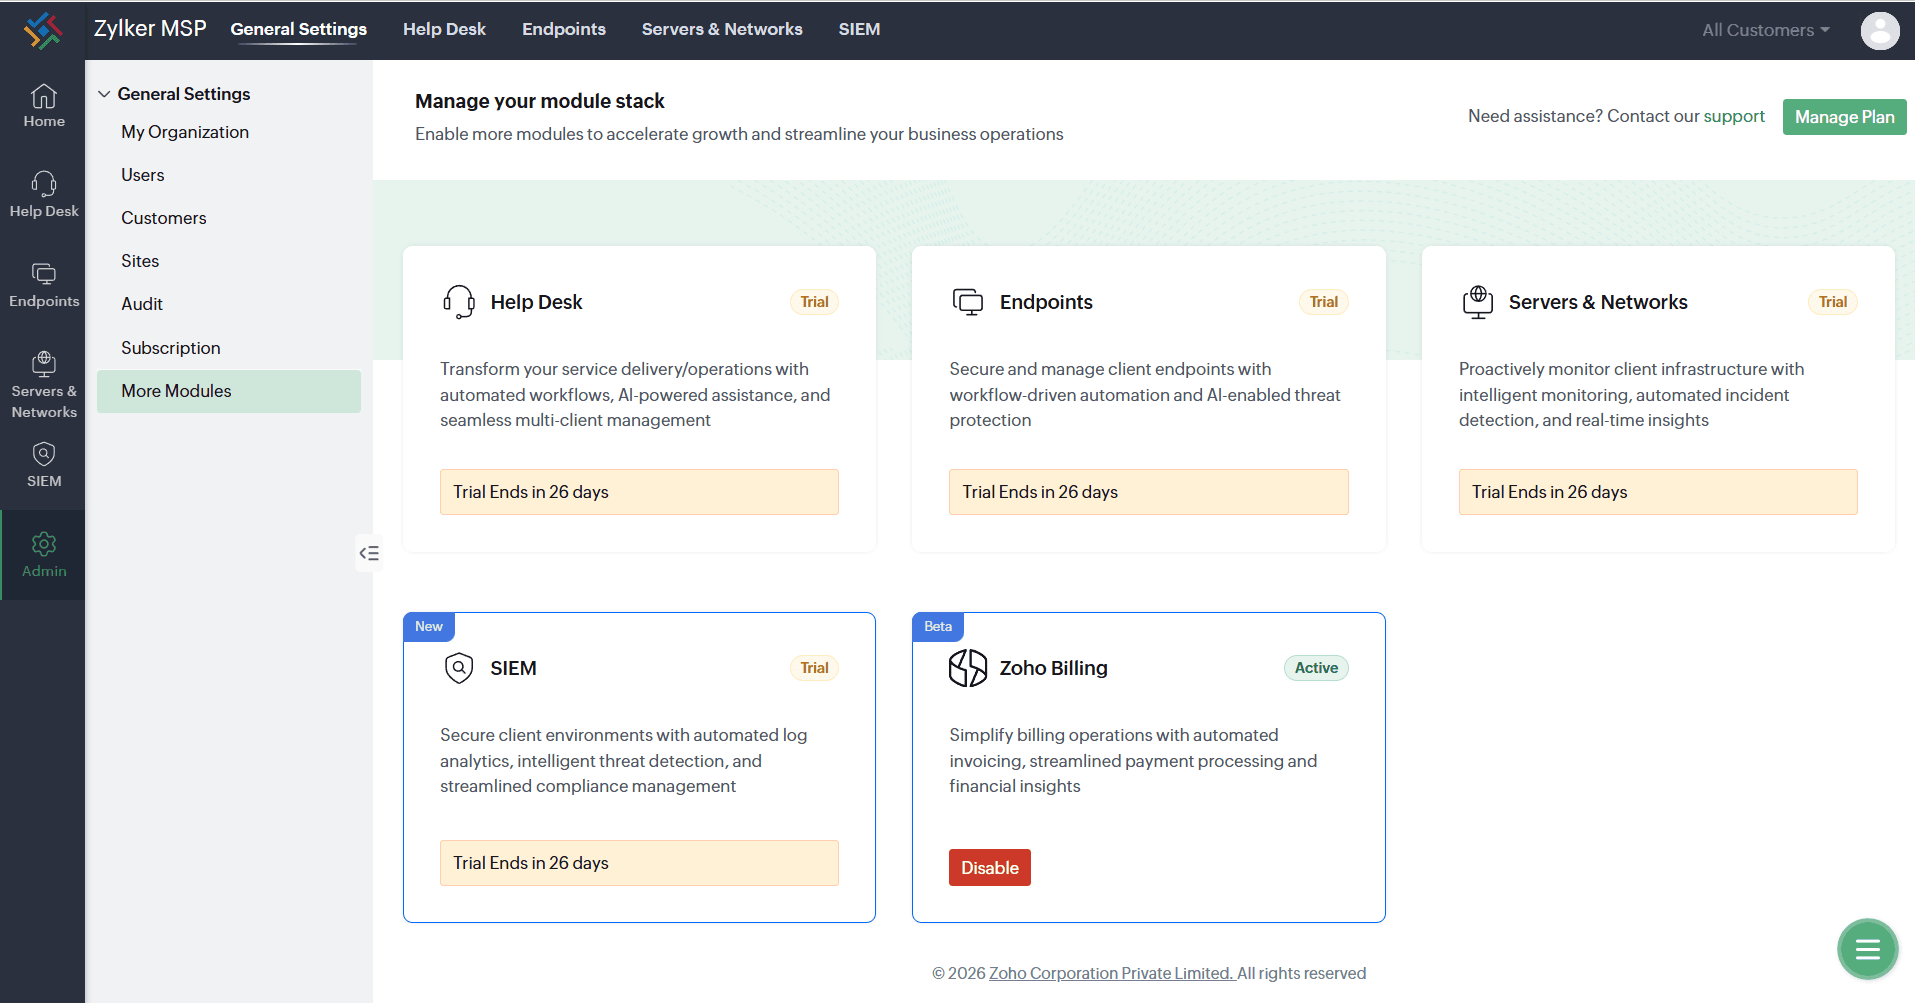
- Once the module shows as Active, your existing Customer and Product data automatically syncs from MSP Central to Zoho Billing.
- Customer data: Existing customer records (name and email address) are synced to Zoho Billing. Any new customer added in MSP Central will automatically sync to Zoho Billing as well - no manual step required.
- Product data: In Zoho Billing, "products" represent the services you offer your customers. When the integration is activated, four base products - Endpoints, Network Device, Request, and Server Monitoring - are synced by default. If you offer additional services beyond these, you can create new products in Zoho Billing at any time. It is not recommended to delete any existing product in Zoho Billing, as this can disrupt the data sync between MSP Central and Zoho Billing for that particular product.
Part 2: Usage Data Posting & Invoicing
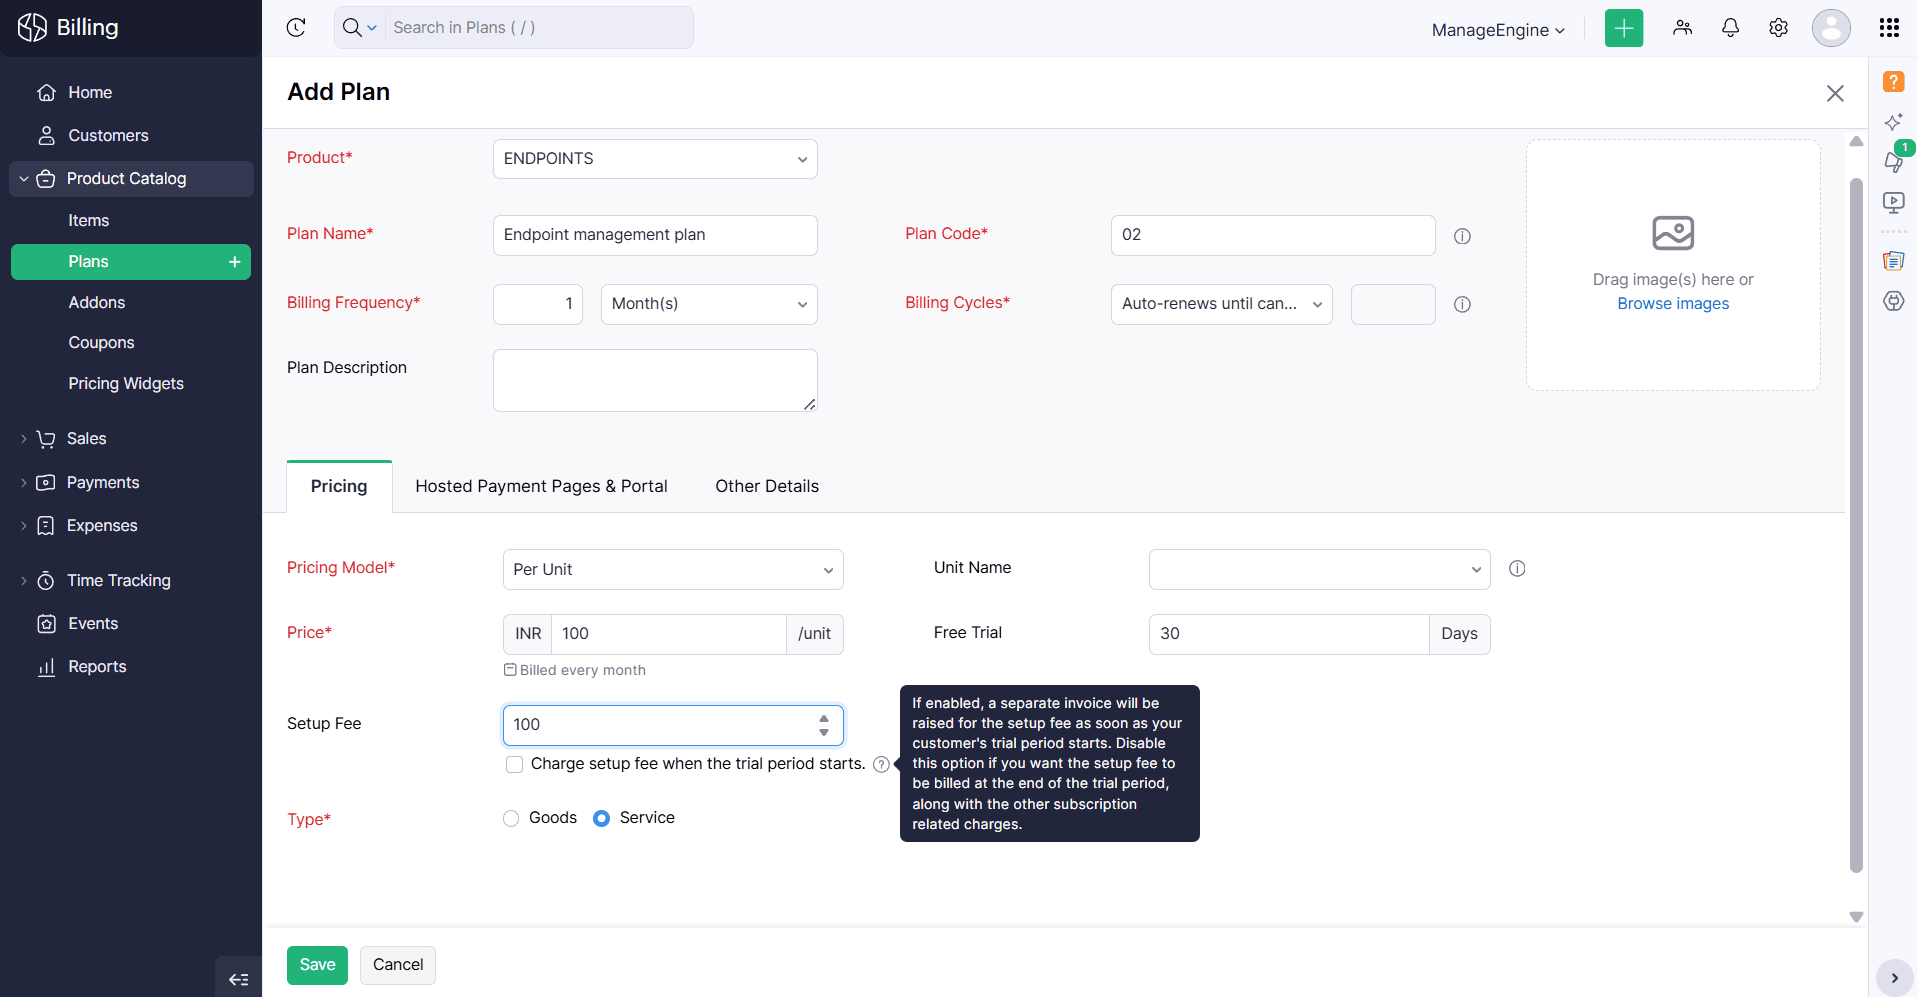
- In Zoho Billing, navigate to Product Catalog > Plans and click New Plan.
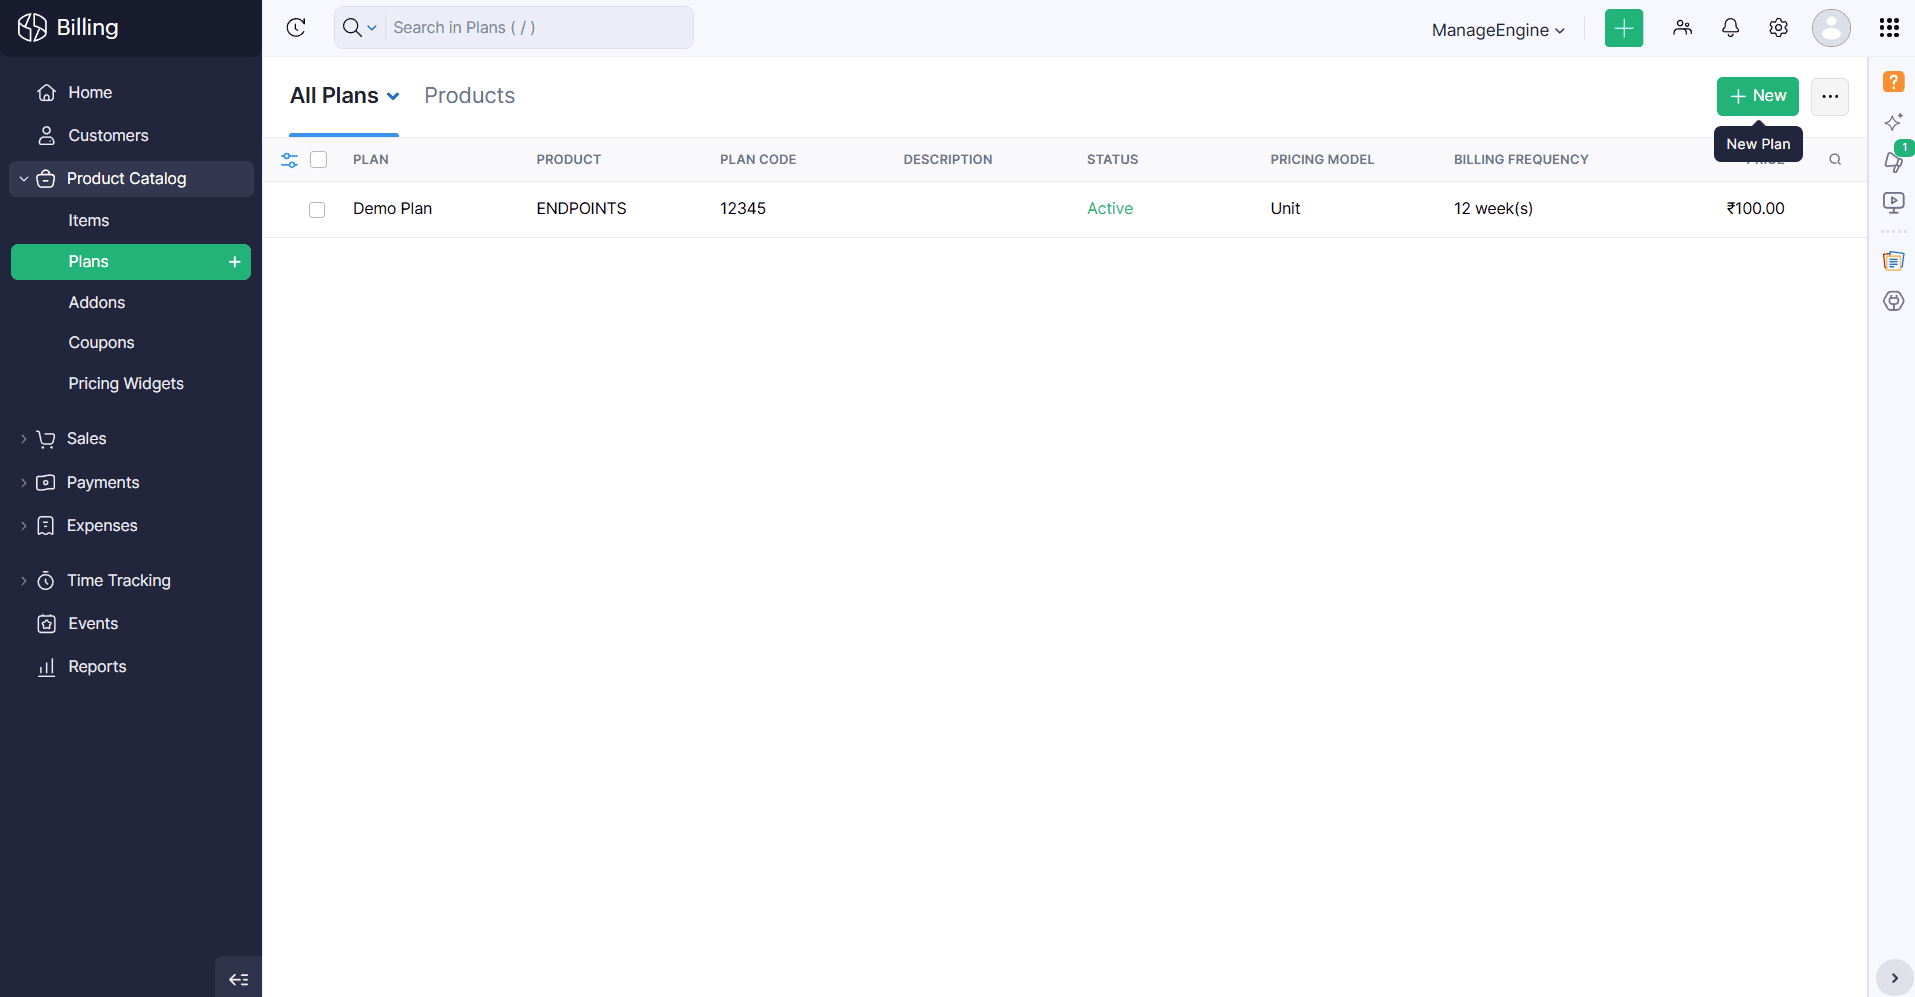
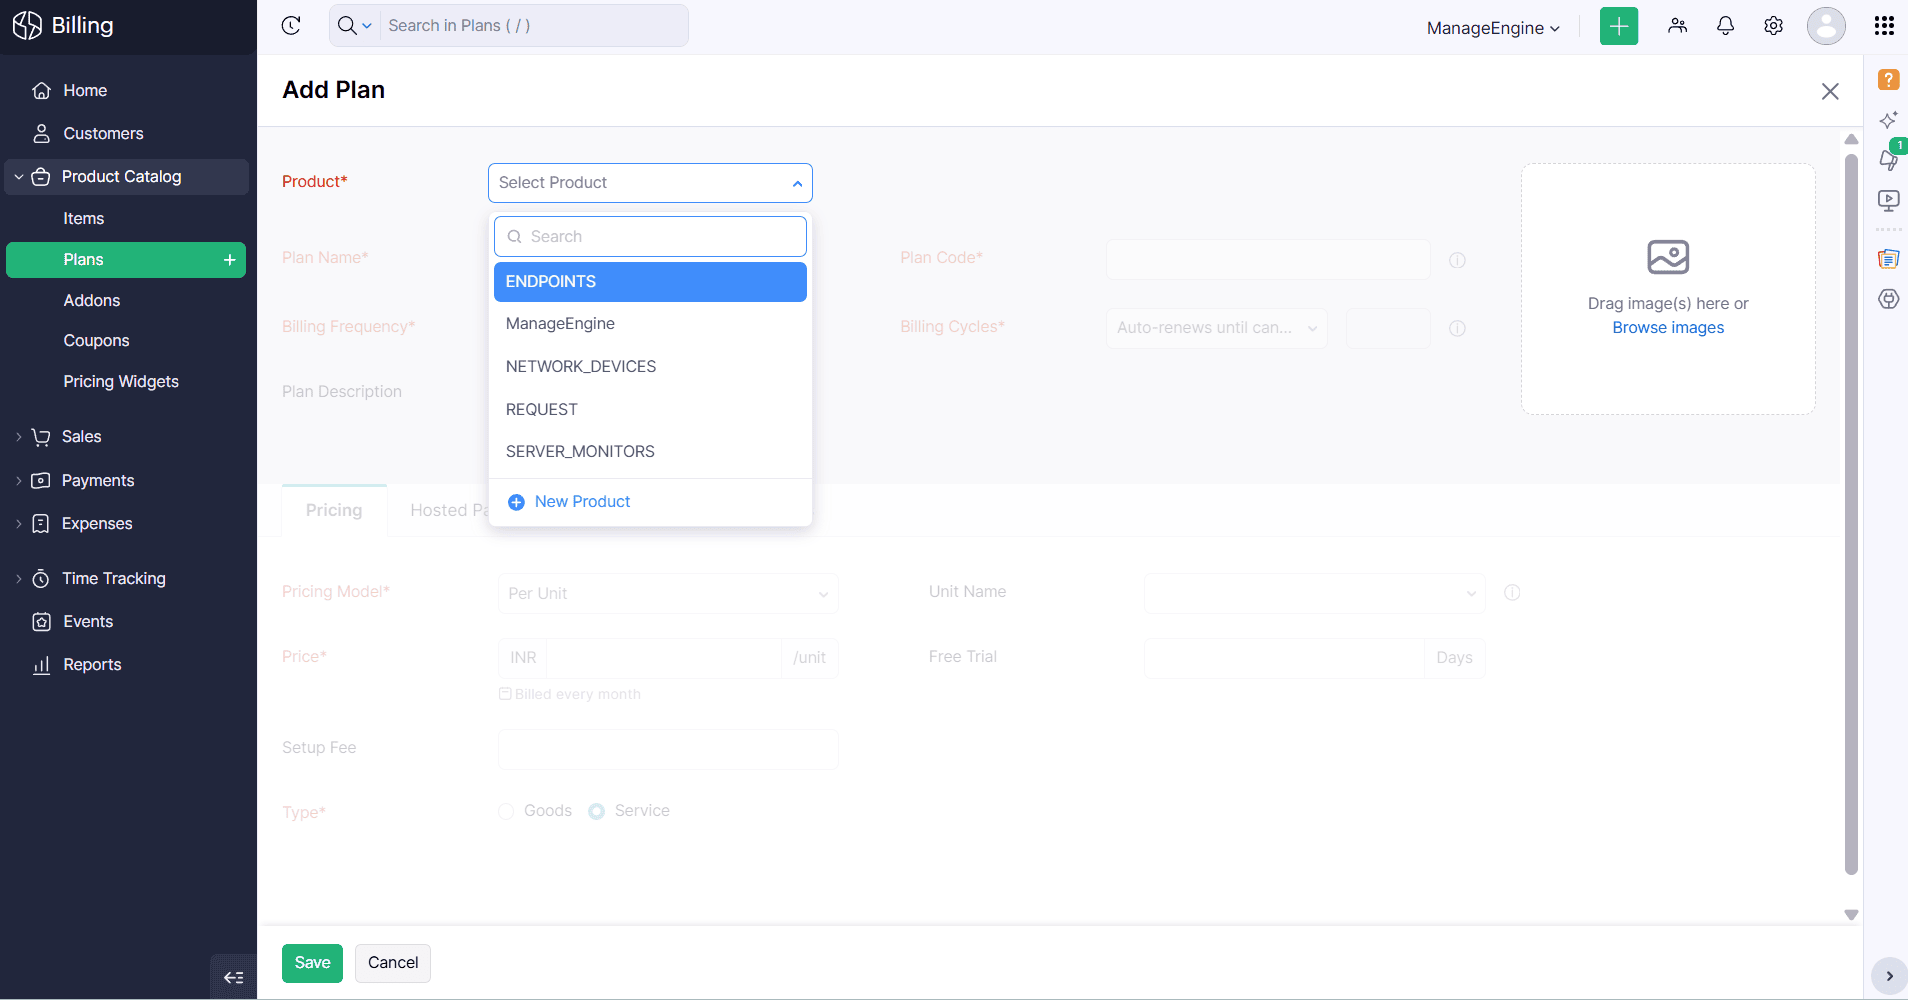
- Create a plan for your synced product (e.g., to bill for help desk requests), which will already exist when you click on the product dropdown. Select one. Add a Plan Name and enter a Plan Code, which could be a unique code you may use to define that particular plan.
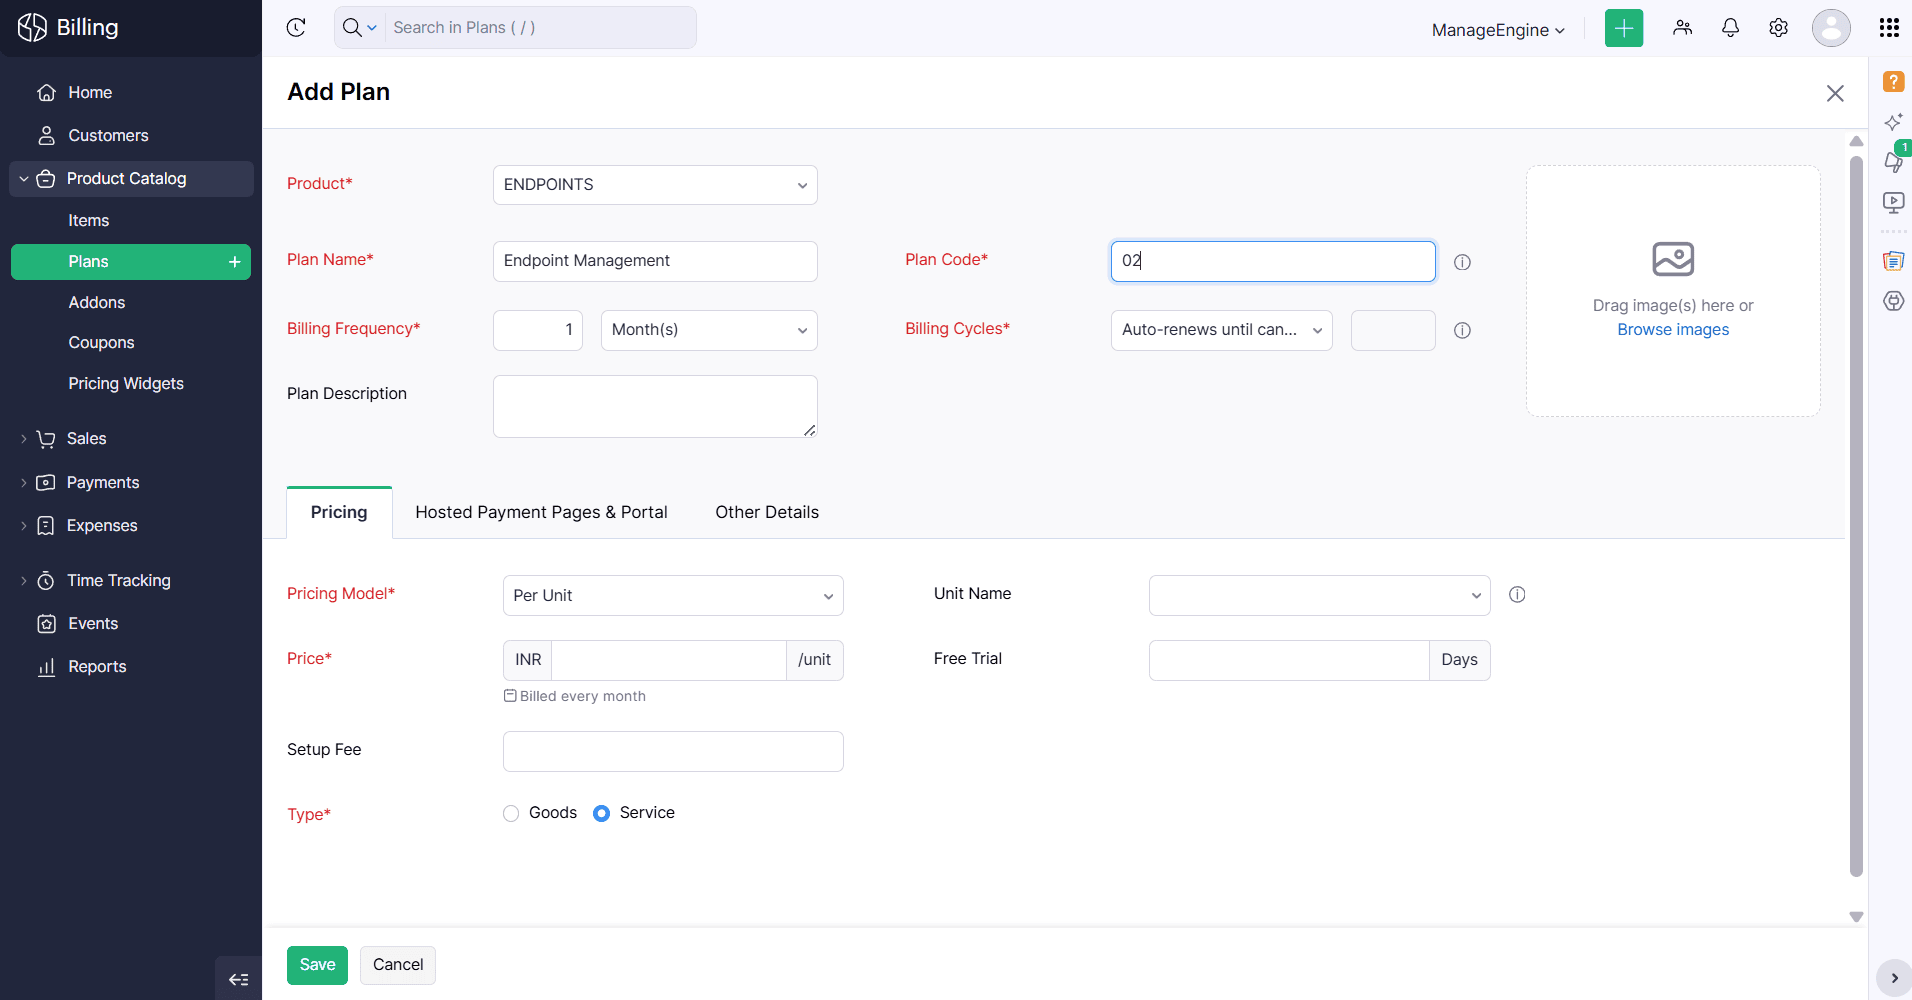
- Select the Billing Frequency period (daily, monthly, yearly) and Billing Cycle from the dropdown options, which could be either "Auto-renew until cancelled" or "Expires after a specific number of billing cycles."
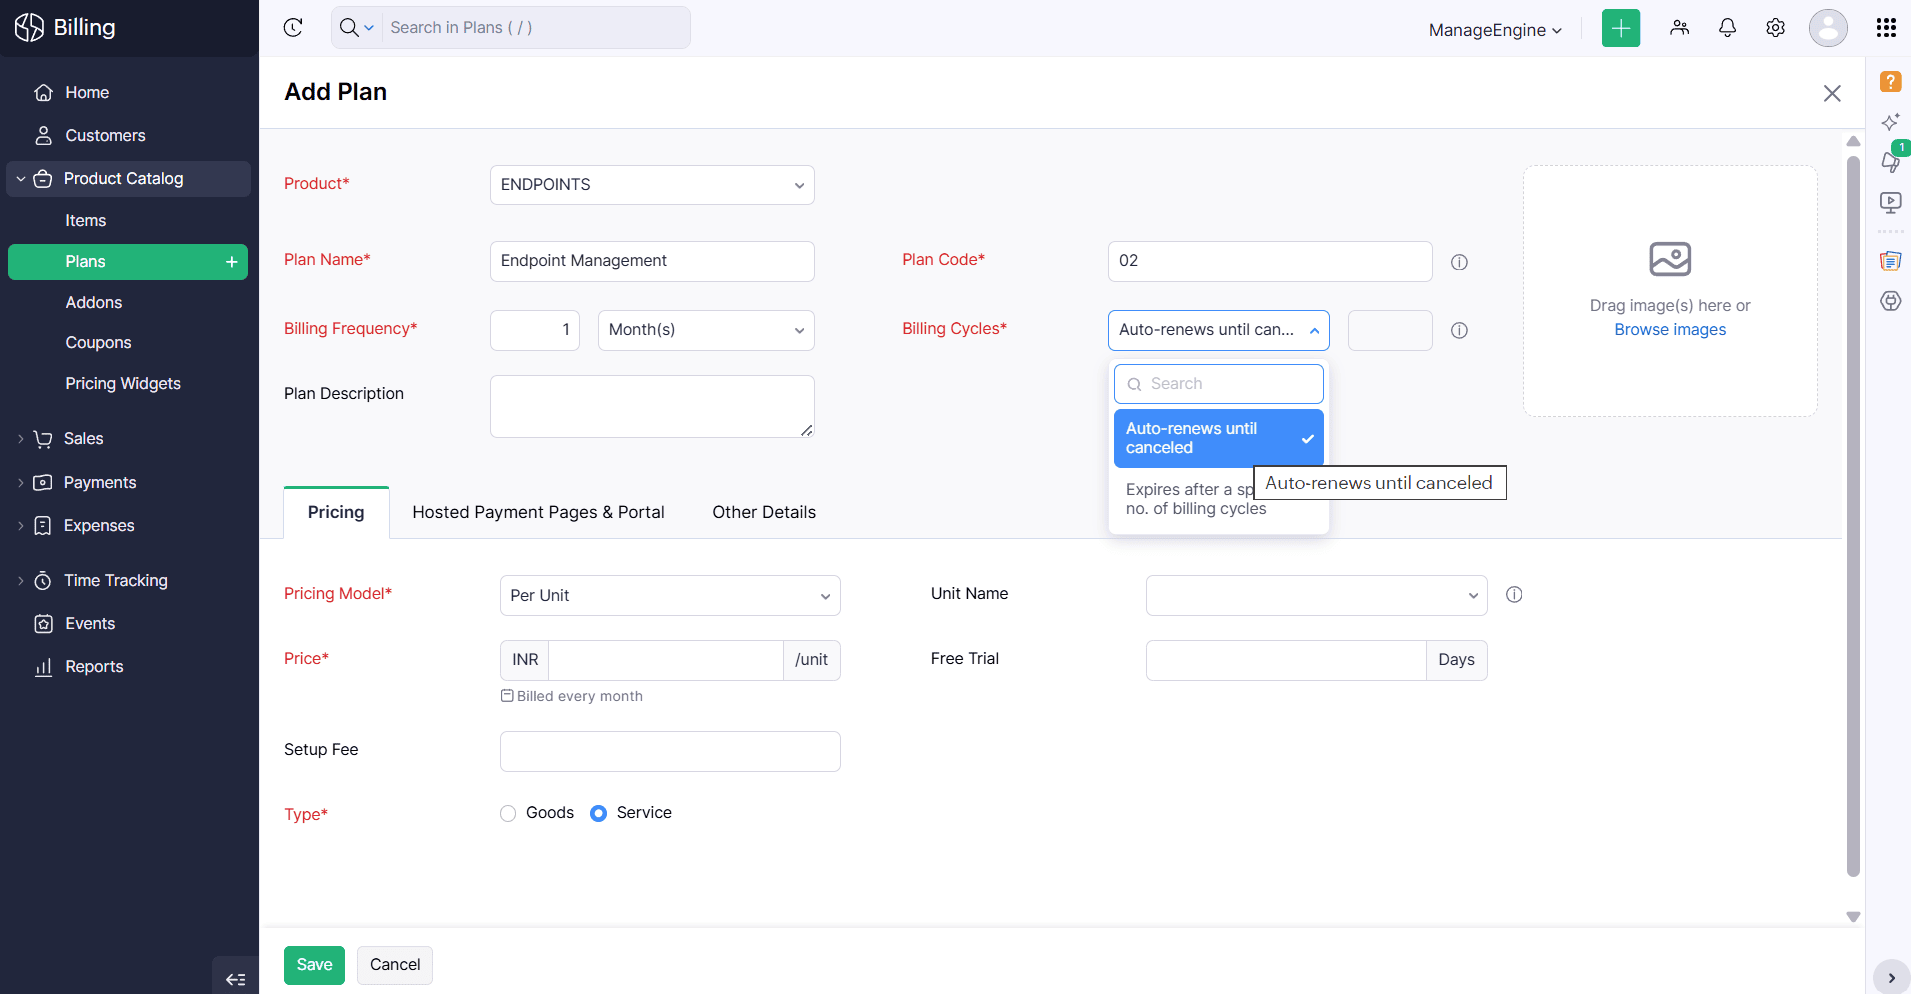
- Define your Pricing Model (e.g., Per unit or flat), Unit Name (which you can choose from the different units in the dropdown), and the Price. Enter any Free Trial Days in the respective field and set a setup-fee to display, if applicable. Choose whether the type is Goods or Services from the radio buttons, then click Save.
- This created plan is not exclusive to a particular customer and can be used across customer. Similarly, the synced products can be associated with multiple plans.
Next, we will proceed with creating a subscription:
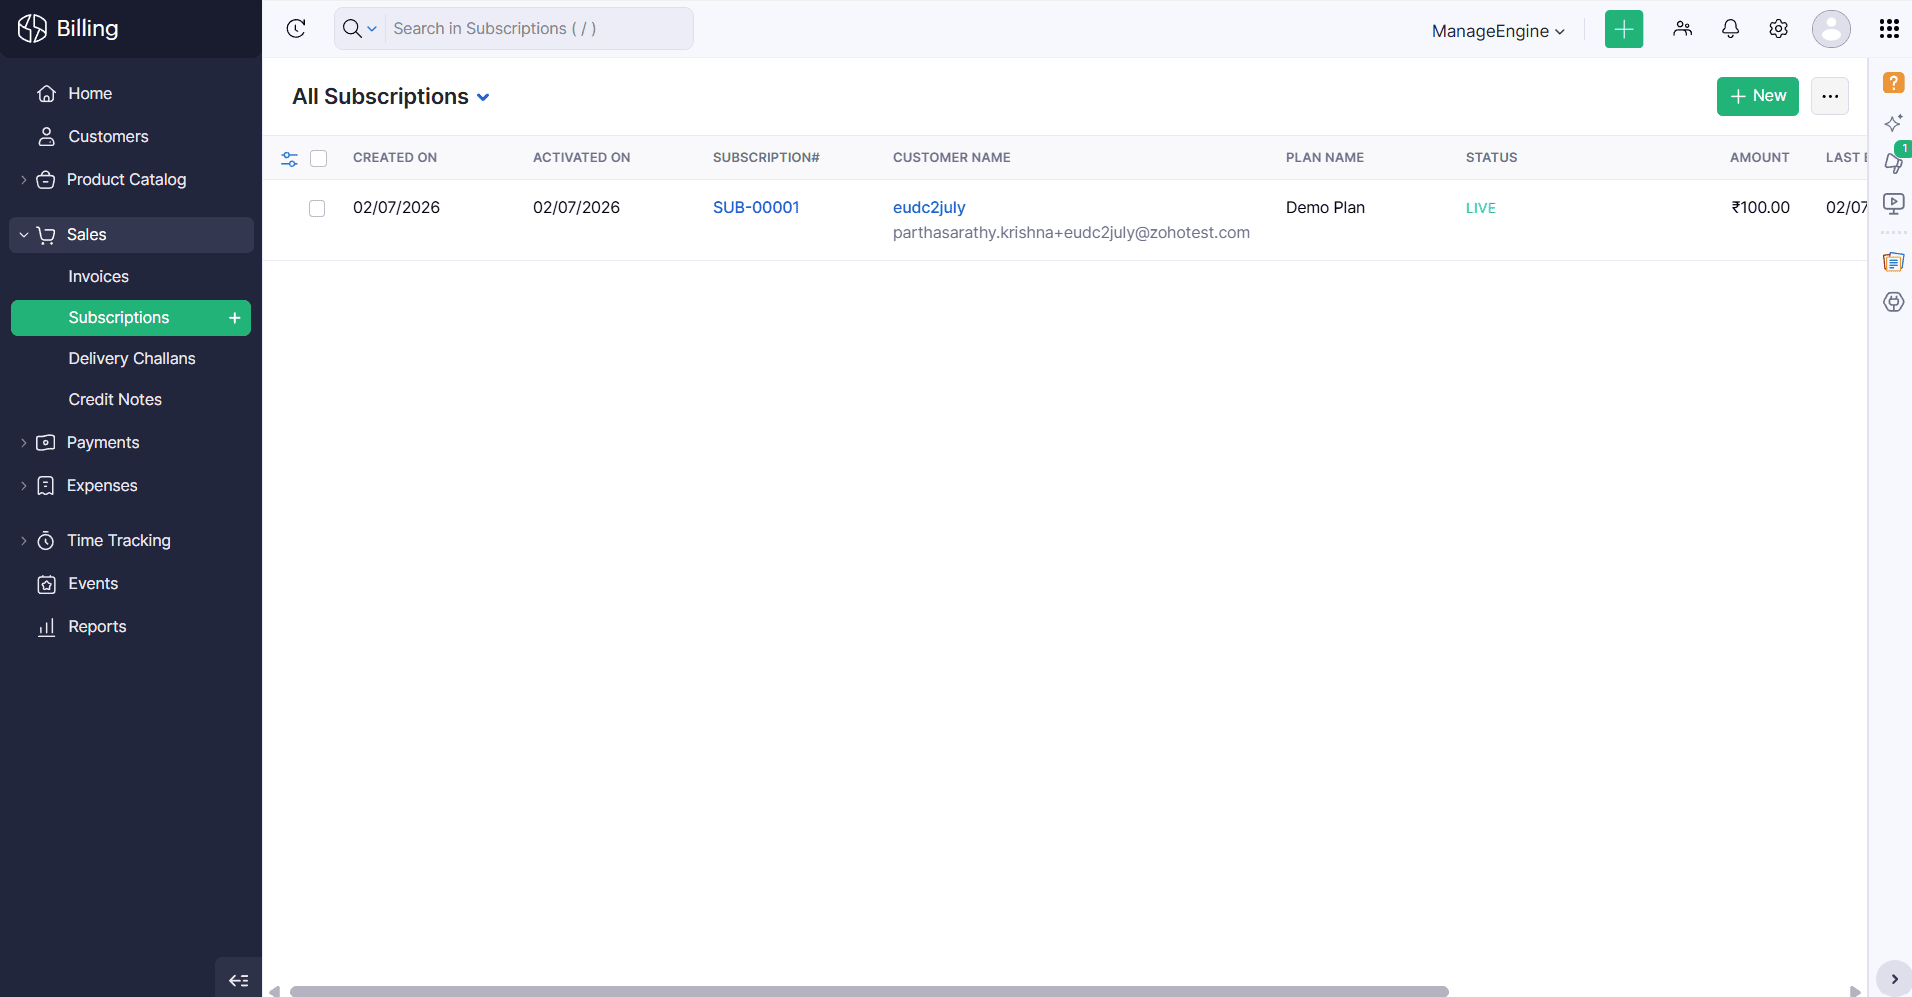
- Navigate to the Sales > Subscriptions and click New.
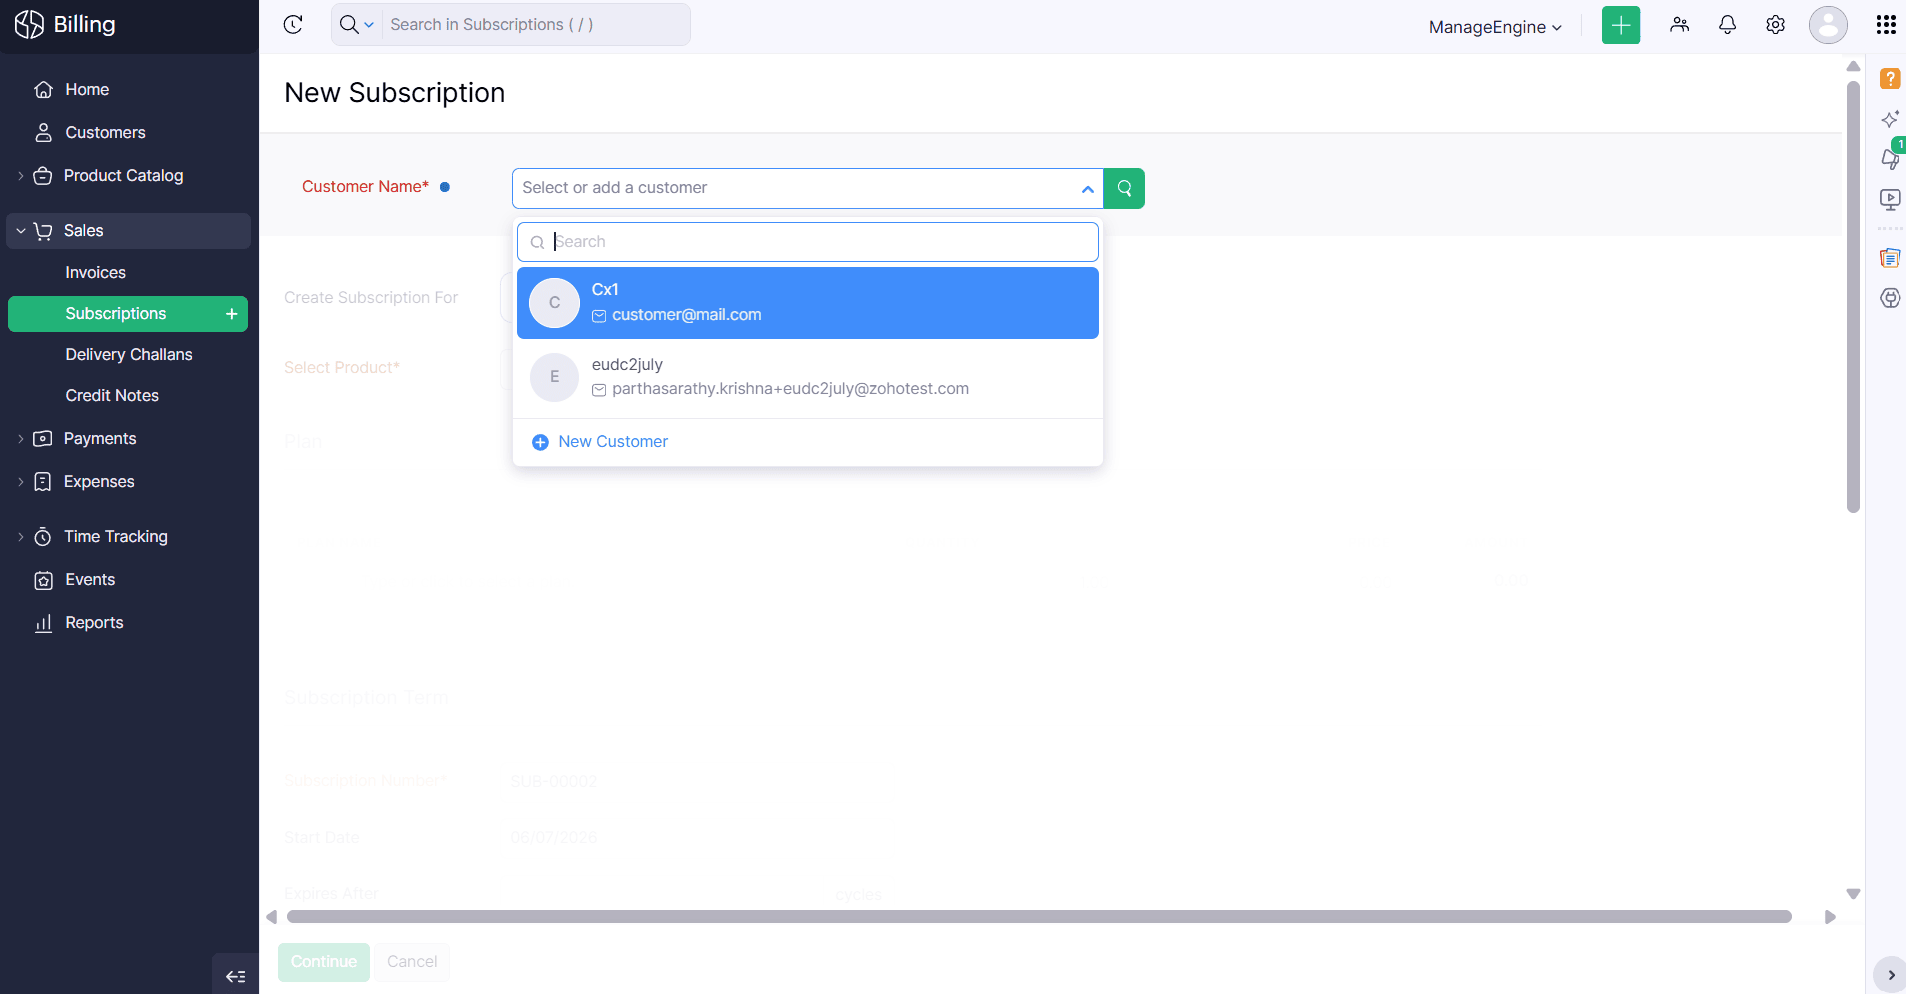
- Provide the required fields in the Subscriptions page. On the page, choose a customer name from the dropdown. Select the specific product from the dropdown for which you wish to create the subscription. A subscription is associated uniquely to a customer and is associated with only one particular plan at a time. Hence a customer can have more than one subscription based on the services agreed upon.
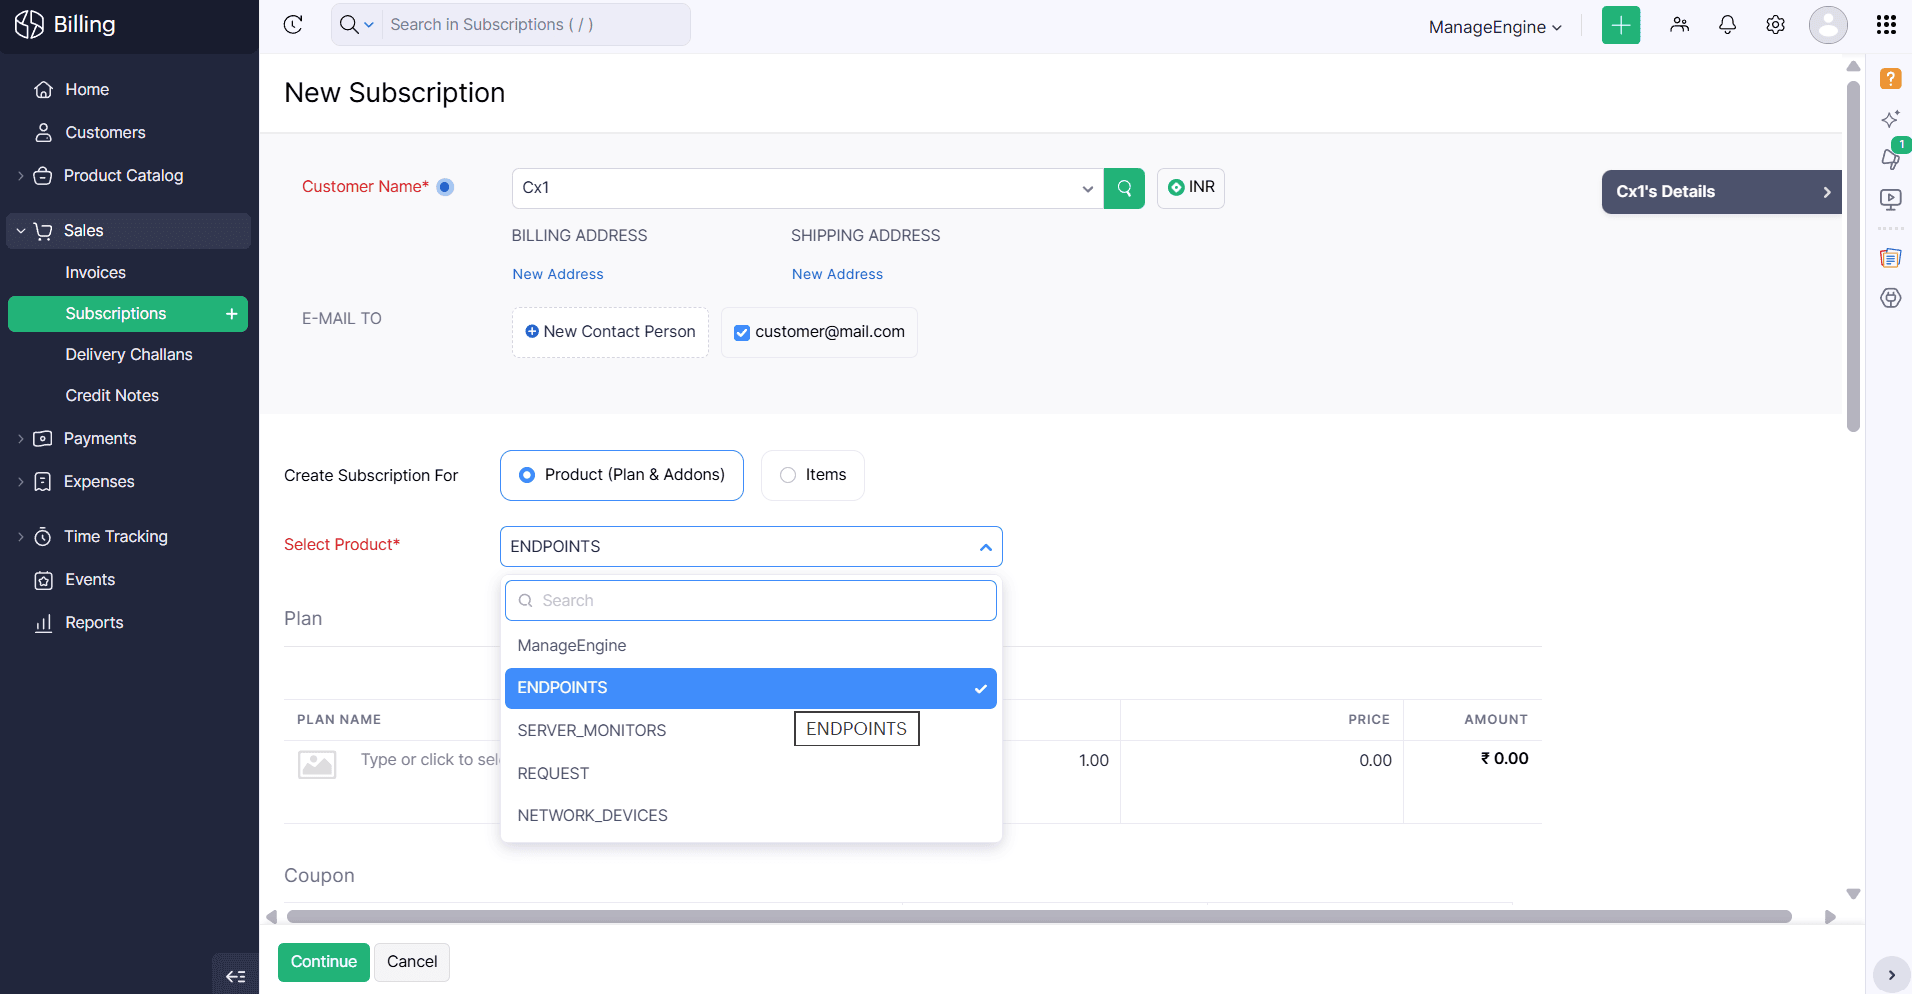
- Select the plans to be associated with the Subscription.
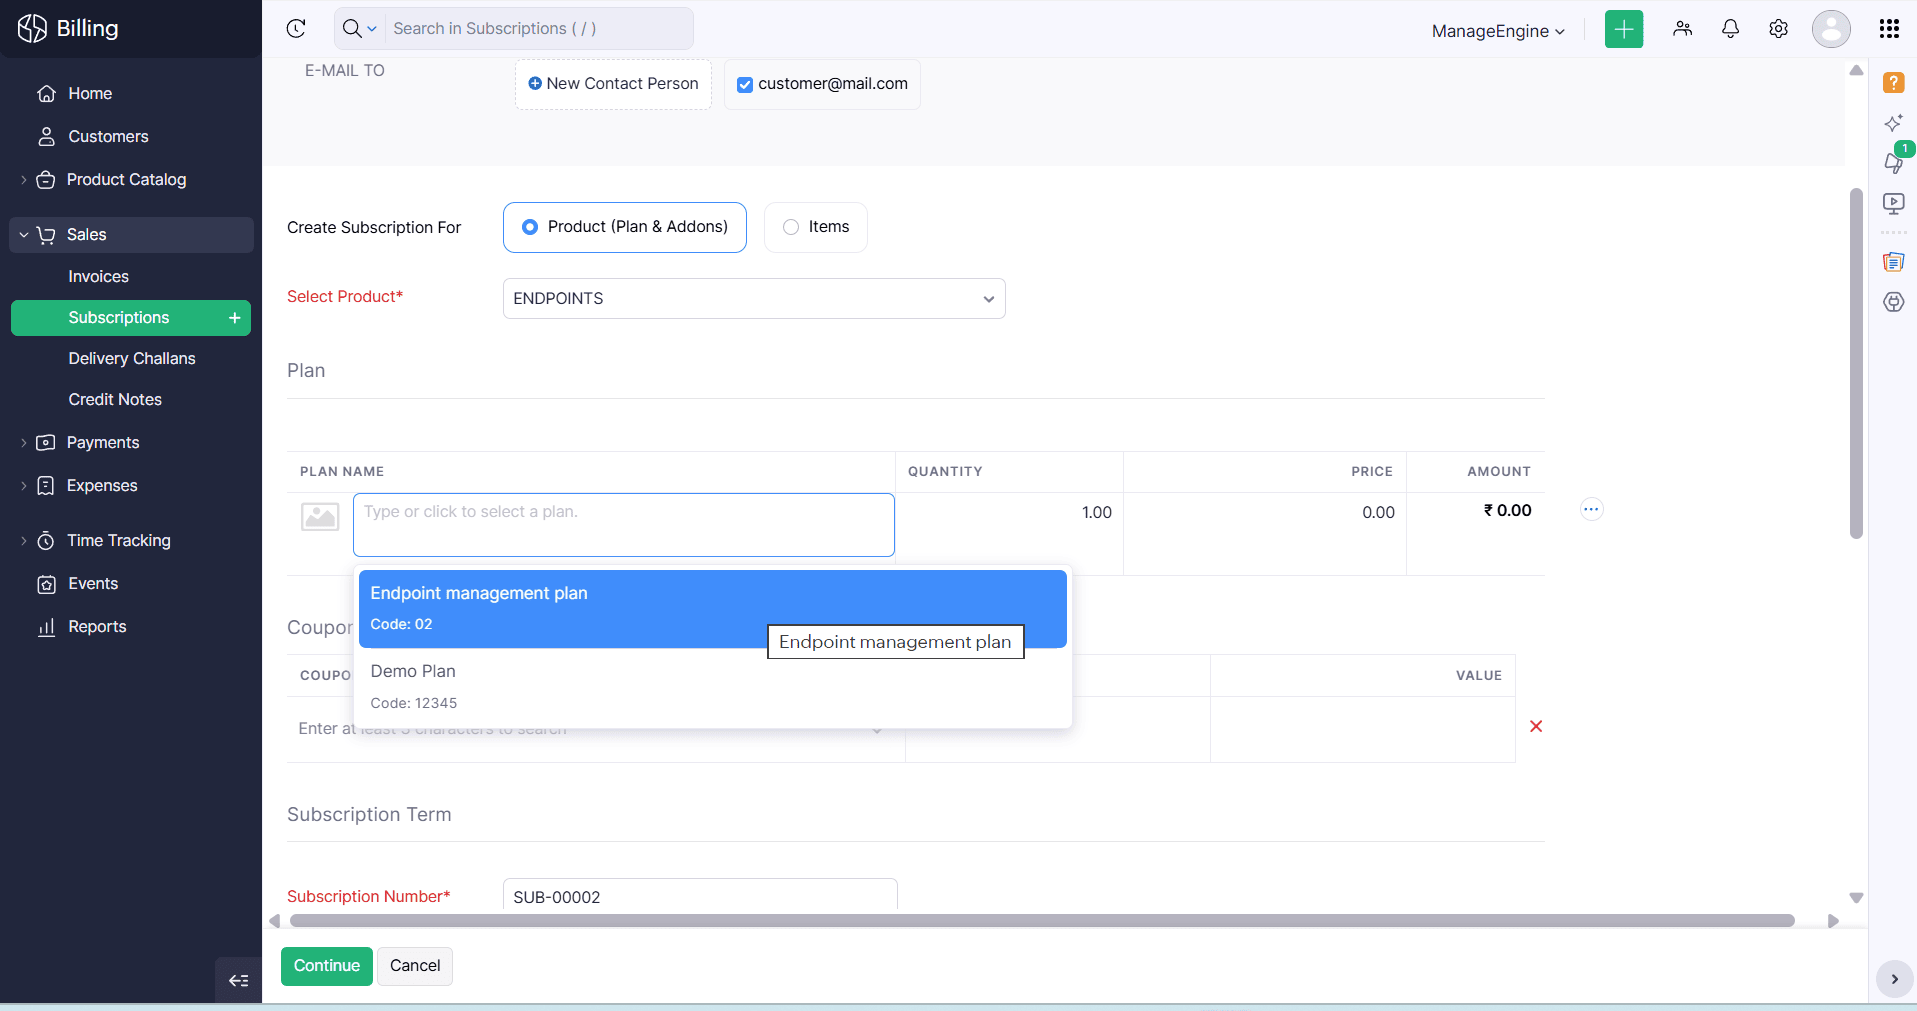
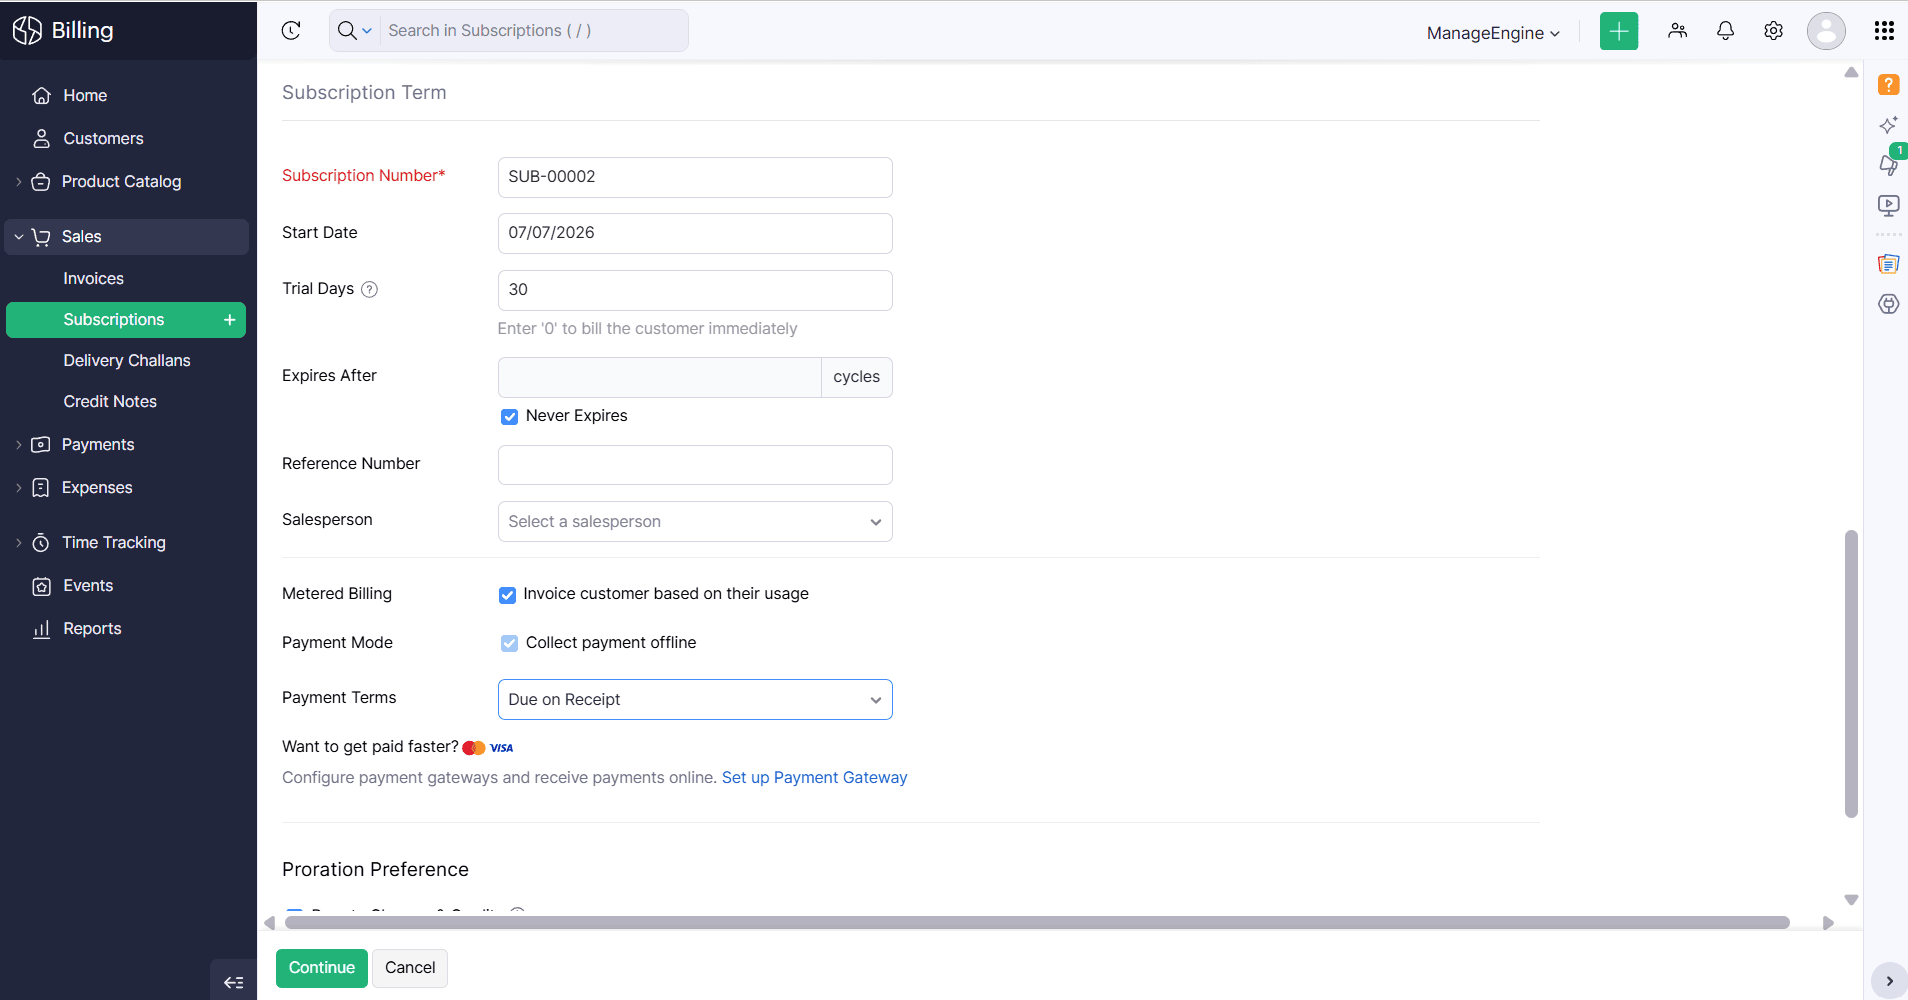
- Fill in other details like the Subscription Number, Start Date, and after how many cycles it expires. On the Subscription page, the Metered Billing checkbox is enabled by default. This option is required to post the usage data to the invoices generated during the renewal date. Once done, click on Continue, confirm the details in the subscription preview, and finally click on Create. A subscription is now created.
- During the renewal date, the invoice generated will be updated with the usage data for the plans available in the invoice, and then sent to the customer's email.
Stop revenue leaks; turn service usage into accurate invoices effortlessly.