Adding a new VoIP monitor
OpManager's VoIP monitoring empower organizations to oversee and optimize Voice over IP (VoIP) networks effectively. It provides real-time monitoring of crucial VoIP metrics such as call quality, jitter, latency, packet loss, and MOS scores (Mean Opinion Score).This help document covers the steps to add a new VOIP monitor in OpManager.
- Step 1: Pre-requisites
- Step 2: Enable SLA responder on the destination device
- Step 3: Creating the VoIP monitor
Steps to set up a new VoIP monitor
OpManager performs the UDP jitter operation to proactively monitor the VoIP quality between Cisco devices. The UDP jitter operation simulates continuous VoIP traffic to consistently monitor the voice quality scores between the source and the destination devices. Using OpManager, you can now monitor the voice and video quality of a 'call path'. Call path is the WAN link between the router in your main office and the one in the branch office that you want to monitor.
Step 1:
- Click here to learn more about the prerequisites for adding VOIP monitors to OpManager.
- Click here to learn more about the prerequisites for fetching VOIP monitors from a source device, and add them to OpManager.
Step 2:
To monitor the destination device, please enable the SLA responder. For detailed instructions on how to enable the SLA responder on Cisco devices, refer to the following documents.
Step 3:
OpManager offers two approaches for adding VOIP monitors: users can either add VOIP monitors directly from a source device or fetch them from the source device to add them to OpManager.
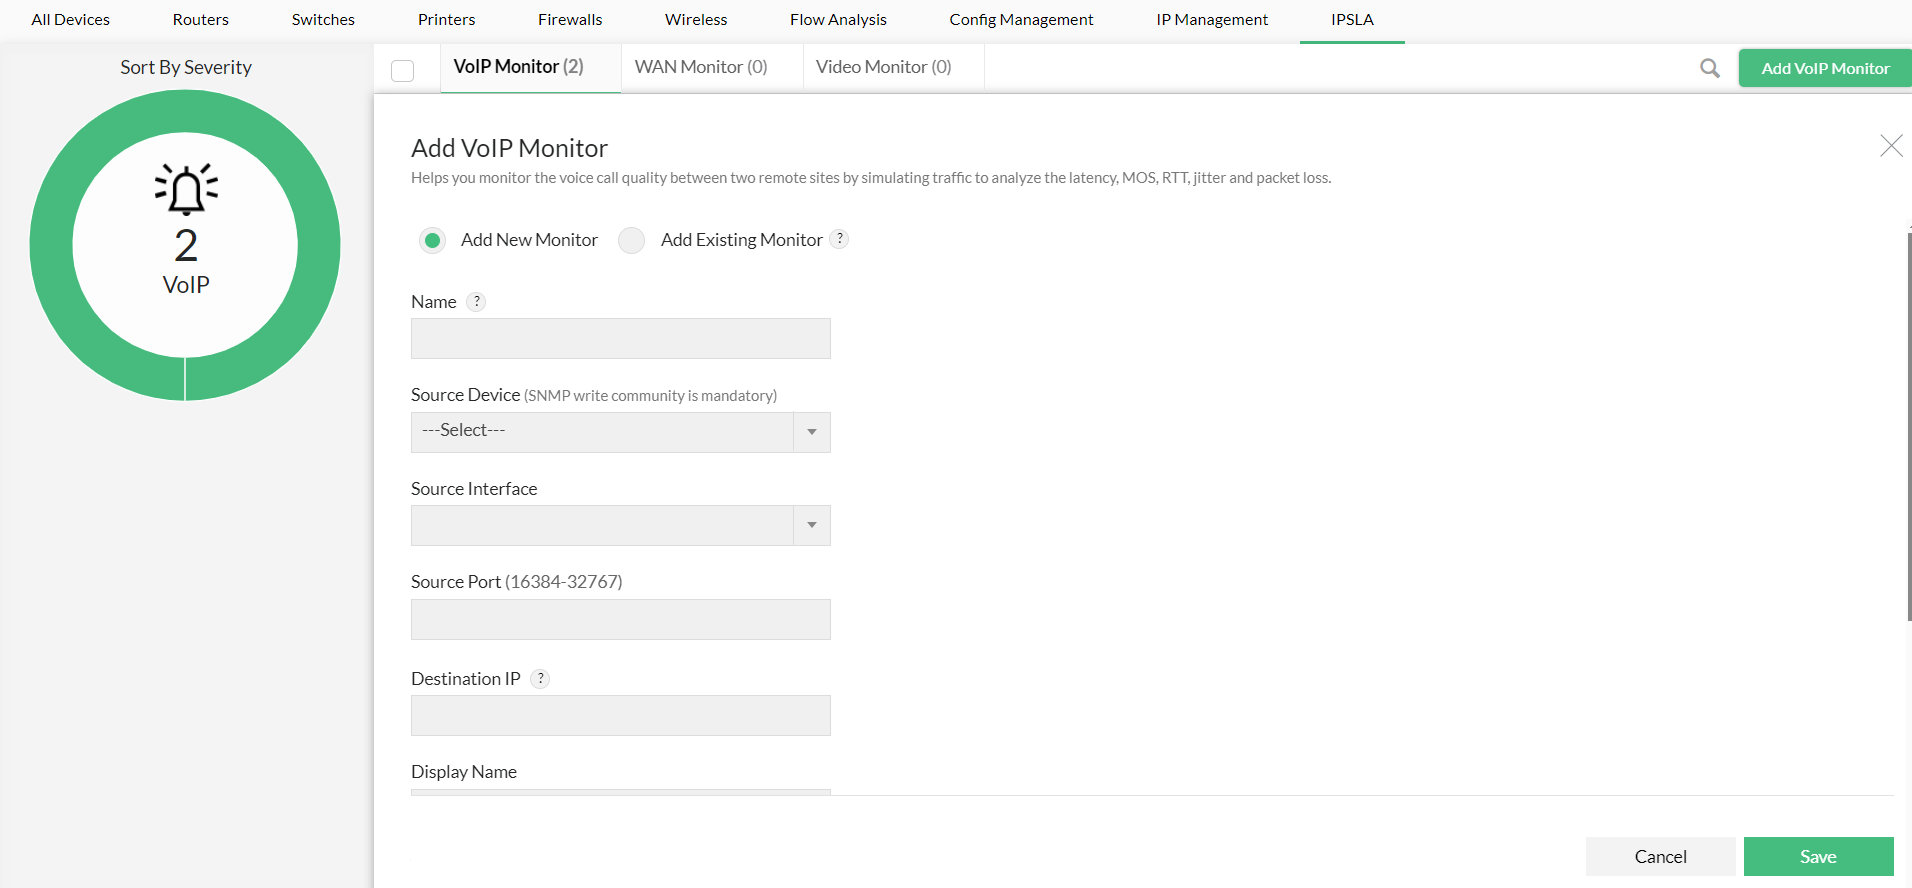
Add VOIP monitors to OpManager (Add new monitor):
- Go to Network → IPSLA → VoIP monitor → Click on Add VoIP monitor at the top right corner
- Select Add New Monitor
- Enter a name for the monitor.
- Select the source router from the list of routers discovered in OpManager, and select the relevant interface.
- Specify the destination router, display name, and the poll interval in minutes.
- You will see the summary of the monitor you are about to configure. Now click 'Save' to submit the details to the device. This will take few seconds to configure.
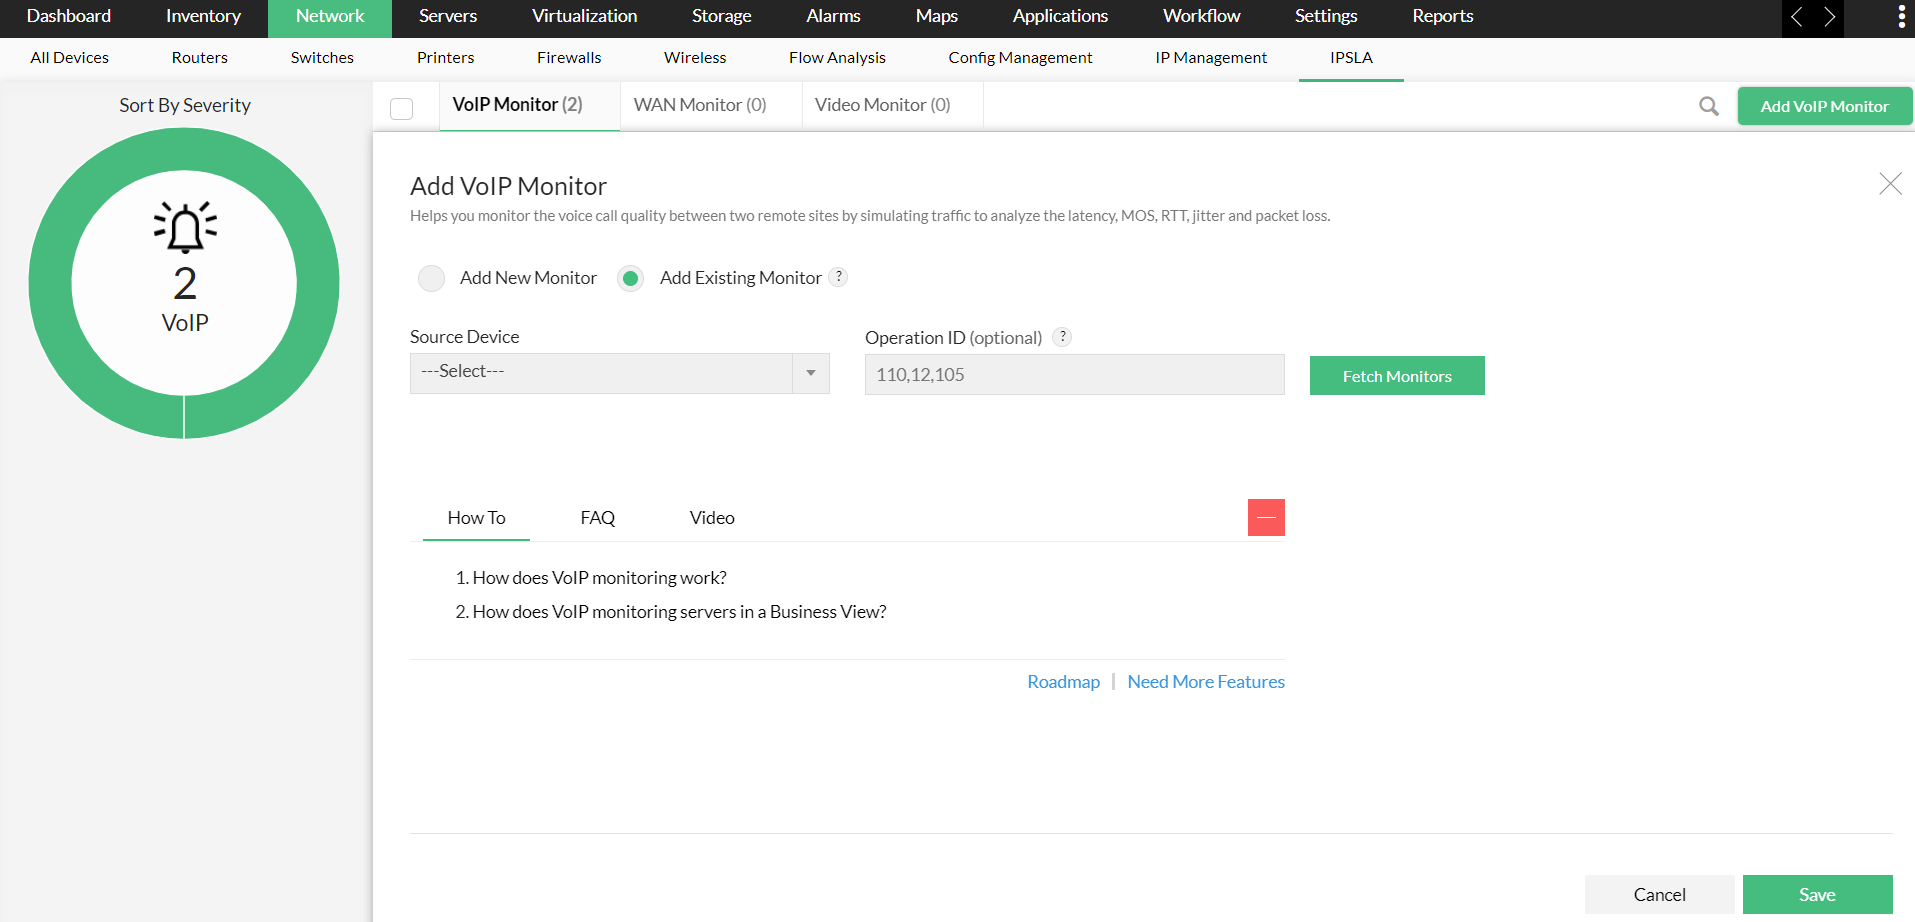
Fetch monitors from a source device and add them to OpManager (Add Existing Monitor):
- Go to Network → IPSLA → VoIP monitor → Click on Add VoIP monitor at the top right corner
- Select Add Existing Monitors
- Select the required Source device from the drop-down.
- Enter the Operational ID, if multiple Operation IDs are required, enter the values separated by a comma.
- Or, you can click on the Fetch Monitors button to fetch the list of available monitors in that device.
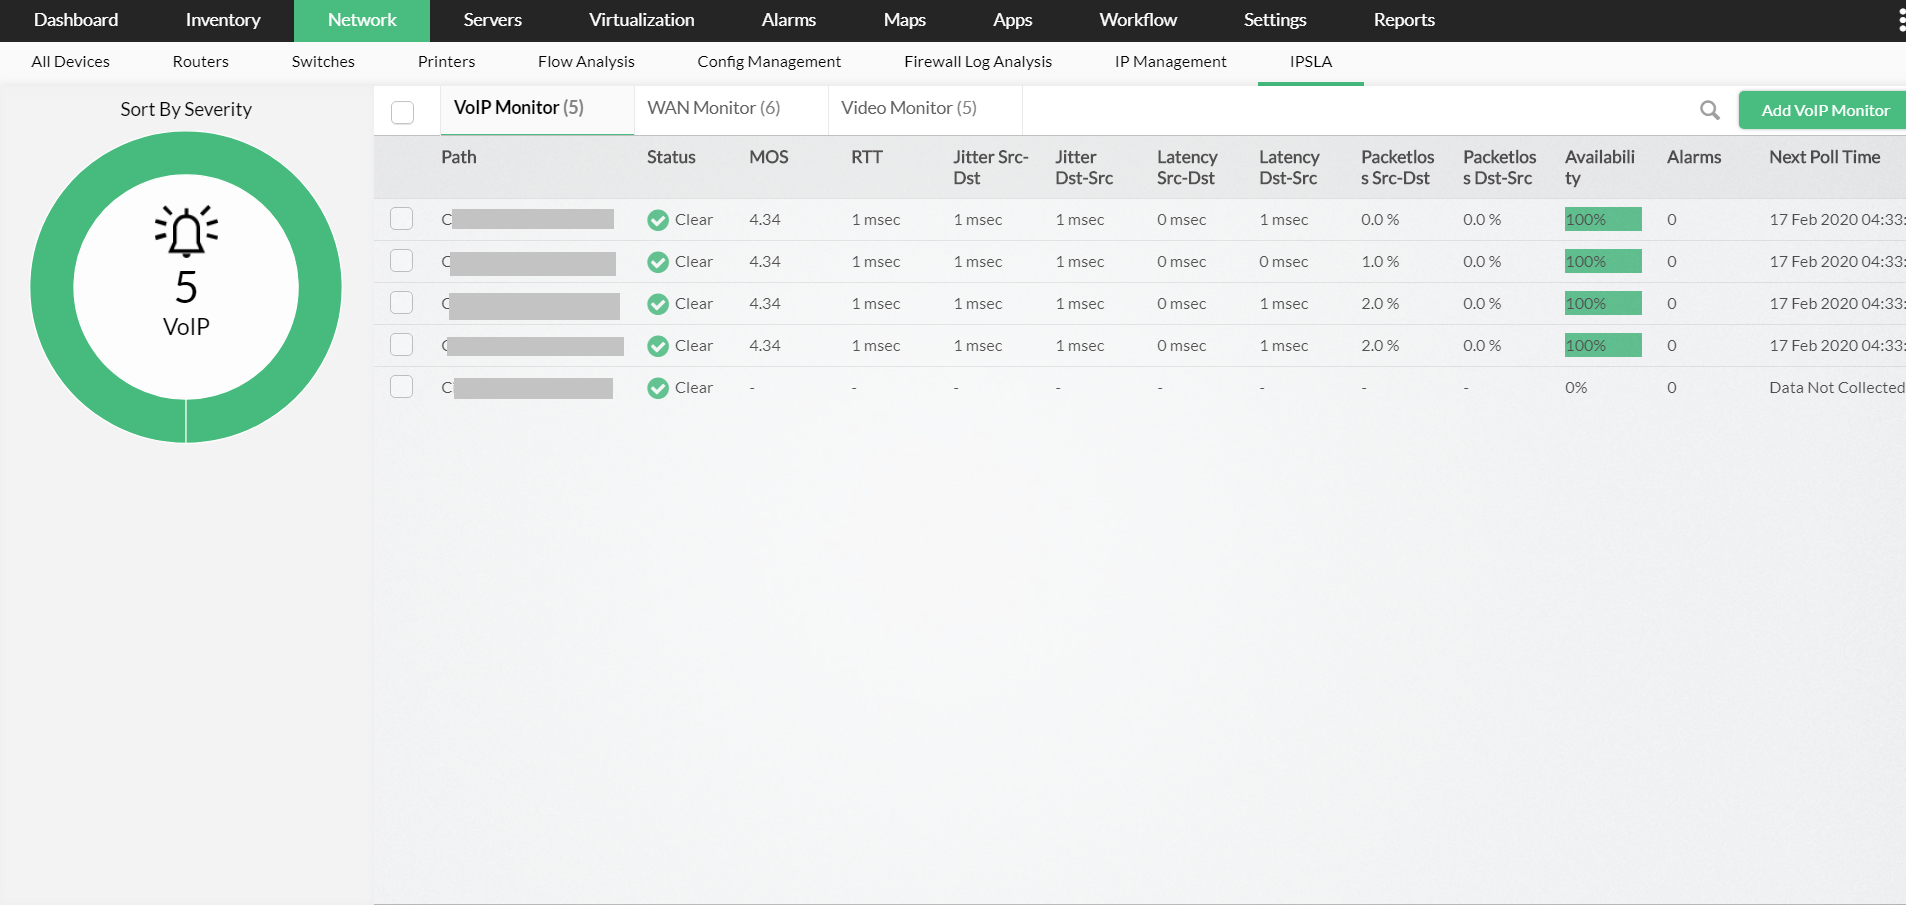
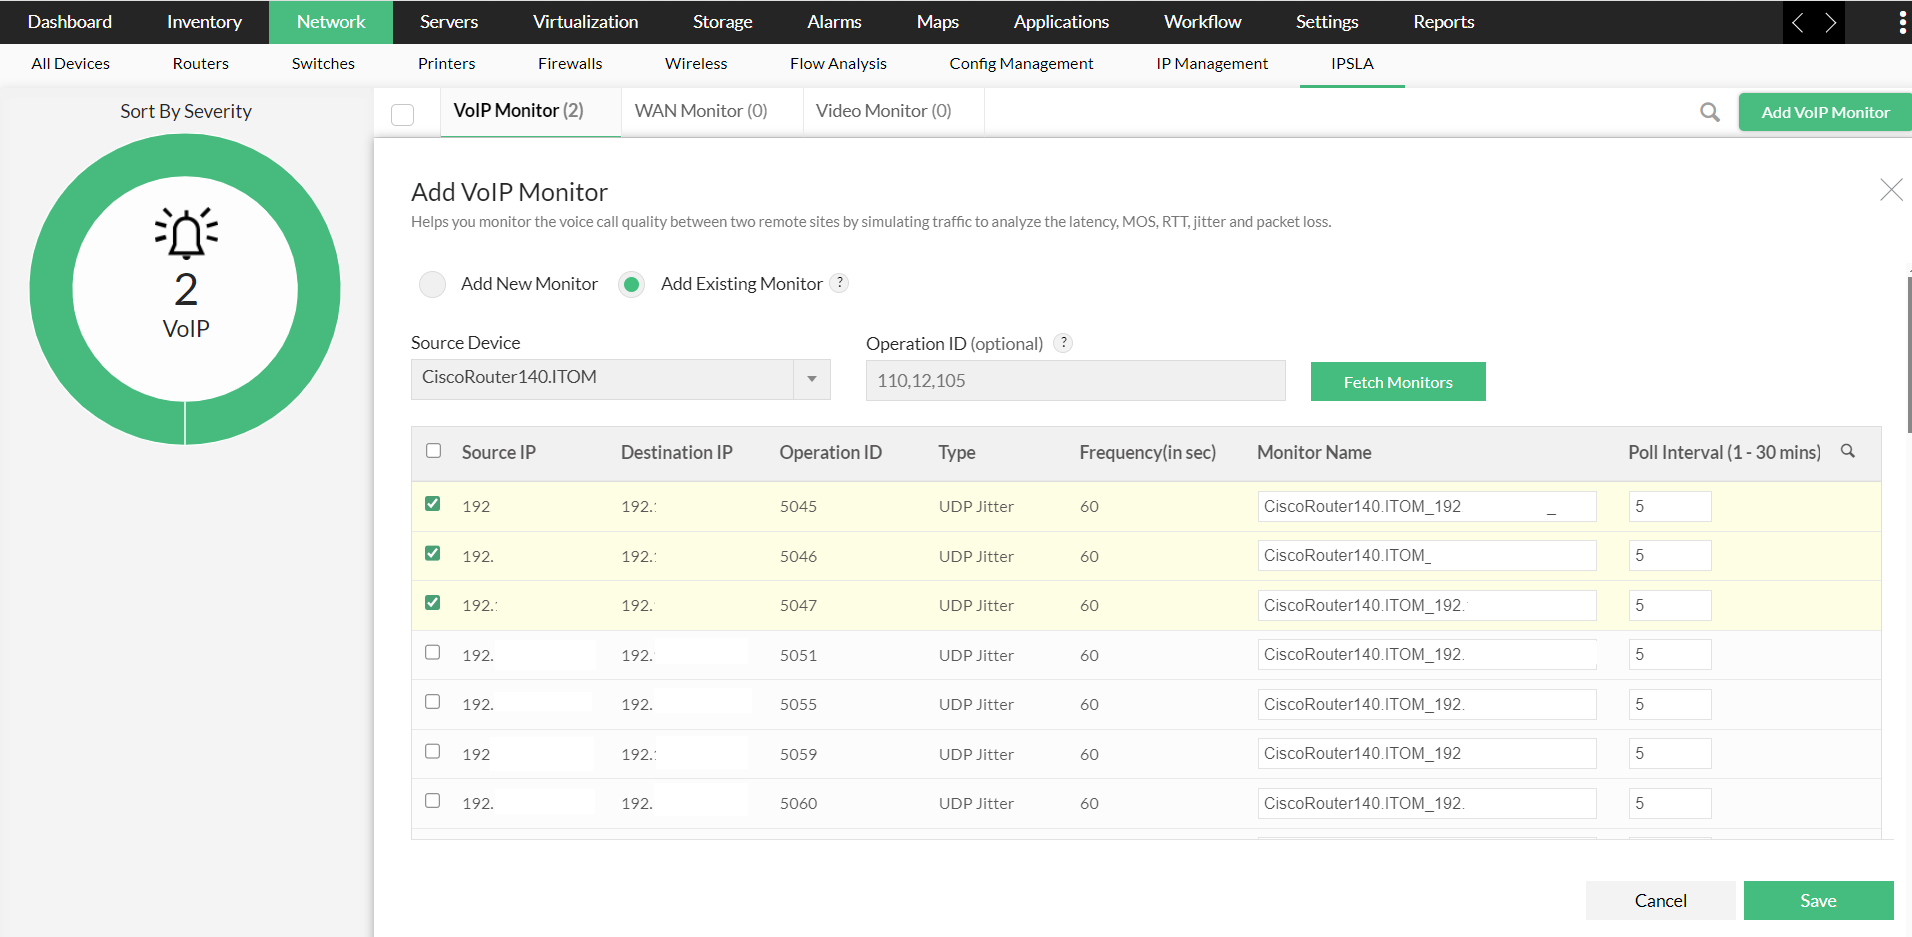
- The relevant monitors will be displayed, along with the Source and Destination IP, Operation ID, Type, Frequency in seconds, Monitor name and the Poll Interval.
- Select the required monitors from the displayed list, and click Save.
Learn more about VoIP monitoring in OpManager