If you choose to use MSSQL as the backend database for OpManager, we highly recommend creating a separate account for OpManager in your MSSQL database server to ensure proper functionality. However, if you wish to proceed with your existing server account credentials, you may skip this configuration procedure and proceed directly with the installation.
For supported versions of MSSQL, refer here.
Note: It is highly recommended that you use MSSQL database for production. This also provides failover/high availability.
Follow the below steps to configure MSSQL with OpManager
To ensure proper communication between the MSSQL database server and OpManager, a new account has to be created with the below-mentioned steps:
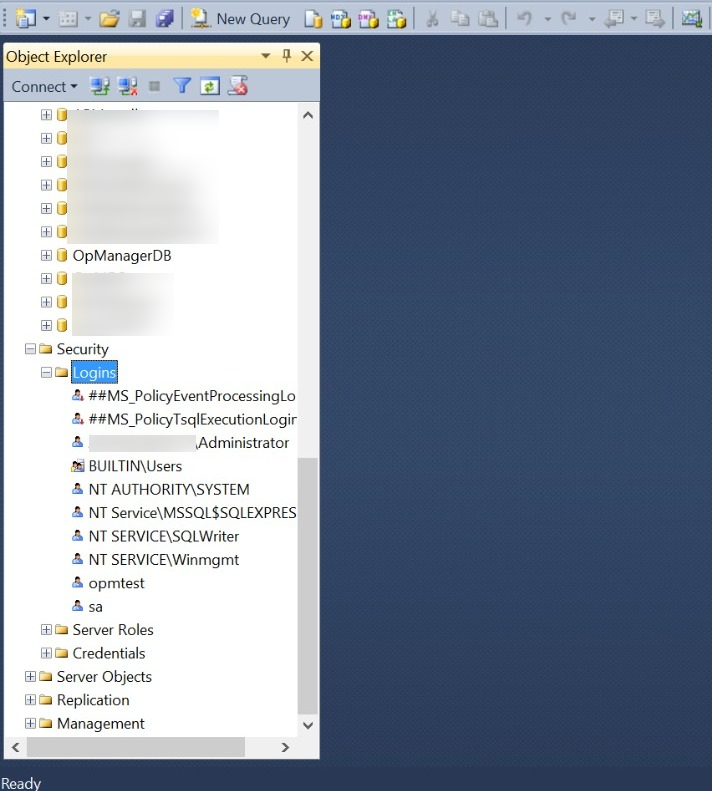
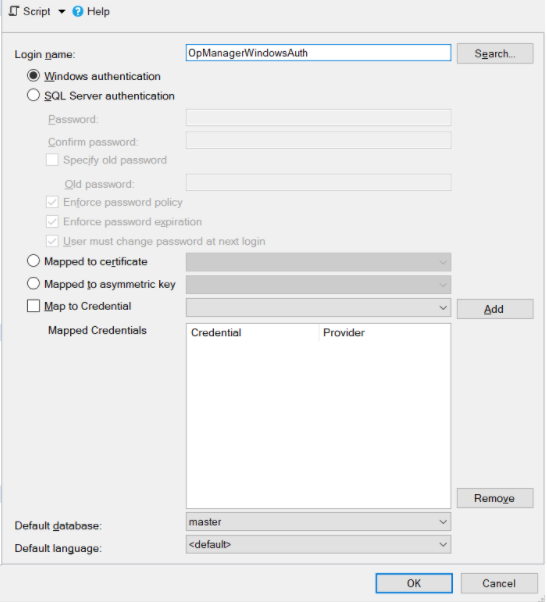
Select Authentication type. For Windows authentication, select and login using your Windows login credentials. For SQL Server Authentication, enter the password. Then proceed with Step 3.
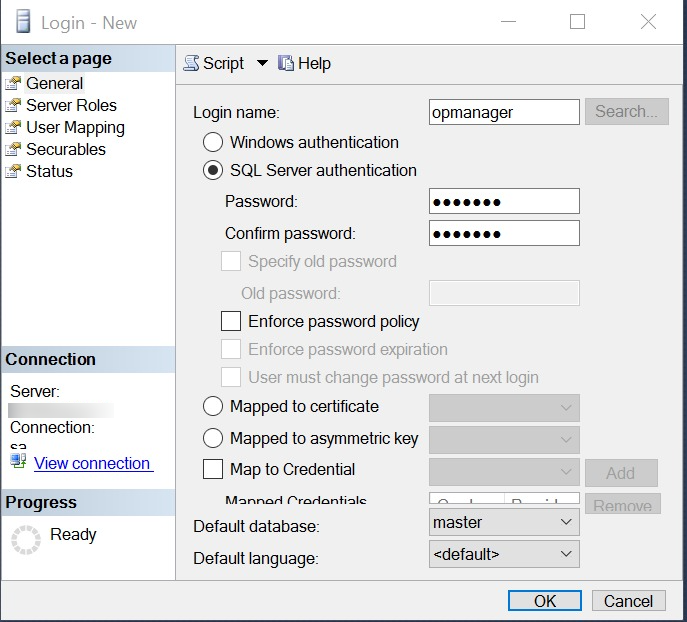
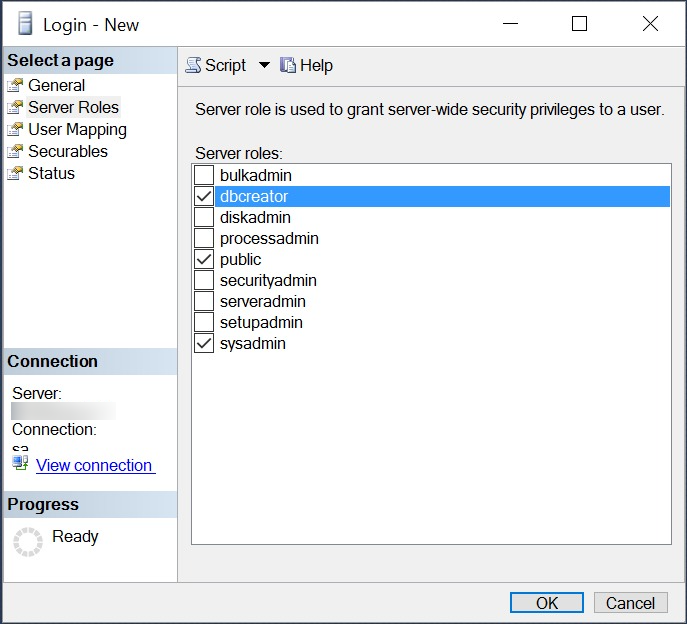
Click on Server Role. Select Server Roles "dbcreator", "public" and "sysadmin".
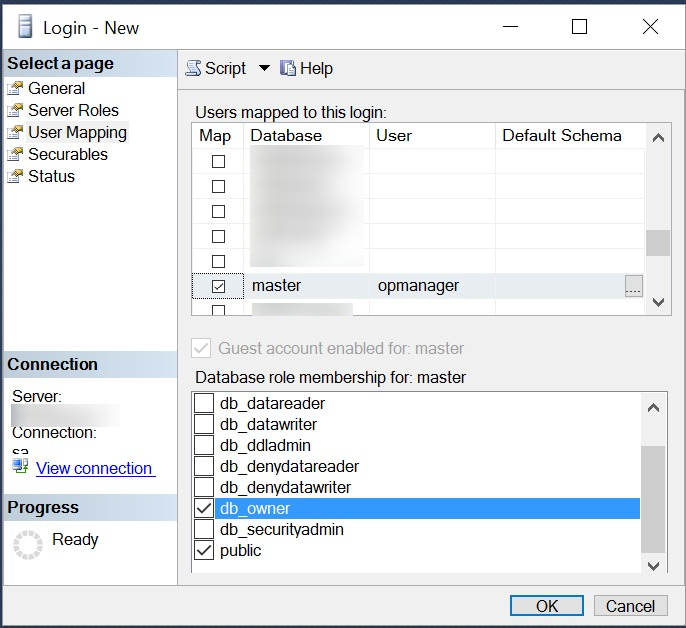
Click on User Mapping. Map this login to "master" with database role ownership set as "db_owner" and "public". Click OK.
The below table gives the details of the roles required for a user to be configured in OpManager for MSSQL DB Configuration:
| DB Roles | Server Roles | UserMapping Roles |
|---|---|---|
| Master DB | Public | Public |
| OpManager DB - Installation and First Start | db_creator, Public | db_owner, Public |
| OpManager DB - Subsequent Starts | Public | db_owner, or other roles with the least privilege granted |
Note:
*replace user with the username that is used in OpManager. Eg: GRANT CONTROL ON SYMMETRIC KEY::[##MS_DatabaseMasterKey##] TO [opmuser];
Note : If you encounter the "Cannot find the symmetric key" error or the "Cannot find the Certificate" error , please contact opmanager-support@manageengine.com.
Thank you for your feedback!