Configuration of Remote PostgreSQL in OpManager ( for versions below 12.5)
Download and install the appropriate version of the Enterprise PostgreSQL and follow the below steps.
Note: The below steps are applicable only for OpManager versions below 12.5 (PgSQL 9.2.4 to 9.4*)
1. Changes to be made in the pg_hba.conf file
- Open the pg_hba.conf file from <InstalledRemotePgSQLHome>\data.
- Replace the existing address value with the IP range that you wish to allow (ex:192.168.93.0/24). If you plan on listening to all the interfaces, specify the address as all and save the changes. #IPv4 local connections:
| #TYPE |
DATABASE |
USER |
ADDRESS |
METHOD |
| #IPv4 local connections: |
| host |
all |
all |
<ip that is allowed to connect> |
md5 |
2. Changes to be made in postgresql.conf
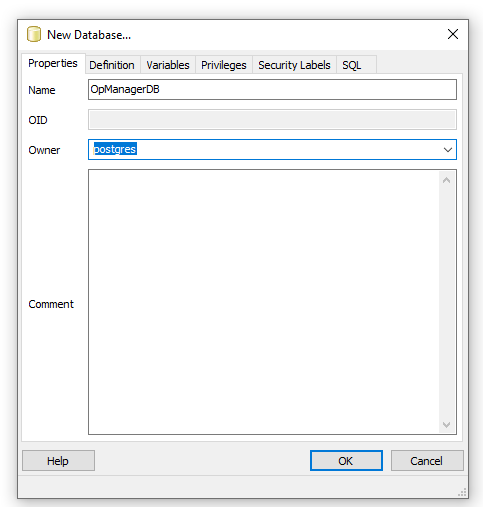
3. Creating a new database in the Remote PgSQL server.
- Restart the PostgreSQL service.
- Create a new database in the Remote PostgreSQL server.
4. Changes to be made in the OpManager Directory
- Stop OpManager service and close all related operations.
- Open the database_params file from <OpManagerHome>\conf.
- Change the existing URL in the following format.
url jdbc:postgresql://<remotePgSQLInstalledIPAddress>:<PortNumber>/<DBName>
- Enter the username and the encrypted password.
#login username for data base if any
username postgres
#login password for the database if any
#password <EncryptedPassword>
Run the encrypt.bat file from <OpManagerHome>\bin to generate the encrypted password. (For Linux machines, run the encrypt.sh file)
Execute <OpManagerHome>\bin\encryt.bat Password
- Open customer-config.xml file from <OpManagerHome>\conf.
- Change the Configuration value for StartDBServer as 'false'.
<configuration name="StartDBServer" value="false"/>
- Save both the files and restart OpManager.
Thank you for your feedback!