Remote PostgreSQL PPM Migration from OpManager version 12.4 and 12.5

Note: The below steps are applicable only for upgrading OpManager from version 12.4 to 12.5 and 12.5 to any version above (PgSQL 10.21 to 10.x)

Applying PPM:

While upgrading to a newer version (via PPM), the OpManager server will run a check on the current version of PgSQL that is installed. OpManager versions above 12.5 only supports PostgreSQL version 10.21 to 10.x. If your PgSQL version is not compatible with the supported versions, the PPM installation will be stopped. If you wish to bypass this check and carry out the PgSQL migration later,

  • Create a new file named remote_pgsql_migration.properties.
  • Add the following line to the file.
  • allow.remote.pgsql.migration = true

  • Save the file and retry applying the PPM.

Remote PostgreSQL Migration (version 9.2.4 to 10.x)

Once OpManager is upgraded, it is mandatory to migrate the remote PgSQL to its latest version. Follow the below steps to migrate remote postgreSQL from version 9.2.4 to 10.x. 

  1. Create a new database in the new PgSQL server.
  2. Create database <databasename>

  3. Create a new user named 'rouser' with read-only permission.
  4. CREATE USER rouser with password '<ROPASSWORD>';
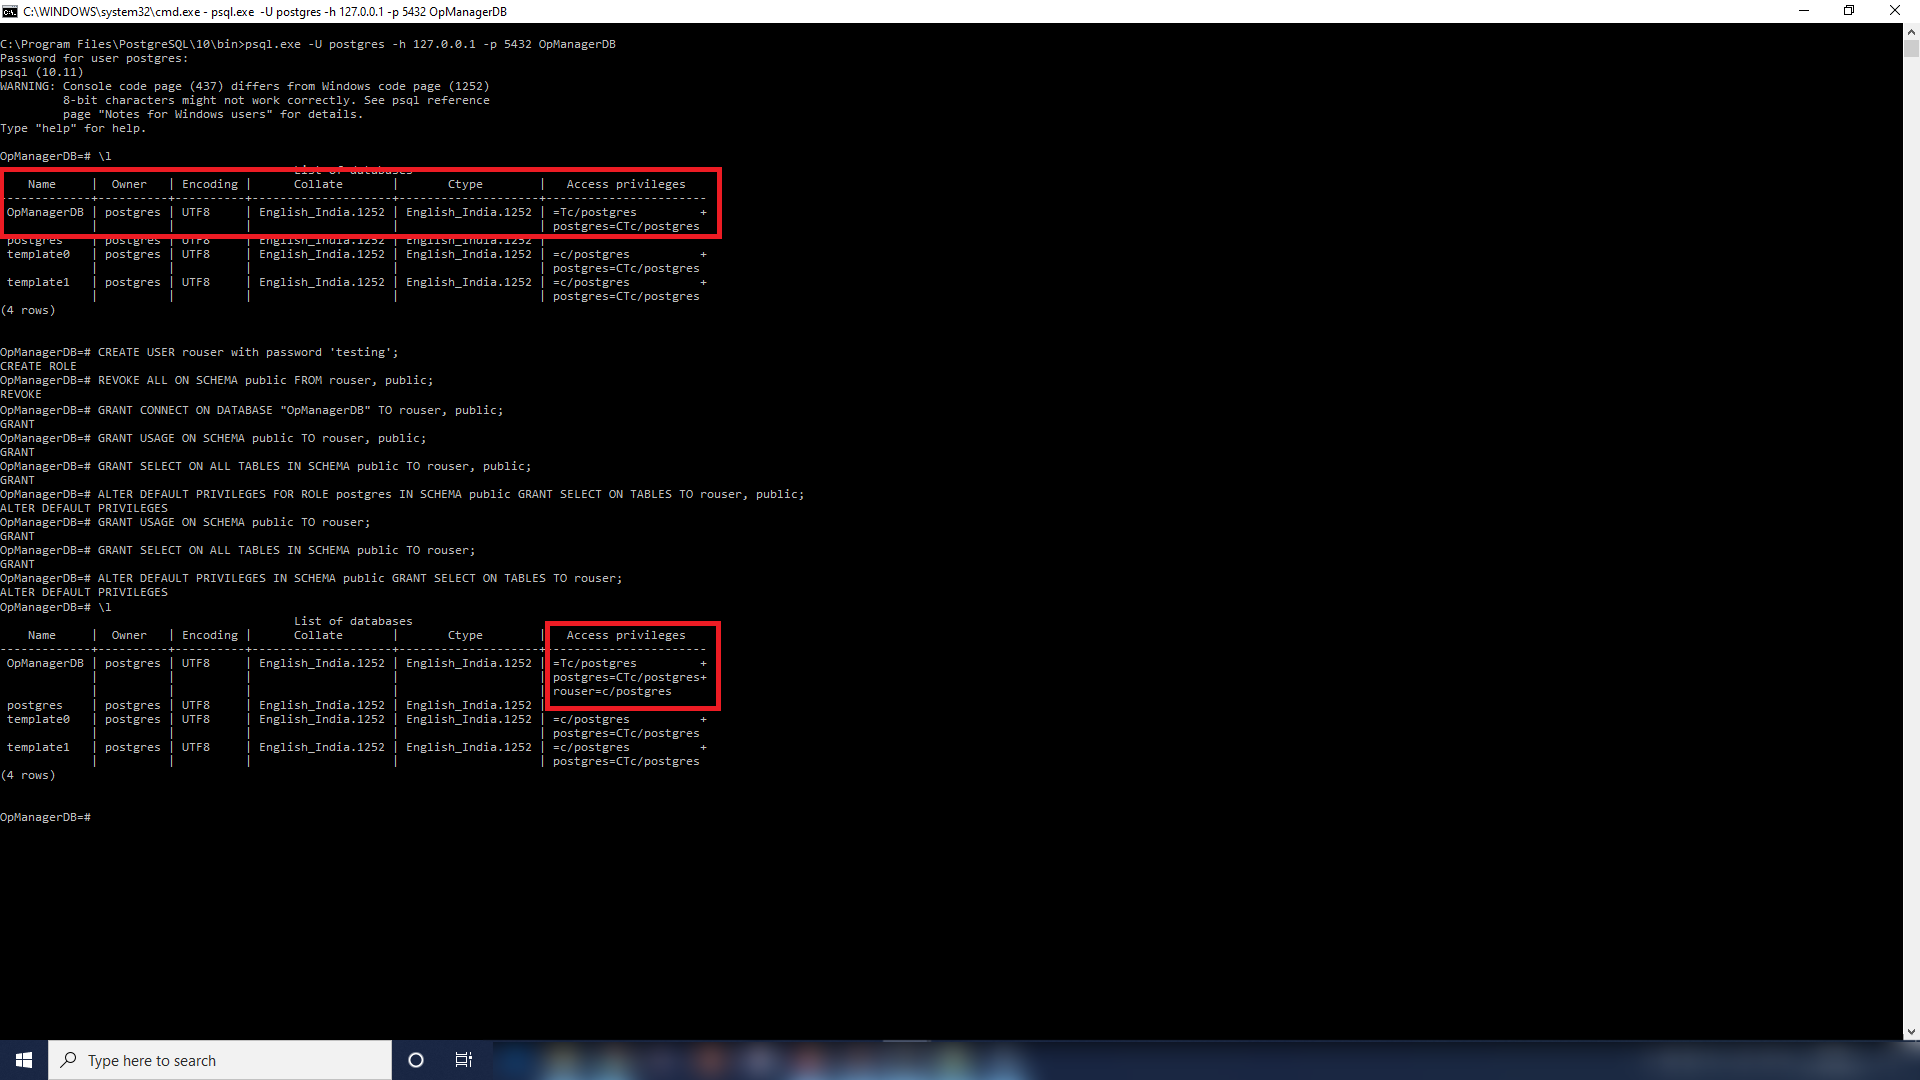
  5. Execute the below queries:
    • REVOKE ALL ON SCHEMA public FROM rouser, public;
    • GRANT CONNECT ON DATABASE "OpManagerDB" TO rouser, public;
    • GRANT USAGE ON SCHEMA public TO rouser, public;
    • GRANT SELECT ON ALL TABLES IN SCHEMA public TO rouser, public;
    • ALTER DEFAULT PRIVILEGES FOR ROLE postgres IN SCHEMA public GRANT SELECT ON TABLES TO rouser, public;
    • GRANT USAGE ON SCHEMA public TO rouser;
    • GRANT SELECT ON ALL TABLES IN SCHEMA public TO rouser;
    • ALTER DEFAULT PRIVILEGES IN SCHEMA public GRANT SELECT ON TABLES TO rouser;
  6. remot-psql

Dump the data from the old PgSQL database to the new one

Once the migration is completed, dump the data from the old PgSQL database to the new one by executing the following command:

    "<OldPgSQLHome>\bin\pg_dump.exe" -U postgres -p <OldPgSQLPort> -h <OldPgSQLHost> -x -W OpManagerDB | "<NewPgSQLHome>\bin\psql.exe" -U postgres -p <NewPgSQLPort> -h <NewPgSQLHost> -W OpManagerDB

    Example: "C:\Program Files\PostgreSQL\9.2.4\bin\pg_dump.exe" -U postgres -p 5431 -h 127.0.0.1 -x -W OpManagerDB | "C:\Program Files\PostgreSQL\10.21\bin\psql.exe" -U postgres -p 5432 -h 127.0.0.1 -W OpManagerDB

Changes to be made in the OpManager directory

  1. Open the database_params.conf file from <OpManagerHome>\conf.
  2. Change the existing URL in the following format with the new PgSQL details.

    url jdbc:postgresql://<NewPgSQLHost>:<NewPgSQLPort>/<NewlyMigratedDBName>?dontTrackOpenResources=true&useUnicode=true&characterEncoding=utf8

    Example: url jdbc:postgresql://remote-pgsql-host:5432/OpManagerDB?dontTrackOpenResources=true&useUnicode=true&characterEncoding=utf8

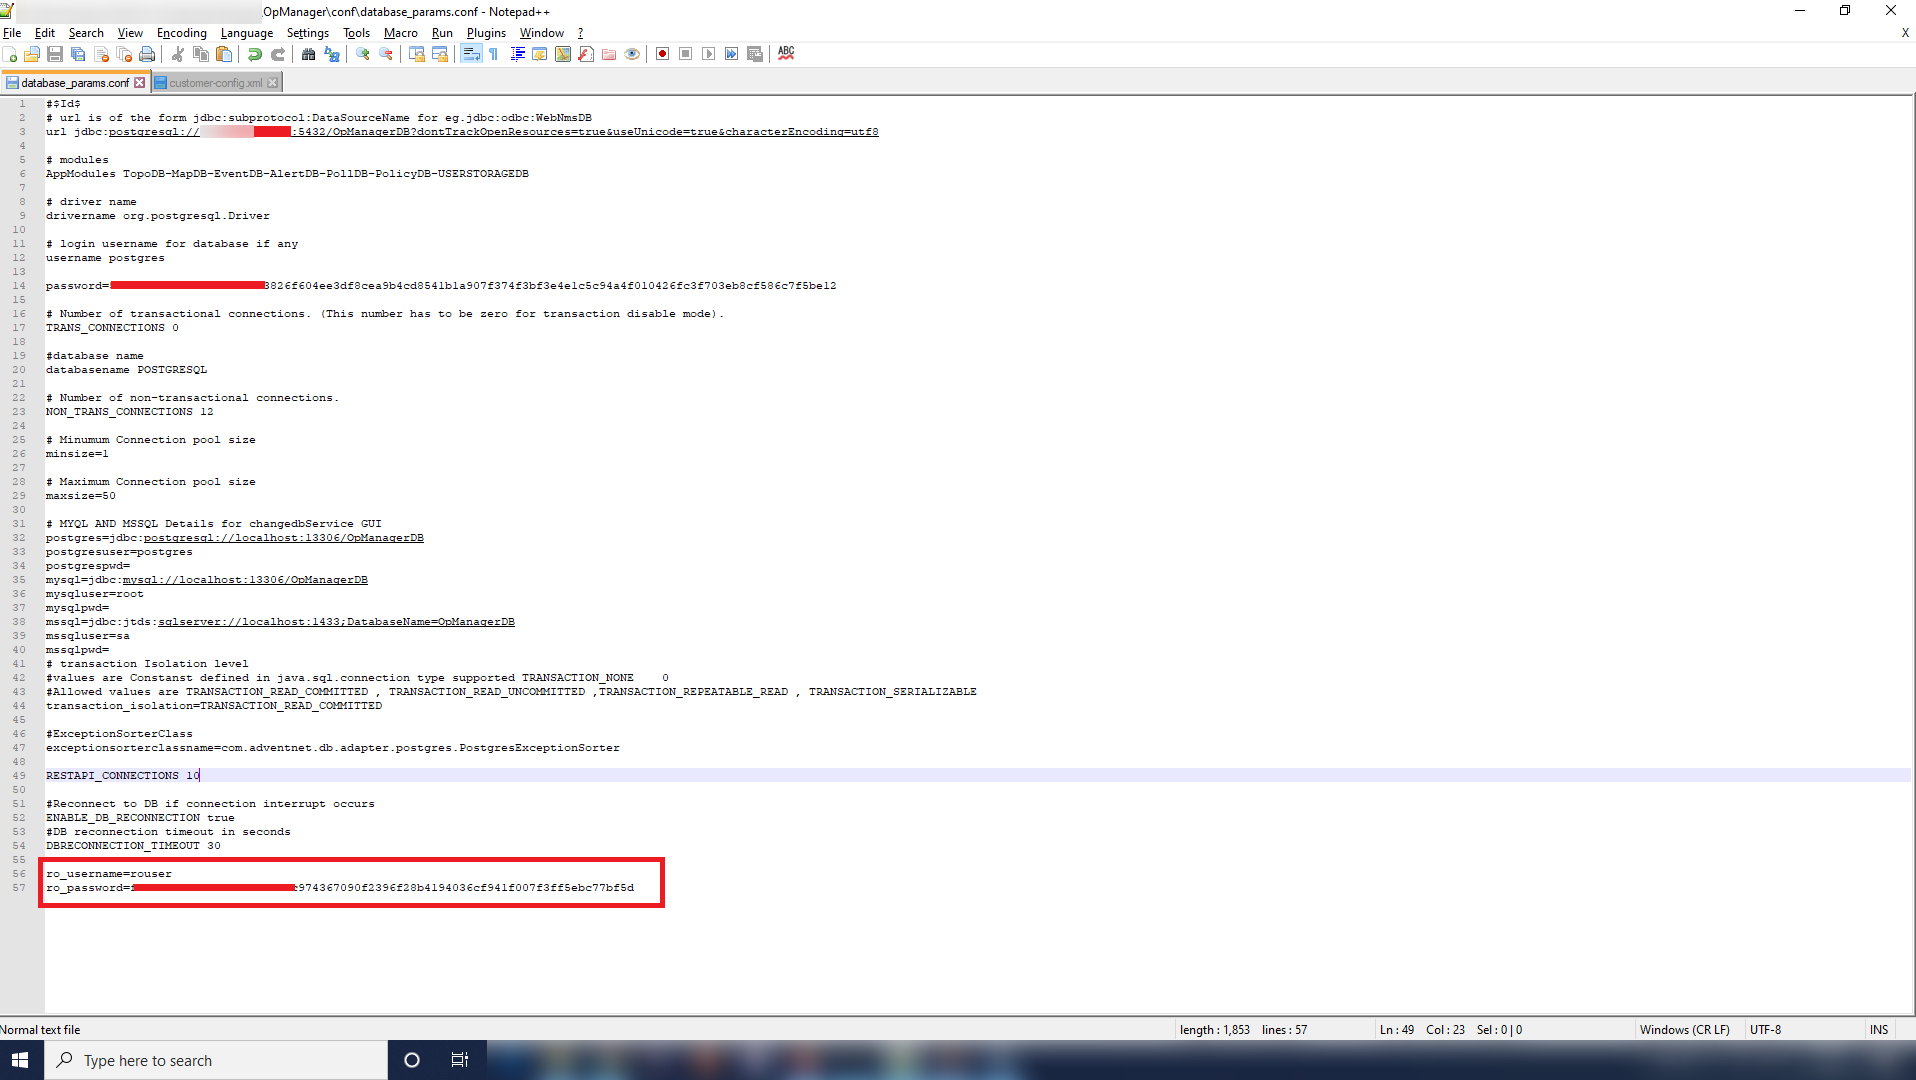
  3. Encrypt the password of the 'rouser' and change the same. Encryption of plain text can be done by running the script 'encrypt.bat/sh' from <OpManagerHome>\bin directory. Specify the algorithm as 'AES.256' and use the CryptTag from <OpManagerHome>\conf\customer-config.xml.

    Execute the following command: encrypt.bat -v <ROPASSWORD> -a AES.256 -k <CryptTag>


  4. Add the ro_password using the password supplied in step 3. (ro_password=<ROPASSWORD>)


  5. Save the file and start the OpManager service. 

After starting service, for sanity testing, execute a query in the submit query page and try adding device or any other basic functionality in product. [Sample Query - Select * from BuildDetails;]


Thank you for your feedback!

Was this content helpful?

We are sorry. Help us improve this page.

How can we improve this page?
Do you need assistance with this topic?
By clicking "Submit", you agree to processing of personal data according to the Privacy Policy.