Integrating PAM360 with Automation Anywhere
This document discusses the procedure to integrate PAM360 with Robotic Process Automation (RPA) tools. PAM360 integrates with Automation Anywhere, an RPA tool that mimics different software processes using bots.
The PAM360 bot automatically fetches passwords using resource and account details from PAM360's vault, thereby eliminating the need to retrieve passwords manually to perform different tasks. The PAM360 bot can be combined with other bots in Automation Anywhere to create a complete endpoint management workflow. Let's assume your company needs a secure remote login setup automated using bots. You can combine PAM360's bot with another bot that initiates the remote connection. The password fetching mechanism of PAM360's bot will ensure that the password is fetched securely from PAM360's vault and used to log in to the remote device.
At the end of this document, you will have learned the following topics:
- Roles and Permissions
- How does the Integration Work?
- Setting up the Automation Anywhere Portal
- Configuring RPA Integration in PAM360
- Downloading Account Details in PAM360
1. Roles and Permissions
By default, users with the Privileged Administrator, Administrator and Cloud Administrator user roles can integrate and set up Automation Anywhere. Apart from these predefined roles, users with the custom roles enabled with Robotic Process Automation privilege under Custom Settings can integrate and set up.
2. How does the Integration Work?
Through the integration, the PAM360 bot can automate the process of fetching passwords from PAM360's password repository. The securely fetched password can then be used to connect to a machine, application, or a database.
PAM360's Task bots can fetch the password from PAM360 vault in two ways: Through resource & account name and through resource & account ID. The Task bots can take input values from the user manually and also read the data from a text file. The input value includes a unique App Token, generated from PAM360's web interface. Once the required input details are provided, run the Task bot in the Automation Anywhere portal; the password of the requested resource and account will be fetched and displayed in Automation Anywhere.
3. Setting up the Automation Anywhere Portal
First-time users, click here to download Automation Anywhere and get started.
Follow the below steps to set up the Automation Anywhere portal and add the PAM360 bot:
- Download the PAM360 bot from the Bot Store.
- Double click the .msi file and follow the installation instructions. Copy the license code from the downloads page of Automation Anywhere. The Installer creates a folder structure with respective contents under the Automation Anywhere Directory.
Additional Details
The PAM360 bot package contains two task bots that can perform the following functions. These task bots located under <Automation-Anywhere-Installation-Directory> >> My Tasks >> Bot Store >> Retrieve Credentials from PAM360-ManageEngine >> My Tasks.
- MasterBot.atmx - Password retrieval by providing resource name and account name manually.
- MasterBot-ReadInputFromFile.atmx - Password retrieval by reading resource ID and account ID from a text file which can be downloaded from PAM360's web interface. Refer to section 5 below to learn more about downloading the accounts details in detail.
- Now, open the Automation Anywhere portal and proceed with the further steps below.
3.1 Retrieving Password using Resource Name and Account Name
To fetch password using the Task bot MasterBot.atmx, follow the below steps:
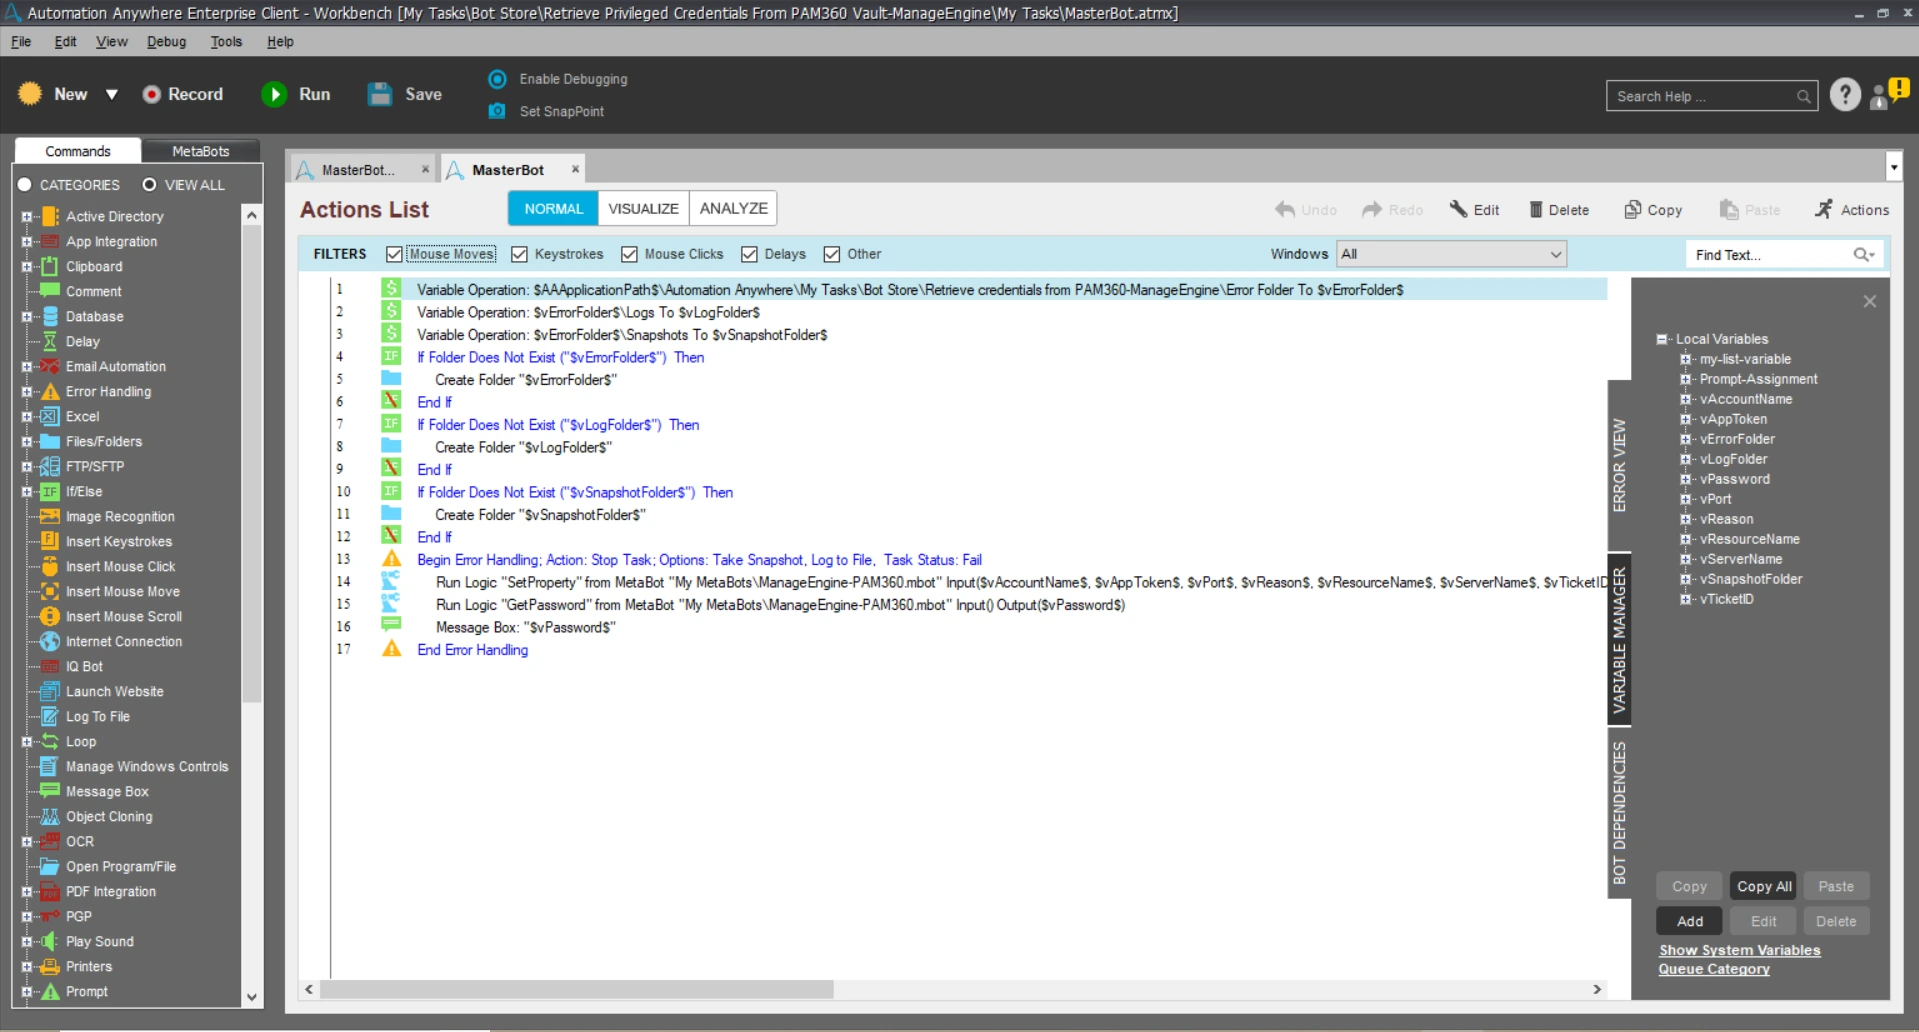
- In the left pane, under Tasks >> Bot Store >> Retrieve Credentials from PAM360-ManageEngine, you will find MasterBot.atmx in My Tasks. Right click MasterBot.atmx and click Edit.
- In the Variable Manager on the right pane, the following variables will be listed: vServerName, vPort, vAccountName, vResourceName, vReason, vAppToken, vTicketID. Double click on the required variable to pop up the Edit Variable window. Here, enter a value for the selected variable. You need to supply input parameters such as vAppToken generated from PAM360, vPort, vServerName, vResourceName, vAccountName, along with vReason and vTicketID for password retrieval if applicable.
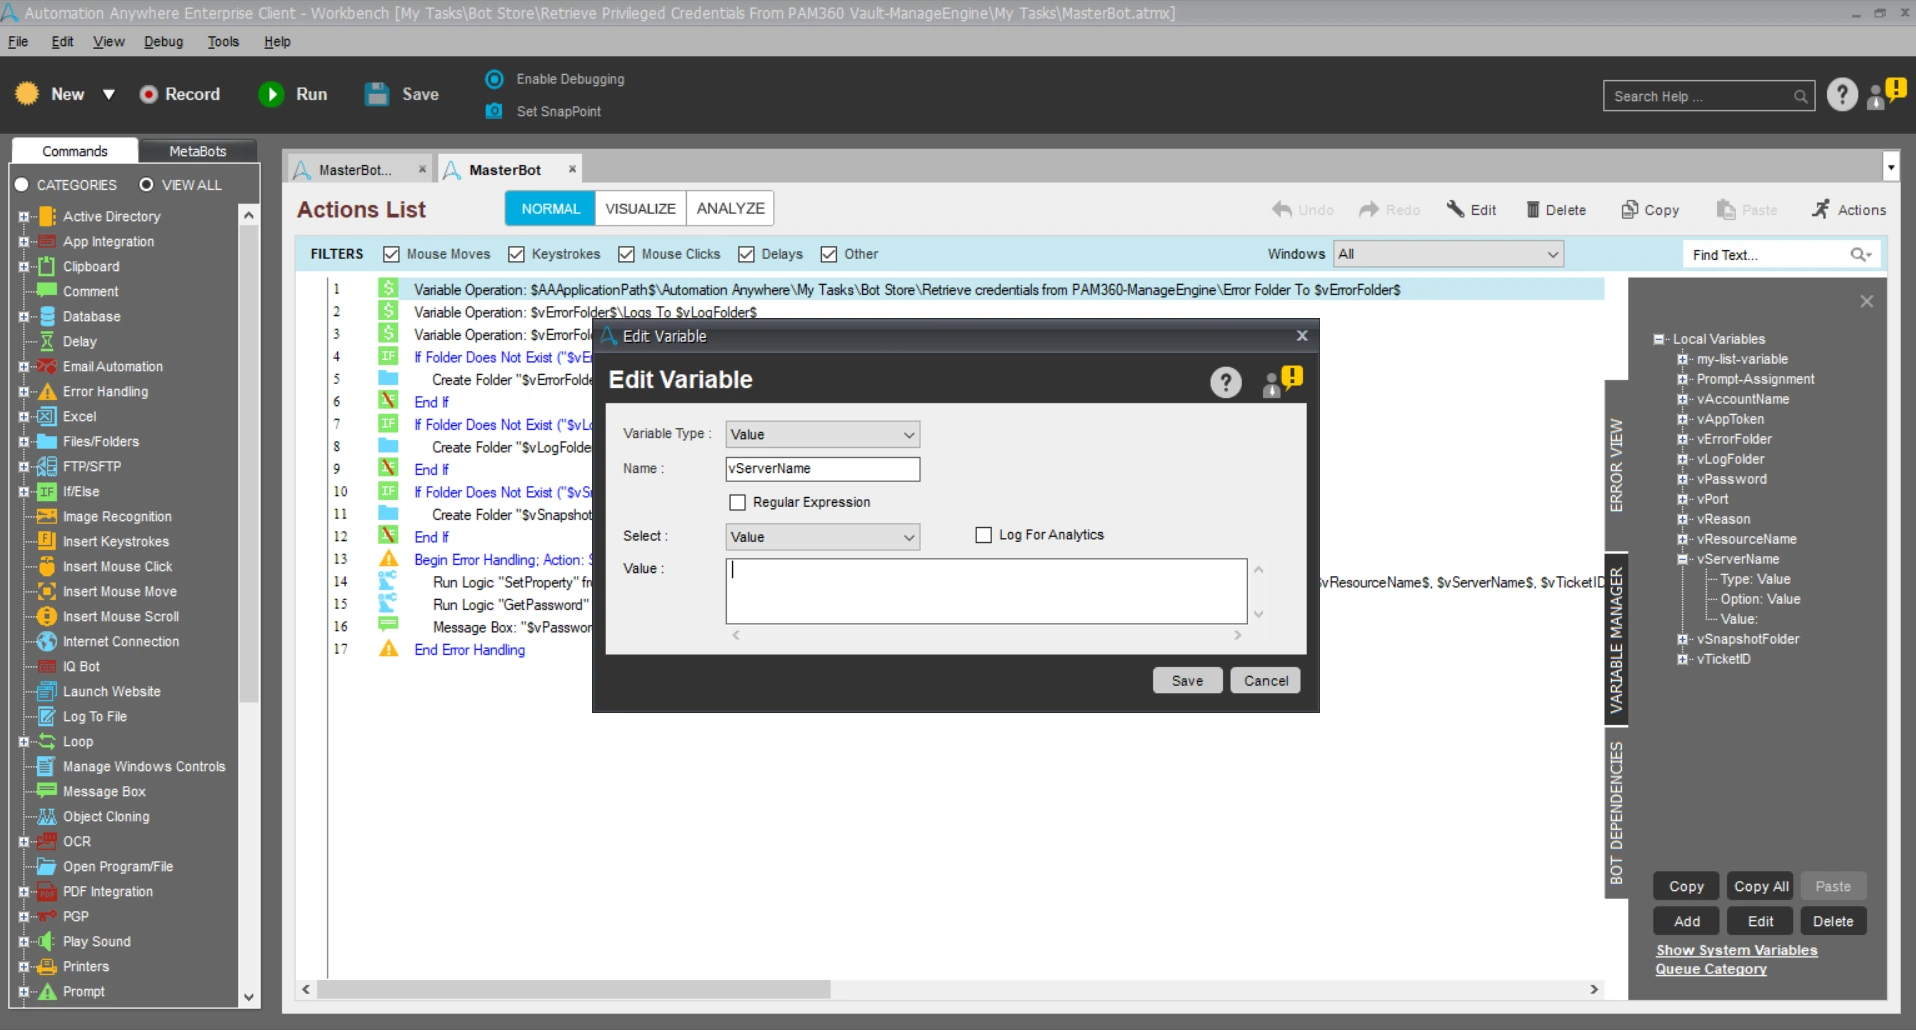
- Click Save from the menu bar at the top and click Run to execute the bot. If all the input parameters are given correctly, the bot will fetch the required password from PAM360 and display it in a message box.
3.2 Retrieving Password using the Read From File Option
To fetch the password using the Read From File option, you need to download the text file containing the resource and account details for a particular account, from PAM360. Click here to learn how to download the text file from PAM360.
Once you have the text file saved in your local disk, continue with the below steps:
- In the left pane, under Tasks >> Bot Store >> Retrieve Credentials from PAM360-ManageEngine, you will find MasterBot-ReadInputFromFile.atmx in My Tasks. Right click MasterBot-ReadInputFromFile.atmx and click Edit.
- In the Actions List, double click Read From Text File (line 14 in the image below). The Read from CSV/Text window will pop up. Here, click the browse option to select and add the text file stored in your local disk. By default, the text file downloaded from PAM360 has '=' as the delimiter. Click Save to save the changes.
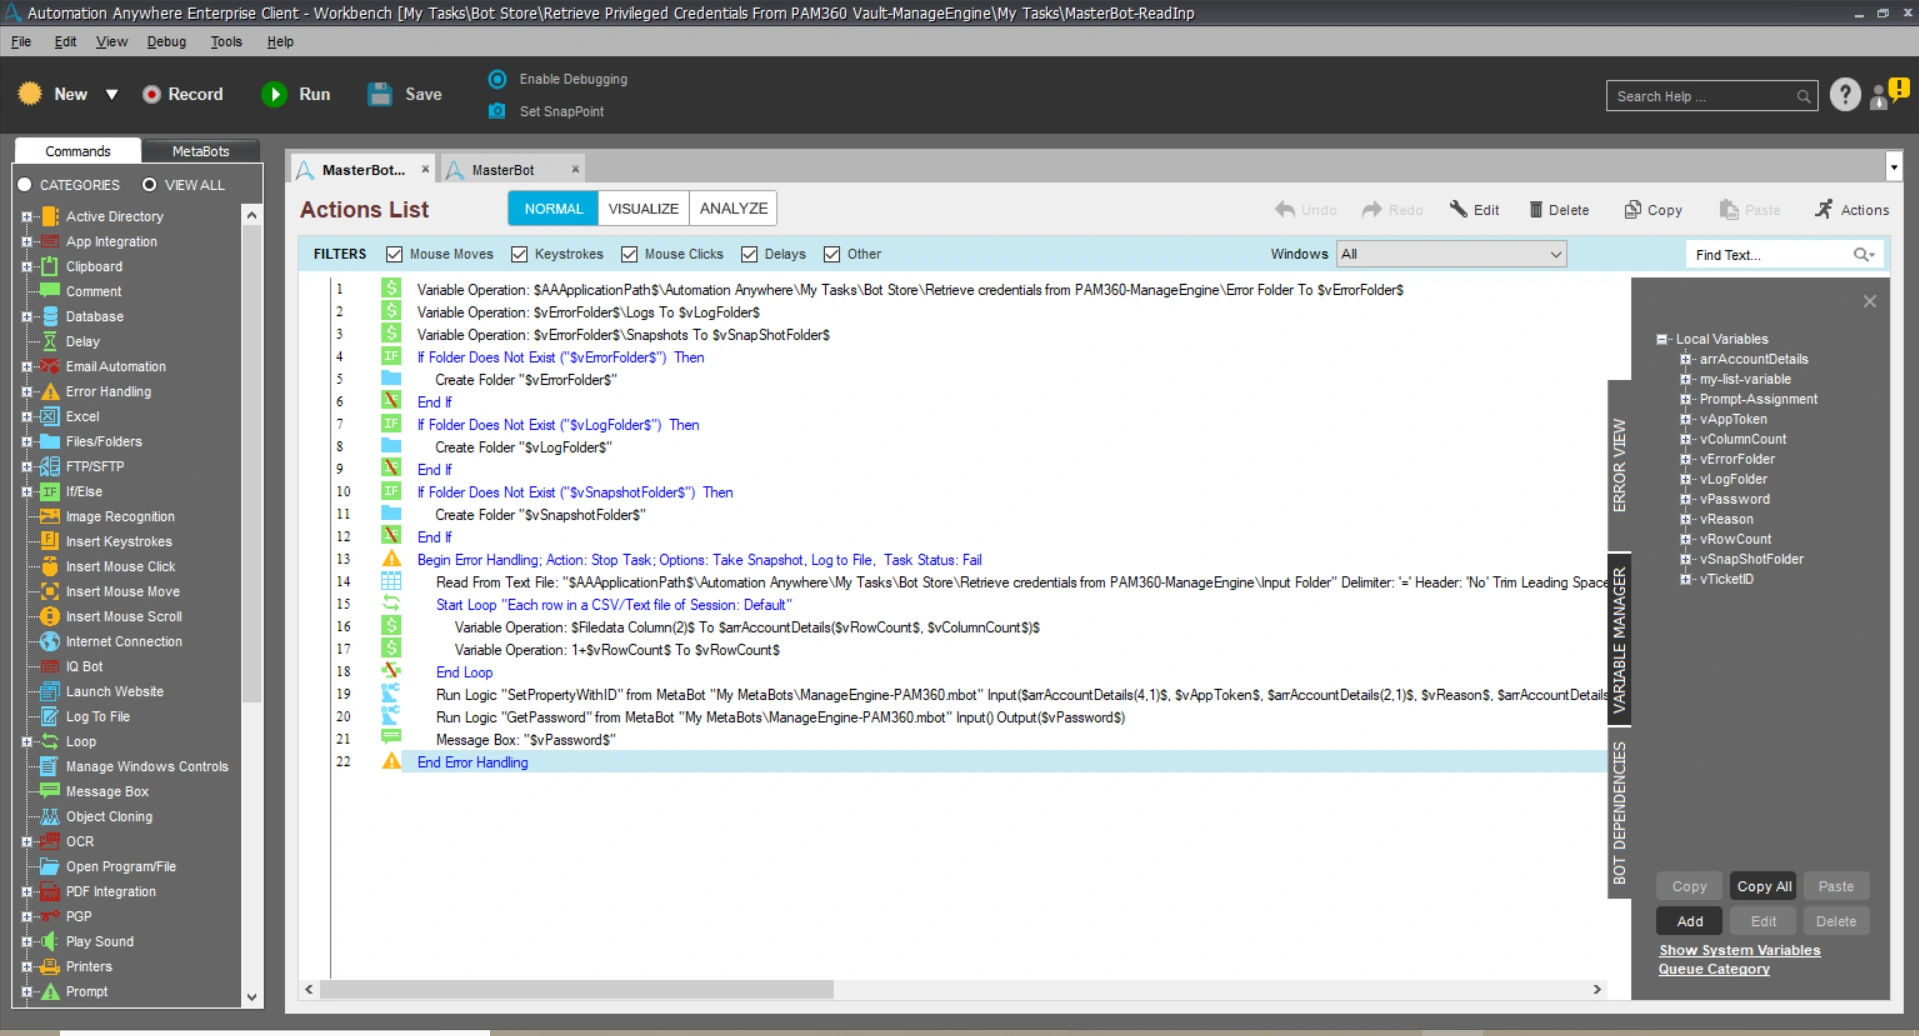
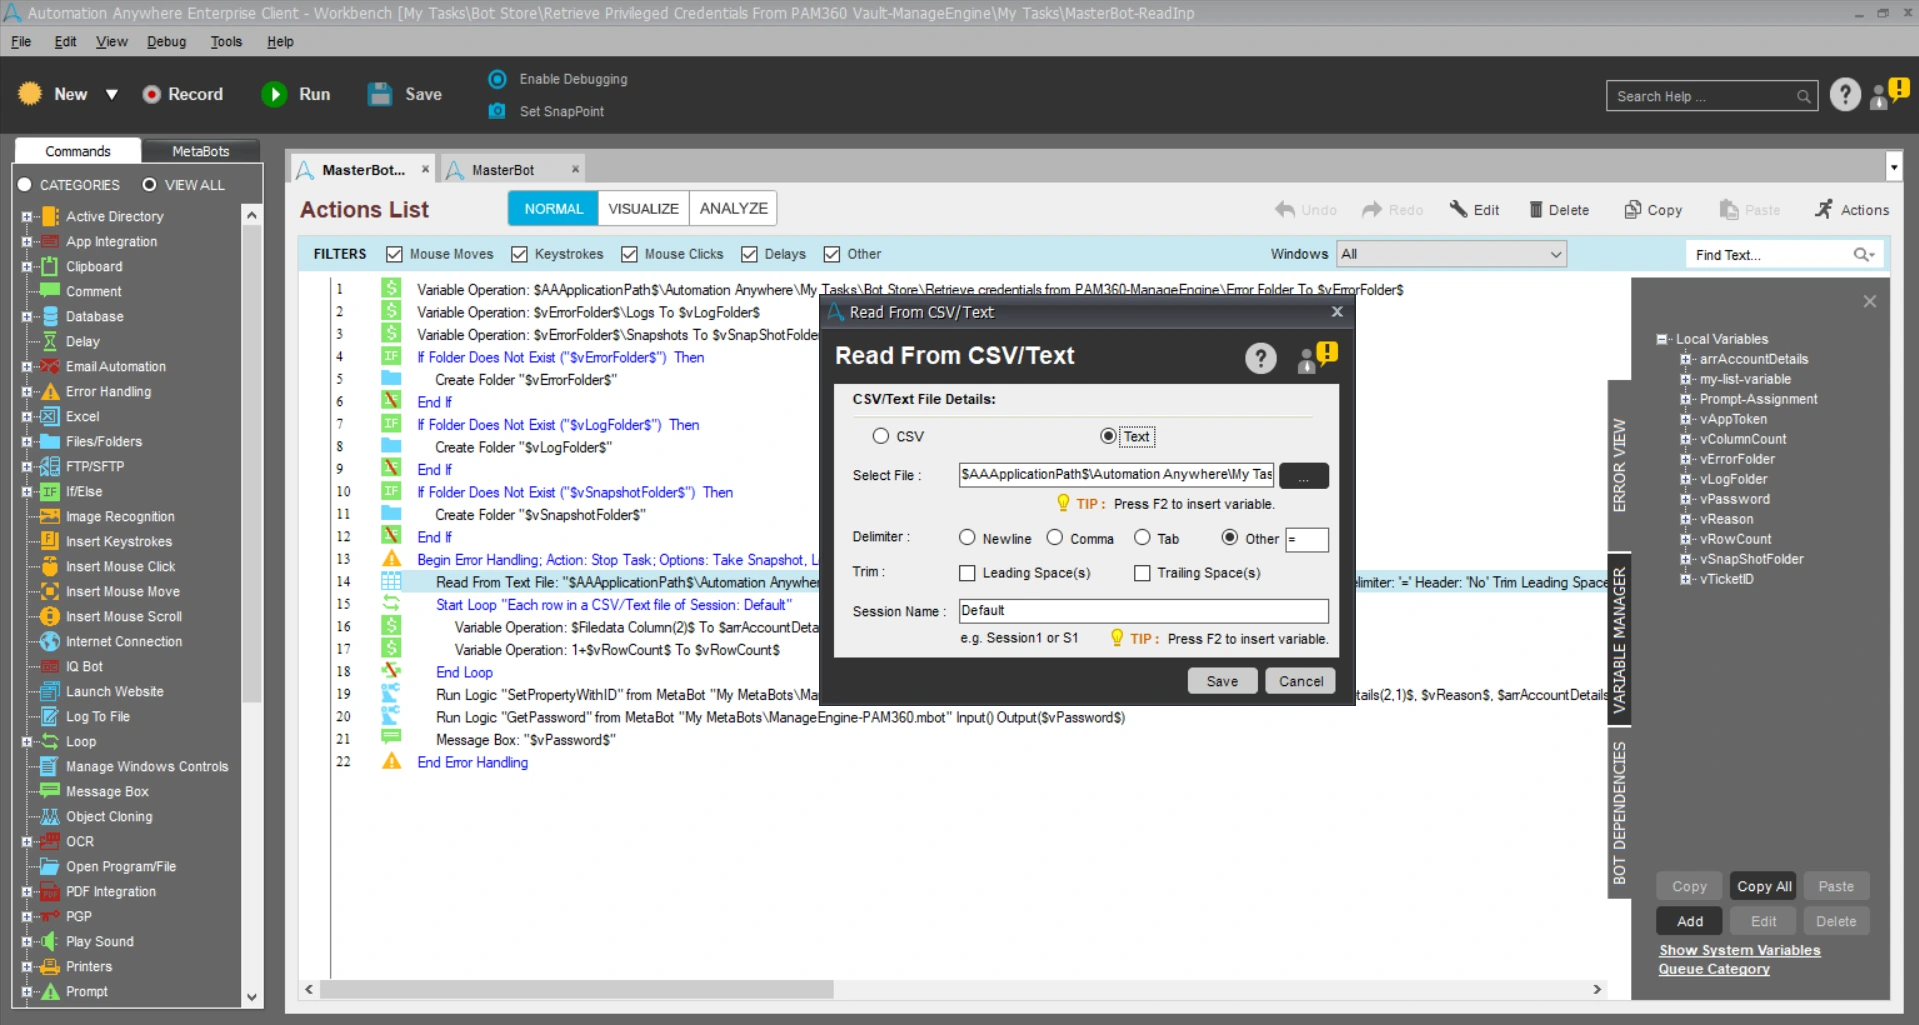
- The input parameters such as vPort, vResourceID, vAccountID, vServerName will be populated directly from the text file. However, it is mandatory to enter the vAppToken generated from PAM360. Furthermore, add values for vReason and vTicketID parameters if applicable.
- Click Save from the menu bar at the top and click Run to execute the bot. If all the input parameters are given correctly, the bot will fetch the required password from PAM360 and display it in a message box.
Automation Anywhere set up is complete. Now, you have completed setting up PAM360's Metabots in the Automation Anywhere portal, follow the below section to complete the integration in PAM360.
4. Configuring RPA Integration in PAM360
To enable the RPA integration, follow these steps:
- Login to PAM360's web interface and navigate to Admin >> Workflow Orchestration >> Robotic Process Automation.
- Click Enable under Automation Anywhere.
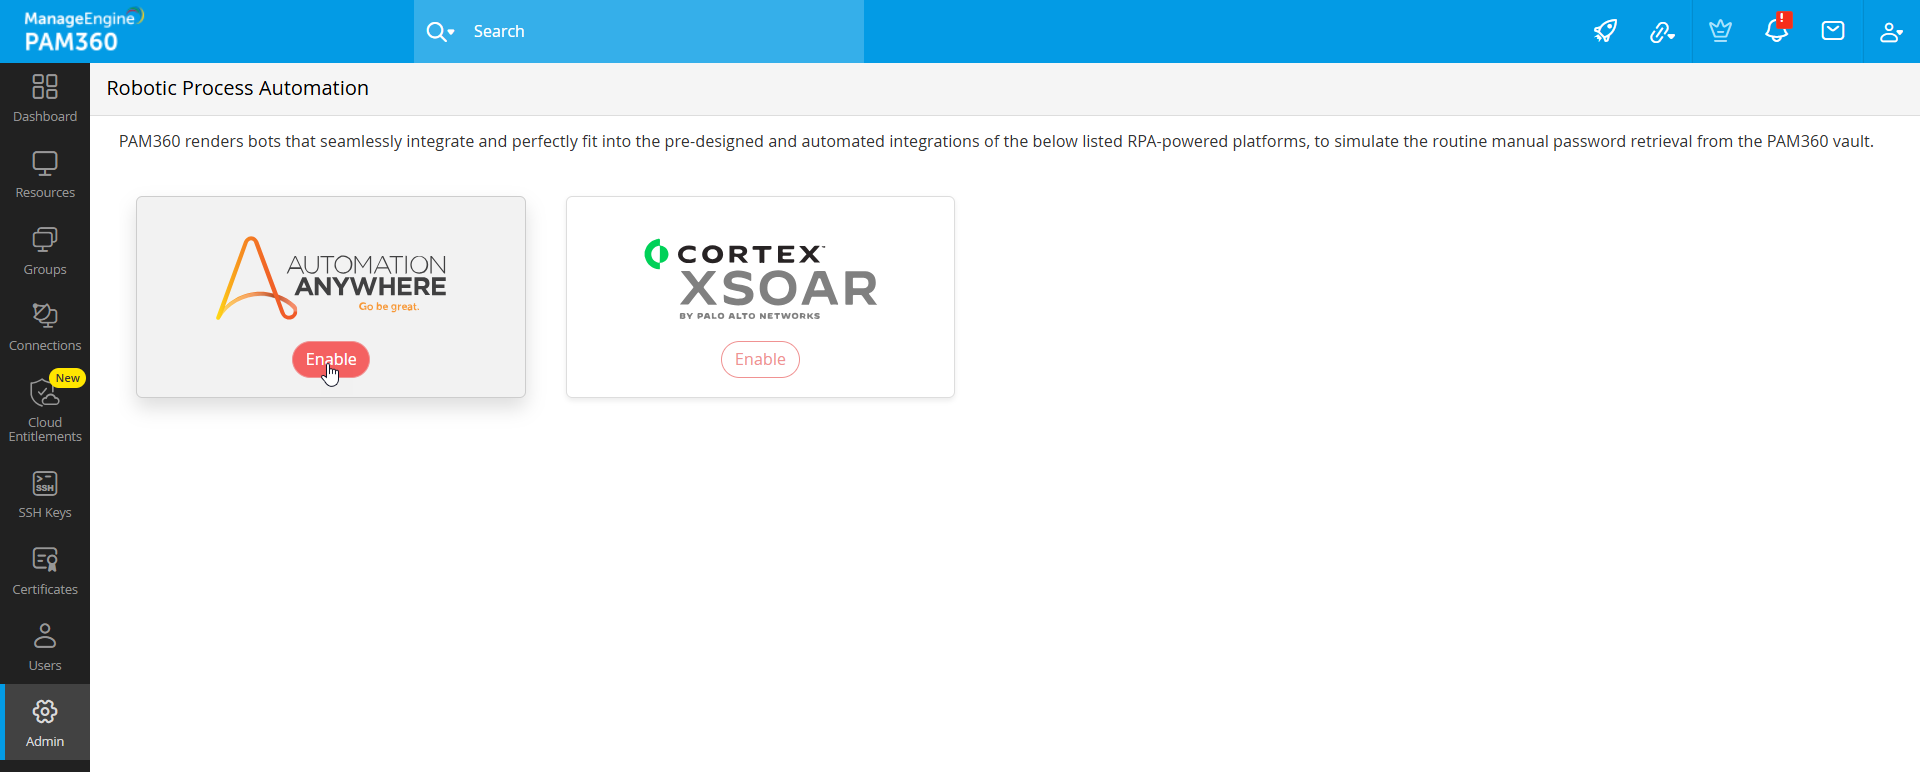
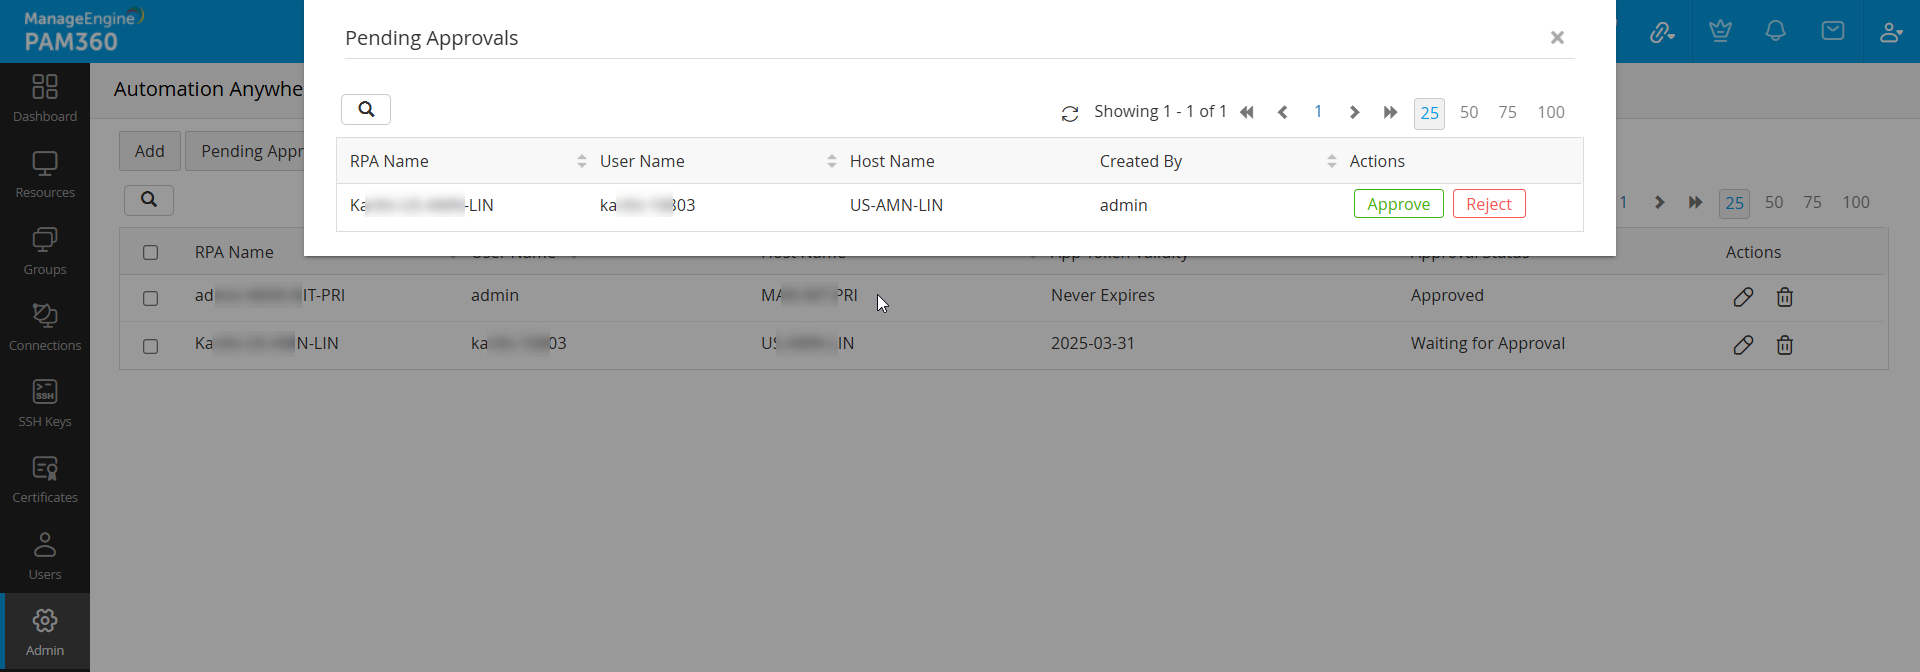
- From the new window, you can add, edit or delete RPA entries and approve pending requests.
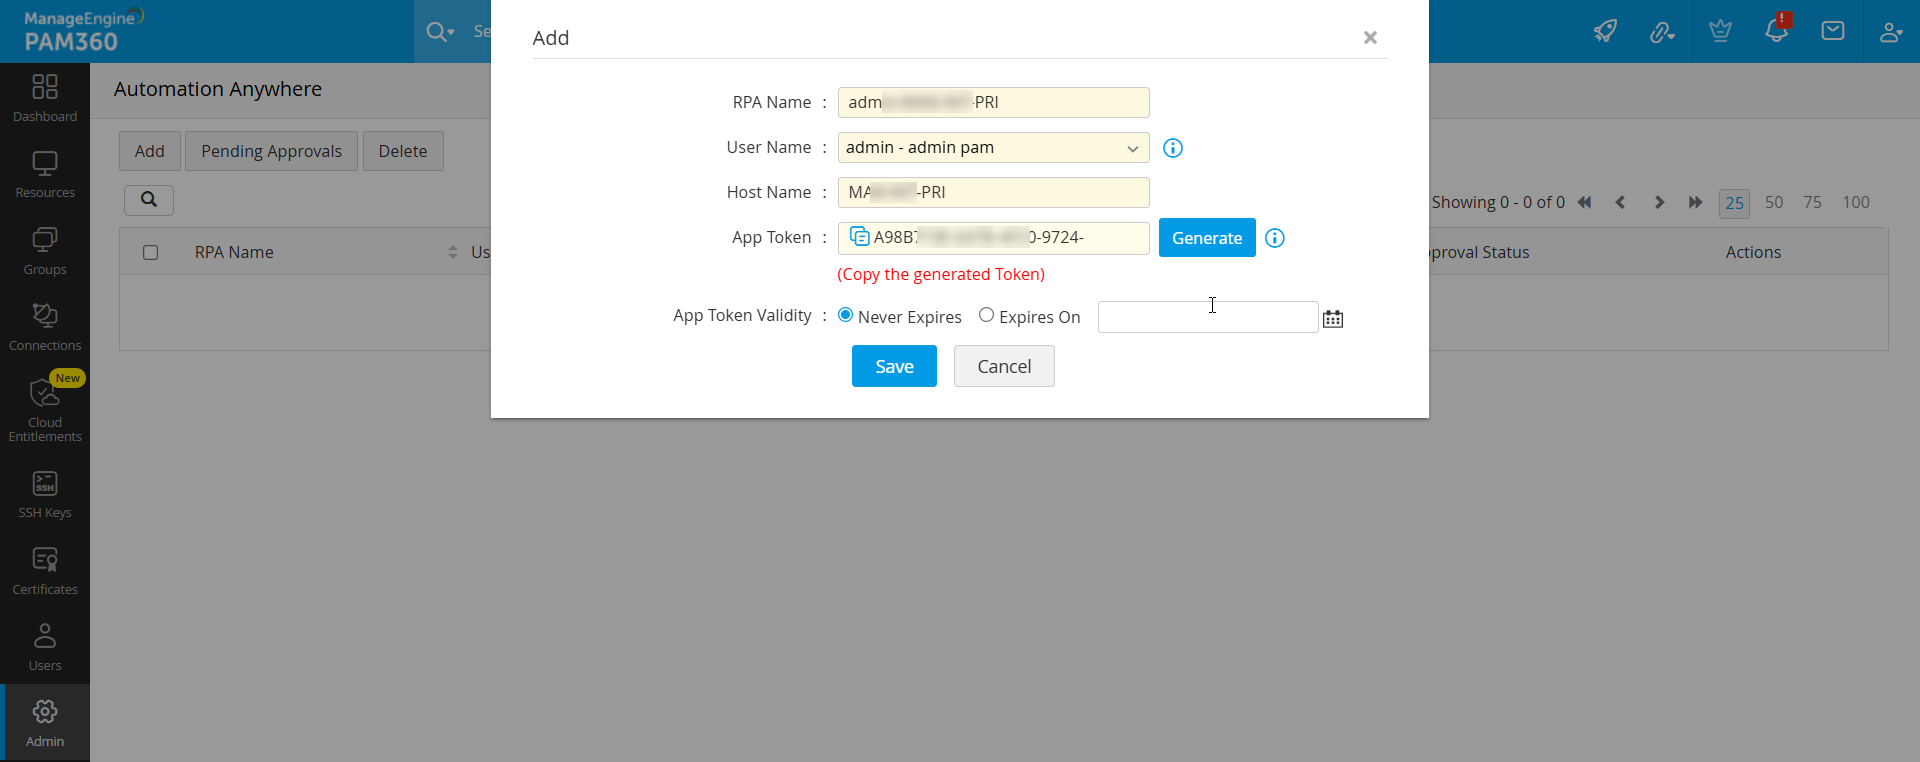
To add a new RPA entry, click Add and enter the following attributes to add a new RPA entry for a user:
- RPA Name: Enter a unique name for your reference, e.g. username-hostname
- User Name: Users that are visible to you in PAM360 will be listed in the drop-down. The user selected here will be the one who can use the App Token in Automation Anywhere from the Host Name specified in the next step. Before the App Token can be used, the request will go through an approval mechanism. Refer to the Approval Workflow section to know how the approval works for different types of users.
- Host Name: Enter a Host Name from which the selected user can use the PAM360 bot after the generated App Token is approved. There can only be one RPA entry for a unique User Name - Host Name combo.
- App Token: Click Generate to generate an App Token. This App Token will become active only after RPA entry request is approved by the selected user. By default, the App Token is valid forever. However, you can define a validity period for the App Token in the next step.
- App Token Validity:Never Expires is automatically selected and it will keep the App Token valid forever. Click Expires On to set a date for the expiry of the App Token.
- Now, click Save to add a new entry.
To edit an RPA entry, click the edit icon under Actions beside the required RPA Name and edit the values as required. Once the details are edited, the request will go through the approval mechanism again. The new App Token or Host Name will be active once the request is approved.
To delete an RPA entry, click the Delete icon under Actions beside any RPA name. To delete multiple entries, select check boxes beside the RPA names and click Delete User from the top bar. Then, click Delete in the confirmation dialog box to complete the deletion process.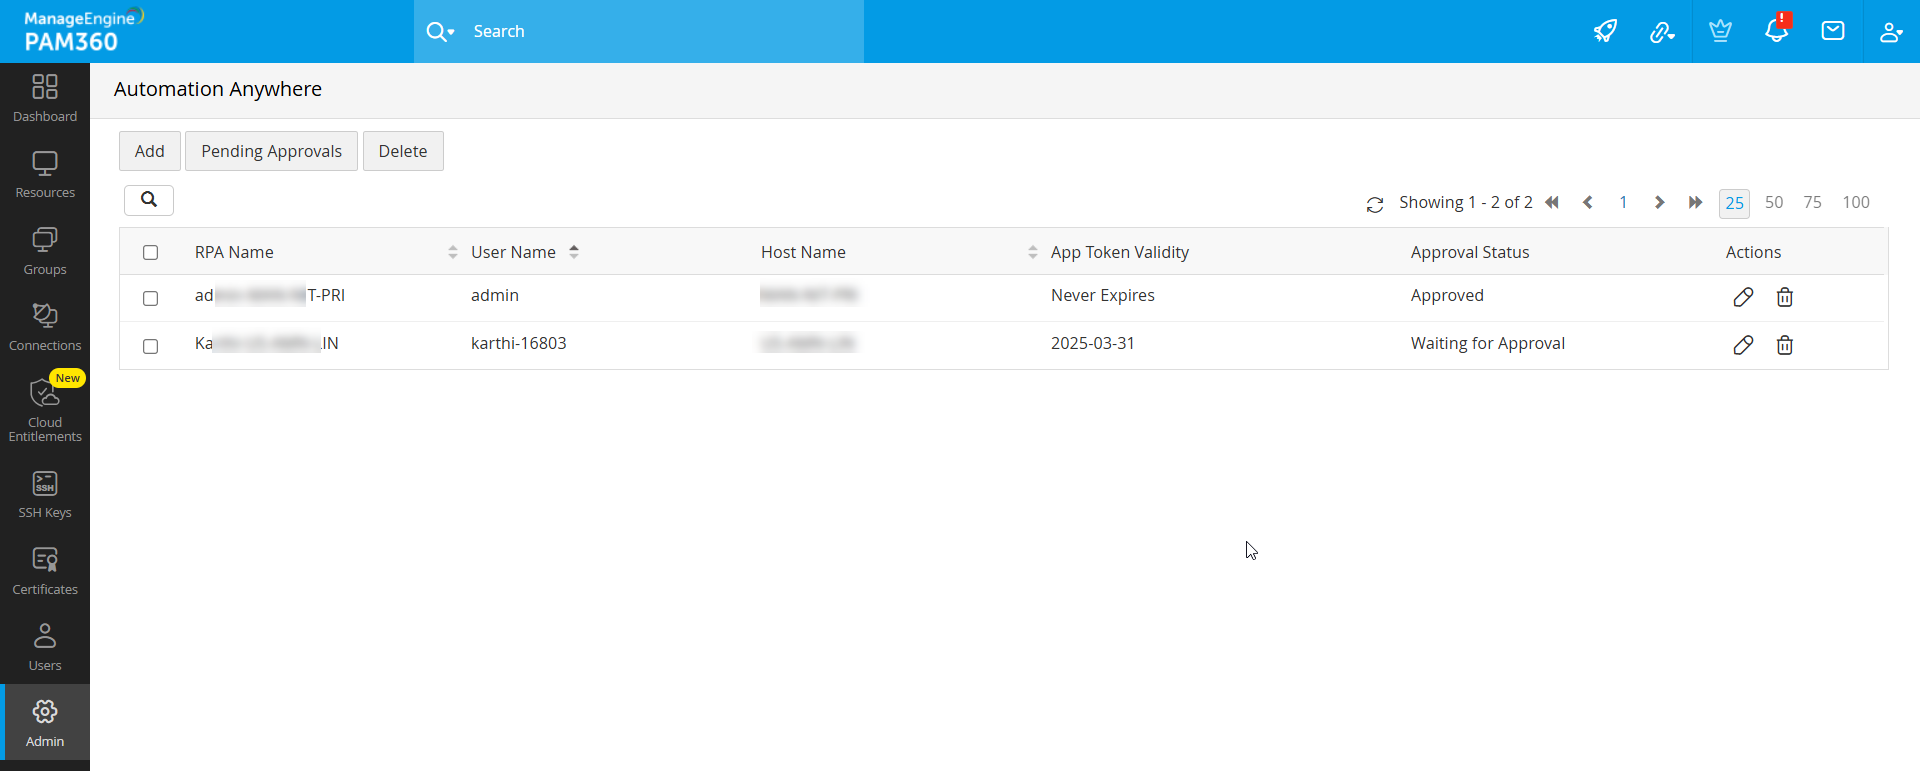
4.1 Approval Workflow for RPA Entries
The User Name chosen in the Add window can be an admin user, another admin user, or a non-admin user (Password User or Password Auditor). Based on the selected user, the RPA entry approval mechanism varies as follows:
Case I - Automatic Approval: If you choose your own user name, the entry will be automatically approved and the App Token will be active right away.
Case II - Awaiting Approval for RPA Privileged Users: If the RPA owner is a user with RPA privilege, then the approval request will be sent to the RPA Owner and will be visible for them under Pending Requests. They can review details such as User Name, Host Name, Created By and choose to approve or reject the request. Upon approval, the RPA Owner can either generate a new App Token or use the same one generated when the entry was added. Please note that only the RPA Owner will be able to apply the App Token and use the PAM360 bot in Automation Anywhere. Upon rejection of the request, the RPA entry will be deleted from the menu.
Case III - Awaiting Approval for Users without RPA Privilege: If the RPA owner is not a user with RPA privilege, then all admins other than the one creating the RPA entry will get the approval request — any one of the admins can approve or reject the request. You can copy the App Token and provide it to the RPA owner after approval from one of the admins.
Caution
The App Token will not be valid if met with any one of the following cases:
- The App Token is incorrect or expired.
- Automation Anywhere integration is disabled under Admin >> Workflow Orchestration >> Robotic Process Automation.
- If the App Token is used from a host different from the one specified while creating the RPA entry.
5. Downloading Account Details in PAM360
Automation Anywhere provides an option to add input variables through a text file, in addition to giving the details manually. Follow the below steps to download account details for a particular account in PAM360:
- Navigate to Resources and click a resource name. Account Details window will display all accounts associated with the resource.
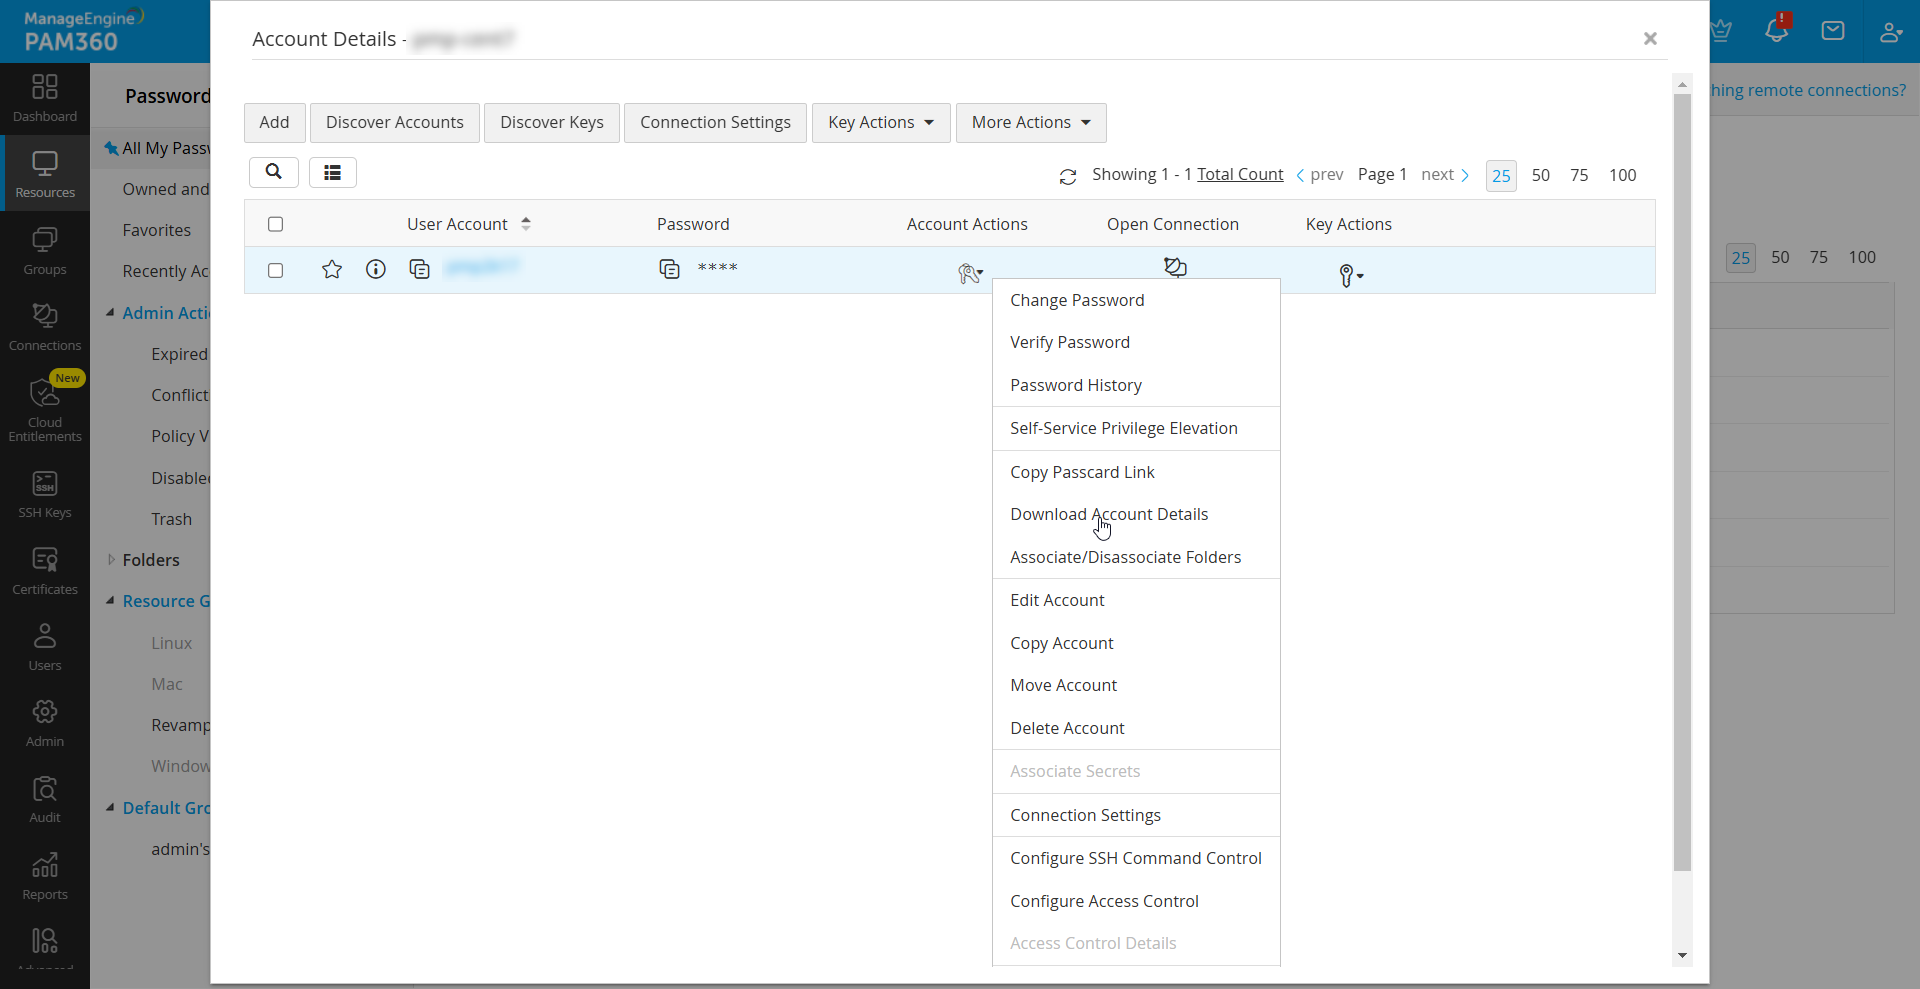
- Click the Account Actions drop-down beside an account and choose Download Account Details from the drop-down.
- A text file containing details such as ServerName, Port, ResourceID, AccountID will be exported. The key-value pairs will be separated by the delimiter '=' in the text file.
