Integrating PAM360 with Cortex XSOAR
PAM360, a unified Privileged Access Management product from ManageEngine, integrates with Cortex XSOAR by Palo Alto Networks, a robotic process automation (RPA) tool that allows you to build standardized responses using commands created through techniques that incorporate case management, automation, real-time collaboration, and threat intelligence management to serve security teams across the incident life cycle.
At the end of this document, you will have learned the following topics:
- Roles and Permissions
- Key Benefits of Integration
- How does the Integration Work?
- Setting up the PAM360 Instance in Cortex XSOAR
- Configuring Cortex XSOAR in PAM360
1. Roles and Permissions
By default, users with the Privileged Administrator, Administrator and Cloud Administrator user roles can integrate and set up Cortex. Apart from these predefined roles, users with the custom roles enabled with Robotic Process Automation privilege under Custom Settings can integrate and set up.
2. Key Benefits of Integration
Through the PAM360 - Cortex XSOAR integration, the commands provided by PAM360 can automate a variety of password-related operations such as creating resources and accounts, fetching passwords, and updating resource and account details. These operations can be used further by Cortex XSOAR to perform any automated tasks.
This integration allows you to securely configure instances in Cortex XSOAR using credentials stored in the PAM360 vault. From the Cortex XSOAR instance, you can reset account passwords, fetch resource and account details without revealing the passwords, enforce automated approval workflows to gain access to passwords.
3. How does the Integration Work?
The PAM360-Cortex XSOAR integration utilizes commands to automatically fetch passwords using resource and account details from PAM360's vault. PAM360 provides various commands covering a variety of automation tasks that can be combined to create a complete endpoint management workflow.
Let's assume a scenario in which an automation task is required to trigger scans on specified endpoints in your environment. The credentials to connect to the endpoints are stored in the PAM360 vault. By integrating PAM360 with Cortex XSOAR, you can create an automated setup that uses the commands provided by PAM360 to retrieve passwords and other account details from the PAM360 vault that can be put to use based on your requirements.
4. Setting up the PAM360 Instance in Cortex XSOAR
Caution
A working instance of Cortex XSOAR is required to complete the integration with PAM360. First-time users, click here to sign up for Cortex XSOAR and get started.
Follow the below steps to set up the Cortex XSOAR portal and add the PAM360 instance in there:
- Login to the Cortex XSOAR portal and navigate to the Marketplace option available in the left pane.
- Here, search for the ManageEngine PAM360 application and click Install.
- After installation, go to Settings >> Integration and you will find it under the Servers and Services category.
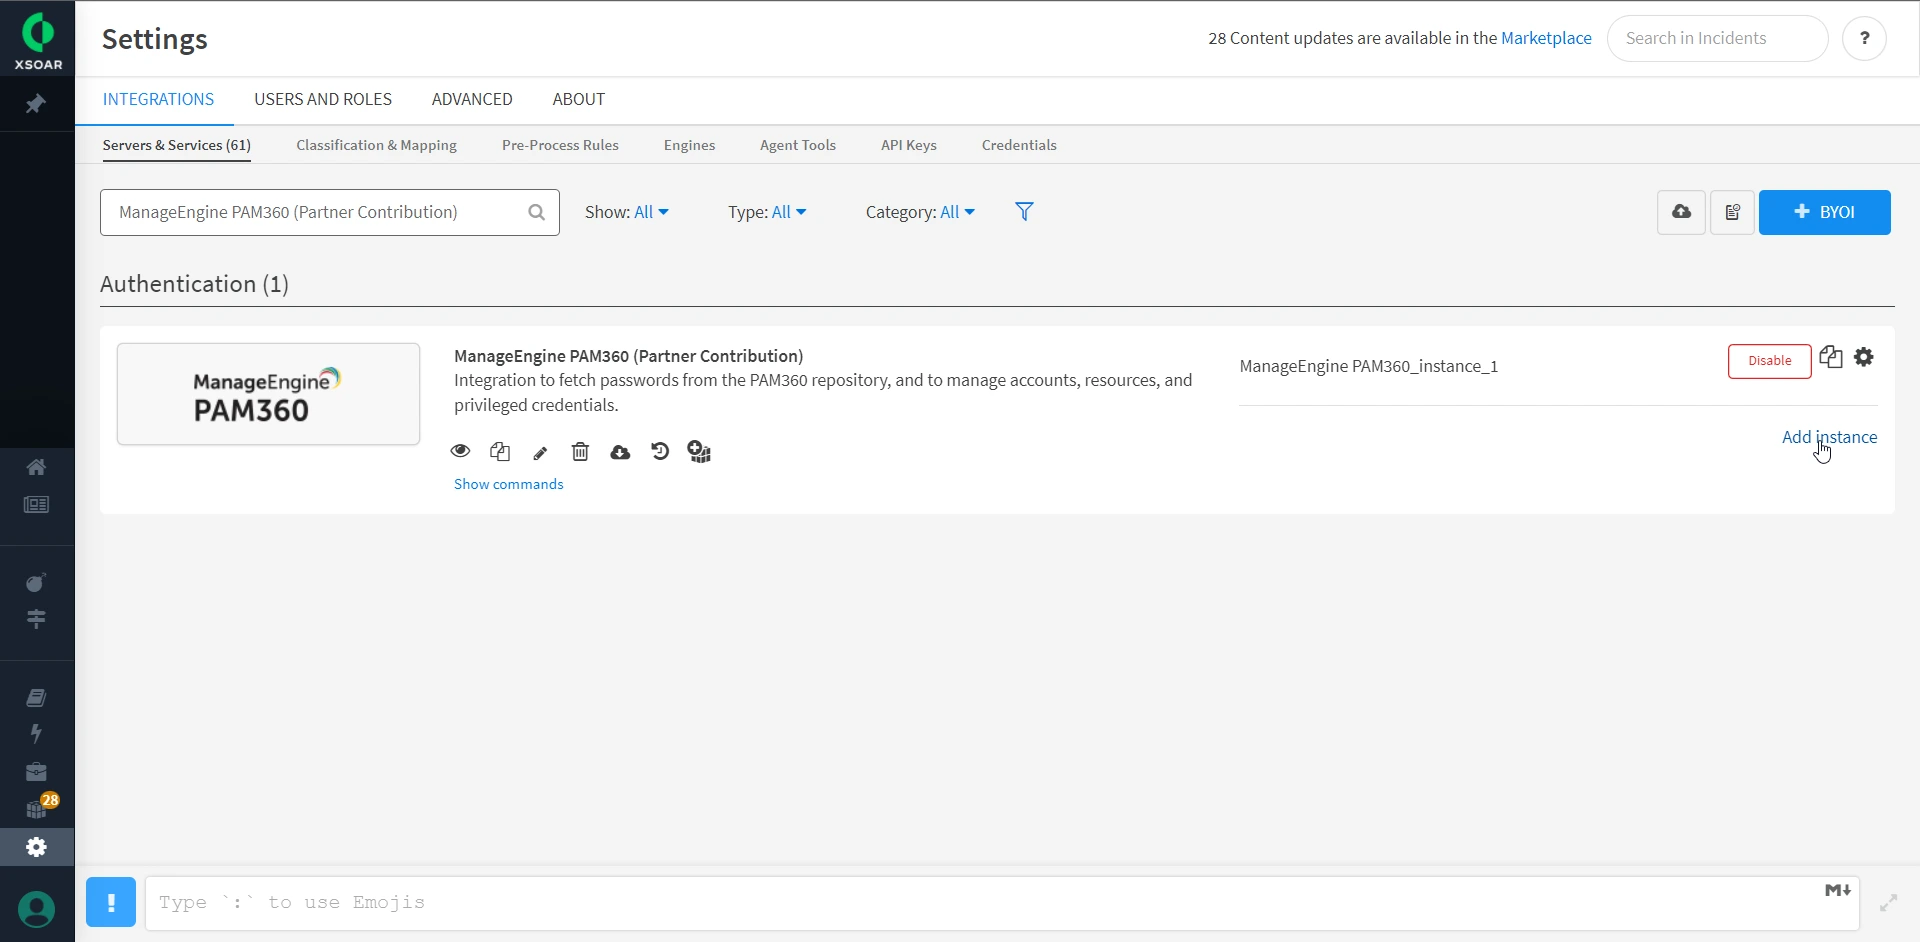
- To add PAM360 as an instance, under the PAM360 application, click Add Instance.
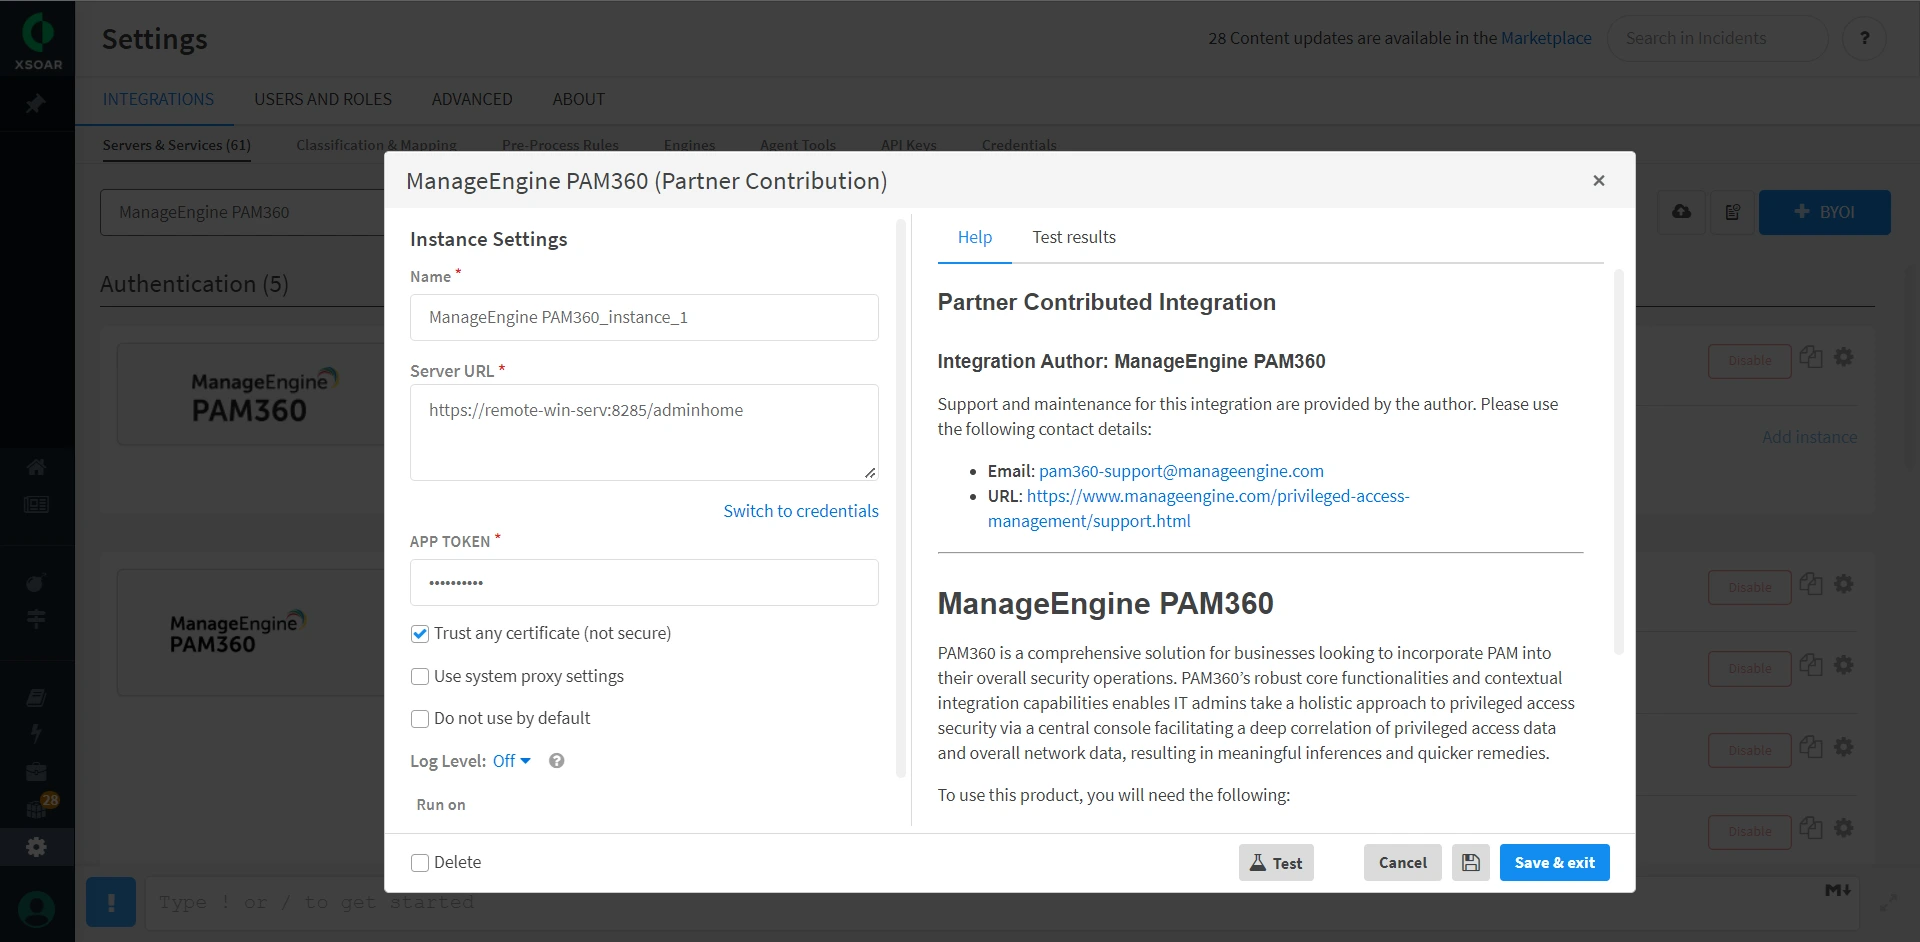
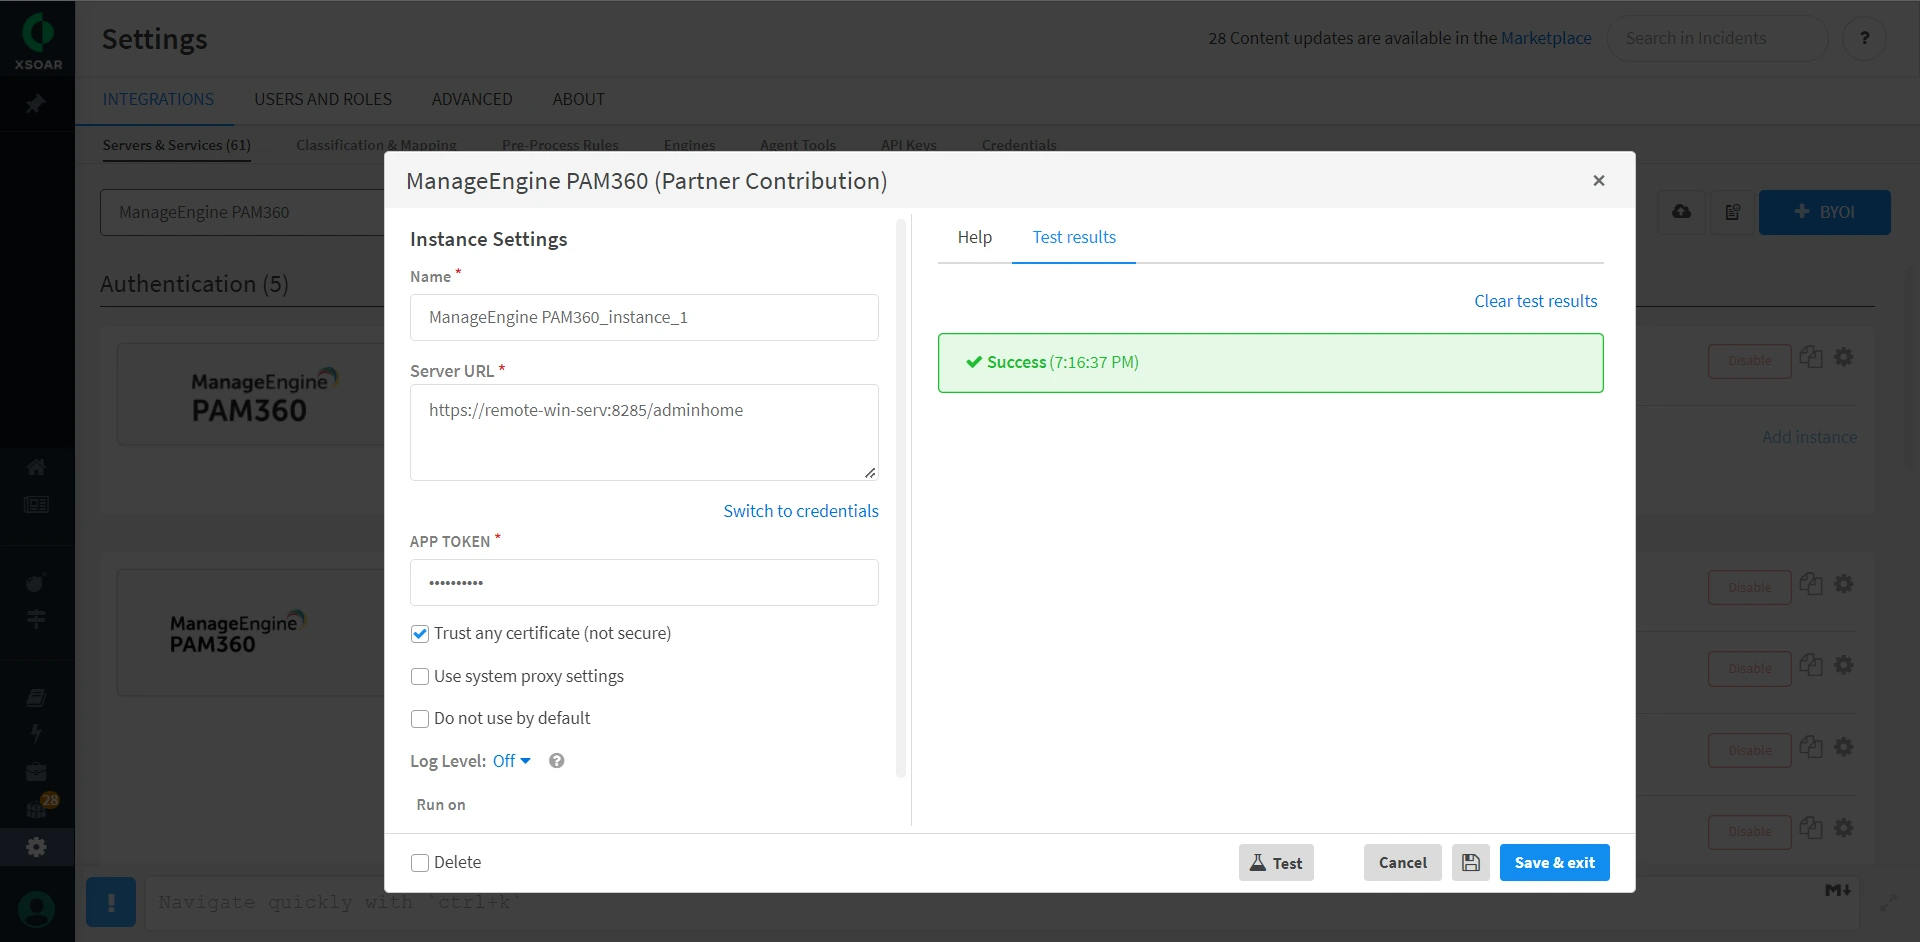
- Here under Instance Settings, add parameters such as name, PAM360 Server URL, and the App Token generated from the PAM360 interface. Once done, click the Test option to check the connection. The set up is complete when you see a success message.
- Once you have set up the PAM360 Instance in the Cortex portal, you can view and run the PAM360 commands by adding relevant input parameters. PAM360's commands work using the REST API, therefore it is vital to provide appropriate input data for seamless results.
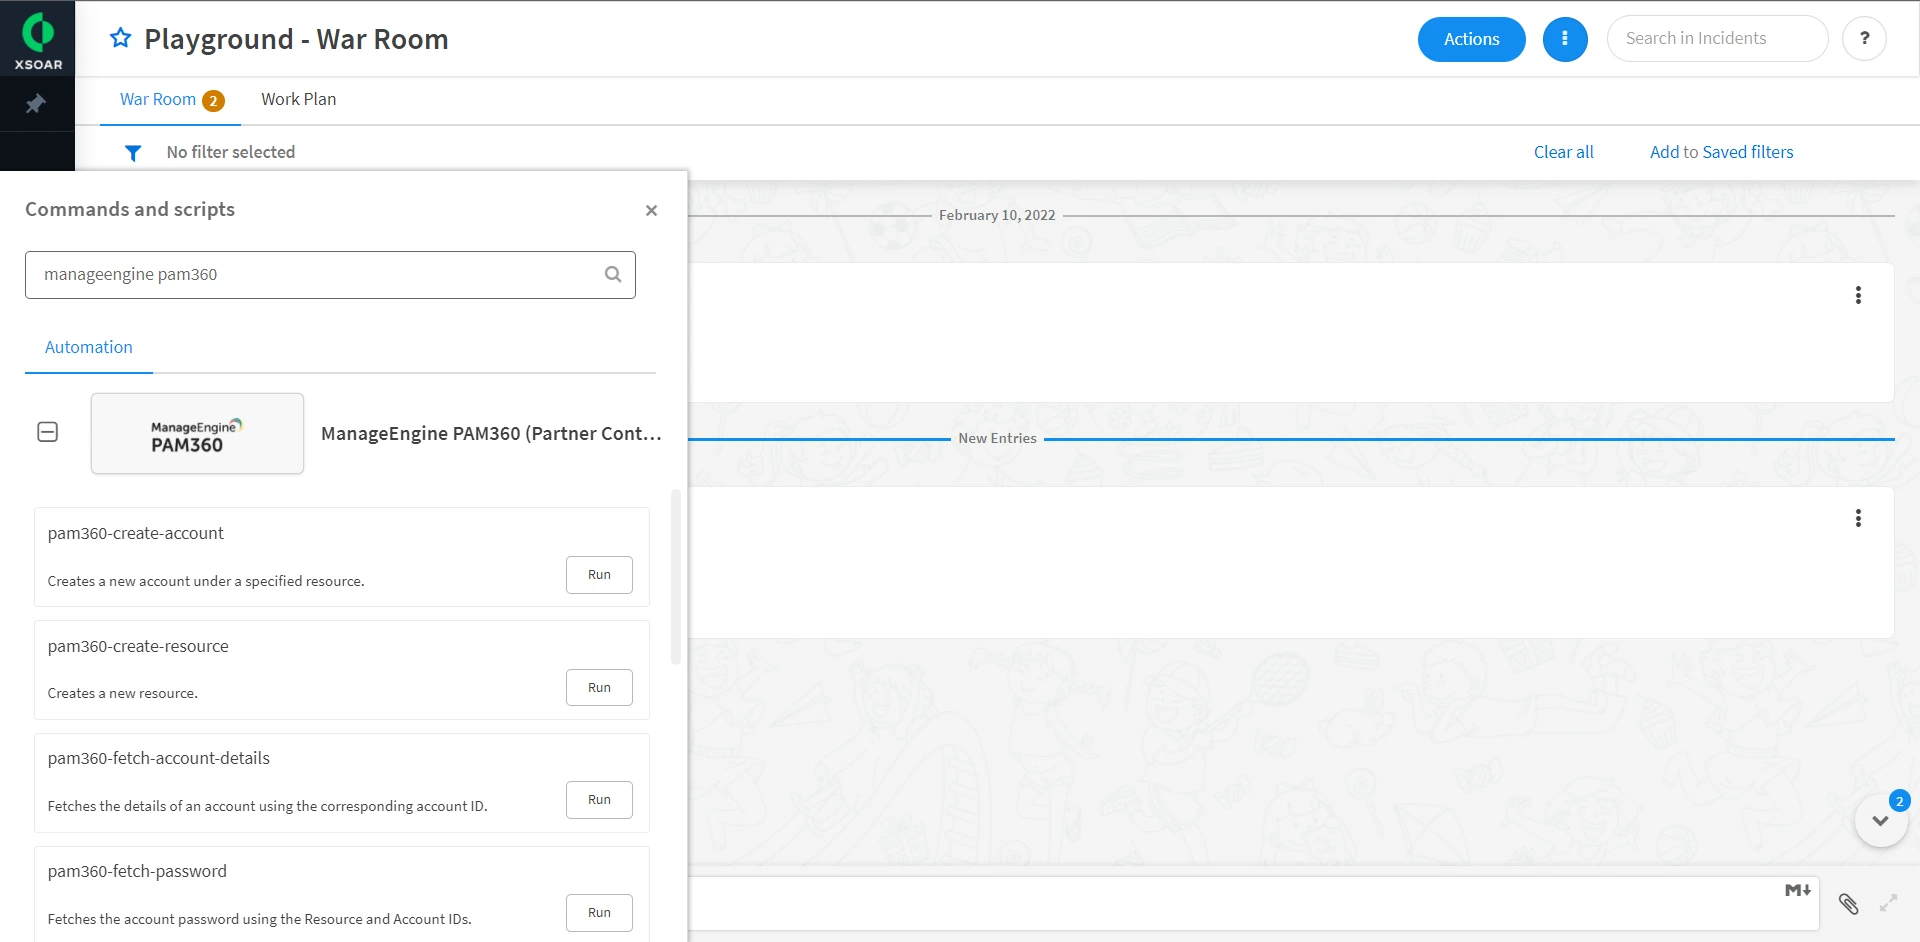
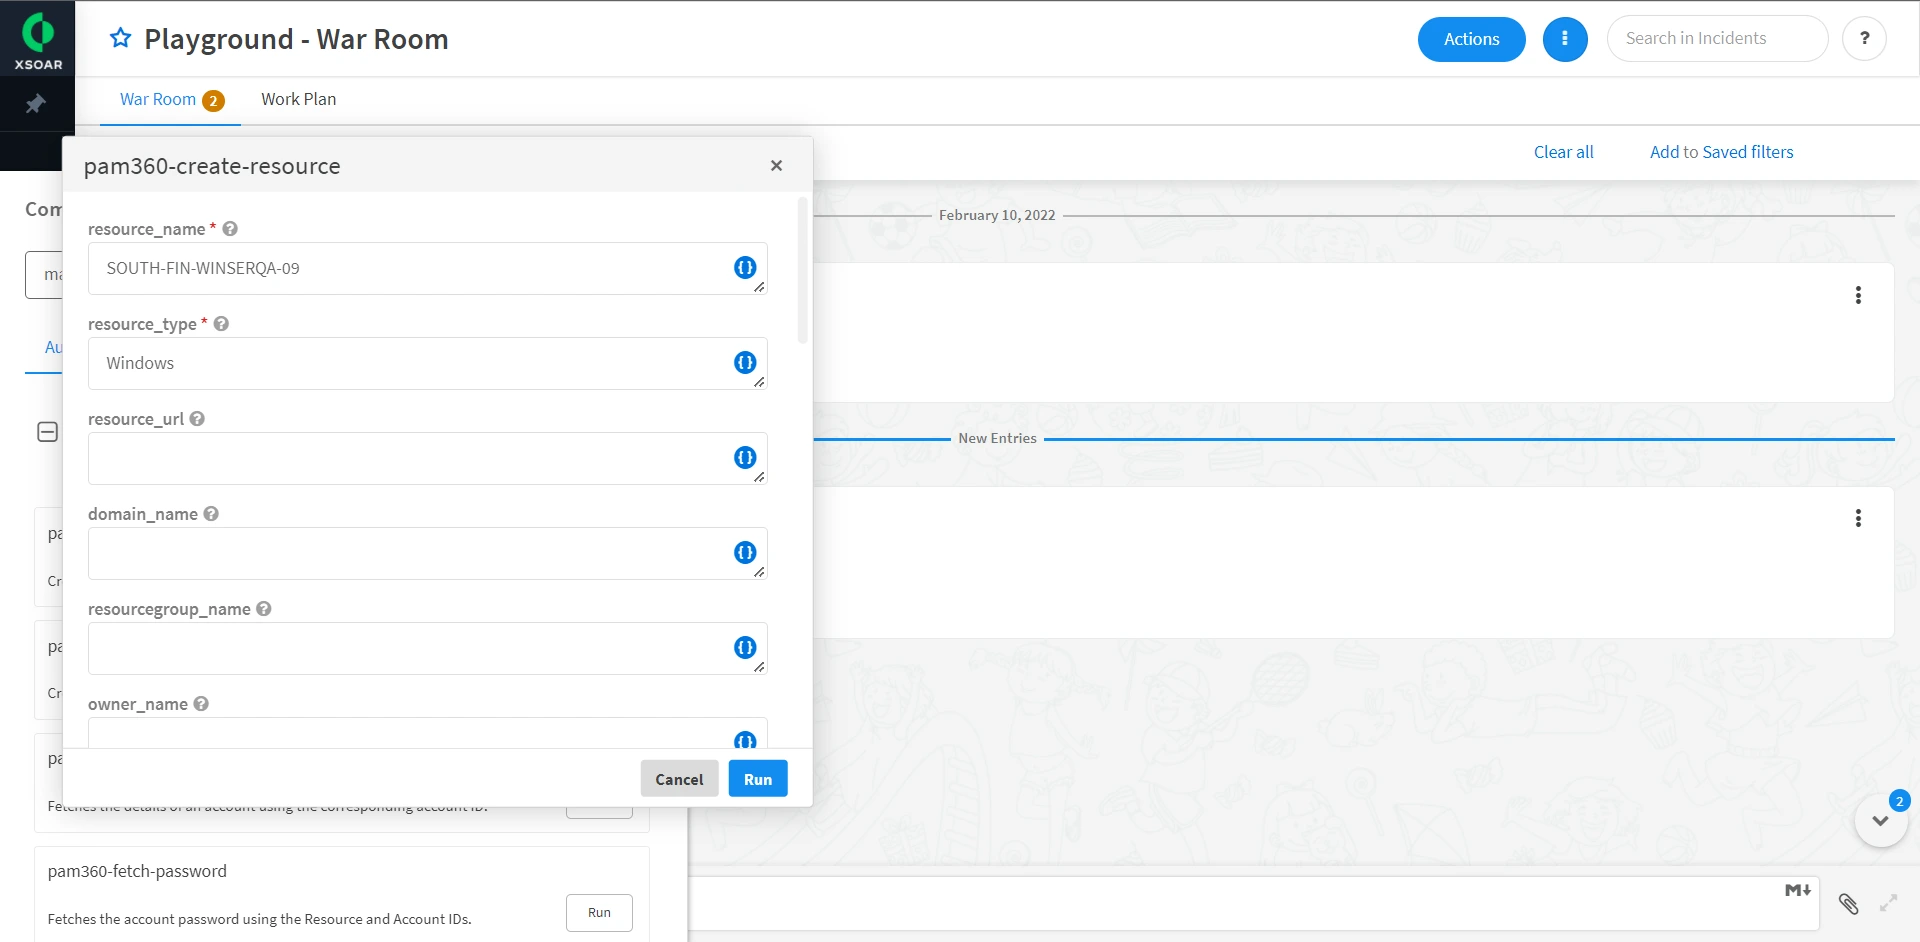
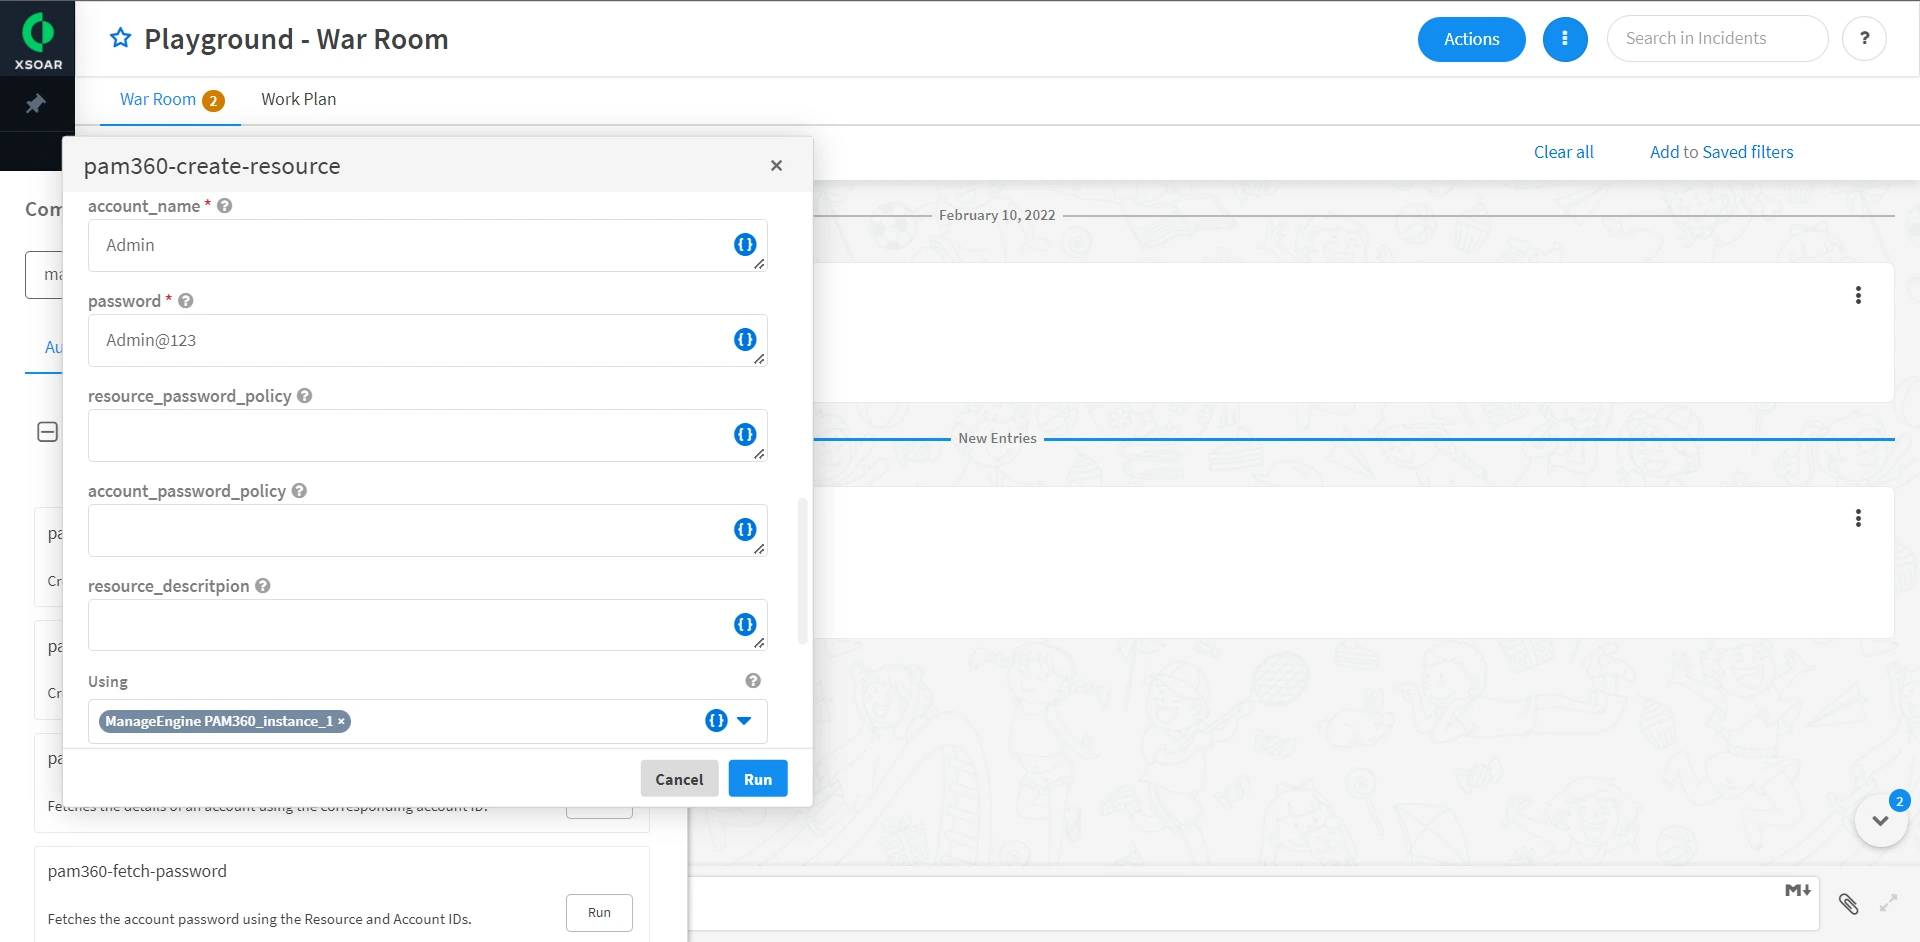
- In the Playground - War Room page, search for your PAM360 Instance under Commands and scripts. Here, you can view all the commands offered by PAM360. Click Run beside each command to add parameters necessary for each command. For example, for the command pam360-create-resource, enter the following attributes for successful creation of a new resource: Resource Name, Resource Type, Account Name, Account Password, and choose a valid PAM360 instance added in the Cortex portal. Now, click Run to run the command.
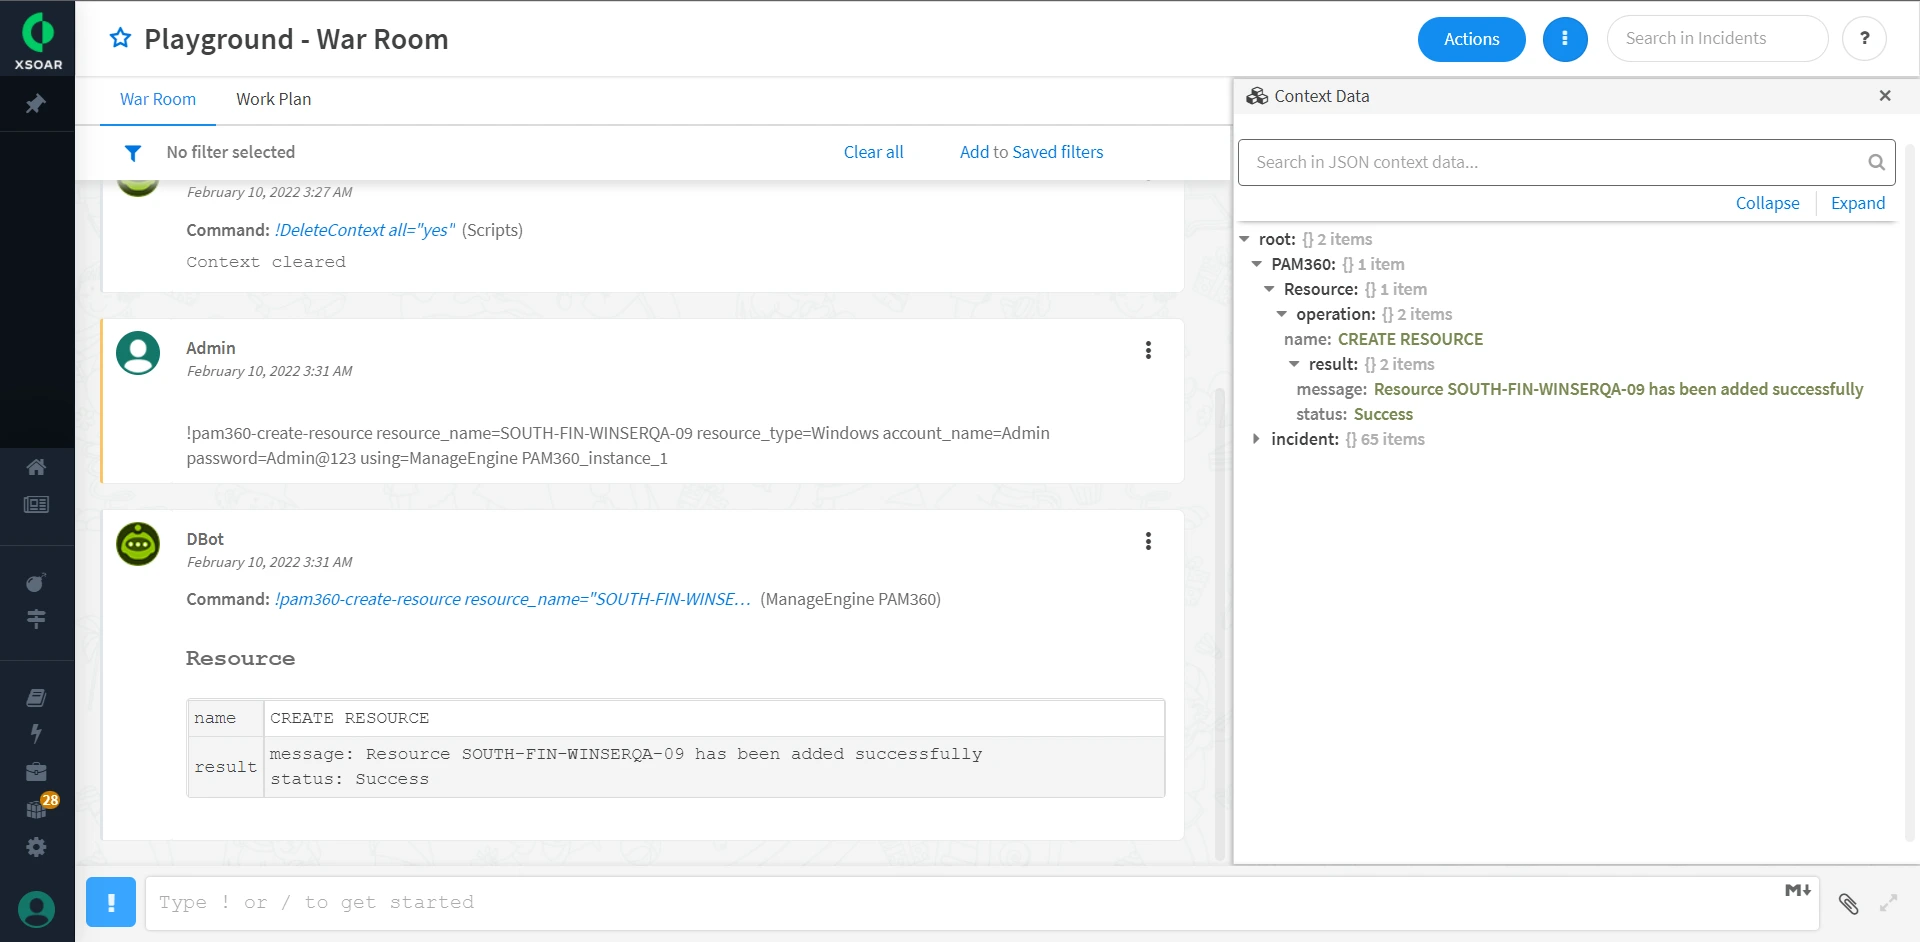
- For each command invoked, the status will be displayed as a DBot message in the Playground - War Room page. To view detailed output results of the commands, click the ellipses beside the Actions option at the top and click Context Data.
- Below is a list of commands offered by PAM360. Click each link for samples of input and output data for each command:
Commands Description To create resources
To create accounts
To update the attributes of a resource
To update the attributes of an account
To list all resources owned by and shared to the user
To list all accounts that belong to a specific resource
To fetch the details of an account
To fetch the resource and account IDs
To fetch a password
To update the password of an account
5. Configuring Cortex XSOAR in PAM360
To enable the RPA integration, follow these steps:
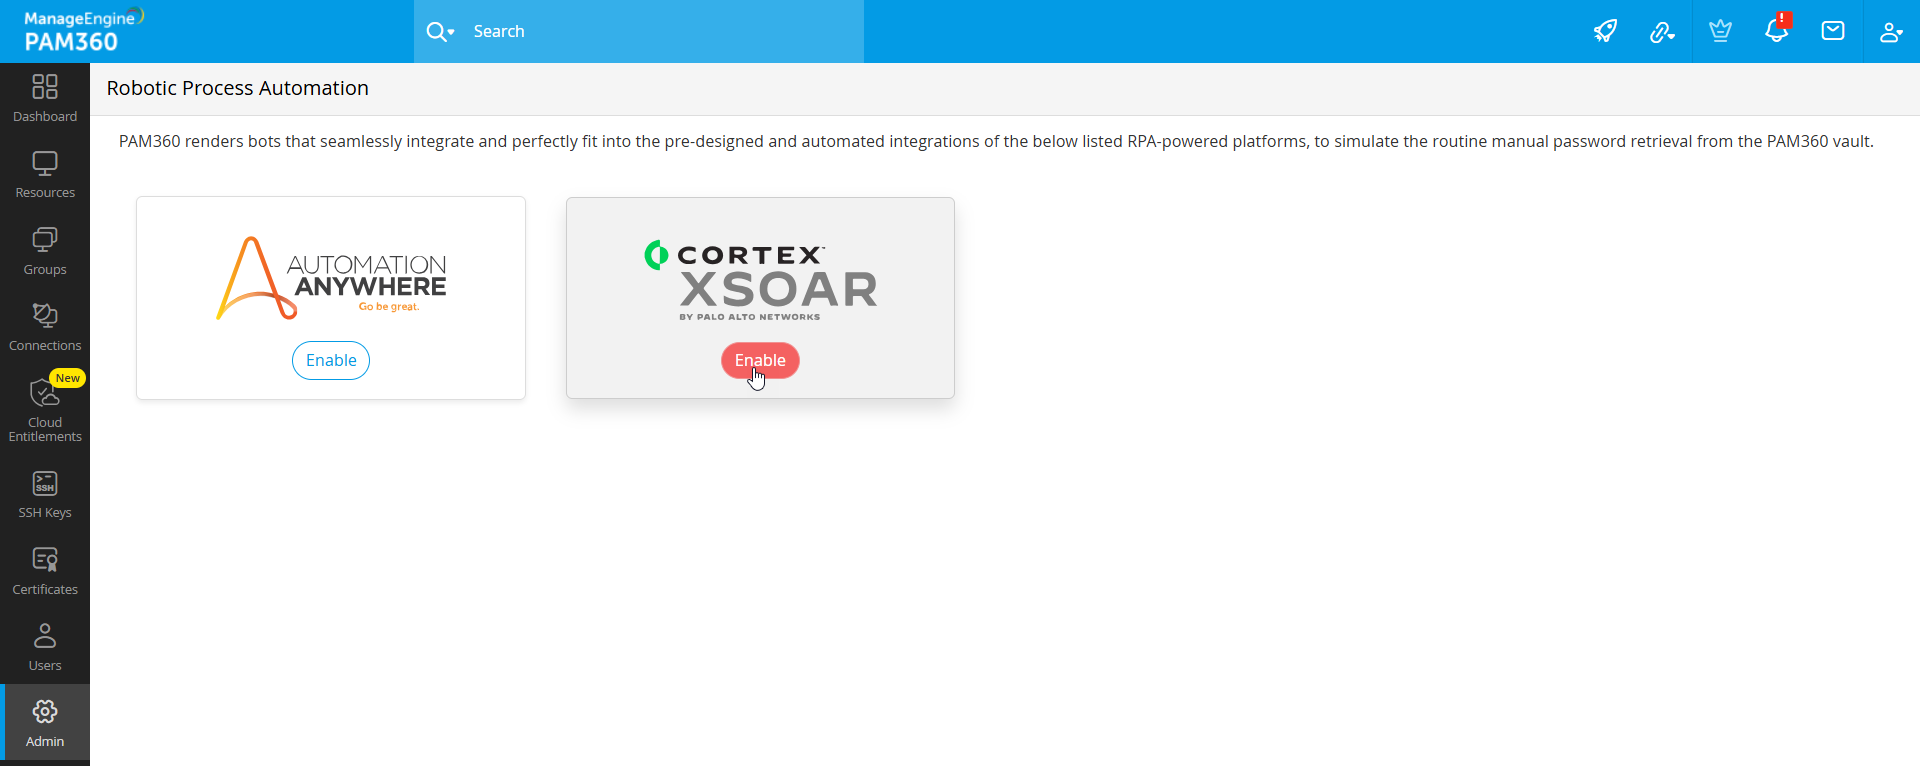
- Login to PAM360's web interface and navigate to Admin >> Workflow Orchestration >> Robotic Process Automation.
- Click Enable under Cortex XSOAR.
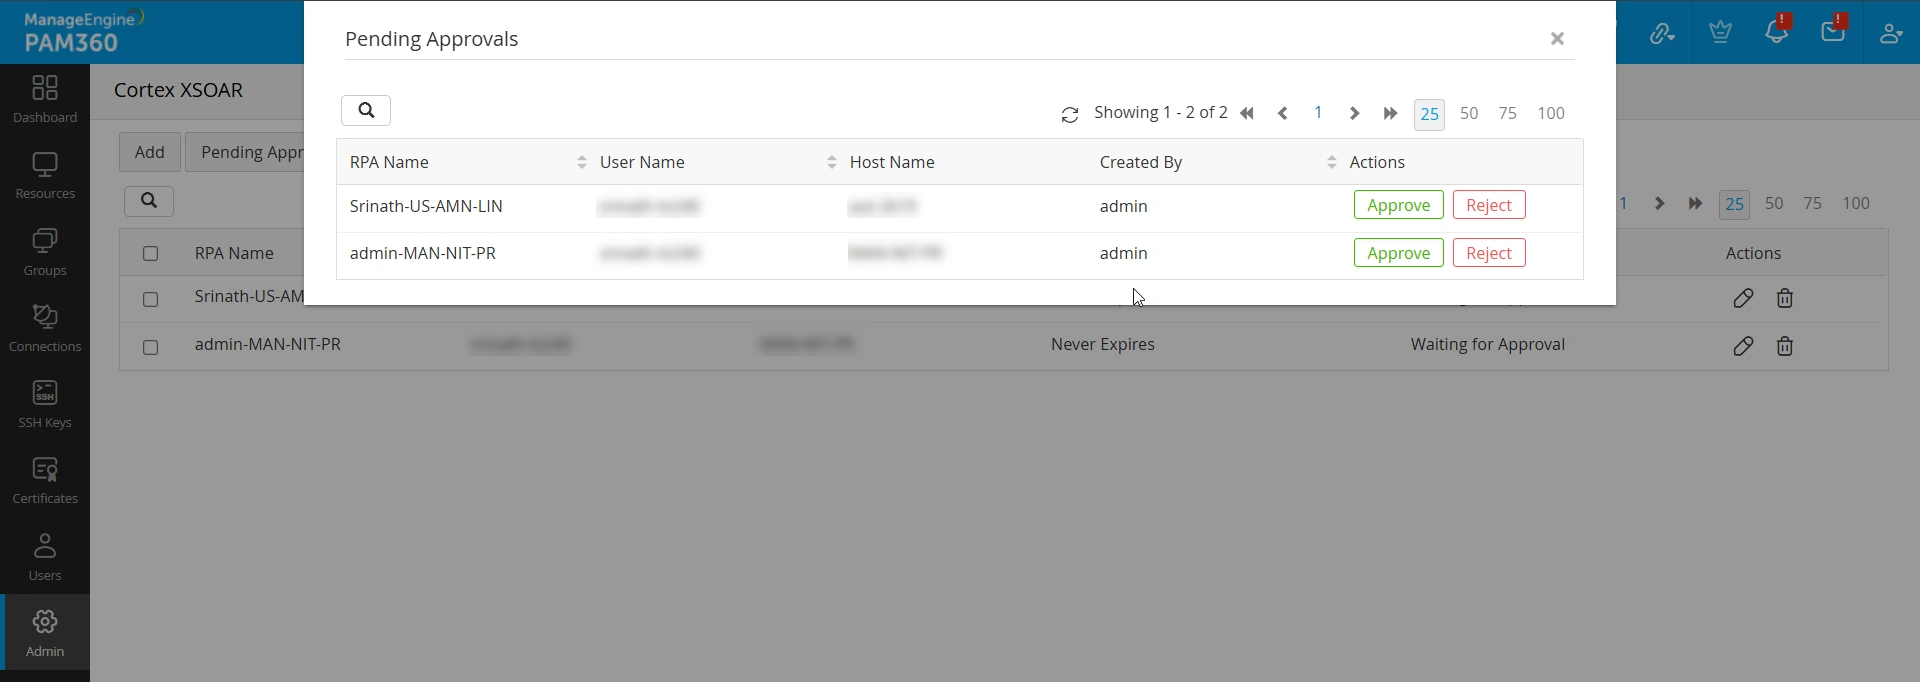
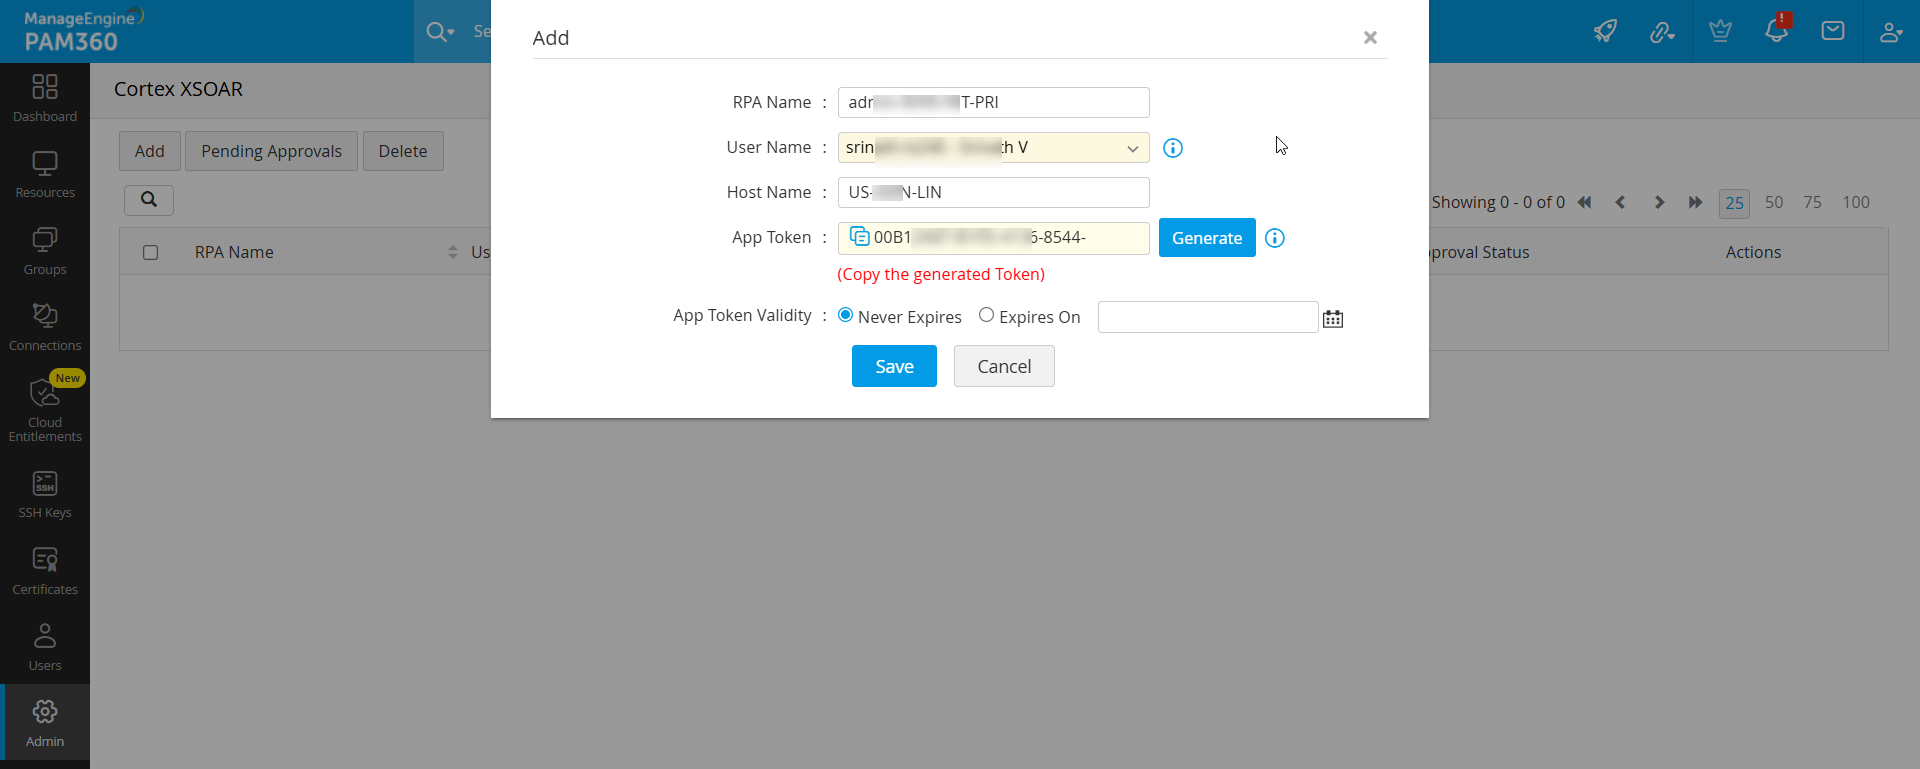
- From the new window, you can add, edit or delete RPA entries and approve pending requests. To add a new RPA entry, click Add and enter the following attributes to add a new RPA entry for a user:
- RPA Name: Enter a unique name for your reference, e.g. Password-Retrieval-Bot.
- User Name: All users who have web access to PAM360 will be listed in the drop-down. The user selected here will be the one who can use the App Token in Cortex XSOAR from the Host Name specified in the next step. Before the App Token can be used, the request will go through an approval mechanism. Refer to the Approval Workflow for RPA Entries section to know how the approval works for different types of users. Please note that if you choose your own user name, the RPA entry will be auto-approved and the App Token generated will be active right away.
- Host Name: Enter a Host Name from which the selected user can use PAM360 commands after the generated App Token is approved. There can only be one RPA entry for a unique User Name - Host Name combo.
- App Token: Click Generate to generate an App Token. This App Token will become active only after RPA entry request is approved by the selected user. By default, the App Token is valid forever. However, you can define a validity period for the App Token in the next step.
- App Token Validity:Never Expires is automatically selected and it will keep the App Token valid forever. Click Expires On to set a date for the expiry of the App Token.
- Now, click Save to add a new entry.
To edit an RPA entry, click the edit icon under Actions beside the required RPA Name and edit the values as required. Once the details are edited, the request will go through the approval mechanism again. The new App Token or Host Name will be active once the request is approved.
To delete an RPA entry, click the Delete icon under Actions beside any RPA name. To delete multiple entries, select check boxes beside the RPA names and click Delete User from the top bar. Then, click Delete in the confirmation dialog box to complete the deletion process.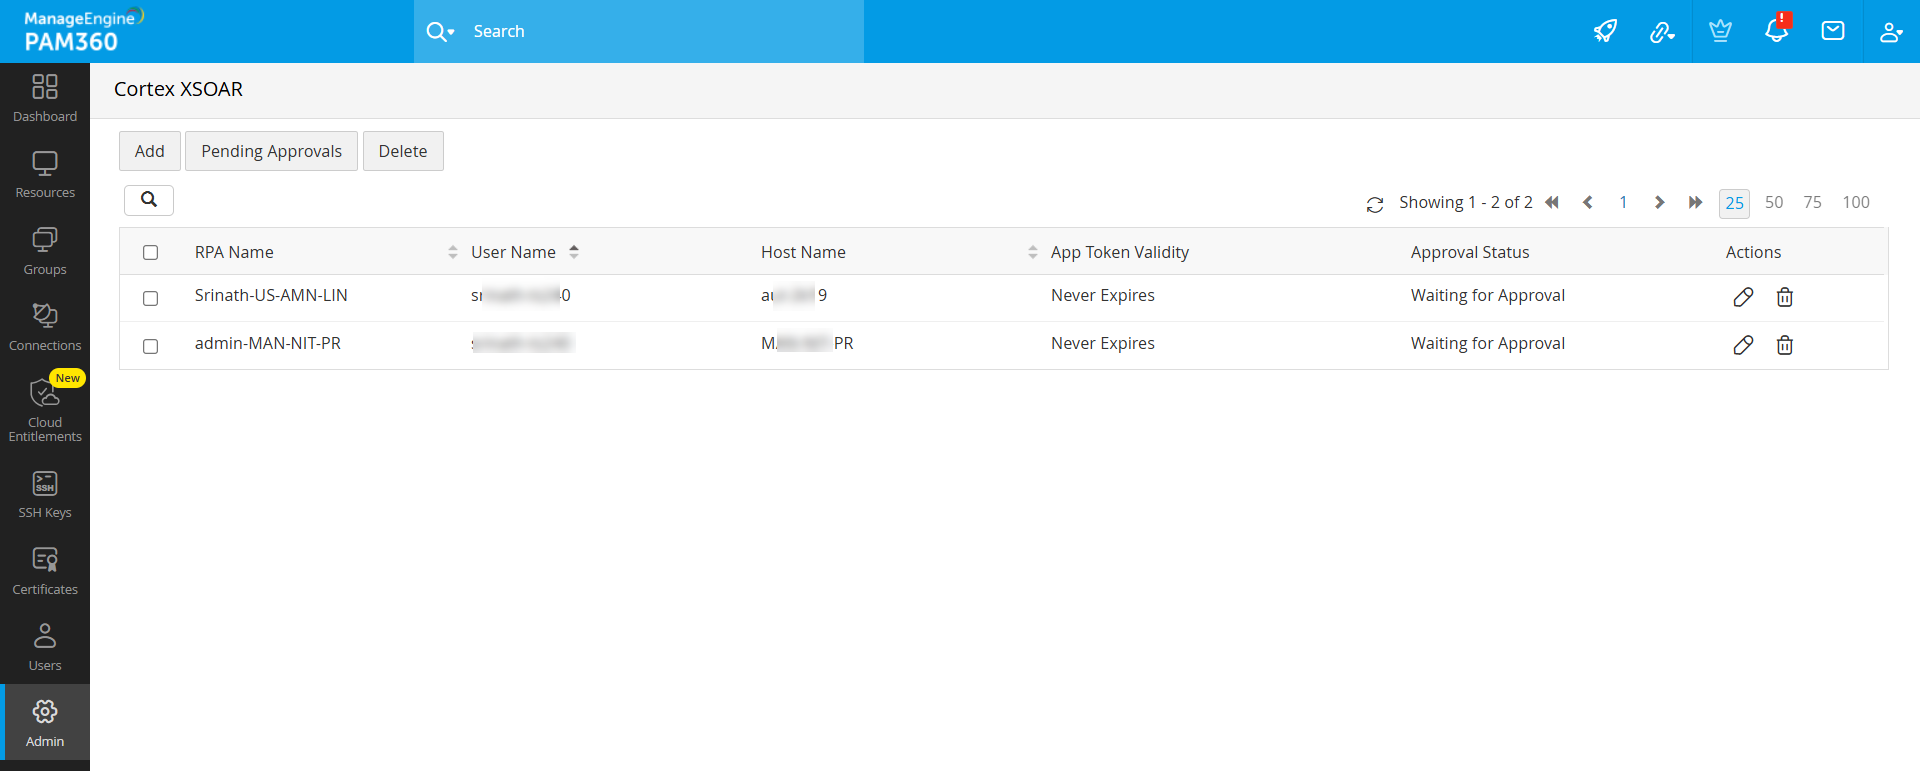
5.1 Approval Workflow for RPA Entries
The User Name chosen in the Add window can be your own admin user name, another admin user or a non-admin user (Password User or Password Auditor)
Case I - Automatic Approval: If you choose your own user name, the entry will be automatically approved and the App Token will be active right away.
Case II - Awaiting Approval for RPA Privileged Users: If the RPA owner is a user with RPA privilege, then the approval request will be sent to the RPA Owner and will be visible for them under Pending Requests. They can review details such as User Name, Host Name, Created By and choose to approve or reject the request. Upon approval, the RPA Owner can either generate a new App Token or use the same one generated when the entry was added. Please note that only the RPA Owner will be able to apply the App Token and use PAM360 commands in Cortex XSOAR. Upon rejection of the request, the RPA entry will be deleted from the menu.
Case III - Awaiting Approval for Users without RPA Privilege: If the RPA owner is not a user with RPA privilege, then all admins other than the one creating the RPA entry will get the approval request — any one of the admins can approve or reject the request. You can copy the App Token and provide it to the RPA owner after approval from one of the admins.
Caution
The App Token will not be valid if met with any one of the following cases:
- The App Token is incorrect or expired.
- Cortex XSOAR integration is disabled under Admin >> Workflow Orchestration >> Robotic Process Automation.
- If the App Token is used from a host different from the one specified while creating the RPA entry.
