Managing Resources
You can manage all the resources added by you from the 'Resources' tab. Edit any of the attributes of the resources and the associated accounts, such as Resource URL, Password Policy, Domain Name, etc., anytime as required. It is also possible to temporarily move the resources to trash or permanently remove them if no longer needed.
The following are the possible actions on the existing resources:
- Editing a Resource
- Adding Accounts to an Existing Resource
- Deleting a Resource
- Restoring Resources from Trash
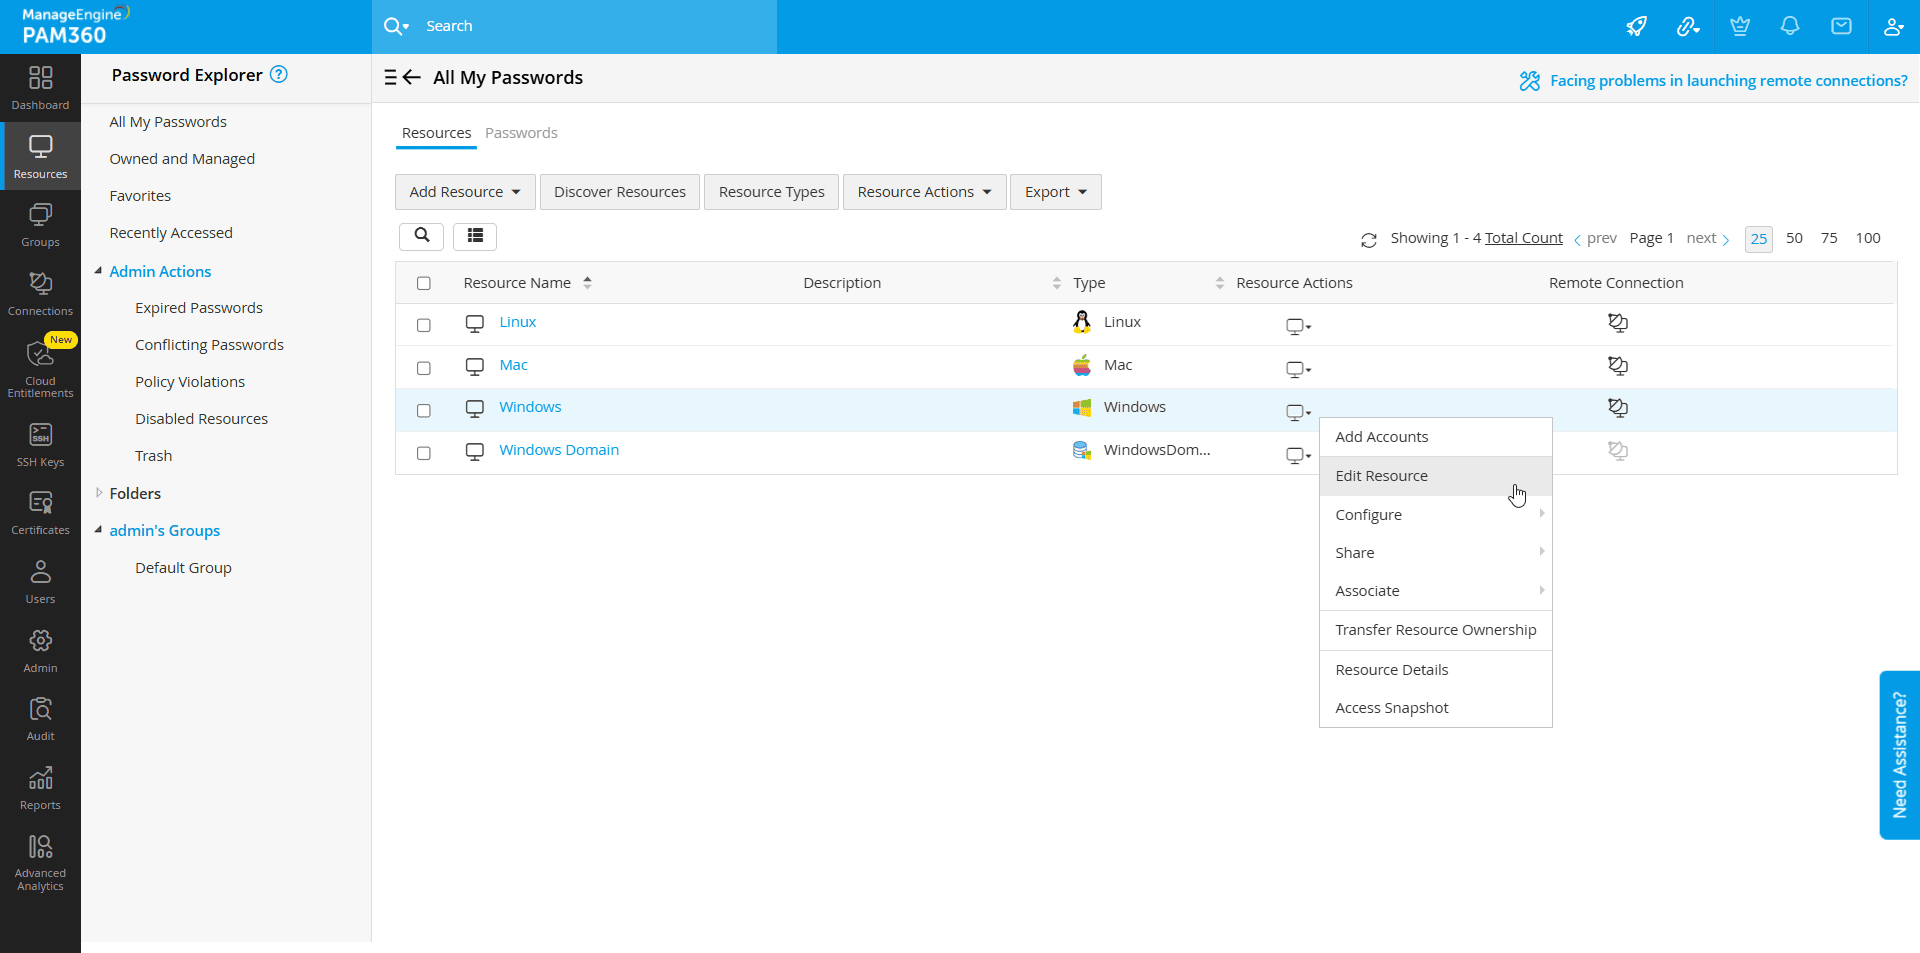
1. Editing a Resource
- Navigate to the Resources tab.
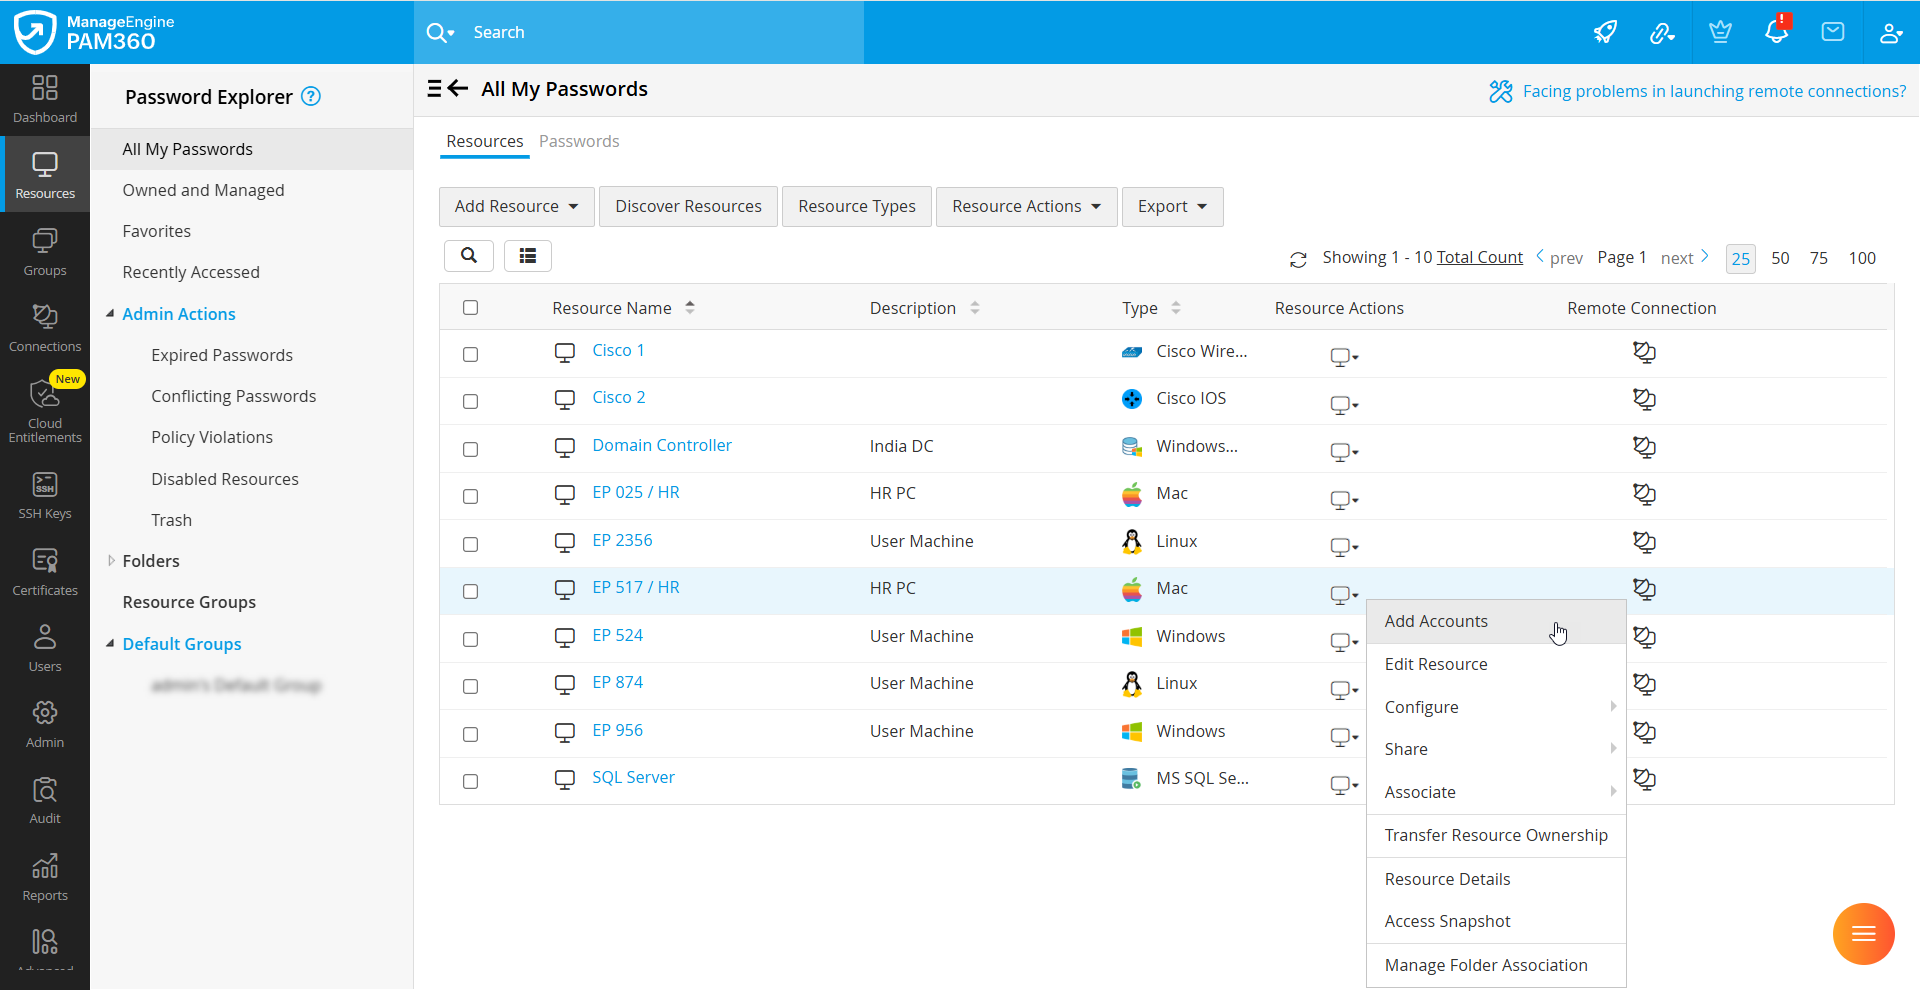
- Click the Resource Actions icon beside the desired resource you wish to edit and select the Edit Resource option from the drop-down list.
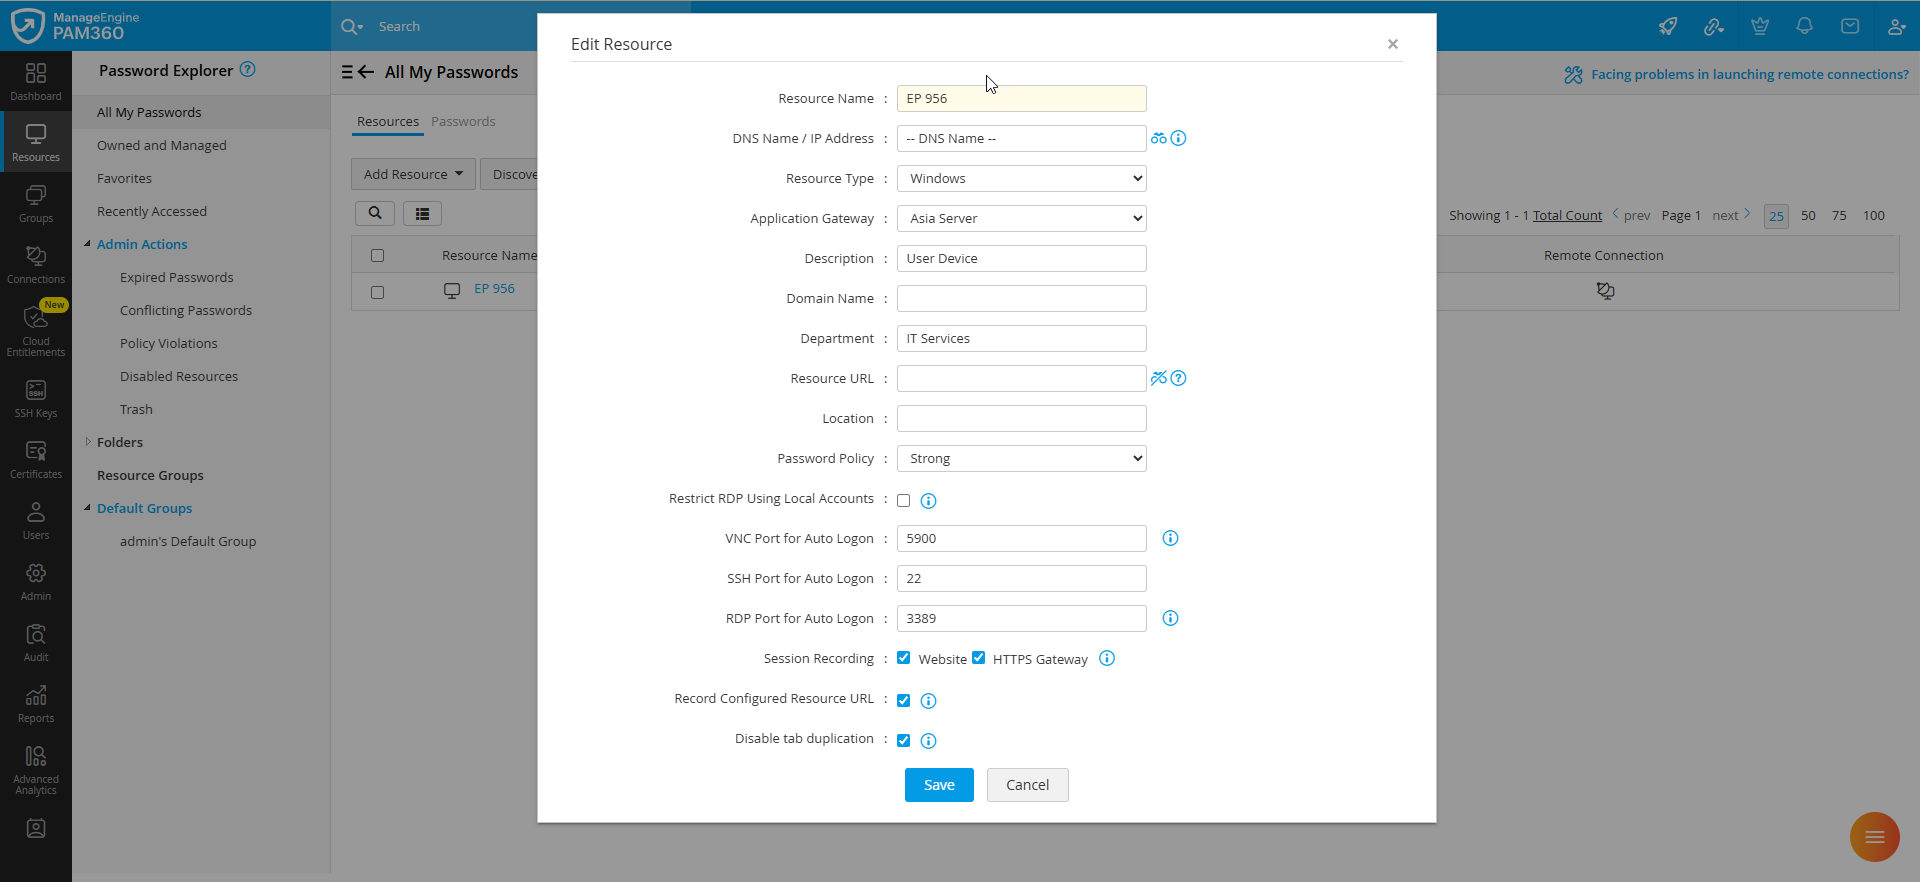
- In the Edit Resource window, modify the desired resource attributes and click Save to save the configured changes.
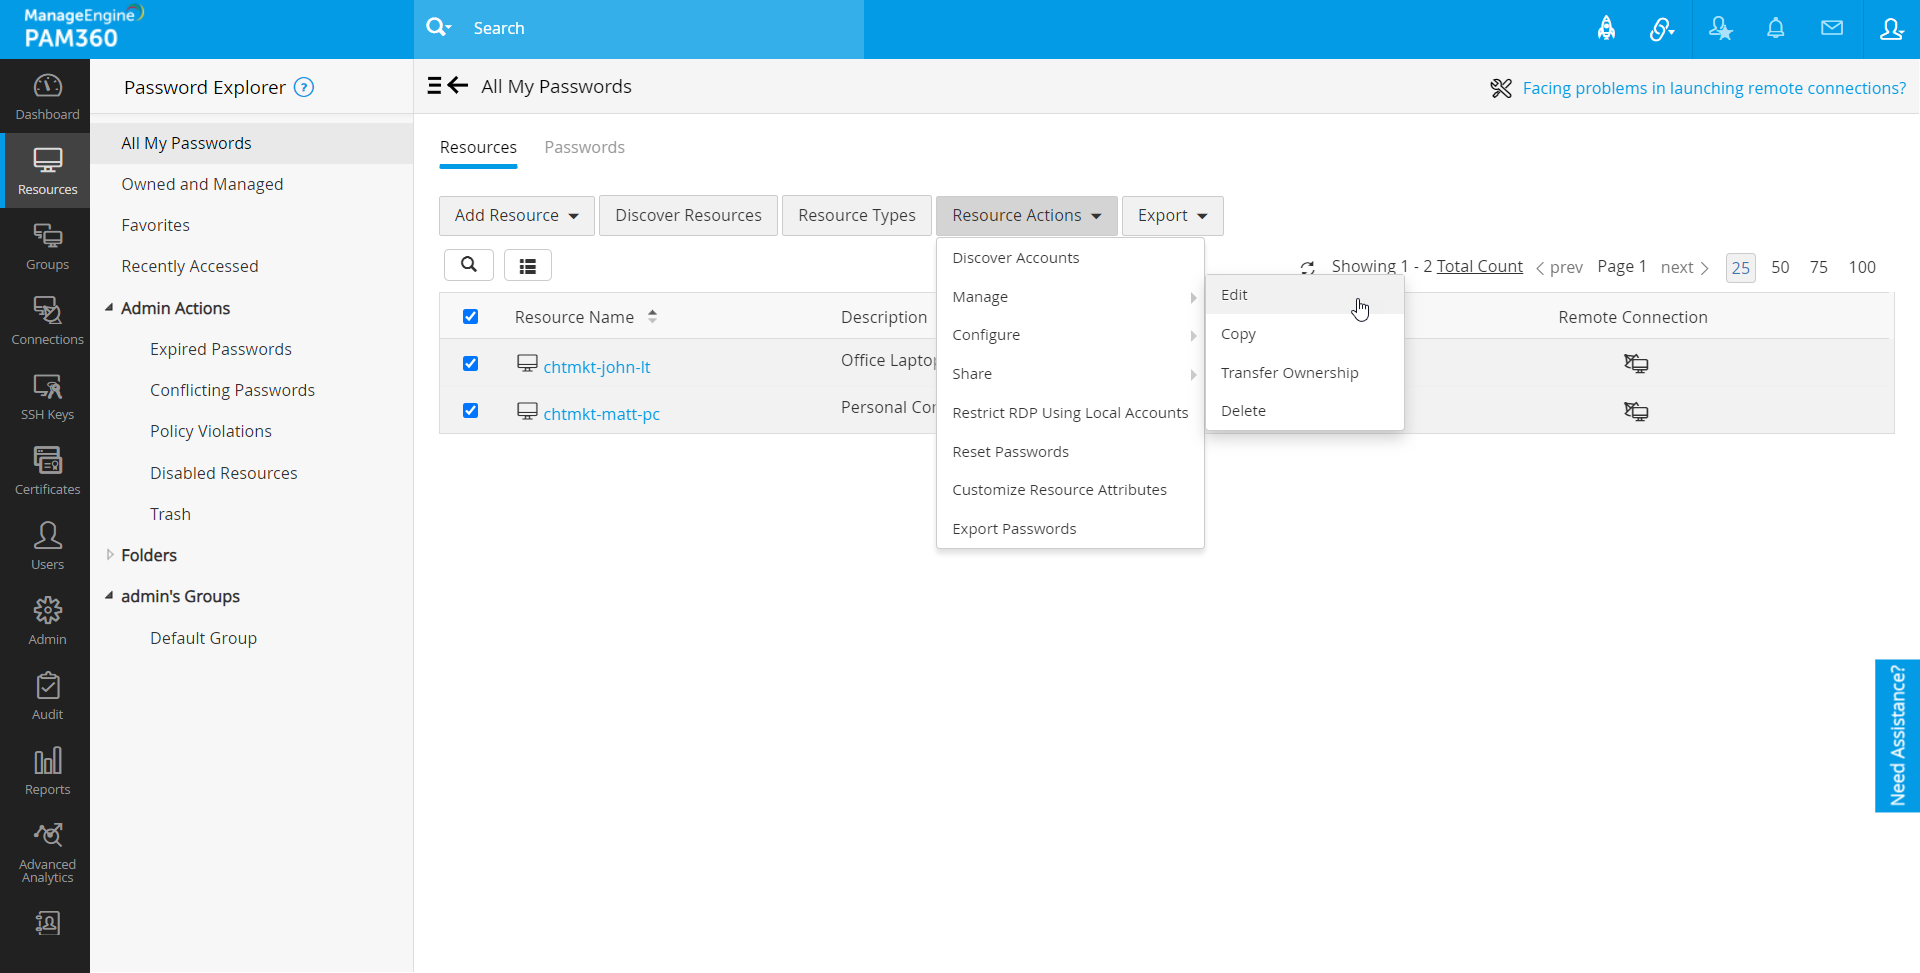
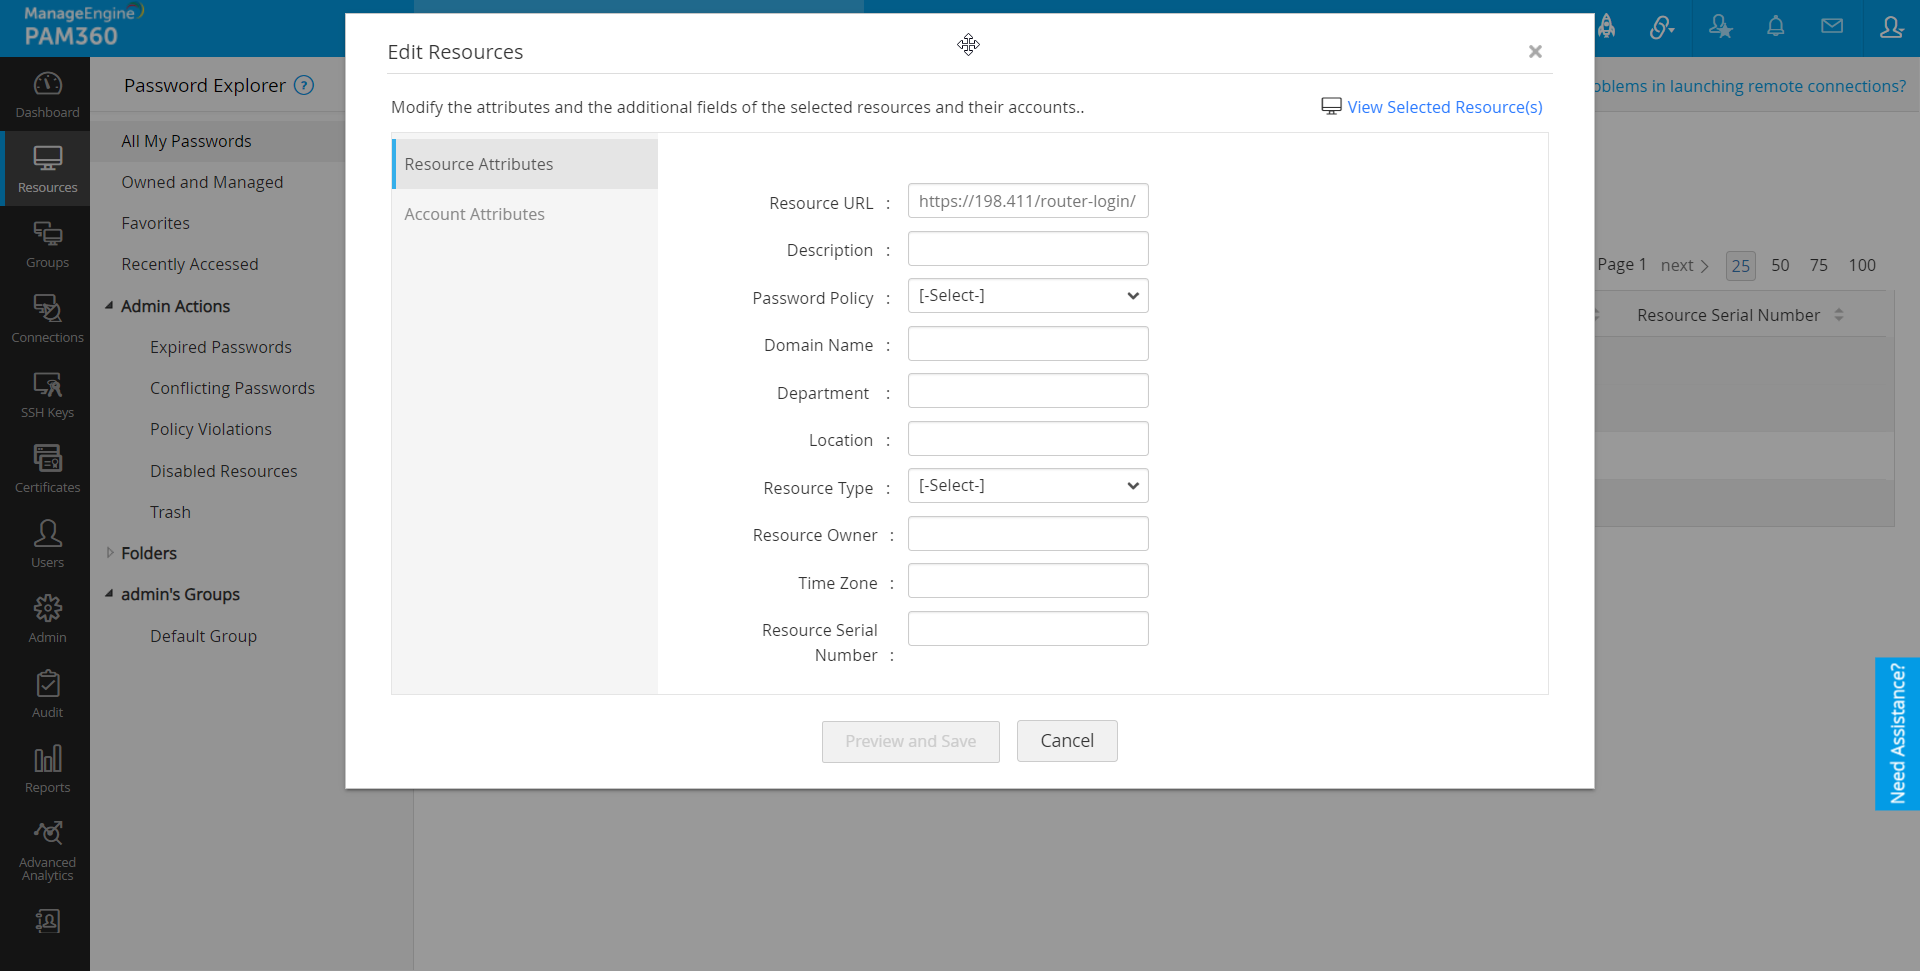
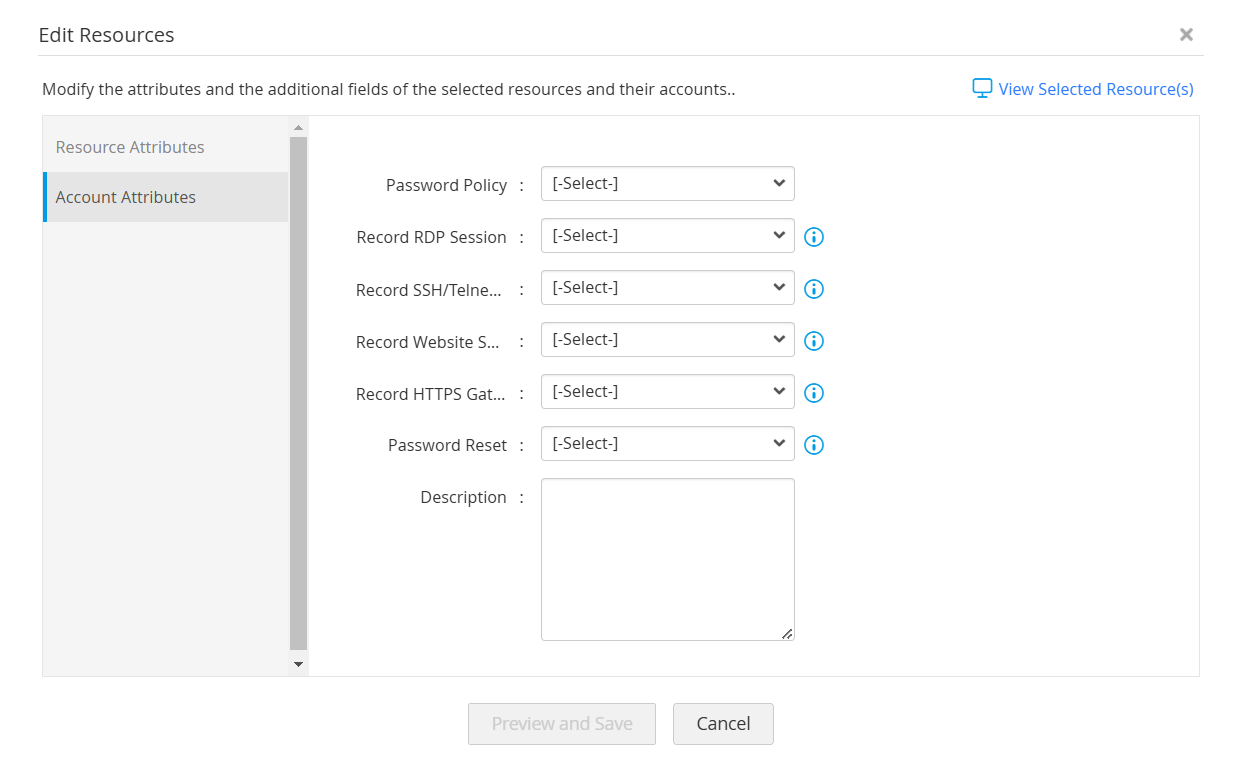
- To edit resources in bulk, select the required resources and select Resource Actions >> Manage >> Edit from the top pane. This will open the Edit Resources window. Here, you can modify the attributes and the additional fields of the selected resources and their accounts.
- From the Resource Attributes tab, you can edit the following attributes: Resource URL, Description, Password Policy, Domain Name, Department, Location, Resource Type, and custom attributes.
- From the Account Attributes tab, you can edit the following attributes: Password Policy, Record RDP Sessions, Record Website Sessions, Record HTTPS Gateway Sessions, Record SSH/Telnet Sessions, Password Reset, Description, and custom attributes.
- If you have already configured additional fields, they will appear under the default attributes on both Resource Attributes and Account Attributes windows. To learn how to create additional fields, click here.
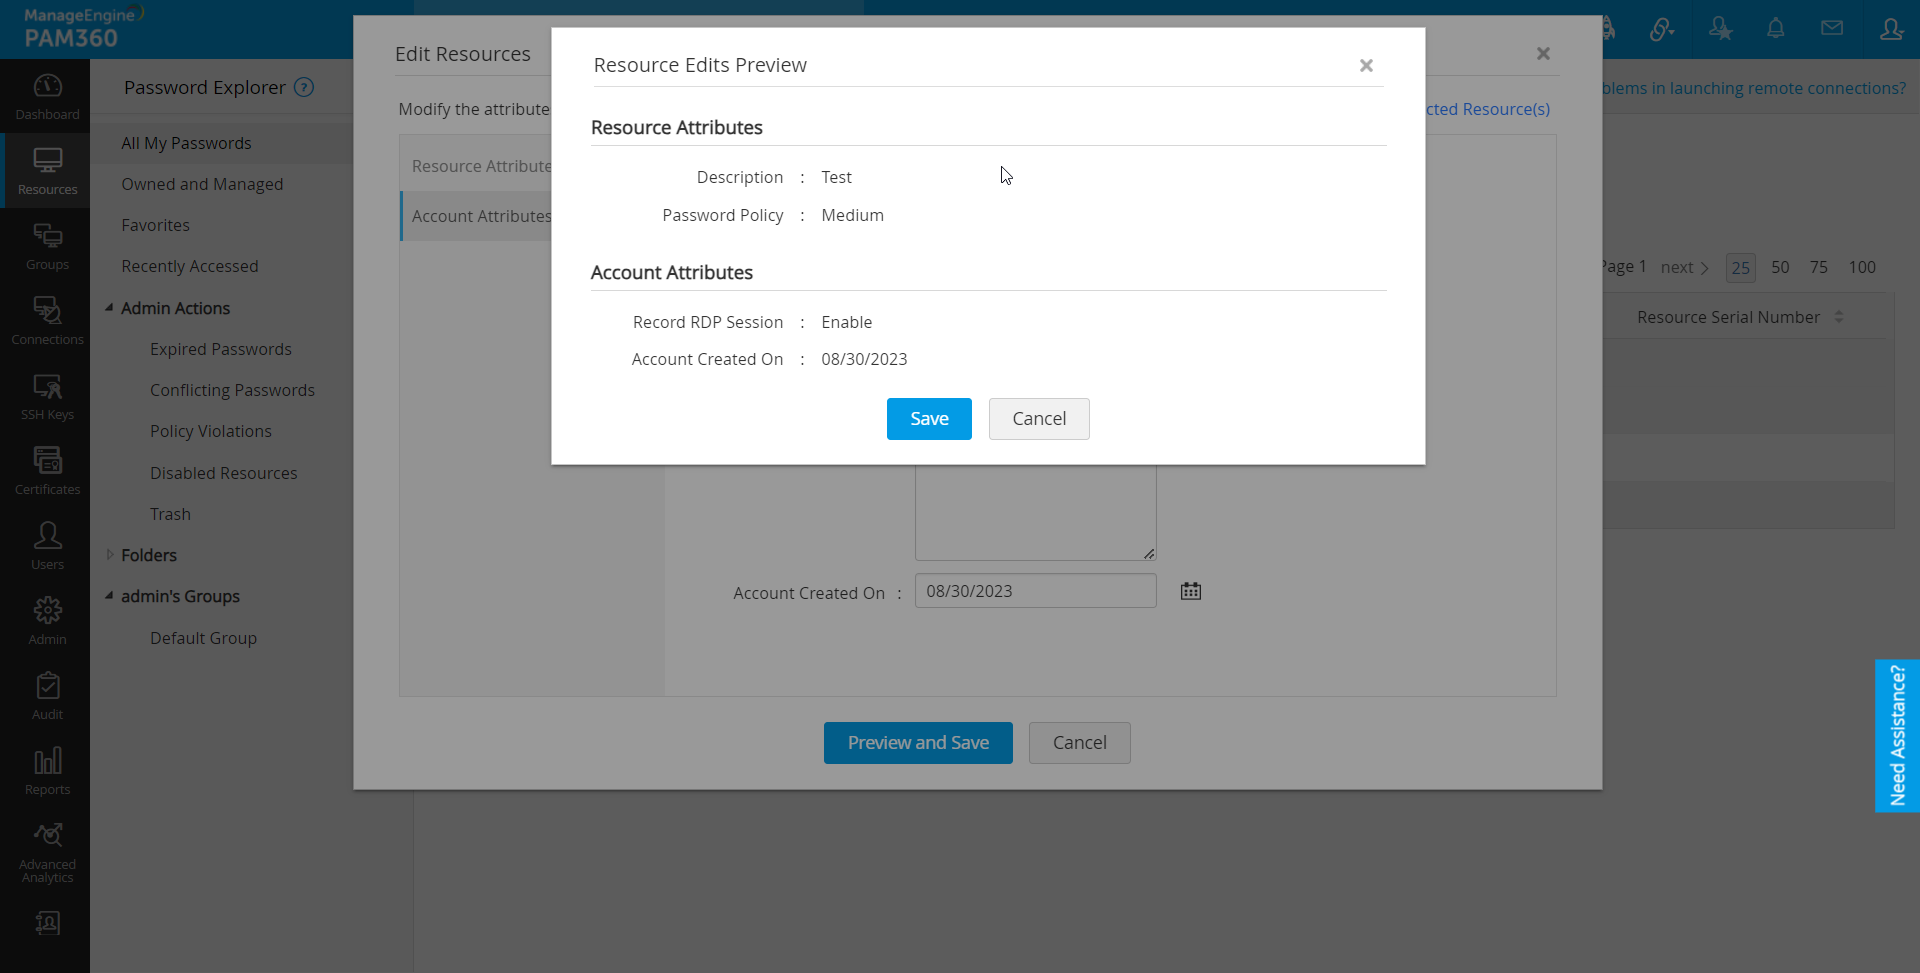
- After editing the attributes, click Preview and Save.
- In the Resource Edits Preview window that appears, review the edits you have made and click Save.
Note: The Record Website Sessions and Record HTTPS Gateway Sessions fields are applicable from build 7400 only.
The changes you made will be applied to the selected resources with respect to the resource types. For example, if the selected resources include both Windows and Linux resource types and both RDP session recording and SSH/Telnet session recording are enabled in the Account Attributes tab, you can take RDP session recording only for the Windows resources and SSH/Telnet session recording only for the Linux resources. You can also review the changes made in bulk edit from the Audit tab.
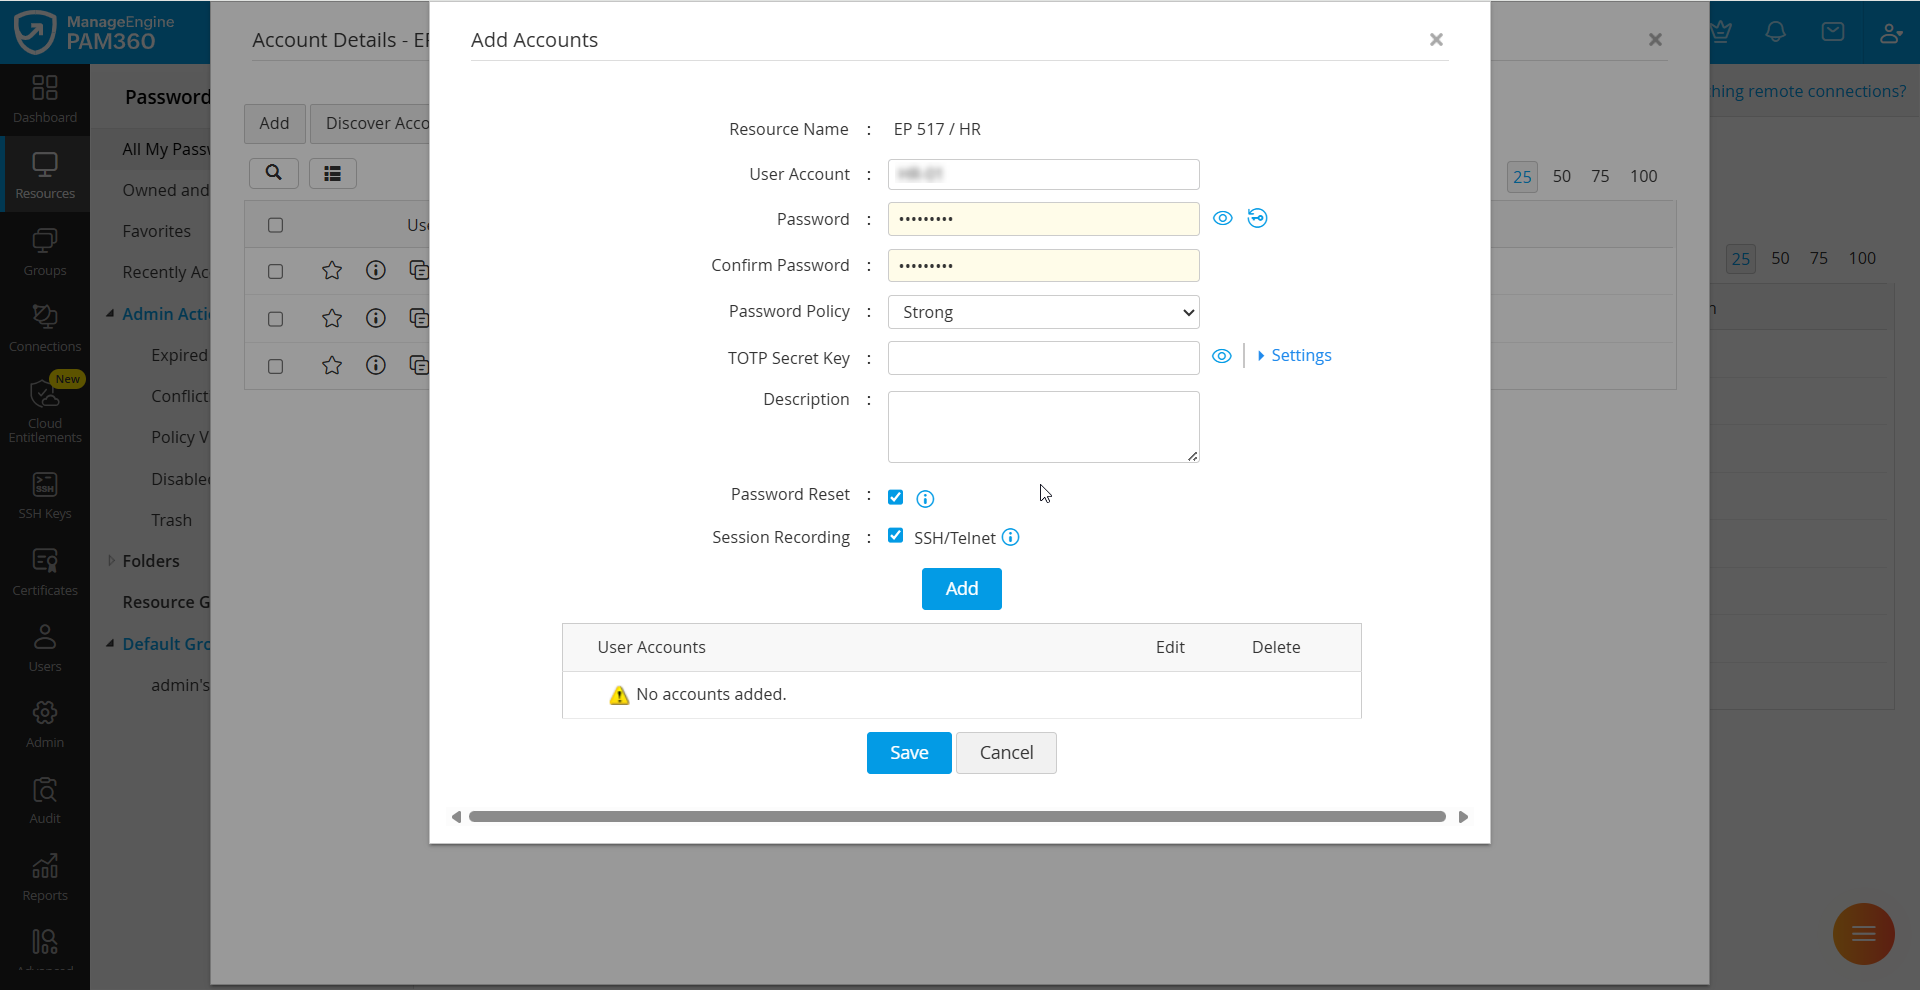
2. Adding Accounts to an Existing Resource
You can add any number of user accounts to an already existing resource. To add an account,
- Navigate to the Resources tab.
- Click the Resource Actions icon against the resource you wish to add an account and select Add Accounts from the drop-down list.
- In the pop-up form that appears, enter the details about the account to be added.
- Click Add. If you want to add more accounts, add them too by repeating the steps given here.
- Click Save.
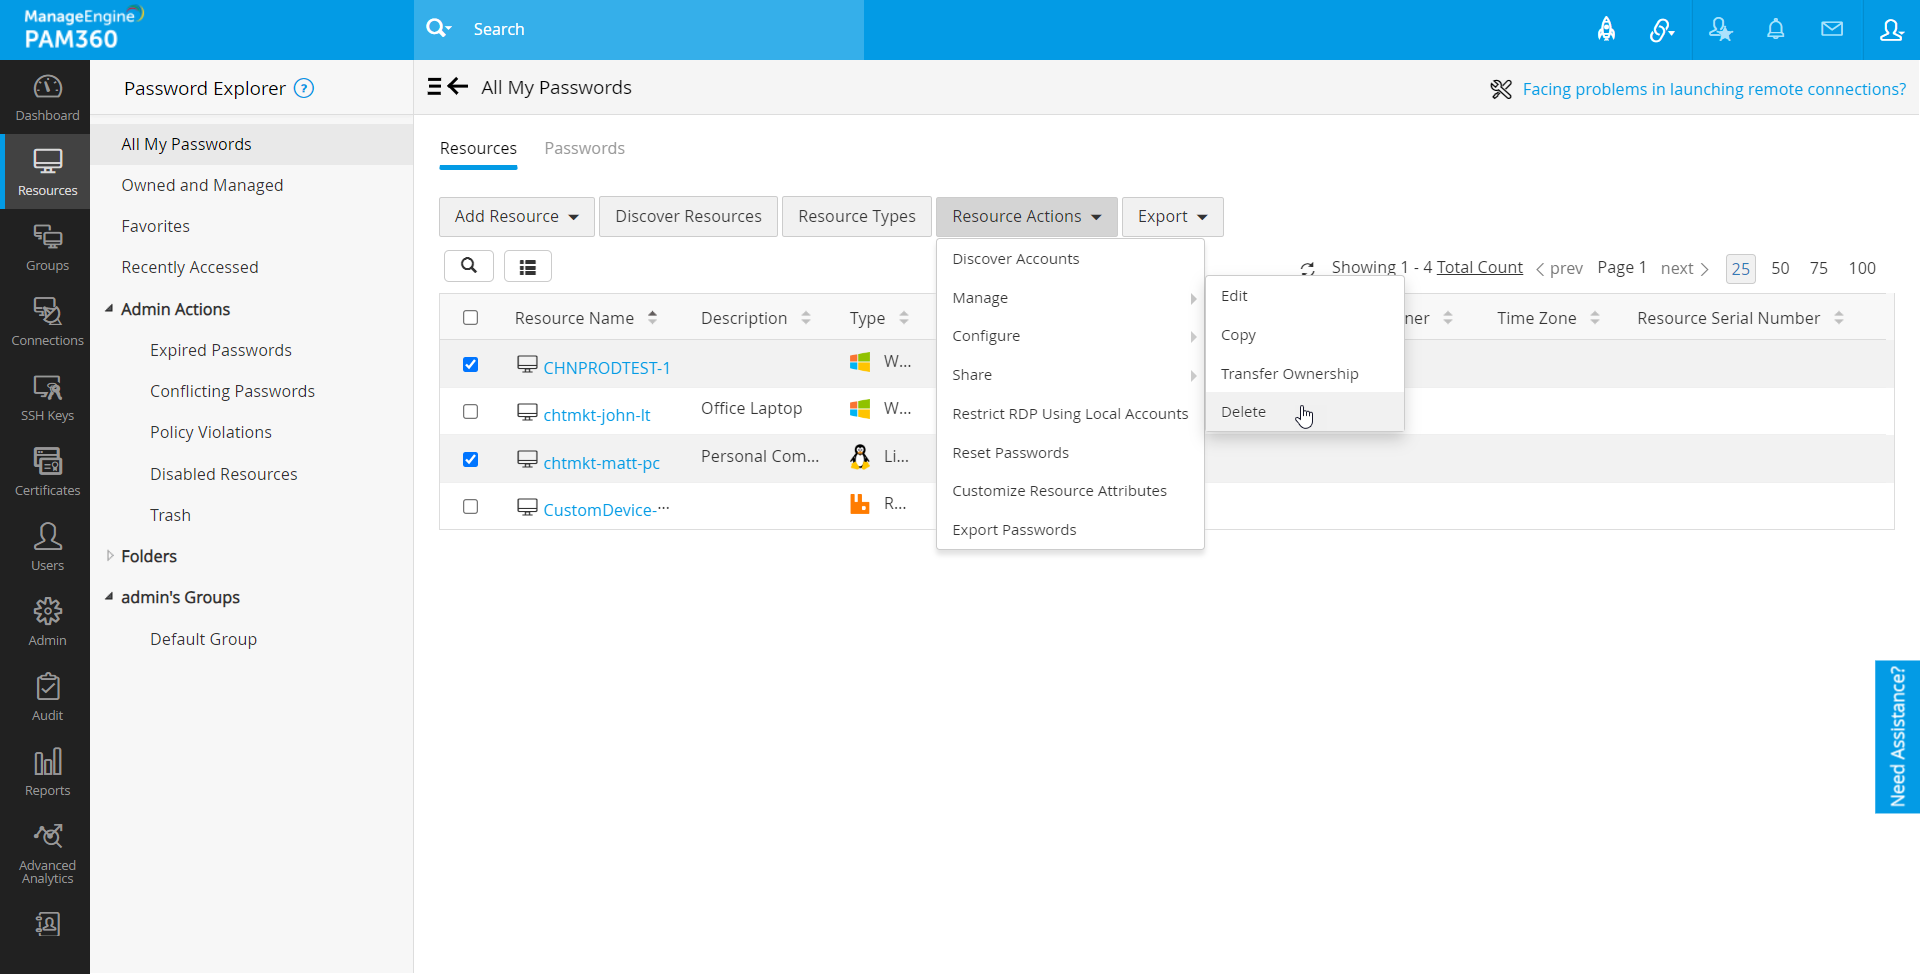
3. Deleting a Resource
You can delete those resources that are no longer required from the PAM360's Resources list. If you delete a resource, all the accounts and passwords that were part of that resource would also be deleted permanently. Alternatively, you can choose to move a resource to Trash from which it can be restored at a later point of time.
To delete a resource:
- Navigate to the Resources tab.
- Select the particular resource that is to be deleted.
- Click the Resource Actions tab at the top and select Manage >> Delete from the drop-down list.
- To delete resources in bulk, select the required resources and click Resource Actions >> Manage >> Delete at the top.
- In the pop-up window that opens, you will have two options:
- Delete:
- To delete intended resources permanently, select the resource name and click Delete.
- Move To Trash:
- This option can be used to move the resources to Trash without deleting them permanently.
- When a resource is moved to trash, only the resource owner will be able to view it under the Trash tab.
- Resources moved to the Trash will not be removed from PAM360 and can be restored at any time until the PAM360 encryption keys have been rotated.
- However, once the key rotation is done, the resources in Trash and all their associated privileged accounts will be removed from PAM360.
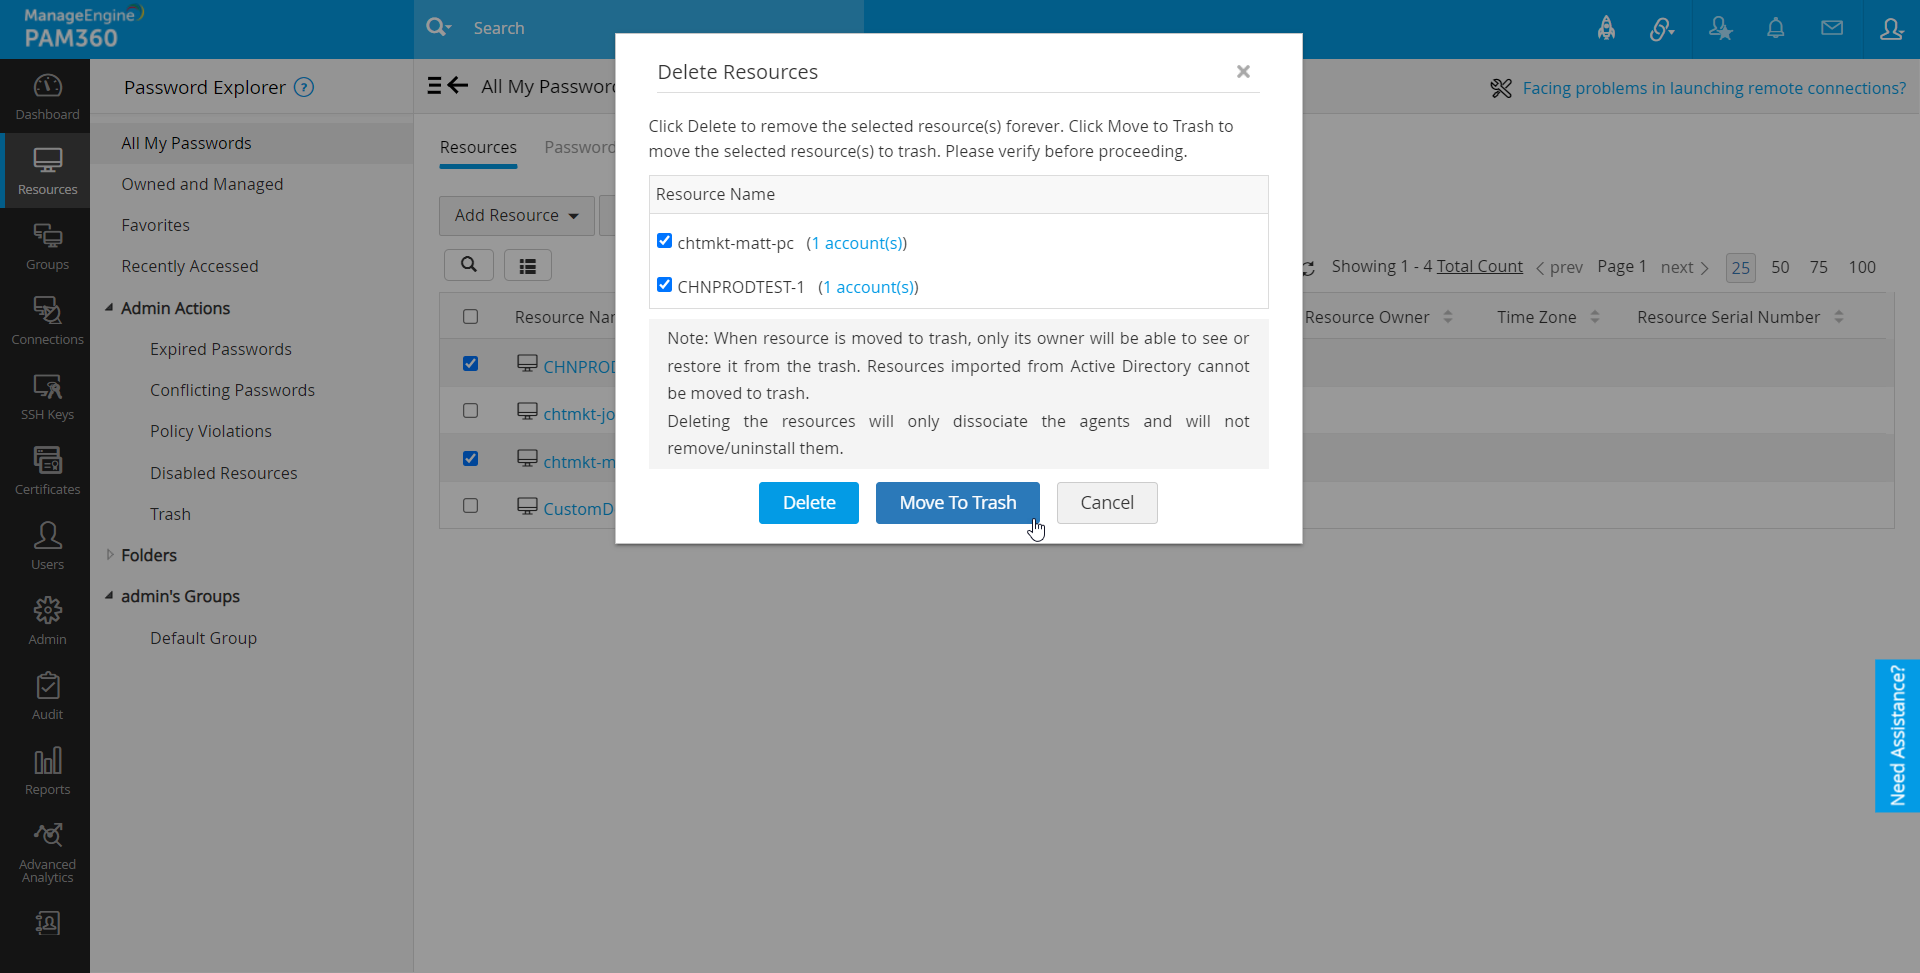
Note: Resources imported from AD, Microsoft Entra ID, and LDAP directories cannot be moved to Trash.
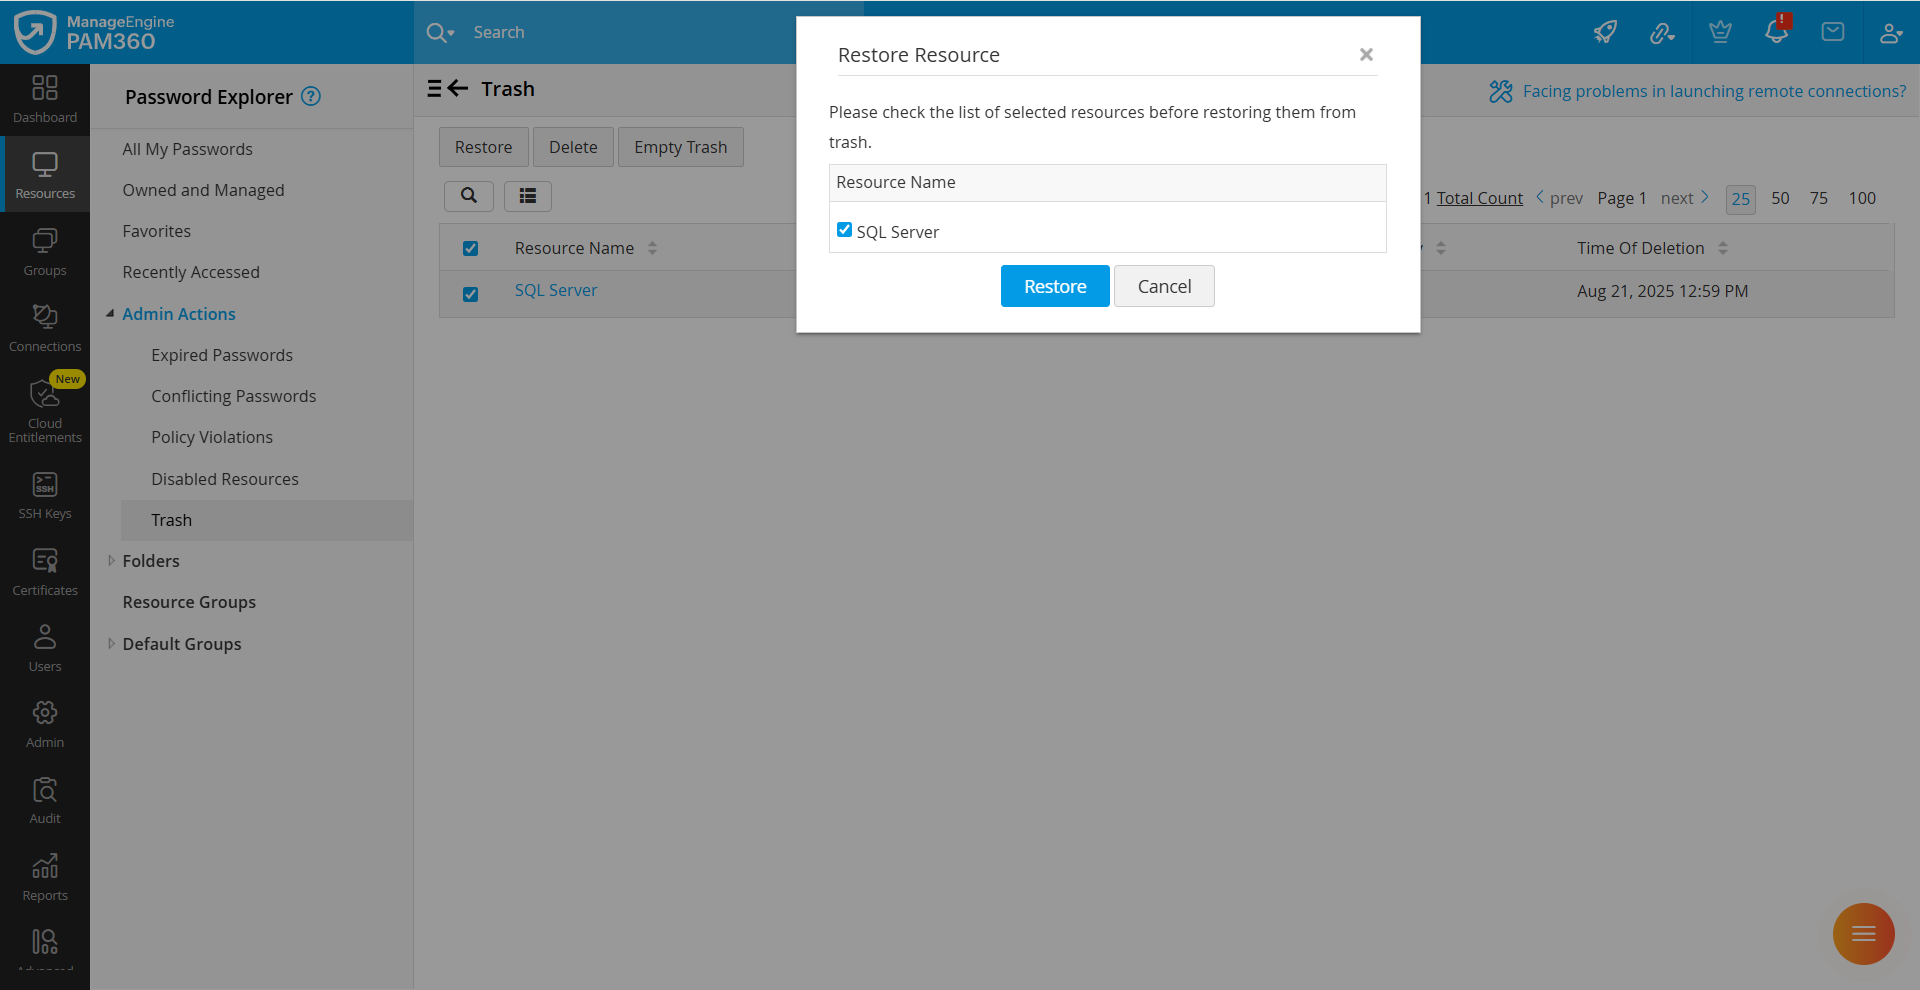
4. Restoring Resources from Trash
To restore a resource that has been moved to Trash, navigate to Resources >> Trash and click Restore. A list of resources in the Trash will open in a pop-up box from which the intended resource(s) can be restored.