Configuring Gmail as the Mail Server
PAM360 supports Gmail as a mail server for sending user onboarding messages, notifications, alerts, and other product-generated emails. Mail delivery can be configured through either SMTP or the Gmail API, with OAuth 2.0 used to authorize PAM360 to send email through the selected method.
This help document covers the following topics in detail:
- Creating a Google Cloud Project and Enabling the Gmail API
- Configuring the OAuth Application for Mail Delivery
- Configuring the OAuth Scopes for Mail Delivery
- Creating an OAuth Client for PAM360
- Configuring Gmail as the Mail Server in PAM360
1. Creating a Google Cloud Project and Enabling the Gmail API
To configure Gmail as the mail server in PAM360, select an existing Google Cloud project or create a new project, and enable the Gmail API for the selected project.
- Log in to Google Cloud Console as a Google Workspace administrator.
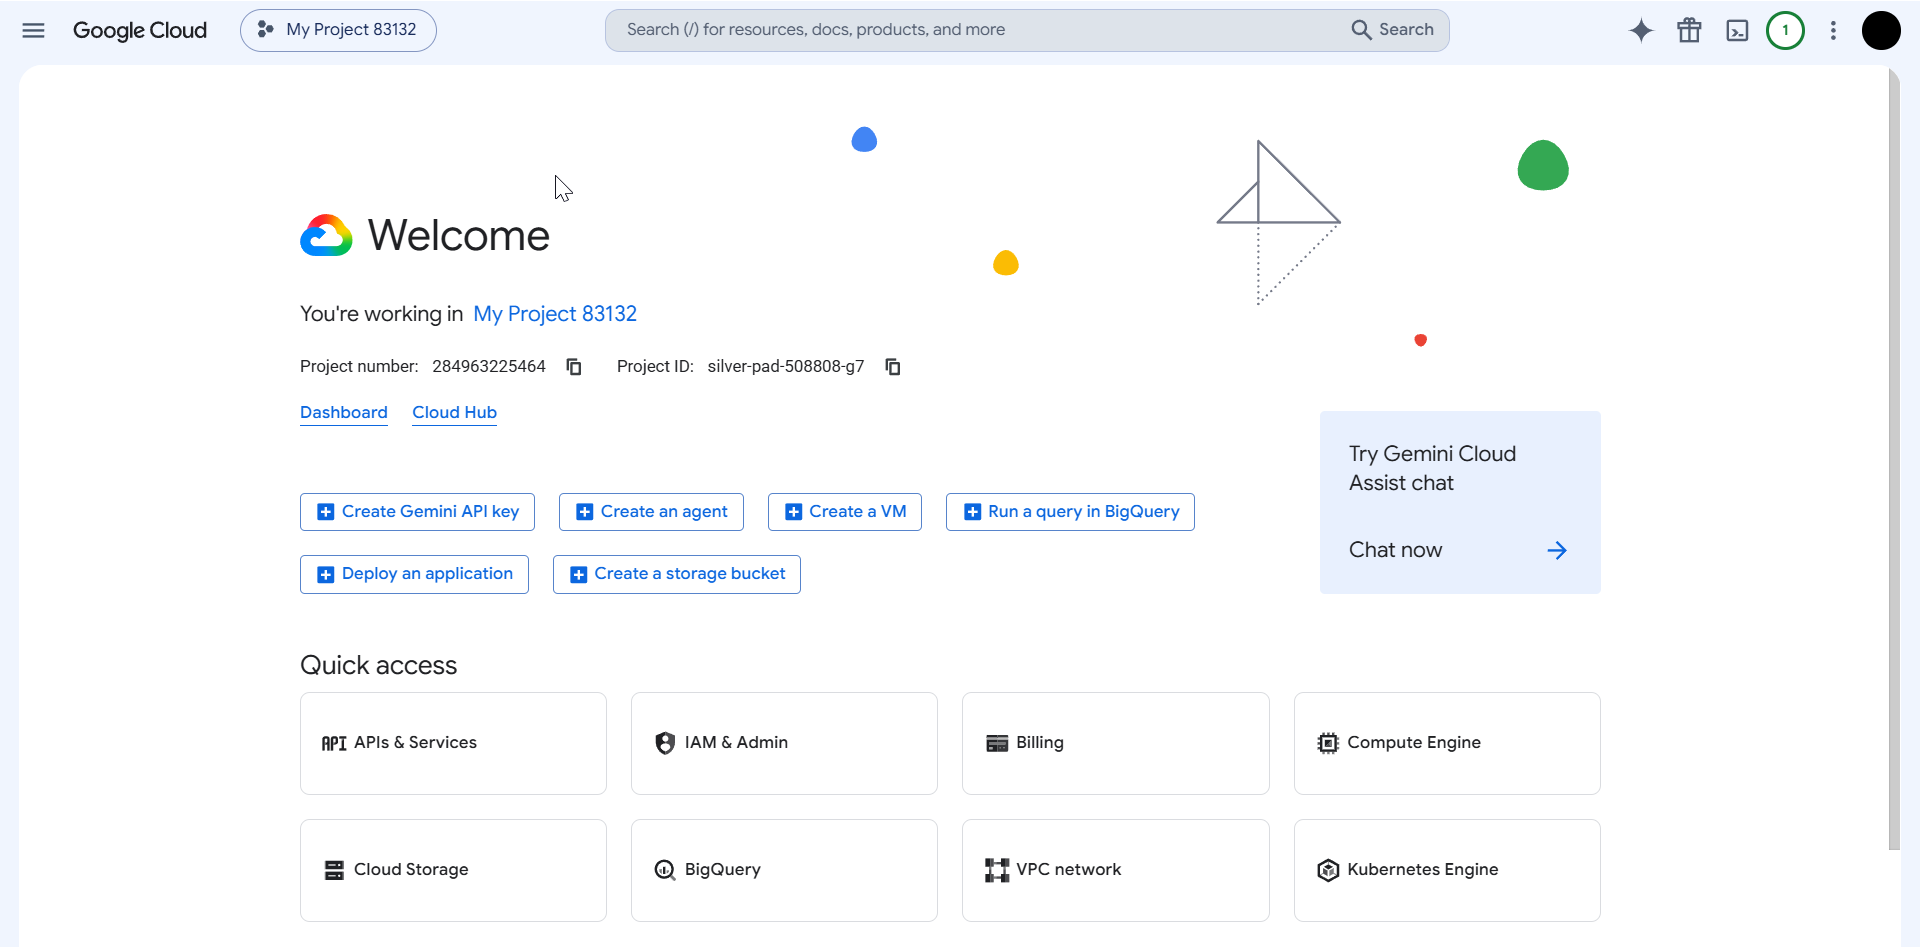
- On the Google Cloud Console home page, click Select a project / My Project in the top pane.
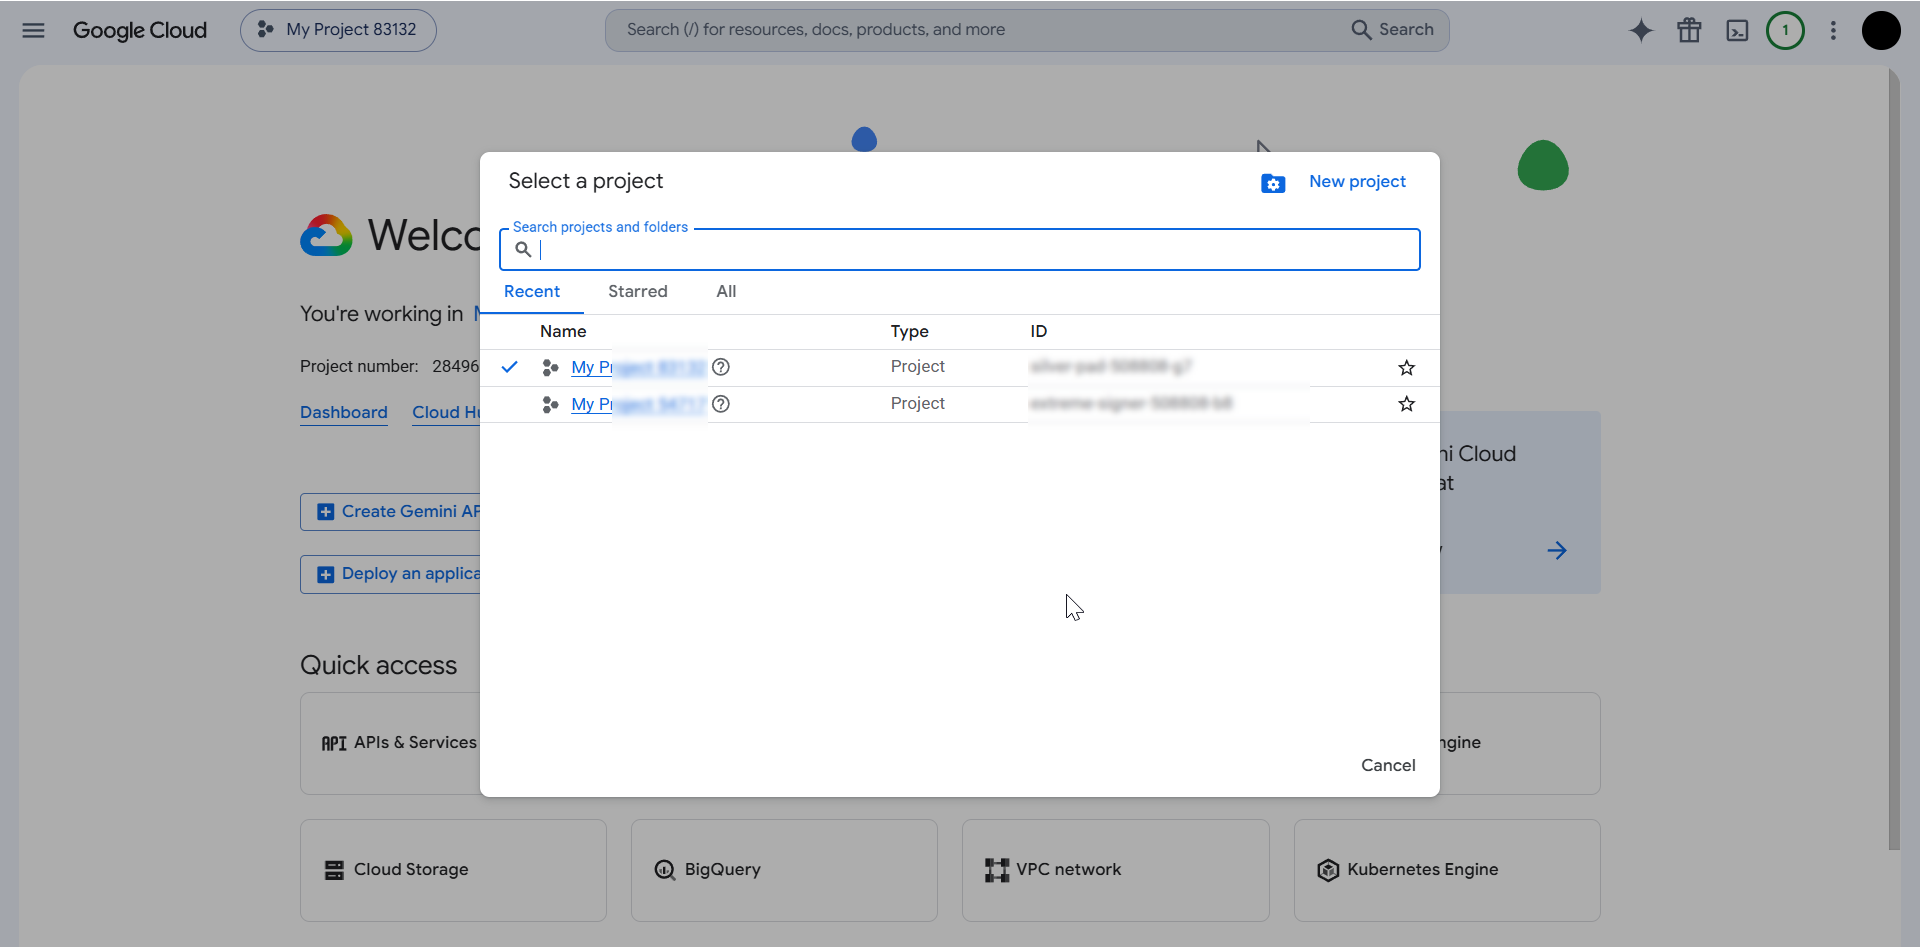
- In the Select a project window, choose the project you want to use for the PAM360 integration
- If you do not have an existing project, click New Project in the top-right corner of the window to create a new project.
- In the New Project window, enter the following details:
- Project name - Enter a name for the project.
- Parent resource - Click Browse, select the folder where the project should be created, and click Select.
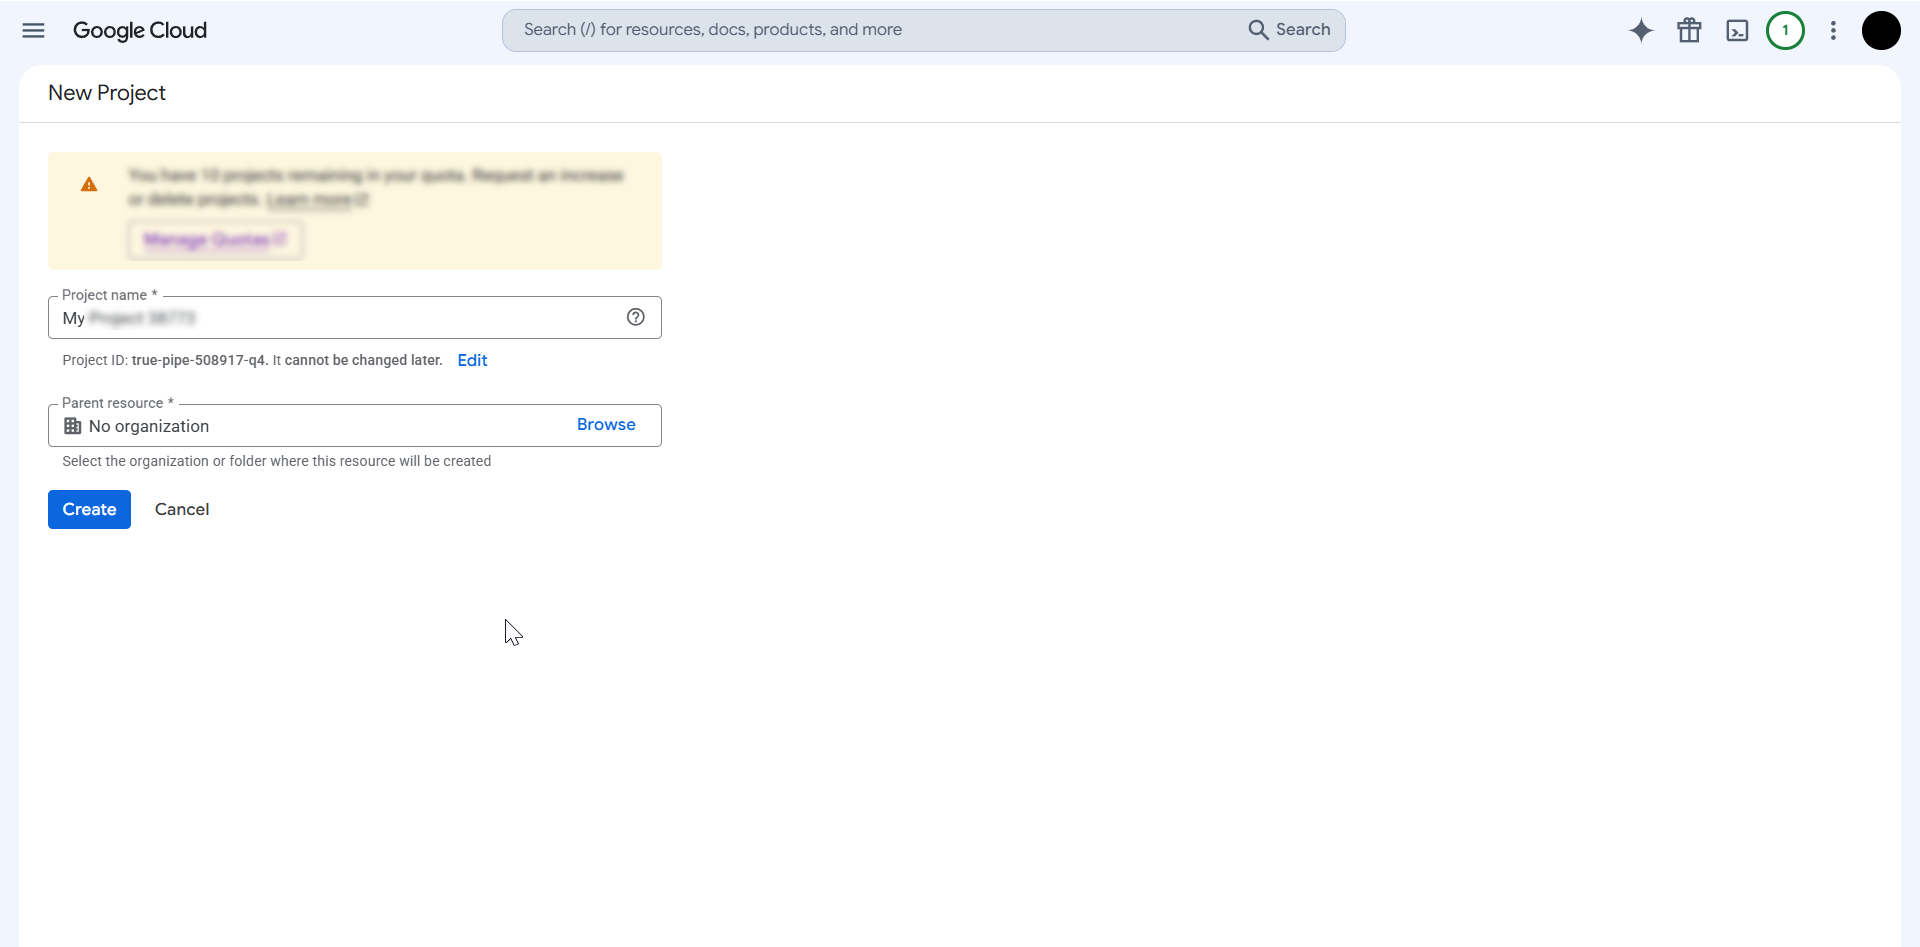
- After entering the required details, click Create.
- In the New Project window, enter the following details:
- Use the search bar to locate the Gmail API. Click on Gmail API from the displayed search results.
- On the Gmail API page, click Enable.
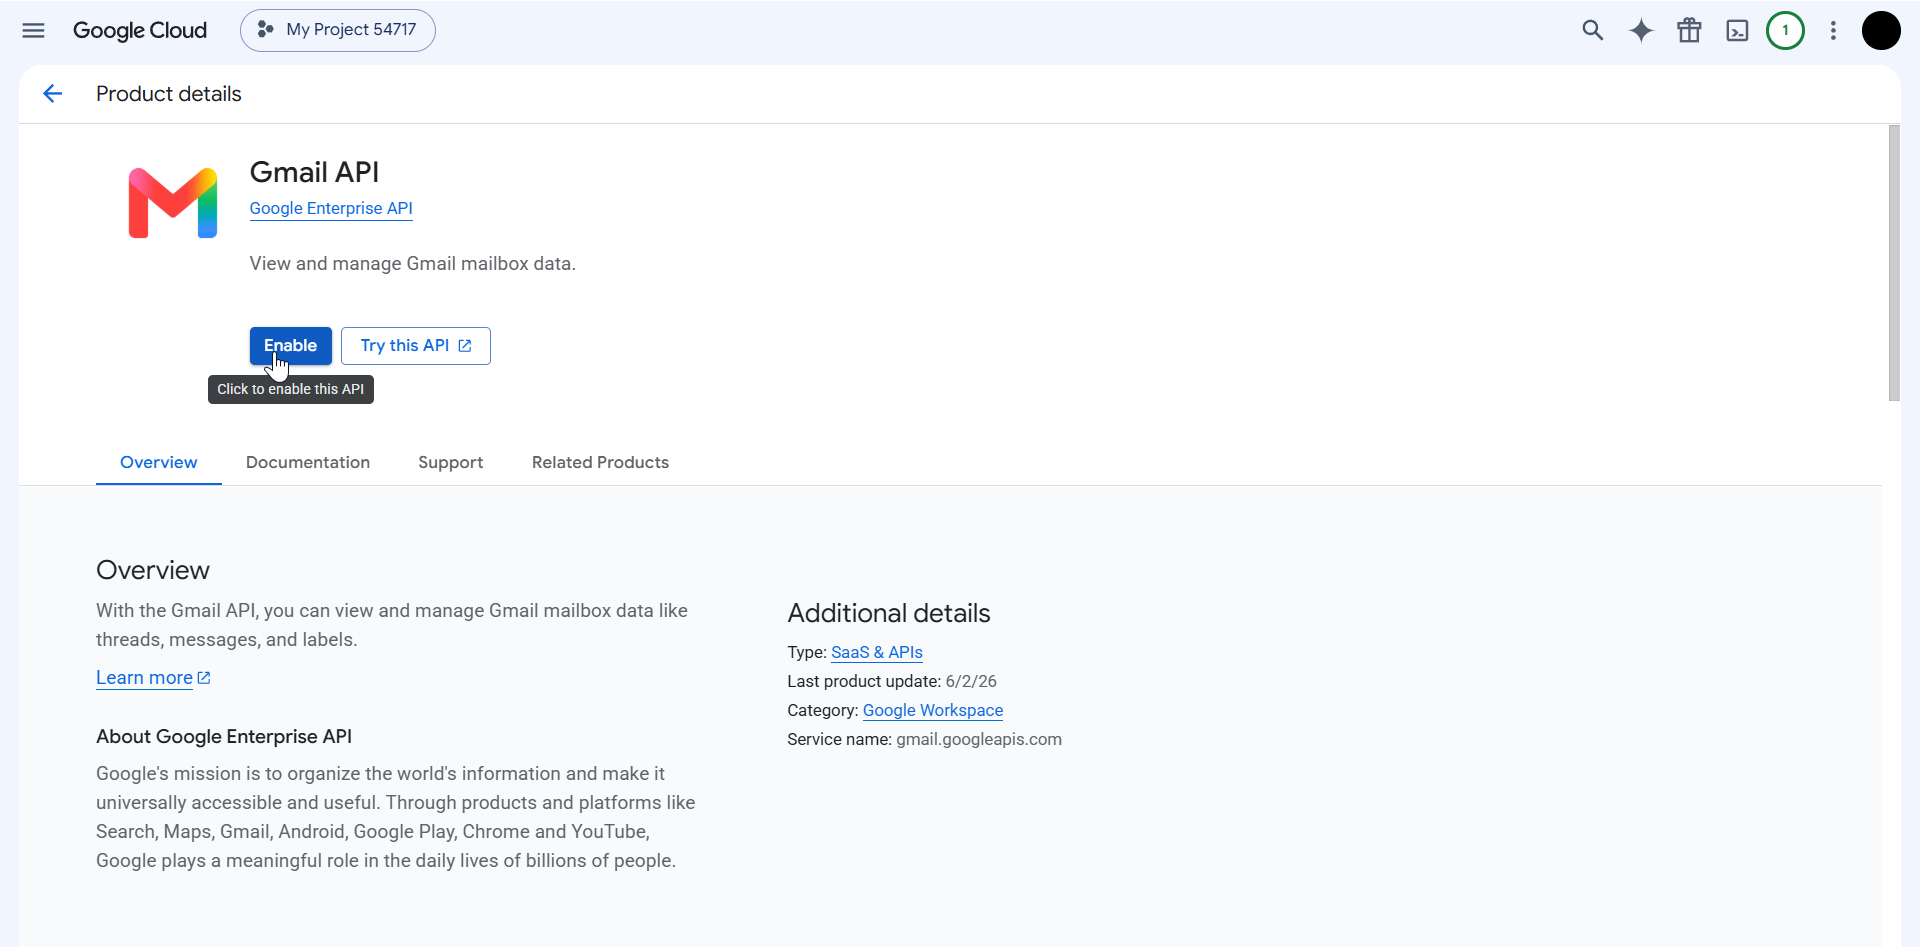
The Gmail API is now enabled for the selected Google Cloud project. You will be redirected to the Gmail API page. Proceed to configure the OAuth application details required to authorize PAM360.
2. Configuring the OAuth Application for Mail Delivery
Configure the OAuth application details, audience, and users who can authorize PAM360 to access Gmail.
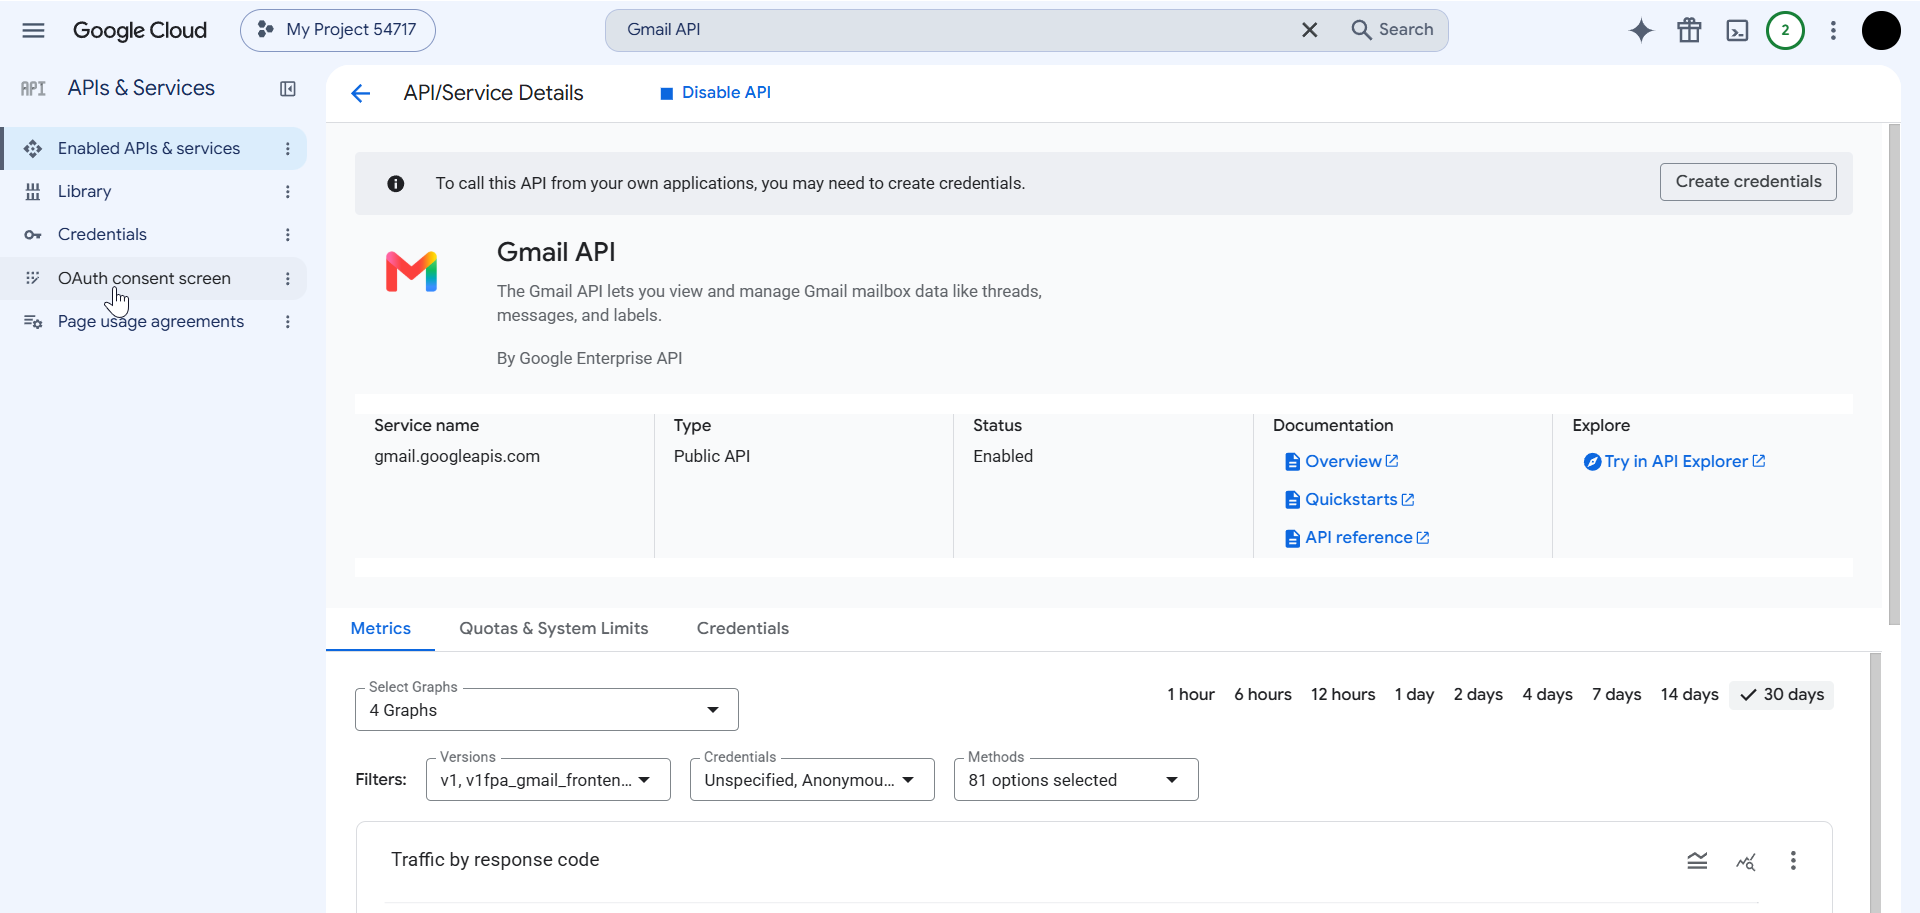
- From the left pane, click on OAuth consent screen. You will be redirected to the OAuth Overview page. Click Get started to proceed with OAuth configuration.
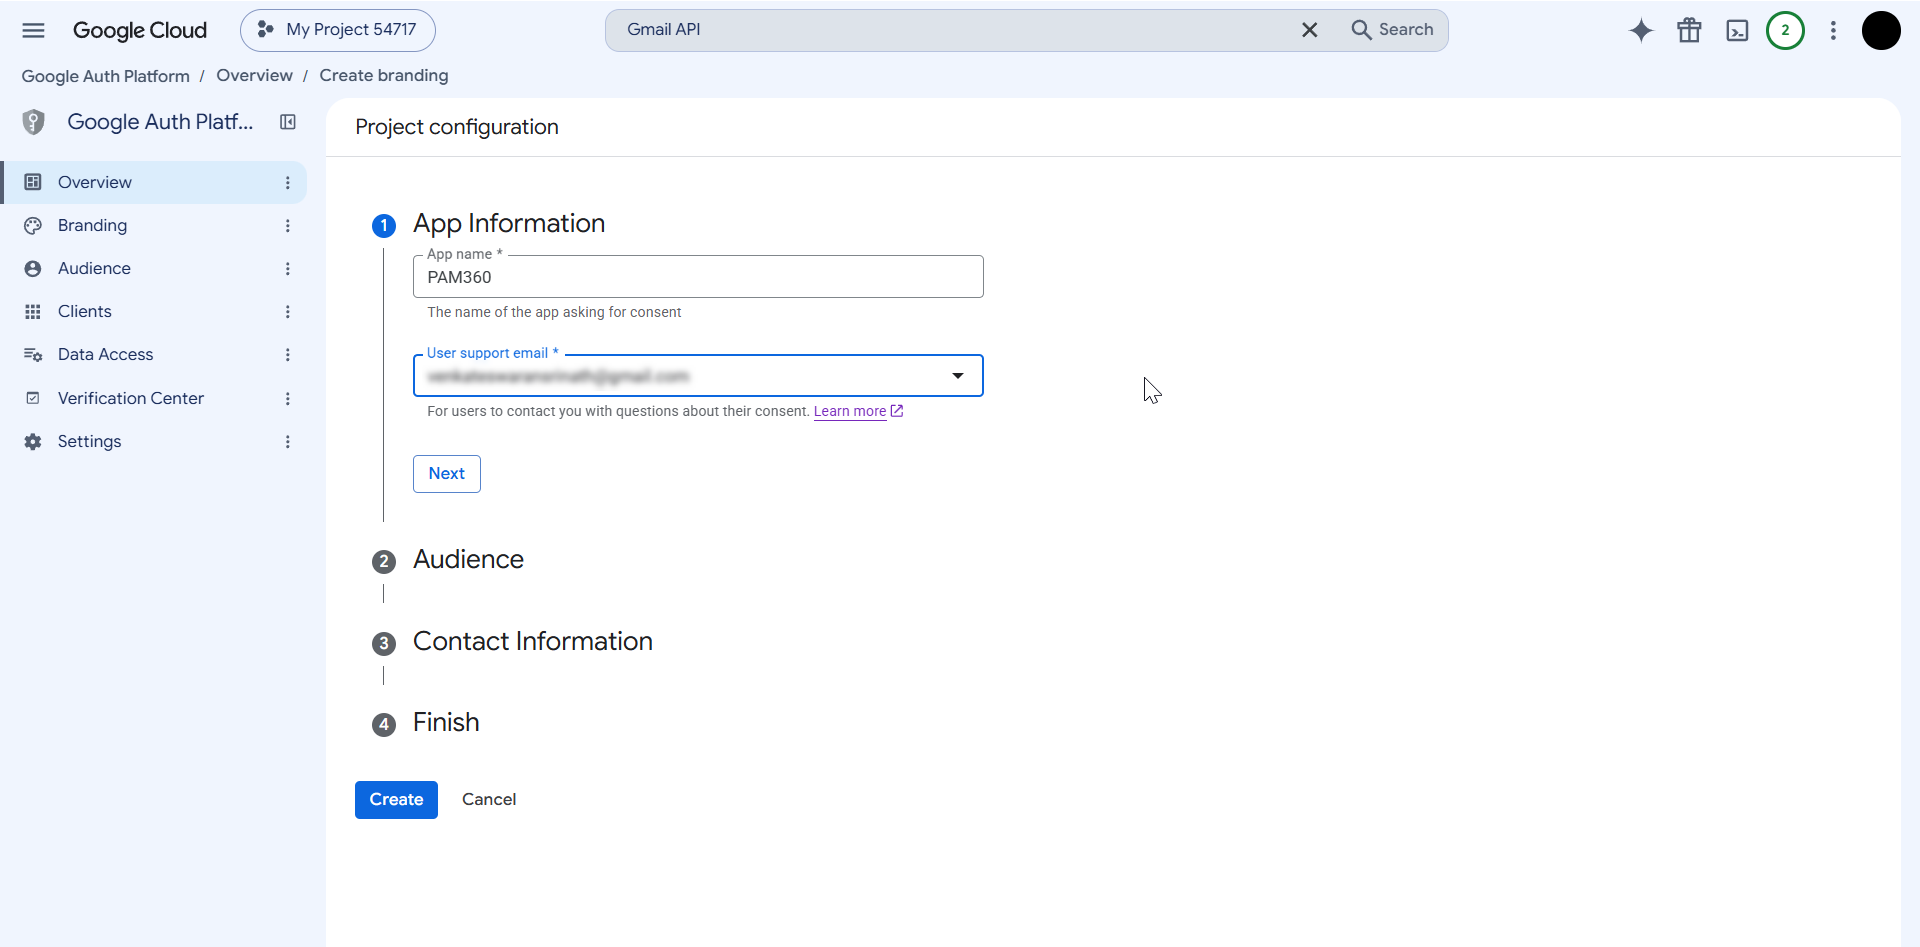
- On the Project configuration page, enter the following details. Explore this link for more information about managing OAuth app branding.
- App Information - Enter the following details:
- App name - Enter a display name for the OAuth application created for PAM360, such as PAM360. This name is displayed on the OAuth consent screen.
- User support email - Enter the mail address to be displayed on the OAuth consent screen as the support contact for the application. Users can use this address for questions related to sign-in, authorization, or the application.
- Audience - Select the appropriate audience:
- Internal - Select this option if only users within your Google Workspace organization should be allowed to authorize the application.
- External - elect this option if Google accounts outside your Google Workspace organization should also be allowed to authorize the application.
- Contact Information - Enter an email address where Google can send notifications about changes or important updates related to the Google Cloud project.
- Finish - Select the checkbox to agree to the Google API Services Data Policy and click Continue.
- App Information - Enter the following details:
- After entering the required information, click Create to complete the project configuration.
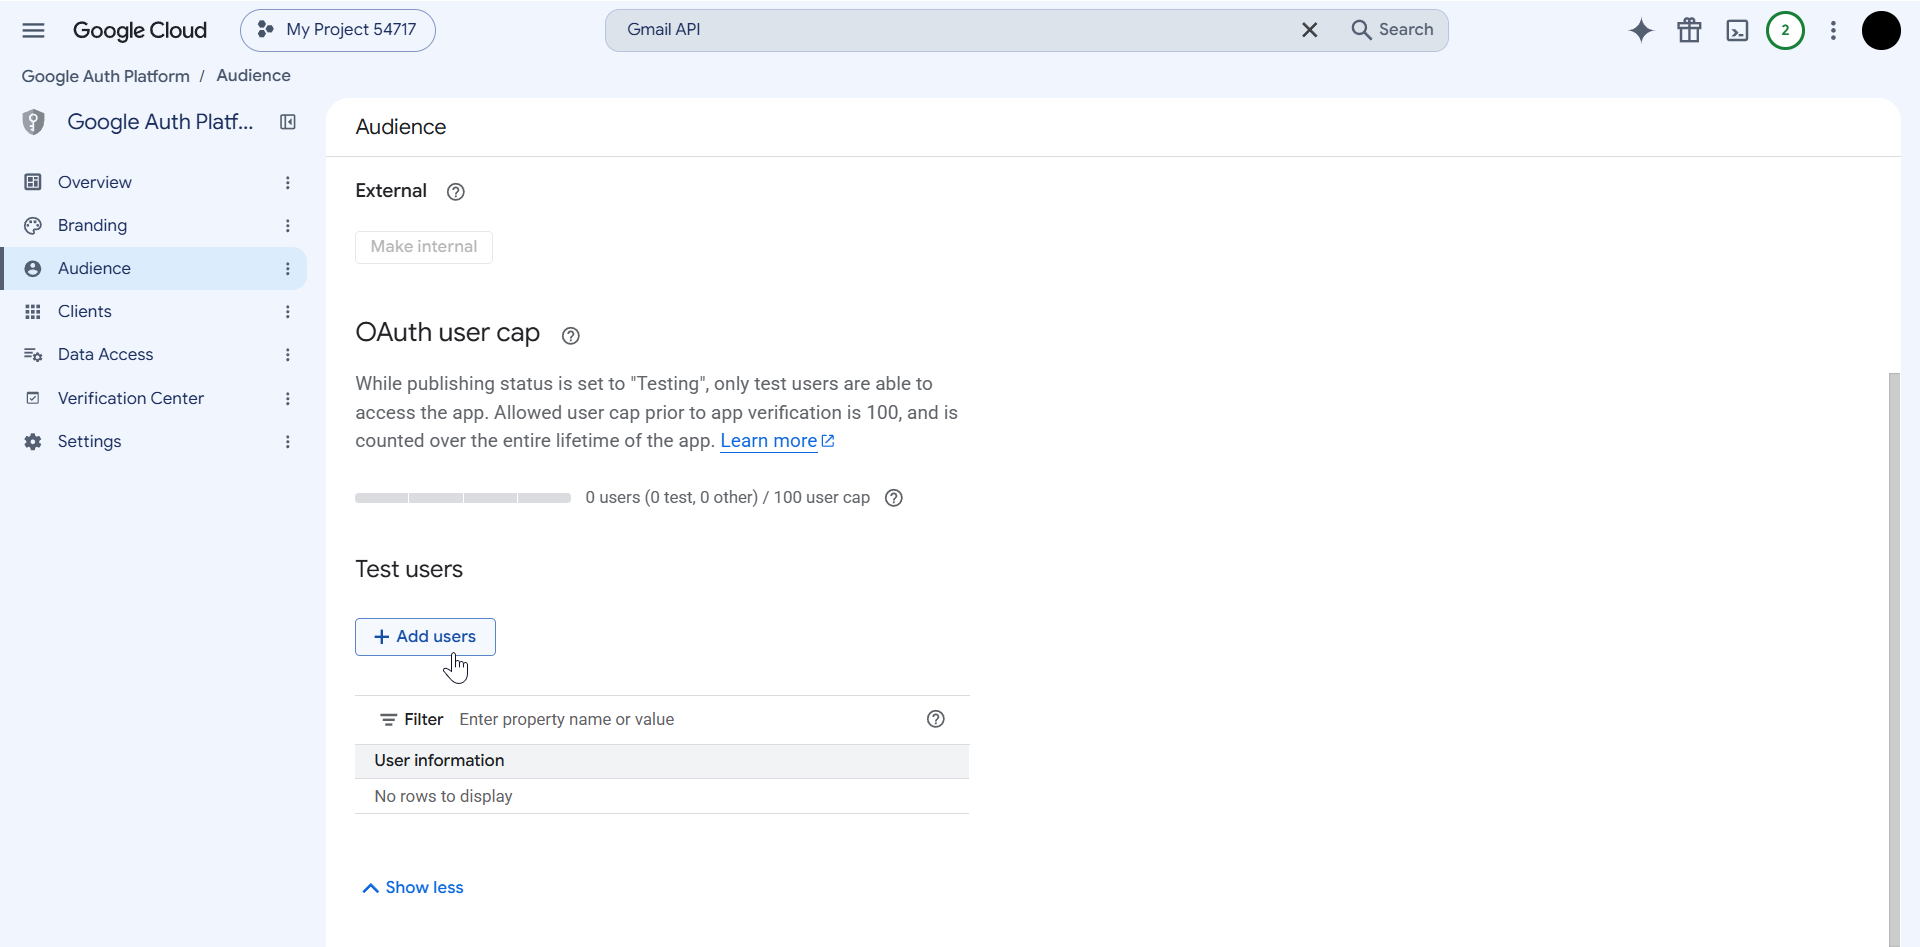
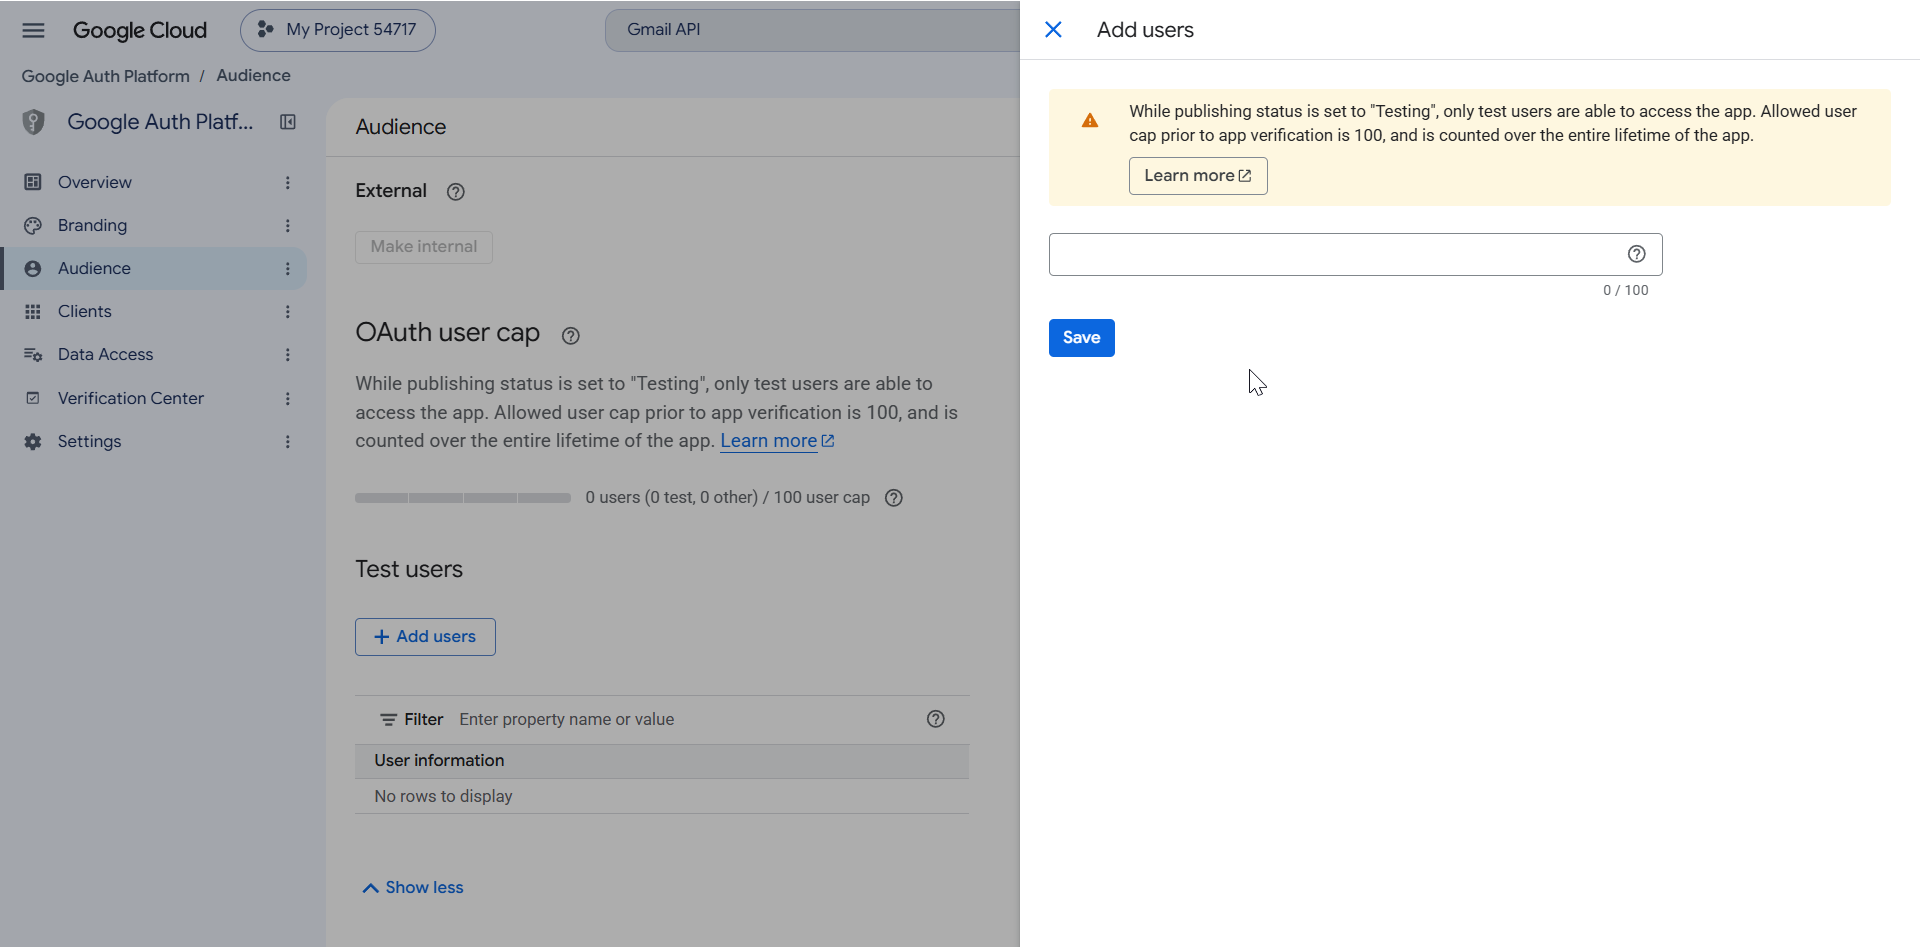
- If you selected External as the audience, select Audience from the left pane. Under Test users, click + Add users, enter the Google accounts that should be allowed to authorize the application, and click Save.
The OAuth application and its audience are now configured. Next, configure the OAuth scopes required for the mail delivery method used in PAM360.
3. Configuring the OAuth Scopes for Mail Delivery
Configure the OAuth scopes required to authorize PAM360 to send email through Gmail. The required scope varies based on whether PAM360 uses the Gmail API or SMTP for mail delivery.
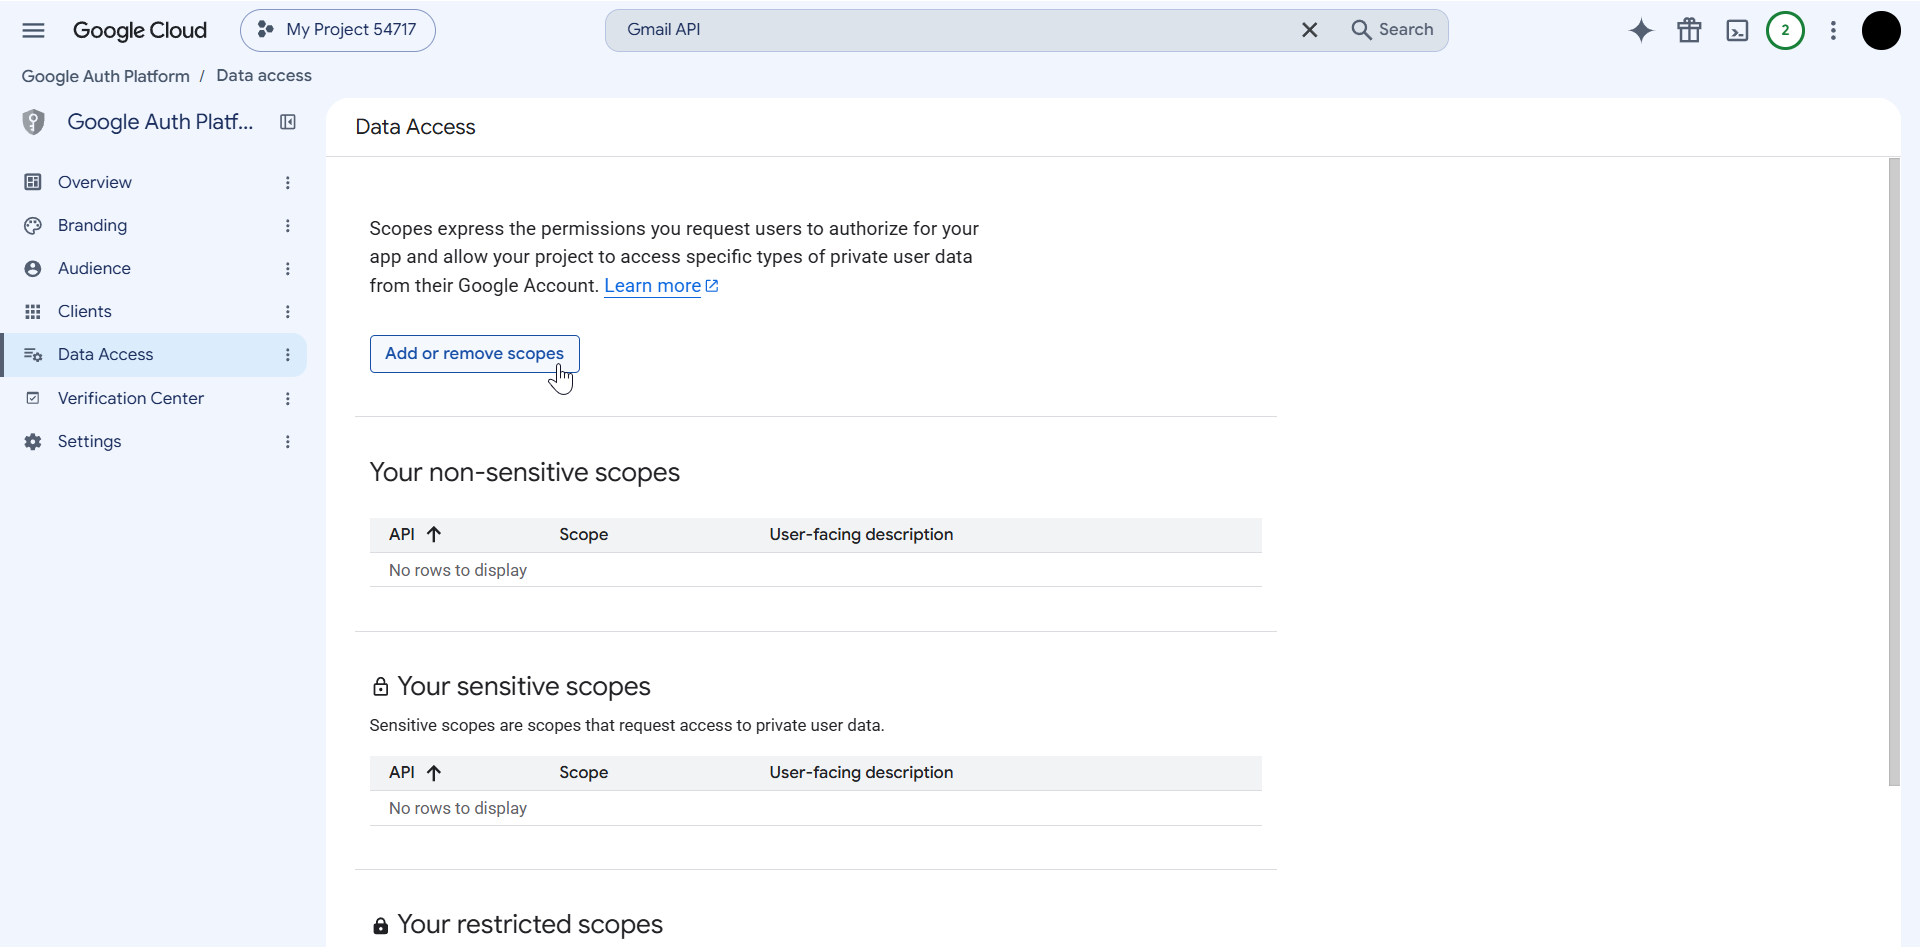
- Select Data Access from the left pane to add the OAuth scopes.
- In the Data Access page, click Add or remove scope.
- In the Update selected scopes sliding window, enter the required scope under the Manually add scopes section based on your mail delivery method:
- API - https://www.googleapis.com/auth/gmail.send
- SMTP - https://mail.google.com/
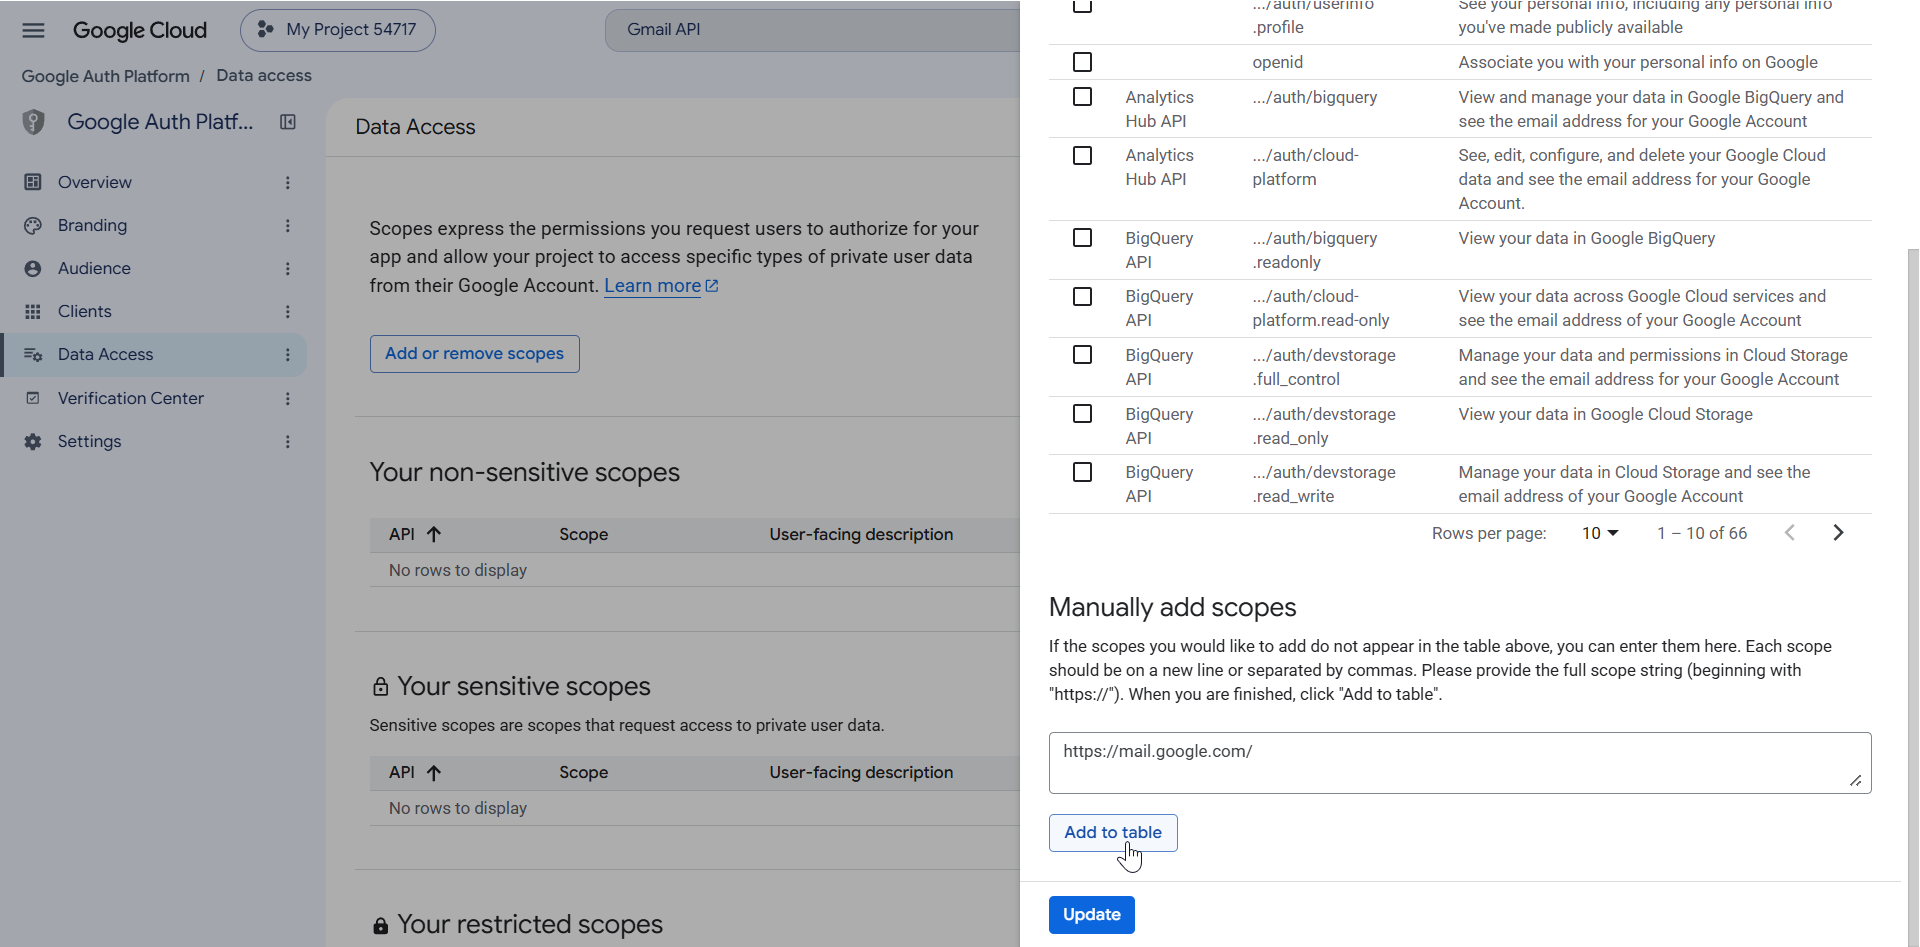
- Click the Add to table button to add the entered OAuth scope.
- Click Update after adding the scope.
The required OAuth scope is now associated with the application. Proceed to create the OAuth client credentials required to configure Gmail in PAM360.
4. Creating the OAuth Client for PAM360
Create an OAuth client for PAM360 and obtain the Client ID and Client Secret required for the Gmail configuration in PAM360.
- Access the Clients tab from the left pane.
- On the Clients page, click the + Create client button in the top pane.
- In the Create OAuth client ID page:
- Select Web application from the Application type drop-down menu.
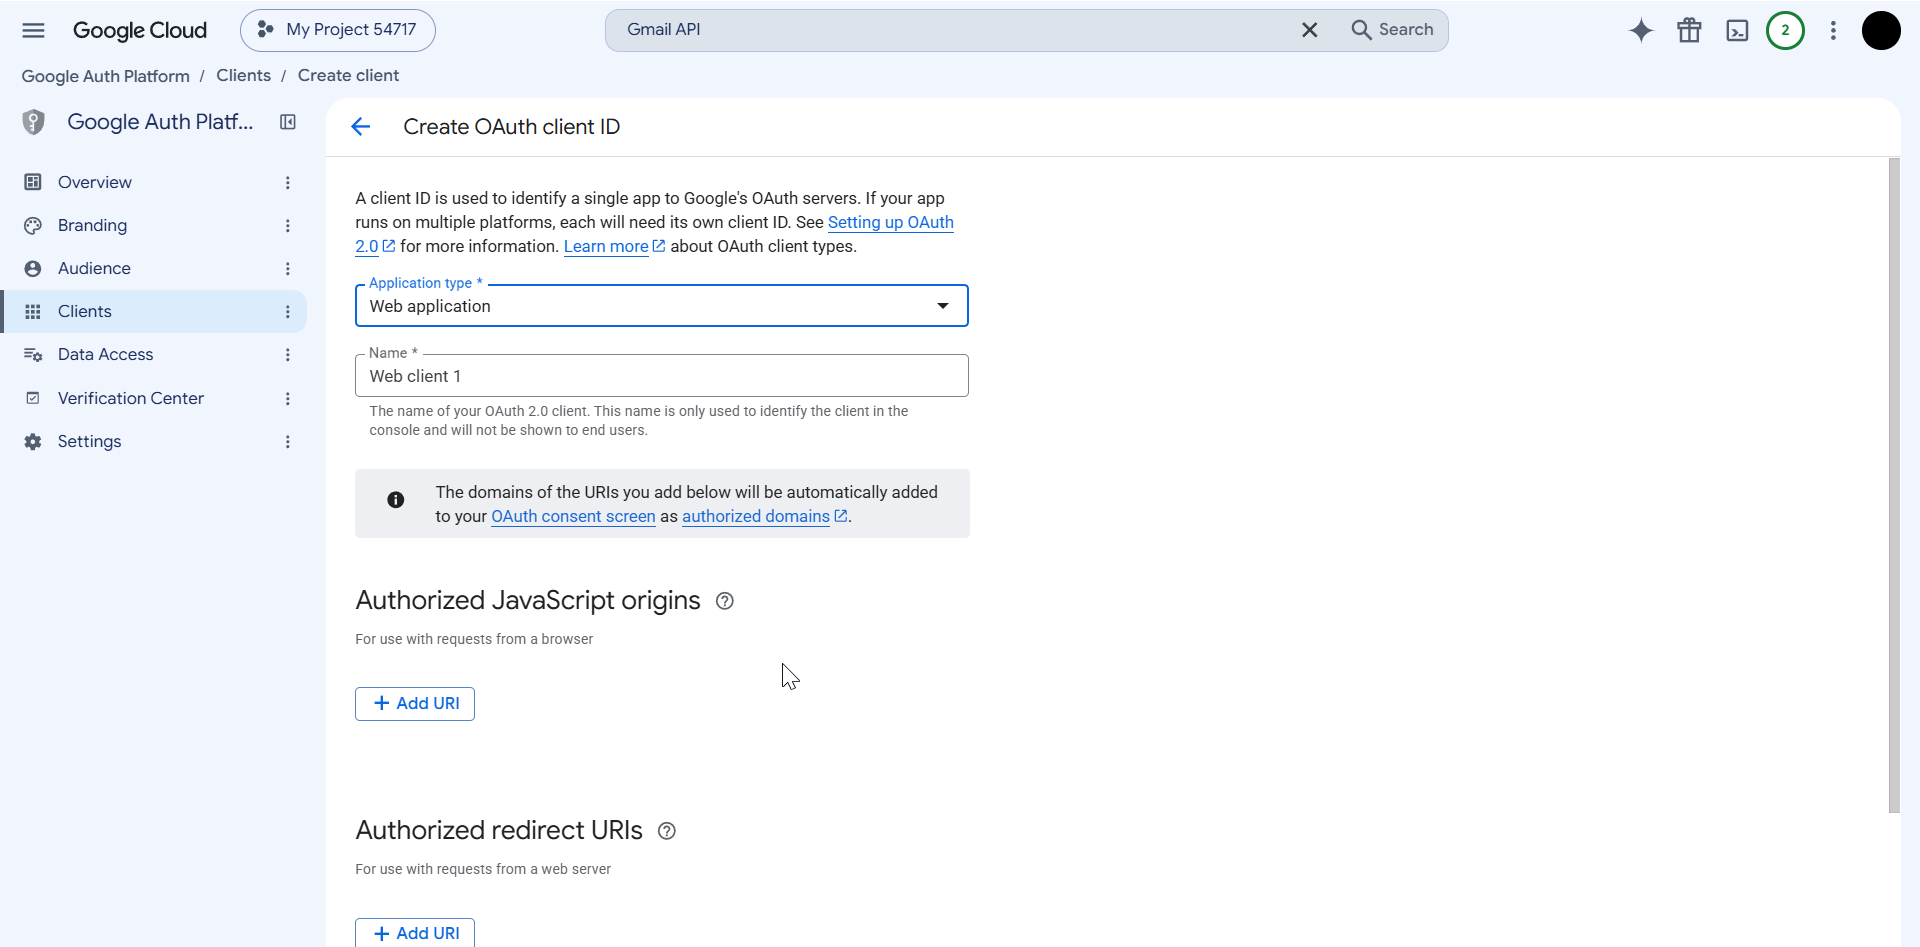
- Enter a name for the OAuth client in the Name field, and click Create.
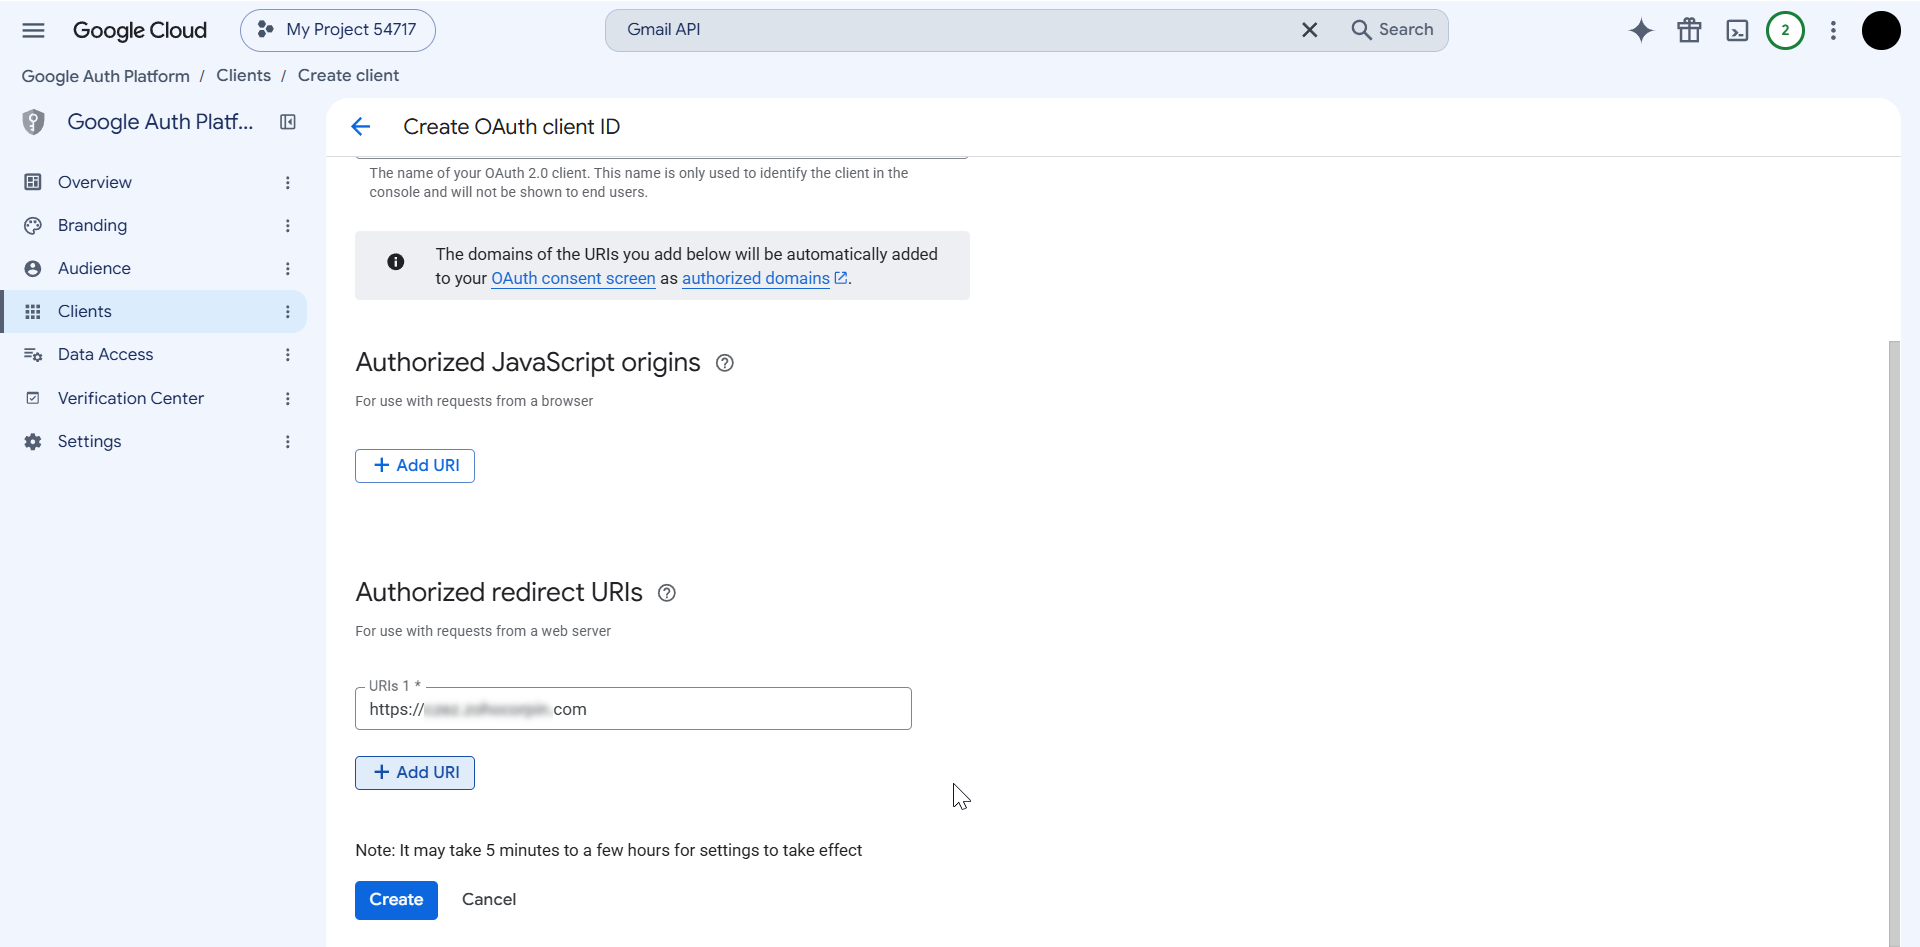
- Under Authorized redirect URIs, add the PAM360 redirect URI in the https://<PAM360_Access_URL>/pam360redirect/GoogleOAuth format.
Additional Detail
The PAM360 access URL used for Google OAuth should contain a valid fully qualified domain name with an acceptable top-level domain, such as .com, or use localhost. An access URL containing only a hostname and port is not supported for Google OAuth configuration.
- Select Web application from the Application type drop-down menu.
- In the confirmation window, click Download JSON to download the OAuth client details, as a JSON file to your machine, and click OK. You will be redirected to the OAuth 2.0 Client IDs page.
- On the client details page, copy the Client ID and Client Secret. You will need them while configuring Gmail as the email service provider in PAM360.
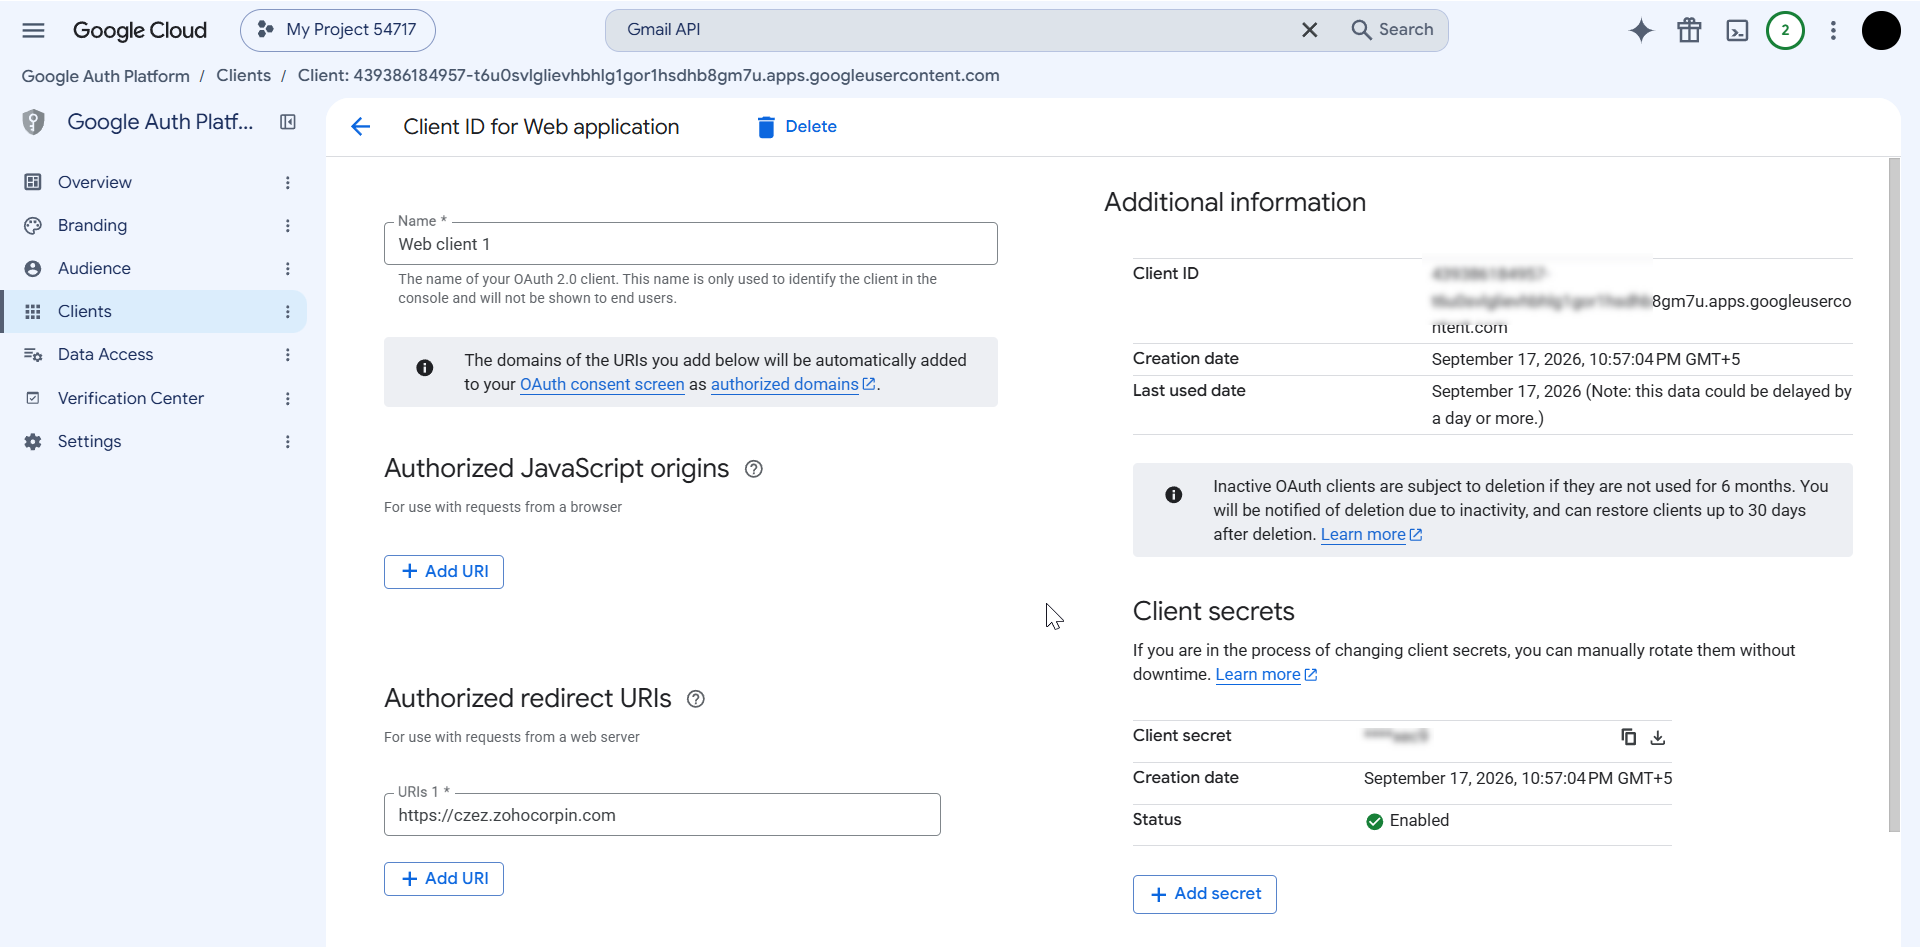
The OAuth client configuration is complete. Use the Client ID and Client Secret when configuring Gmail as the email provider in PAM360.
5. Configuring Gmail as the Mail Server in PAM360
To configure Gmail as the mail server in PAM360, specify the required mail delivery, connection, authentication, and access settings in the PAM360 interface. Follow these steps to configure Gmail as the mail server in PAM360:
- Navigate to Admin >> Server Settings >> Mail Server Settings.
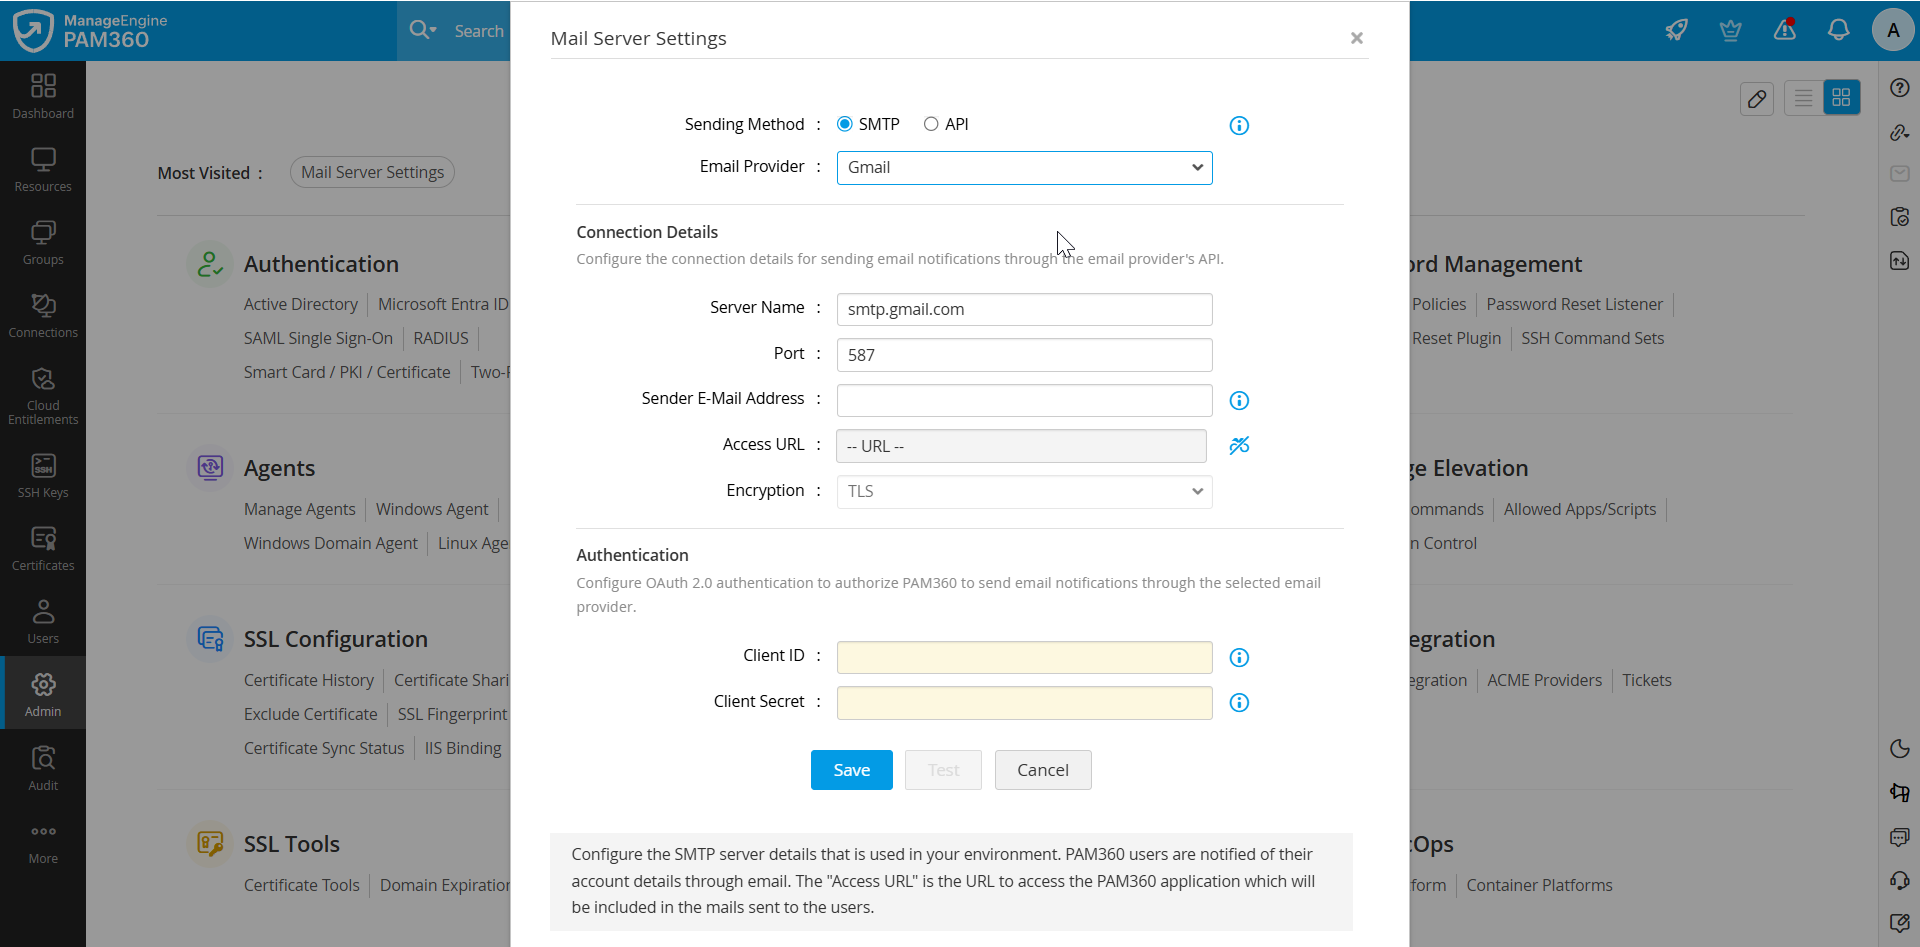
- In the Mail Server Settings window, select the email sending method and the email provider.
- Sending Method - Choose between SMTP or API as the desired email delivery method.
- Email Provider - Select Gmail as the service provider from the drop-down.
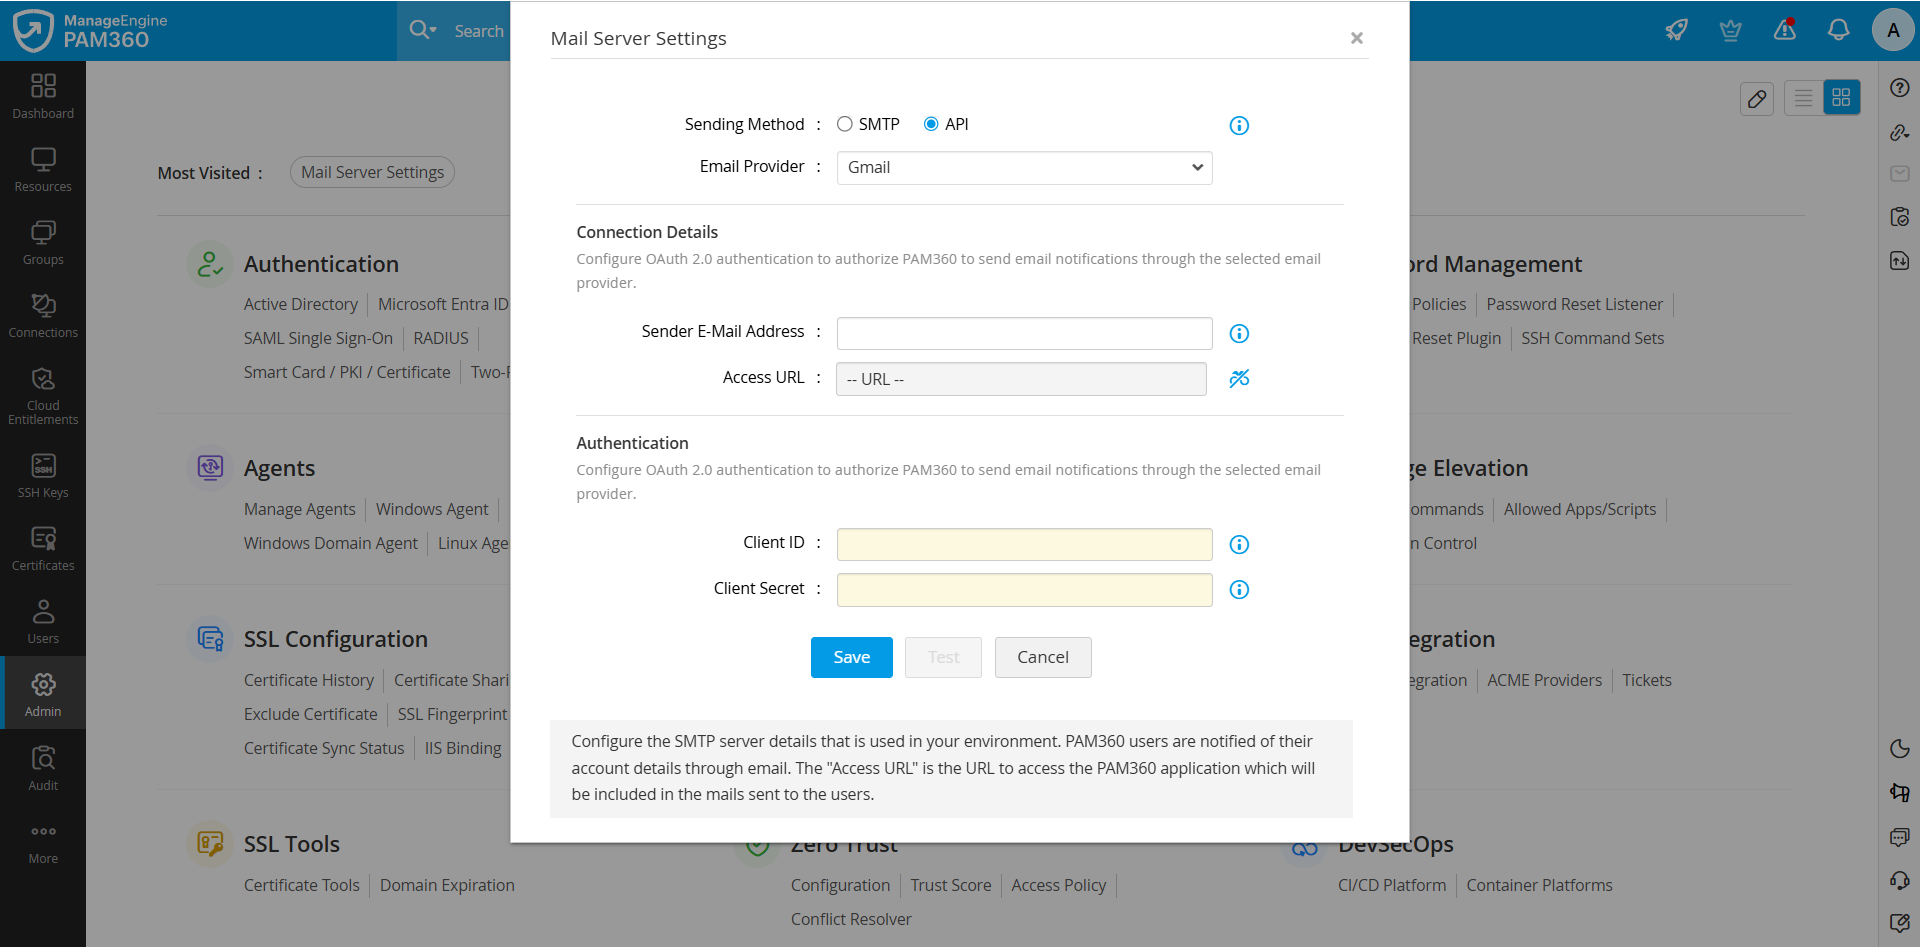
- Under the Connection Details section, enter the following details which are required depending on the sending method you selected:
- Server Name - Enter the actual name of the SMTP server, such as smtp.gmail.com.
- Port - Specify the port number for TLS (587) or SSL (465), depending on your setup.
- Sender E-mail Address - Provide a valid email address for sending onboarding messages, notification alerts, and license expiry reminders.
- Access URL - Enter the PAM360 access URL to be included in the email notifications sent to users.
- Under the Authentication section, enter the Client ID and Client Secret generated on the Google Cloud Console.
- After entering the required details, click Save to save the configuration.
Gmail is now configured as the mail server in PAM360 using the selected mail delivery method and permission type.