Configuring SAML Single Sign-On for JumpCloud Users
ManageEngine PAM360 integrates with JumpCloud to enable SAML-based Single Sign-On (SSO), allowing JumpCloud to act as the Identity Provider (IdP) and PAM360 as the Service Provider (SP). This integration enables users to access PAM360 using their existing JumpCloud credentials, eliminating the need to maintain separate PAM360 credentials and providing a seamless authentication experience. This help documentation covers the following topics in detail:
- Prerequisites
- Adding PAM360 as an Application on the JumpCloud Admin Portal
- Assigning JumpCloud Users to PAM360 Application
- Configuring JumpCloud as the Identity Provider in PAM360
1. Prerequisites
To configure PAM360 as a service provider in the JumpCloud admin portal, you need the Service Provider (SP) details displayed in Step 1 of the Identity Provider configuration in PAM360. These details are required to configure the PAM360 SAML application in JumpCloud. Explore this link for detailed steps to obtain the required service provider details to configure PAM360 as a service provider on JumpCloud.
2. Adding PAM360 as an Application on the JumpCloud Admin Portal
Follow these steps to add PAM360 as an enterprise application in the JumpCloud Portal:
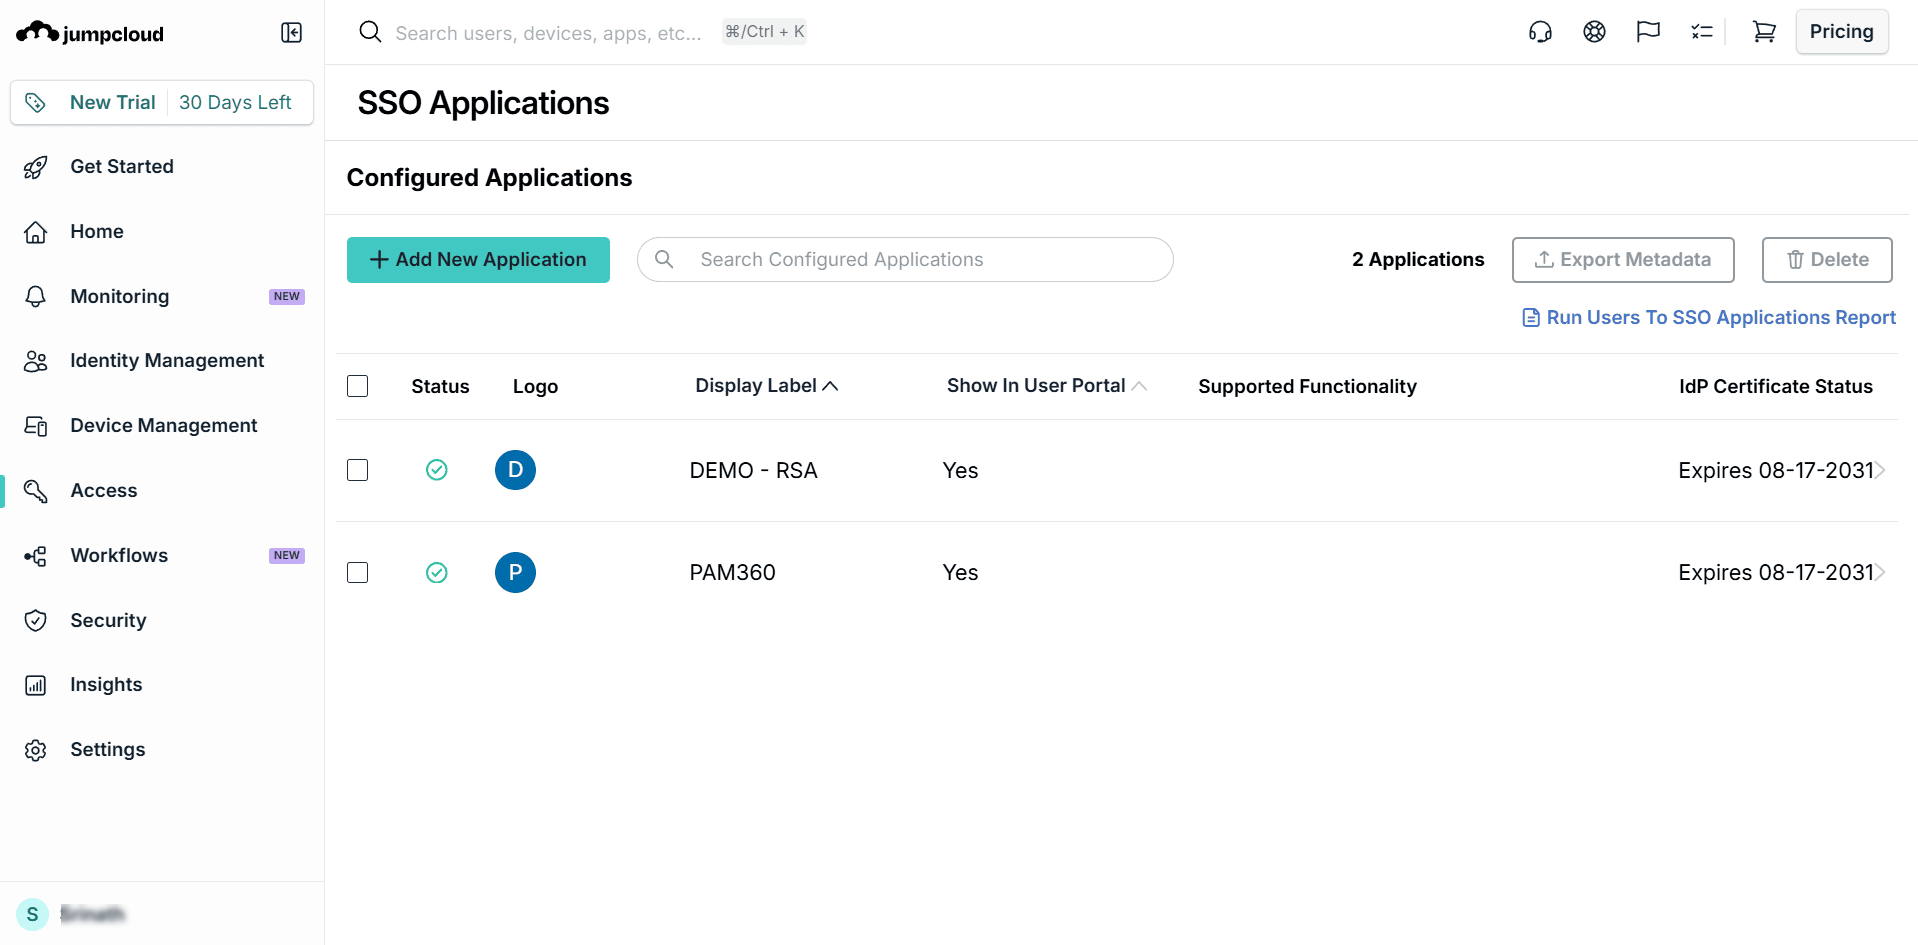
- Log in to the JumpCloud admin portal and navigate to Access >> SSO Applications.
- On the SSO Applications page, click + Add New Application.
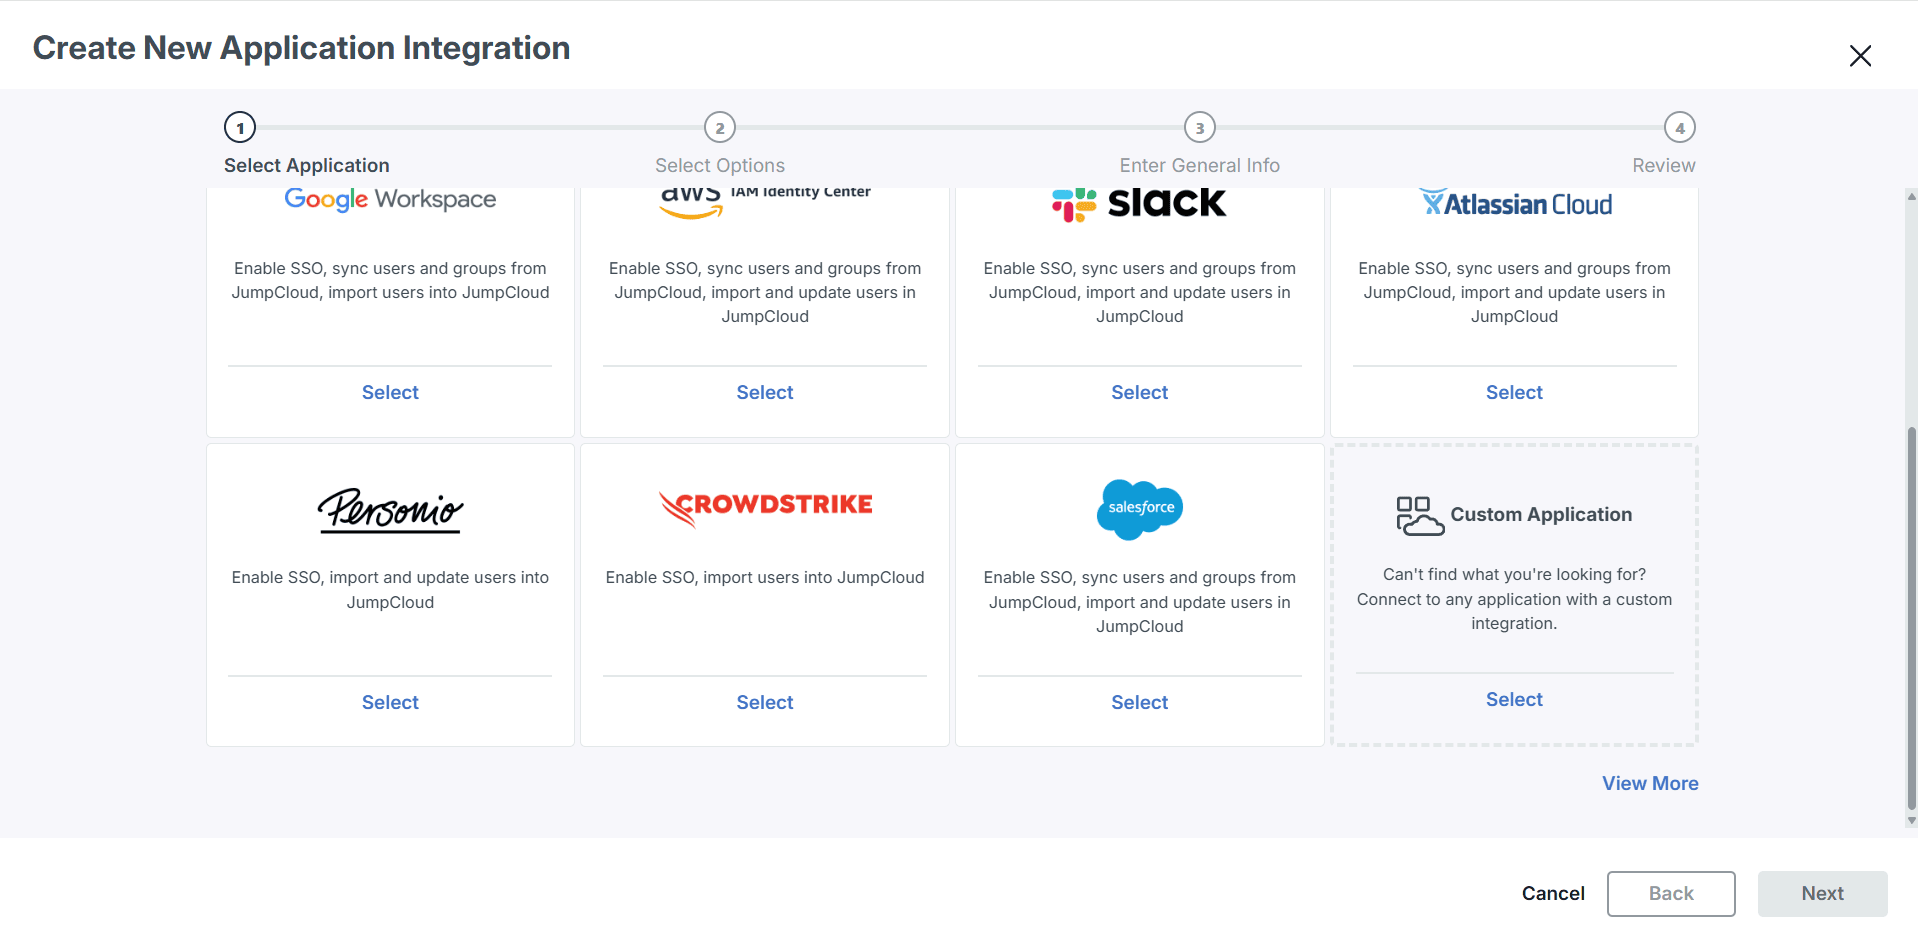
- On the Create New Application Integration page that appears, click Select under the Custom Application tile, and click Next.
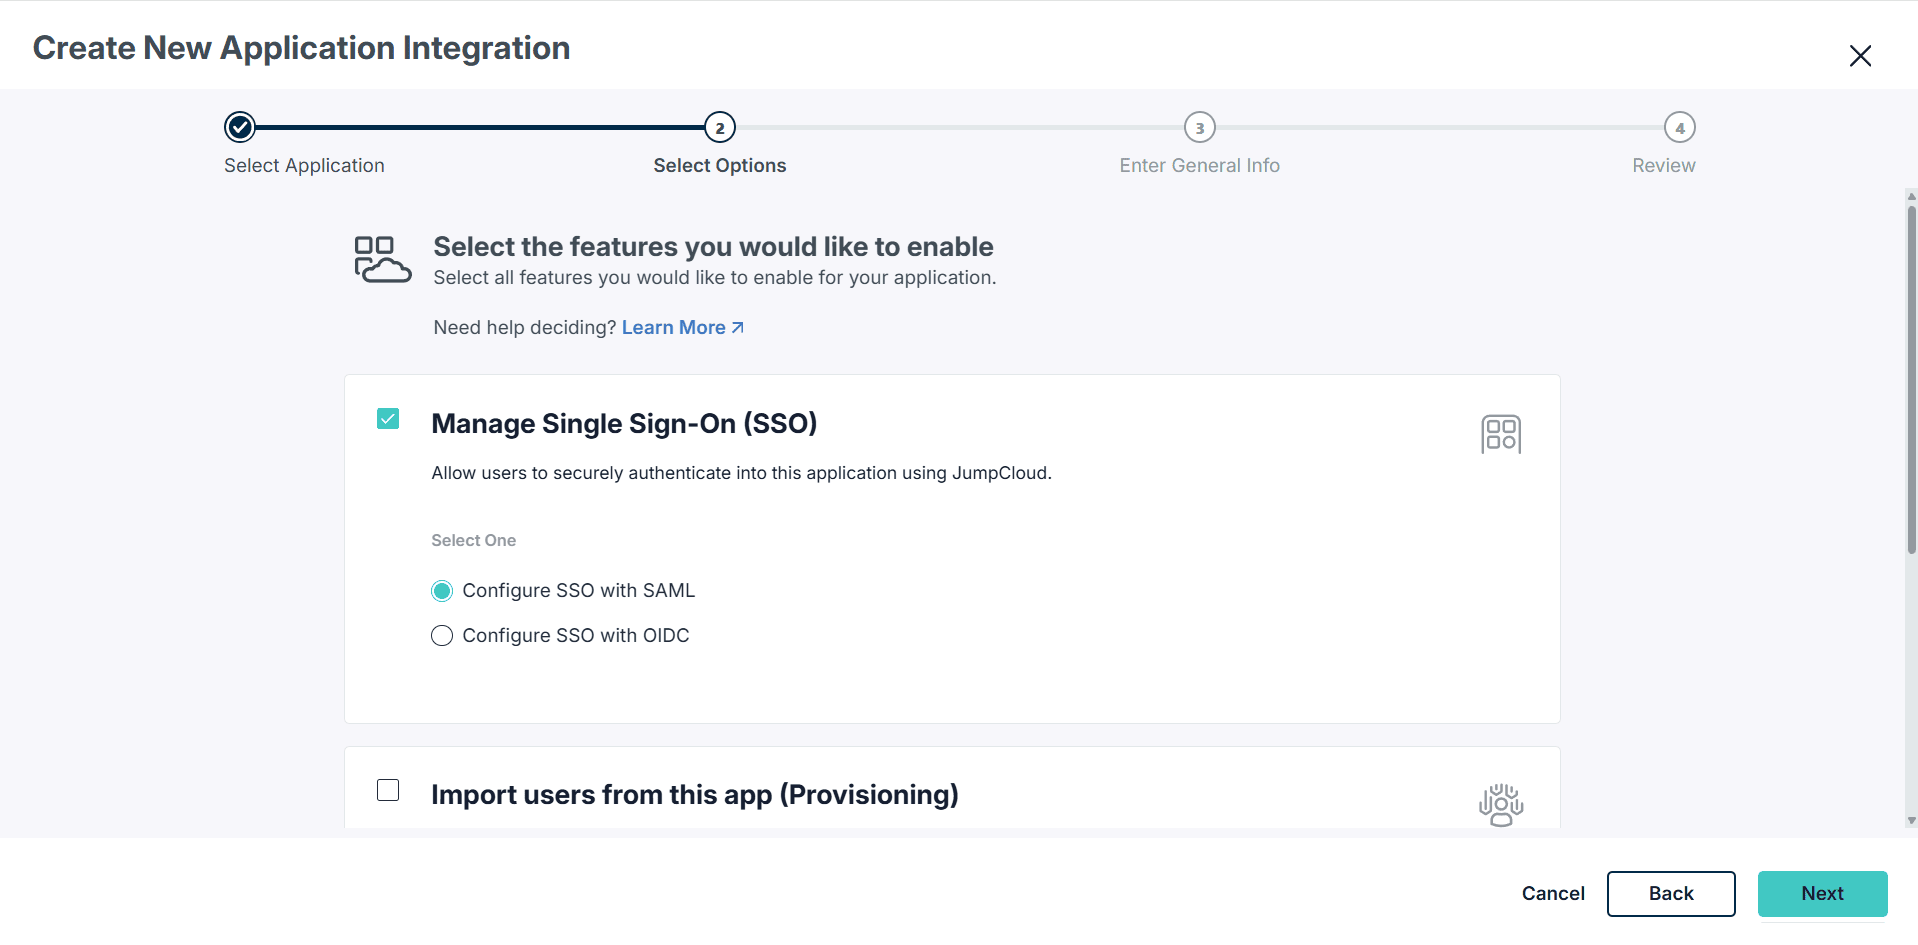
- On the Select Options page, enable Manage Single Sign-On (SSO), then select Configure SSO with SAML from the displayed options, and click Next.
- On the General info page, enter the following details:
- Display Label - Enter a name for the SAML application you are creating for PAM360. For example, PAM360. This name will be displayed to users in the JumpCloud User Portal
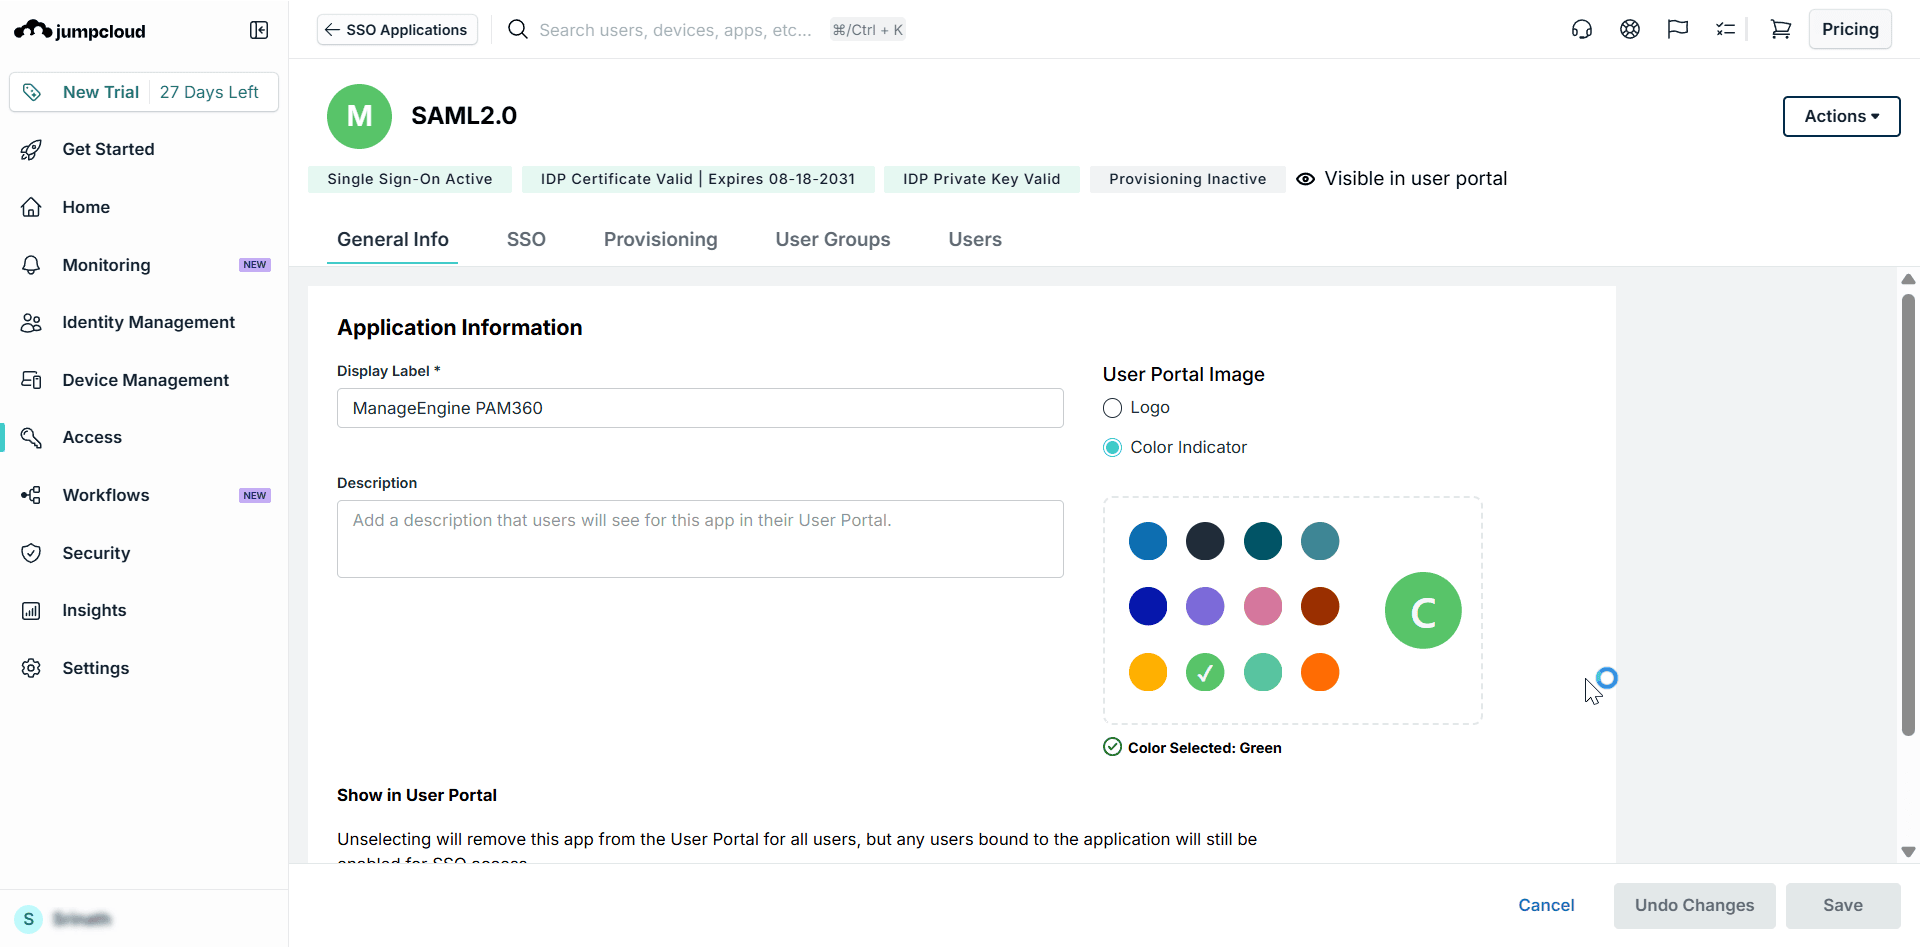
- Description - Enter a brief description of the application.
- Color Indicator - Select the desired color indicator for the PAM360 application.
- Logo - To add a logo, select the Logo radio button and click Choose A File to upload the required image from your machine.
- SSO IdP URL - Expand the Advanced Settings section and specify a unique URL to identify the SAML identity provider for this application. If no value is entered, it will default to https://sso.jumpcloud.com/saml2/<applicationname>.
Caution
The SSO IdP URL is not editable after the application is created. You will have to delete and recreate the connector if you need to edit this field later.
- Display Label - Enter a name for the SAML application you are creating for PAM360. For example, PAM360. This name will be displayed to users in the JumpCloud User Portal
- Click Save Application to create the custom SAML application for PAM360.
- The summary page of the newly created PAM360 application will appear. Click Configure Application to configure the service provider (i.e., PAM360) details and obtain the identity provider (i.e., JumpCloud) details required for PAM360.
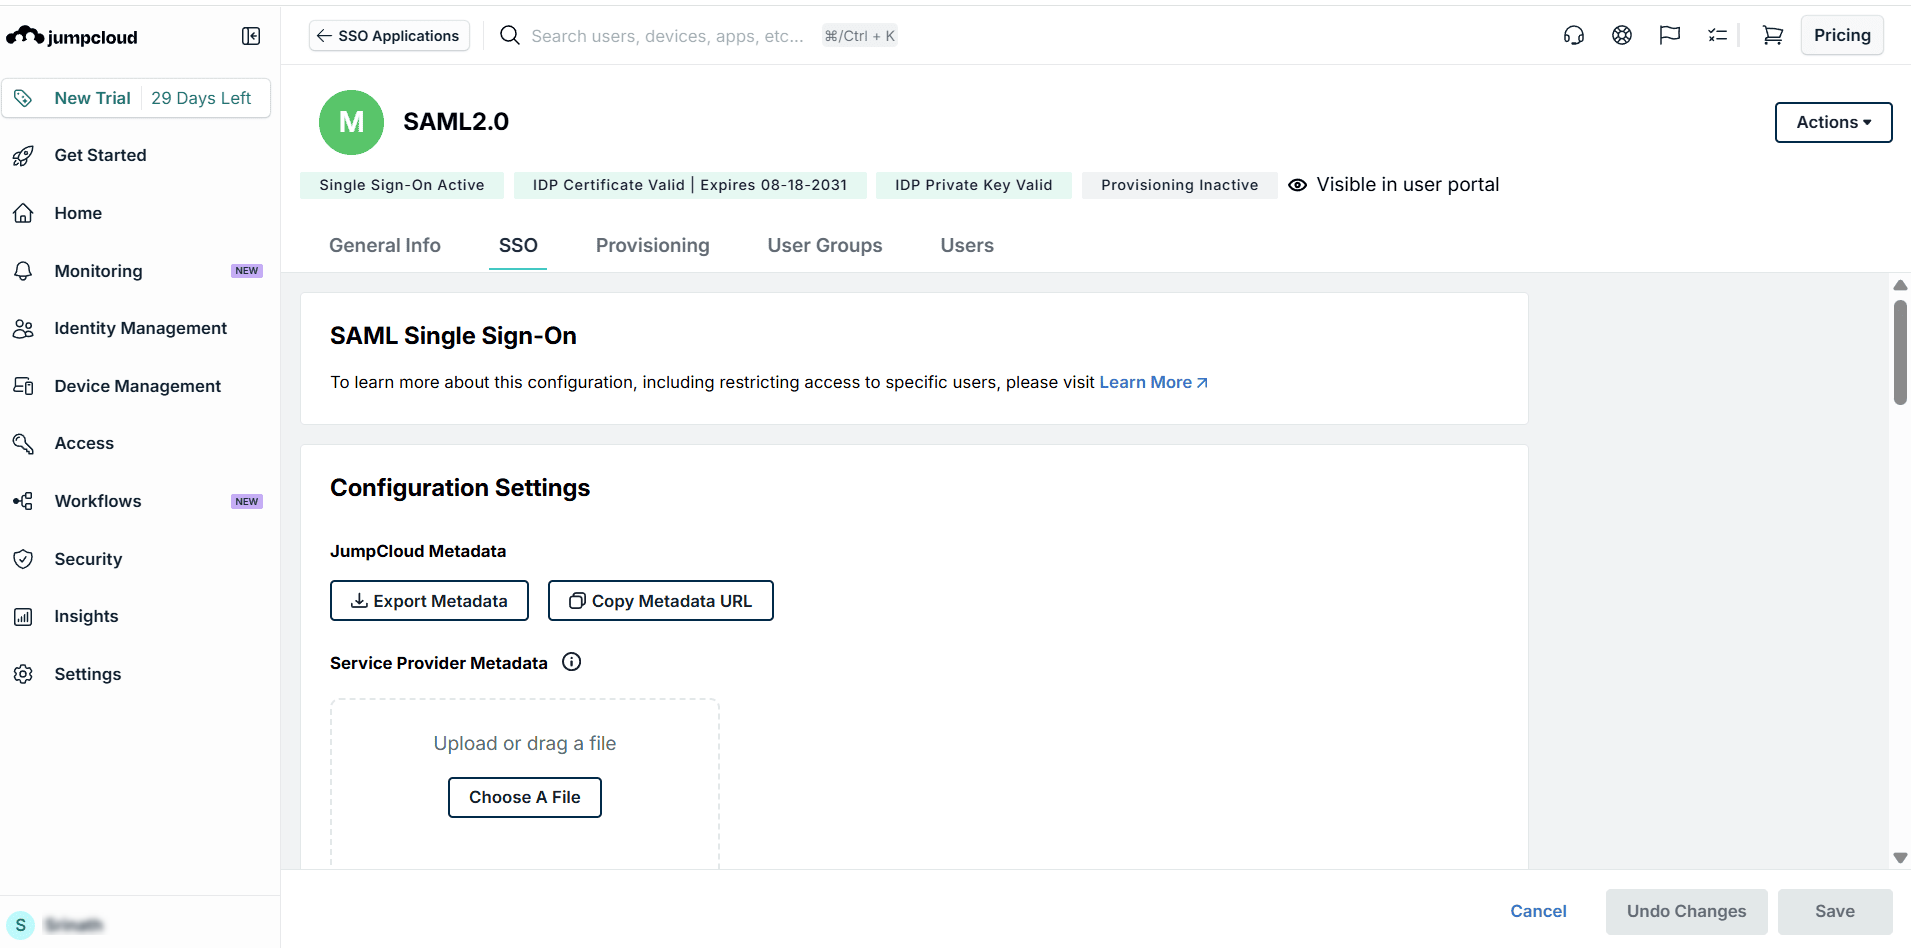
- On the PAM360 application page, under Configuration Settings, click on Export Metadata to download JumpCloud's IdP details as an .xml file to your machine. This file is required to configure the IdP details on PAM360.
- Configure the PAM360 Service Provider details in JumpCloud. You can either upload the metadata.xml file downloaded from PAM360 or enter the details manually. Click on Choose A File, select the required file from your machine, and click Open to configure the SP details using the metadata.xml file. When you upload the metadata.xml, the SP Entity ID, ACS URLs, and the Sign fields will be auto-filled.
- Alternatively, you can also enter the following details manually to complete the configuration:
- SP Entity ID - Enter the PAM360's entity ID in this field. This uniquely identifies PAM360 as the SAML Service Provider.
- ACS URLs - Click Add URL and enter the Assertion Consumer Service (ACS) URL generated by PAM360. This is the PAM360 endpoint to which JumpCloud sends the SAML response after authenticating the user.
- IdP Entity ID - Enter a unique identifier for JumpCloud as the Identity Provider. This value should be unique and match the IdP Entity ID configured in PAM360.
- SAMLSubject NameID - Select the user attribute that matches the PAM360 username. JumpCloud provides attributes such as email, username, first name, last name, alternate email, and description as default NameID options. Ensure that the selected attribute matches the PAM360 username of the users in your environment.
- SAMLSubject NameID Format - Select the required NameID format. Ensure that the format configured here matches the NameID format configured in PAM360.
- Signature Algorithm - RSA-SHA 256 is selected by default. It is recommended to retain this setting. Ensure that SHA256 is selected as the algorithm in PAM360.
- Sign - PAM360 signs both the SAML assertion and response. Enable the Assertion and Response radio button.
- Default Relay State - Leave this field blank.
- Login URL - Leave this field blank.
- After entering the required details, click Save to save the SAML configuration.
If none of the default NameID attributes match the PAM360 username used in your environment, create a custom user attribute in JumpCloud and configure it as the SAMLSubject NameID. JumpCloud supports configuring custom user attributes at the user-group level. Explore this link for more information about creating custom user attributes in JumpCloud.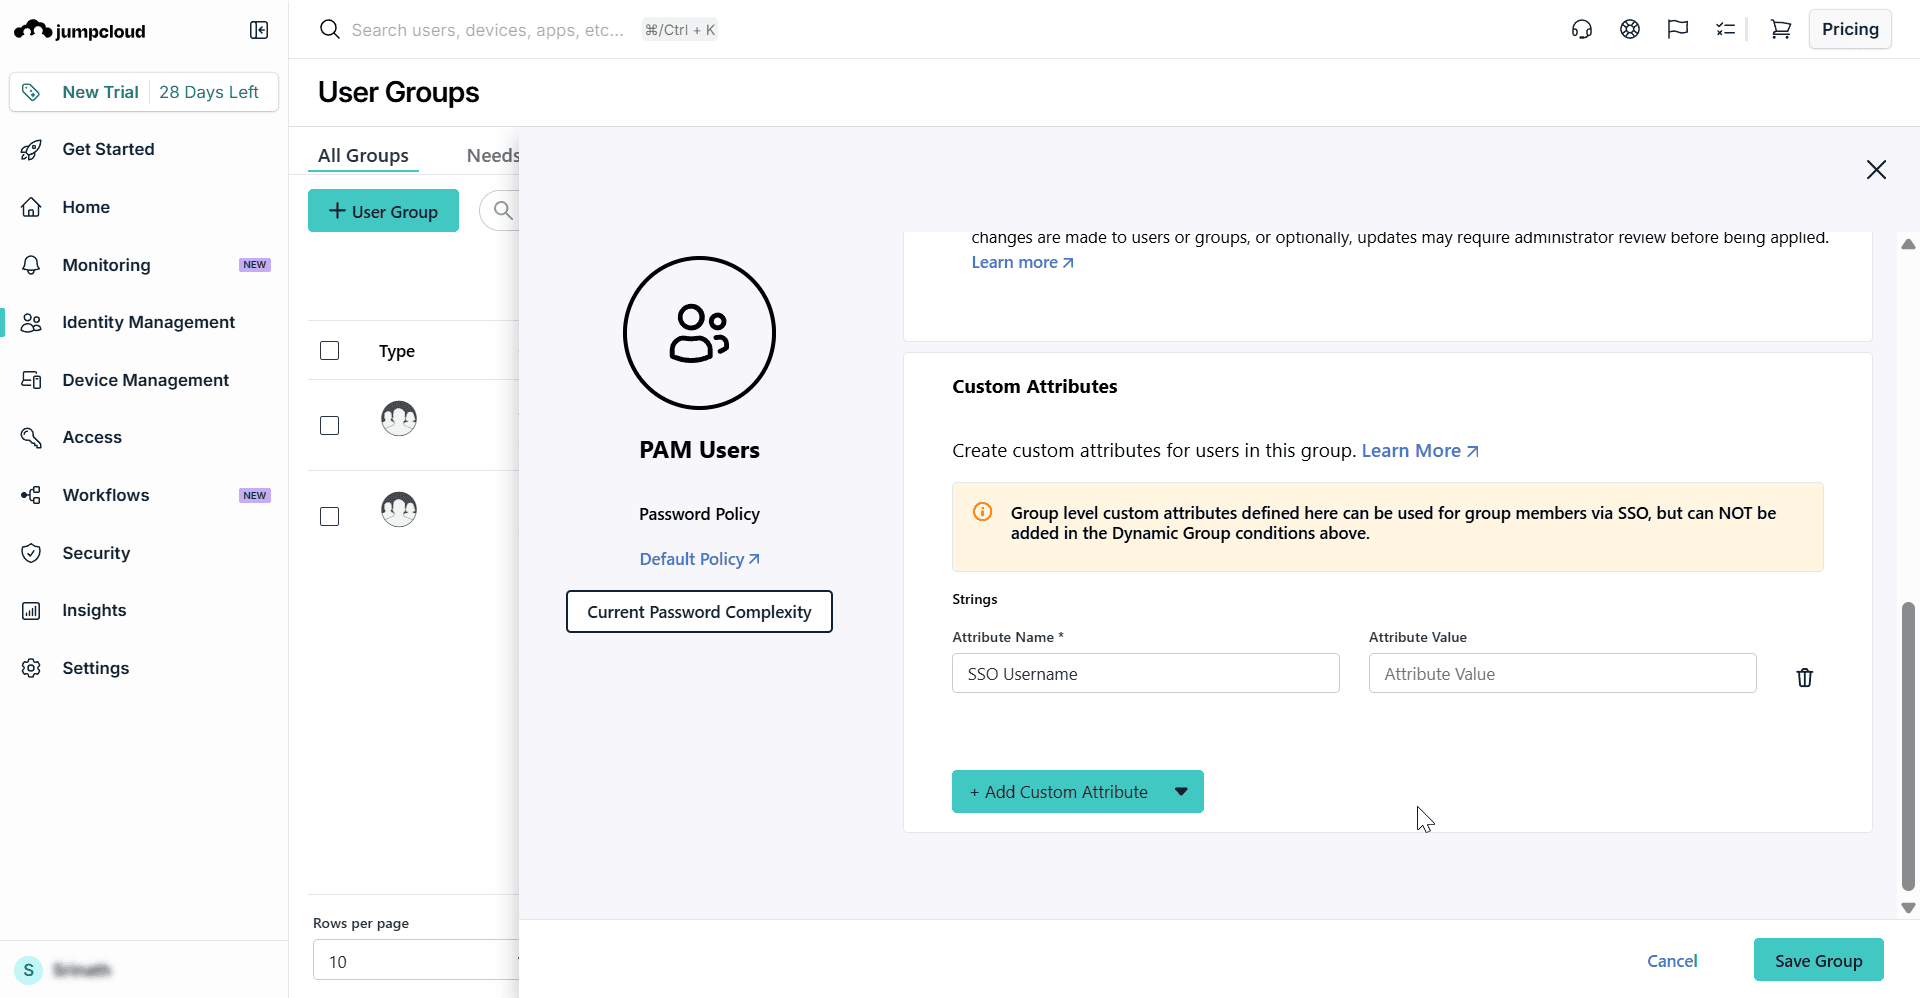
3. Assigning JumpCloud Users to PAM360 Application
Follow these steps to assign JumpCloud users to the PAM360 application.
- Navigate to Access >> SSO Applications and click the PAM360 application on the Configured Applications page.
- On the PAM360 application page, switch to the User Groups tab.
- Here, you will see the list of all the user groups in your JumpCloud directory. Select the user group that contains users who require access to PAM360 and click Save in the bottom-right corner.
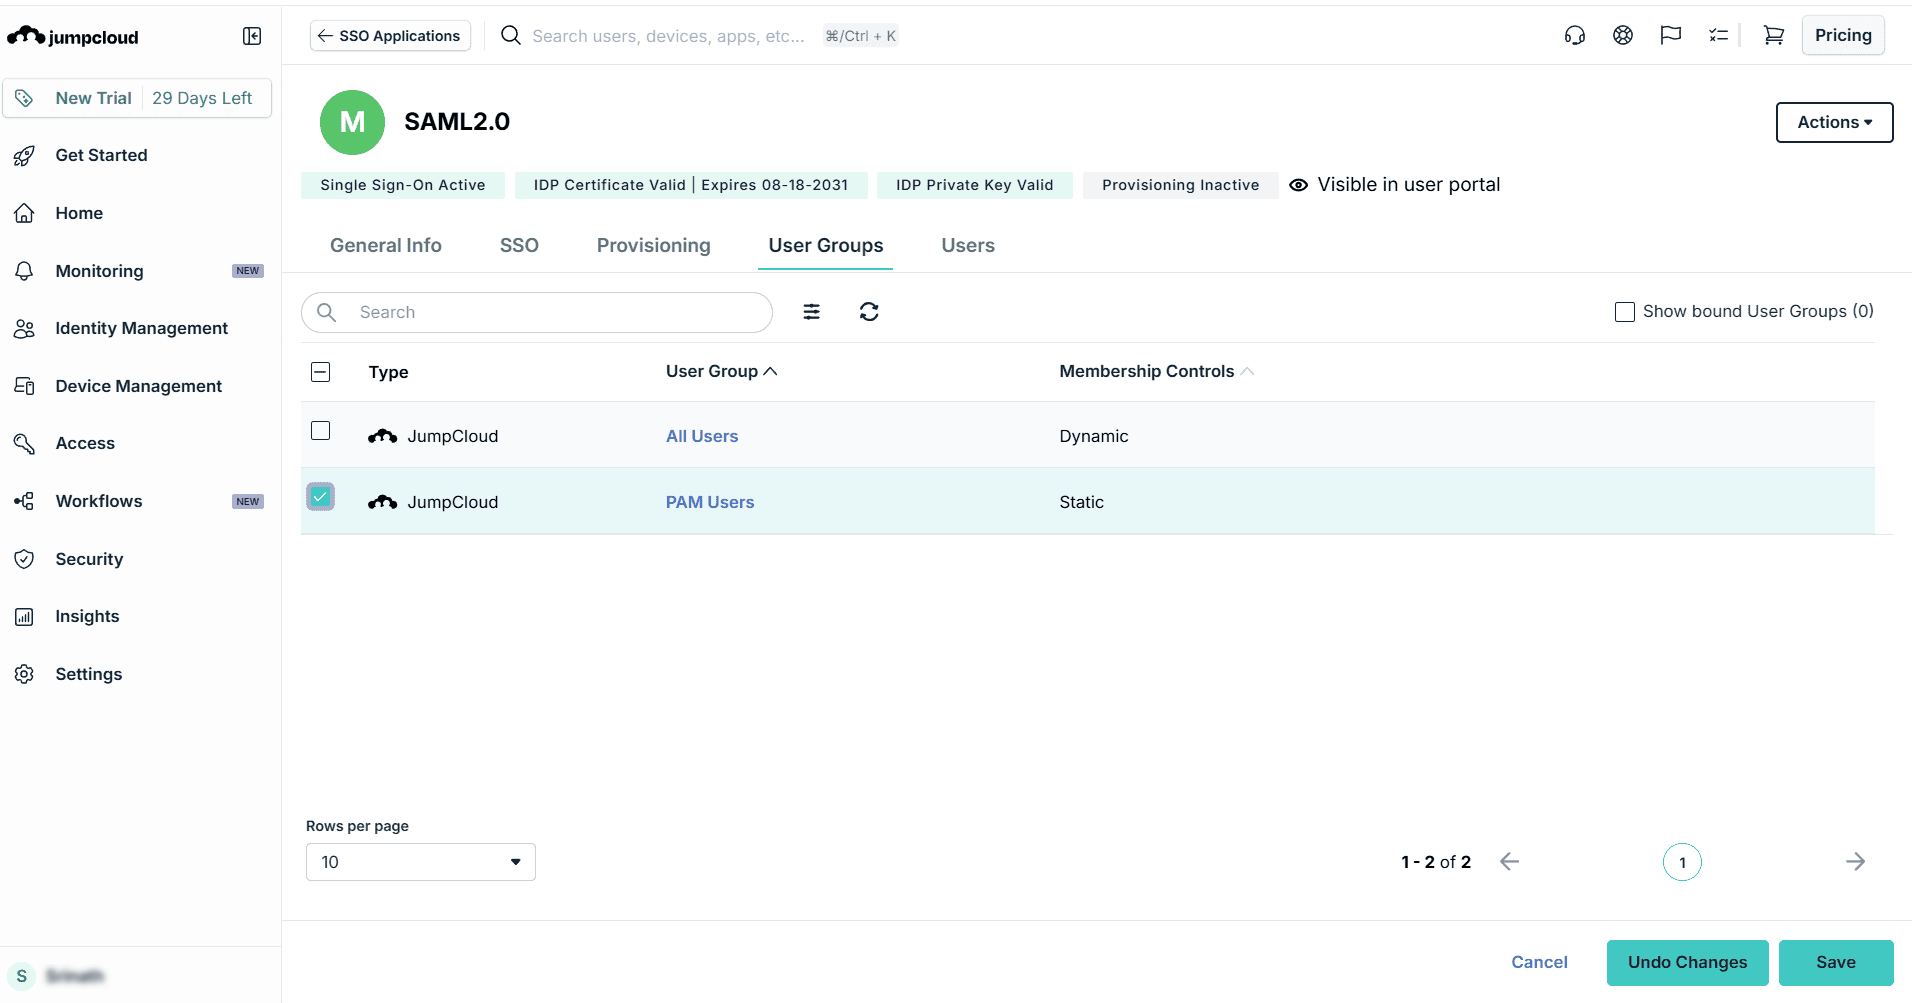
The selected user group is now associated with the PAM360 application. Switch to the Users tab to view the users who have been assigned access to the application.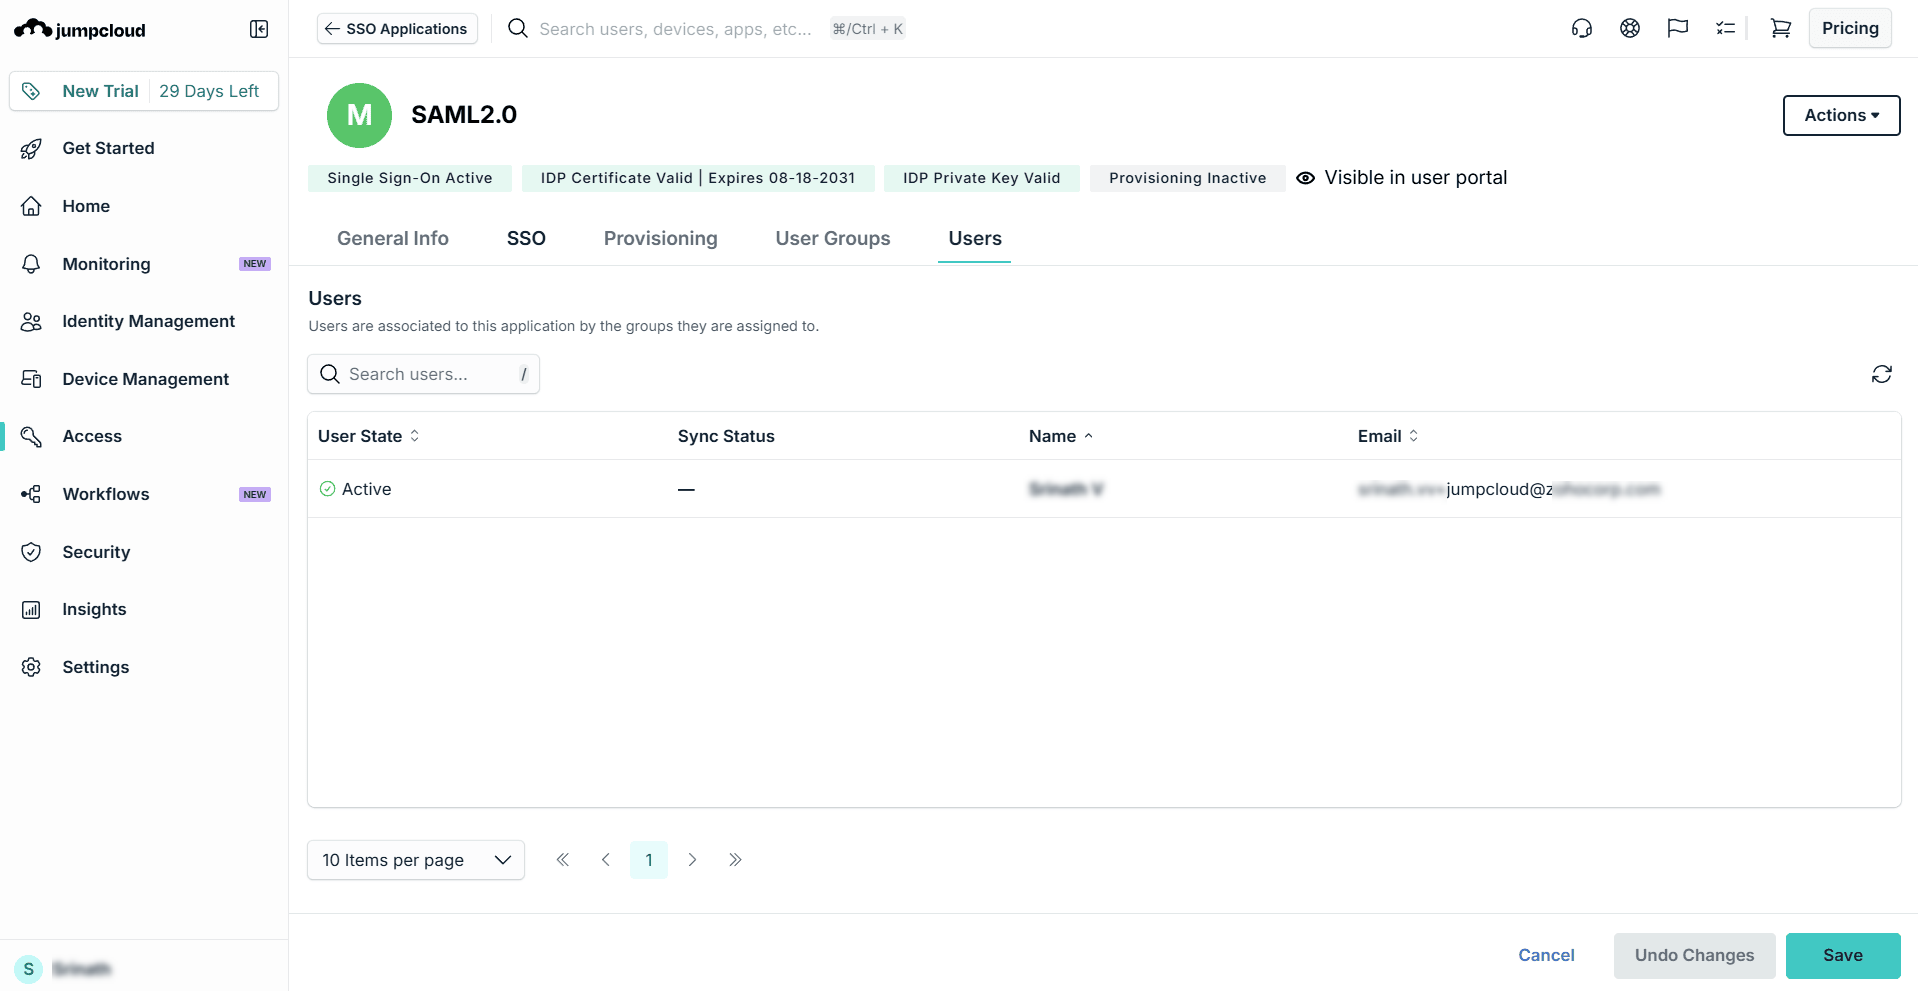
The PAM360 application will be displayed in the JumpCloud User Portal for the assigned users. Users can click the application to access PAM360 through SSO without re-authenticating.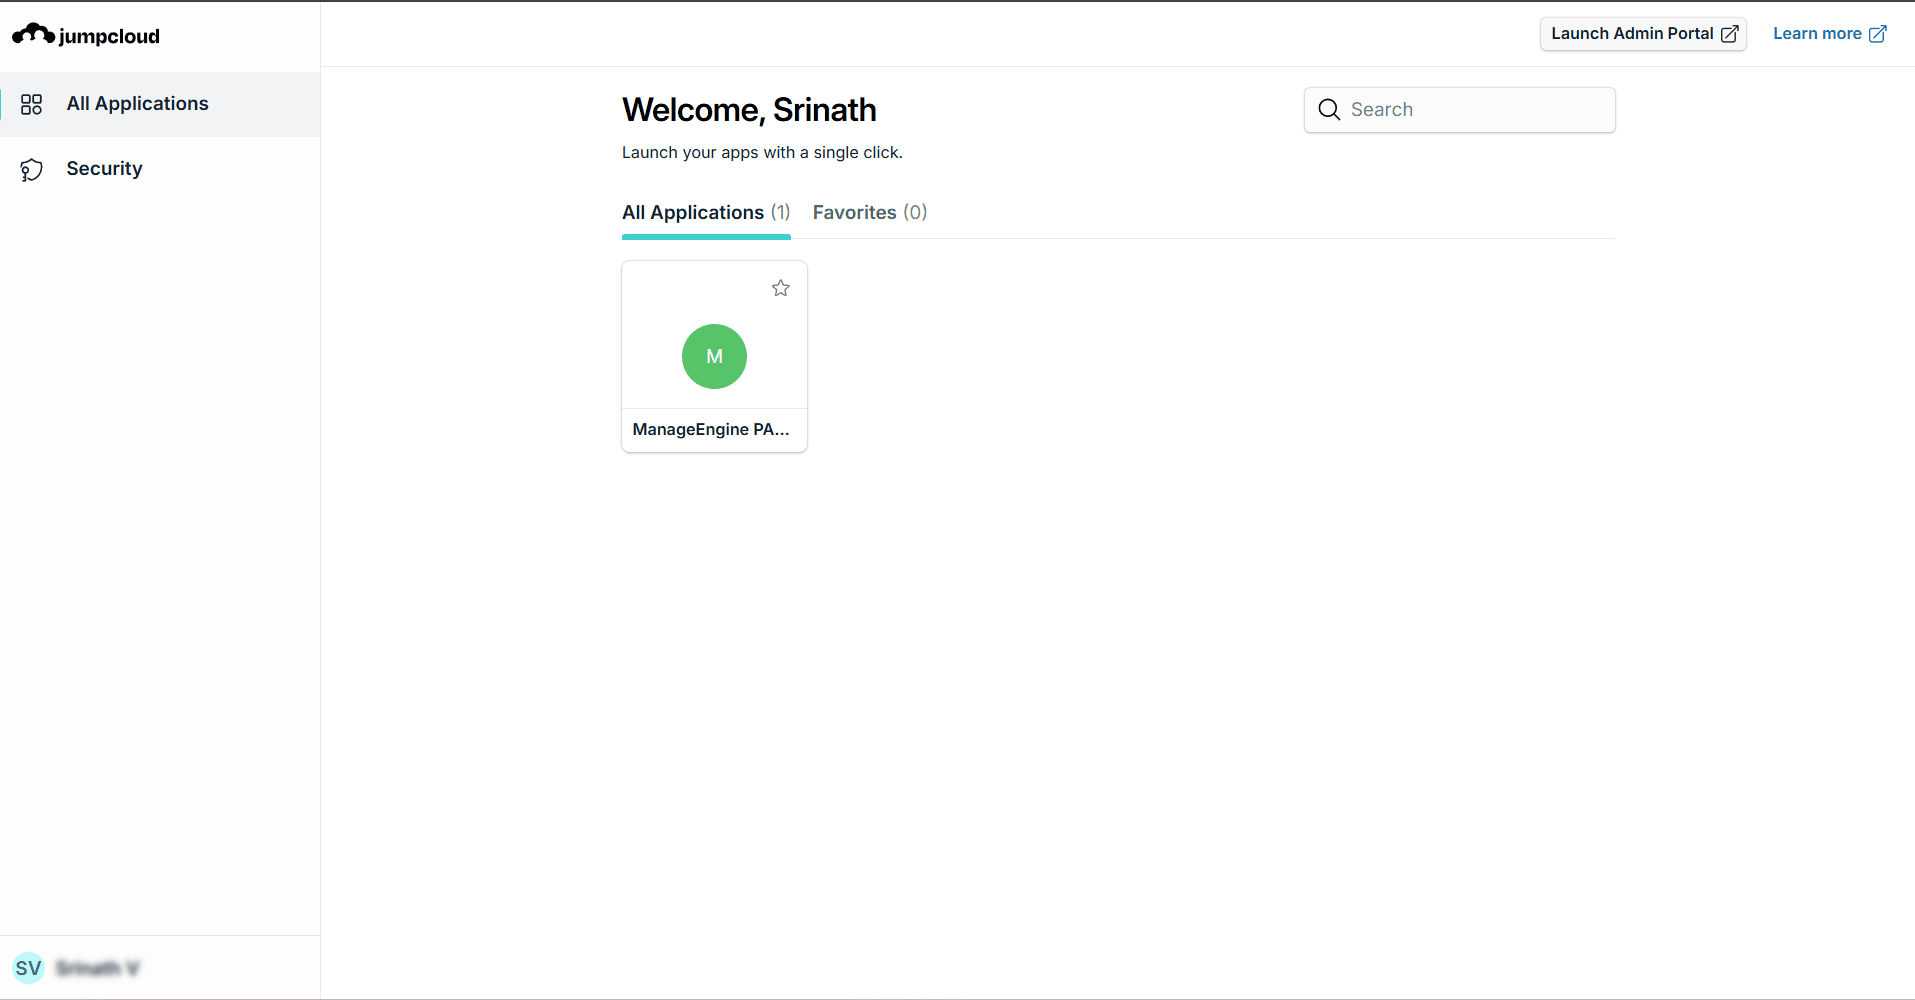
4. Configuring JumpCloud as the Identity Provider in PAM360
Upon setting up PAM360 as a service provider in the JumpCloud portal, configure JumpCloud as an identity provider in PAM360 to establish it as a trusted entity. Access the PAM360 browser window and proceed with the IdP configuration starting from Step 2: Configure Identity Provider Details. Follow the instructions provided in this link to complete Step 2 (Configure Identity Provider Details) and Step 3 (Configure SAML Properties) for setting up JumpCloud as the IdP for your desired access URL in PAM360.