Active Directory Synchronization Schedules
Access Manager Plus allows you to configure auto-synchronization with Active Directory (AD) for a specific group or OU of an AD domain. This will ensure that the user database in Access Manager Plus is always in sync with the AD user database.
To set up a synchronization schedule, enter a time interval while importing users from AD. Once the schedule is set, Access Manager Plus will query the Active Directory at the specified intervals to keep the user database updated. The time interval could be as low as a minute or it can be in the range of hours/days.
Click here to learn how to import users from Active Directory.
Summary of Steps
- Viewing Synchronization Schedules
- Editing Synchronization Schedules
- Editing Domain Details
- Deleting Synchronization Schedules
- Deleting a Domain
1. Viewing Synchronization Schedules
To view the synchronization schedule set for different AD domains, follow the below steps:
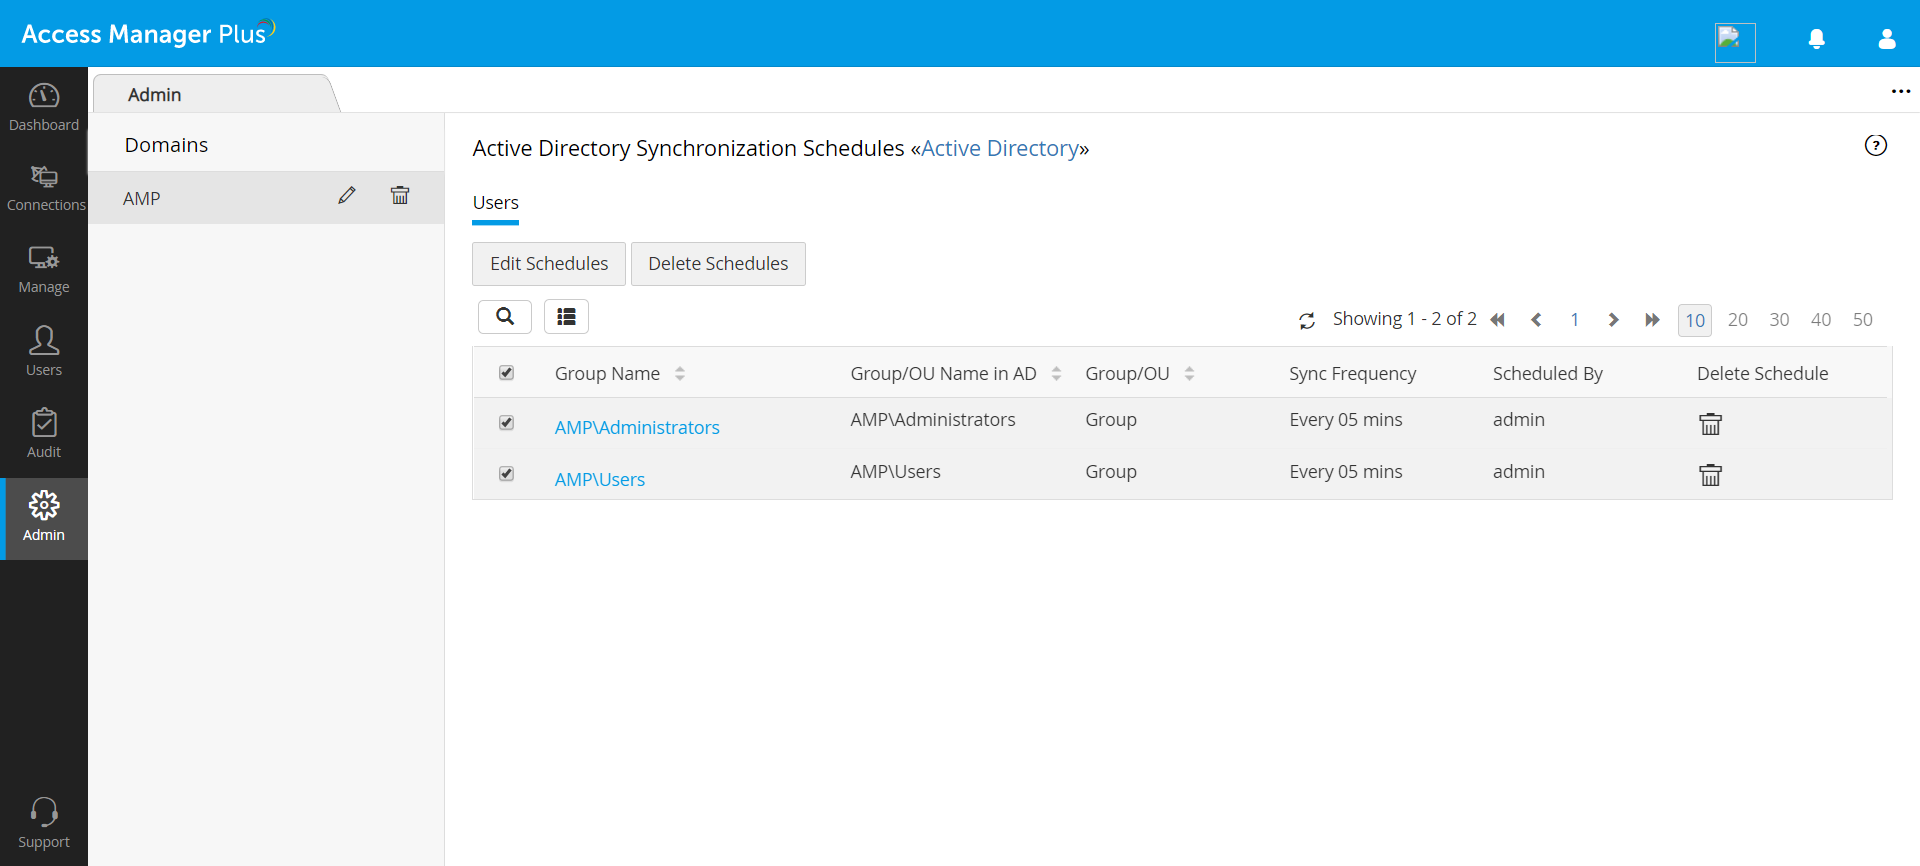
- Go to Admin >> Authentication >> Active Directory and click View Synchronization Schedules
- In the Active Directory Synchronization Schedules page, synchronization schedules configured for various groups or OU will be displayed
- All AD domains for which synchronization is configured will be listed in the left pane
- From the Active Directory Synchronization Schedules page, you can edit or delete schedules.
2. Editing Synchronization Schedules
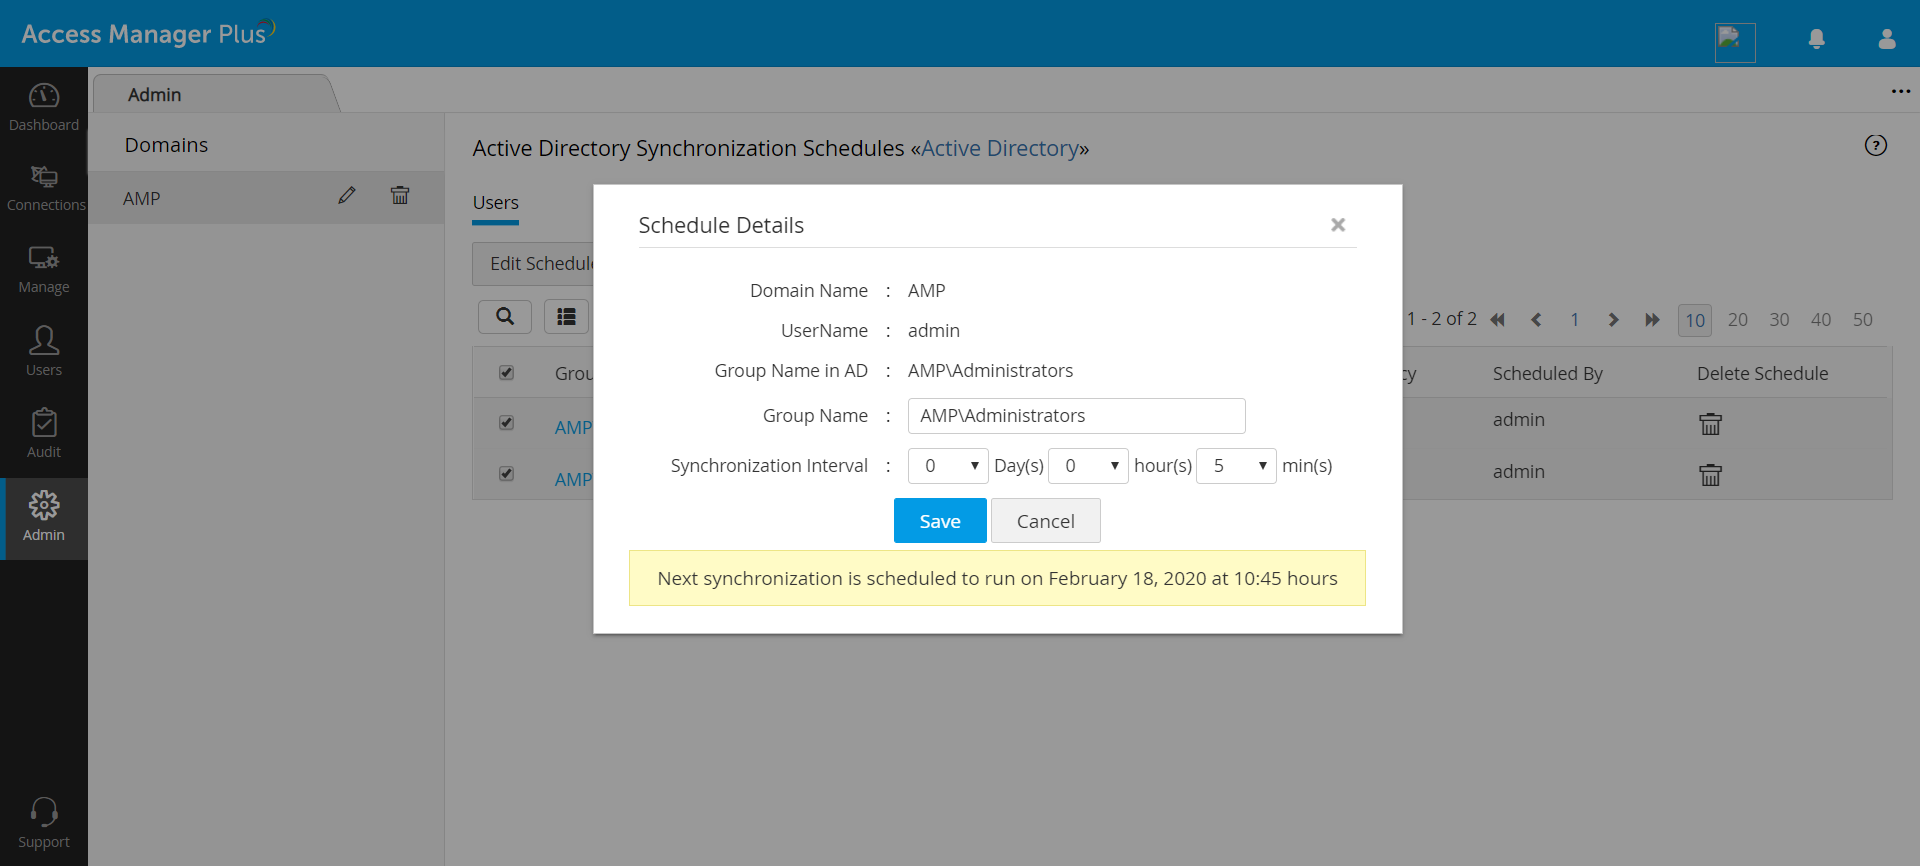
- To edit schedule details for a particular group, click the respective Group Name.
- Schedule Details for that particular group will open up. Here, the Domain Name, UserName, Group Name in AD will be displayed.
- You can edit the Group Name displayed in Access Manager Plus. Editing the group name here will not affect the original Group/OU name in Active Directory.
- Edit the synchronization interval by choosing a new time interval using the drop-downs.
- Click Save. The new synchronization interval will be saved.
- Alternatively, you can provide the same synchronization interval for a number of groups in bulk. Select the groups using the check-boxes and click Edit Schedules from the menu bar at the top. Here, set a new synchronization interval for the selected groups. This action will override any previously set schedule interval for the groups and update the current one.

3. Editing Domain Details
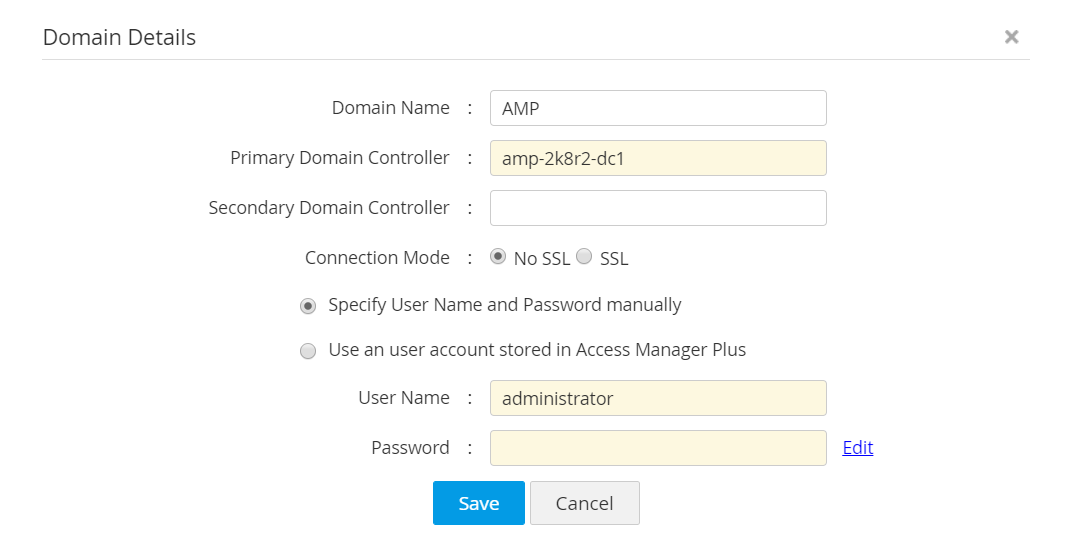
- Locate the required domain from the left pane and click the 'edit' icon beside it.
- In the Domain Details dialog box, edit the attributes such as Domain Name, Primary Domain Controller, Connection Mode and User credentials.
- Click Save to save the new domain.
Note: Once you have modified the details of a domain, Access Manager Plus will use the modified details the next time it tries to communicate with the domain for data synchronization.
4. Deleting Synchronization Schedules
- To delete an individual schedule, click the 'delete' icon under Delete Schedule beside the required Group Name. Click OK in the confirmation dialog box that pops up.
- To delete multiple schedules in bulk, select the required schedules using the check box beside them and click Delete Schedules from the menu bar at the top.
5. Deleting a Domain
- Locate the required domain from the left pane and click the 'delete' icon beside it.
- Once a domain is deleted here, all synchronization schedules configured for user import from that particular domain will be completely removed. To set up user sync again, go to Admin >> Authentication >> Active Directory >> Import Now (or) Manage >> Discover.