Mail Server Settings
Once the administrator creates an account for the users, Access Manager Plus sends email notifications to users with their account details. The email sent from Access Manager Plus will serve as both a notification and contain vital information such as access URL and credentials for login. Hence, it is essential to configure mail server settings in Access Manager Plus before adding users. Access Manager allows you to configure the SMTP mail server used in your environment or an external mail server - Microsoft Exchange Online, that permits OAuth 2.0 authentication for all emails sent from Access Manager Plus.
The following sections will help you to learn about configuring different mail server settings in Access Manager Plus.
1. Configuring Microsoft Exchange Online as the Mail Server
To configure Microsoft Exchange Online as the mail server, create an Azure application in the Microsoft Azure portal to generate required inputs such as Tenant ID, Client ID, and Client Secret for OAuth 2.0 authentication. Follow the below sub-sections for further configuration details:
1.1 Creating an Azure Application in Microsoft Azure
- Log in to the Microsoft Azure portal.
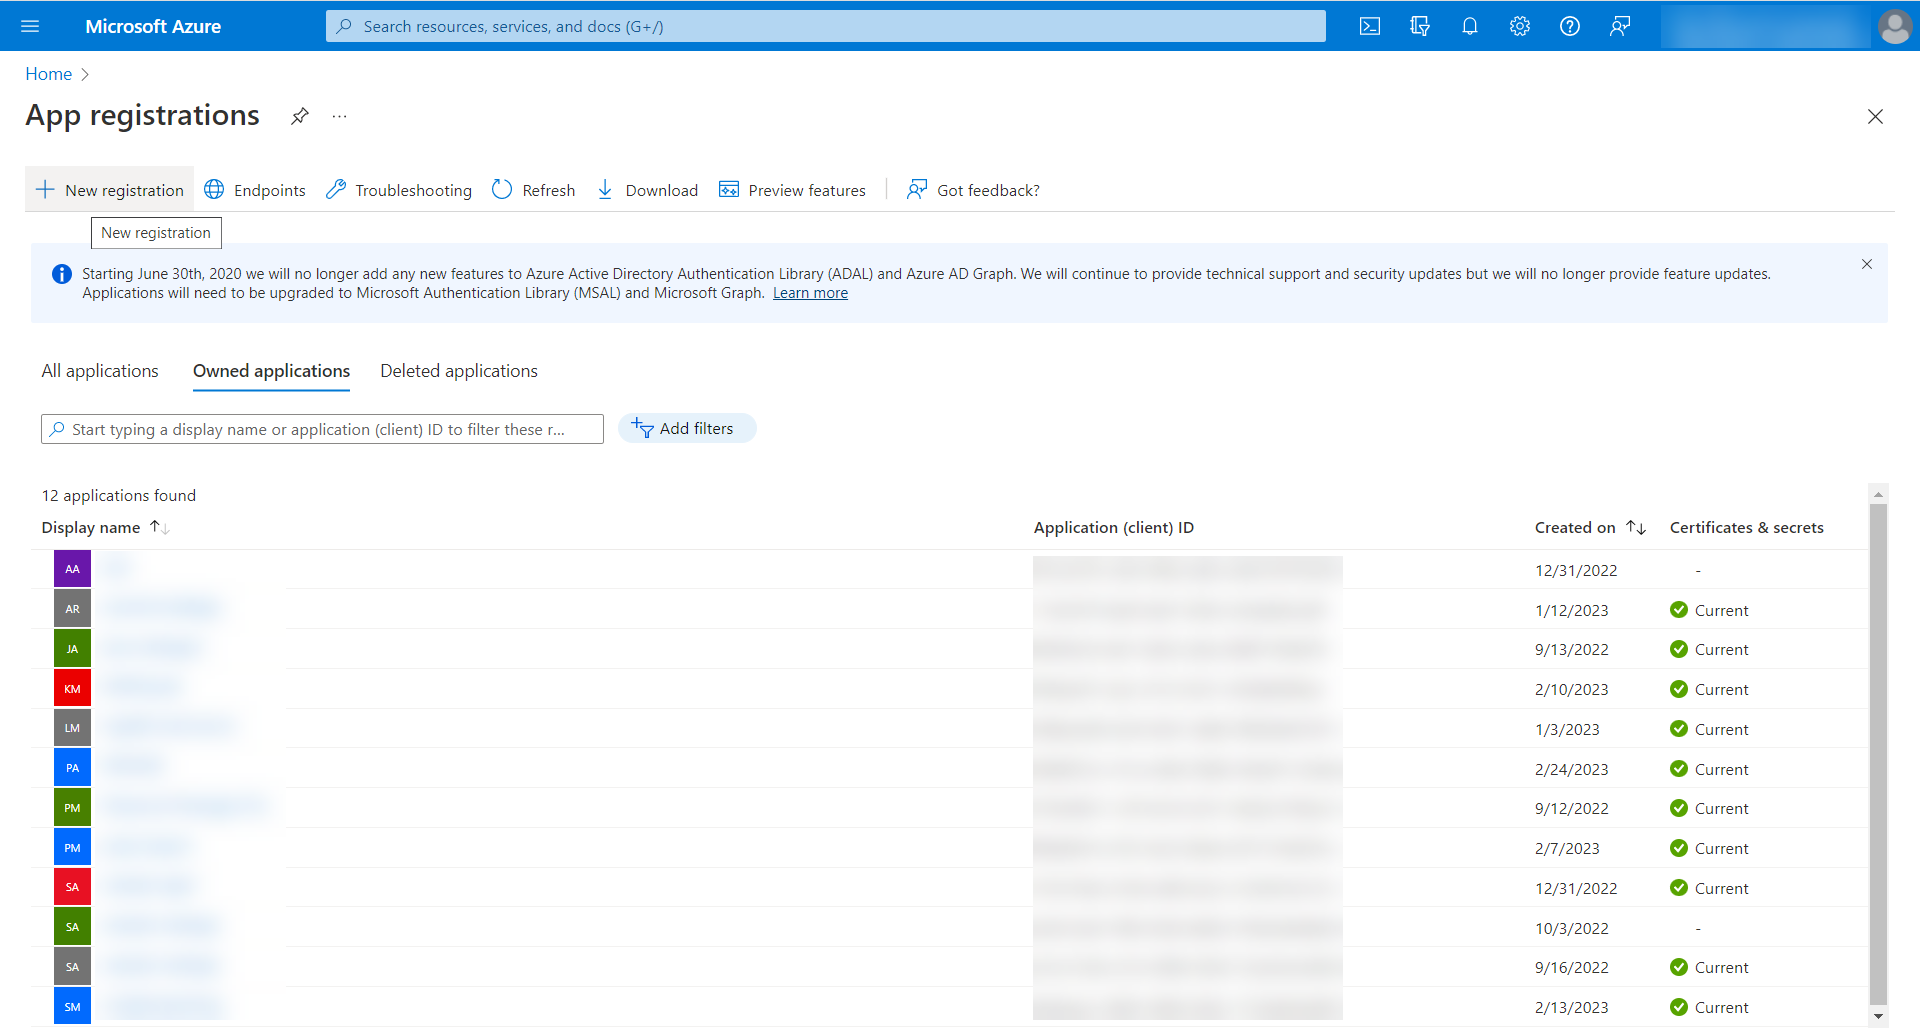
- Click App registrations on the Microsoft Azure home page.
- Click + New registration from the top pane of the App registrations page.
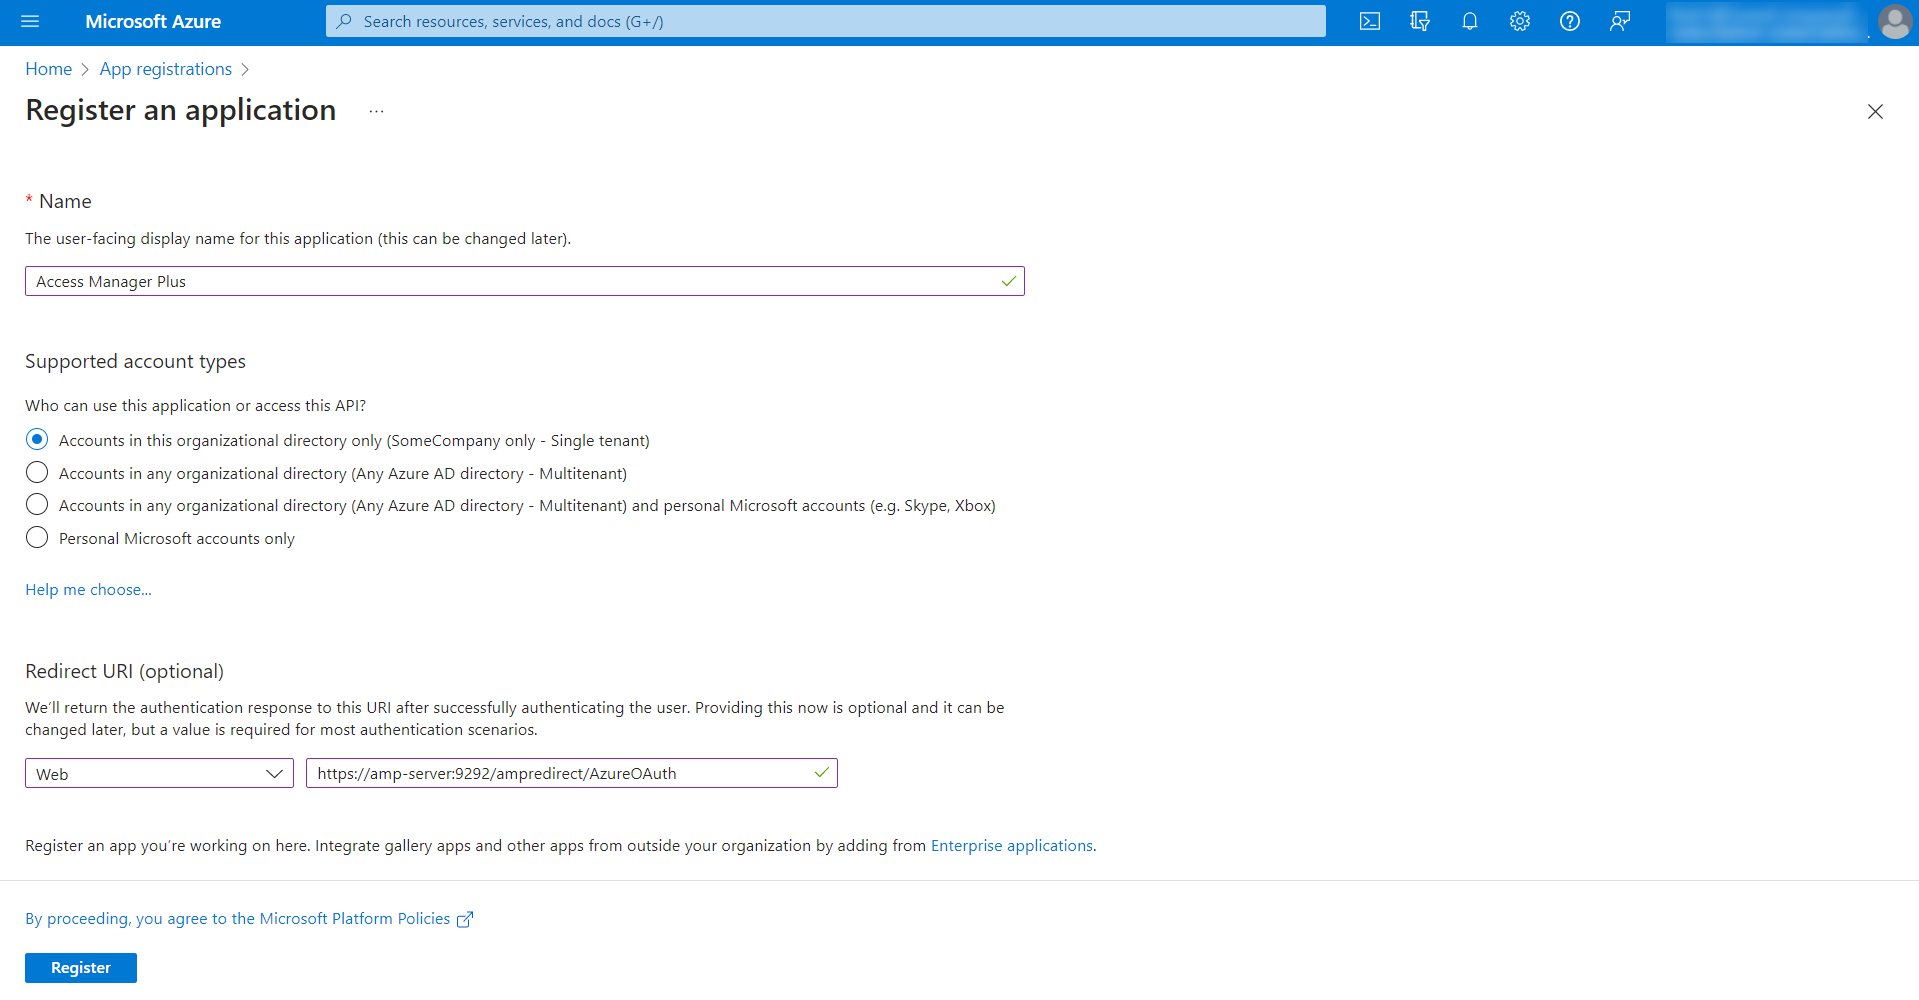
- On the Register an application page, enter the following attributes:
- Click Register to add Access Manager Plus as an application in the Microsoft Azure portal. Now you will be redirected to the page with the essentials of the newly registered application.
- From the left pane, click API permissions under Manage. In the API Permissions page, click + Add a permission.
- In the Request API Permissions page, choose Microsoft Graph.
- Click Delegated Permissions and search for 'SMTP.Send' in the Select Permissions search bar to populate relevant permissions. Select the option SMTP.Send and click Add Permissions.
- Click Delegated Permissions and search for 'offline_access' in the Select Permissions search bar to populate relevant permissions. Select the option offline_access and click Add Permissions.
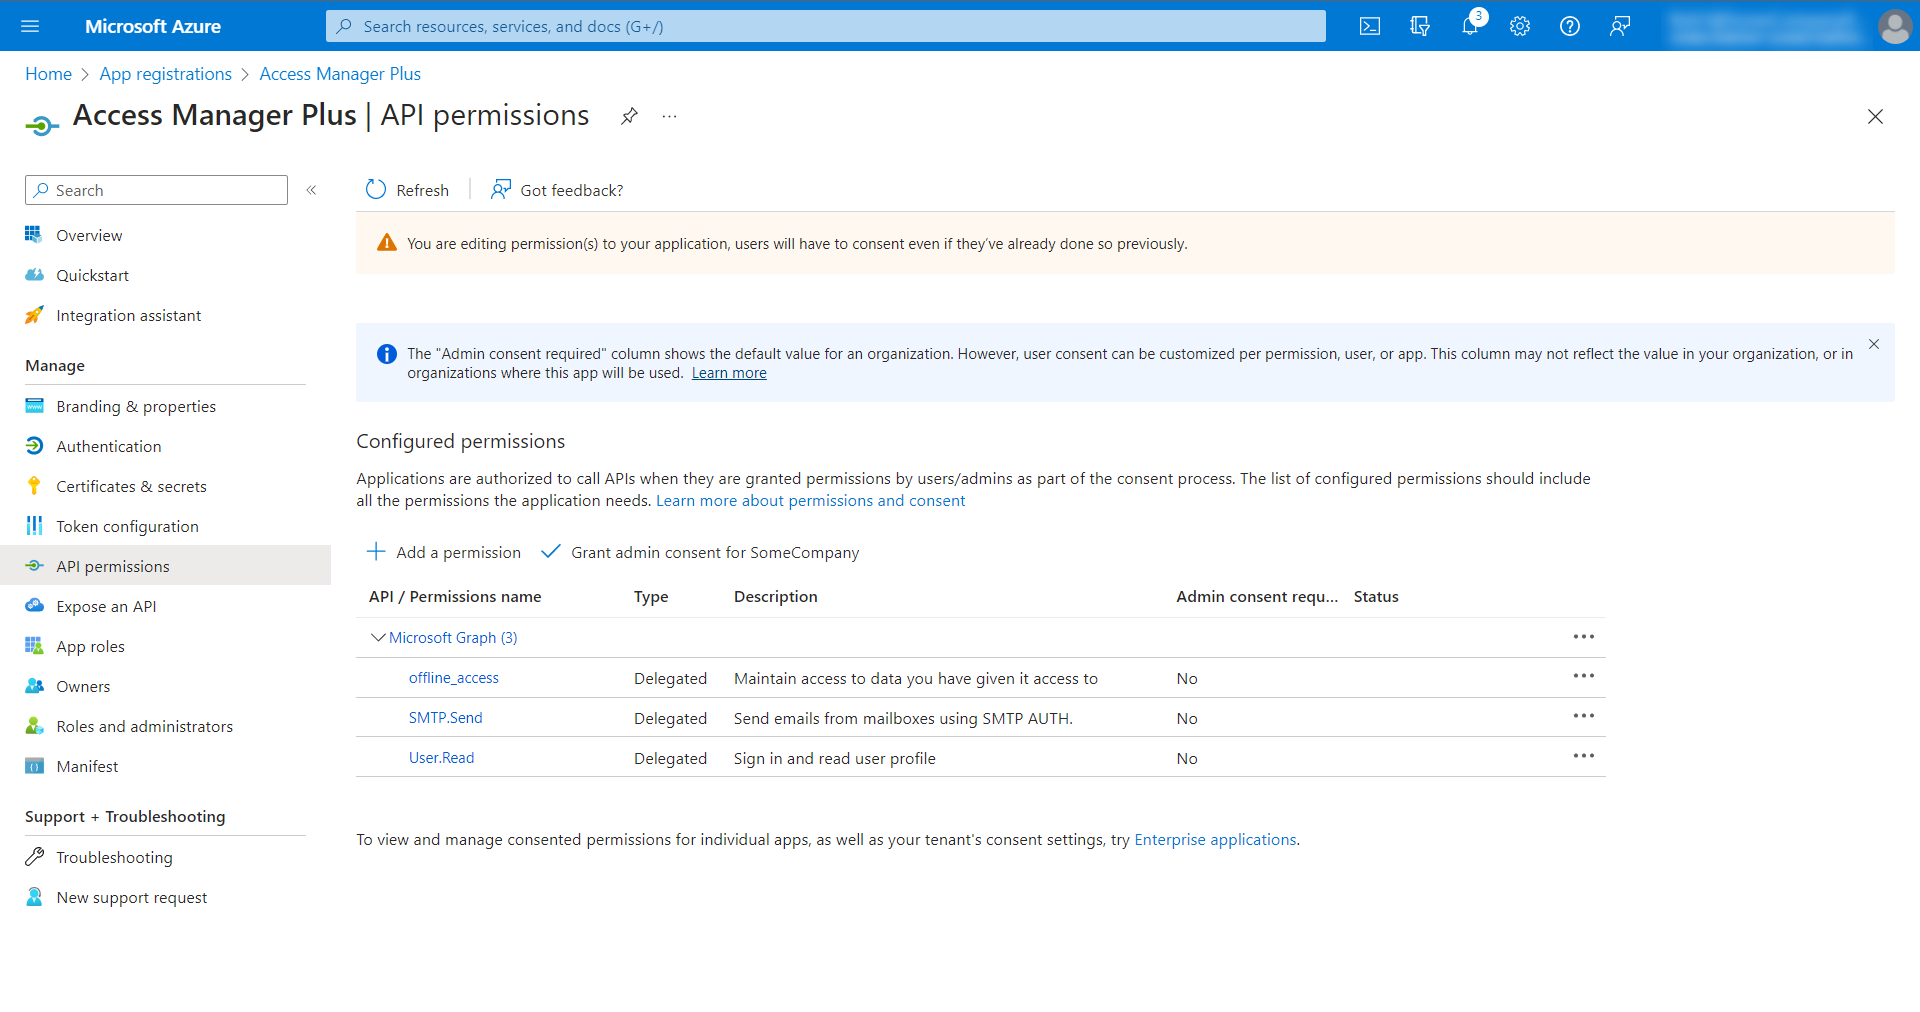
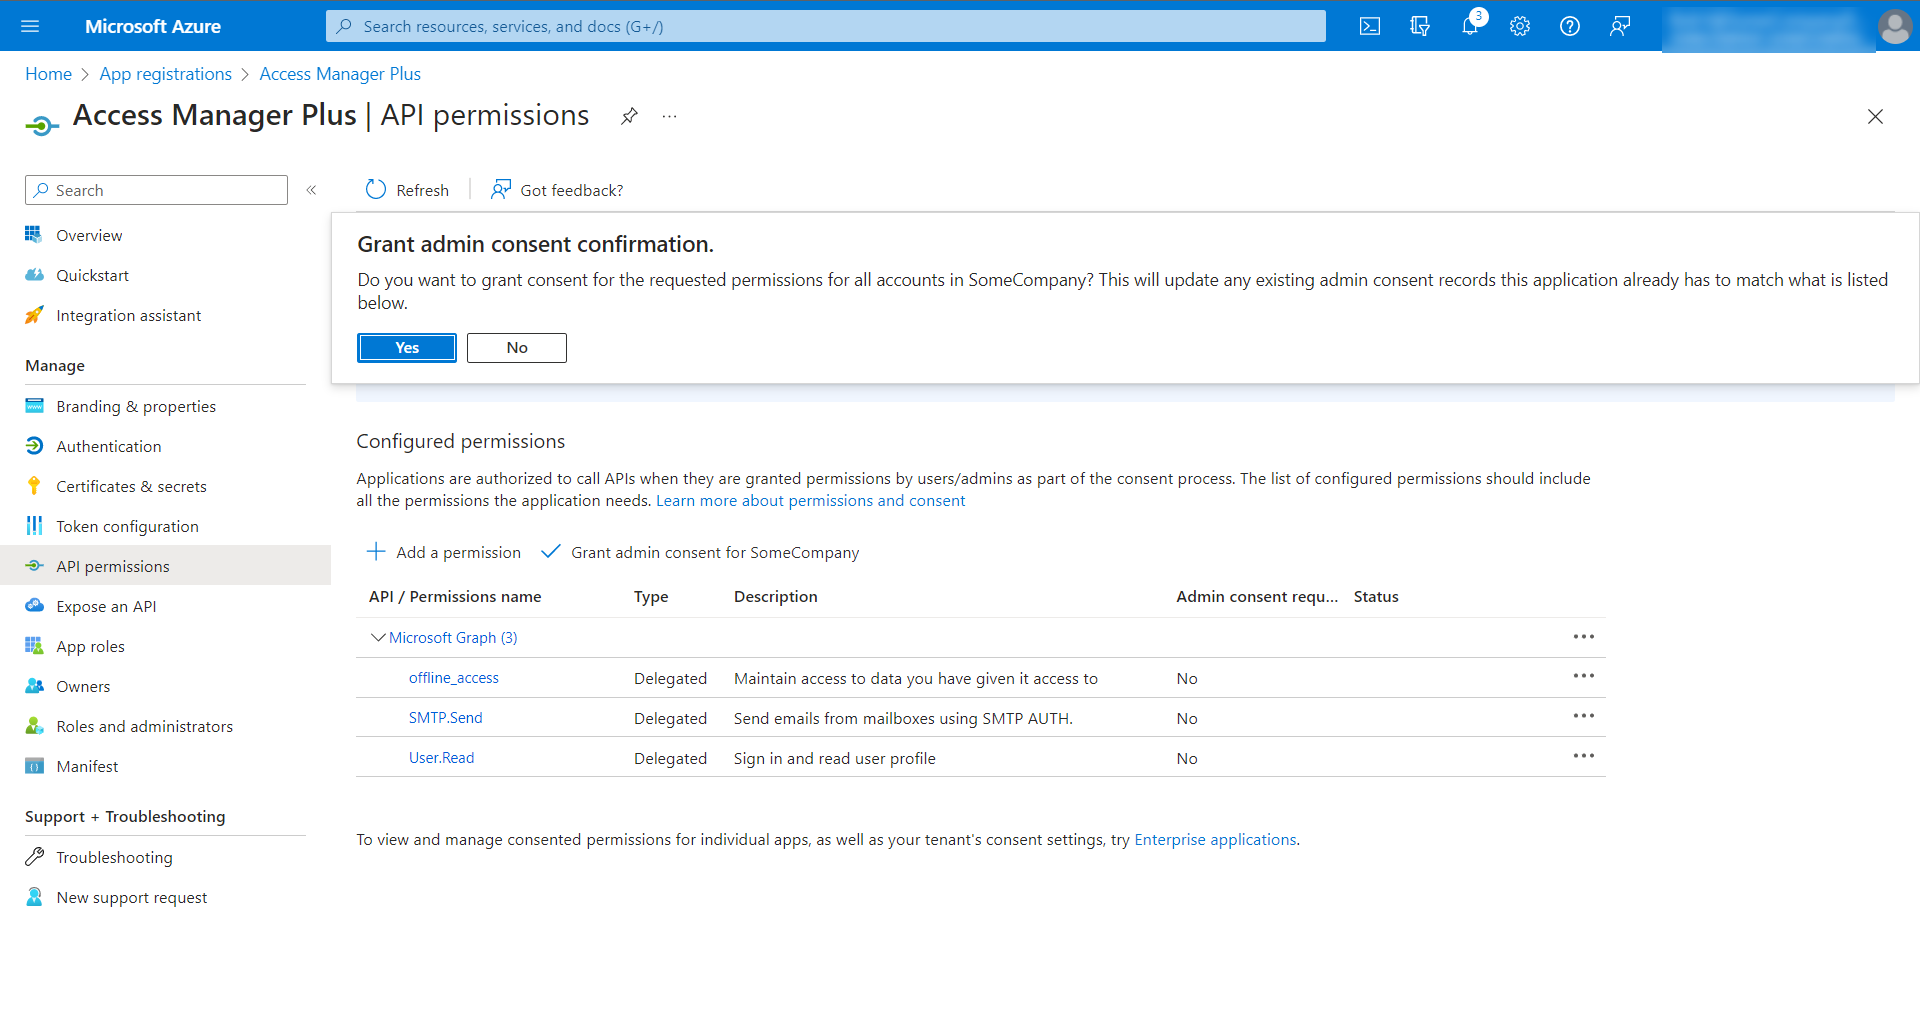
- After adding the required API permissions, click the Grant admin consent button beside + Add a Permission.
- In the pop-up that opens, click Yes to grant consent for the requested permissions.
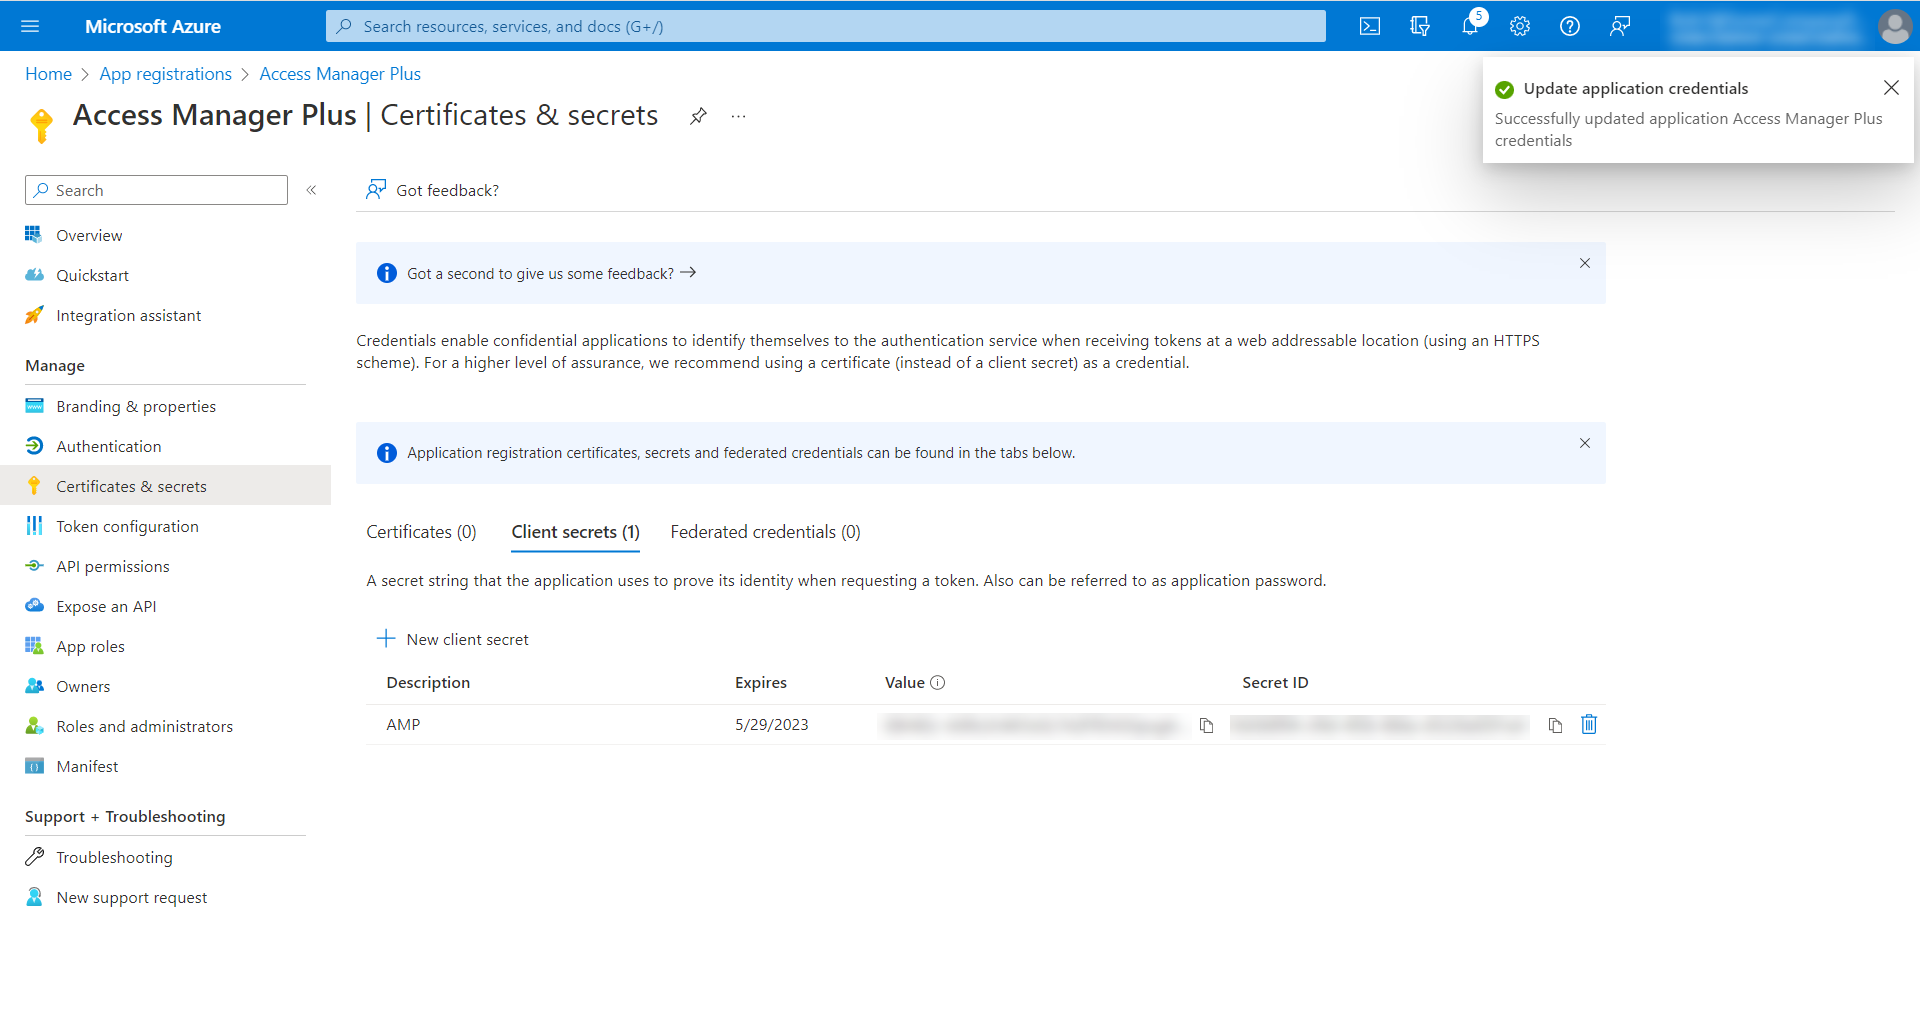
- Click the Certificates & secrets option on the left pane.
- Navigate to the Client secrets tab and click + New client secret.
- Enter a Description, choose an expiry period, and click Add.
- Immediately after the creation, the client secret value will be displayed under the Value column in the table. Copy the value and save it in a secure location. This client secret value will be displayed only once and will not be accessible once you navigate to other pages of the Microsoft Azure portal.
- Once you have registered the application with the appropriate permissions, go to the Access Manager Plus web interface and configure the mail server settings.


1.2 Configuring Microsoft Exchange Online as the Mail Server in Access Manager Plus
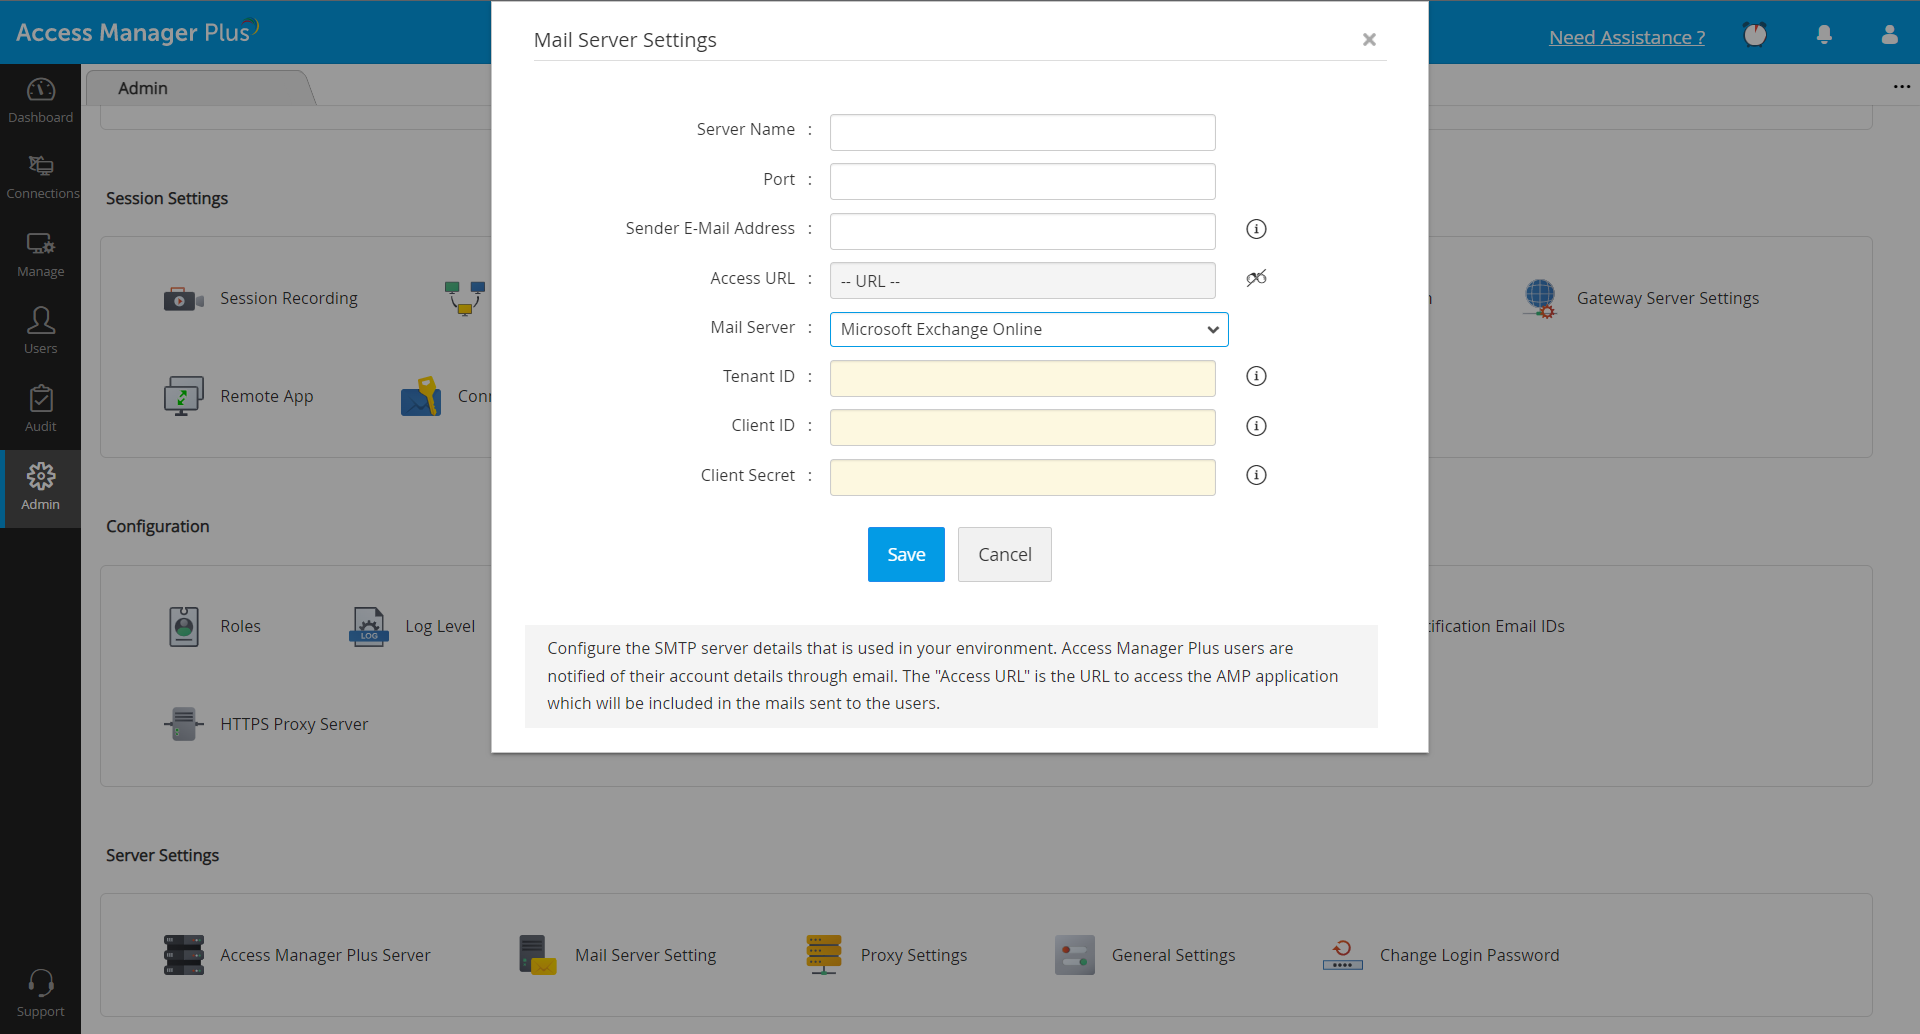
- Navigate to 'Admin >> Server Settings >> Mail Server Setting'.
- In the pop-up that opens, enter the following:
- In the Server Name field, enter the actual SMTP server's name. E.g., smtp.office365.com
- Port - The default port for TLS is 587, and SSL is 465. Enter the port that you are using.
- Choose Microsoft Exchange Online from the Mail Server drop-down.
- Sender E-mail Address - Enter the sender's email address. Make sure that the address you provided here is the same as the email provided in the Microsoft Azure sign-in credentials.
- Access URL - Please ensure that the Access URL is the same as the Redirect URI mentioned in step 4.c. For example, if the mentioned Redirect URI is https://amp-server:9292/ampredirect/AzureOAuth, then the Access URL entered here must be https://amp-server:9292.
- Tenant ID - Enter the directory ID of the Azure application.
- Client ID - Enter the application ID of the Azure application.
- Client Secret - Enter the client secret value created for the Azure application.
- Click Save to save the mail server settings.
You have now configured Microsoft Exchange Online as your mail server for your organization. Once you save the settings, the session will redirect you to the Microsoft Azure portal for the first-time authentication. This is a one-time operation during the mail server configuration.
2. Configuring Other Mail Servers
- Navigate to 'Admin >> Server Settings >> Mail Server Setting'.
- In the pop-up that opens, enter the following:
- Server Name: Enter the name of the SMTP server used in your environment E.g. manageengine.360.com.
- Port - Enter a valid port number. By default, most SMTP servers work with port 25. However, the default port for TLS is 587, and SSL is 465. If you are choosing TLS or SSL under the Secure Connection Protocol option required below, then enter the corresponding port here.
- Choose Others from the Mail Server drop-down.
- Sender E-mail Address: Provide the email address that will appear as the sender's email address in the email notifications sent from Access Manager Plus. Ideally, this could be the email of your team's IT admin.
- Access URL: Enter the URL with which users can access Access Manager Plus. This URL will be included in the notification email sent to them.
- Requires Authentication: Selecting this checkbox will give you two options:
- Specify a Username and Password Manually - Choose this option to provide a username and password to log in to the access URL.
- Use an account stored in Access Manager Plus - Choose this option to use an account stored in Access Manager Plus. The password of this account will be retrieved from Access Manager Plus and used at the time of authentication to the SMTP server.
- Use Secure Connection: Choose a protocol to encrypt the emails sent from Access Manager Plus. Choose None to leave the emails unencrypted.
- SSL - Secure Sockets Layer (SSL) is a cryptographic protocol that enables secure connection over the internet.
- TLS - Transport Layer Security (TLS) is a new version of SSL that enables secure connection over the internet.
- Once you have provided the authentication details and the secure connection protocol, click Test to send a test email for verification. Click Save once satisfied.

Note: It is recommended to use SSL/TLS options for secure communication over the Internet/Intranet.