Managing Sessions
Access Manager Plus is capable of launching secure privileged sessions, record, playback, and archive the privileged sessions launched from Access Manager Plus web interface. These features offer support for forensic audits and allow enterprises to monitor and control all actions performed by the privileged accounts during privileged sessions. The session recording feature caters to the audit and compliance requirements of organizations that mandate proactive monitoring of activities, thereby enabling administrators to readily answer the ‘who,’ ‘what’ and ‘when’ questions of privileged access. You can use Access Manager Plus to record Windows RDP, SSH, SQL and VNC sessions launched from the Access Manager Plus web interface.
How Secure is Session Recording in Access Manager Plus?
Access Manager Plus employs first-in-class, browser-based remote login mechanism for the session recording process. From any HTML5-compatible browser, users can launch highly secure, reliable and completely emulated Windows RDP, SSH, VNC, SQL sessions with a single click, without the need for an additional plug-in or agent software. Remote connections are tunneled through the Access Manager Plus server, requiring no direct connectivity between the user device and the remote host. In addition to superior reliability, the tunneled connectivity provides extreme security as passwords needed to establish remote sessions do not need to be available at the user’s browser. The session recording capability is an extension of the robust remote login mechanism of Access Manager Plus.
Access Manager Plus comes bundled with RDP, SSH, VNC, SQL session gateways. This allows the users to launch remote terminal sessions from their browsers that are tunneled through the Access Manager Plus server. The remote terminal sessions are emulated in the browser screen itself and hence there is no need for installing any plug-in or agent in any of the end-points. The only requirement is that the browsers should be HTML 5 compatible (For example IE 9 or above, Firefox 3.5 or above, Safari 4 or above, and Chrome).
- Launching a secure remote session
- Session shadowing/real-time session monitoring
2.1 Monitoring sessions in parallel
- Configuring session recording
- Viewing and deleting the recorded sessions
1. Launching a Secure Remote Session
- The Connections tab displays all Connections available in Access Manager Plus. To find the particular connection, filter using the type of connection, or use the keyword search to locate the connection.
- Hover the mouse over the Connection thumbnail and click Connect.
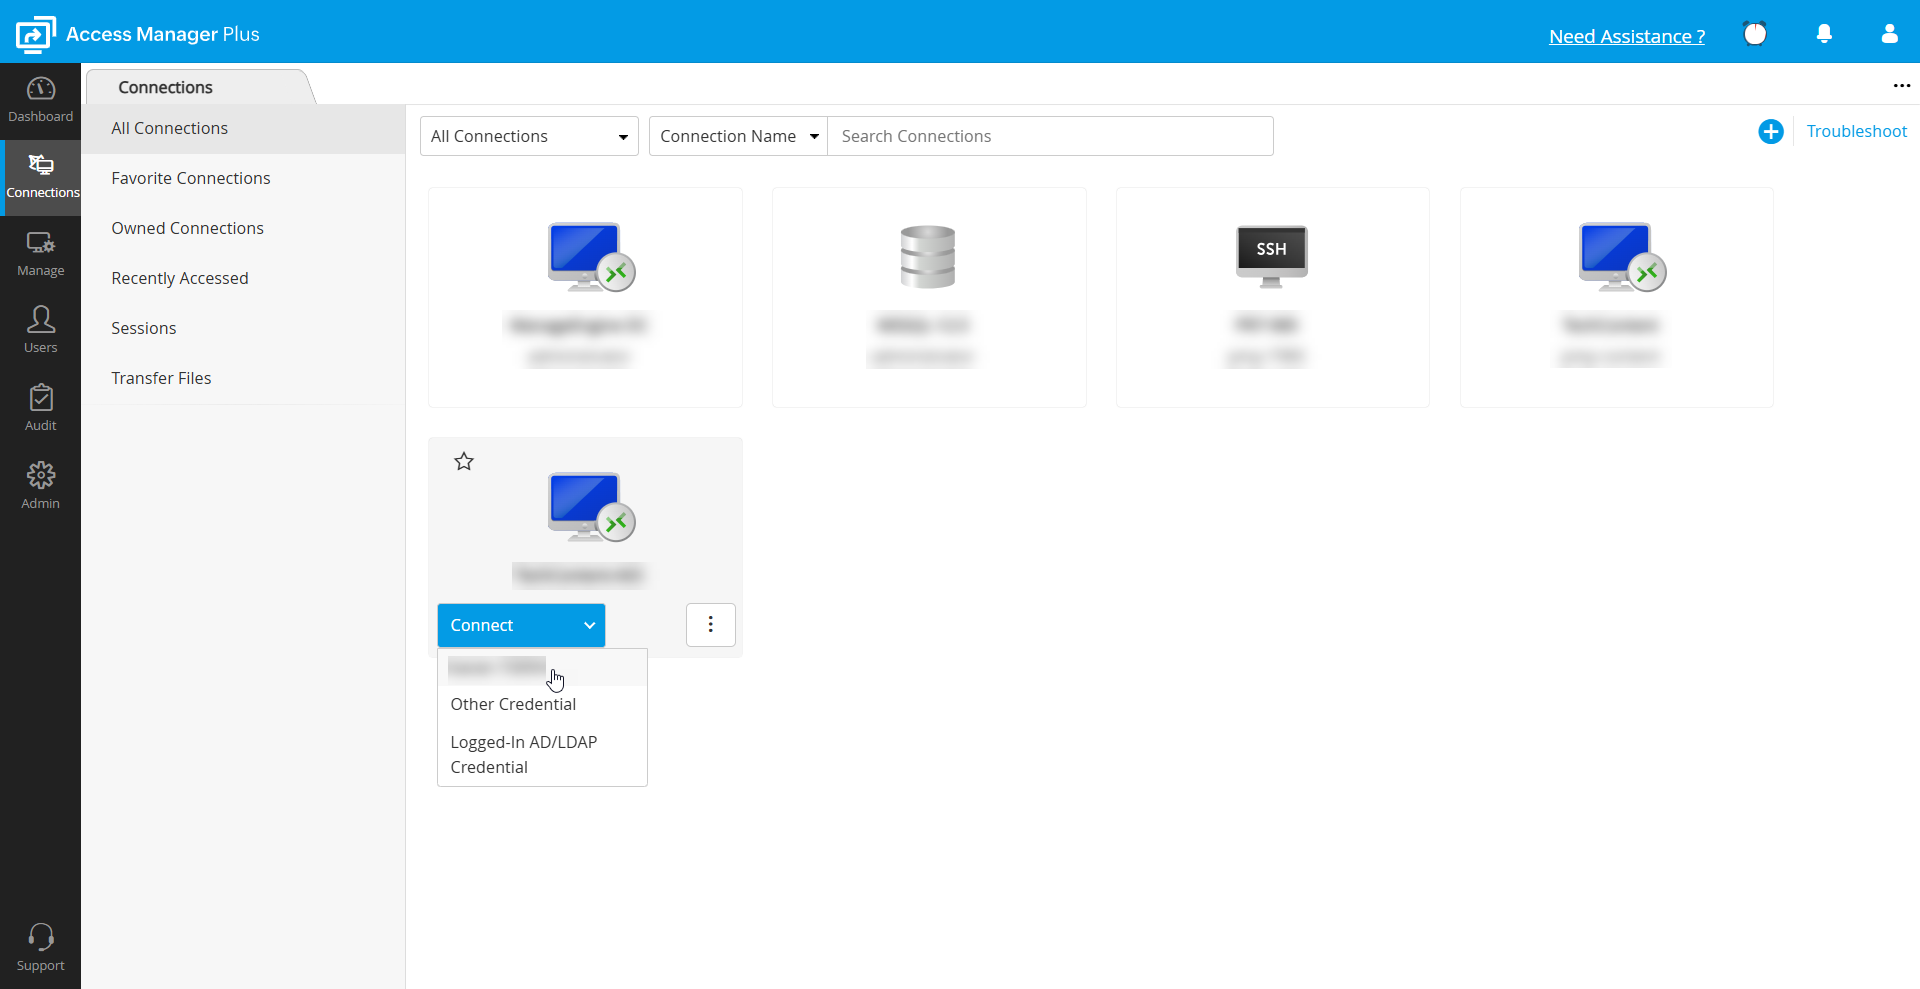
- Starting from build 4400, you can connect directly to a remote machine by clicking the Connect drop-down and selecting the desired connection name. Alternatively, you can choose to connect using different valid credentials:
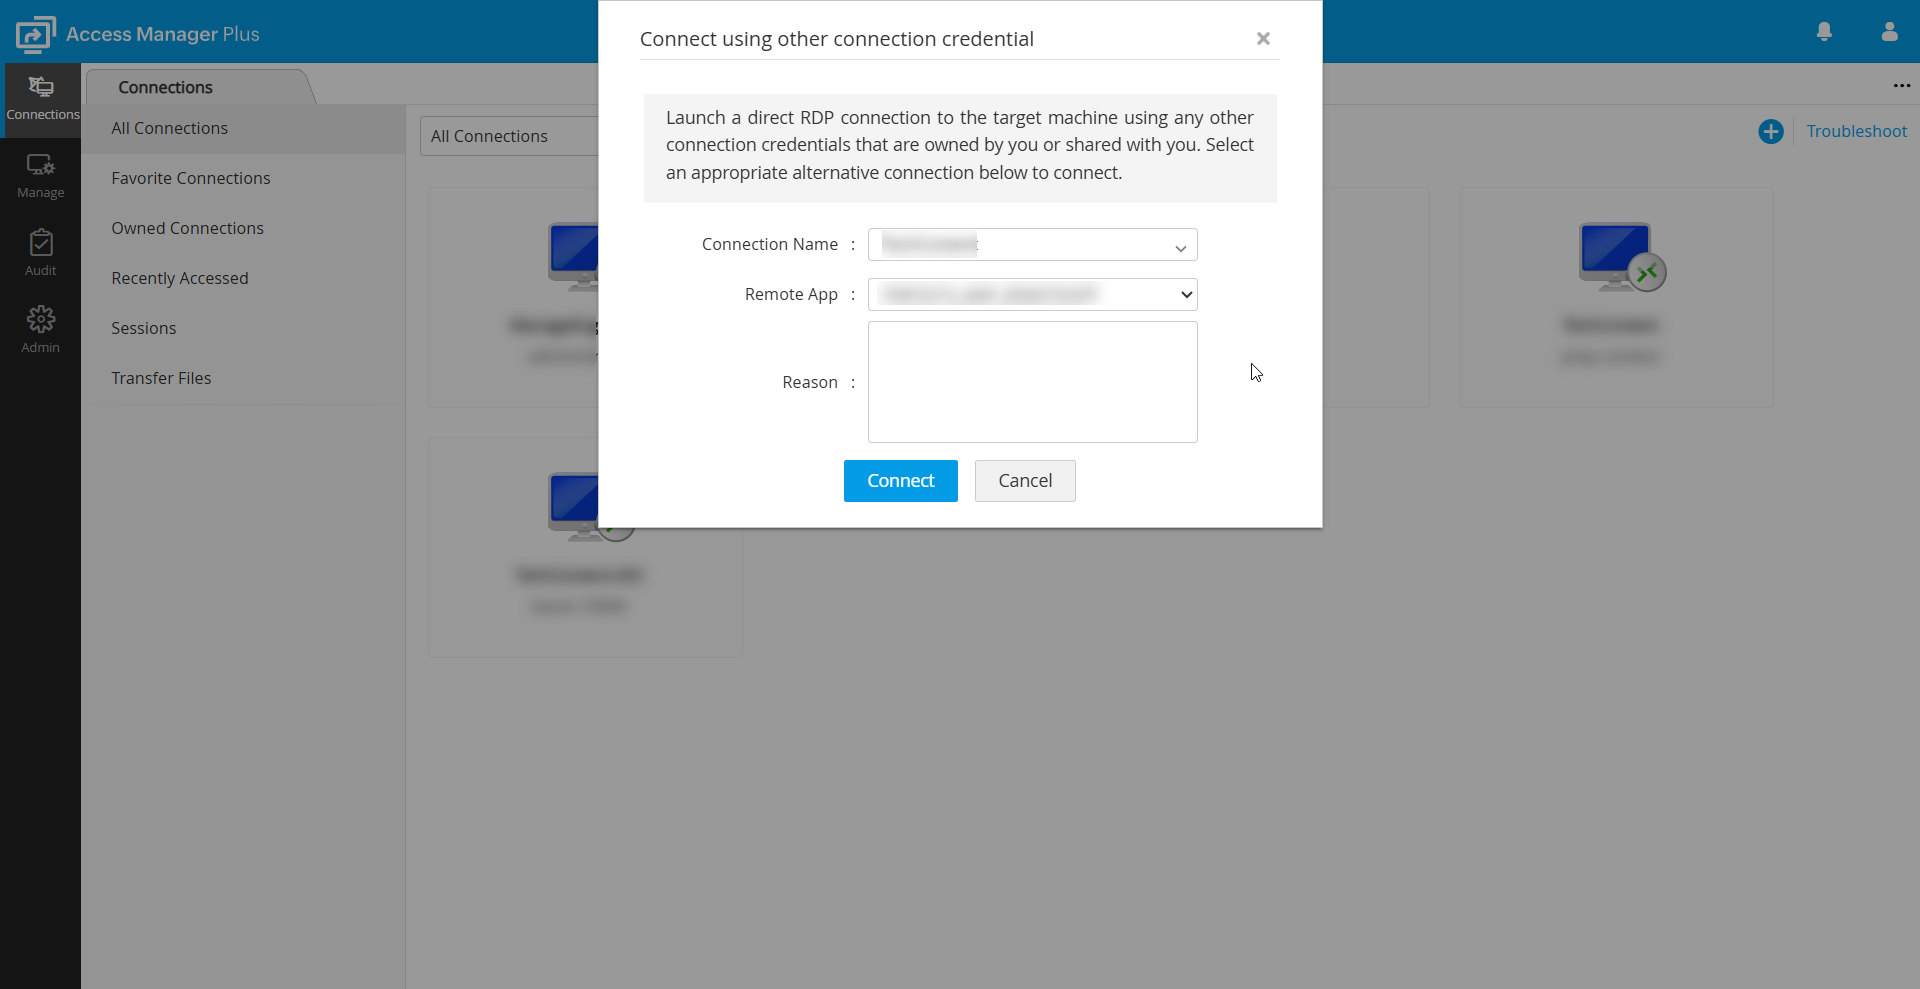
- To establish a direct connection to the target machine with alternative credentials; either your own or those shared with you, click Other Credential, select the Connection Name, and click Connect.
- If you need to connect to a specific remote application on the machine using the alternative credential, choose the relevant Remote App from the dropdown, and click Connect.
- If you have authenticated Access Manager Plus using directory service credentials, you can seamlessly connect to a remote machine by selecting Logged-In AD/LDAP Credential and entering your AD login password in the Password field.
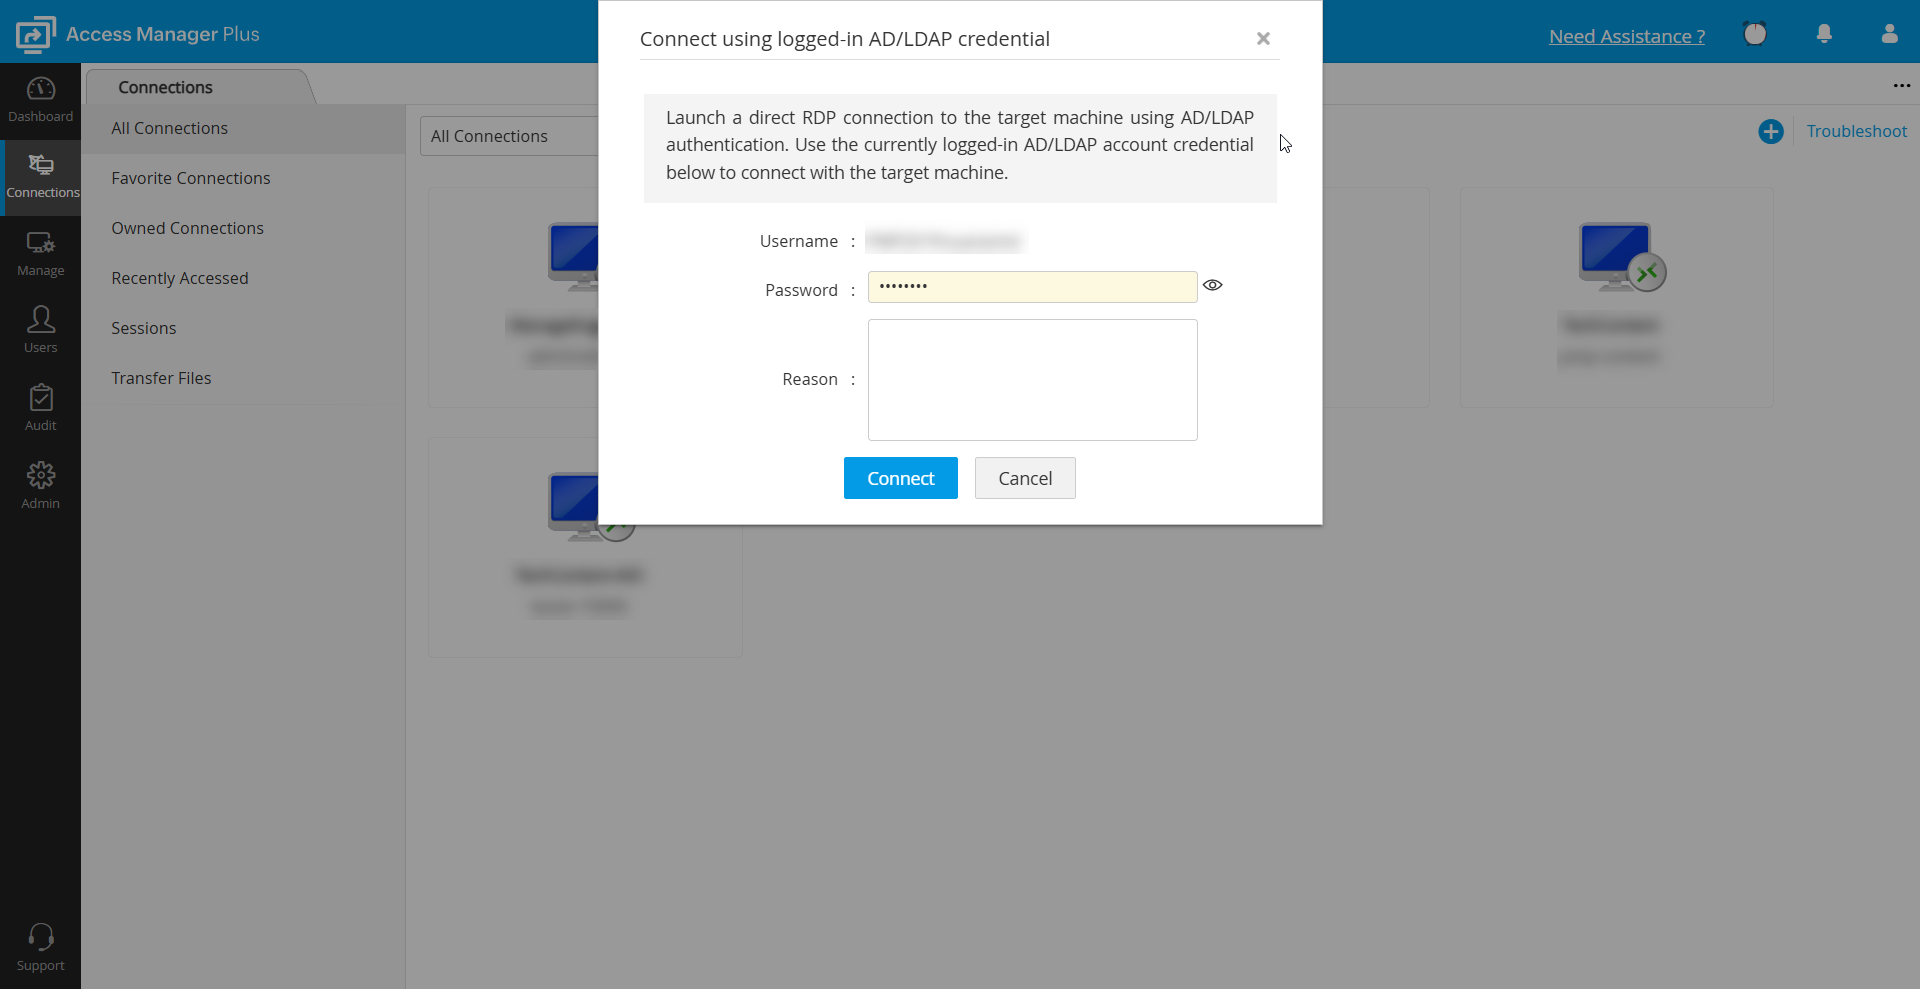
- If you need to connect to a specific remote application on the machine, click the Remote App button beside the Connect button, and click the respective remote app to connect.
- Access Manager Plus will authenticate the connection and the remote session will open in a new tab within the Access Manager Plus interface.
- You can open multiple remote connections at a time. All users in your Access Manager Plus environment will be notified of the on-going active sessions from the Notifications panel.
- Other Administrators can join, collaborate or terminate the remote sessions initiated by you. Standard Users will not have the option to terminate other on-going sessions but they can still use the join or collaborate options.
2. Session Shadowing/Real-time Session Monitoring
Access Manager Plus lets administrators monitor the privileged sessions on highly sensitive IT assets. Shadowing allows admins to join active sessions, observe user activities in parallel, and terminate them in case of suspicious activities. Admins can also offer assistance to users while monitoring the users’ activities during troubleshooting sessions. All of these operations can be done from the Connections tab.
2.1 Monitoring Sessions in Parallel
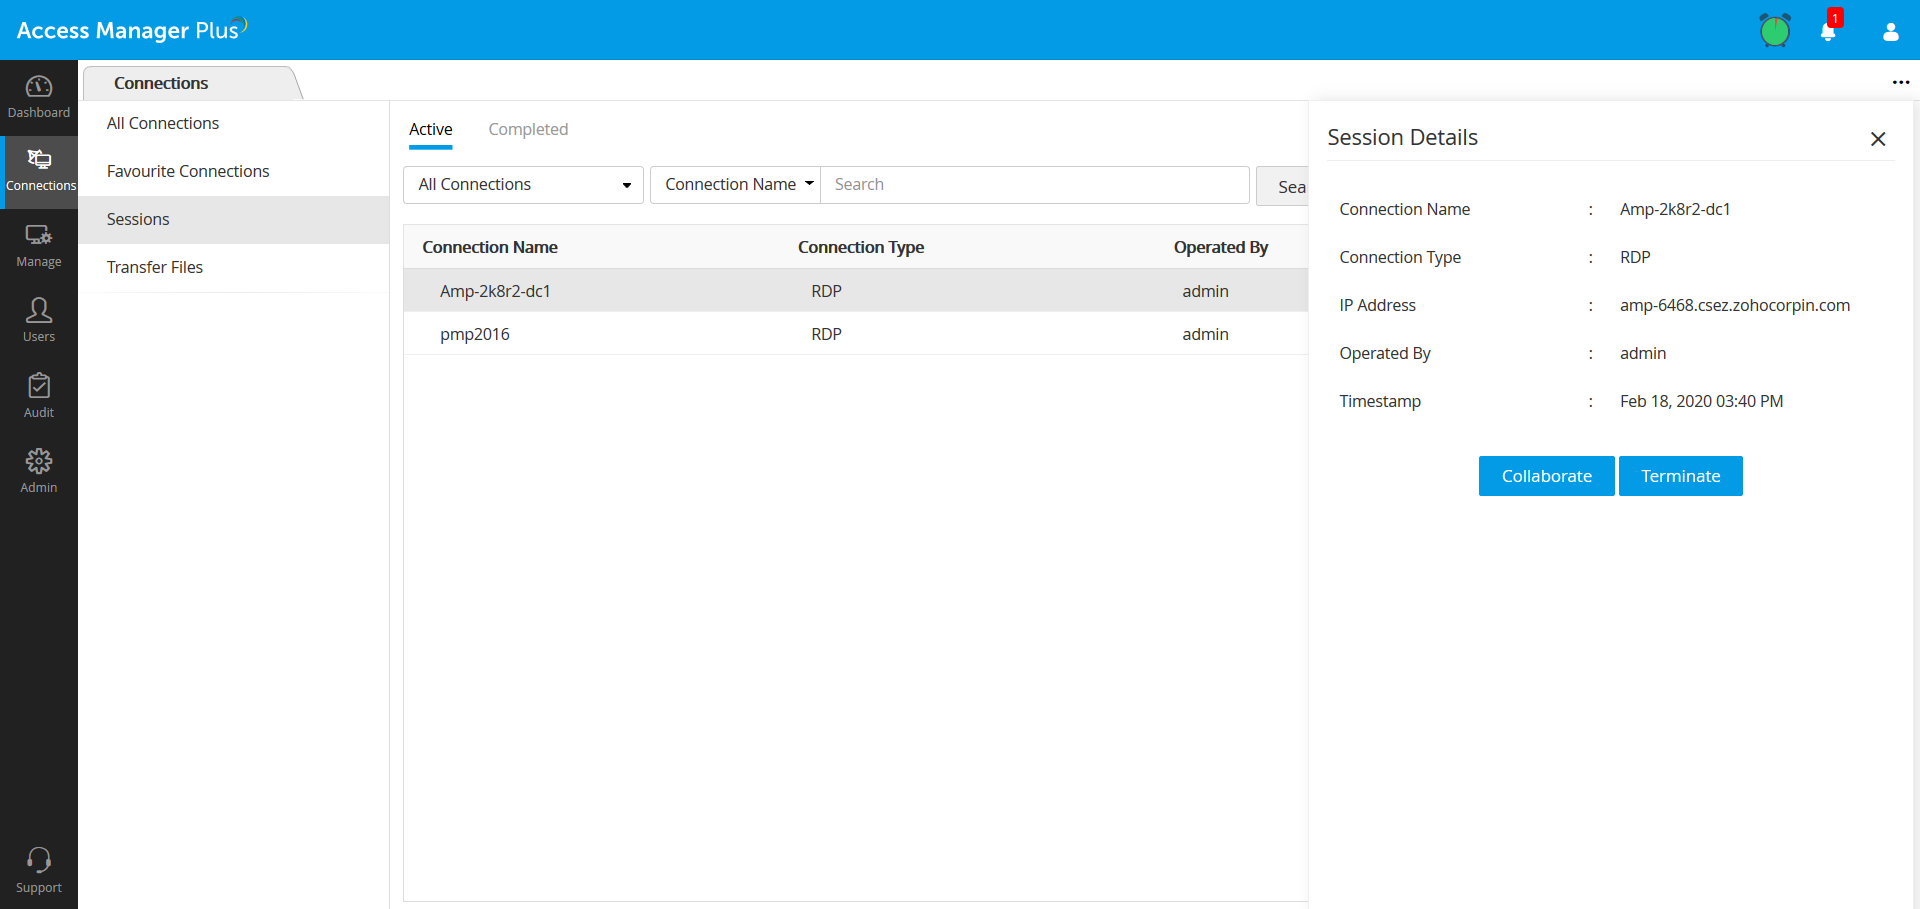
- Navigate to Connections >> Sessions.
- Trace the active session through the name of the connection.
- Click a session name and click the Join button. You will be able to view the session in parallel.
2.2 Collaborating on Active Sessions
- Navigate to Connections >> Sessions.
- Trace the active session through the name of the connection.
- Click a session name and click the Collaborate button. You will be able to work with session in parallel and perform the same operations as the user who initiated the session.
Note: The Collaborate option will not be available for SQL-based Connections and SSH servers that are used as a Landing Server in Access Manager Plus.
2.3 Terminating a Suspicious Session
- Navigate to Connections >> Sessions.
- Trace the active session through the name of the connection.
- Click a session name and click the Terminate button. The remote session will be terminated and the user will lose connection with the remote connection. This action can be performed only by another Administrator.
3. Configuring Session Recording
Follow the below steps to configure sessions recordings in Access Manager Plus and customize the external storage location.
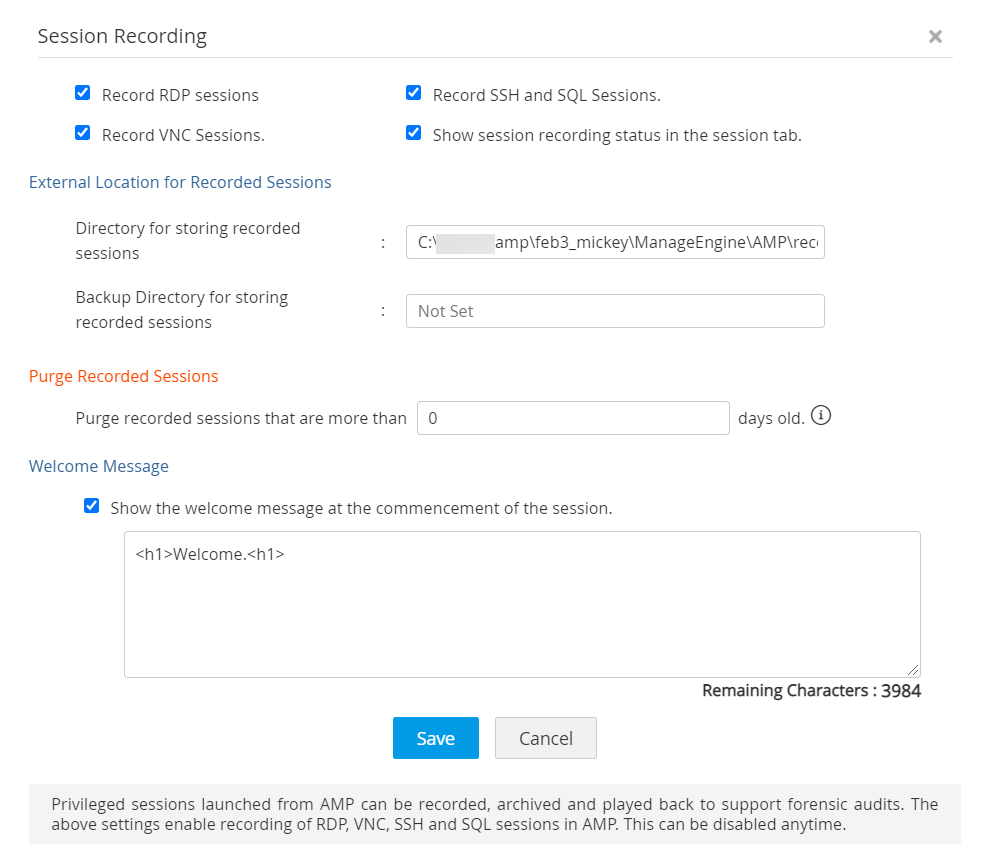
- Navigate to Admin >> Session Settings >> Session Recording.
- In the pop-up form that opens, select the options Record RDP sessions and/or Record VNC sessions and/or Record SSH and SQL sessions as required.
- Select the check-box - Show session recording status in the session tab if you wish to display the session recording status in the session window.
- Enter a valid path to store the recorded sessions under External Location for Recorded Sessions. You can also set a backup directory for storing the recordings, in which case the recorded files will be stored in both locations.
- To purge the records that are older than a specified number of days, enter the number under Purge recorded sessions that are more than -- days old. You can disable purging by leaving the text field empty or by entering 0 as the value.
- Select the check-box - Show the welcome message at the commencement of the session and enter the message that you want to display in the text field given below. This text field has a limit of 4000 characters and supports CSS in In-line styles. This way, you can enable and customize the welcome message as desired.
- Click Save to save the changes. Now, the session recording feature becomes available as soon as an administrator adds a Connection that supports one of these remote terminal session types (RDP, SSH, SQL, VNC).
4. Viewing and Deleting the Recorded Sessions
View and delete the recorded sessions from the Connections tab in the Access Manager Plus interface by following the steps below. You can trace sessions using any detail such as the name of the Connection, the user who launched the session, or the time at which the session was launched.
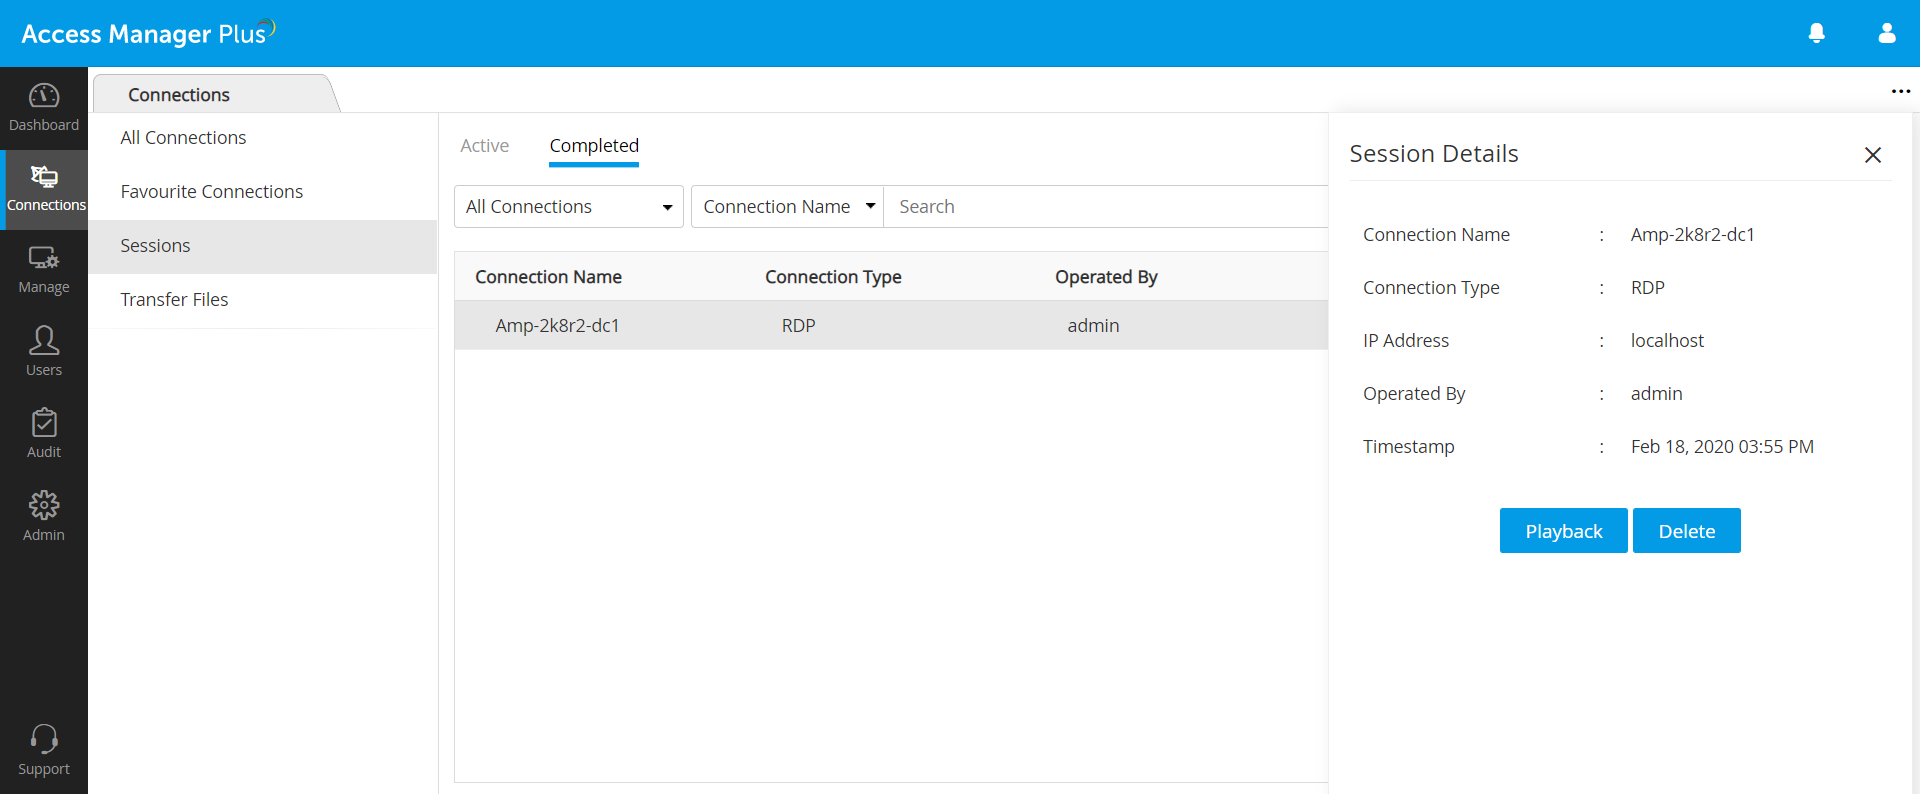
- Navigate to the Connections>> Sessions.
- Switch to the Completed tab.
- All the recorded remote sessions will be displayed here. Click any recording to display the Session Details. The session details will contain Connection Name, Connection Type, IP Address, Timestamp, user who operated.
- Click Playback to open the video of the recorded session. Click the seek bar to skip a part of the recording and progress.
- Click Delete to remove the recording from the list as well as the local directory in which the recording is stored.
- The selected Connection has Access Control enforced for it. Click here to learn more about Connection Access Control.
- The session recording file is deleted from the local disk where it is stored.
Notes:
Playback and Delete options will appear disabled if: