Managing User Roles
As Access Manager Plus serves as a repository for remote systems, fine-grained access restrictions are critical for secure usage of the product. The solution provides role-based access control to achieve this. By default, Access Manager Plus has two pre-defined roles that come with a specific set of permissions: Administrator and StandardUser.
- Administrator: This role gives access to set up, configure, and manage remote systems in Access Manager Plus. Users with this role can manage all users, connections and password-related operations, as well as access audit records.
- Standard User: This role gives access to set up, configure, and manage remote systems in the Access Manager Plus application. Users with this role can manage connections, as well as access audit records. However, they will not have access to manage other users and approve connection requests from other users.
Role | Operations | ||||||
Manage Users | Manage Connections | Manage Passwords | View Passwords | View Audits | |||
Administrator |  | | | | | ||
Standard User |  | | | | | ||
Custom User Roles
In addition to pre-defined user roles, the administrator can also create custom roles for your users. The role customization option allows you to create a new user role from scratch, by selecting the desired permissions from the list of 100+ operations available in Access Manager Plus. As an additional security measure, dual controls are enforced for custom role creation—any new custom role added by an administrator has to be approved by another administrator.
How to Manage Custom User Roles?
- Add Custom Roles
- Role Filter
- Change Roles for Users
- Edit or Delete Custom Roles
- Frequently asked questions
1. Add Custom Roles
To add a new 'custom' role, follow the steps given below:
- Go to Admin >> Configuration >> Roles.
- In the Roles window, click Add Role. In the Add Roles window, enter a name for the new role you want to create, along with a description, based on requirement.
- While creating a new role from scratch, the scope of the role as to what this role can and cannot do in Access Manager Plus should be defined. This is the next step, i.e. defining the role's scope by selecting the desired options from the list of operations available. These operations are categorized under different sections such as Connection, Users, Remote Access, Audit, Server Settings, Custom Settings (as shown in the left pane of the Add Roles window).
- Select the operations as per your requirements. For better understanding, here are two custom role examples and the list of operations that should be selected for each example: User management role. If you would like to create a role for the sole purpose of user administration such as new user addition in Access Manager Plus, edit/delete user profiles, change roles, and transferring ownership of connections between users, here are the basic operations that should be selected from the list:
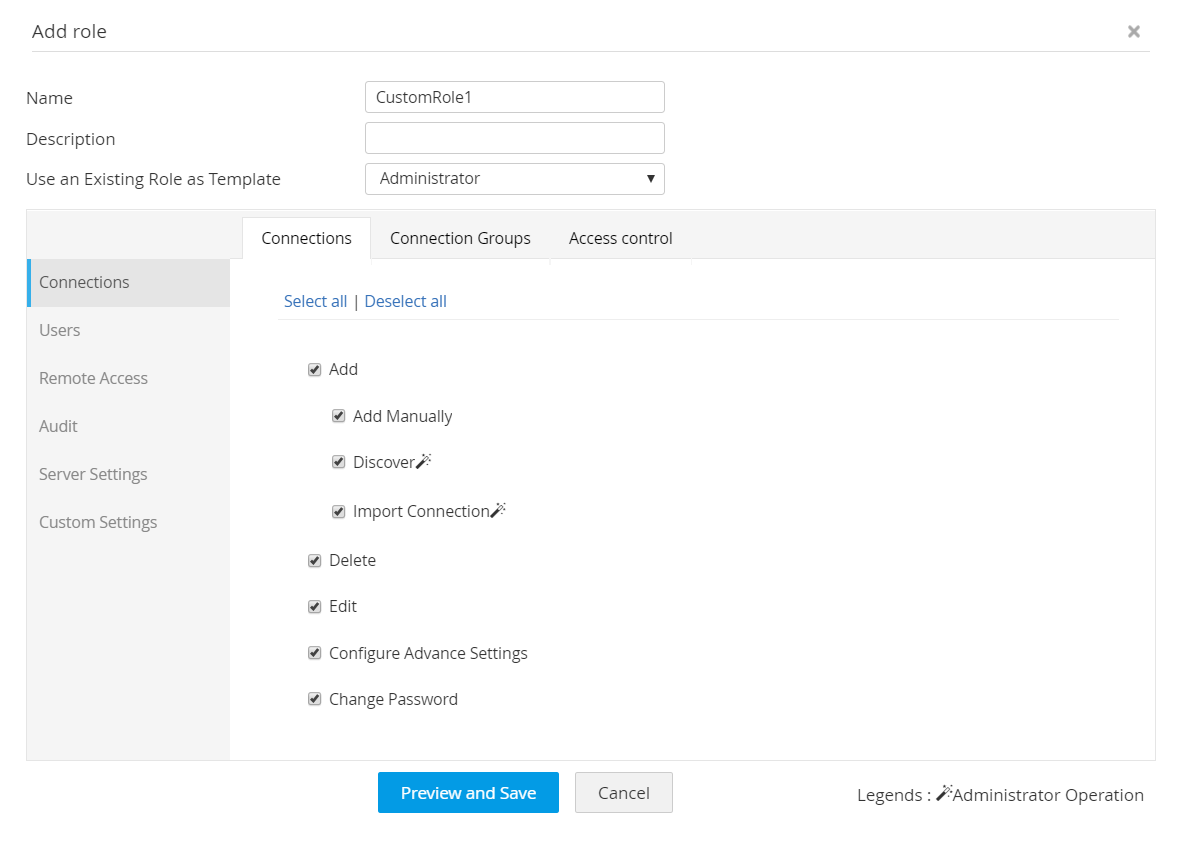
- Connection
- Add
- Add Manually
- Discover
- Change Password
- Delete
- Edit
- Edit Settings
- Add
- Connection Groups
- Add
- Edit
- Delete
- Access Control
- Configure
- Approve Password Requests
- Users
- Manage web users
- Add users manually
- Import from AD
- Import from LDAP
- Import from Azure AD
- Import from file
- Edit
- Delete
- Manage API Users
- Change user roles
- Transfer connections owned by a user
- Transfer access control privileges
- Generate reports
- Manage web users
- User authentication protocols
- Manage Active Directory
- Manage Azure AD
- Manage RADIUS authentication
- Manage two-factor authentication
- Manage LDAP
- Manage SAML single sign-on
- Manage Smart Card authentication
- User groups Apart from the above example, you can customize any role according to your enterprise needs with the appropriate choice of operations.
Notes:
1. If you do not want to create a new role from scratch, you can select pre-defined roles or custom roles created earlier as a basic template for the new role under the option Use this role as template. Once you select a role as template from the drop-down, the permission levels preset for that role will be applied for the new role.
2. By default, both Administrators and Standard Users have the right to configure connection access control and approve access requests. However, you can disqualify a custom user role from configuring access control by using the checkboxes from the Access Control section.
2. Role Filter
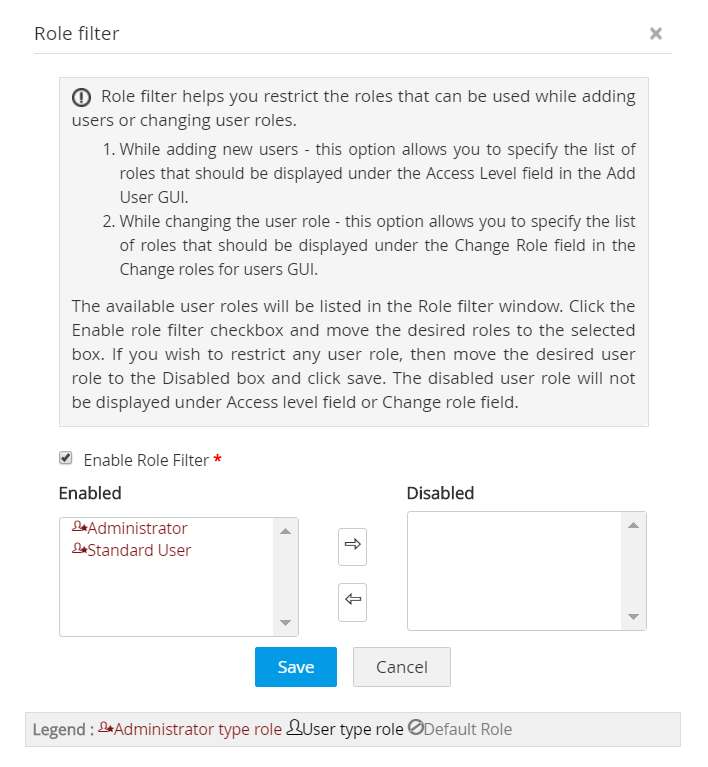
Role filter option allows you to choose the list of roles that should be displayed under the Access Level field in the Add User window. Using role filter, you can restrict the roles that should be assigned to users who have been either newly added or changed roles.
2.1 Steps to Enable Role Filter
- Go to Admin >> Roles >> Role Filter. Check the Enable Role Filter box.
- Now, you can decide which roles should be enabled/disabled and sort them under respective boxes. Only those roles in Enabled box will be displayed during new user addition or role changes. Once you are done, click Save. The role filter will be applied.
3. Change Roles for Users
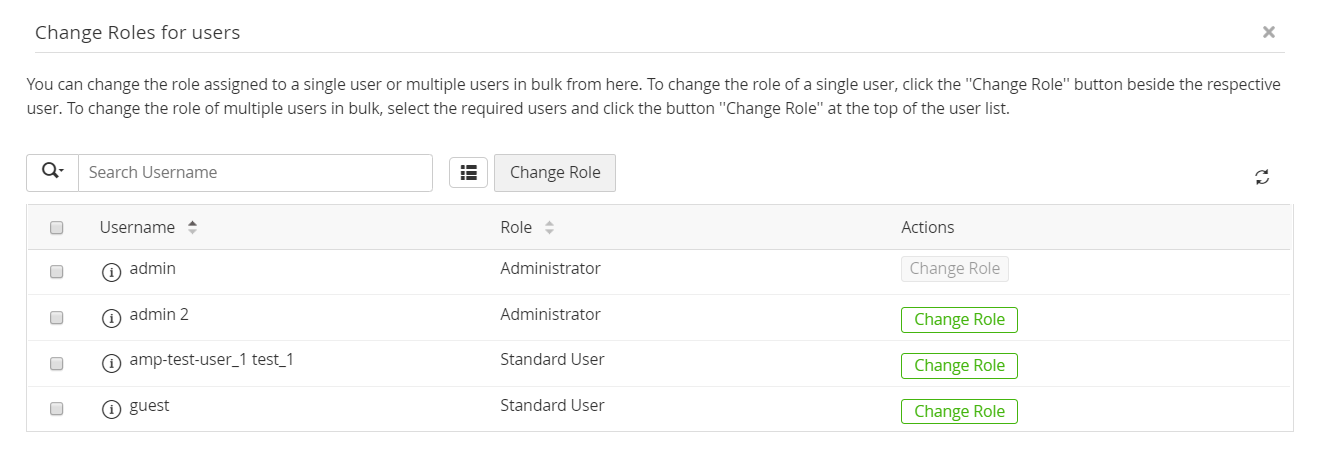
You can easily change the roles assigned for different users in bulk, by following the steps given below
- Go to Admin >> Configuration >> Roles and click Change Roles.
- In the new window that opens, if you would like to first view the list of all users belonging to a specific role, use the filter above the table to choose the role. The users associated to that role will be displayed. Select the users whose role has to be changed.
- Now, choose the role which should be assigned for the selected users and click Change Role.
4. Edit or Delete Custom Roles
- To edit/modify any custom role, click on the Edit icon beside the particular role and carry out necessary changes. Then, click Preview and Save. Verify the edits and click Save. The edits too, before being applied to the role, will be queued for approval from another administrator. Edits pending approval for a role can be viewed by clicking on [Waiting for approval] option available beside the specific role. In the below image, red denotes operations that have been removed and blue denotes operations that have been added to the role.
- To delete a role, click on the Delete icon. Before deletion, you will be prompted to transfer the users associated with the particular role to another. After mapping the users to another role, click Save and Delete.
5. Frequently Asked Questions
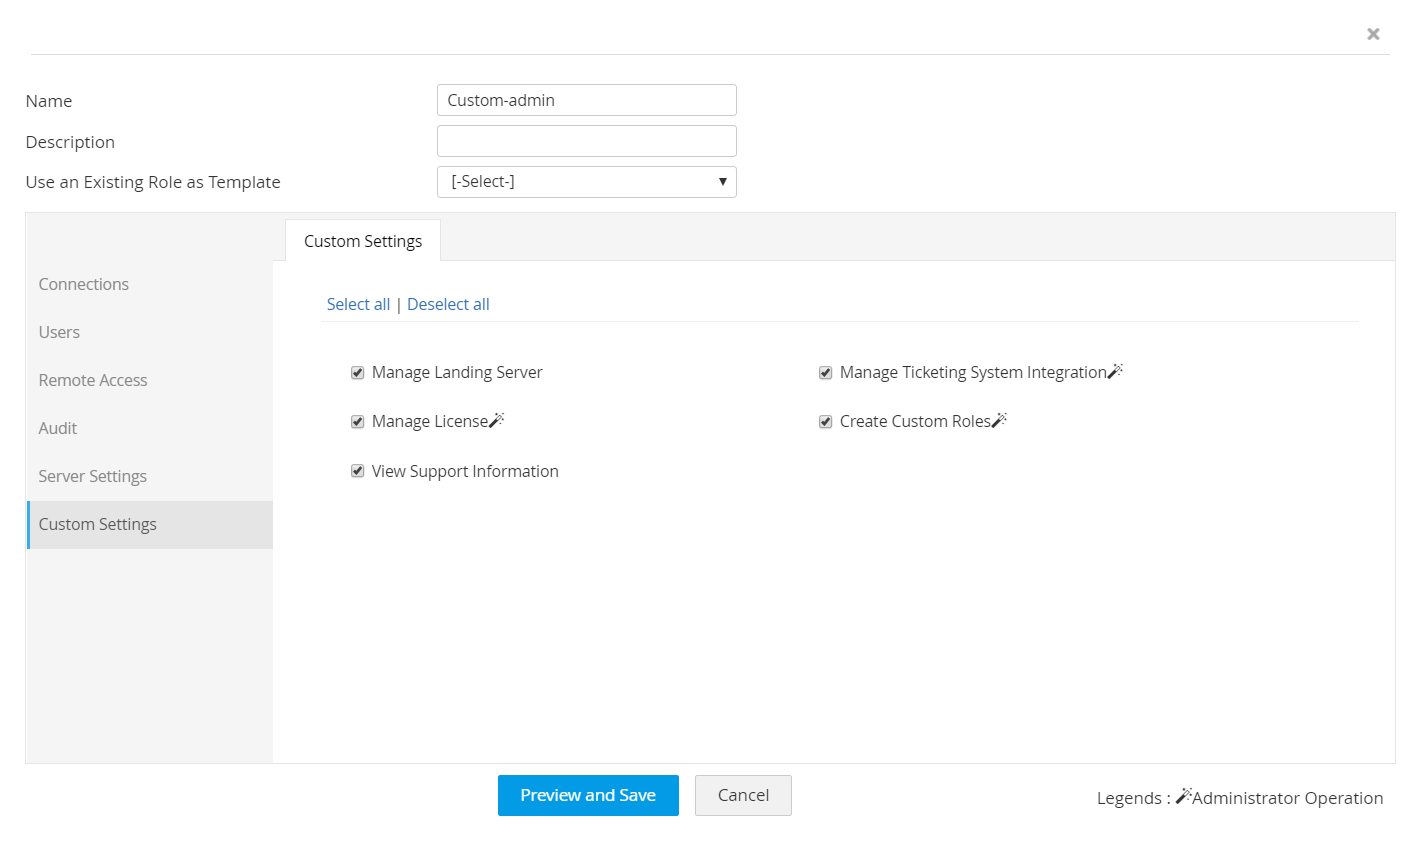
i. Some operations are marked with a magic wand icon. What does that mean?
Options that are followed by a magic wand denote those that qualify as an Administrator's operation. A custom role created with even one of these wand-marked operations is considered as a role equivalent to an Administrator. You can create as many custom roles as desired with wand-marked operations, but the role will be counted towards license only when it is assigned to a user in Access Manager Plus.
ii. Who can create custom roles in Access Manager Plus?
Creating custom roles is an administrative operation. Among Access Manager Plus's pre-defined roles, only the Administrators have the privilege to create custom roles. A new custom role created needs the approval of another administrator, which means there must be at least 2 admin users present in an installation of Access Manager Plus to successfully create a custom role. Using the Create Custom Roles option under Custom Settings in Add Roles option, you can also authorize a custom role with privileges to create future custom roles. When this custom role is assigned to a user, they will have the privilege to create custom roles of their own.
After completing all the steps explained above, click Preview and Save. A preview box will open, listing the operations you have chosen for the role. Verify and click Save. The new role will be created and queued for approval from another administrator. To view roles that are pending approval, click on Role Requests. Once the role is reviewed and approved, you can begin assigning it to desired users.
iii. I'm unable to delete a custom role, why?
There are two cases when a role cannot be deleted right away:
- To delete a custom role successfully, there must not be any users associated with it at the time of deletion. If there are users associated with the custom role, transfer these users to another role. If you do not have any administrator licenses left and an admin role is not available to transfer the existing users, then you cannot perform this operation. In this case, you either cannot delete the existing role or you must purchase additional admin license to proceed with this operation.
- In case you have switched on role filter settings and disabled all non-admin user role under the filter, when you try to delete a user role, you will be able to transfer all the users to an admin role only due to the filter. Now, if you don't have any administrator licenses remaining, this operation cannot be completed. In this case, enable at least one non-admin user role or purchase additional admin licenses.