Configuring single sign-on to ADAudit Plus using Active Directory Federation Services (AD FS)
Step 1: Configure ADAudit Plus in AD FS
Prerequisites
To configure AD FS for identity verification in ADAudit Plus, you need:
- To install the AD FS server. The detailed steps for installing and configuring AD FS can be found in this Microsoft article.
- An SSL certificate to sign your AD FS login page and the fingerprint for that certificate.
Configuration steps
Note: Only the Forms Authentication method is configured for users trying to access ADAudit Plus through AD FS authentication. You can view this setting in the AD FS console under Authentication Policies → Primary Authentication → Global Settings.
Claim rules and Relying Party Trust
During configuration, you will need to add a Relying Party Trust and create claim rules. A Relying Party Trust is created to establish the connection between two applications for authentication purposes by verifying claims.
In this case, AD FS will trust the relying party (ADAudit Plus) and authenticate users based on the claims generated. Claims are generated from claim rules by applying certain conditions on them. A claim is an attribute that is used for identifying an entity to establish access. For example, the Active Directory SAMAccountName.
- Open the AD FS Management console.
- The connection between AD FS and ADAudit Plus is created using a Relying Party Trust (RPT). Select the Relying Party Trusts folder.
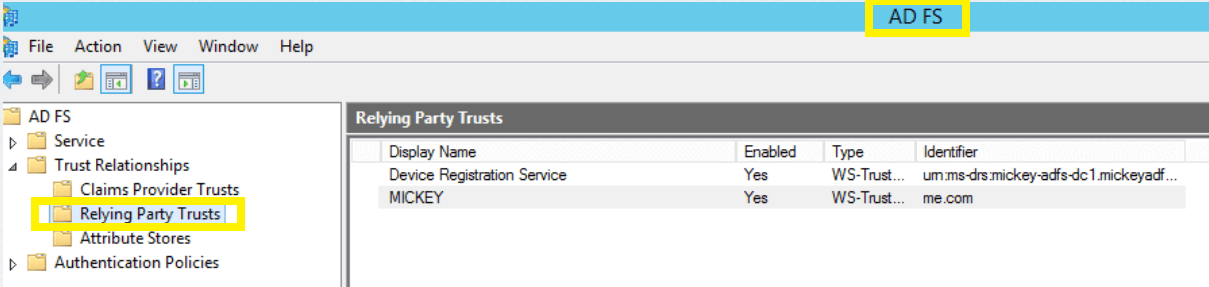
- Click Actions > Add Relying Party Trust. When the Add Relying Party Trust Wizard opens, click Start.
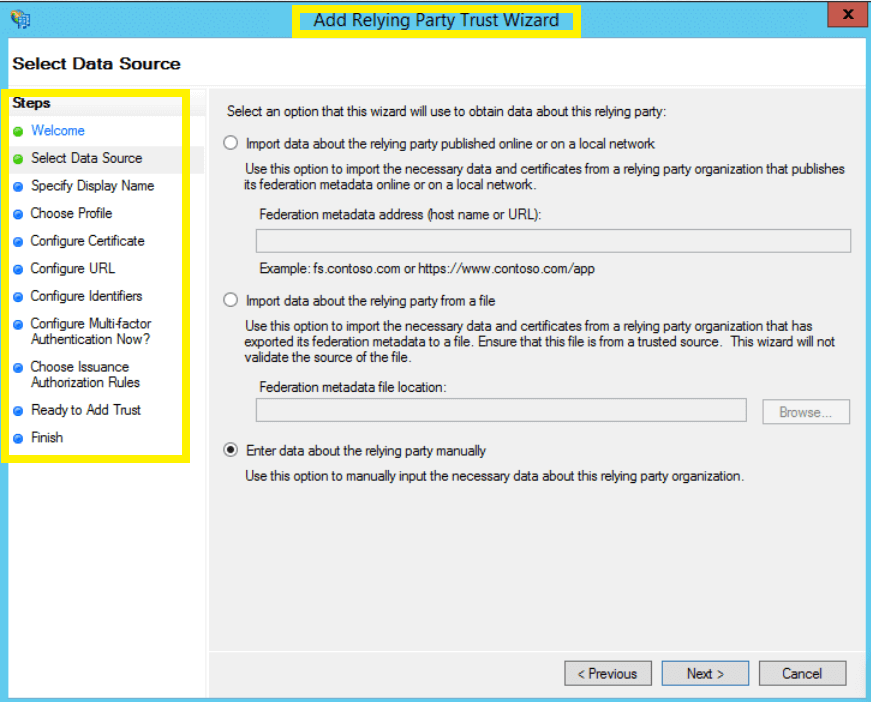
- In the Select Data Source page, click on Enter Data About the Party Manually, and click Next.
- In the Specify Display Name page, enter a display name of your choice and add additional notes if required. Click Next.
- In the Choose Profile page, click AD FS profile. Click Next.
- In the Configure Certificate page, the default settings would have already been applied. Click Next.
- In the Configure URL page, check the box next to Enable Support for the SAML 2.0 WebSSO protocol. The relying party SAML 2.0 SSO service URL will be the ACS URL of ADAudit Plus.
Note:
There is no trailing slash at the end of the URL. For example:
https://ADAuditPlus-server/samlLogin/955060d15d6bb8166c13b8b6e10144e5f755c953
To get the ACS URL value, open the ADAudit Plus console, navigate to Admin → Administration → Logon Settings → Single Sign-On. Check the box next to Enable Single Sign-On, and select SAML Authentication → Identity Provider (IdP) → ADFS. You can find the ACS URL/Recipient URL value here.
- On the Configure Identifiers page, in the Relying party trust identifiers field, paste the Entity ID value.
Note: To find the Entity ID value, log in to the ADAudit Plus console, navigate to Admin → Administration → Logon Settings → Single Sign-On. Check the box next to Enable Single Sign-On, and select SAML Authentication → Identity Provider (IdP) → ADFS. You can find the Entity ID value here.
- In the Configure Multi-factor Authentication Now? page, you can choose to configure multi-factor authentication settings for the relying party trust. Click Next.
- In the Choose Issuance Authorization Rules page, you can choose to Permit all users to access this relying party. Click Next.
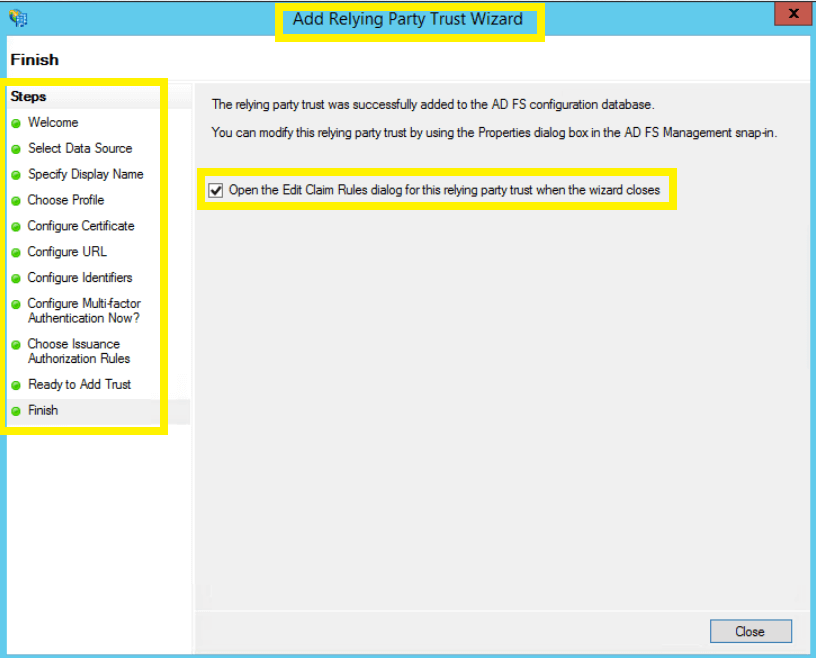
- The next two pages will display an overview of the settings you have configured. In the Finish page, click Close to exit the wizard.
Keep the Open the Edit Claim Rules dialog for this relying party trust when the wizard closes option selected to open the Claim Rules editor automatically.
- In Claim Rules Editor, under the Issuance Transform Rules tab, click Add Rule.
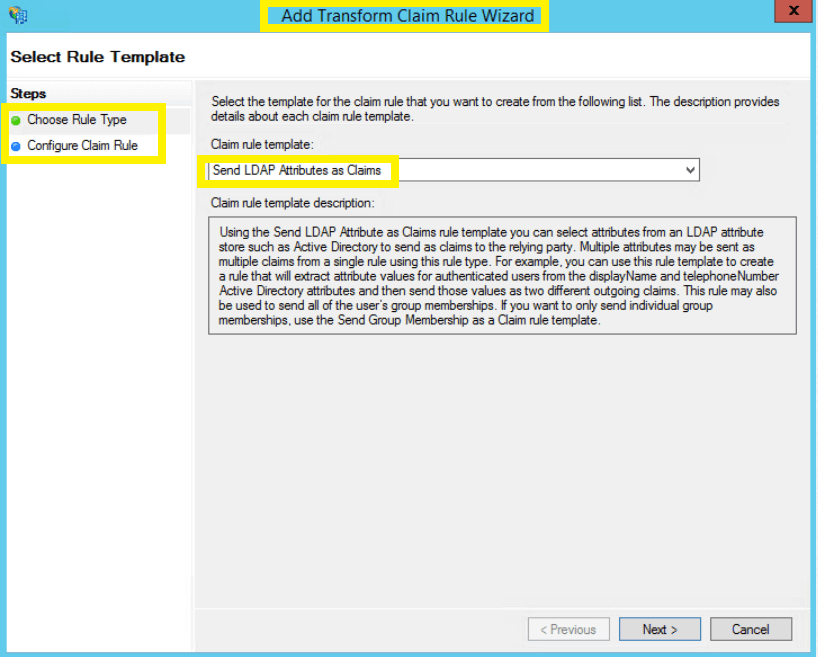
- From the Claim rule template drop-down, select Send LDAP Attributes as Claims, and click Next.
- In the Configure claim rule page, provide a Claim rule name, and select Active Directory from the Attribute store drop-down. In the LDAP Attribute column, select User-Principal-Name. In the Outgoing Claim Type column, select Name ID, and click Finish.
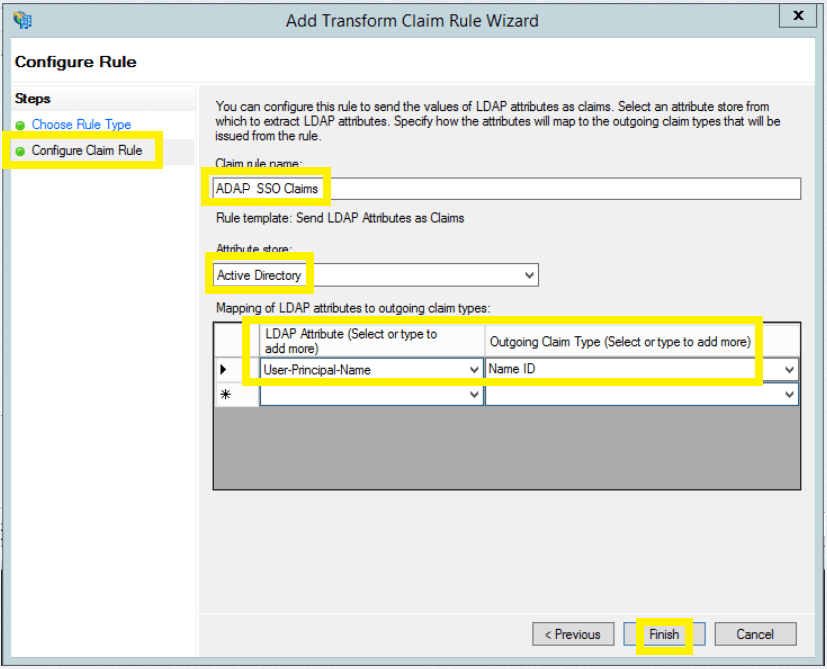
- You can now view the rule that has been created. Click OK.
- Next, download the metadata file by clicking on the Identity Provider metadata link. For example: https://<server_name>/FederationMetadata/2007-06/FederationMetadata.xml.
Note: Replace <server_name> with the AD FS hostname
Save this file, as you will need it while configuring SAML authentication in ADAudit Plus.
- Navigate back to Relaying Party Trusts, and find the rule you've created. Right-click on the rule, and click Properties. In the window that opens, click on Endpoints → Add SAML → OK.
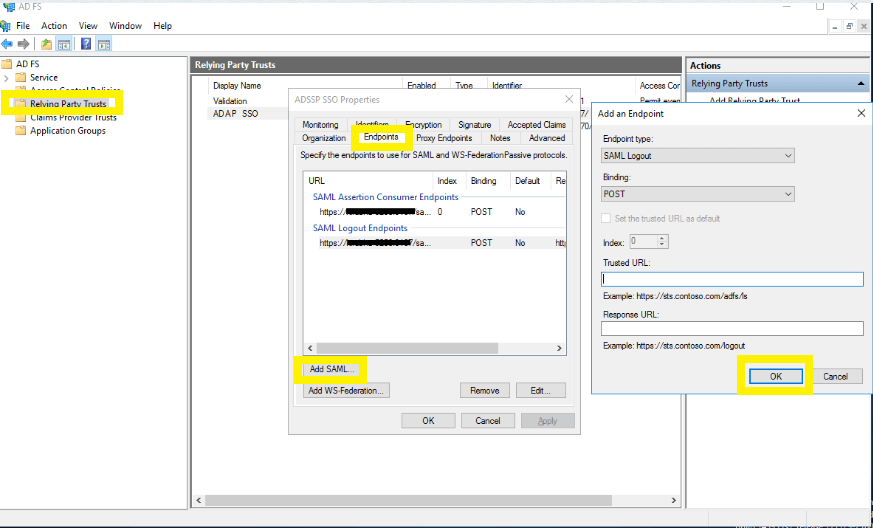
- In the Trusted URL field, paste the SP Logout URL.
Note: To get the SP Logout URL, open the ADAudit Plus console, navigate to Admin → Administration → Logon Settings → Single Sign-On. Check the box next to Enable Single Sign-On, and select SAML Authentication → Identity Provider (IdP) → ADFS. You can find the SP Logout URL value here. Click OK.
- Next, click on Signature, and upload the X.509 Certificate.
Note: To get the X.509 Certificate, open the ADAudit Plus console, navigate to Admin → Administration → Logon Settings → Single Sign-On. Check the box next to Enable Single Sign-On, and select SAML Authentication → Identity Provider (IdP) → ADFS. You can find the X.509 Certificate here. Click OK.
Step 2: Configure AD FS in ADAudit Plus
Prerequisites
Enable RelayState in AD FS.
For Windows Server 2012
- Navigate to the %systemroot%\ADFS\Microsoft.IdentityServer.Servicehost.exe.config file in your AD FS server.
- In the <microsoft.identityServer.web> section, enter the following code: <useRelayStateForIdpInitiatedSignOn enabled="true" />
Sample code:
<microsoft.identityServer.web>
…..
<useRelayStateForIdpInitiatedSignOn enabled="true" />
</microsoft.identityServer.web>
- Restart the AD FS server.
For Windows Server 2016:
- Open an elevated PowerShell Prompt (right-click PowerShell, and select Run as administrator) in your AD FS server.
- Run the following command to enable IdP-initiated SSO: Set-ADFSProperties -EnableIdPInitiatedSignonPage $true
- Run the following code to enable RelayState: Set-ADFSProperties -EnableRelayStateForIDPInitiatedSignon $true
- Restart the AD FS server.
Log in to the ADAudit Plus web console with admin credentials, and navigate to Admin → Administration → Logon Settings → Single Sign-On. Check the box next to Enable Single Sign-On, and select SAML Authentication → Identity Provider (IdP) → ADFS.
- Click Browse, and upload the metadata file you downloaded from Step 1: 17. Click Save.
- If needed, enable Single Logout under Advanced Settings.
- Advanced Settings configuration:
Note: Ensure that the configuration settings selected here match those configured in your AD FS.

Authentication Request Configuration
| Setting |
Description |
Available values |
| SAML Request |
Defines whether the authentication request sent to AD FS is digitally signed |
|
| Authentication Context Class |
Specifies the method AD FS should use to authenticate users |
- None
- Windows Authentication
- Kerberos
- PasswordProtectedTransport
- Password
- TLS Client
- Unspecified
- X.509 Certificate
|
SAML Response Configuration
| Setting |
Description |
Available values |
| SAML Response |
Specifies whether the overall SAML response from AD FS is signed |
|
| SAML Assertion |
Specifies whether the SAML assertion inside the response is signed |
|
| Signature Algorithm |
Defines the algorithm used for generating digital signatures in SAML responses |
- SHA1
- SHA256
- SHA384
- SHA512
|
Encryption Configuration
| Setting |
Description |
Available values |
| Assertion Encryption |
Determines whether the SAML assertions returned from AD FS are encrypted |
|
| Encryption Certificate |
Certificate used for encrypting the assertion |
|
Accessing ADAudit Plus through AD FS
- To access ADAudit Plus, use the URL provided below: https:// <ADFSserver>/adfs/ls/idpinitiatedsignon.aspx
- Where ADFSserver is the server in which AD FS is deployed.
- In the AD FS web console, select ADAudit Plus from the list of applications.
Don't see what you're looking for?
-
Visit our community
Post your questions in the forum.
-
Request additional resources
Send us your requirements.
-
Need implementation assistance?
Try OnboardPro
