Jira
Jira Service Desk
Before configuring Jira Service Desk in ADAudit Plus, you need to get a few details from your Jira ticketing tool:
- Log in to your Jira Service Desk account, click the settings icon in the top-right corner, and select Projects.
- In the project list, make a note of the Key corresponding to the project for which you want your tickets to be raised.
- Navigate to the Issues tab and reenter your username and password when prompted.
- Make a note of the type of issues that the particular project can hold. The issues raised from ADAudit Plus should have the same type for tickets to be successfully raised in Jira Service Desk.
- Close Jira Service Desk and open ADAudit Plus to complete the configuration process.
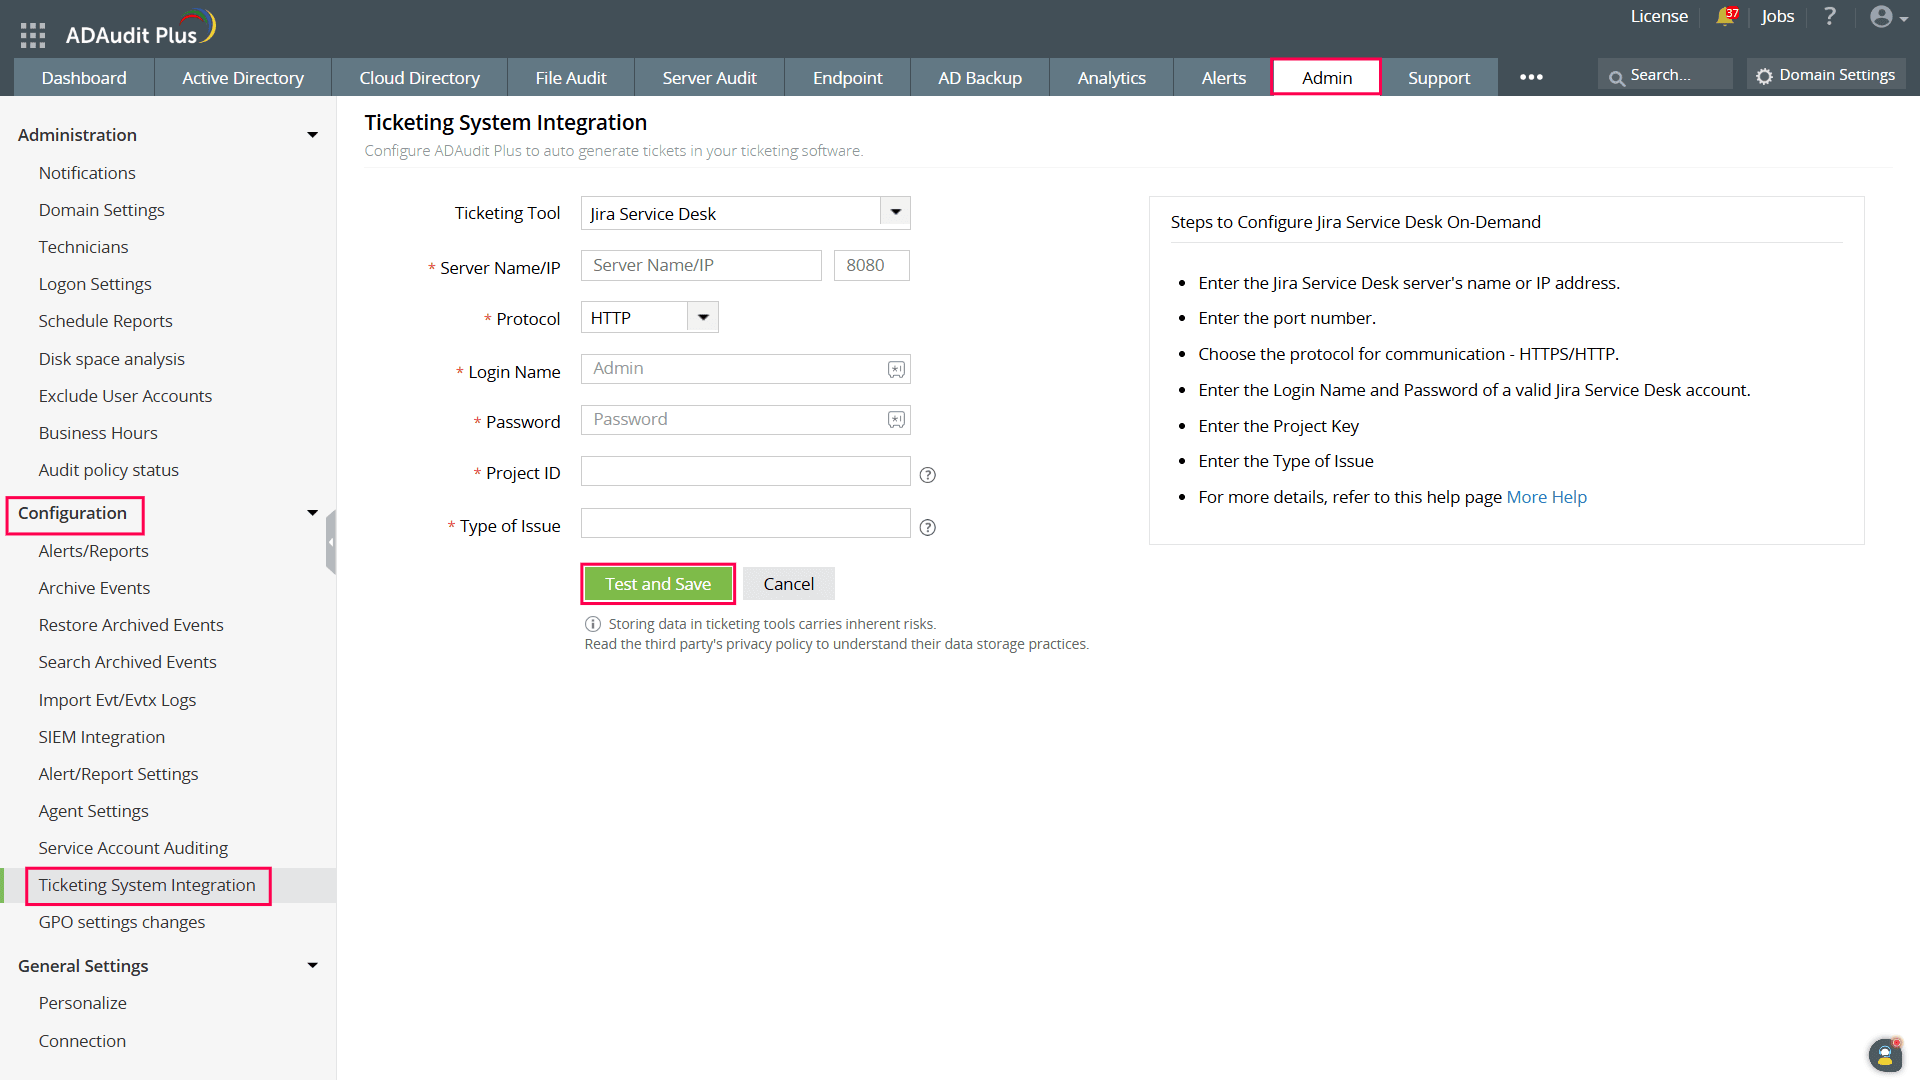
To configure Jira Service Desk in ADAudit Plus:
- Log in to your ADAudit Plus web console.
- Navigate to Admin > Configuration > Ticketing System Integration.
- From the Ticketing Tool drop-down, select Jira Service Desk.
- Enter the Jira Service Desk Server Name/IP.
- Enter the port number.
- Choose the Protocol for communication: HTTP or HTTPS.
- Enter the Login Name and Password of the account with admin privileges.
- Enter the Project ID. This is the Key of the particular project noted from the ticketing tool.
- Enter the Type of Issue noted earlier. This needs to be the same as the issue type that the project has been configured to hold.
- Click the Test and Save button to establish communication and complete the configuration.
Jira Service Desk Cloud
Note: Only users with permissions to view and edit requests can proceed with the configuration.
To configure ADAudit Plus with Jira Service Desk Cloud, you need to first get some details from your Jira ticketing tool. Refer to the official Jira Cloud help document to get the API token.
- Log in to your Jira Service Desk Cloud account, click the settings icon in the top-right corner, and select Projects.
- In the project list, make a note of the Key corresponding to the project for which you want your tickets to be raised.
- Navigate to the Issues tab.
- Make a note of the type of issues that the particular project can hold. The issues raised from ADAudit Plus should have the same type for tickets to be successfully raised in Jira Service Desk Cloud.
- Close Jira Service Desk Cloud and open ADAudit Plus to complete the configuration process.
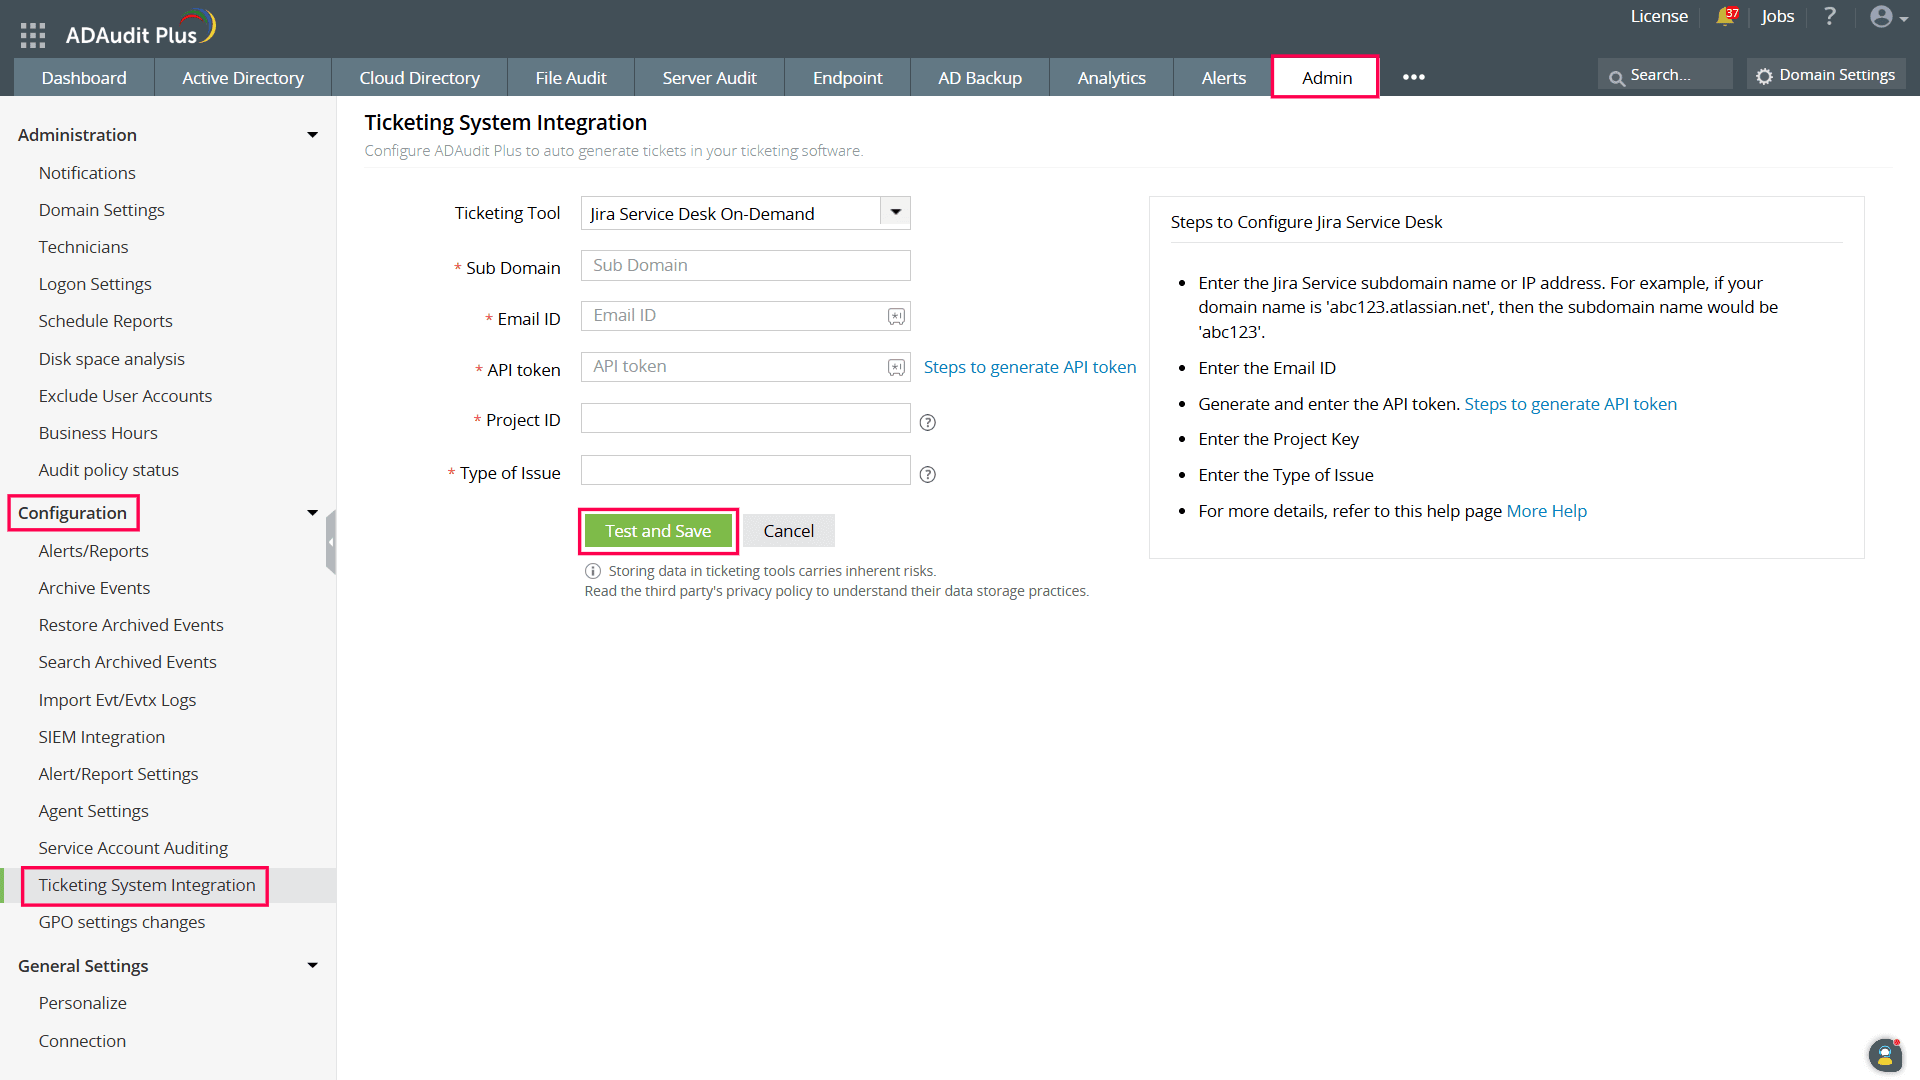
To configure Jira Service Desk Cloud in ADAudit Plus:
- Log in to your ADAudit Plus web console.
- Navigate to Admin > Configuration > Ticketing System Integration.
- From the Ticketing Tool drop-down, select Jira Service Desk On-Demand.
- Enter the Jira Service Desk Cloud Sub Domain.
- Enter your Jira account Email ID.
- Enter the API token retrieved by following the steps in the official Jira Cloud help document.
- Enter the Project ID. This is the Key of the particular project noted from the ticketing tool.
- Enter the Type of Issue noted earlier. This has to be the same issue type that the project has been configured to hold.
- Click the Test and Save button to establish communication and complete the configuration.
Don't see what you're looking for?
-
Visit our community
Post your questions in the forum.
-
Request additional resources
Send us your requirements.
-
Need implementation assistance?
Try OnboardPro
