Steps to enable SSL
The following steps will guide you through enabling SSL manually in ADAudit Plus.
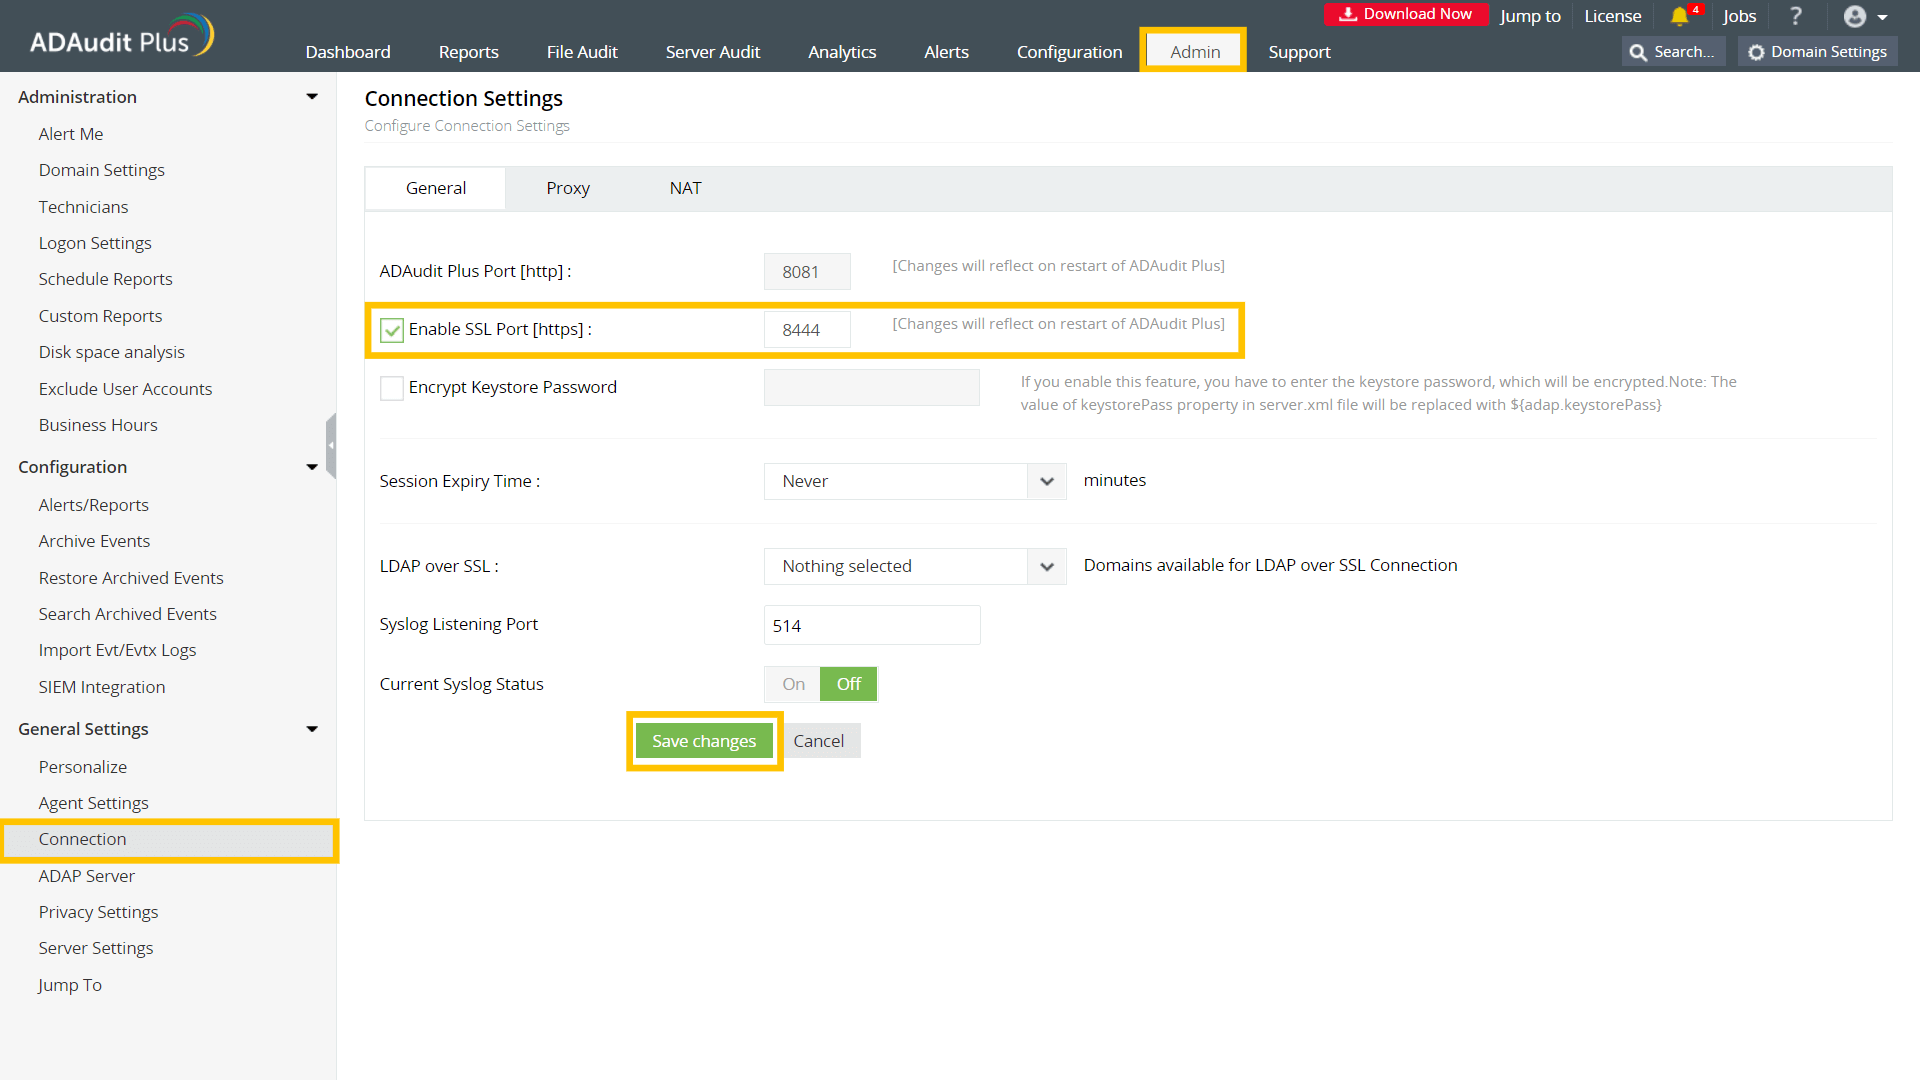
Step 1: Define the SSL port
- Log in to ADAudit Plus with an account that has administrative privileges.
- Navigate to Admin > General Settings > Connection.
- Check the Enable SSL Port [https] box. The default port number 8444 is selected automatically.
- Click Save changes.
- Restart ADAudit Plus for the changes to take effect.
Note: If you want to install an existing PFX or PKCS #12 certificate, skip to the PFX or PKCS #12 format section in Step 5.
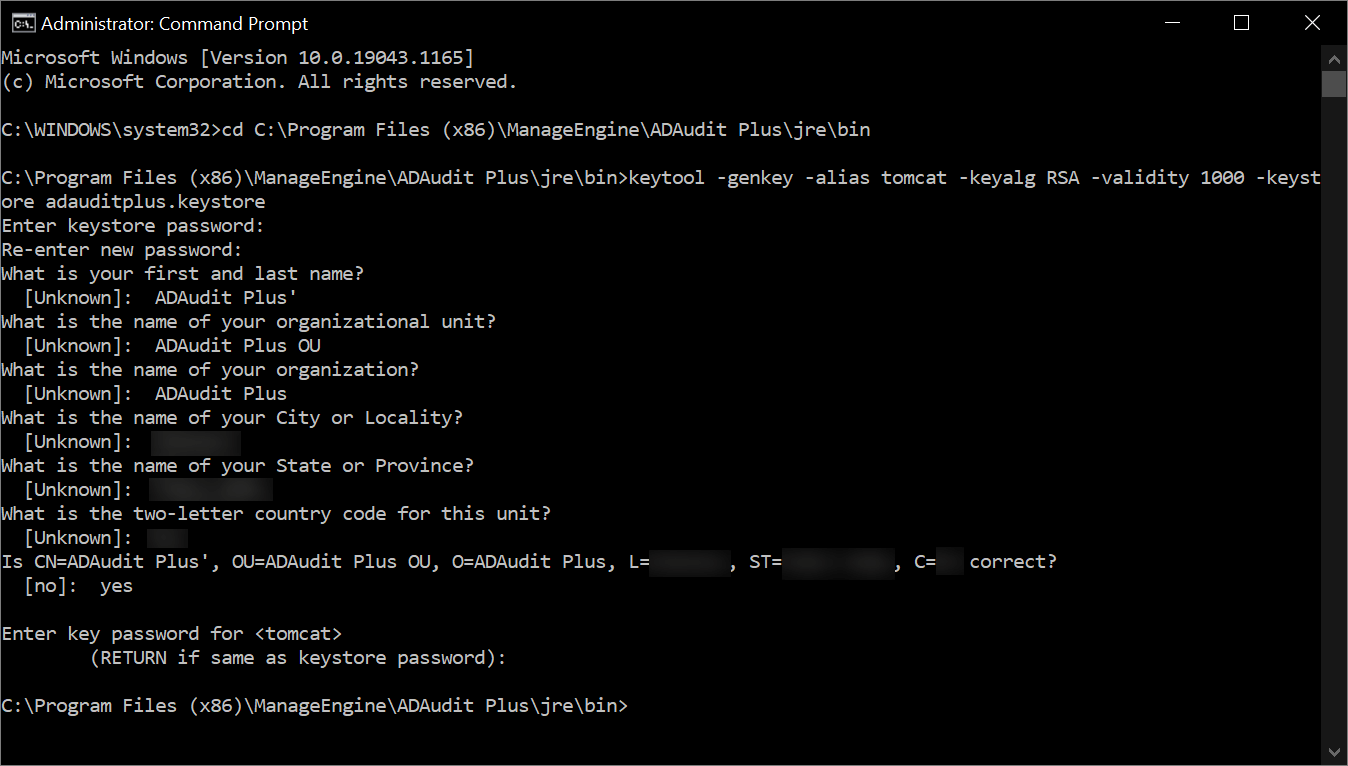
Step 2: Create the keystore
A keystore is a password-protected file that contains the keys and certificates for the server to encrypt and decrypt data.
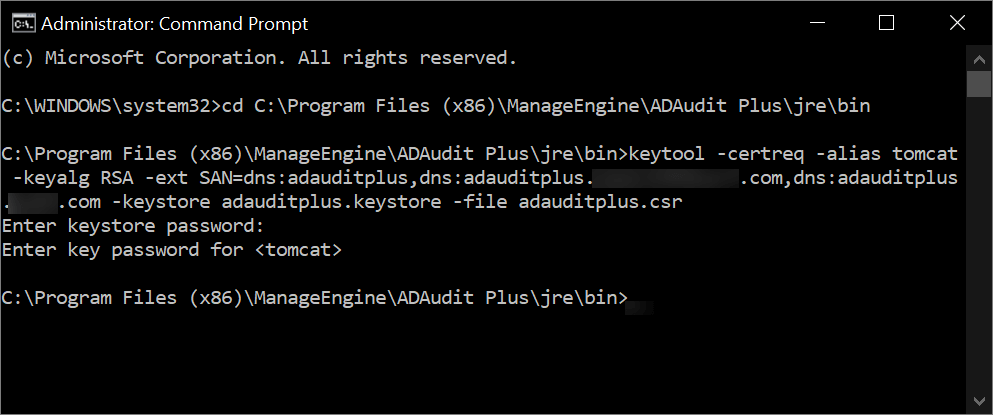
Step 3: Generate the certificate signing request (CSR)
To create a CSR with a subject alternative name (SAN), execute the following command in Command Prompt:
keytool -certreq -alias tomcat -keyalg RSA -ext SAN=dns:server_name,dns:server_name.domain.com,dns:server_name.domain1.com -keystore <domainName>.keystore -file <domainName>.csr
Replace <domainName> with the name of your domain and provide the appropriate SANs as shown in the image below:
Step 4: Issue the SSL certificate
In this step, you will connect to a certificate authority (CA), submit the CSR to the specific CA, and get the SSL certificate issued to you.
A. Issue the SSL certificate using an external CA
- To request a certificate from an external CA, submit the CSR to that CA. You can locate the CSR file in the <product_installation_directory>\jre\bin folder.
- Unzip the certificates returned by your CA and put them in the <product_installation_directory>\jre\bin folder.
Note: After the SSL certificate is issued by the external CA, proceed to Step 5 to install the certificate.
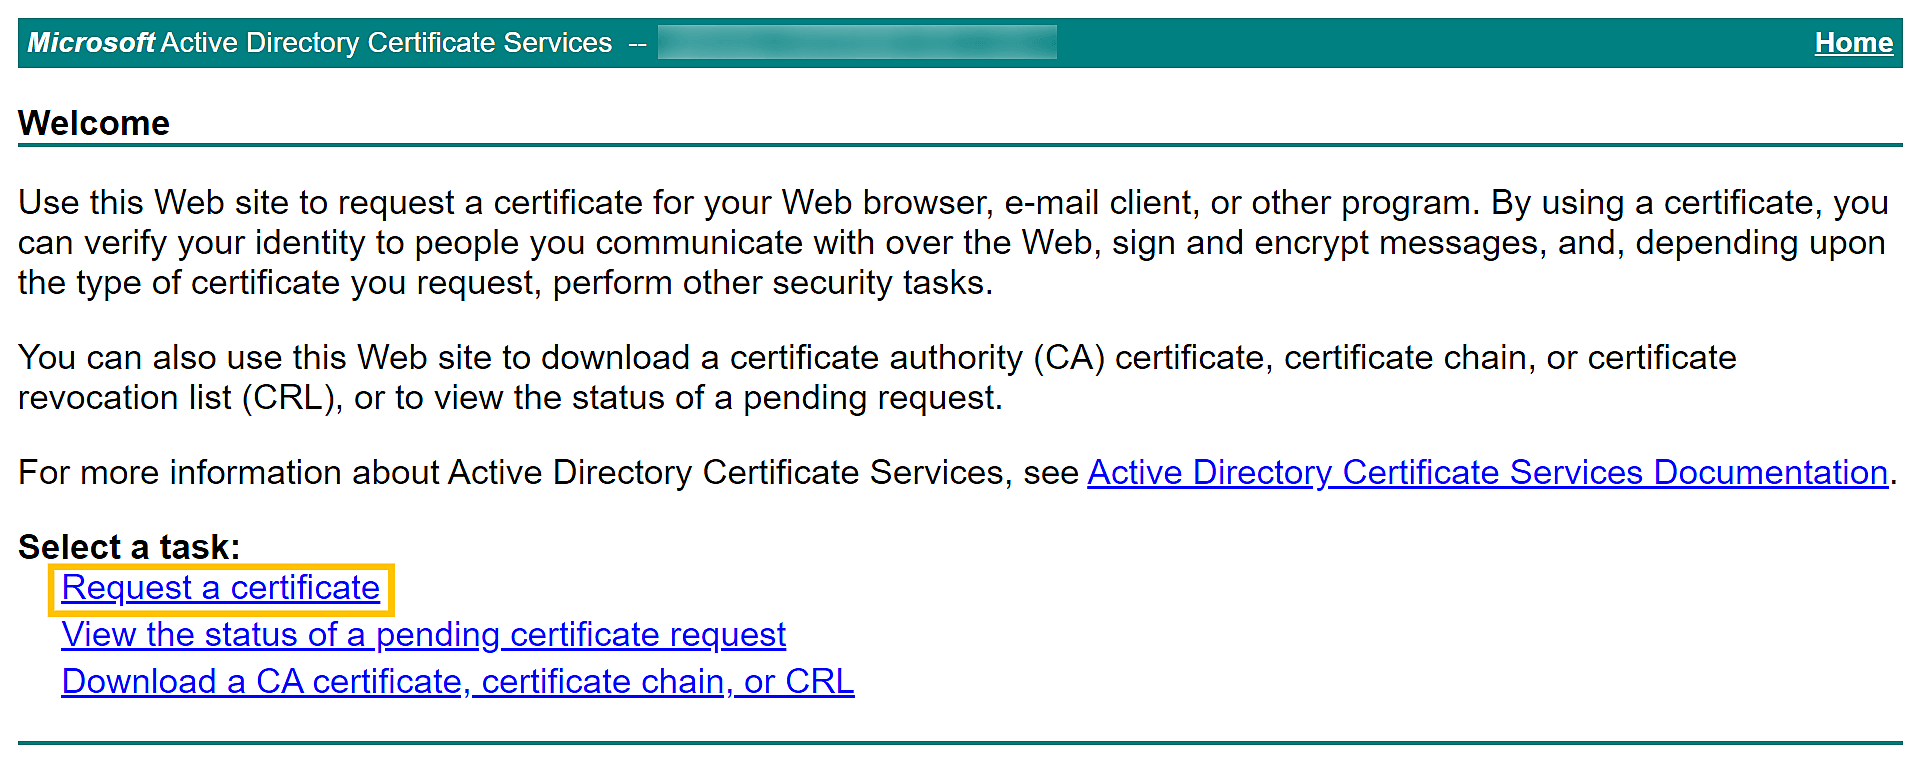
B. Issue the SSL certificate using an internal CA
An internal CA is a member server or domain controller in a specific domain that has been assigned the CA role.
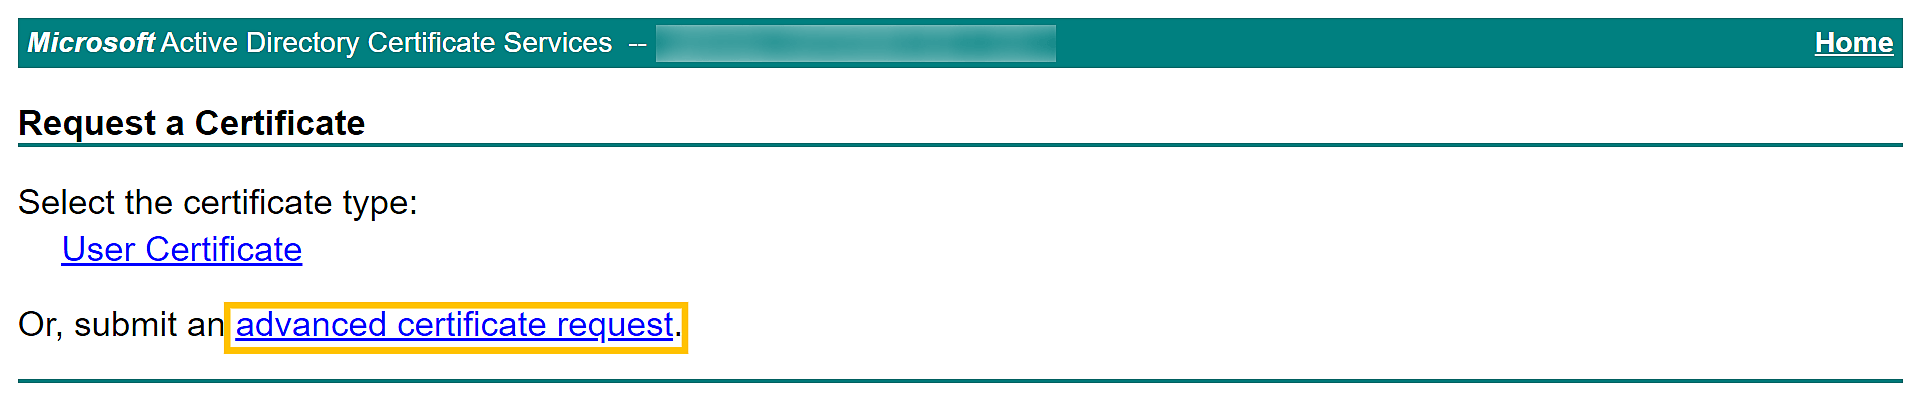
- Connect to the Microsoft Active Directory Certificate Services of your internal CA and click the Request a certificate link.
- On the Request a Certificate page, click the advanced certificate request link.
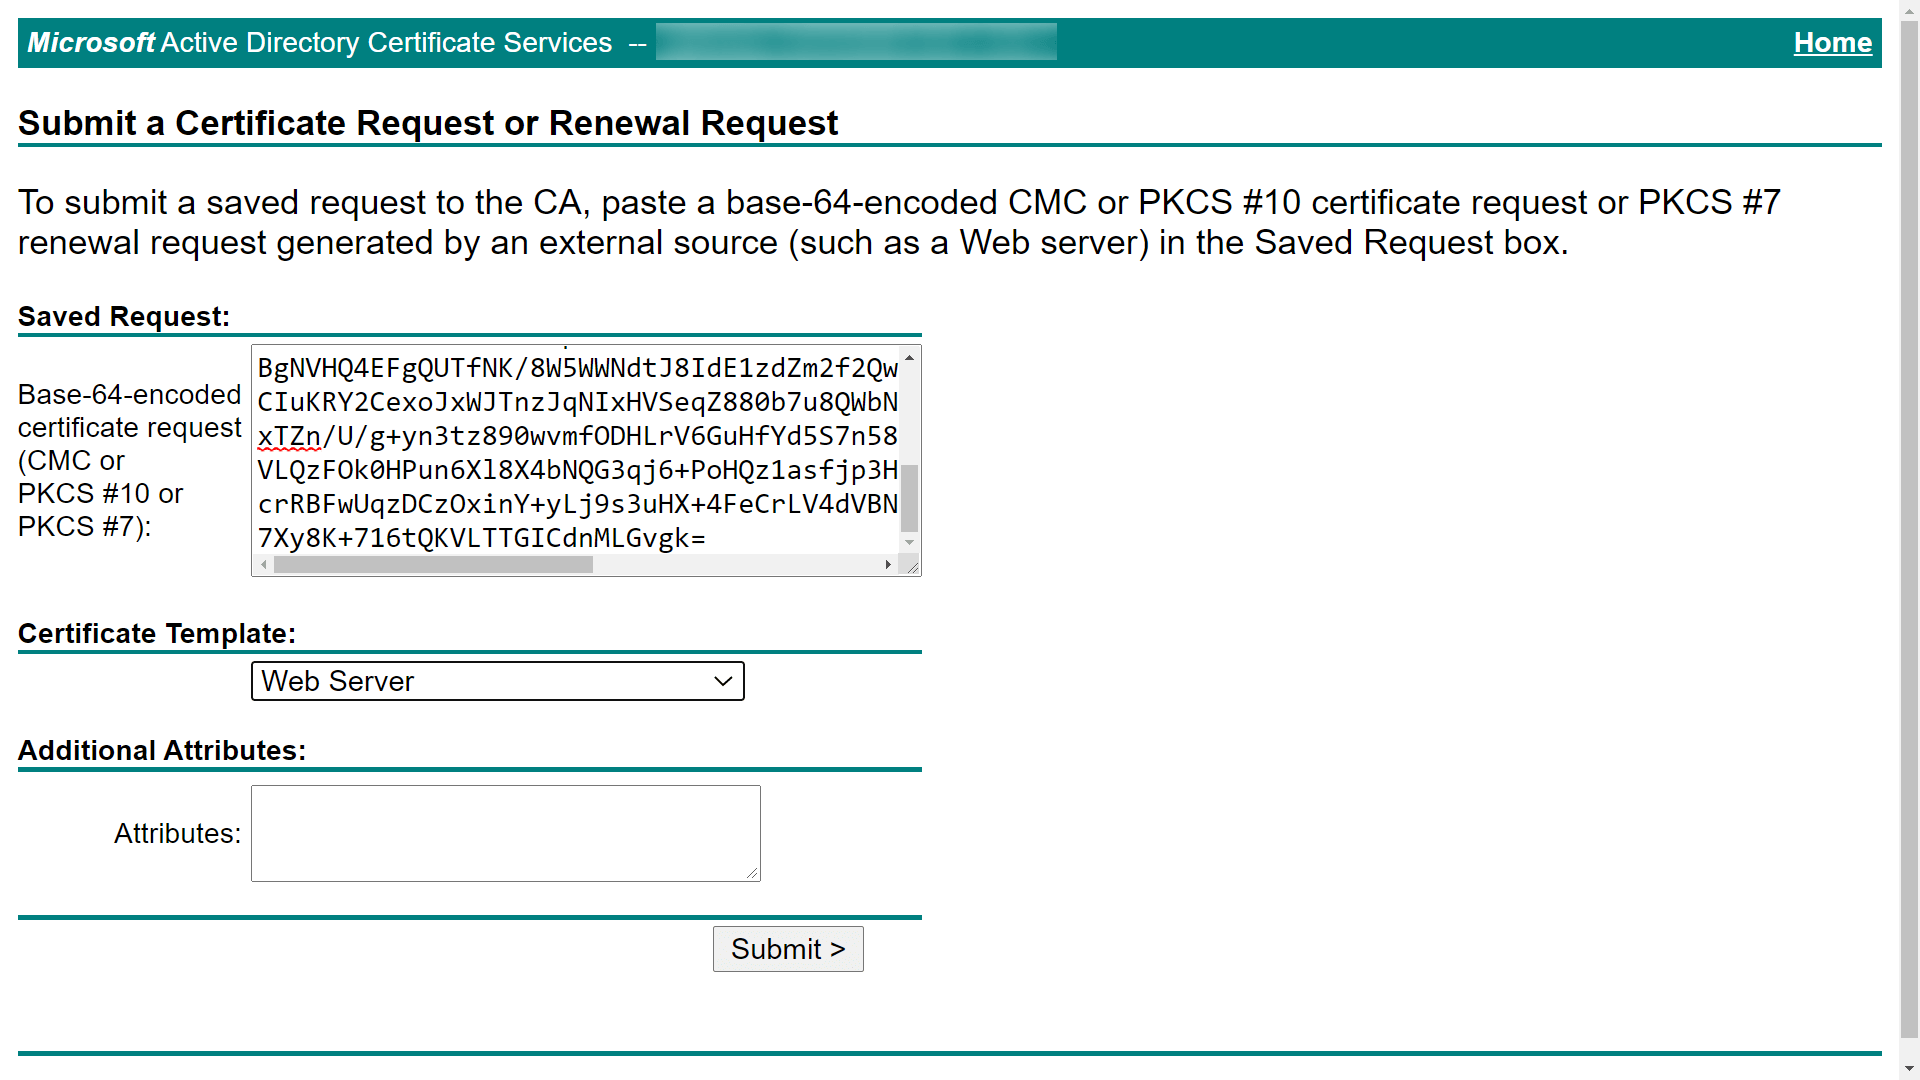
- On the Submit a Certificate Request or Renewal Request page, copy the content from your CSR file and paste it in the Saved Request field.
- Select Web Server or the appropriate template for Tomcat under Certificate Template and click Submit.
- The certificate will be issued when you click the Download certificate chain link. The downloaded certificate will be in the P7B file format.
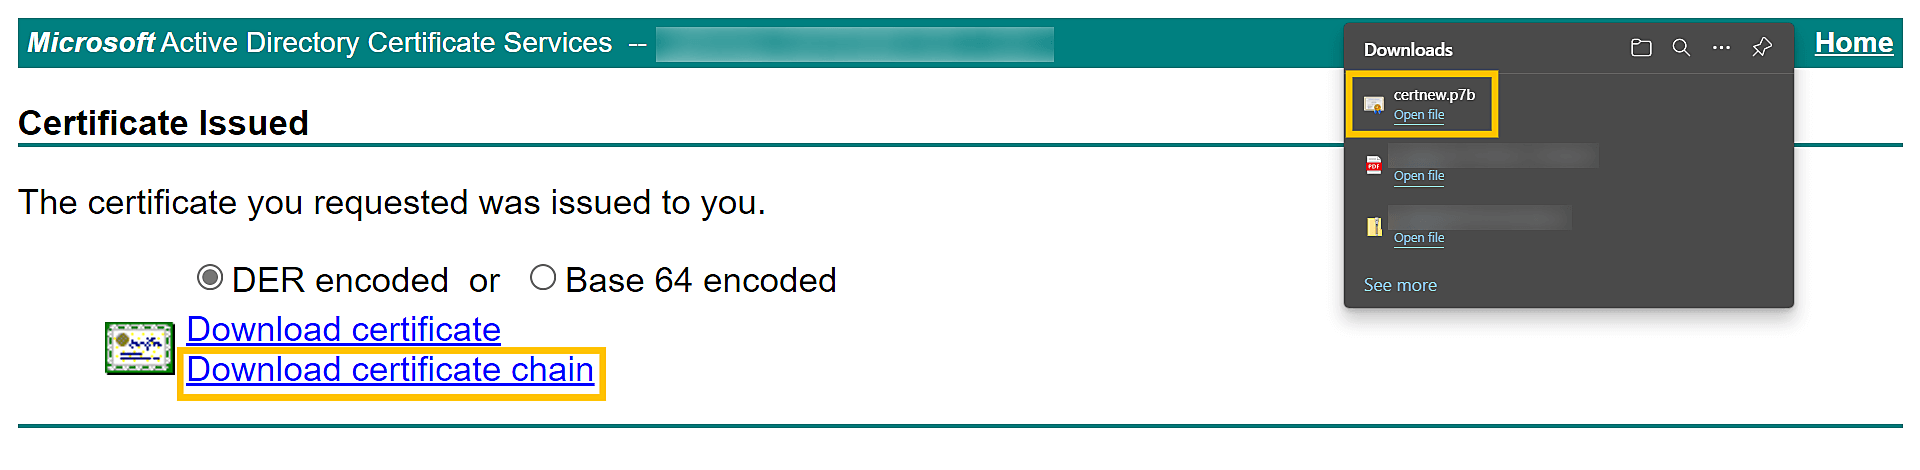
- Copy the P7B file to the <product_installation_directory>\jre\bin folder.
Step 5: Import the certificate
Follow the steps given below that correspond with the format in which you want to import the certificate.
A. Privacy-enhanced mail (PEM) format
To import the certificate into the keystore file in PEM format, open Command Prompt, navigate to <product_installation_directory>\jre\bin, and run the commands from the list below that applies to your CA.
General commands
- keytool -importcert -alias root -file <root.cert.pem> -keystore <your.domain.com>.keystore -trustcacerts
- keytool -importcert -alias intermediate -file <intermediate.cert.pem> -keystore <your.domain.com>.keystore -trustcacerts
- keytool -importcert -alias intermediat2 -file <intermediat2.cert.pem> -keystore <your.domain.com>.keystore -trustcacerts
- keytool -importcert -alias tomcat -file <server.cert.pem> -keystore <your.domain.com>.keystore -trustcacerts
Vendor-specific commands
For GoDaddy certificates
- keytool -import -alias root -keystore <domainName>.keystore -trustcacerts -file gd_bundle.crt
- keytool -import -alias cross -keystore <domainName>.keystore -trustcacerts -file gd_cross.crt
- keytool -import -alias intermed -keystore <domainName>.keystore -trustcacerts -file gd_intermed.crt
- keytool -import -alias tomcat -keystore <domainName>.keystore -trustcacerts -file <domainName>.crt
For Verisign certificates
- keytool -import -alias intermediateCA -keystore <domainName>.keystore -trustcacerts -file <your intermediate certificate.cer>
- keytool -import -alias tomcat -keystore <domainName>.keystore -trustcacerts -file <domainName>.cer
For Comodo certificates
- keytool -import -trustcacerts -alias root -file AddTrustExternalCARoot.crt -keystore <domainName>.keystore
- keytool -import -trustcacerts -alias addtrust -file UTNAddTrustServerCA.crt -keystore <domainName>.keystore
- keytool -import -trustcacerts -alias ComodoUTNServer -file ComodoUTNServerCA.crt -keystore <domainName>.keystore
- keytool -import -trustcacerts -alias essentialSSL -file essentialSSLCA.crt -keystore <domainName>.keystore
For Entrust certificates
- keytool -import -alias Entrust_L1C -keystore <keystore-name.keystore> -trustcacerts -file entrust_root.cer
- keytool -import -alias Entrust_2048_chain -keystore <keystore-name.keystore> - trustcacerts -file entrust_2048_ssl.cer
- keytool -import -alias -keystore <keystore-name.keystore> -trustcacerts -file <domainName.cer>/li>
For certificates purchased through the Thawte reseller channel
- keytool -import -trustcacerts -alias thawteca -file <SSL_PrimaryCA.cer> -keystore <keystore-name.keystore>
- keytool -import -trustcacerts -alias thawtecasec -file <SSL_SecondaryCA.cer> - keystore <keystore-name.keystore>
- keytool -import -trustcacerts -alias tomcat -file <certificate-name.cer> -keystore <keystore-name.keystore>
Once the certificate is installed, proceed to Step 6 to bind the certificate to ADAudit Plus.
Note: If you are receiving the certificates from a CA that is not listed above, then contact your CA to get the commands required to add its certificates to the keystore.
B. P7B or PKCS #7 format
To import the certificate into the keystore file in P7B or PKCS #7 format, open Command Prompt, navigate to <product_installation_directory>\jre\bin, and execute the following command:
keytool -import -trustcacerts -alias tomcat -file certnew.p7b -keystore <keystore_name>.keystore
Once the certificate is installed, proceed to
Step 6 to bind the certificate to ADAudit Plus.
C. PFX or PKCS #12 format
- Copy and save your PFX or PKCS #12 file in the <product_installation_directory>\conf folder.
- Open the server.xml file present in the <product_installation_directory>\conf folder with a local text editor. Create a backup of the existing server.xml file just in case you wish to restore it.
- Find the connector tag that contains <Connector ... SSLEnabled="true"... name="SSL".../>.
- Within the connector tag, make the following changes:
- Replace the value of keystoreFile with "./conf/<YOUR_CERT_FILE.pfx>".
- Add keystoreType="PKCS12".
- Save and close the server.xml file.
<Connector SSLEnabled="true" URIEncoding="UTF-8" acceptCount="100" ciphers="TLS_ECDHE_RSA_WITH_AES_128_CBC_SHA256,TLS_ECDHE_RSA_WITH_AES_128_CBC_SHA,TLS_ECDHE_RSA_WITH_AES_256_CBC_SHA384,TLS_ECDHE_RSA_WITH_AES_256_CBC_SHA,TLS_RSA_WITH_AES_128_CBC_SHA256,TLS_RSA_WITH_AES_128_CBC_SHA,TLS_RSA_WITH_AES_256_CBC_SHA256,TLS_RSA_WITH_AES_256_CBC_SHA" clientAuth="false" connectionTimeout="20000" debug="0" disableUploadTimeout="true" enableLookups="false" keystoreFile="./conf/<YOUR_CERT_FILE.pfx>" keystorePass="*********" keystoreType="PKCS12"maxSpareThreads="75" maxThreads="150" minSpareThreads="25" name="SSL" port="8444" scheme="https" secure="true" sslEnabledProtocols="TLSv1,TLSv1.1,TLSv1.2" sslProtocol="TLS"/>
Step 6: Bind the certificates to ADAudit Plus
- Copy the <domainName>.keystore file from the <product_installation_directory>\jre\bin folder and paste it in the <product_installation_directory>\conf folder.
- Open the server.xml file present in the <product_installation_directory>\conf folder with a local text editor. Create a backup of the existing server.xml file just in case you wish to restore it.
- Find the connector tag that contains <Connector ... SSLEnabled="true"... name="SSL".../>.
- Within the connector tag, replace the value of keystoreFile with "./conf/<Your_Domain_Name>.keystore".
<Connector SSLEnabled="true" URIEncoding="UTF-8" acceptCount="100" ciphers="TLS_ECDHE_RSA_WITH_AES_128_CBC_SHA256,TLS_ECDHE_RSA_WITH_AES_128_CBC_SHA,TLS_ECDHE_RSA_WITH_AES_256_CBC_SHA384,TLS_ECDHE_RSA_WITH_AES_256_CBC_SHA,TLS_RSA_WITH_AES_128_CBC_SHA256,TLS_RSA_WITH_AES_128_CBC_SHA,TLS_RSA_WITH_AES_256_CBC_SHA256,TLS_RSA_WITH_AES_256_CBC_SHA" clientAuth="false" connectionTimeout="20000" debug="0" disableUploadTimeout="true" enableLookups="false" keystoreFile="./conf/<Your_Domain_Name>.keystore" keystorePass="*********" maxSpareThreads="75" maxThreads="150" minSpareThreads="25" name="SSL" port="8444" scheme="https" secure="true" sslEnabledProtocols="TLSv1,TLSv1.1,TLSv1.2" sslProtocol="TLS"/>
- Save and close the server.xml file.
Encrypt the keystore password
- Log in to your ADAudit Plus web console and navigate to Admin > General Settings > Connection.
- Select the General tab, check the Encrypt Keystore Password box, and enter the keystore password you used while generating the CSR for this certificate file.
- Click Save changes.
- Restart ADAudit Plus again for the changes to take effect.

Don't see what you're looking for?
-
Visit our community
Post your questions in the forum.
-
Request additional resources
Send us your requirements.
-
Need implementation assistance?
Try OnboardPro
