- Related Products
- AD360
- Log360
- ADAudit Plus
- ADSelfService Plus
- EventLog Analyzer
- Exchange Reporter Plus

Help Document
Customize Naming Formats
In large environments, maintaining a consistent naming convention for Active Directory (AD) objects—like user accounts, groups, and devices—is more than just good practice. It’s essential for clarity, automation, and security.
ADManager Plus lets you define custom naming formats that reflect your organization’s internal policies, regulatory requirements, or operational standards. The formats make it easier to:
- Keep naming consistent across all AD objects.
- Prevent manual errors during provisioning.
- Simplify search, reporting, and ongoing management.
- Ensure compatibility with third-party tools or scripts that depend on a specific naming structure.
Steps to create a custom naming format
- Log in to ADManager Plus.
- Navigate to Admin > Custom Settings > Naming Format.
- Click the + Add New Format button to create a new naming convention.
- In the Format Name field, provide a suitable name to the naming format.
- In the Select Data section:
- Choose attributes like FirstName, LastName, LogonName, SAMAccountName, or special elements like Dot, Underscore, Random Number, Custom Functions or a Custom Text.
- Granularly add a filter to select only specific characters such as First, Last, or Nth character of the selected attribute.
- Standardize the appearance of values using formatting options such as Given Case, Lower Case, Upper Case, or Init Caps.
Note: Selecting Custom Functions under Select Data allows you to create unique naming formats based on custom logic, which can be configured under Custom Functions in the Admin tab.
- Click Add. The appropriate value will appear in Format Value.
- Repeat the process to add more conditions.
- The specified Naming Format can be reviewed in the Preview section.
- Click Show Advanced for more conditions.
- Click Save. Now, the Naming Format is ready to be used in user creation templates.
Customizing a naming format in ADManager Plus.
Advanced Naming Format
The Advanced Naming Format feature allows administrators to define smart, flexible naming conventions for user attributes such as logon name, display name, and account name. These naming formats ensure consistency across your organization while accommodating exceptions and incomplete data, particularly during bulk user provisioning.
- Click the Add Advanced Format link located in the bottom-right corner of the Customize Naming Formats page.
- In the Advanced Format Name field, enter a suitable name.
- From the Default format without any conditions drop-down, select the default naming format to apply when no conditions are met.
- Click the + Add Condition button to add more conditions.
- In the Condition window:
- Select the attributes and constraints from the drop-downs.
- Choose the format that has to be applied if the above condition is true.
- Click OK.
- Repeat the process to add more conditions.
- Click Save.

How to add conditions in naming formats using ADManager Plus.
Use cases
Use case 1: Creating logon names using initials and a random number
In some organizations, the standard for creating user logon names is to combine the first letter of the user's first name, middle name, and last name, followed by a random three-digit number.
Input:
- First Name: Leonardo
- Middle Name: Da
- Last Name: Vinci
Output:
- Logon Name: LD386@domain.com
To do this in ADManager Plus, under Select Data, choose FirstName, set it to pick the first word, then the first character, specify 1 preceding character, and choose the appropriate case before adding it to the format. Repeat the same steps for MiddleName and LastName. Finally, add a Random Number field with 3 digits to complete the format.
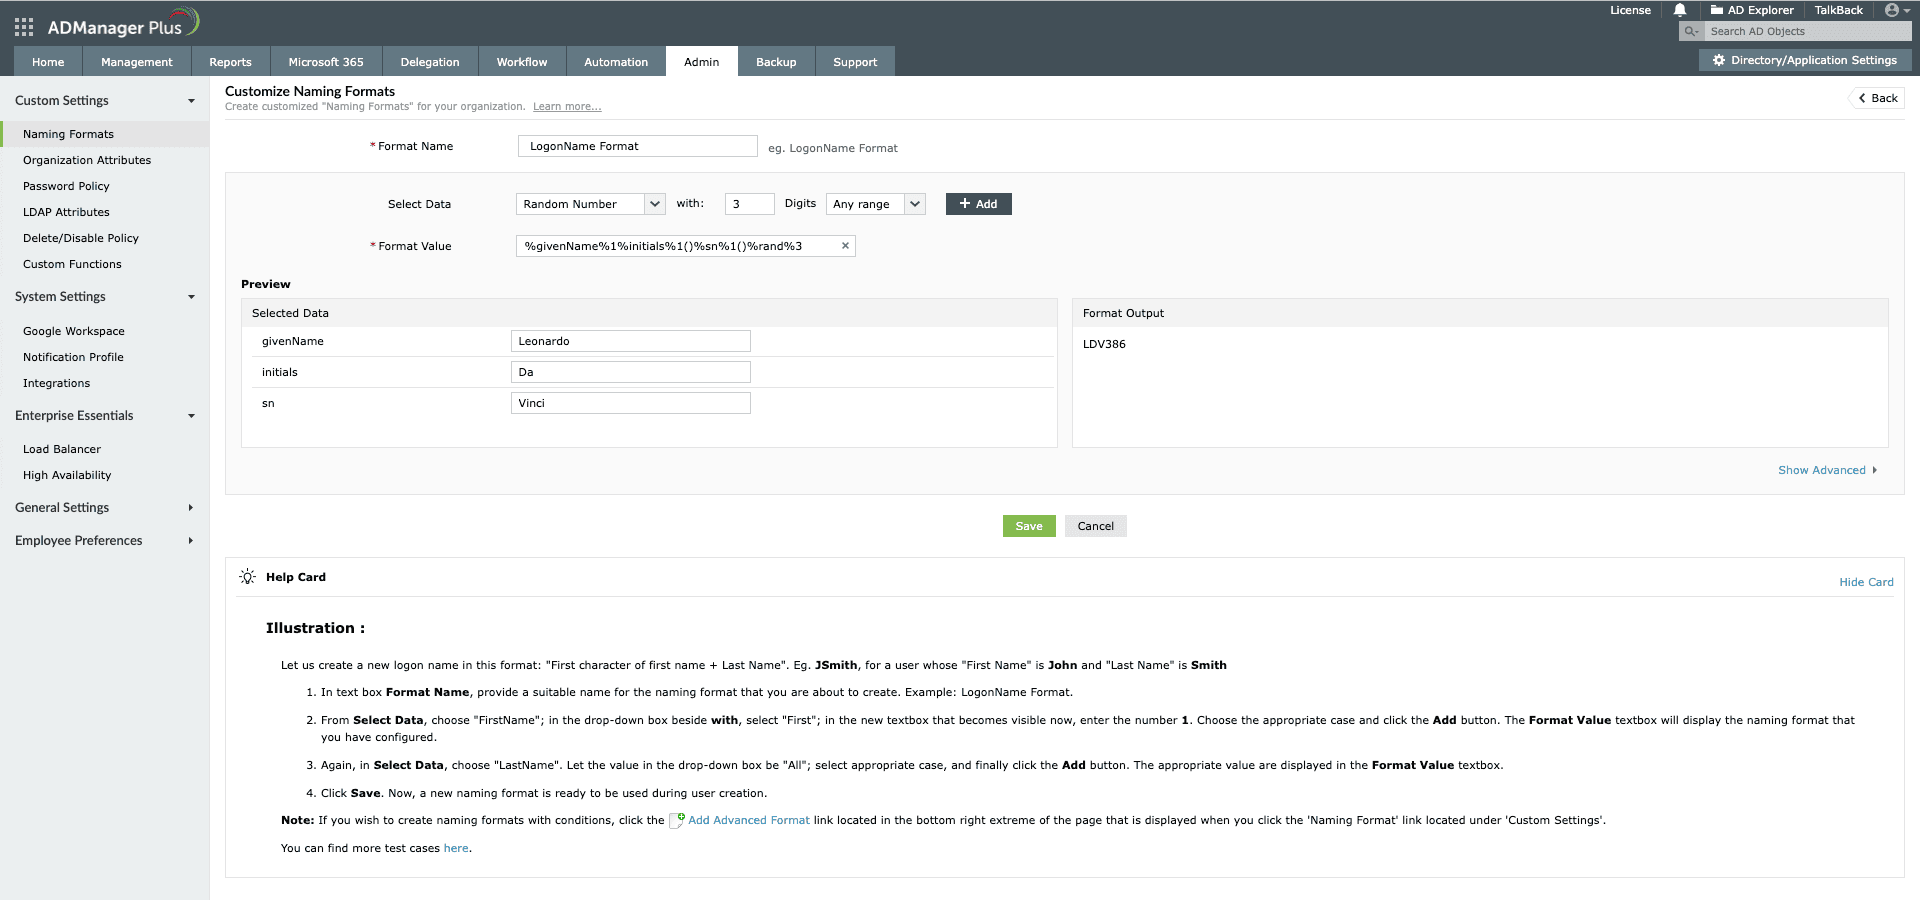
Creating logon names using the first character of first name + first character of middle name + first character of last name + random three digit number.
Use case 2: Creating logon names using initials of first name and last word of last name
In some organizations, the logon naming convention involves using the initials of each word in the first name, followed by the last word of the last name.
Input:
- First Name: Jorge Humberto
- Last Name: Vasquez Murillo
Output:
- Logon Name: JHMurillo@domain.com
To do this in ADManager Plus, under Select Data, choose FirstName, set it to pick the Every Word, then the first character, specify 1 preceding character, and choose the appropriate case before adding it to the format. Next, choose LastName, set it to pick all words, then select the last word, and choose the appropriate case before adding it to the format.
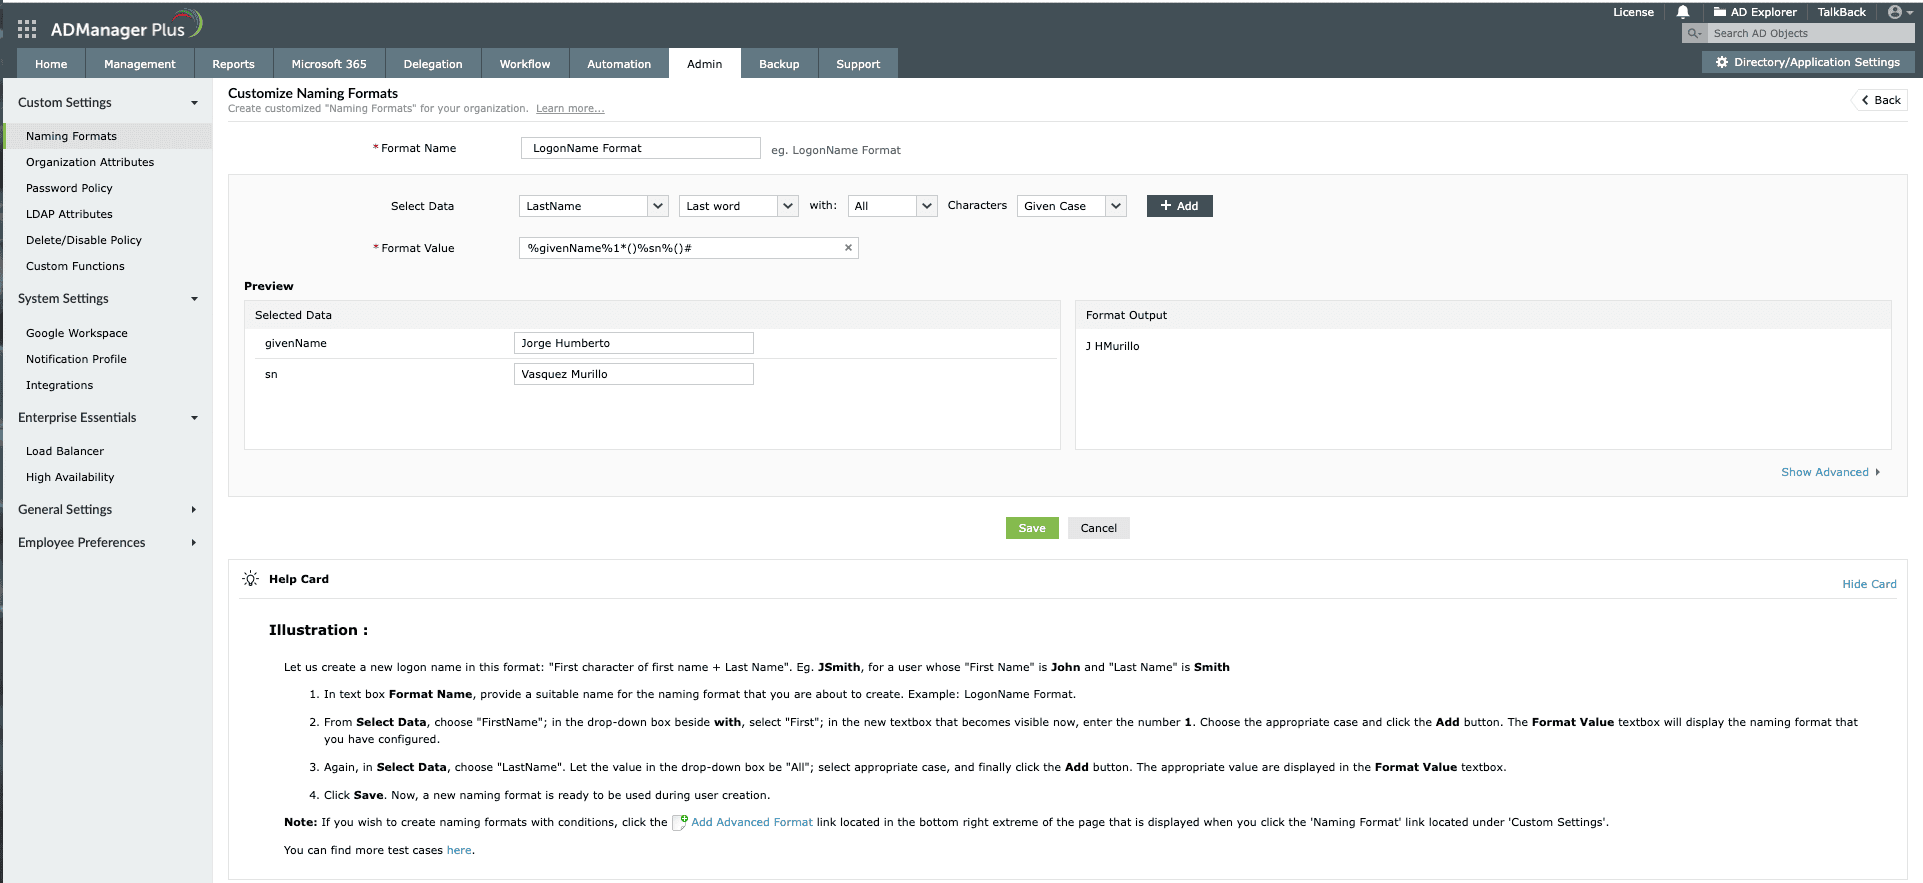
Creating logon names using the first character of every word in the first name + last word of the last name.
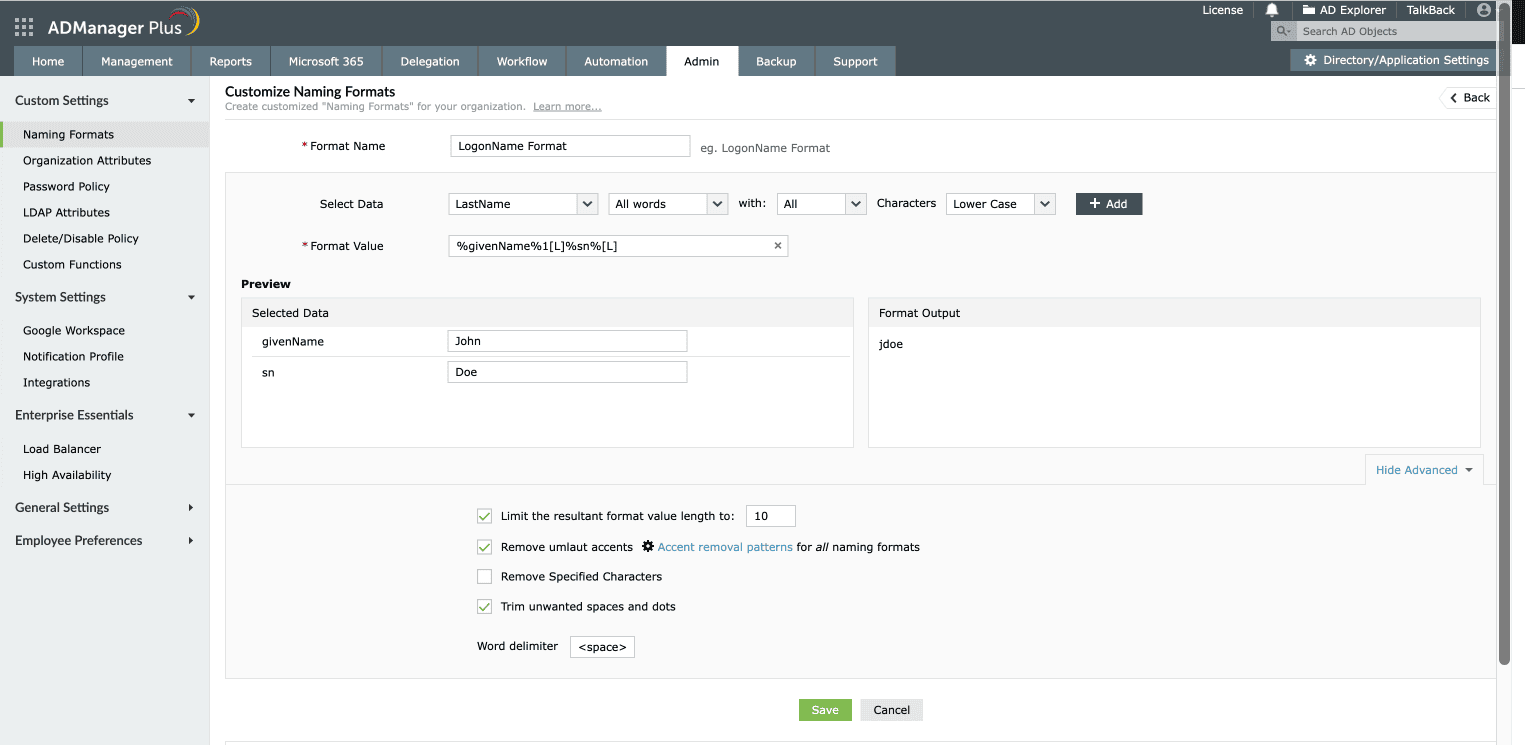
Use case 3: Creating logon names using first name, a specific character from last name, and a date
In some organizations, the logon naming convention involves using the user's full first name, a specific character from the last name, and a date value—typically the date of joining—in a specific format.
Input:
- First Name: John
- Last Name: Doe
- Date of joining: 2022-05-06
Output:
- Logon Name: Johno220506@domain.com
To do this in ADManager Plus, under Select Data, choose FirstName, set it to pick all words, then all characters, and choose the appropriate case before adding it to the format. Choose LastName, set it to pick all words, then the Nth character <2>, and choose the appropriate case before adding it to the format. Finally, choose DateFormat, and add it to the format. Edit the format value to %-Dyymmdd% to ensure the date appears in the desired format.
Note: The default format for date is "%-DyyyyMMdd%". This can be modified as required in the Format Value field.
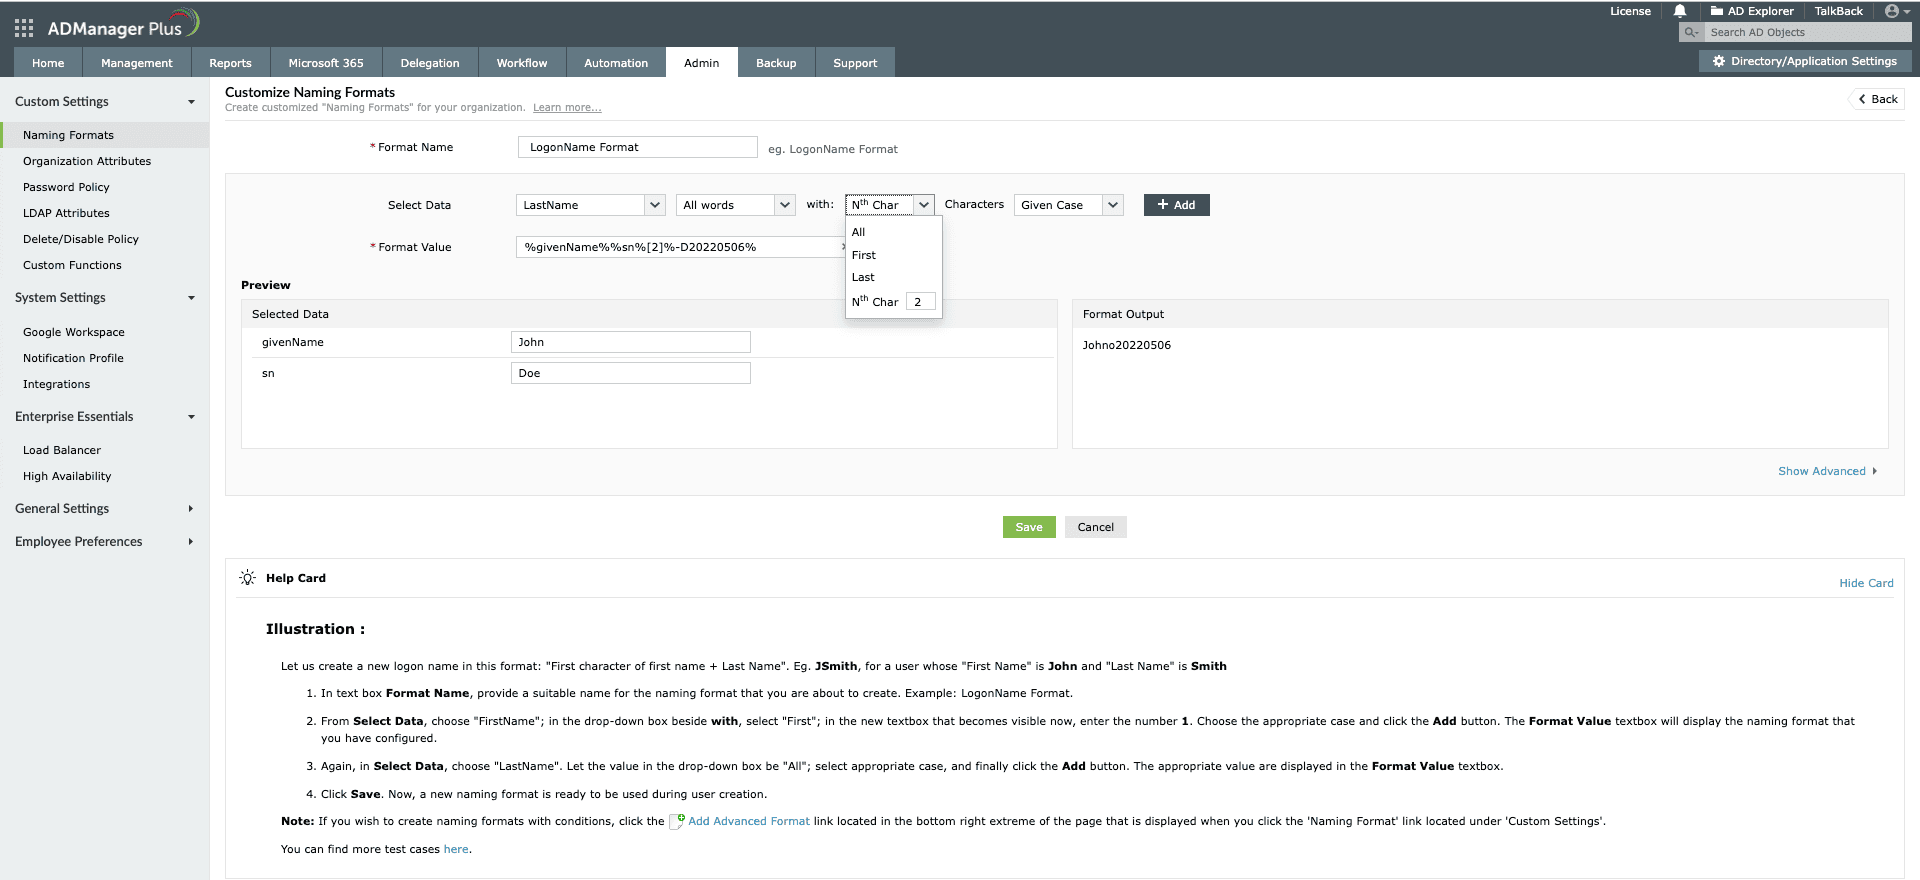
Creating logon names using the first name + specific character from last name + date.
Use case 4: Creating logon names by removing vowels from the last name and combining initials
In some organizations, the logon naming convention requires creating a username by removing vowels from the first name and using the initials of the middle and last names.
Input:
- First Name: Michael
- Middle Name: T
- Last Name: Smith
Output:
Logon Name: MchlTS@domain.com
In ADManager Plus, go to Select Data, choose Custom Functions, and select the Remove Vowels function, which uses a script to remove vowels from the first name. If this function hasn’t been created yet, click Add New Function to create it with the required script. Then, set the input fields as shown below. These will be passed as arguments to the custom function.
- Arg0 to %ad.givenName% (First Name)
- Arg1 to %ad.initials%
- Arg2 to %ad.sn% (Last Name)
Use the Preview section to test the function with sample input values. For instance:
- Arg0: Michael
- Arg1: T
- Arg2: Smith
The Output field will show the desired result, with vowels removed and the components combined. You can use this naming format while creating the users using ADManager Plus.
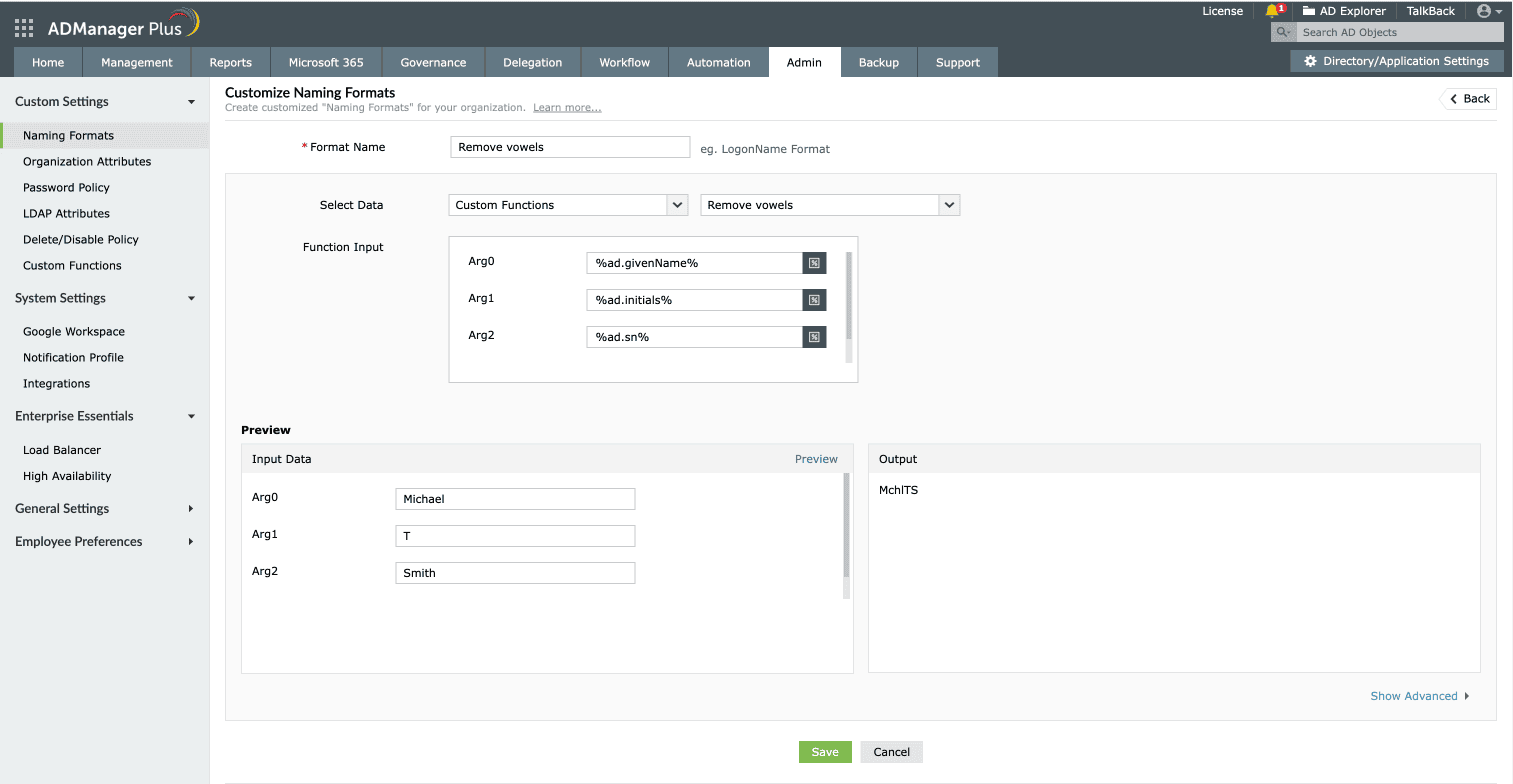
Creating logon names by removing vowels from the first name and combining initials of the middle and last names.