- Related Products
- AD360
- Log360
- ADAudit Plus
- ADSelfService Plus
- EventLog Analyzer
- Exchange Reporter Plus

Help Document
High Availability
|
High availability refers to a system or component which aims to ensure an agreed level of operational performance for a higher than normal period. ADManager Plus helps administrators maintain high availability for a server in case of failure of the primary server. ADManager Plus achieves this by employing a high availability architecture which designates a backup server to act as a shield to the primary server.
|

|
Prerequisites
Before enabling this setting, make sure that the following conditions are satisfied.
Make sure that both instances of the product:
- Are installed and running as services.
- Have the same build architecture (32-bit or 64-bit), version and build number.
- Are connected to the same domain, and network.
If your IP range is 172.21.x.x, then the primary server, standby server, and the virtual IP should also lie in the IP range 172.21.x.x, and also the same subnet. - Archived audit data should be stored on the common network share.
Please note, high availability can be disabled only from the standby server, and also only when the primary server is turned off.
Configuration
Follow the below steps to enable high availability.
- Go to the Admin tab.
- Navigate to Enterprise Essentials → High Availability in the left pane.
- Check the Enable High Availability box.
- Enter the appropriate values for the subsequent fields to enable this setting.
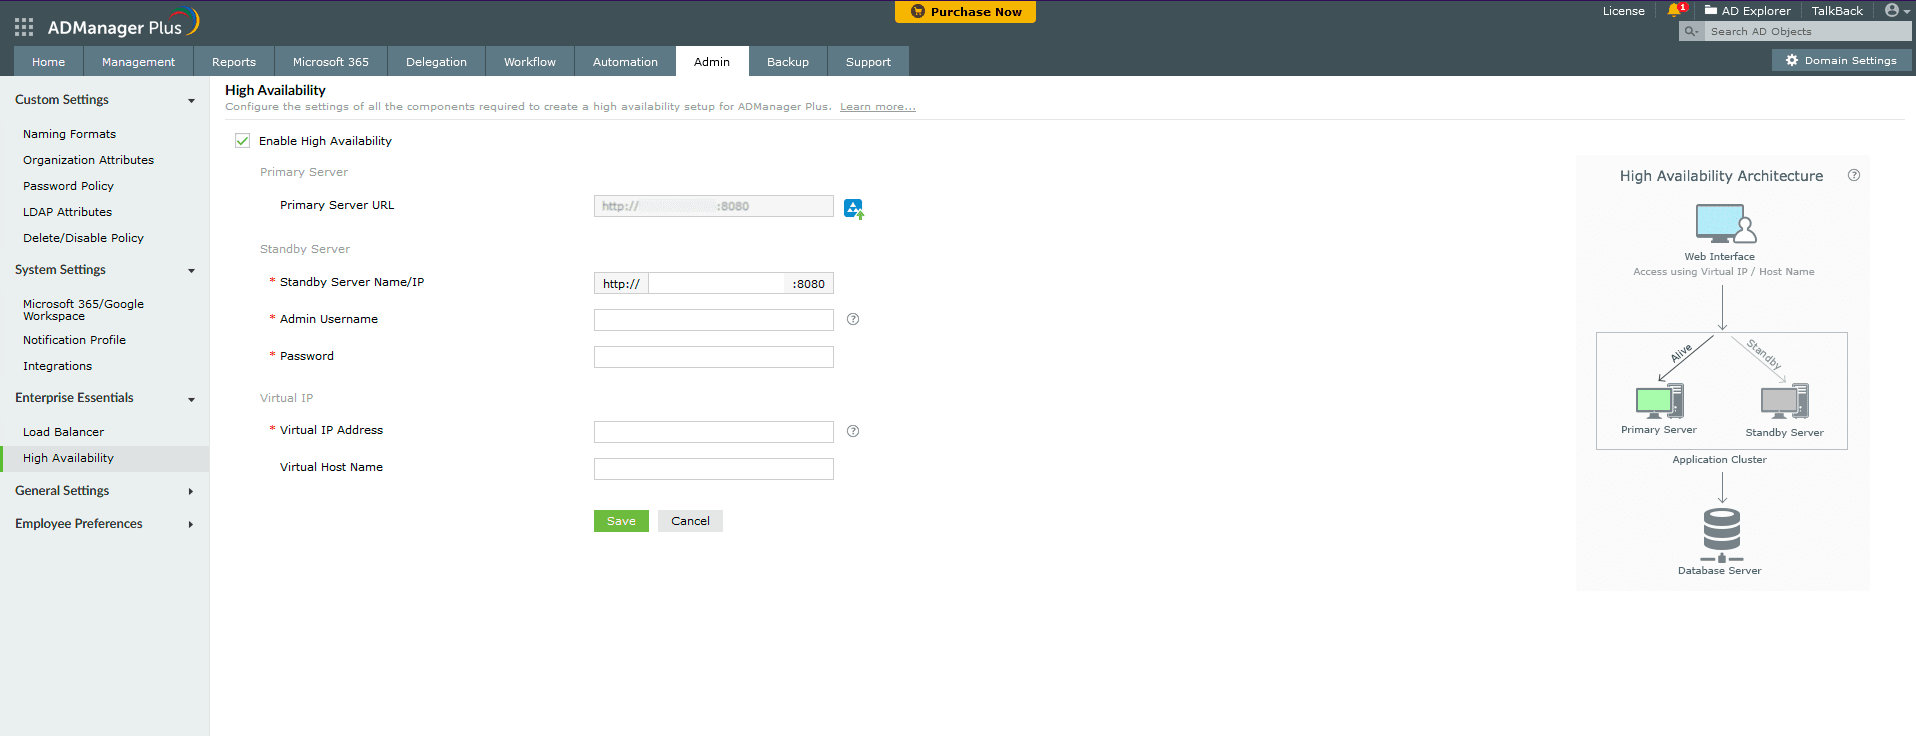
- Primary Server: This text box will contain the URL of the primary server on which the selected component is installed.
- Secondary Server: Enter the details of the secondary server which will take over during downtimes of the primary server.
- Standby Server Name/IP: Enter the URL of the secondary server that you want to take over during downtimes of the primary server.
- Admin Username/Password: Enter the super admin credentials of the component in standby server.
- Virtual IP: Enter a single IP with which to access both the primary and standby servers. When the product is accessed using this IP, the data is routed directly through the server that is active at that particular time.
- Virtual IP Address: A virtual IP address is an unused static IP address. Open cmd and try pinging an IP. If it throws the error "Request timed out", the IP is unused and can be used as the virtual IP. Enter the virtual IP to access both primary and standby servers.
- Virtual Host Name: A virtual host name is the alias given to the virtual IP. This can be set from the DNS server. Enter the virtual host name to access both primary and standby servers.
- Click Save.
Note: Super administrators are users who have been provided with the full control over the entire application.
Note: Microsoft SQL is the recommended database that must be bundled with the product if you want to work with high availability. In case you wish to migrate the ADManager Plus database from PostgreSQL to Microsoft SQL, then disable High Availability before starting the migration process.