- Related Products
- AD360
- Log360
- ADAudit Plus
- ADSelfService Plus
- EventLog Analyzer
- Exchange Reporter Plus

Help Document
Schedule Audit Reports
The Schedule Audit Reports feature helps you to automatically generate and send detailed audit reports of all AD management actions performed by help desk technicians using ADManager Plus. These reports cover important tasks like password resets, user creation or deletion, and changes to user attributes.
With this feature, you can:
- Keep track of technician activities without doing it manually.
- Get reports in PDF, XLSX, CSV, or HTML formats at regular intervals.
- Store reports for audit and compliance purposes.
Steps to schedule audit reports
- Navigate to the Delegation tab.
- Click Audit Report located under Help Desk Audit Reports.
- Click Scheduled Reports located at the top right of the page.
- Click Scheduled New Report in the Scheduled Audit Report page.
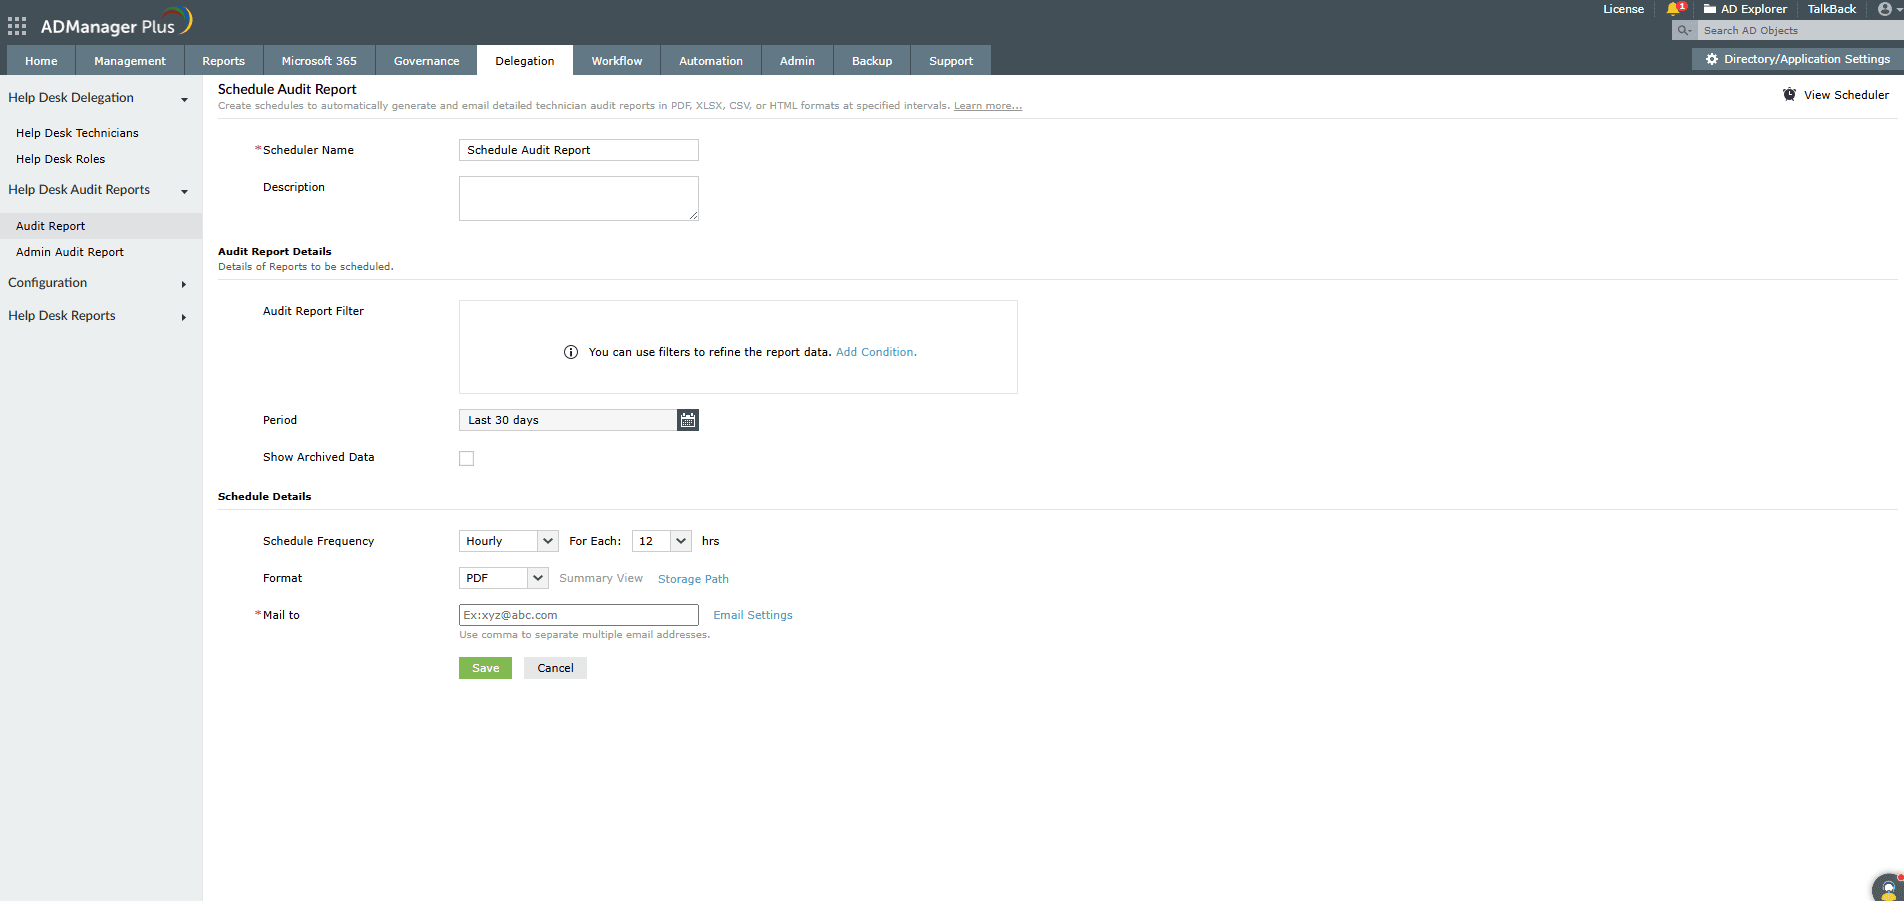
- In the Scheduler Name field, enter a name for the audit report schedule.
- In the Description field, you can enter a brief note to describe the purpose or scope of the schedule.
- In the Select Help Desk Technicians field, select the desired technicians whose action details you want to know.
- In the Period field, select the period for which the report should be generated.
- In the Schedule Frequency section, choose how often the report should be generated and specify the interval accordingly.
- In the Format field, select the format of the report such as PDF, CSV, XLSX, or HTML based on your requirement.
- In the Mail to field, enter one or more email addresses (comma-separated) to which the report should be sent after generation.
- Click Save to apply the settings.
Once scheduled, the reports will be automatically generated and sent to the specified recipients based on the selected frequency.
Schedule details
This option allows you to define how often audit reports should be generated and delivered. You can schedule reports to run at regular intervals based on your needs.
Available scheduling options:
- Hourly: Generates the report every n hours from the time the schedule is created.
- Daily: Generates the report once a day at a specified time.
- Weekly: Generates the report once a week, on the specified day and time.
- Monthly: Generates the report once a month on the specified date and time.
- Custom: This option allows you to generate the report at a specific date and time. Use the Starting Date field to set the date, and the At field to specify the exact time for report generation.
The Frequency option lets you configure the number of times the scheduler is run.
- Choose the Run Once option to run the scheduler only once at the specified time.
- Choose the Repeat option to repeat the scheduler after a particular time interval, from the time the scheduler is created.
Schedule report format
Audit reports can be mailed in PDF, HTML, CSV, or XLSX formats. You can choose the desired format in which you would like to have the report mailed. For PDF and HTML formats, you can toggle between the Standard view and the Summary view. Use the Storage Path option to specify the location in which you wish to save the reports generated.
Email Settings
In the Mail to field, enter the email addresses of the recipients. Multiple addresses can be separated using commas.
To customize the email content and delivery preferences, click Email Settings:
- Enter the desired email subject and content in the Subject and Message fields, respectively.
- Attachment Type: Choose the Send as file(s) option to send the report as an individual file in the specified format or the Send as zipped file option to send the report as a compressed ZIP file.
- Send as a link: Select this option if you wish to send the generated report as a link via email.
- Click OK to save the configurations.
Details of attribute modifications
The Details column in exported reports provides information about configured or modified attributes. This information is available in two formats: Standard View and Summary View.
- In the Standard View, all modified attributes are displayed at a glance.
- In the Summary View, you must click the View Details link to examine specific modified or newly configured attributes.
While the Standard View gives a broad overview of attribute modifications, the Summary View helps you drill down into individual changes for deeper analysis.
By default:
- Summary View is used for PDF and HTML formats.
- Standard View is used for XLS and CSV formats.
However, you can choose your preferred view format at the time of report scheduling.