- Related Products
- AD360
- Log360
- ADAudit Plus
- ADSelfService Plus
- EventLog Analyzer
- Exchange Reporter Plus

Help Document
Custom Reports
ADManager Plus enables you to create customized Active Directory reports to meet the specific needs of your organization. Using the custom report builder, you can:
- Create custom reports
- Modify and delete custom reports
- Generate custom reports
- Delegate custom reports to help desk technicians
- Share custom reports
Create custom reports
You can create a custom report by following the steps below:
- Log in to ADManager Plus.
- Navigate to Reports > Custom Reports.
- Click the New Custom Report button to add a new custom report.
- Specify the Report name and Description details.
- In the Add Report To field, select a category from the drop-down list.
- Choose the appropriate domain from the Select domains list. Click Add OUs link to specify the OUs for which you wish to generate the reports.
- In the Conditions section, click the + icon to choose the object type for which you want to generate a report from the drop-down list that appears.
- On the Filters tab, you can customize the report by configuring AD-object-based filters.
- Under LDAP Filter, click Add Condition to specify attributes based on which data must be obtained from AD.
- Under Advanced Filter, use the options below to customize the LDAP query filter:
- Use the Filter from Report option to select predefined reports from which LDAP queries must be fetched.
- In the LDAP Query field, write your own query based on which data must be fetched.
- Under Refine Results, further refine your criteria on a database level using the Add Condition option.
- Attributes like the Password Expiry Date, Password Status, OU Name, Distinguished Name, Bad Password Count, Days Since Password Last Set, User Logon Count, and Canonical Name can be configured in the Refine Results section.
- On the Columns tab, you can select the attributes that have to appear in the report. By clicking Custom Attributes, you can configure the custom LDAP attributes that are present in AD to be displayed in the report.
- On the Management Actions tab, you can select the management operations that you wish to perform directly from the generated report.
- If you wish to view the applied conditions for a custom report, click Preview Query.
- Click Save.
Note: To add a new category, such as member-based reports, enter the category name in the Add a New Category field in the Add report to section and click the + icon. You can also delete a category if no reports exist under it.
Note: Selecting a report in the Filter from Report field will automatically populate the LDAP Query field with the selected report's predefined queries. You can customize this if required.
Note:
Note: Click Copy Custom Report to copy the configuration of an existing custom report and create a new report according to your specific requirements.
Modify and delete custom reports
- Log in to ADManager Plus.
- Navigate to Reports > Custom Reports.
- On the list of available custom reports, hover the mouse over the report you wish to modify or delete.
- To modify a report:
- Click the edit icon.
- Make the necessary changes and click Save.
- To delete a report:
- Click the delete icon.
Generate custom reports
- Log in to ADManager Plus.
- Navigate to Reports > Custom Reports.
- To generate a report, choose any of the existing custom reports available in the section. Based on the filters applied to the custom reports, multi-domain-controller report generation is also supported.
- Select the domains and OUs.
- Click Generate.
- You can also edit the report by clicking Edit report in the top-right corner of the page.
- You can add filters to the report by selecting the Filters icon on the right side of the generated report.
- You can export the report in any of your preferred formats (XLSX, PDF, HTML, CSV, or CSVDE) by clicking Export as in the top-right corner.
- To edit the export settings' description, click More in the top-right corner, select Export settings, and enter a suitable Description in the text box provided.
Note: The custom report generated with the applied filters can only be saved twice from the report creation page. To make additional changes to the Refine Results conditions, simply edit the custom report.
Note: Click the information icon next to the name of the report to view details about its creator, the person who last modified it, the filter conditions for all objects, and its LDAP query.
Delegate custom reports to help desk technicians
- You can select custom report management in a help desk role.
- Once delegated, technicians can generate all custom reports for their delegated domains and OUs.
- The designated technician can create new custom reports,however the reports can be modified only by the technician who created the report.
Share custom reports
Technicians with the custom report role delegated to them can share custom reports with select technicians or all technicians by specifying varying levels of access permissions. To do this:
- Log in to ADManager Plus.
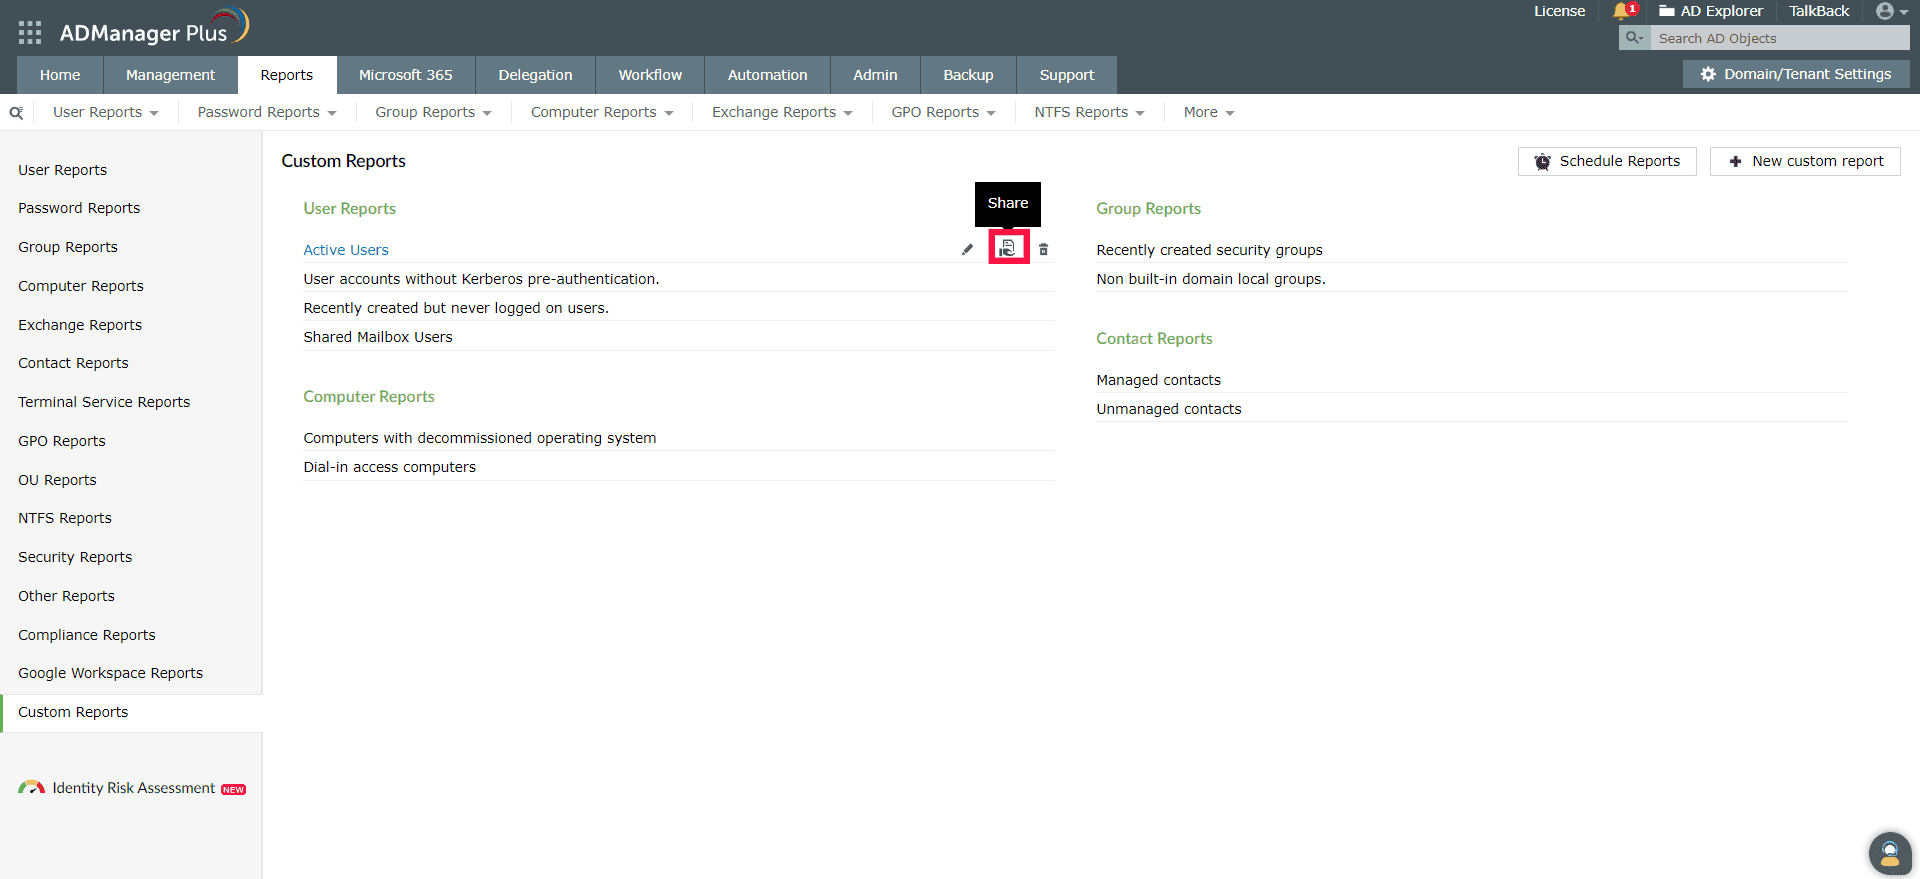
- Go to the Reports tab and click Custom Reports in the left pane.
- Hover over the custom report that you want to share and click the share icon.
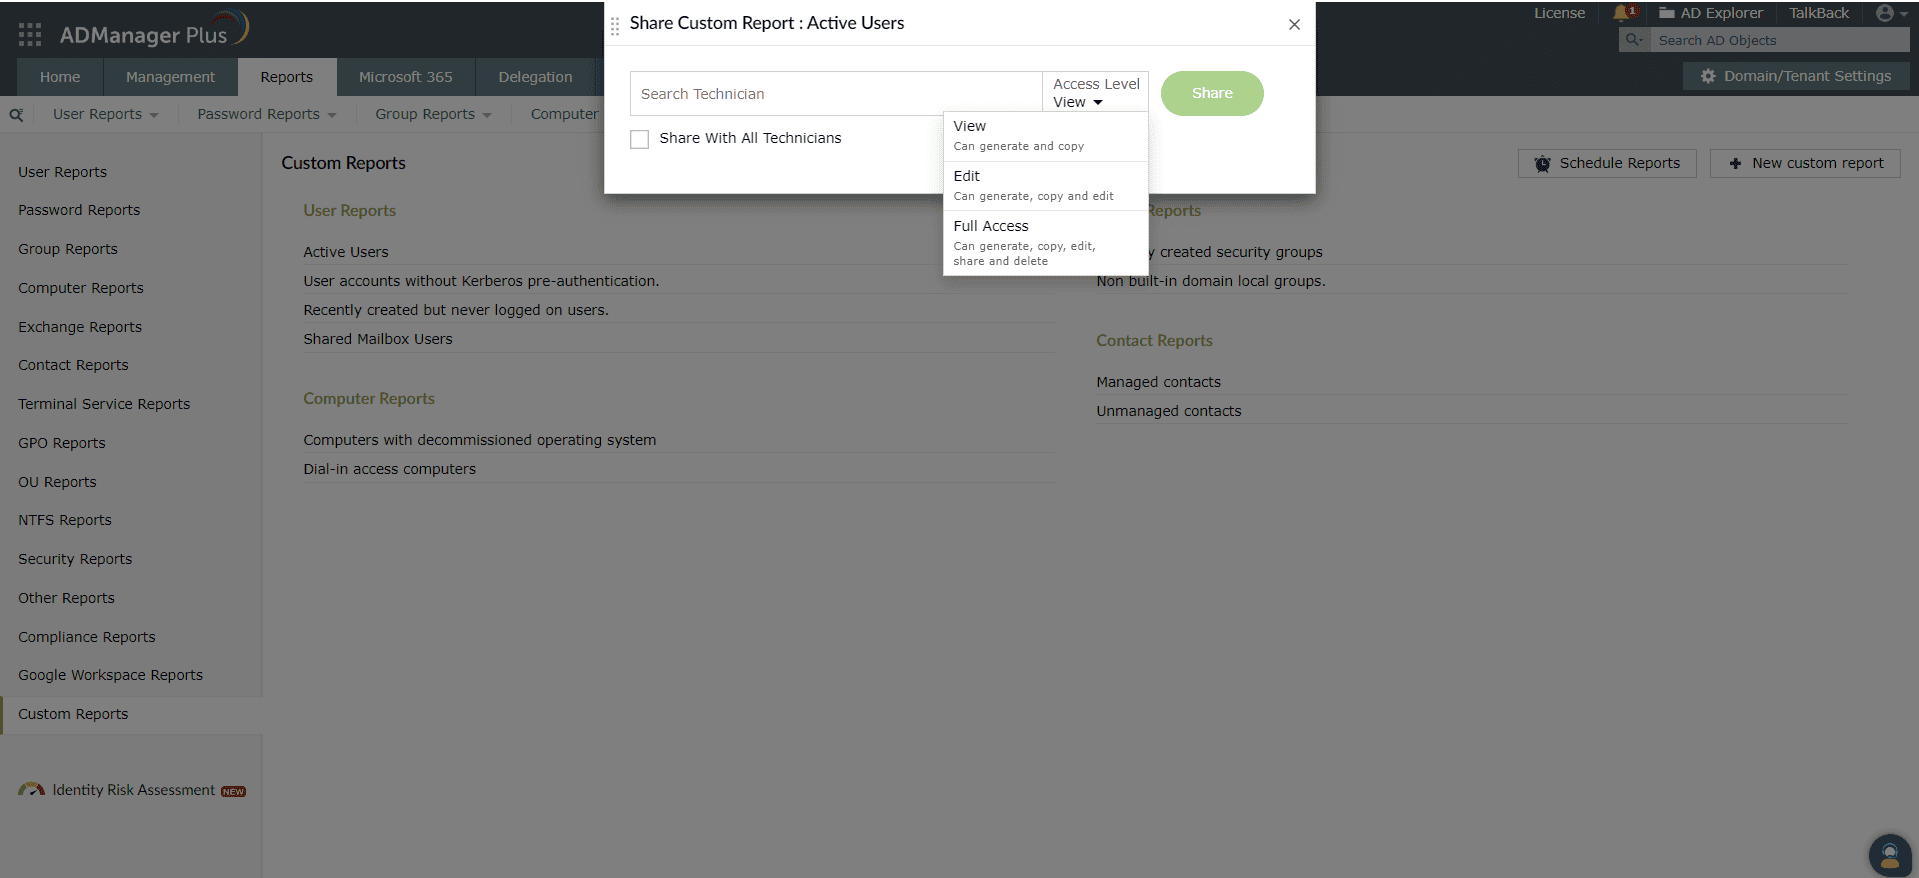
- In the pop-up that opens, search for and add the technicians with whom you want to share the custom report.
- To share the custom report with all the technicians, check the Share With All Technicians box.
- Now, click the Access level drop-down box and select the level of access from the three options given in the list.
- View: This level of access allows a technician to generate and copy the custom reports.
- Edit: This level of access allows a technician to generate, edit, and copy the custom reports.
- Full Access: This level of access allows a technician to generate, edit, copy, share, and delete the custom report.
- Upon completing the above steps, click Share.
- A separate section within the pop-up box displays the details of the shared custom report.