- Overview
- Configuration
Jira Service Management
Integrate Jira with ADManager Plus for streamlined user lifecycle management
Jira is a prominent SaaS platform known for its cloud-based project management and issue tracking software. Integrating Jira with ManageEngine ADManager Plus provides organizations an efficient and streamlined solution for user lifecycle management. By leveraging Jira's features and ADManager Plus' automation capabilities, organizations enhance productivity, foster collaboration, and ensure accurate employee data management across their IT infrastructure.
Automated user provisioning
Ensure consistent and up-to-date user information across platforms, eliminating the need for manual data management and reducing the risk of errors in user account management.
Advanced reports
Comprehensive reporting and auditing capabilities, enabling IT administrators to track user activities, monitor changes, and generate compliance reports.
The following steps are involved during configuring of Jira Service Management with ADManager Plus.
Note:
- If the required data is already present in the Jira Service Management ticket or issue, you can skip steps 1 and 2.
- Authentication can be done through OAuth or Basic authentication.
- Create custom fields to be included in the form.
- Create a form in Jira Service Management.
- Generate API Key in Jira Service Management.
- Configure the Jira Service Management endpoint in Postman and get all the required custom field response parameters.
- Configure the endpoint in ADManager Plus.
Steps to create custom fields in Jira Service Management
Create a custom field and associate it with the corresponding Jira form field in your Jira Service Management console.
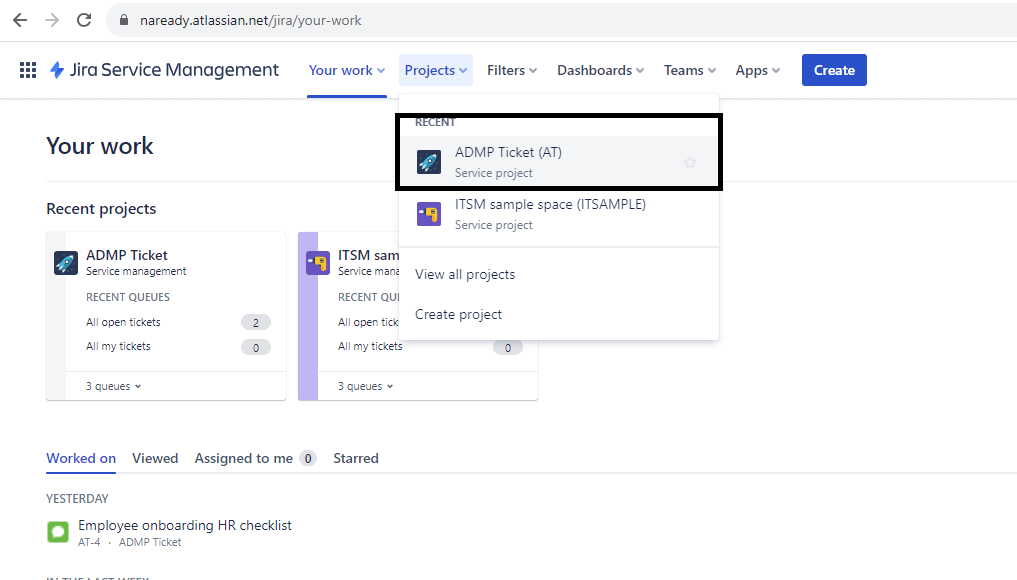
- Log into your Jira Service Management portal.
- Click Projects and select your project.
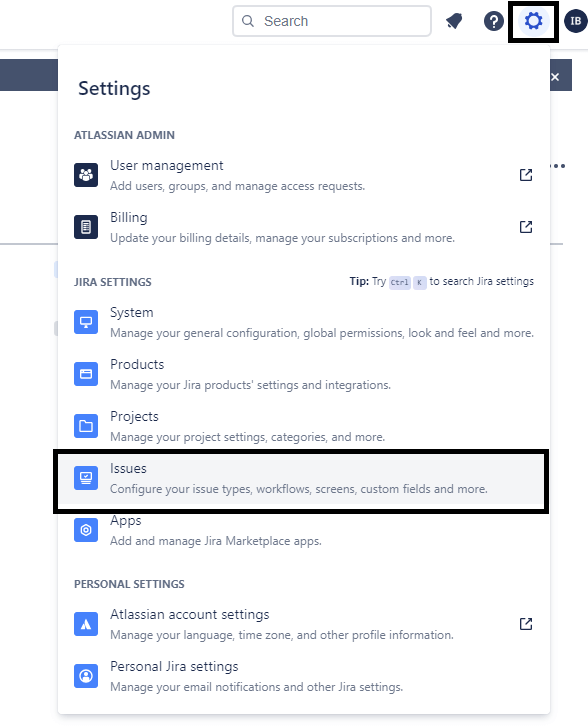
- Select the settings icon in the top right corner, and then click Issues.
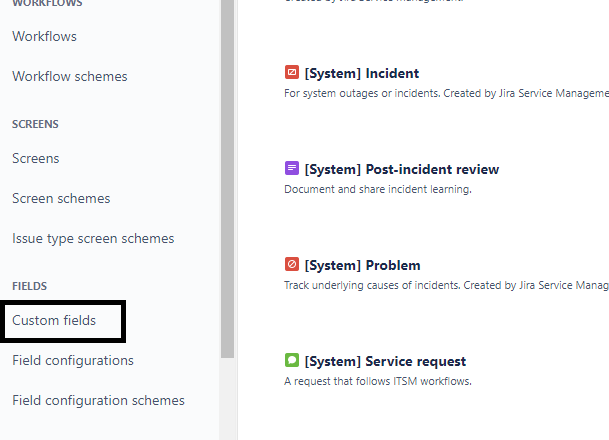
- In the left panel, navigate to Custom fields, and select Create custom field from the top right corner.
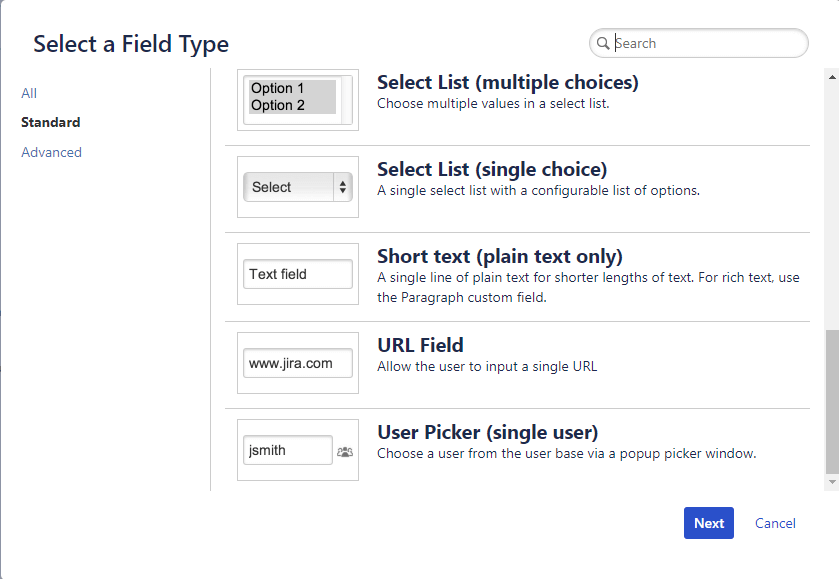
- Select the required Field Type.
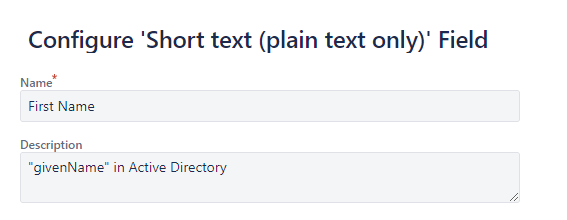
- Enter the Name and Description of the custom field, and then click Create.
- Select the required screens where you want the custom field to be displayed, and then click Update.
- Follow this procedure for each desired field, and repeat the process for all the fields you wish to include.
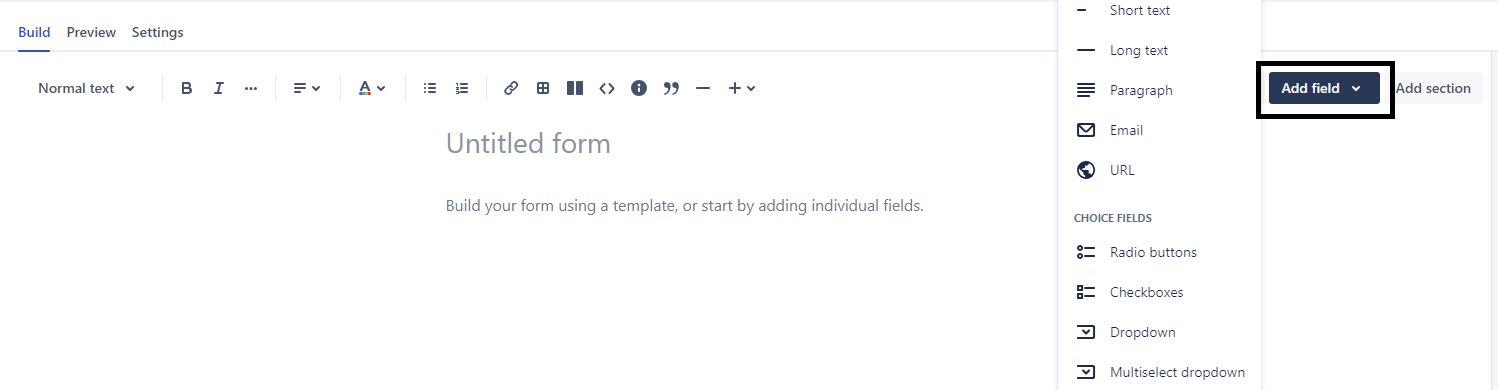
Steps to create a form in Jira Service Management
Create a Jira form to streamline the process of raising user onboarding tickets.
- Navigate to your Jira Service Management dashboard.
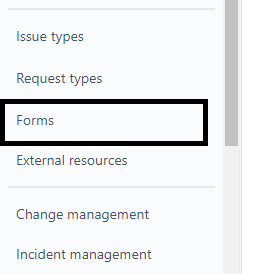
- In the left panel, click Project settings > Forms.
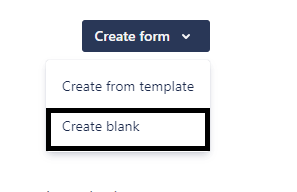
- Select Create form and click Create blank.
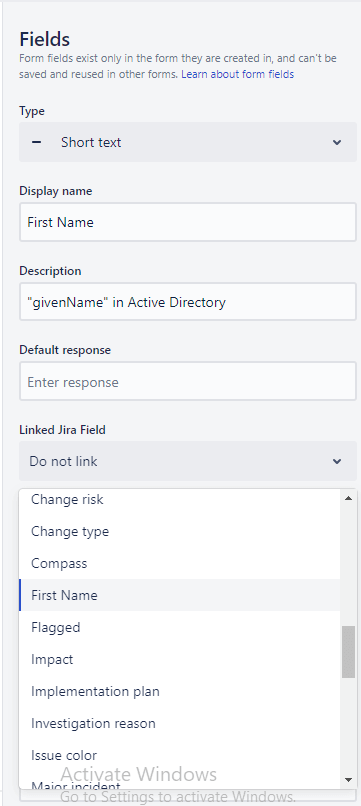
- Choose Add field and select the required field type.
- In the field details panel on the right, enter the required details, and link the form field to the respective custom field you have created.
- Follow this procedure for all the fields you wish to include.
Note:
- Description is a mandatory field in the Jira Service Management form.
- Create a form field and link the associated field in Linked Jira Field.
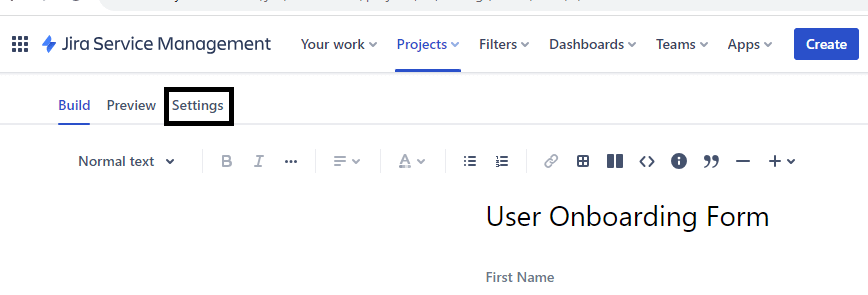
- Once you have added the required fields, click Save Changes.
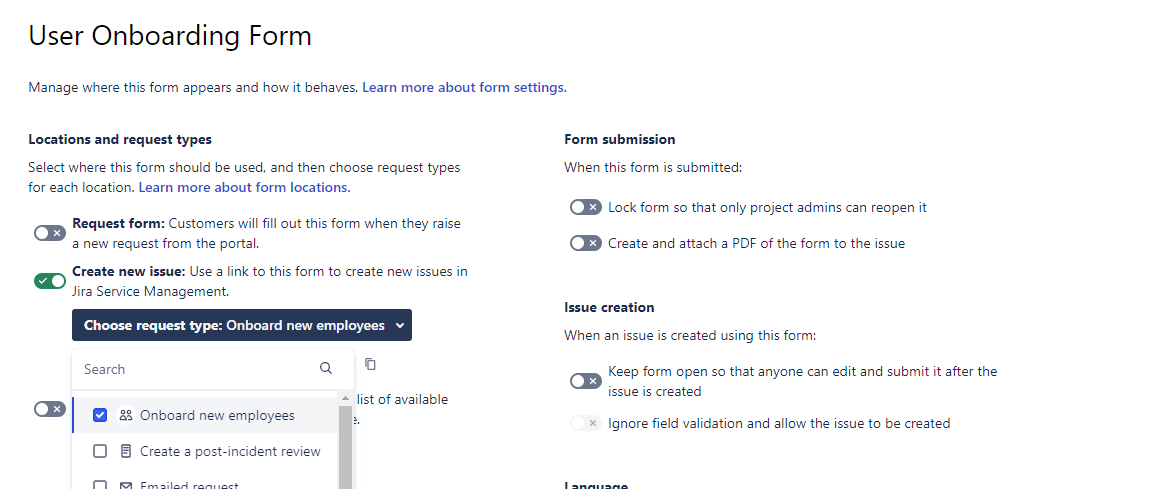
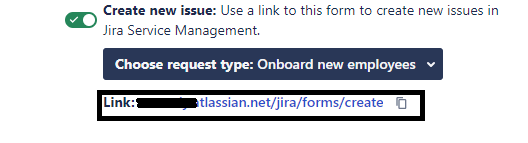
- Select Settings in the top left corner.
- Enable Create new issue and select the required request type from the drop down menu.
- Click Save Changes, and you can find the link to the form under the request type.
- When this form is submitted, a new ticket or issue will be created.

Steps to configure API token in Jira Service Management
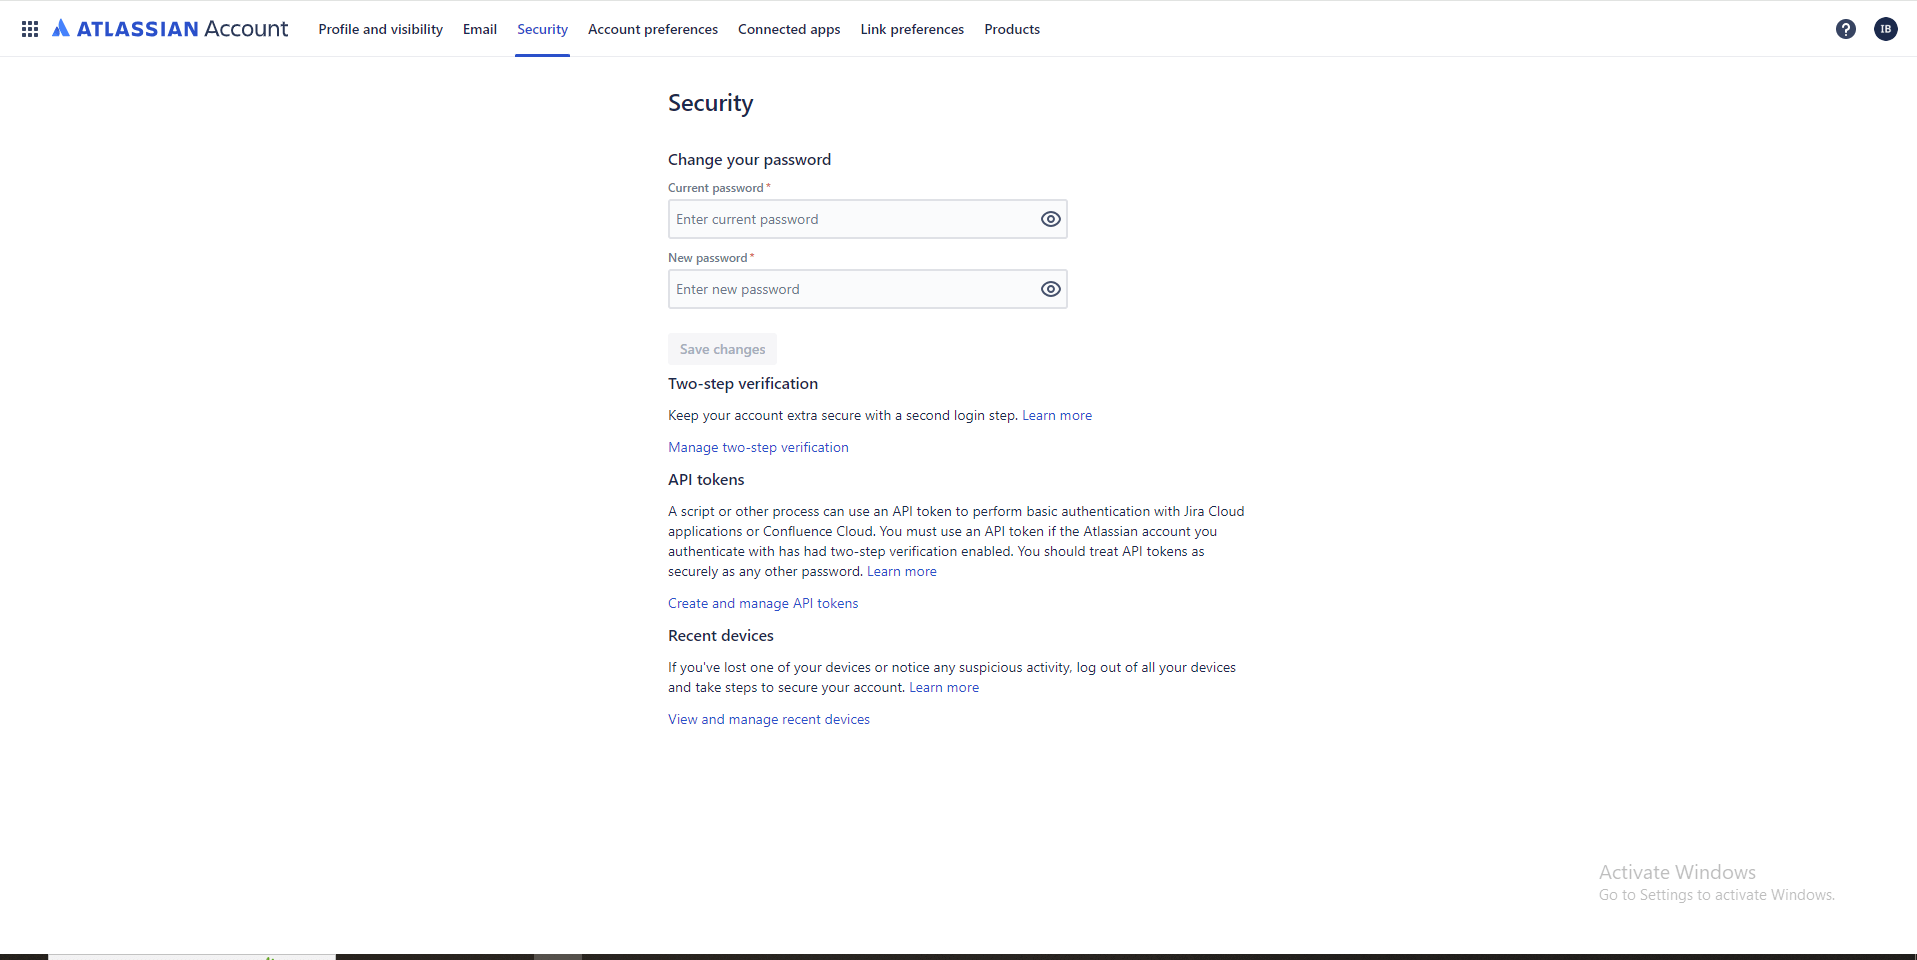
- Login to your Jira Service Management portal.
- Select the profile picture on the top right corner and click Manage account.
- Navigate to the Security tab and select Create and manage API tokens.
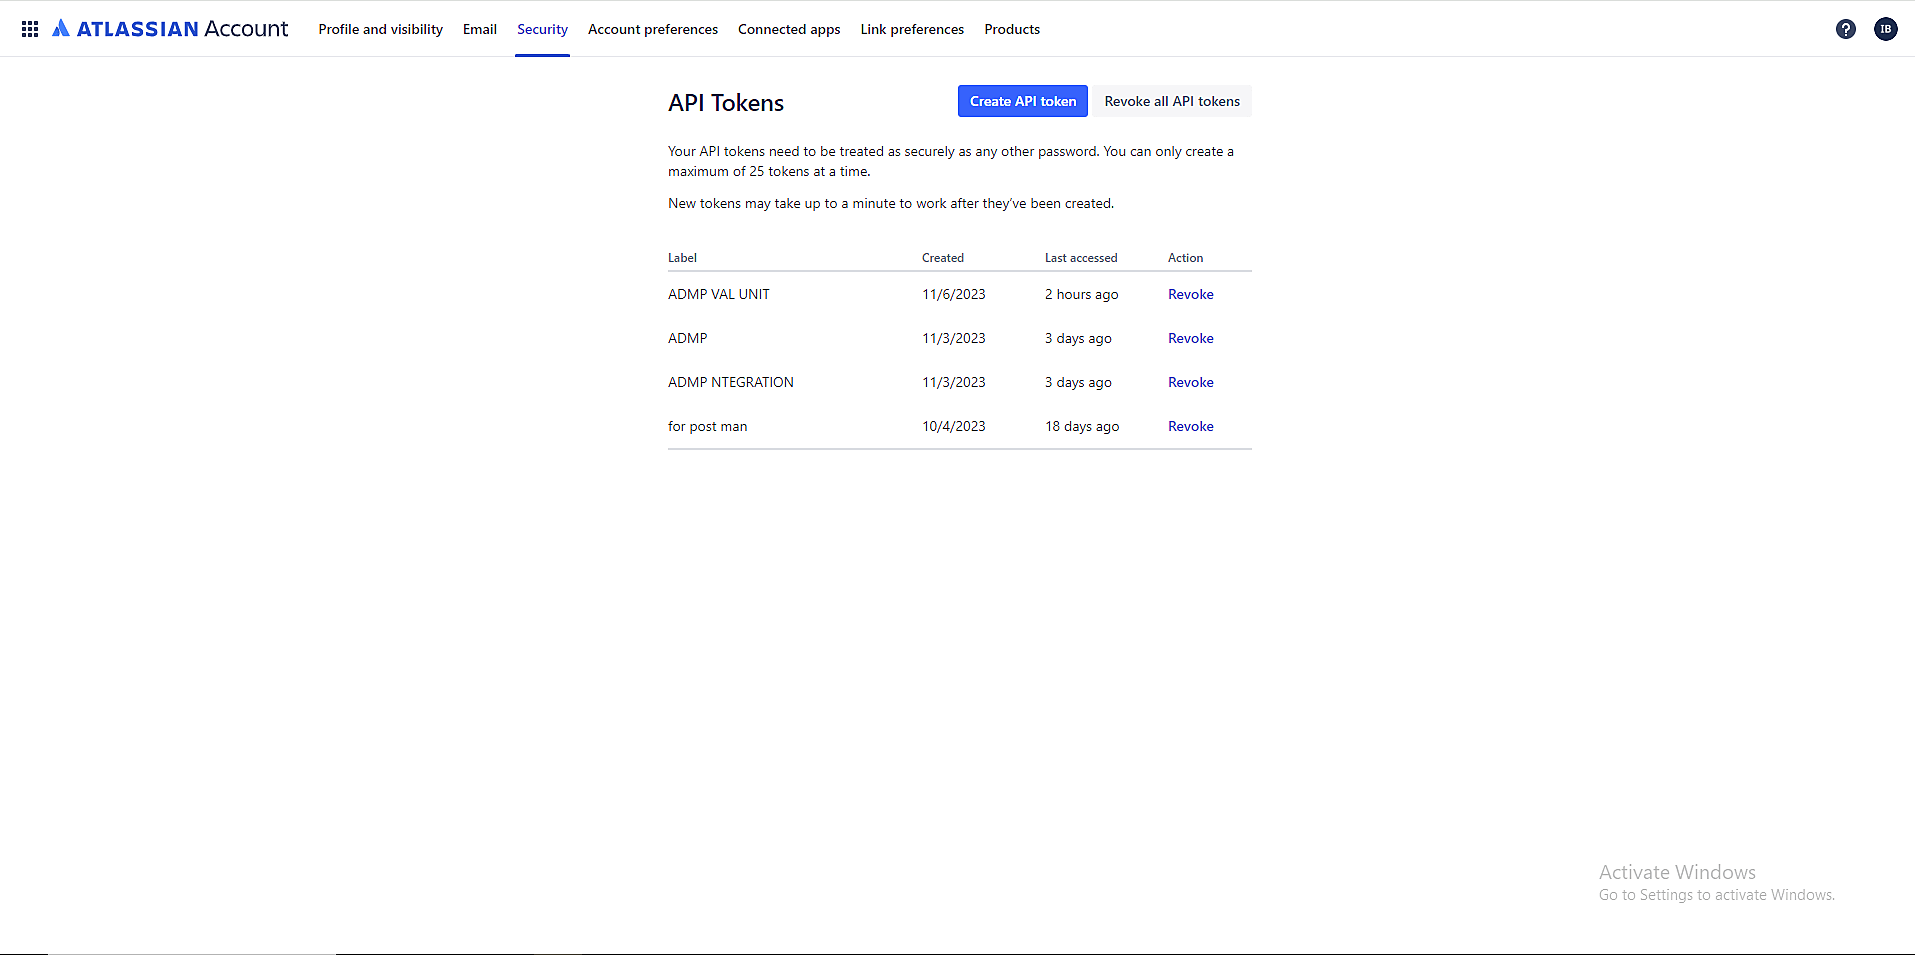
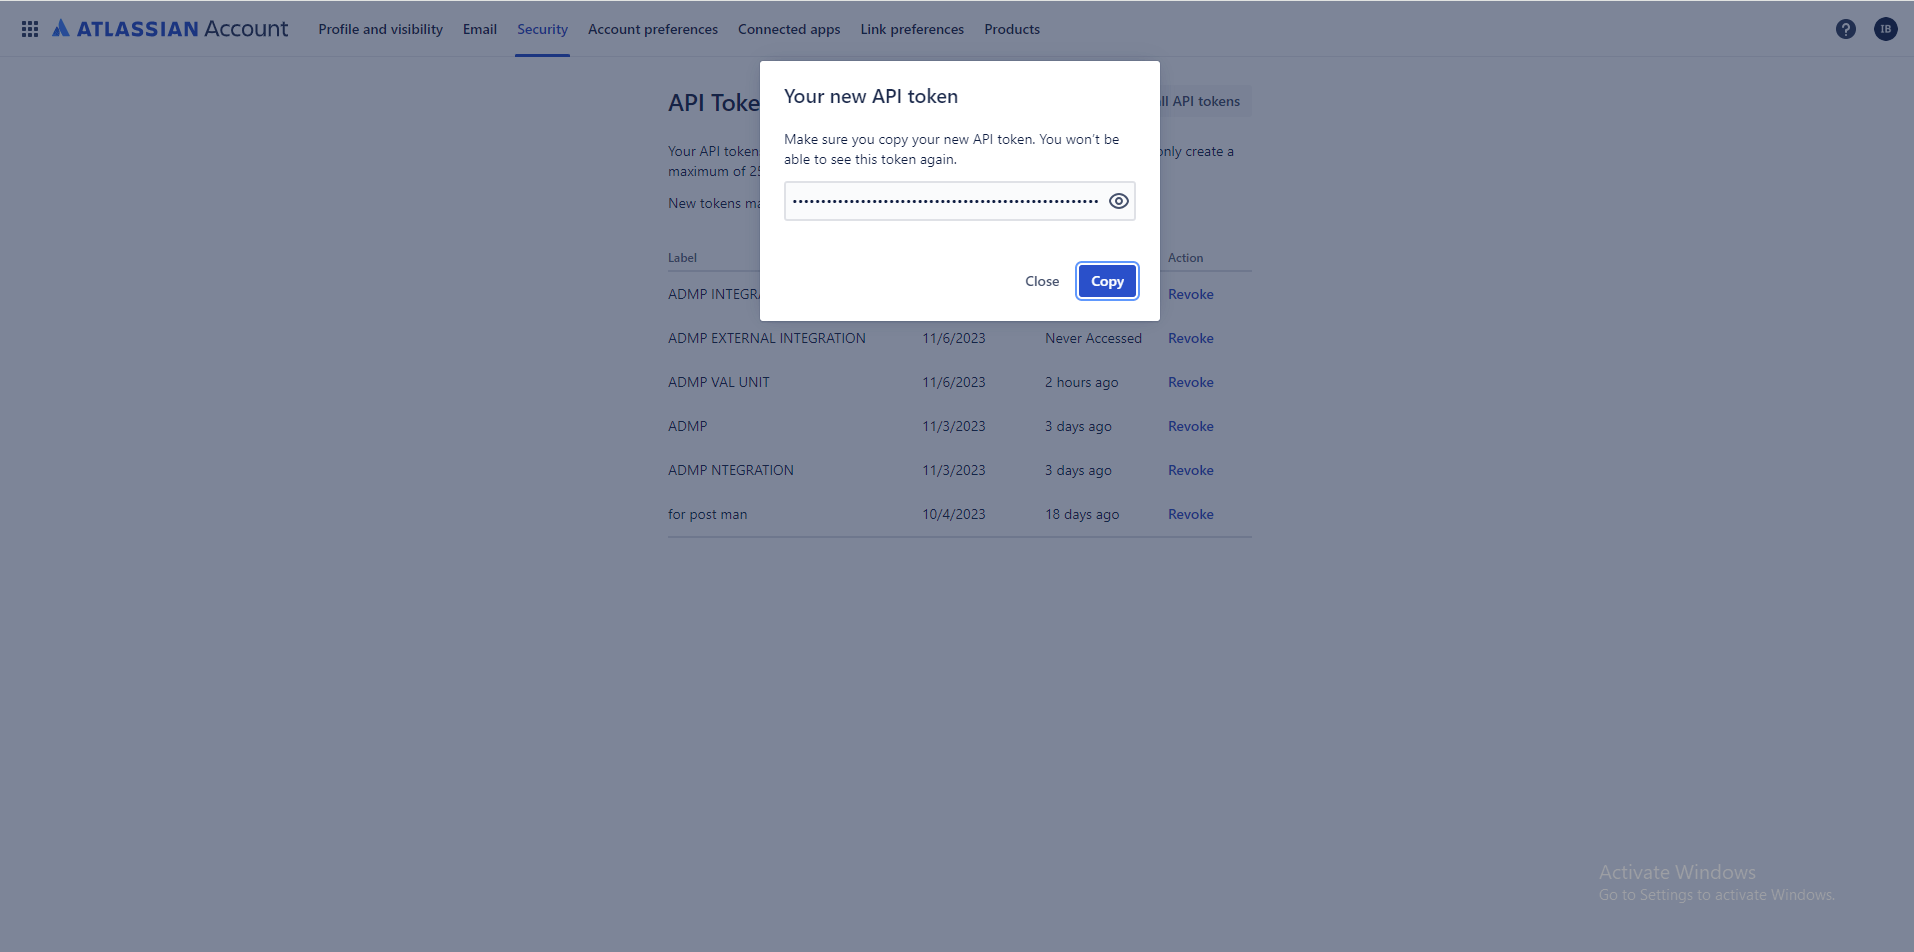
- Click Create API token.
- Enter a name for the API token under Label and then click Create.
- Select Copy to copy the API token.

Steps to configure OAuth app in Jira Service Management
Authenticate with ADManager Plus and obtain the required tokens, facilitating secure access for the retrieval of ticket information.
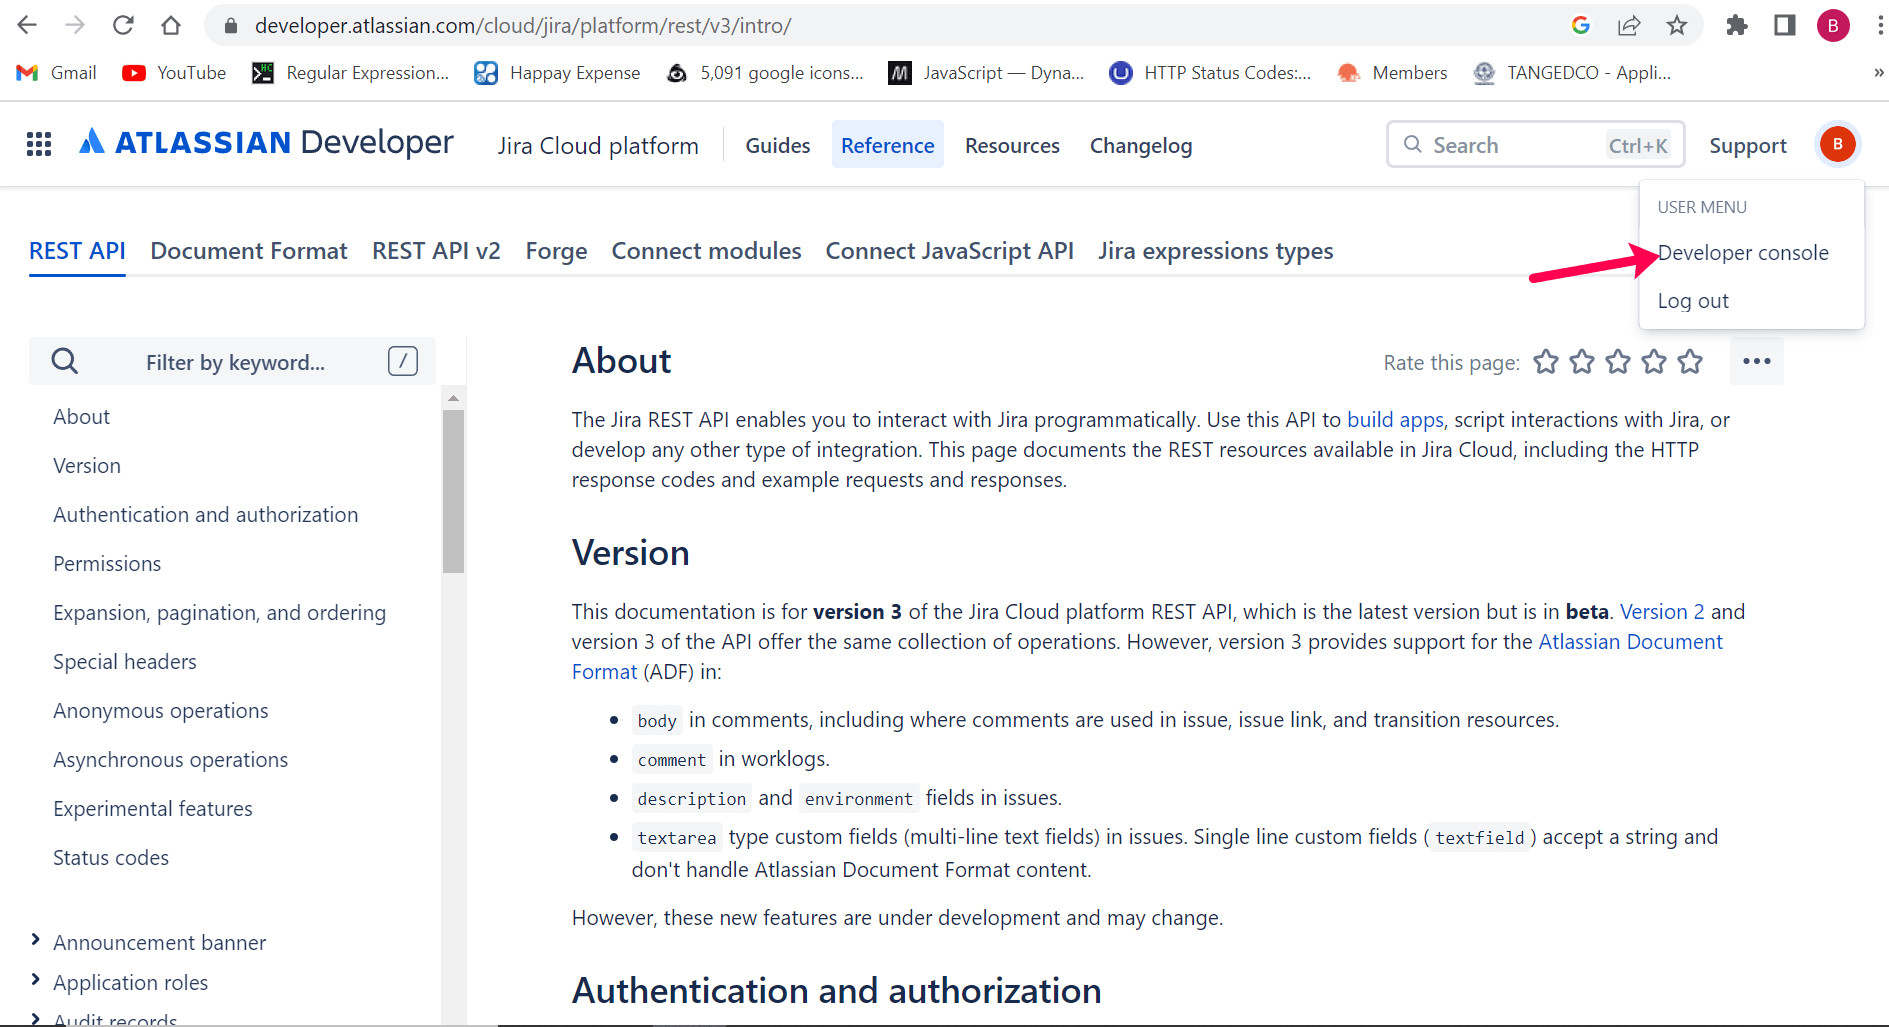
- Navigate to Jira API documentation (developer.atlassian.com) > Profile > Developer console.
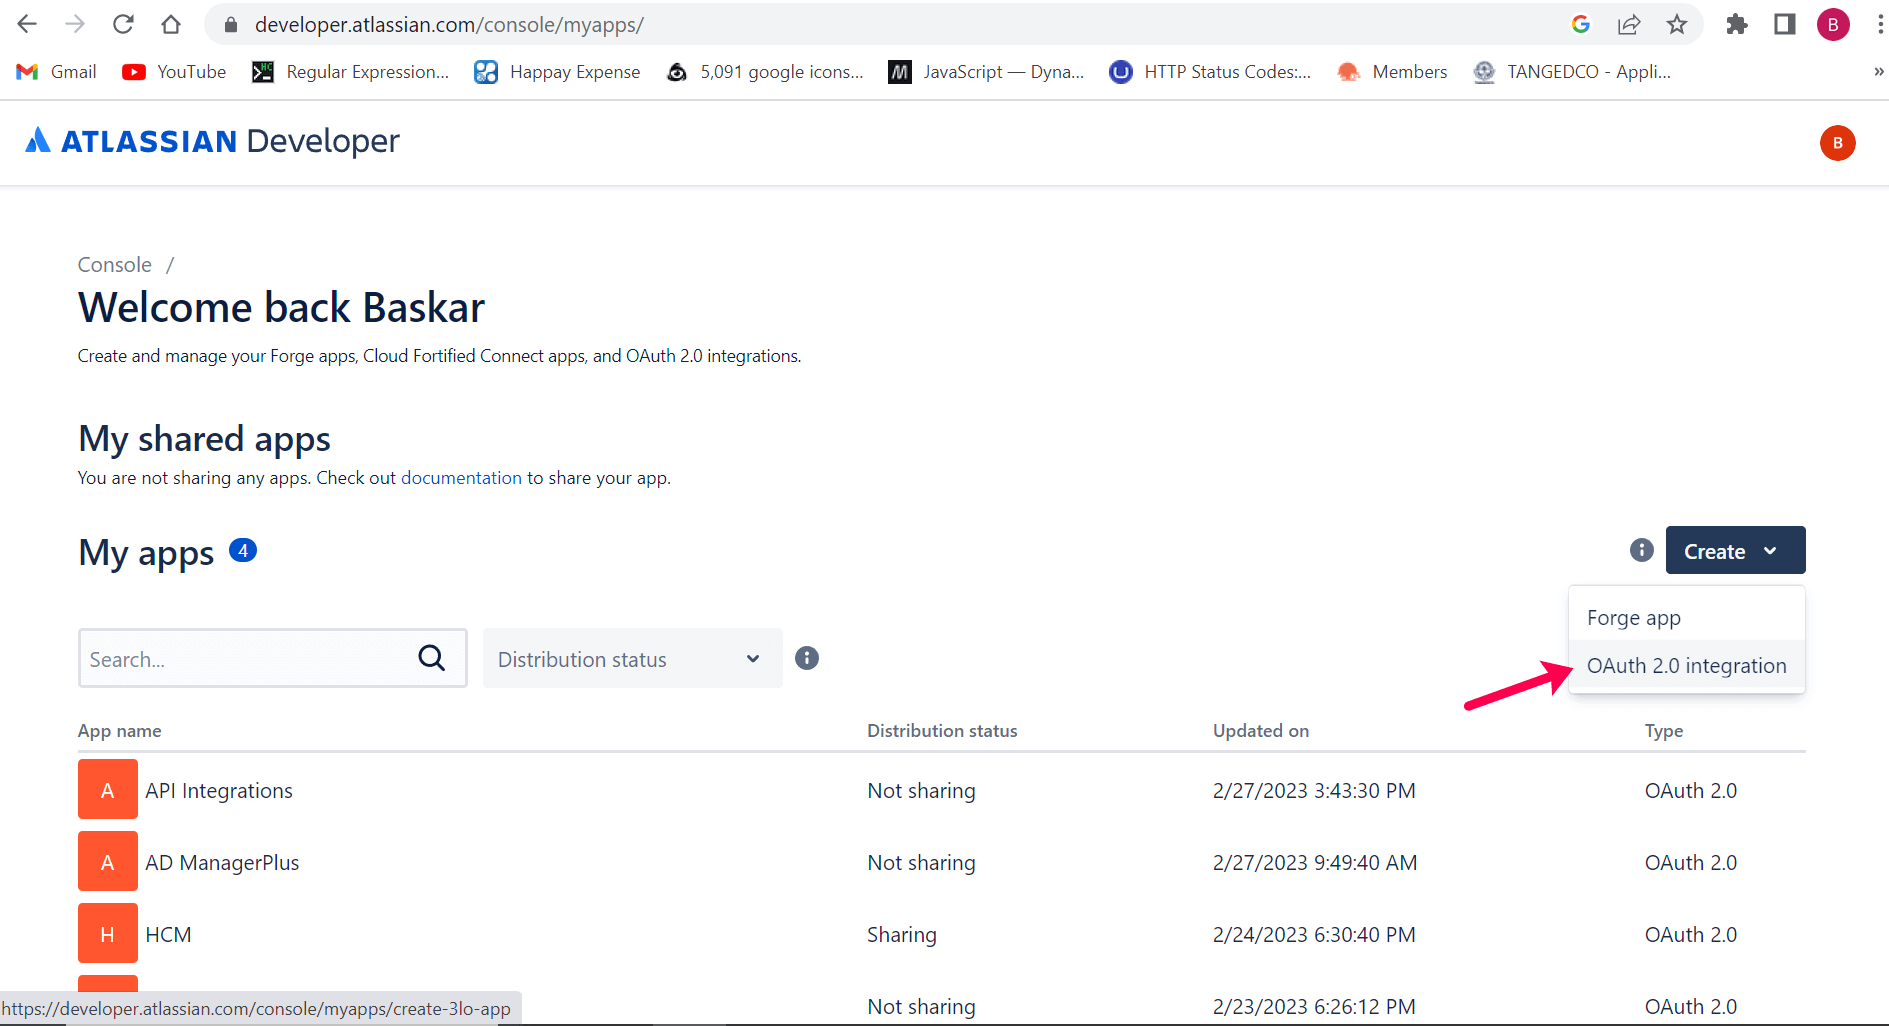
- Select Create and choose OAuth 2.0 integration.
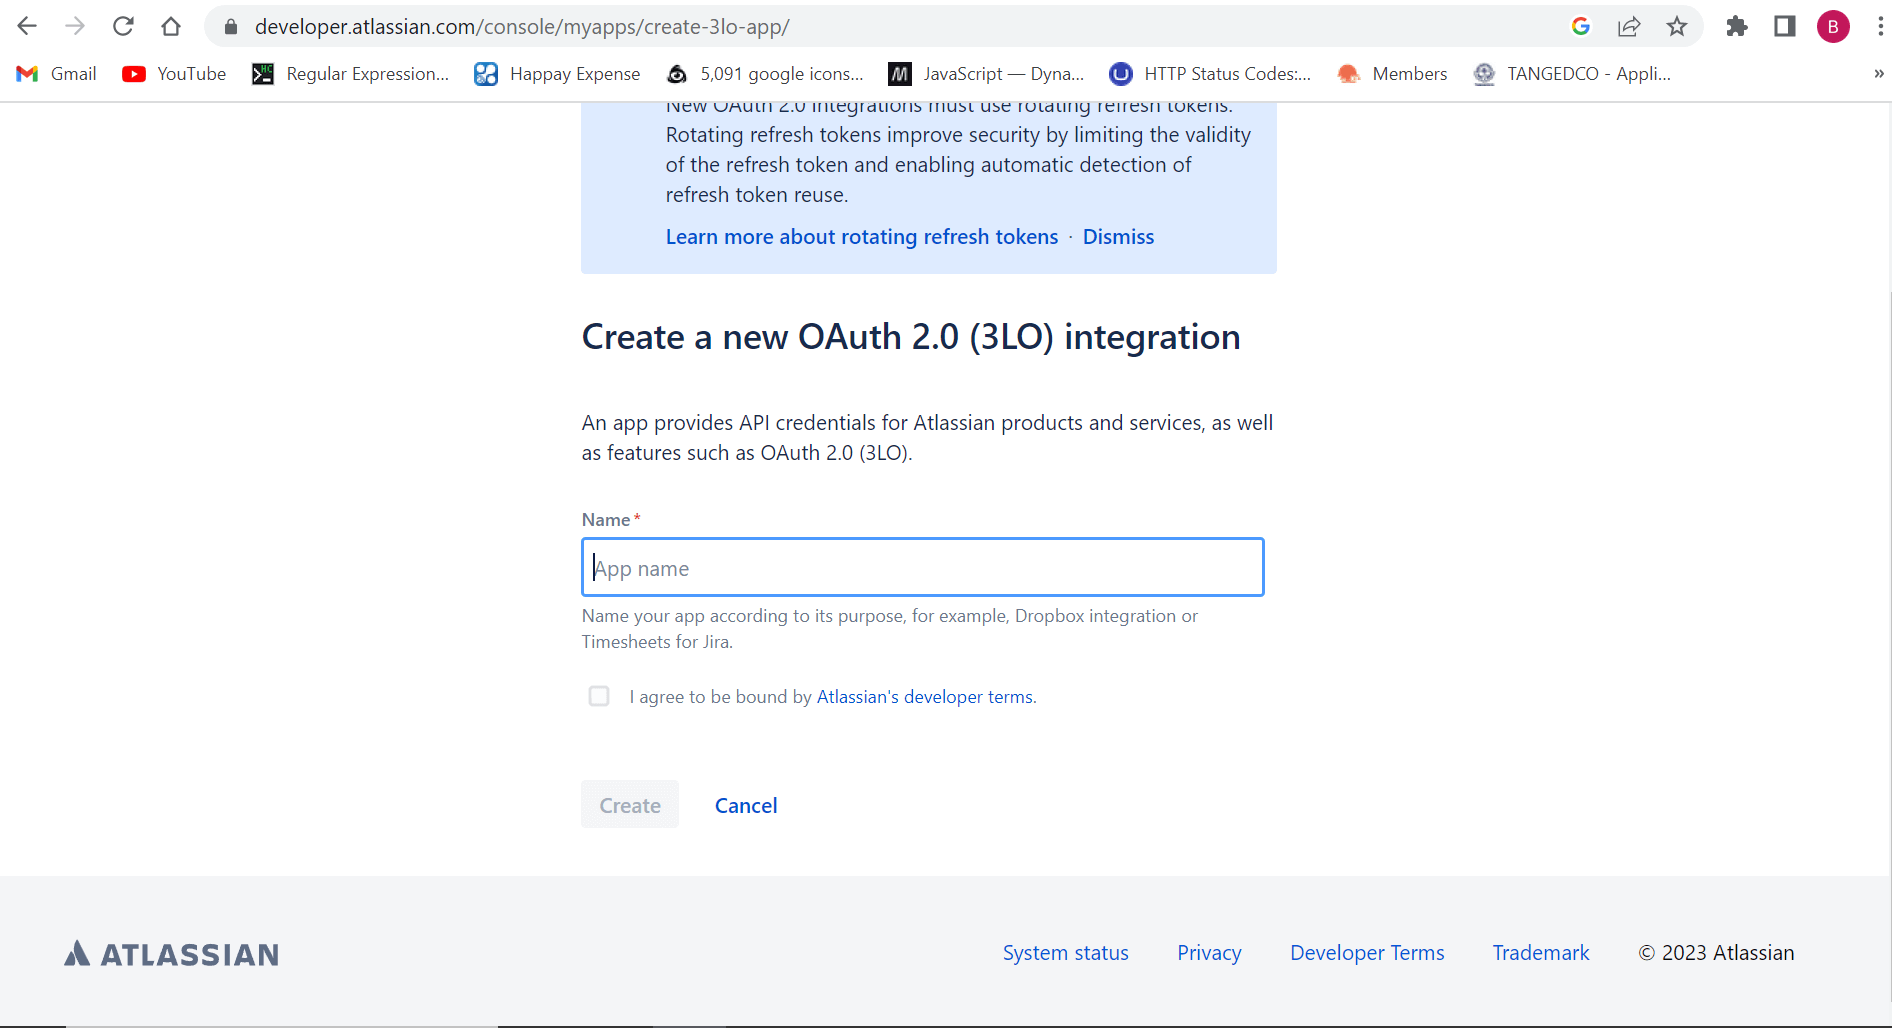
- Enter an application name and check the terms and conditions box.
- Click Create.
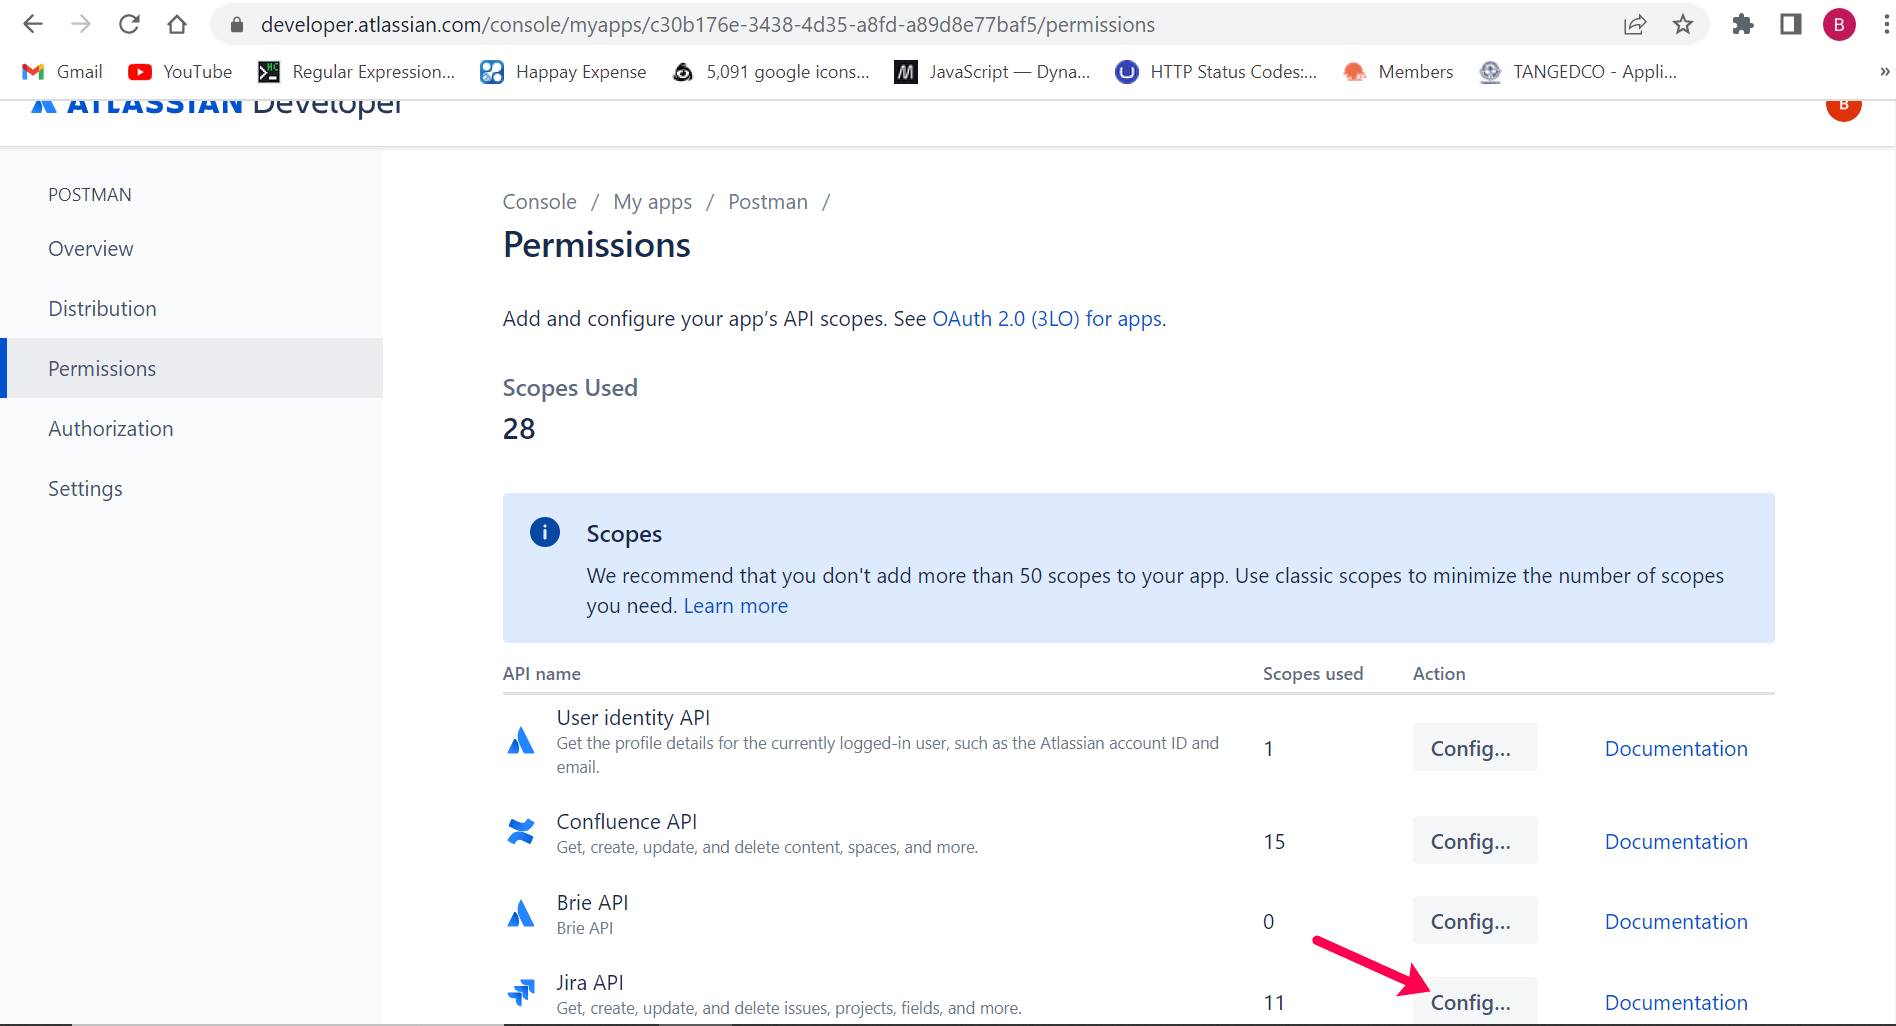
Steps to set permissions in Jira Service Management
Grant ADManager Plus the capability to read tickets, ensuring efficient access and management of relevant ticket information.
- Navigate to Jira API documentation (developer.atlassian.com) > Profile > Developer console.
- Select My apps and choose ADManager Plus.
- From the left pane choose Permissions.
- Click Configure next to Jira API.
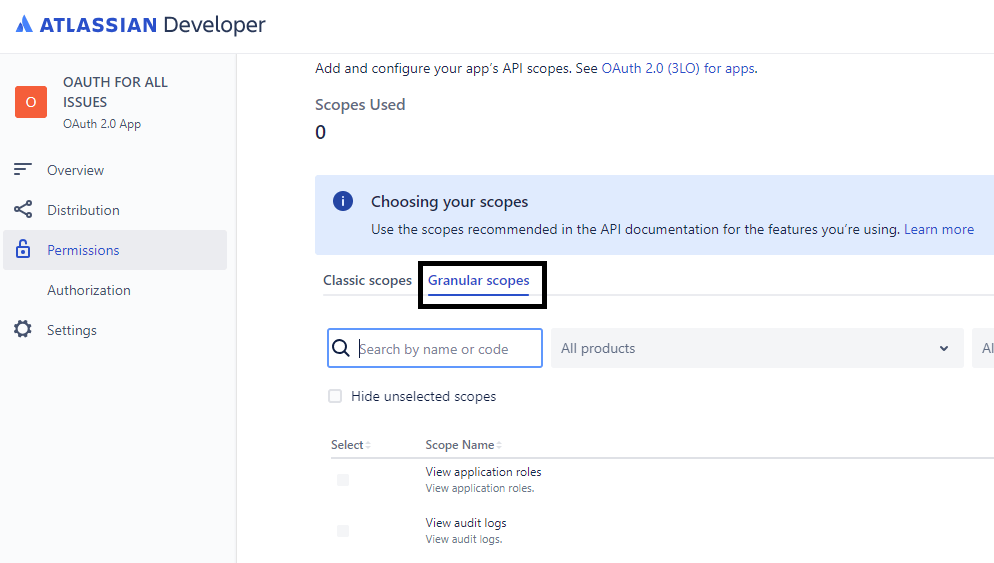
- Select Edit Scopes, check the box for read:jira-work, and then click Save.
- Go to Granular scopes tab and click Edit Scopes.
- Search for the following scopes, check the box next to the required scopes, and then click Save.
- read:issue-details:jira
- read:issue:jira
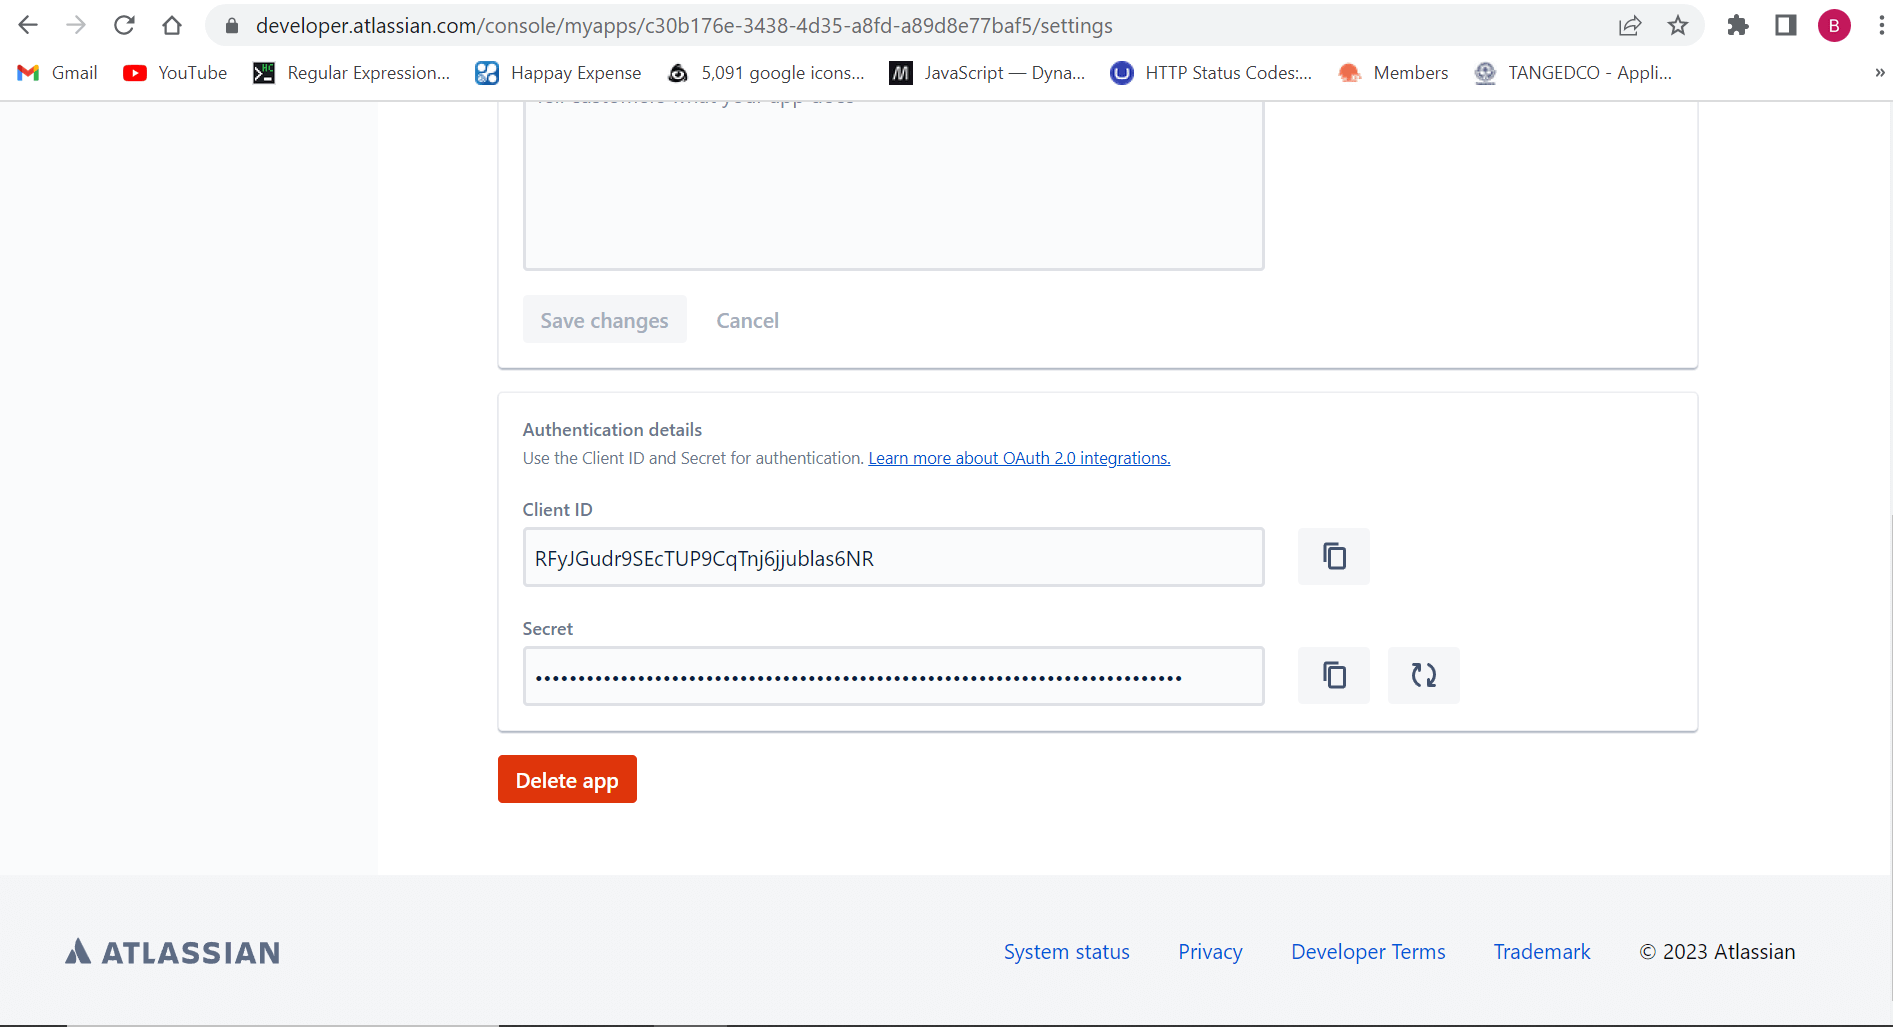
Steps to generate the client ID and the secret in Jira Service Management
Authenticate with ADManager Plus, enhancing integration capabilities and ensuring secure access to HR and identity management functions.
- Navigate to Jira API documentation (developer.atlassian.com) > Profile > Developer console.
- Select My apps and choose ADManager Plus.
- From the left pane choose Settings.
- Copy the Client ID and Secret values and paste the generated values in the required field.
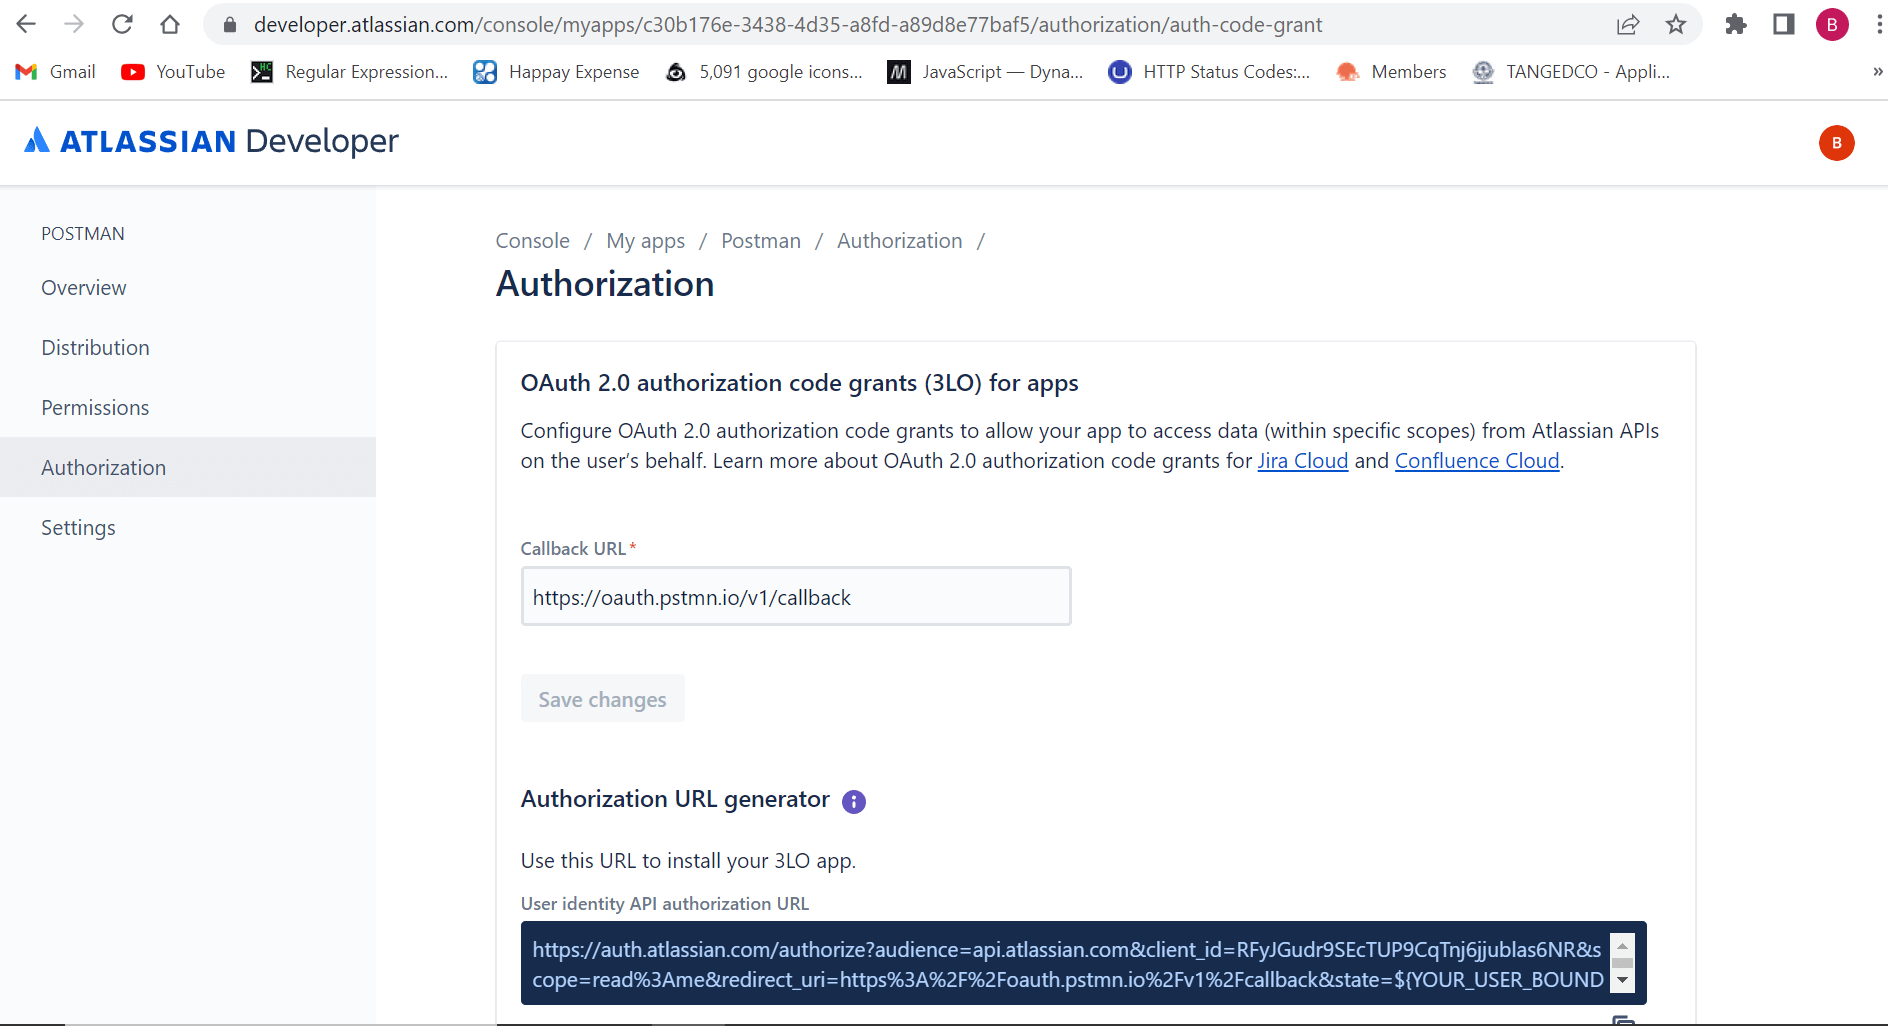
Steps to set the Redirect URI in Jira Service Management
Enable Jira Service Management to send the access token back to ADManager Plus, and secure communication between systems.
- Navigate to Jira api documentation (developer.atlassian.com) > Profile > Developer console.
- Select My apps and choose ADManager Plus.
- From the left pane choose Authorization.
- Paste the Callback URL from ADManager Plus in the Callback URL field.
Steps to configure Jira Service Management endpoints in Postman
Obtain the cloud ID and custom field name and establish their mapping to LDAP attributes, ensuring efficient synchronization and data consistency between systems.
- Login using basic authentication as authentication type
- Navigate to Postman ( https://www.postman.com ).
- In Type select Basic Auth.
- Enter your Username (email address) and then paste the generated API token in the Password field.

- Login using OAuth as authentication type
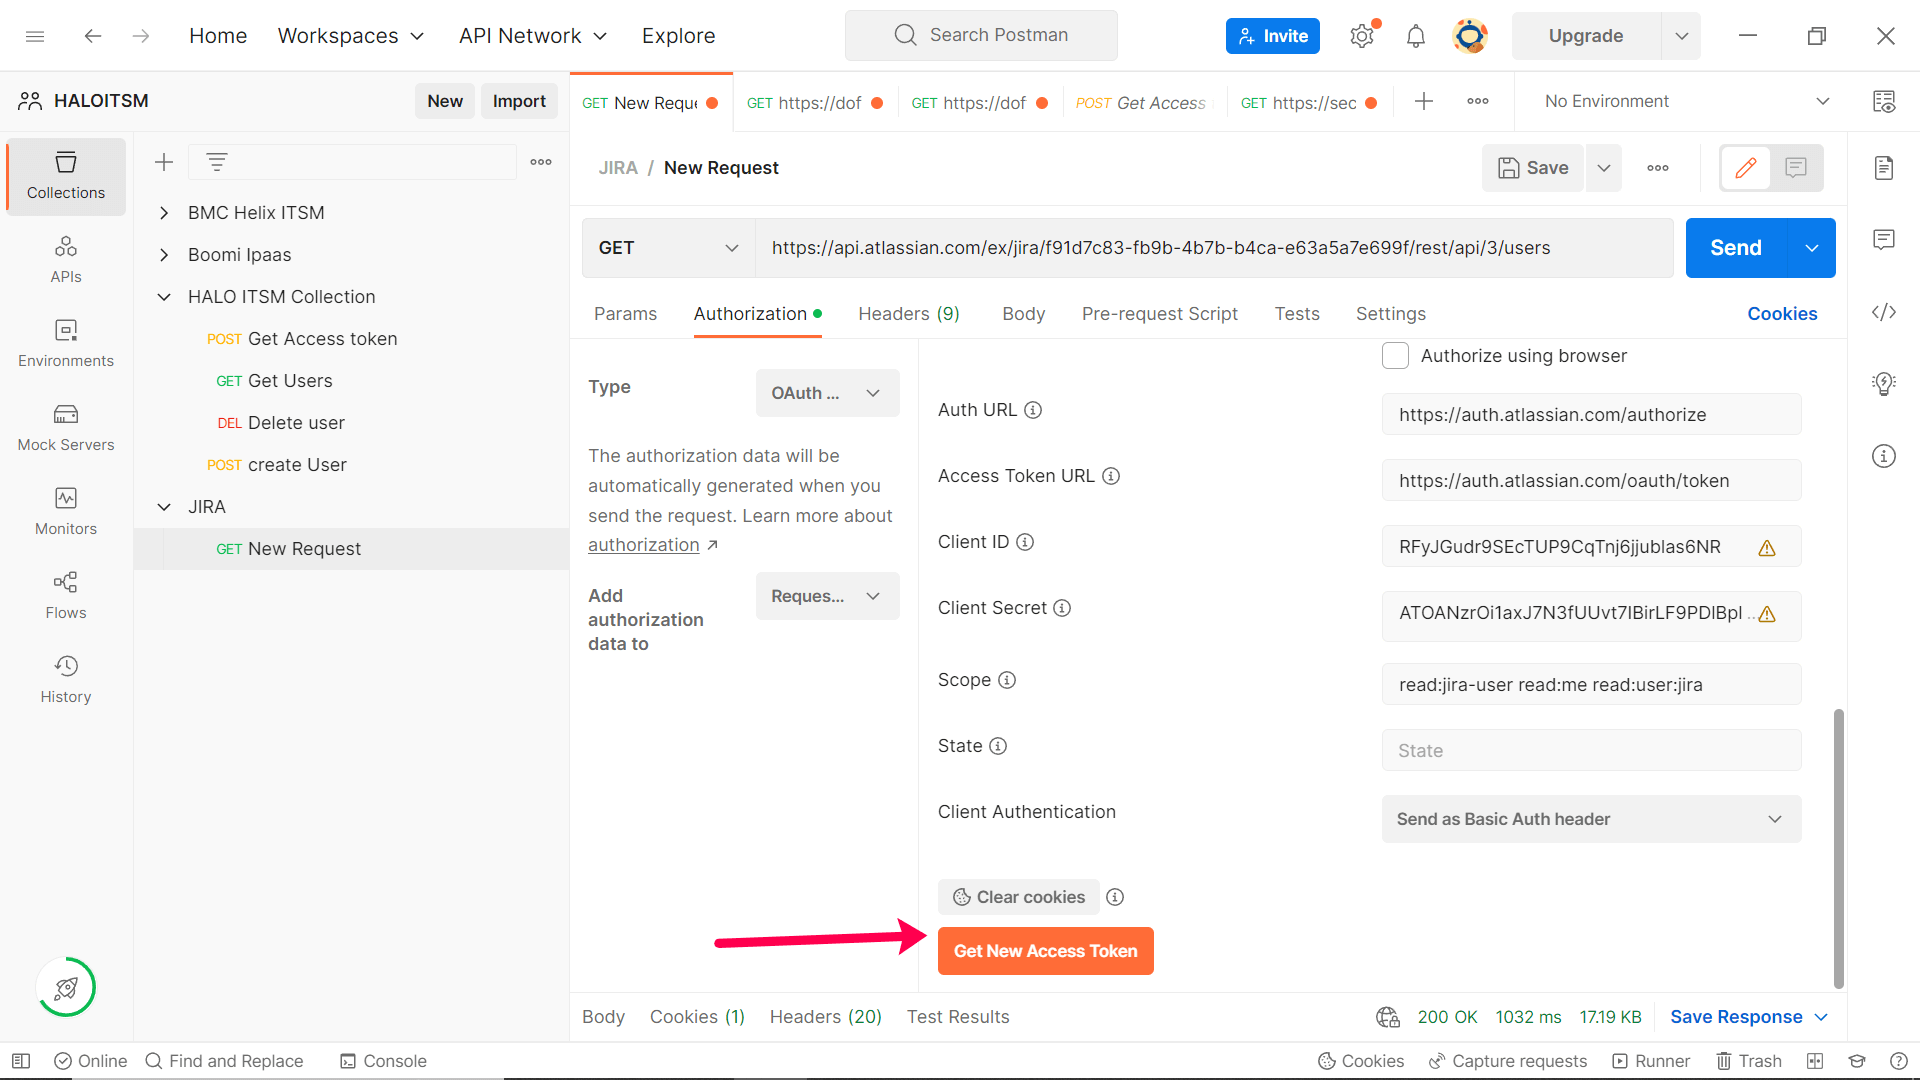
- Navigate to Postman ( https://www.postman.com ).
- Fill in all the required parameters and click Get New Access Token.
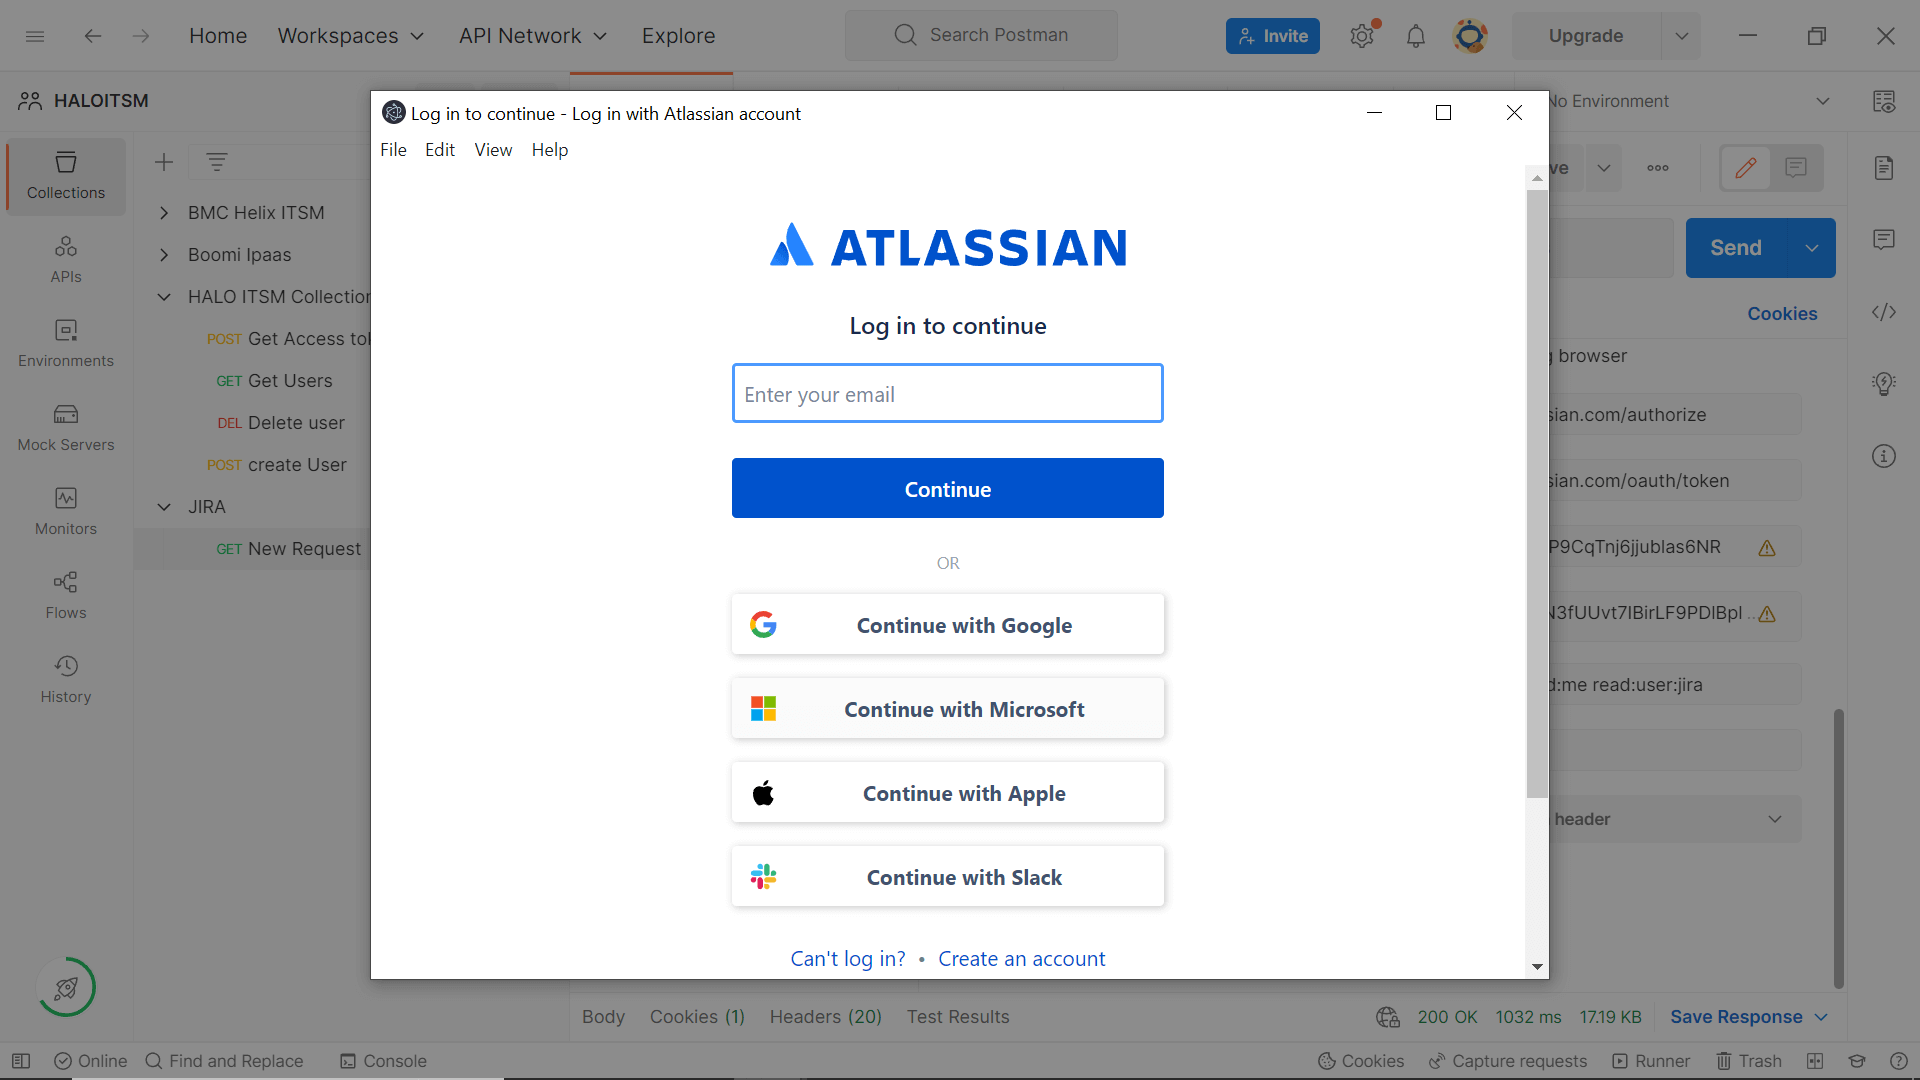
- Once you click Get New Access Token, you will be redirected to the Jira Service Management login page.
- Log in with your Jira Service Management credentials and complete the authentication process.
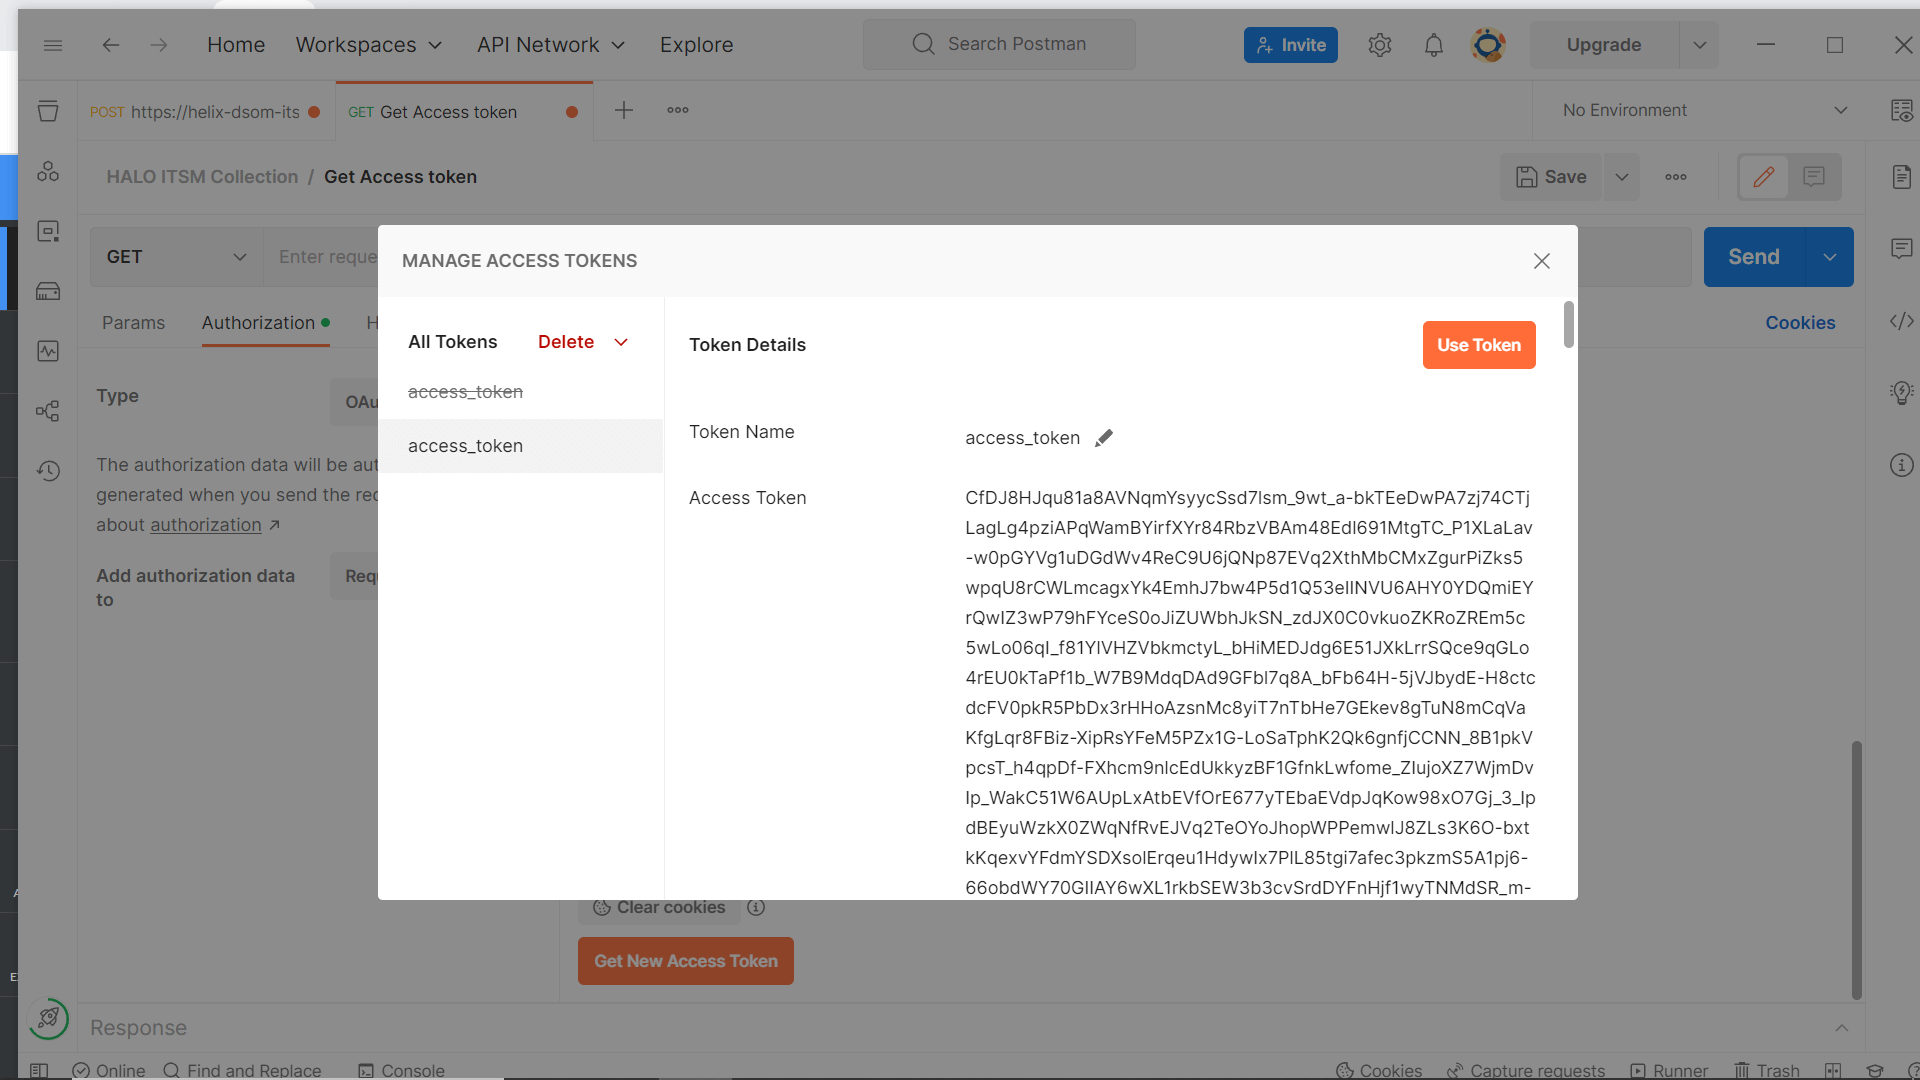
- After successful authentication, the server will respond with Status code 200 if the credentials are valid. The response will include the access token and its expiry time, along with a refresh token if offline_access is specified.
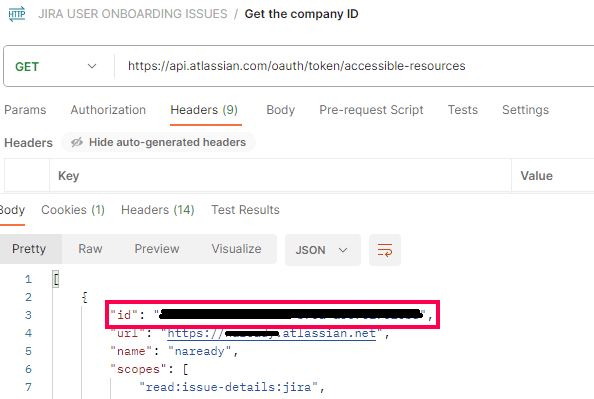
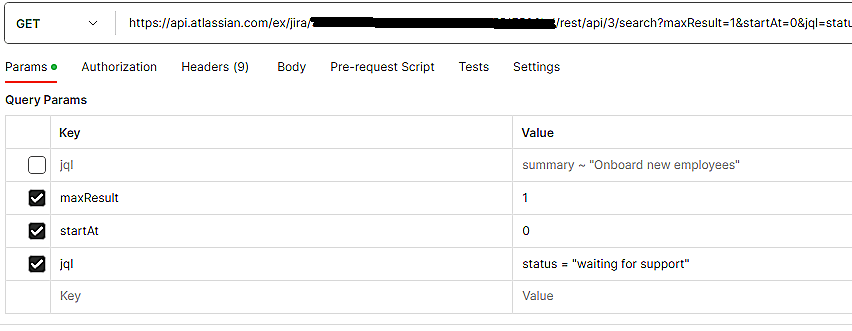
- Send a HTTP request to the following endpoint and obtain the cloud ID: https://api.atlassian.com/oauth/token/accessible-resources
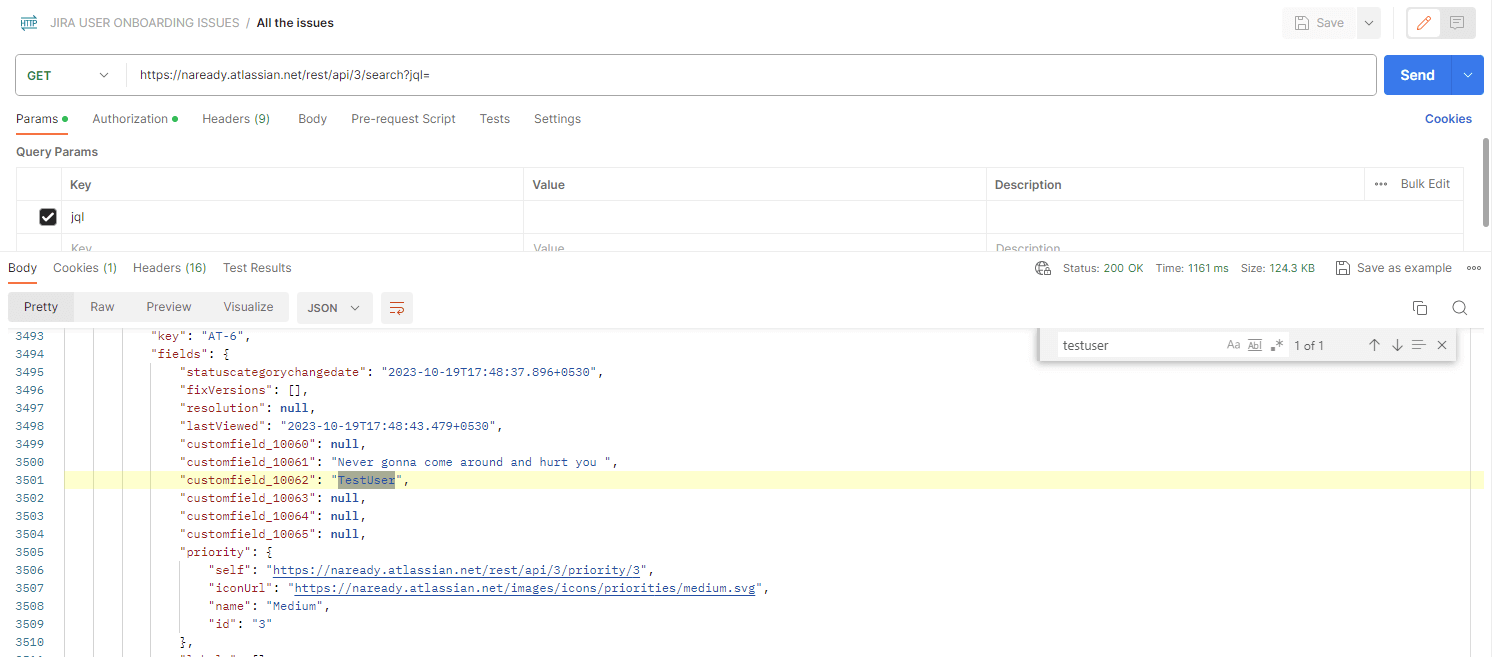
- Use the Cloud ID from the previous step and get the custom field IDs by configuring the following endpoint and adding JQL as the parameter: https://api.atlassian.com/ex/jira/{cloudid}/rest/api/3/search Note: JQL parameter can be modified to filter the tickets or issues based on status, type or other details. For additional details, click here.
- Search for custom field IDs in the response and retrieve the required value, which will be used in the attribute mapping.
Steps to configure authorization in ADManager Plus
- In ADManager Plus, navigate to the Automation tab and click Applications Integrations.
- Under Enterprise Applications, click Jira Service Management.
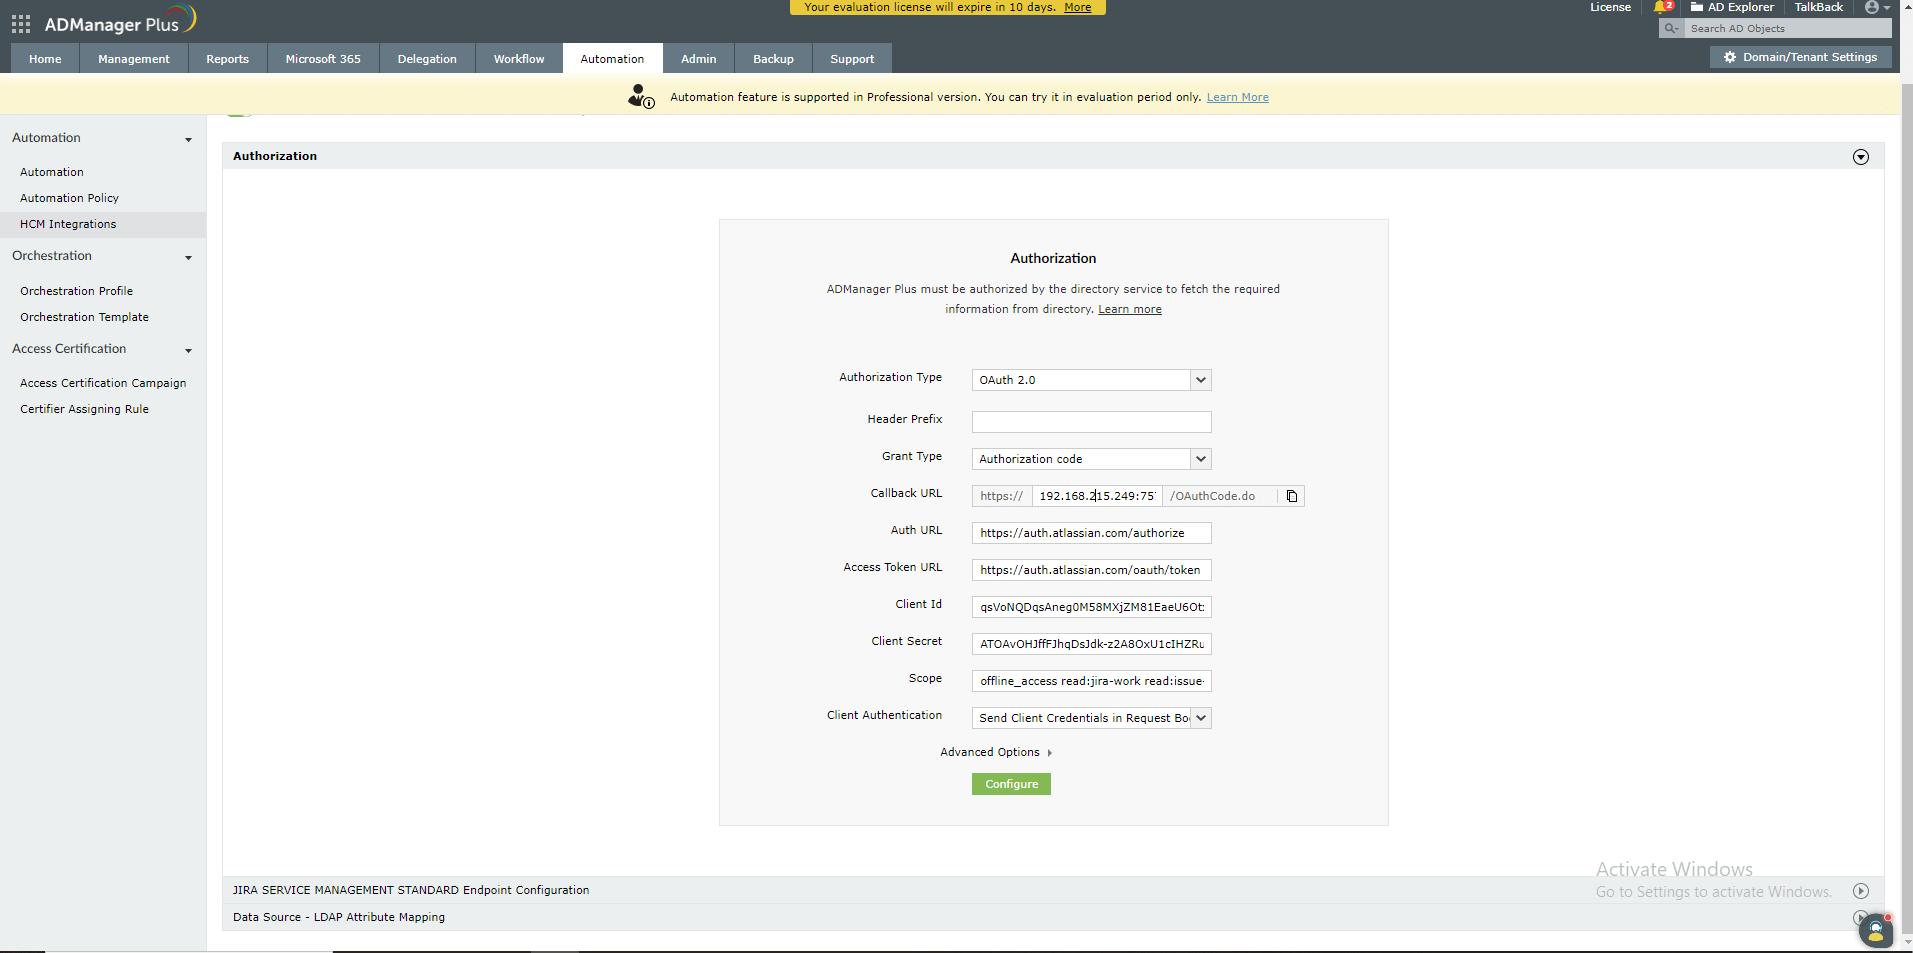
- In the Authorization section, select the Authorization Type from the drop-down and select the appropriate option.
- If you select OAuth 2.0 as the authorization type, specify the following:
- Client ID and Client Secret: Enter a valid ID and its secret key generated in the Jira Service Management portal.
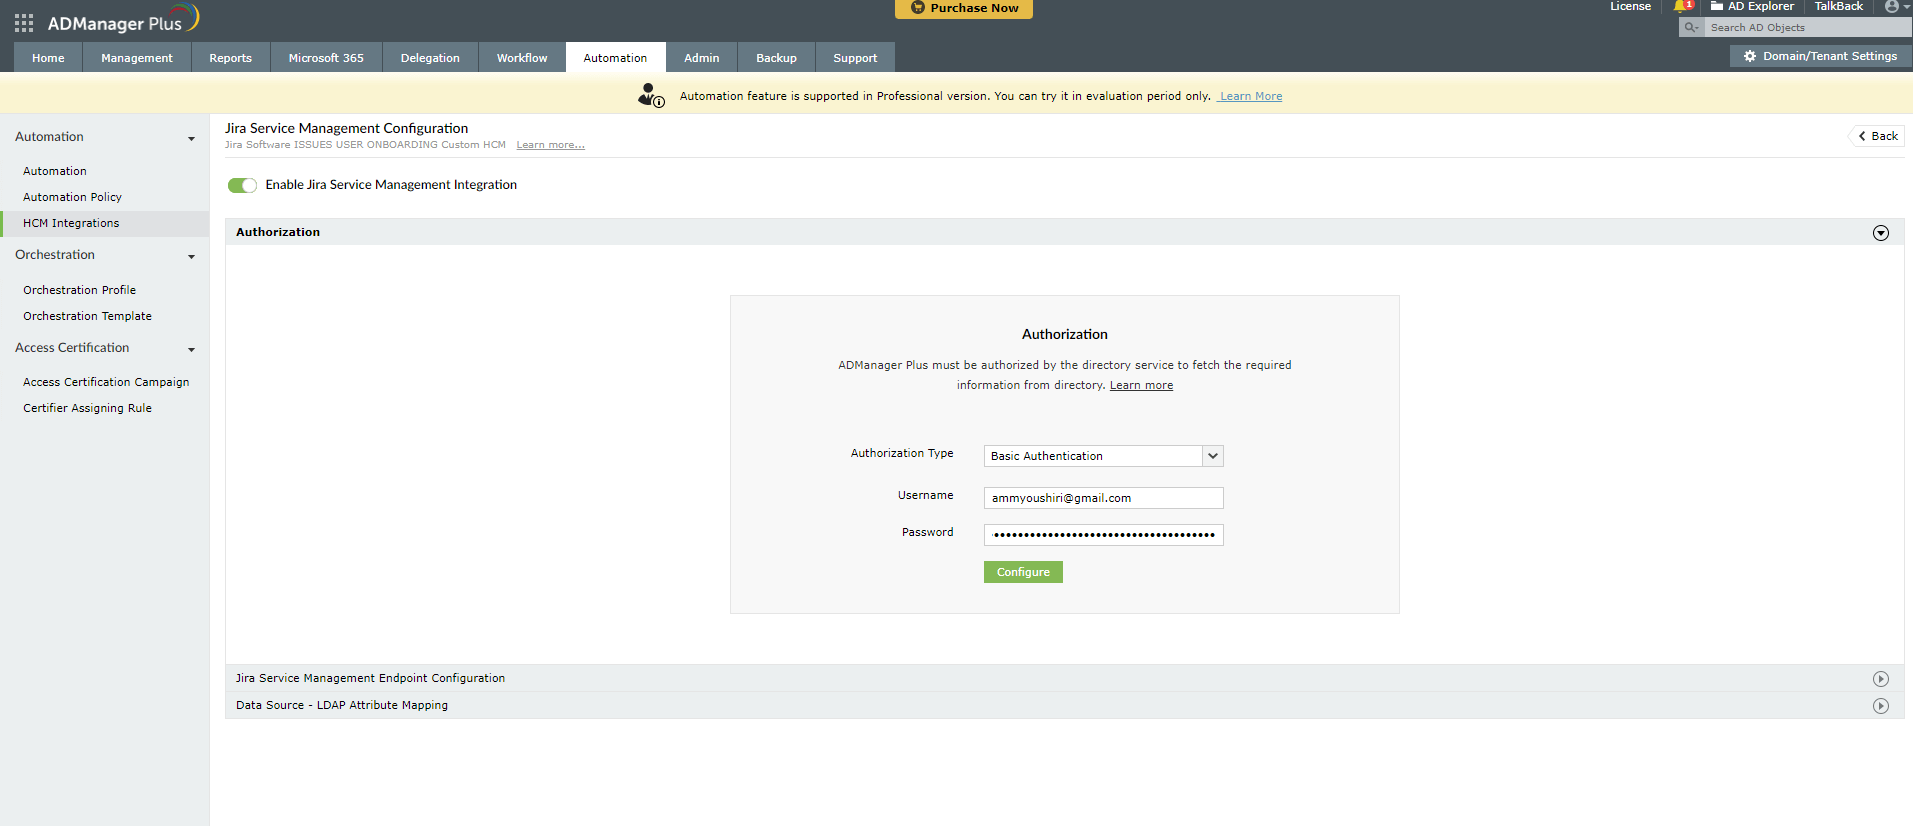
- If you select Basic Authentication as the authorization type,
- Specify a Username and Password and click Configure.
- If you select OAuth 2.0 as the authorization type, specify the following:
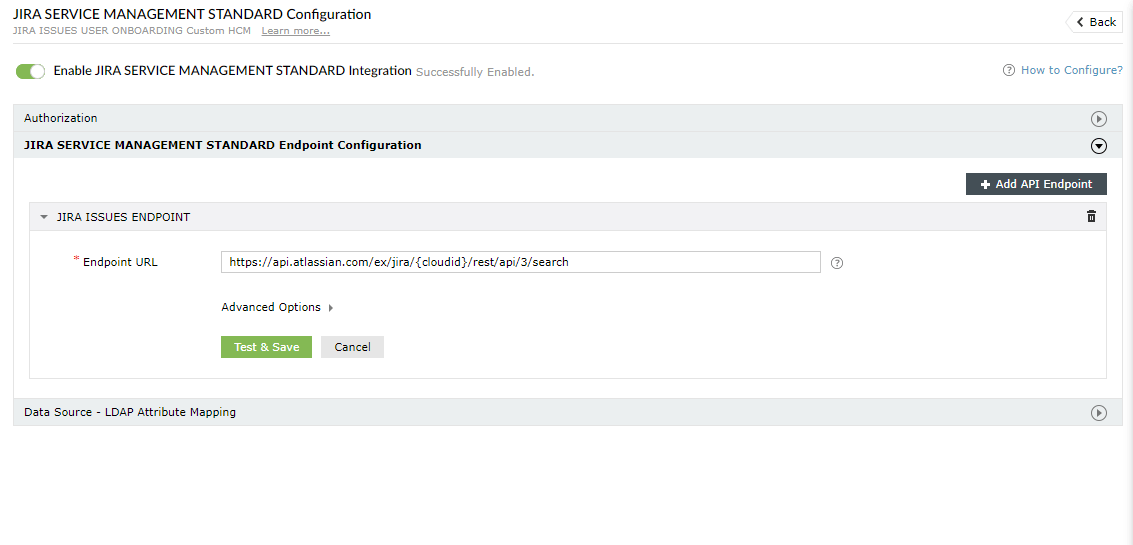
Steps to configure endpoint in ADManager Plus
- In ADManager Plus, navigate to the Automation tab and click Applications Integrations.
- Under Enterprise Applications, click Jira Service Management.
- In the Jira Service Management Endpoint Configuration section, replace {cloudid} with the unique ID generated in your Jira Service Management instance.
Steps to configure LDAP attribute mapping in ADManager Plus
- In ADManager Plus, navigate to the Automation tab and click Applications Integrations.
- Under Enterprise Applications, click Jira Service Management.
- Click Data Source - LDAP Attribute Mapping to match endpoints and map AD LDAP attributes with the respective attributes in Jira Service Management.
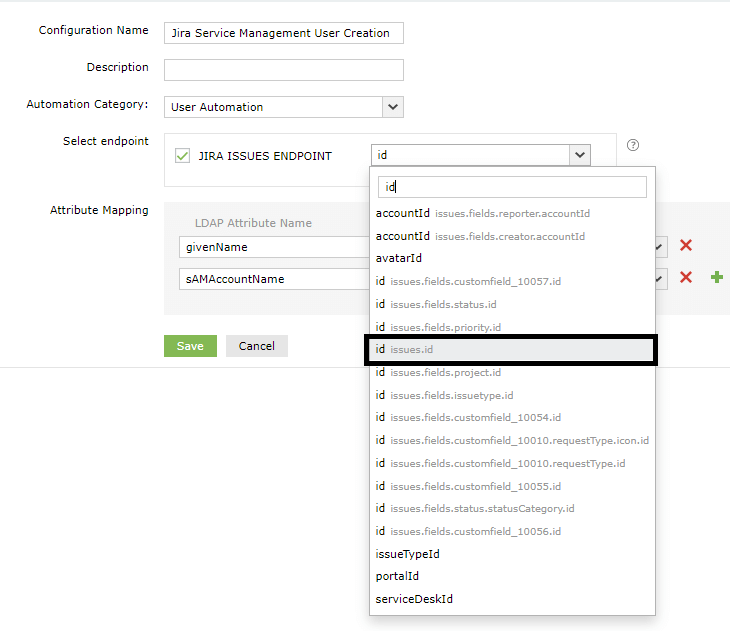
- Enter the Configuration Name and Description and select the Automation Category from the drop-down menu.
- In the Select Endpoint field, check the JIRA ISSUES ENDPOINT box and select issues.id from the drop down menu.
- In the Attribute Mapping field, select the attribute from the LDAP Attribute Name drop-down menu and map it with the Jira Service Management column. fi
- Click Save.