Installing WAN Agents and Distribution Server
Overview
This guide walks you through setting up ManageEngine Endpoint Central to efficiently manage remote offices by installing a Distribution Server and WAN Agents.
It covers both automatic and manual installation methods, helping you optimize network bandwidth and seamlessly control your remote endpoints.
Prerequisites
Before you begin the installation, ensure the following requirements are met:
- The Distribution Server must be installed on a dedicated machine.
- Assign a static IP to the Distribution Server for stable communication.
- For Automatic Agent Installation, you need Domain Credentials with administrator rights for all target computers in the remote office.
- Target computers must be directly reachable from the Distribution Server for Automatic Installation.
- Ensure that port 8383 is open inbound on the Endpoint Central Server for communication from the Distribution Server, and port 8384 is open inbound on the Distribution Server for communication from WAN Agents.
Installing the Distribution Server
The Distribution Server must be installed on a dedicated computer with a static IP for smooth communication. You can install it automatically or manually.
1. Automatic Installation
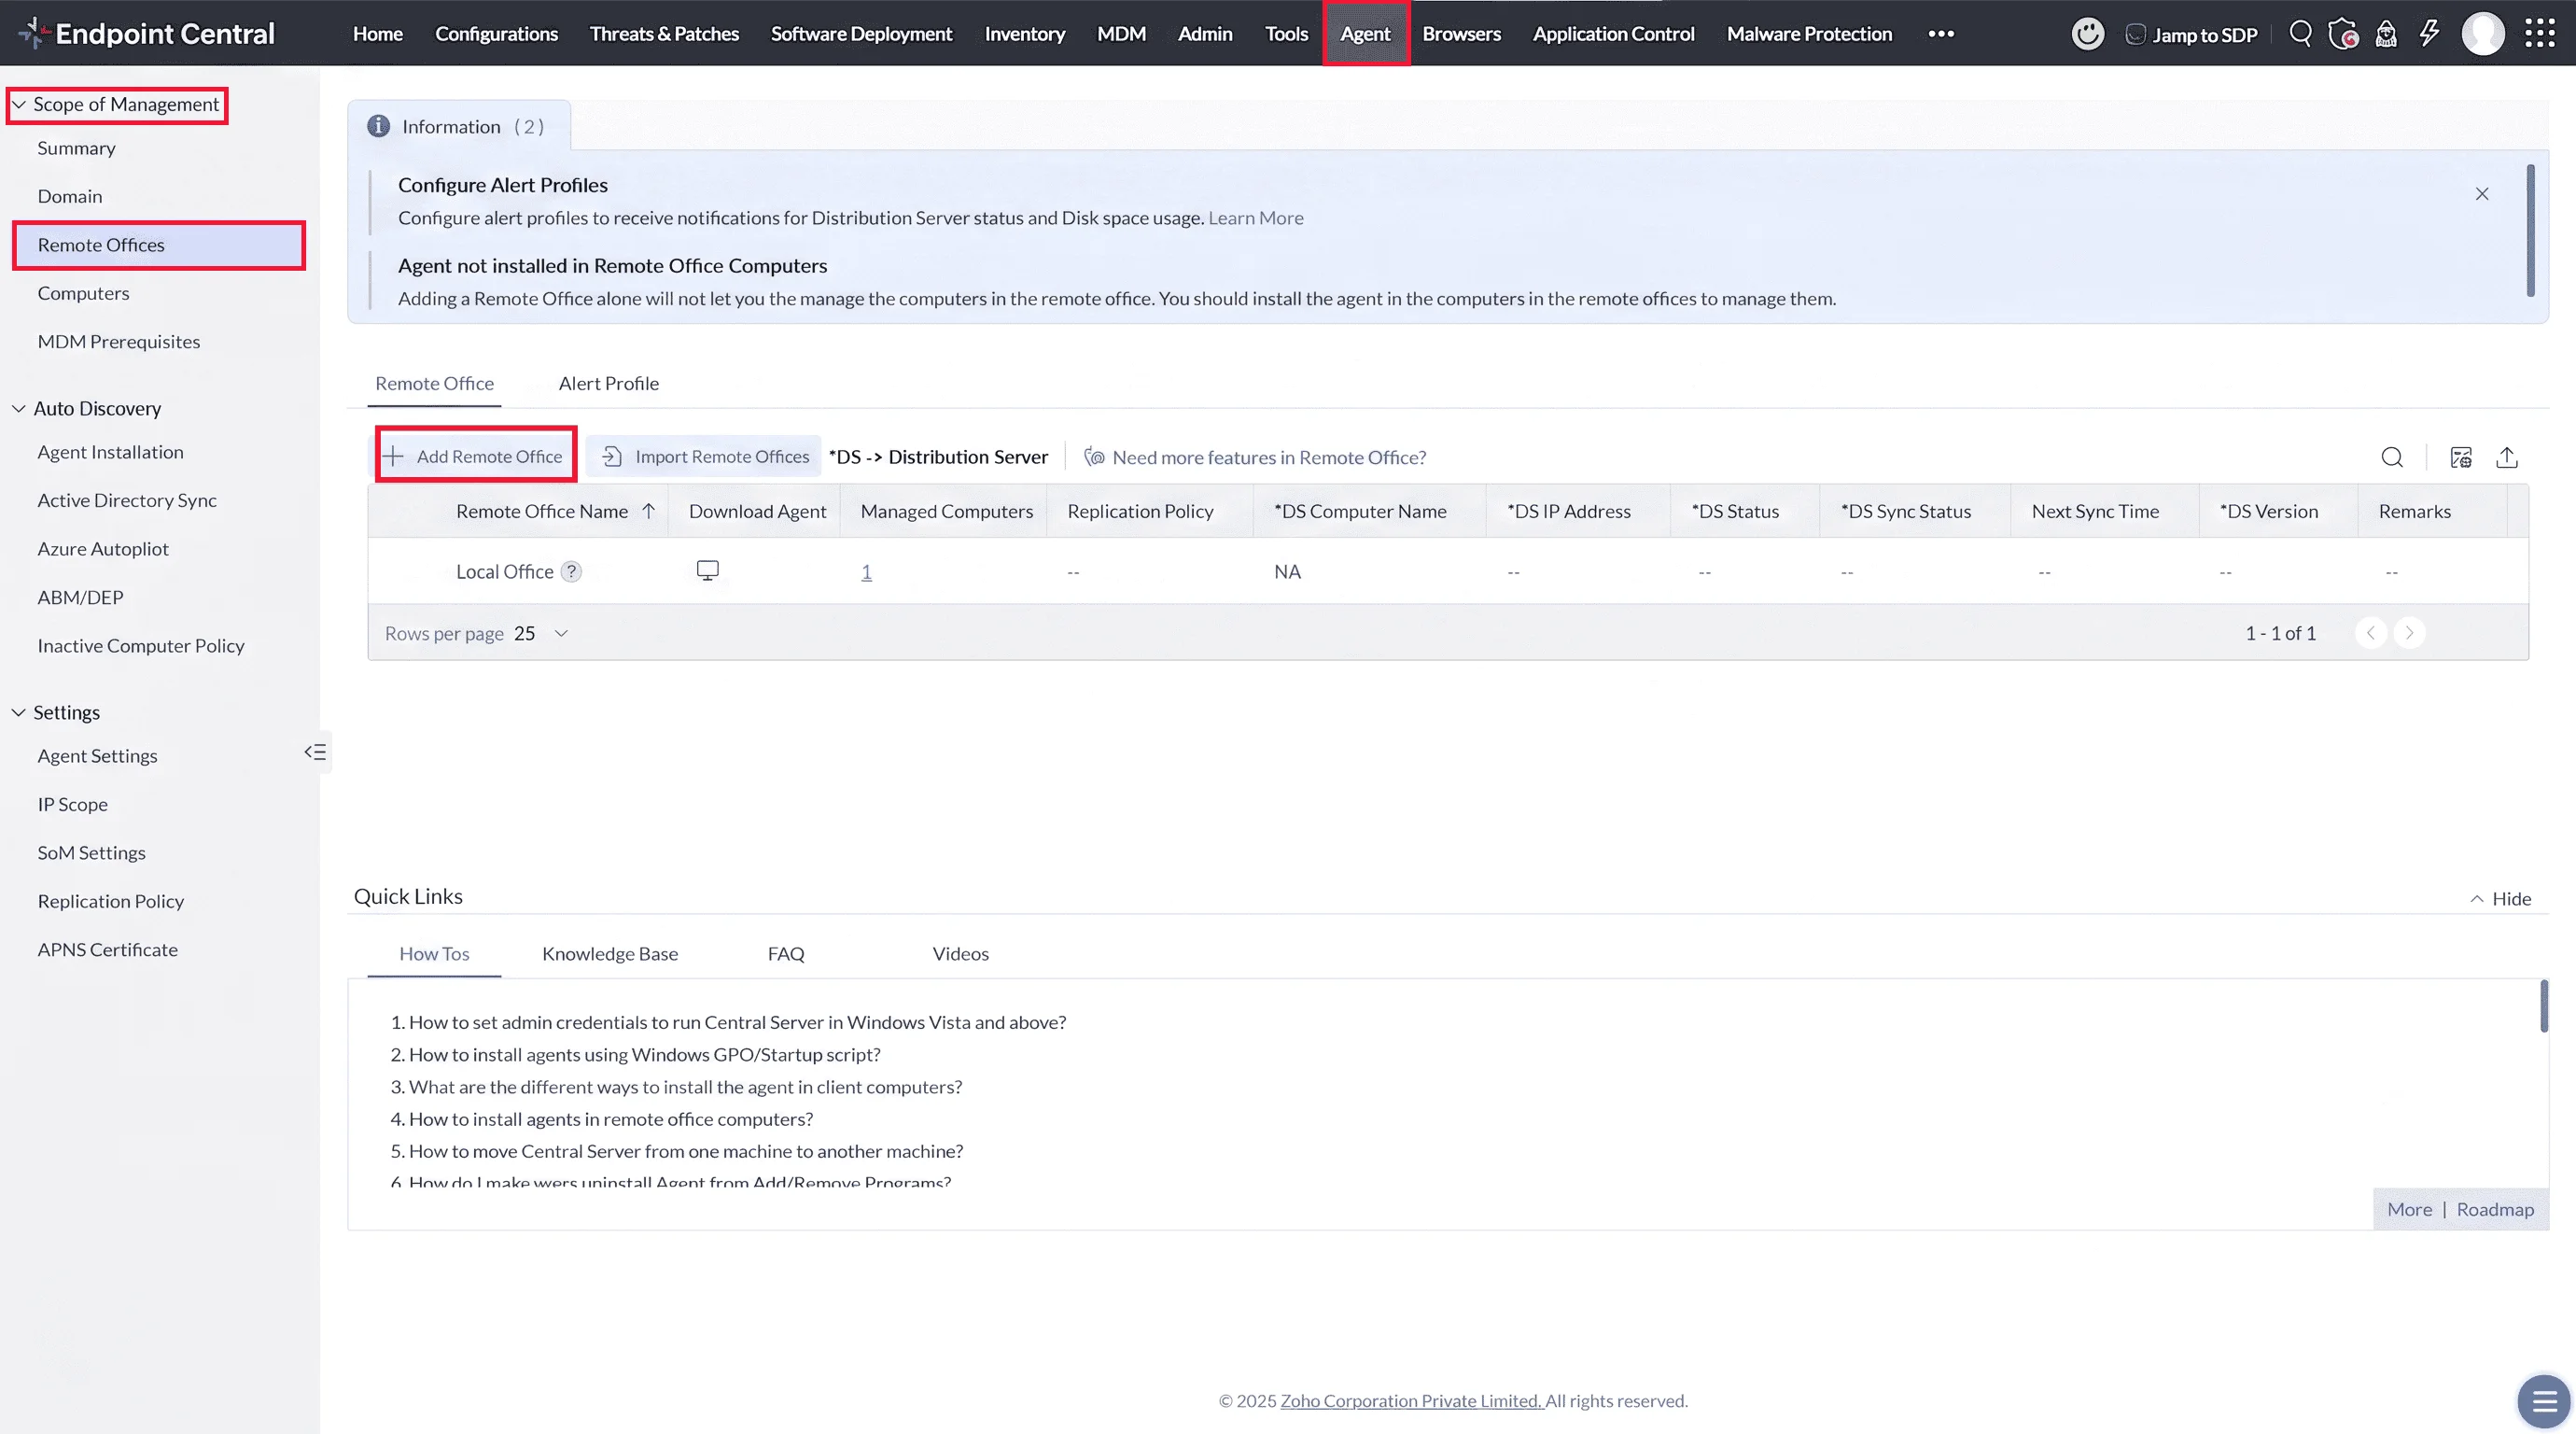
- Navigate to Agent → Scope of Management → Remote offices. Click the Add Remote office icon.
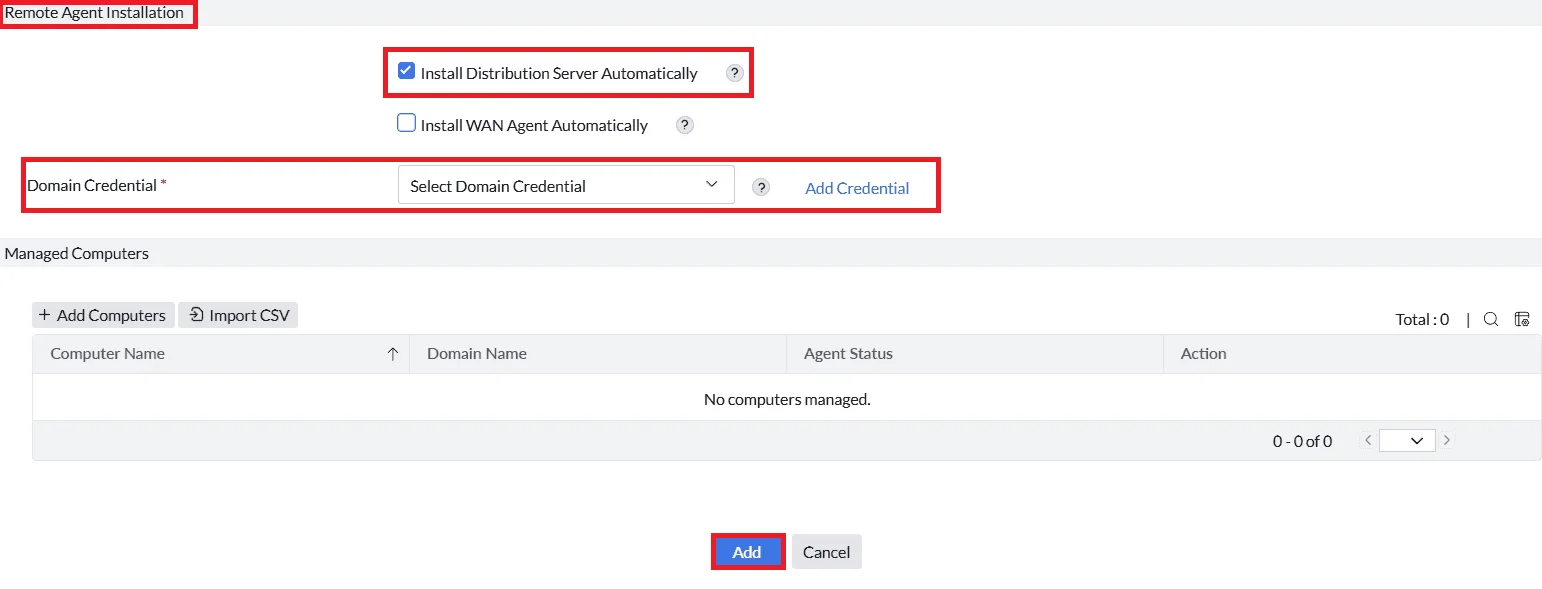
- Scroll down to Remote Agent Installation section under Add Remote Office.
- Check the box for Install Distribution Server Automatically.
- Provide Domain credentials with administrator privileges for all managed computers in the remote office.
- Click the Add button to save the Remote Office.
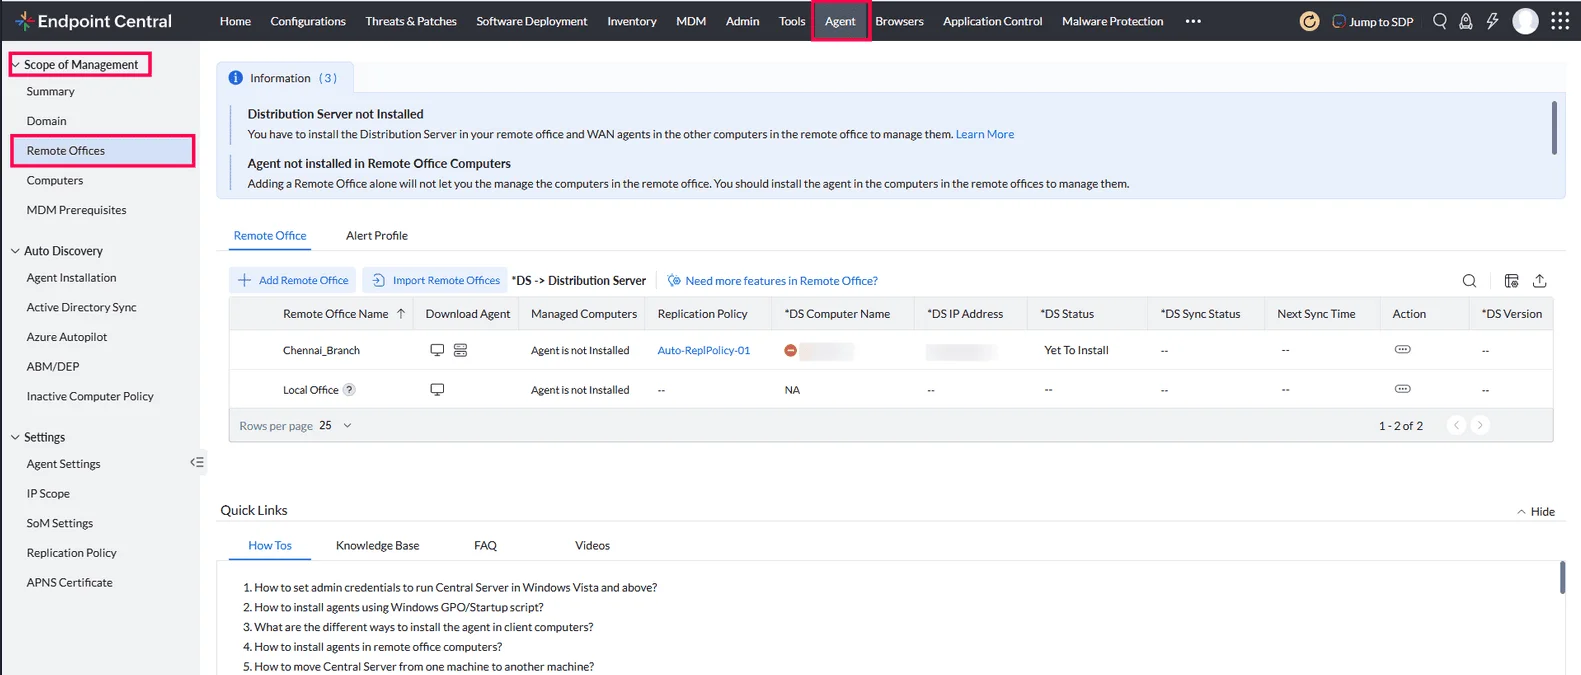
- Check the DS Status column for Successful Installation.

Alternatively:
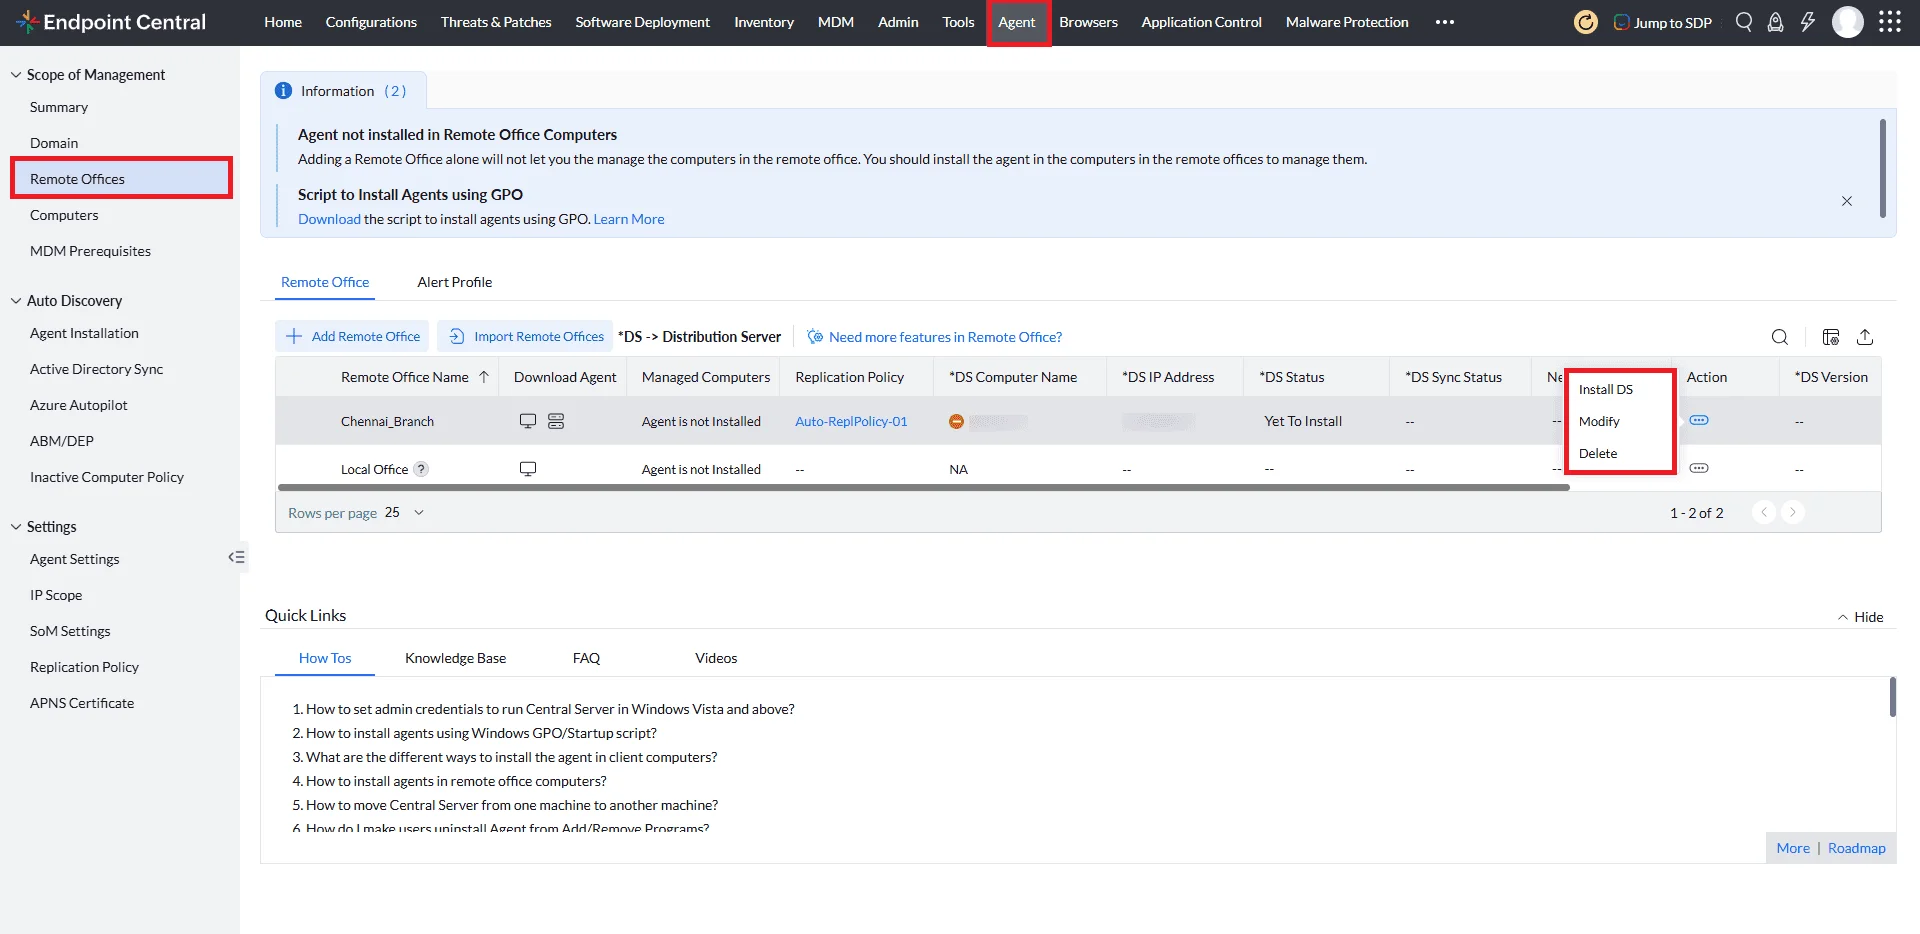
- Under the Remote Offices tab, in the Actions column, click Actions and select Install DS for the added remote office.
- Check the DS Status column for Successful Installation.
2. Manual DS Installation
- Navigate to Agent → Scope of Management → Remote offices.
- In the Download Agent column, find the remote office and click the Distribution Server icon.
- Run the downloaded installer.
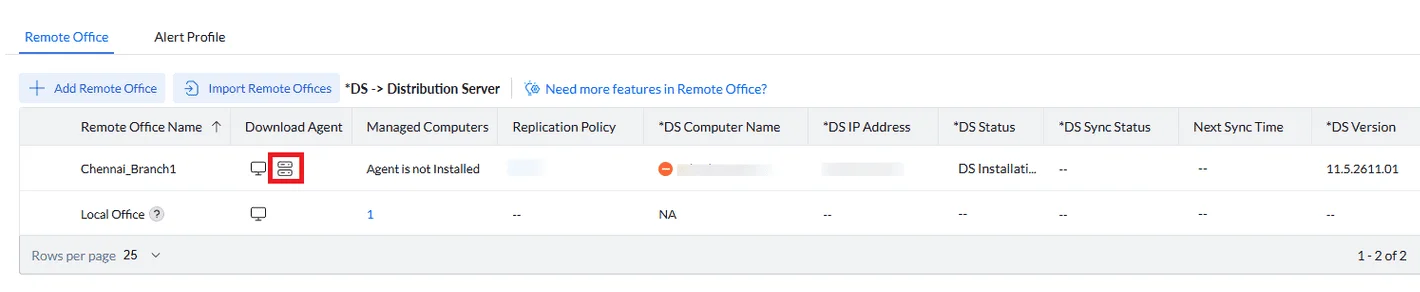
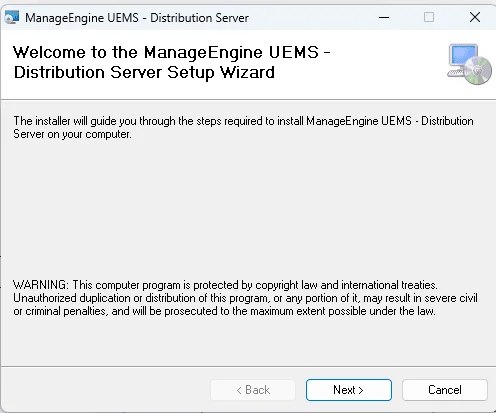
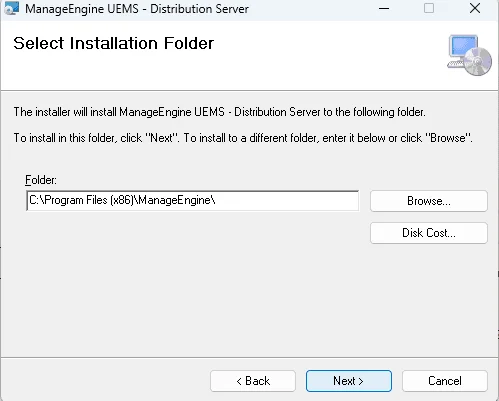
- Select the folder path for the Distribution Server files.
- Follow the on-screen prompts to complete the installation.
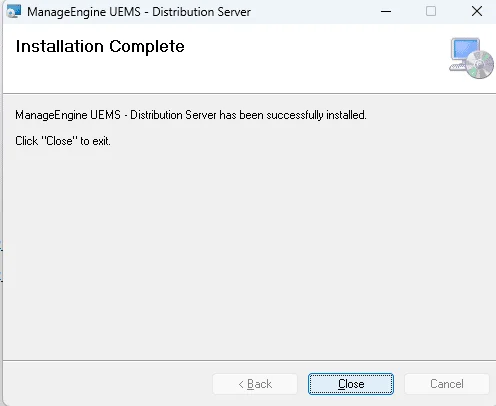
- Check the DS Status column for Successful Installation.
Installing WAN Agents
WAN agents are required to manage computers in the remote office. They can be installed automatically or manually.
1. Automatic Installation
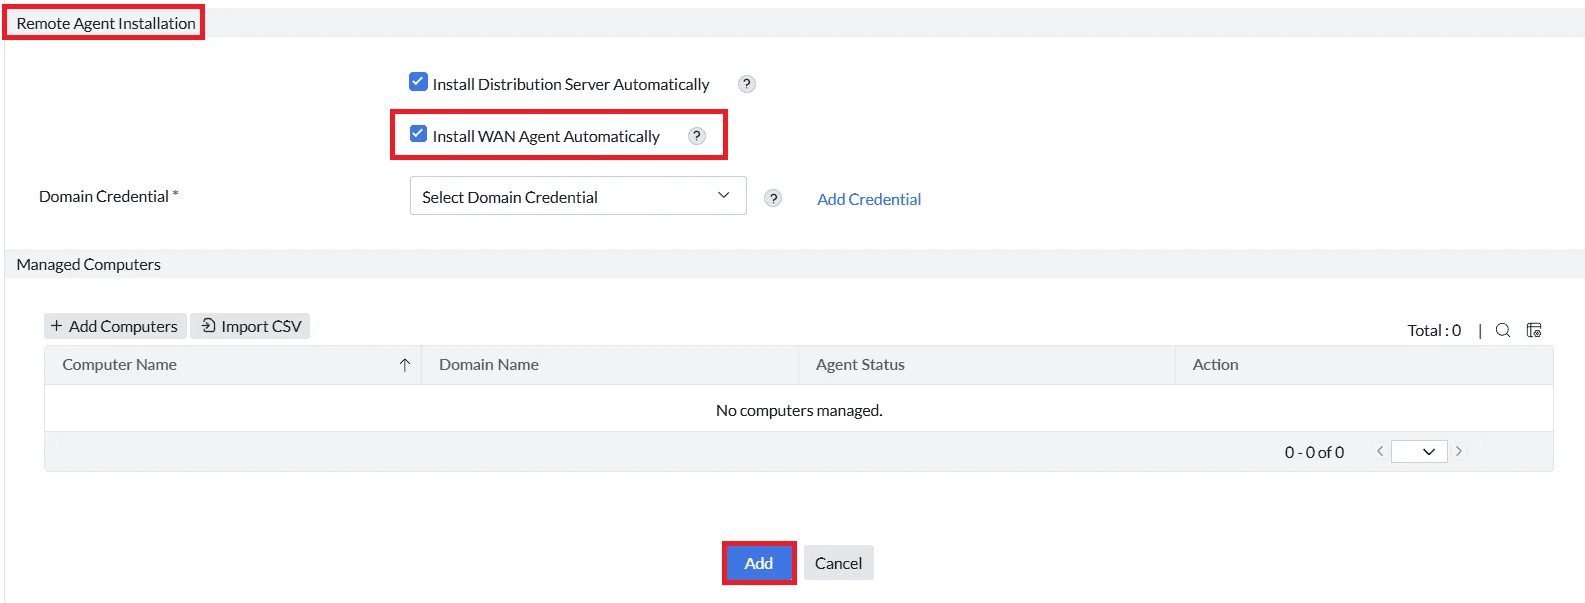
- While adding the remote office, Navigate to the Remote Agent Installation section under Remote office.
- Check the box for Install WAN Agent Automatically
- Provide Domain credentials for administrator access on all managed computers.
- Ensure the communication type is set to Distribution Server under Communication Details section
- Click the Add button to save the Remote Office.

Agent installation will not work if the devices are not directly reachable from the Distribution server, such as in cloud or MSP setups
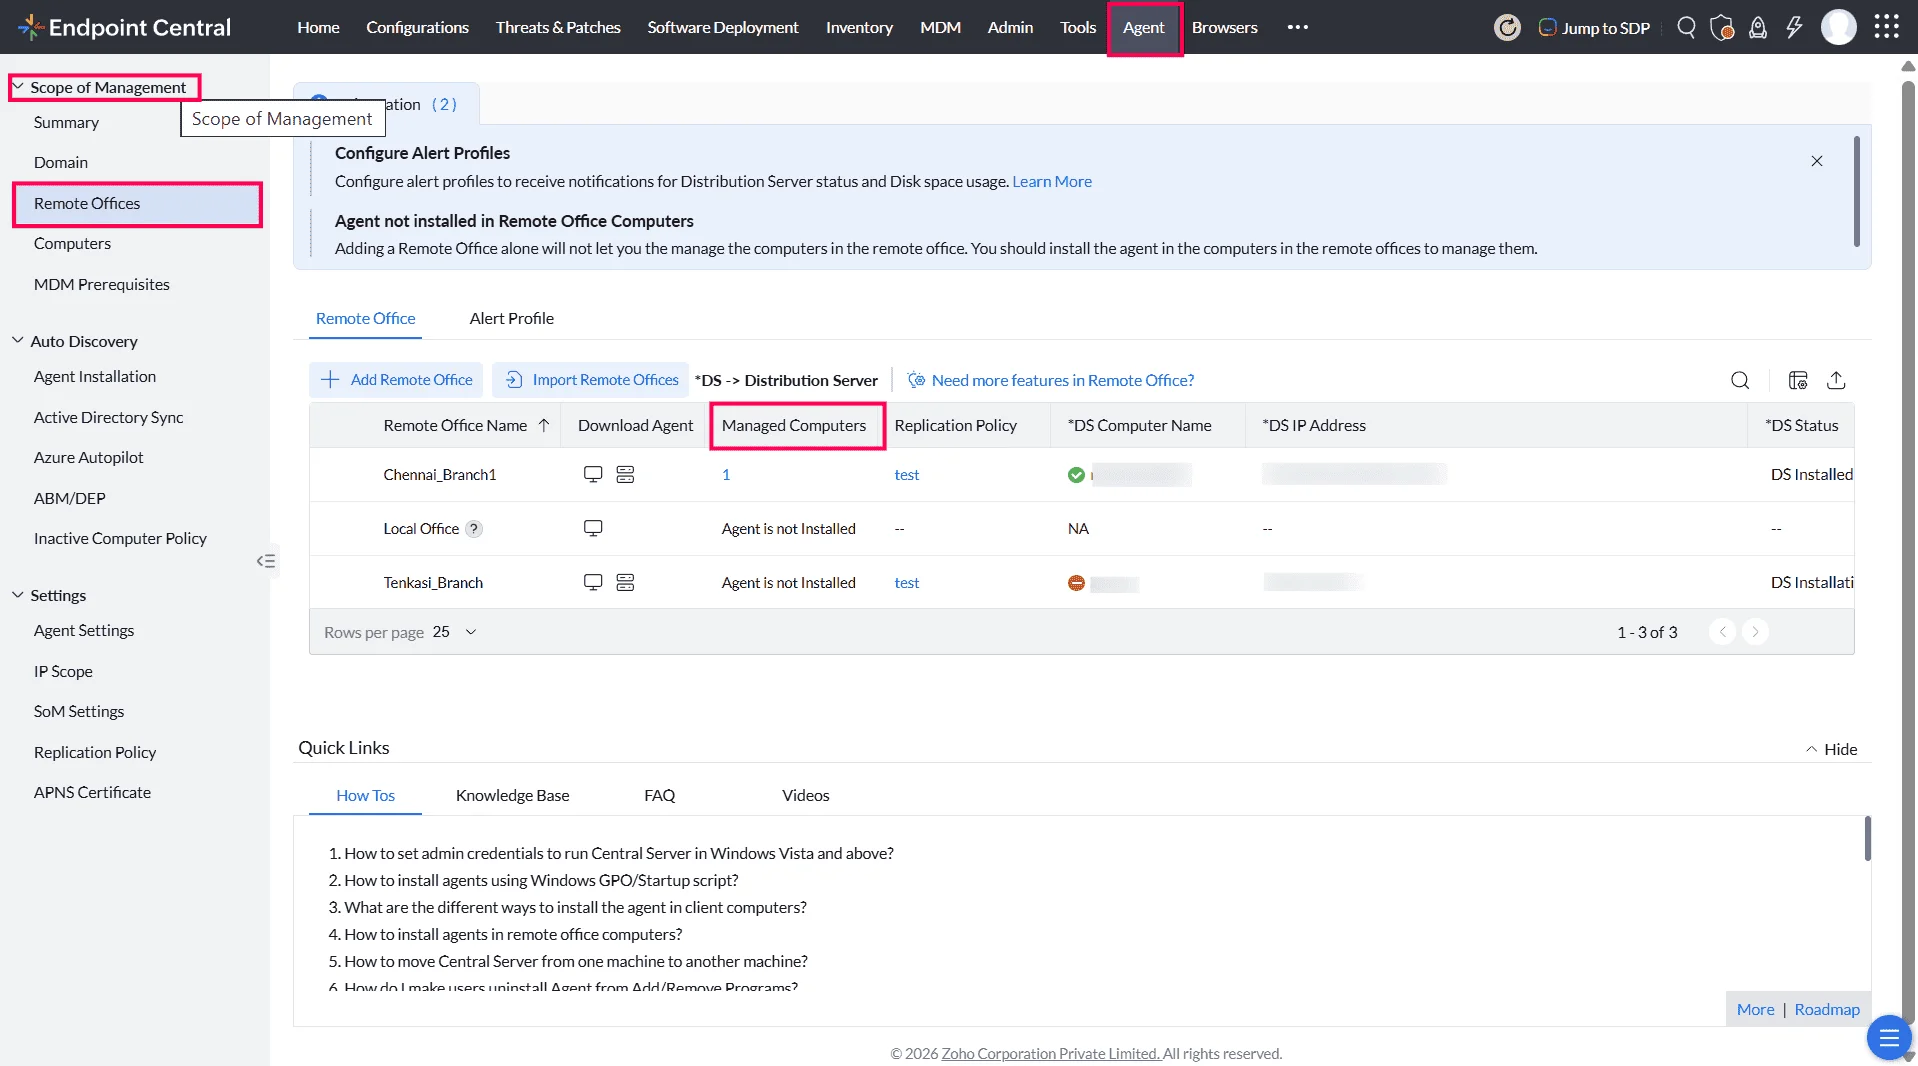
- The WAN agent installation will start once the Distribution Server contacts the central server. Check the Managed Computers column to verify successful WAN agent installation.
2. Manual Installation
To install WAN agents manually:
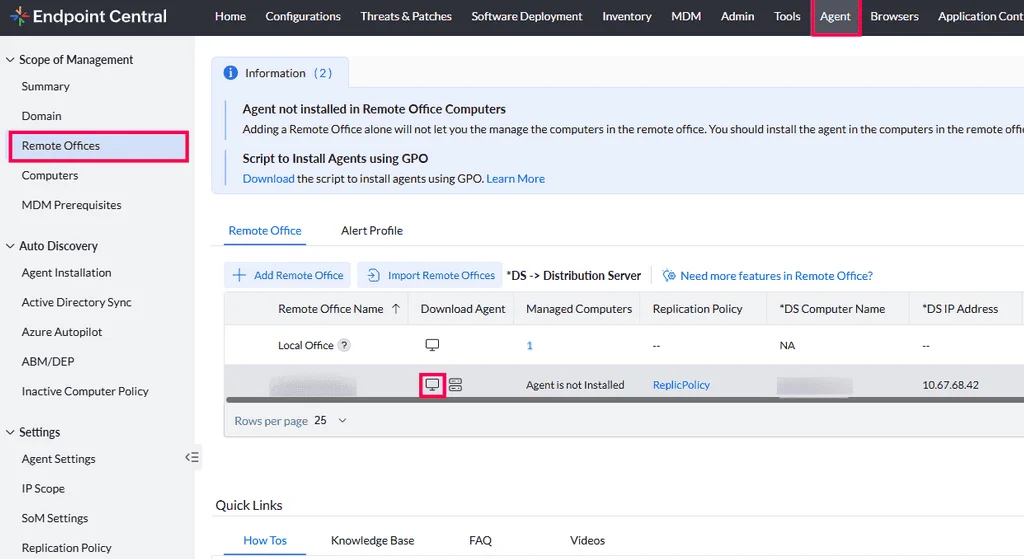
- Navigate to Agent → Scope of Management → Remote offices.
- In the Download Agent column, click the Download WAN Agent icon.
- Select the platform (Windows, macOS, or Linux) and download the installer:
- Windows: Download the .exe file and run it.
- macOS: Download the .pkg file and complete the setup.
- Linux: Download the UEMSLinuxAgent.zip, unzip the file, and follow the steps given in this link to install it using terminal commands.
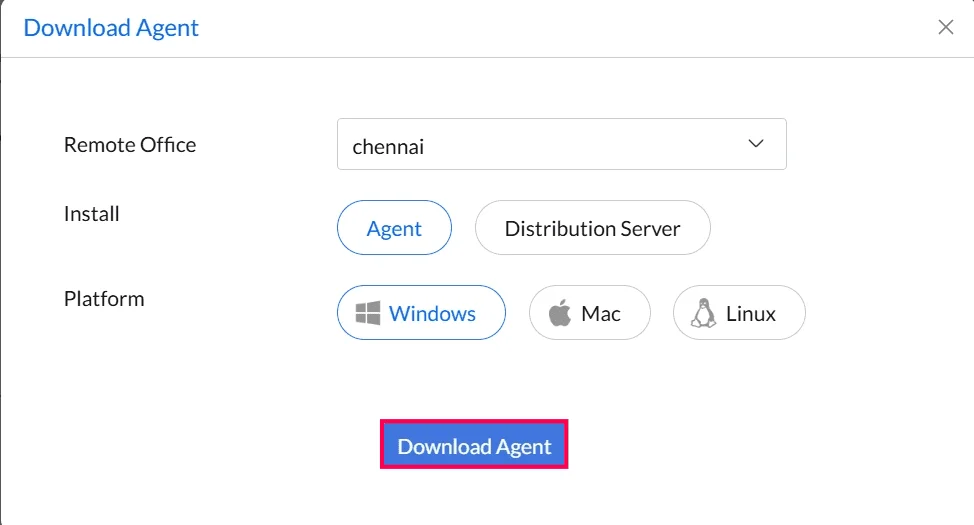
- Run the Download Installer
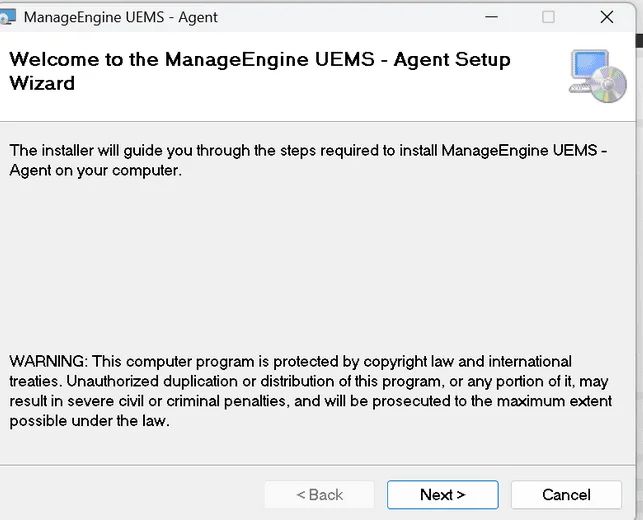
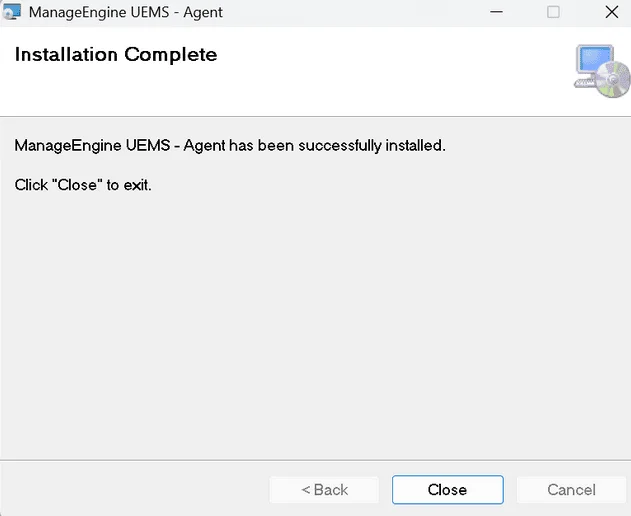
- Select the folder path for the Agent and Follow the on-screen prompts to complete the installation.
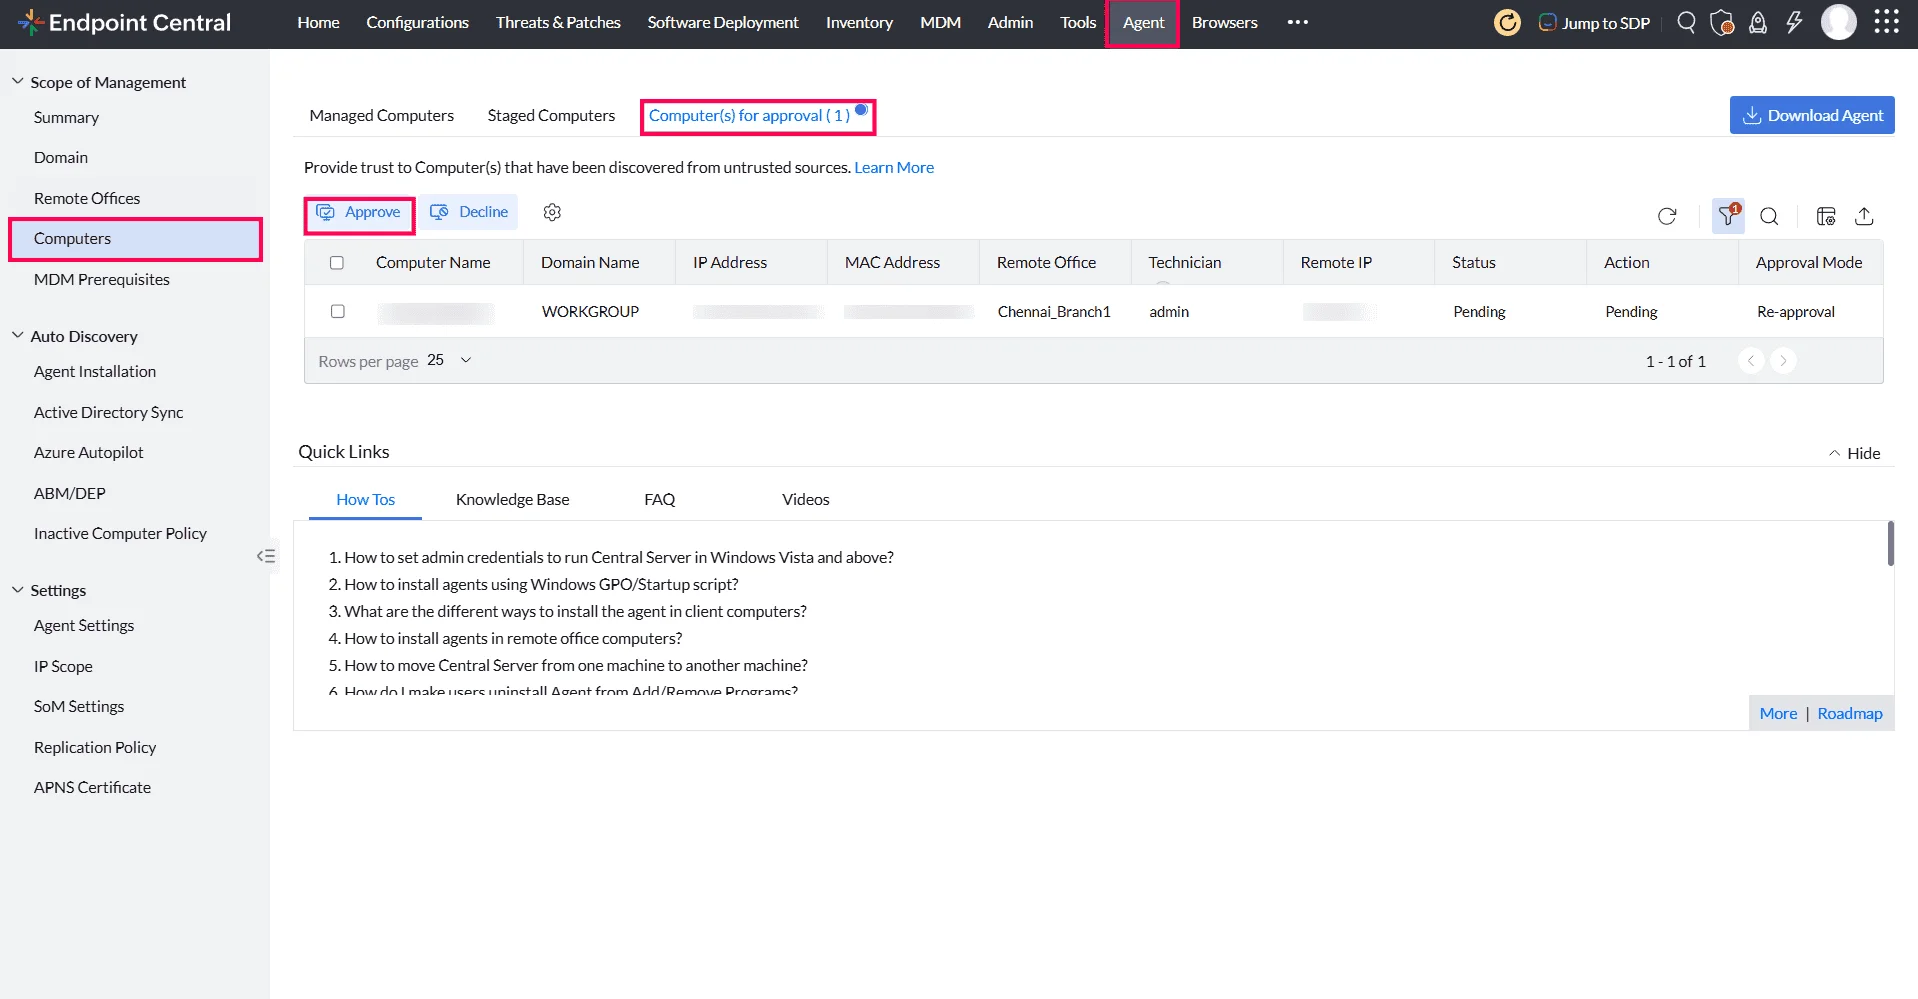
- Navigate to Agent → Computers → Computer(s) for approval. Approve the newly added Computer(s).
If you configured automatic approval criteria to automatically approve the computers then skip this step and move to next.
- The WAN agent installation will start once the Distribution Server contacts the central server. Check the Managed Computers column to verify successful WAN agent installation.
Conclusion
By following these steps, the Distribution Server and WAN agents will be installed successfully, ensuring proper management of computers in the remote office.