Warranty Management
Table of Contents:
Introduction to Warranty Management
Warranty Management in Hardware Asset Management is essential for optimizing the lifecycle and cost-effectiveness of physical IT assets. By systematically tracking warranty coverage, organizations can ensure timely repairs or replacements without incurring unnecessary expenses.
Endpoint Central's warranty tracking feature automatically fetches the warranty details such as Service Tag/Serial Number, Shipping Date, and Expiry Date provided by the vendors. Endpoint Central supports automatic warranty data fetching for Dell, Toshiba, and Lenovo computers. For HP computers, the HP Developer App Settings needs to be configured to retreive the warranty details automatically.
HP Developer App Settings
Warranty details for HP computers are fetched by Endpoint Central when the Client ID and Secret Key obtained from the HP Developer Portal is configured in the HP Developer App Settings in the Central console.
To retrieve these credentials, it is essential to gain access to the HP Developer Portal. The access to the HP Developer Portal must be requested by your organization's HP Account Manager at warrantyapi.customers@hp.com. The access to the HP Developer Portal along with the Warranty API will be granted by the HP team once they have approved your request. Once the HP Developer portal access is gained, follow the below steps to obtain the Client ID and Secret Key.
Obtaining the HP API Credentials
Follow the below steps to retrieve the Client ID and Secret Key:
- You must have an account in the HP Developer Portal or register an account.
- Login to the HP Developer portal and search for the HP Warranty API by using the Search option or by searching the HP Warranty API under the API and Tools section.

- After selecting the HP Warranty API tile, select the APIs icon in the top menu bar under which you will find the APIs offered.
Kindly note that the API assets will be visible only to the members of the Tech Group who are offering the API.
- To request access to the API, click the Get credentials link. You will be guided to the Get Credentials form.

- Provide the below required information to request credentials for the API:
- Select API Product - The API product is the specific published version of the API. In this field, you must select the API Product for which you require the API from the drop-down. Here, select the HP Warranty API product.
- Credentials Name - The credentials name will be the name which will be referenced on the HP Developer portal. It is recommended to provide the name of the service that will be utilizing the credentials to access the API.
- Description - The description field provides information about the business purpose for which the API is used. Since approval might be required to access the selected API, the description helps the HP team understand the purpose for accessing the API.

- Click the Submit button once the above fields are filled to request your API credentials.
- Your API Credentials requests can be monitored by visiting My Credentials under the My Dashboard page in your user profile.
Kindly note that if approval is required by the API product team, your app will be put in Pending state. Once approved, your app's status will be changed to Approved, and an email notification will be sent.
Configuring HP Developer App Settings
After obtaining the Client ID and Secret Key, configure them in the HP Warranty Settings. Follow the below steps to configure:
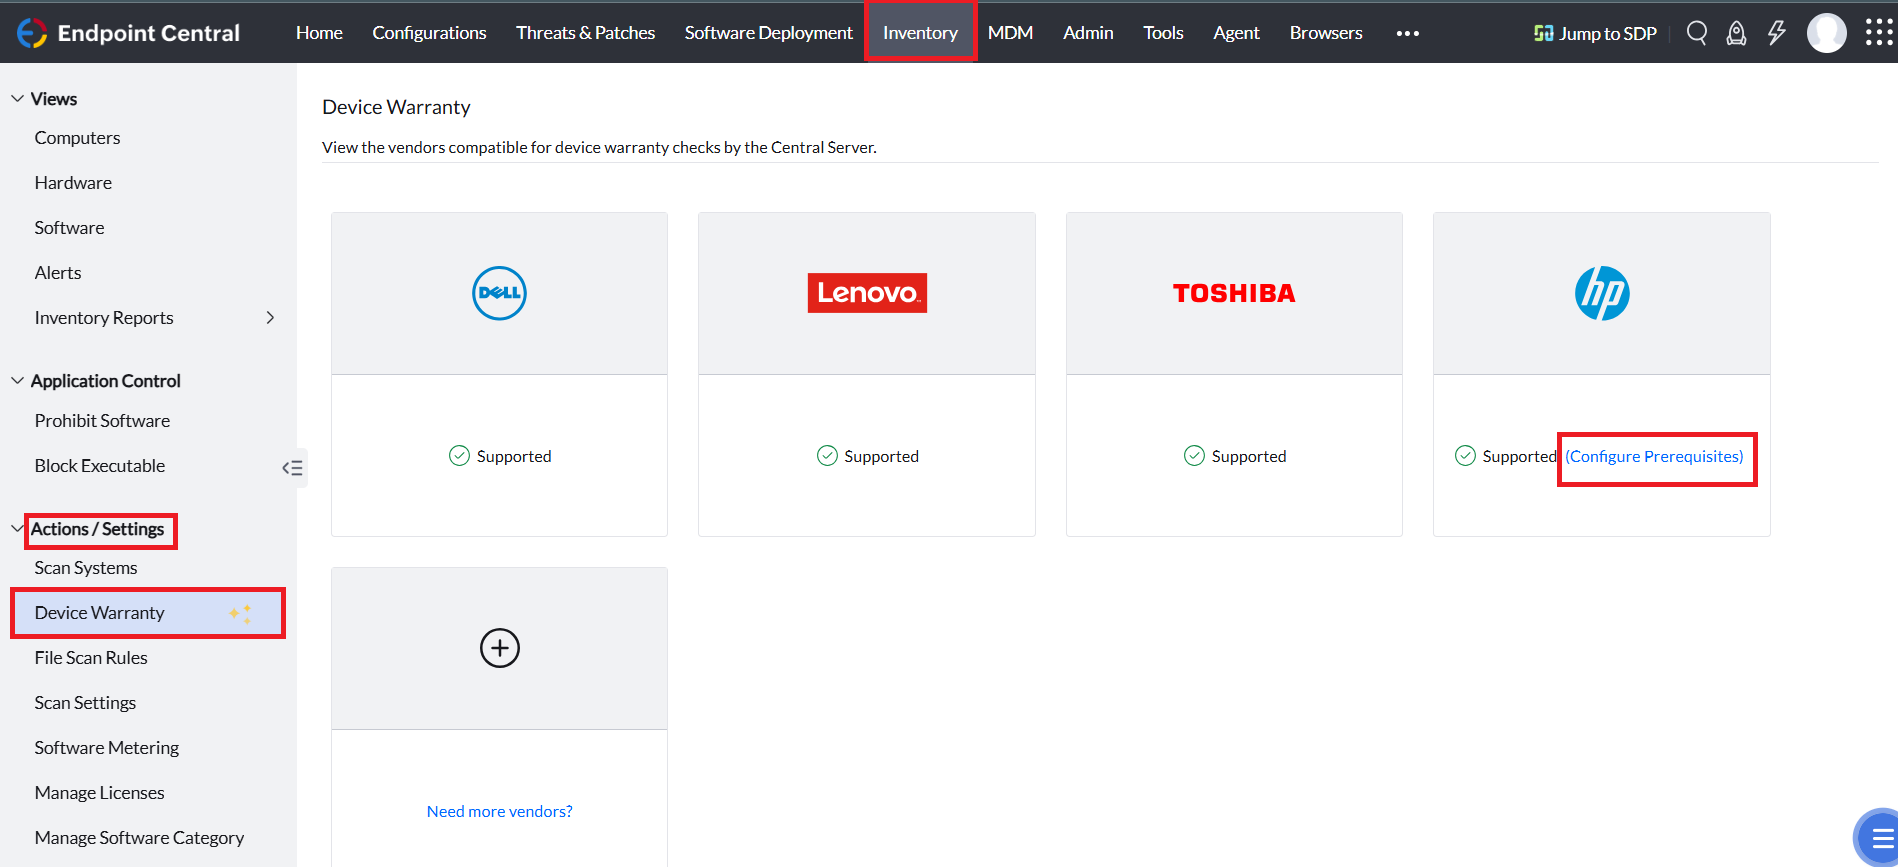
- In the Endpoint Central console, navigate to Inventory > Actions/Settings > Device Warranty > Configure Prerequisites under HP vendor.

- Provide the obtained API credentials in the Client ID and Secret Key fields.
- Provide the Secret Key created date and Secret Key expiry date.
- Once the above data are provided, the data will be validated and saved in the Central Server.
- Once the HP Warranty Settings are configured successfully, the HP Warranty details will be fetched automatically, which can be viewed in the individual HP computer's Computer Details under Inventory.
Kindly note that by default the HP Warranty credentials will be valid for 90 days. Kindly monitor the expiration date of the credential and update the HP Developer Settings accordingly.
Adding Warranty Details Manually
In Endpoint Central, you can provide the warranty details manually. Follow the below steps:

- In the Endpoint Central console, navigate to the Admin tab > Global Settings > Add Custom Data for Computers
- Select the Computer to which you want to manually add the Warranty details by clicking the pencil icon.
- For updating the Warranty details in bulk for multiple computers, select Bulk Update option and manually update the Warranty details.
- Select Import CSV option to import the Warranty details for your managed computers in bulk.