Create APNs Certificate
It is strongly recommended that you use a common generic corporate e-mail instead of personal e-mail as you need to renew the APNs certificate every year.
Create and upload APNs Certificate
- The first step in creating APNs certificate is to download the Vendor Signed CSR. To download a CSR signed by ManageEngine MDM, on the console go to Agent tab and select APNs certificate under the Mac column. Click on Download the Vendor Signed CSR signed by ManageEngine MDM.
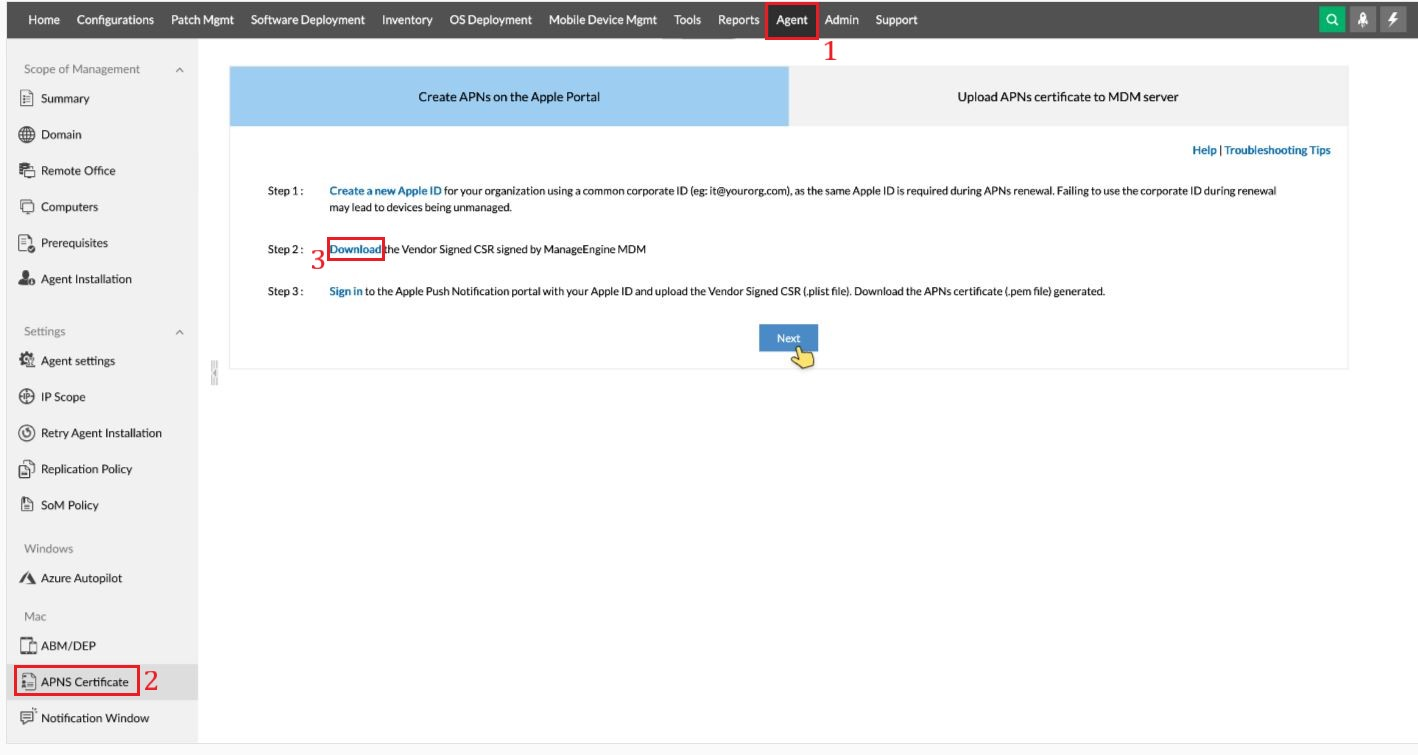
- The Signed CSR, which has been downloaded in step 1, has to be uploaded to the Apple Push Notification portal to create a APNs. Follow the steps mentioned below:
- Go to Apple Push Certificate Portal to create the APNs. It is recommended by Apple to use Safari/Google Chrome/Firefox browsers while executing the below mentioned steps. Internet Explorer is not recommended to create APNs certificate.
Sign in using a corporate Apple ID and password. A corporate Apple ID or Apple Account is recommended, as this would negate the consequences of an employee quitting the enterprise after using a personal Apple ID for APNs creation. If your organization does not have an Apple ID, create one from https://appleid.apple.com .

- It is recommended to use a common organization e-mail address for creating the APNs, instead of using employee e-mail address. If APNs created using an employee mail address is being used, the e-mail used can be changed, during APNs renewal.
- APNs is valid for one year from the day of its creation. It is recommended to use a corporate Apple ID to create APNs. When you renew the APNs certificate, you have to use the same Apple ID. If you happen to use a different Apple ID, then you have to re-enroll all the managed mobile devices.
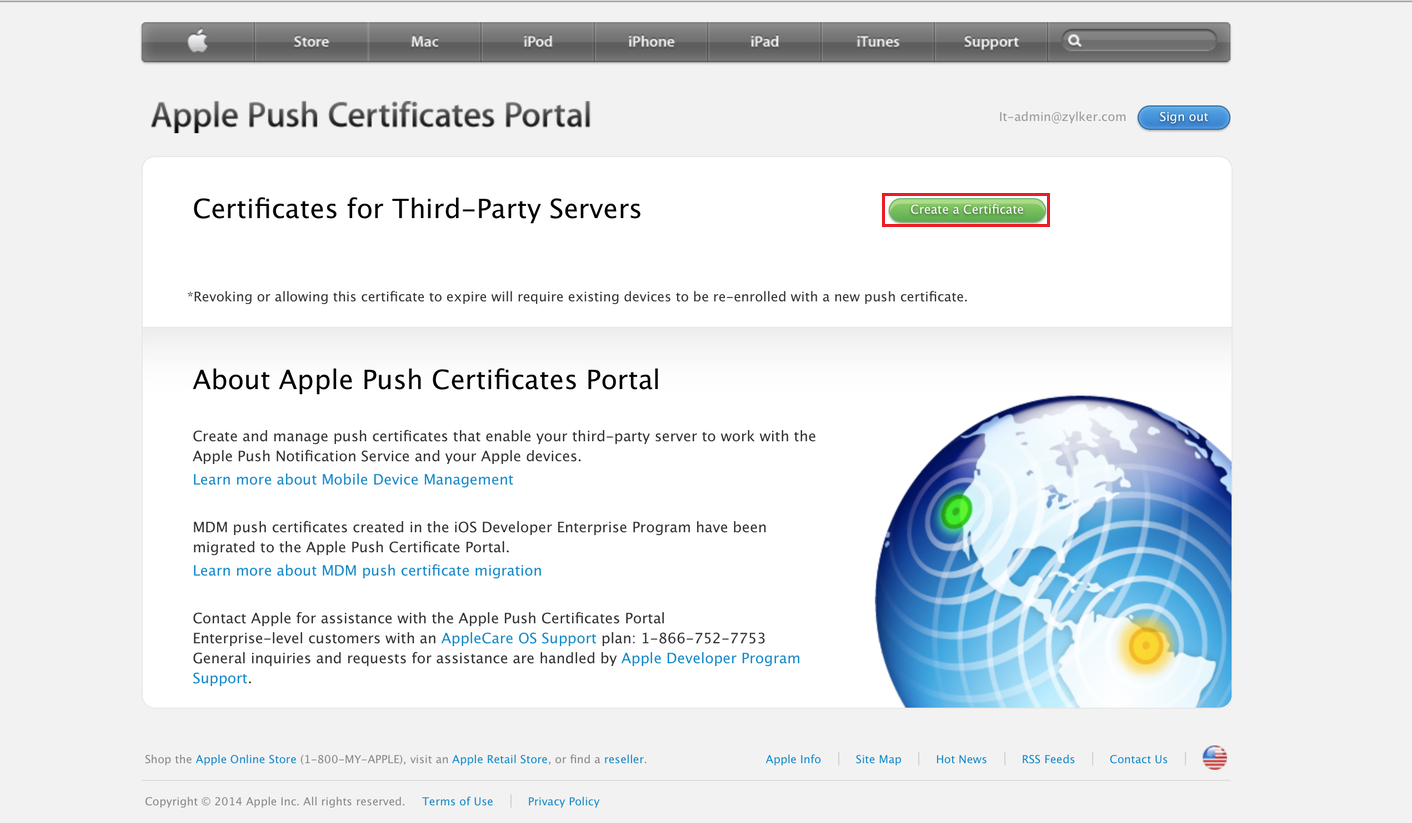
- Once logged in, choose Create Certificate .
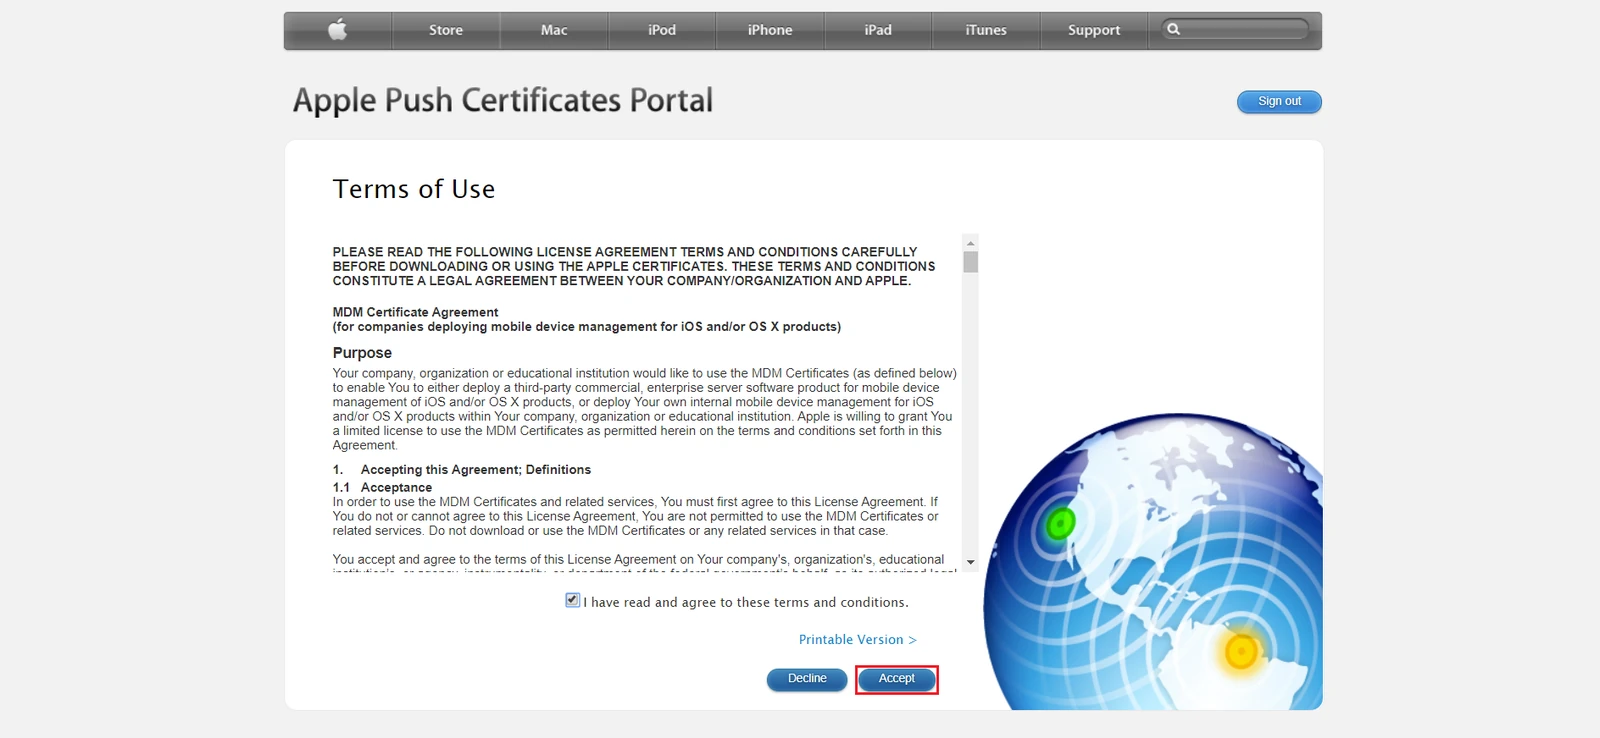
- After reading terms and conditions Click Accept.
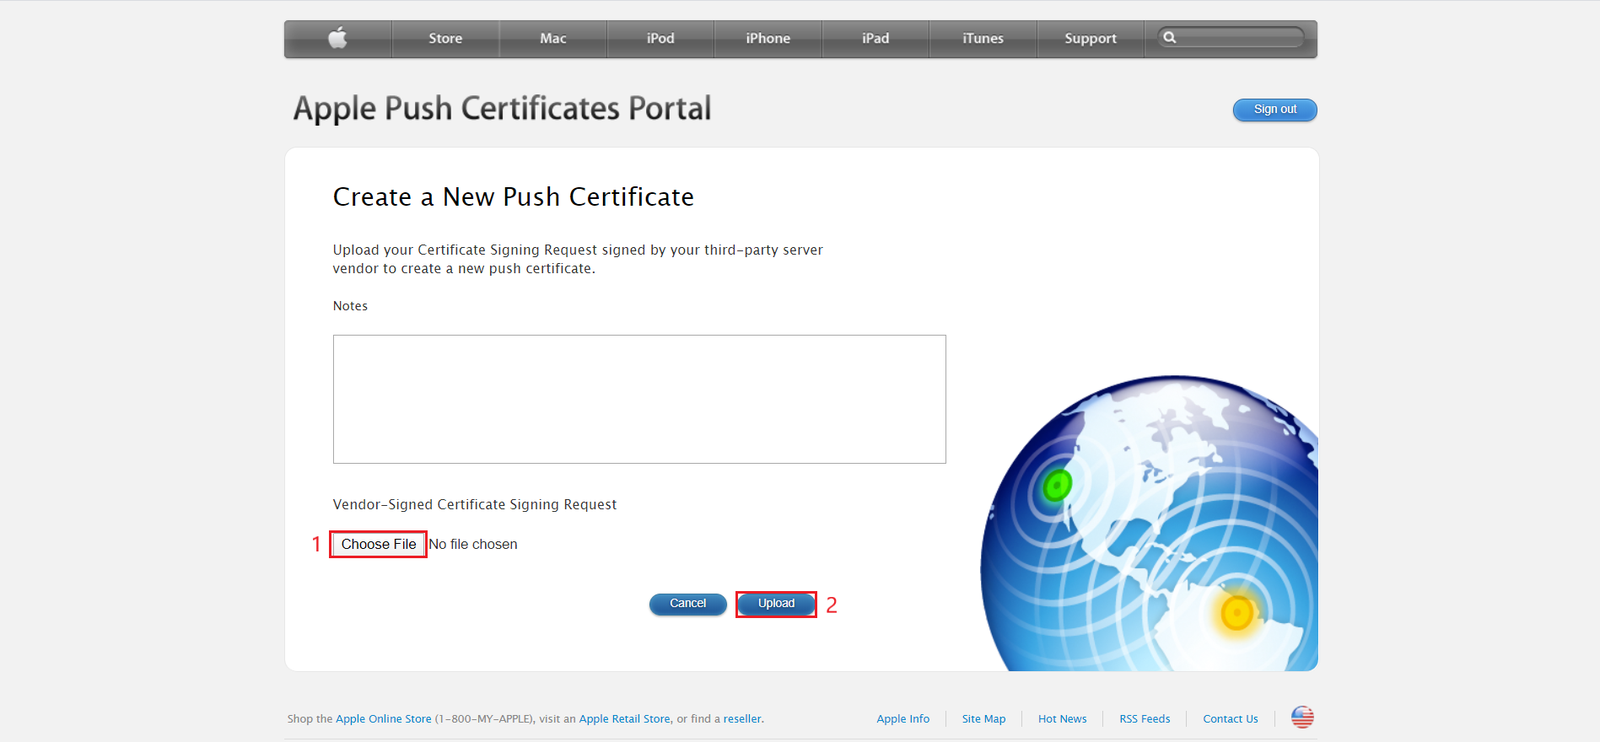
- Upload the signed CSR that you received at step 1.
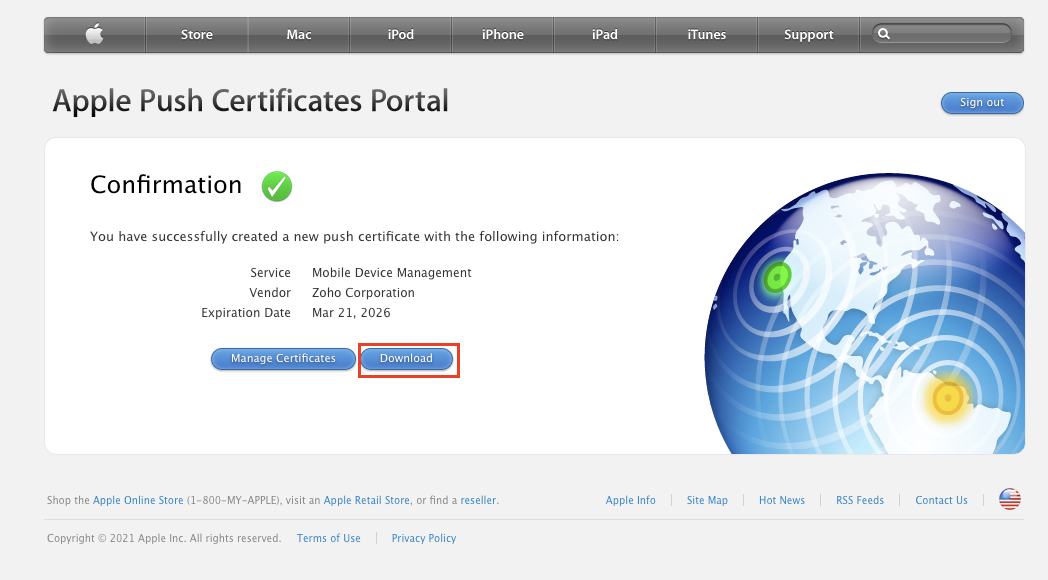
- A new certificate for managing the iOS devices appears in the portal. Download the new Apple signed certificate ( MDM_ZOHO_Corporation_Certificate.pem ).
- On the Mobile Device Manager Plus web console, click Next to upload the APNs certificate, you have downloaded from the Apple Push Notification portal.
- Specify the Corporate Apple ID and address to which notification mails should be sent during APNs expiry.
- Click Upload to complete the process.
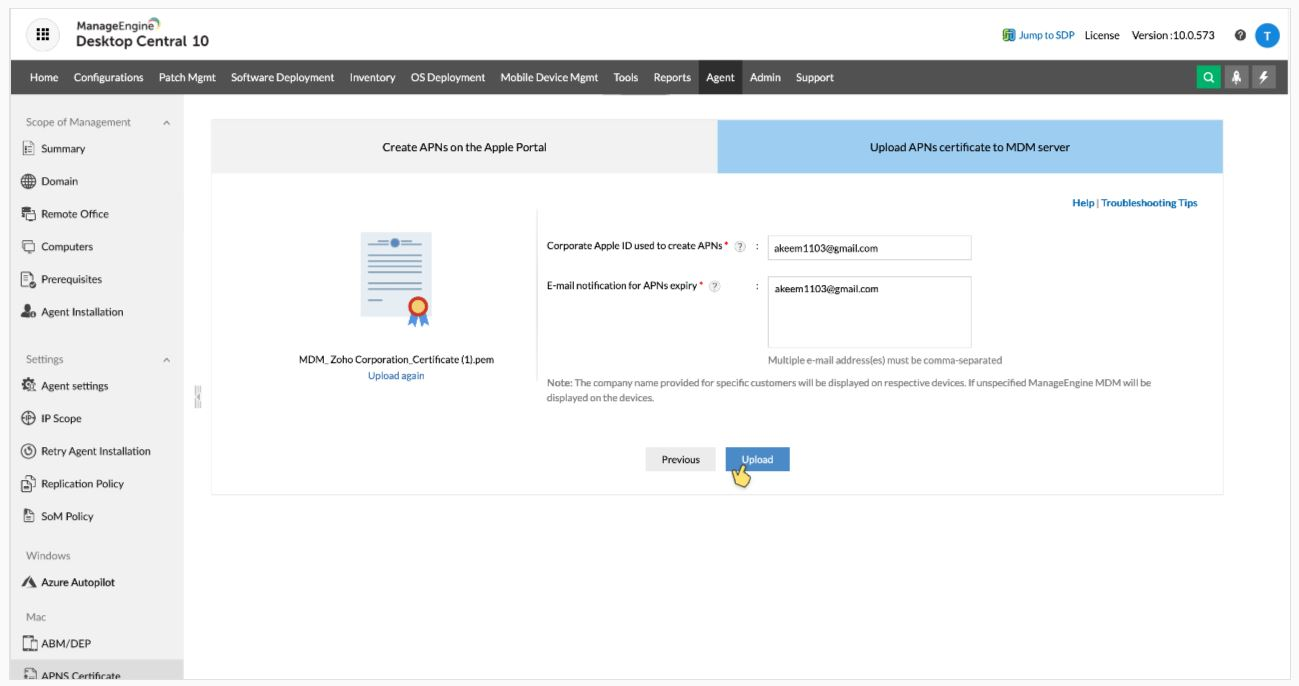
You have successfully uploaded APNs, you can start enrolling your iOS devices.
Remove APNs Certificate
|
|
You may require to remove APNs certificate in the following scenarios:
During the time of APNs renewal, in case you forget the Apple ID used to create the current APNs certificate, you need to remove the existing APNs certificate and upload a new one. You may also need to upload a new APNs certificate when you change the Apple ID used to create APNs certificate and use a Corporate Apple ID.
This can be done by following the steps mentioned below:
- On the web console, click the Agent tab and select APNs Certificate under the Mac tab in the left pane.
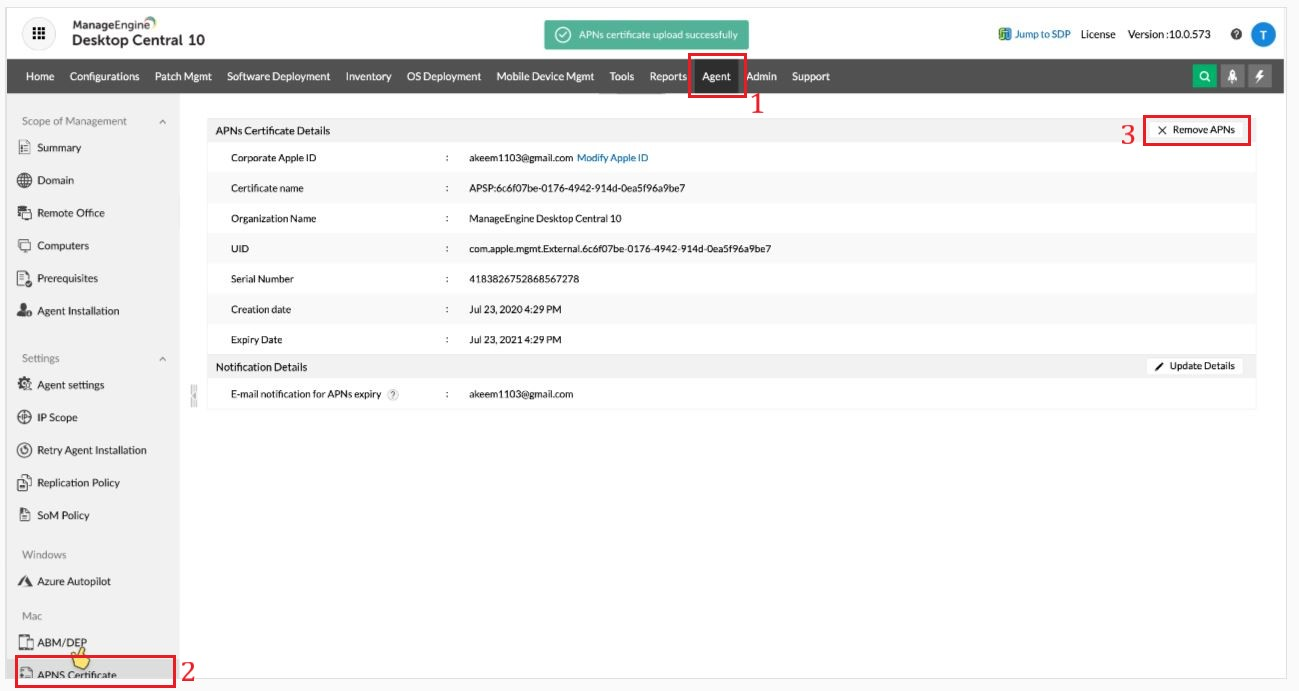
- Click the Remove APNs button