Image Replication to Remote Office
Image replication in OS Deployer enables you to distribute OS images across multiple remote offices for streamlined deployment. When you initiate replication, the selected image is transferred through the cloud server and made available in the target remote office.
Uploading the image to cloud storage before replication is recommended; however, it is not mandatory to upload it separately. If the image is not already available in cloud storage, it is automatically uploaded to the cloud server during the replication process and then replicated to the selected remote office. Currently uploading images to the Zoho Cloud is supported.
Once an image has been uploaded to cloud storage, you do not need to upload it again for subsequent replications. A single upload is sufficient, and the same cloud-stored image can be replicated to multiple remote offices based on the configured replication policies.
Image Replication to Remote Offices
After creating an image in a remote office, you can replicate it to other remote offices. There are multiple ways to initiate replication:
- From the Create Image view
- From the Remote Office view
- From the Remote Office details view
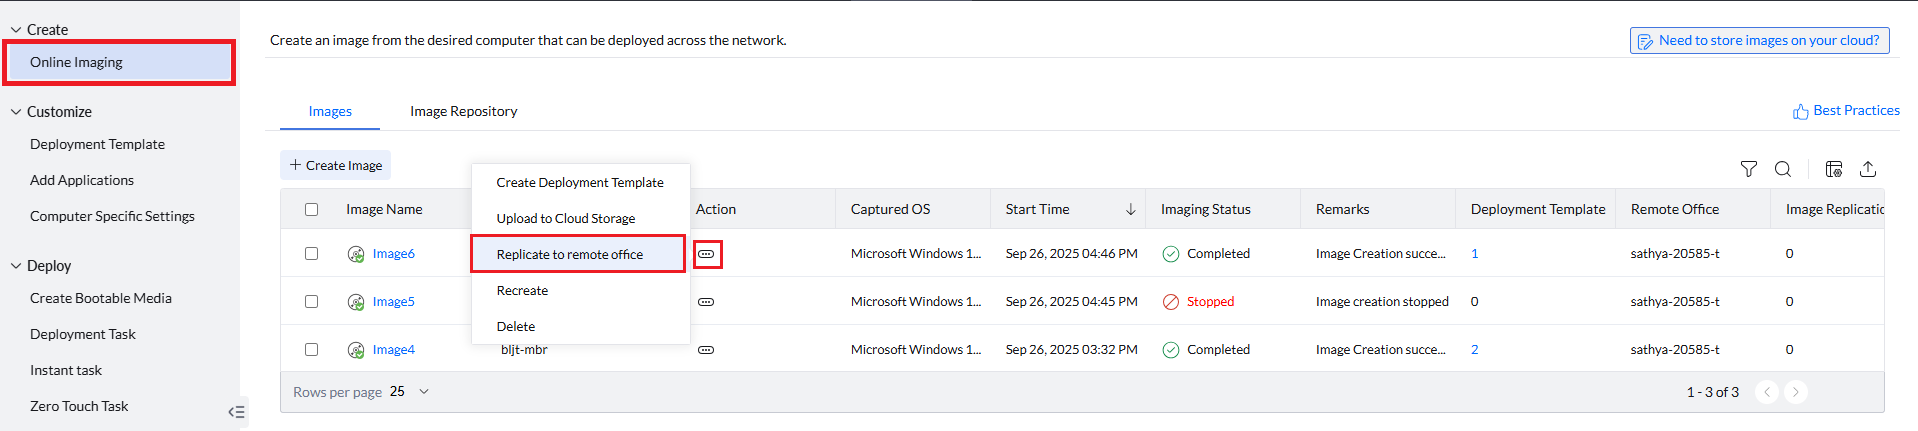
Replication via Create Image View
- Go to the Create tab and select Online Imaging.
- Click Actions beside the image you want to replicate.
- Select Replicate to Remote Office.
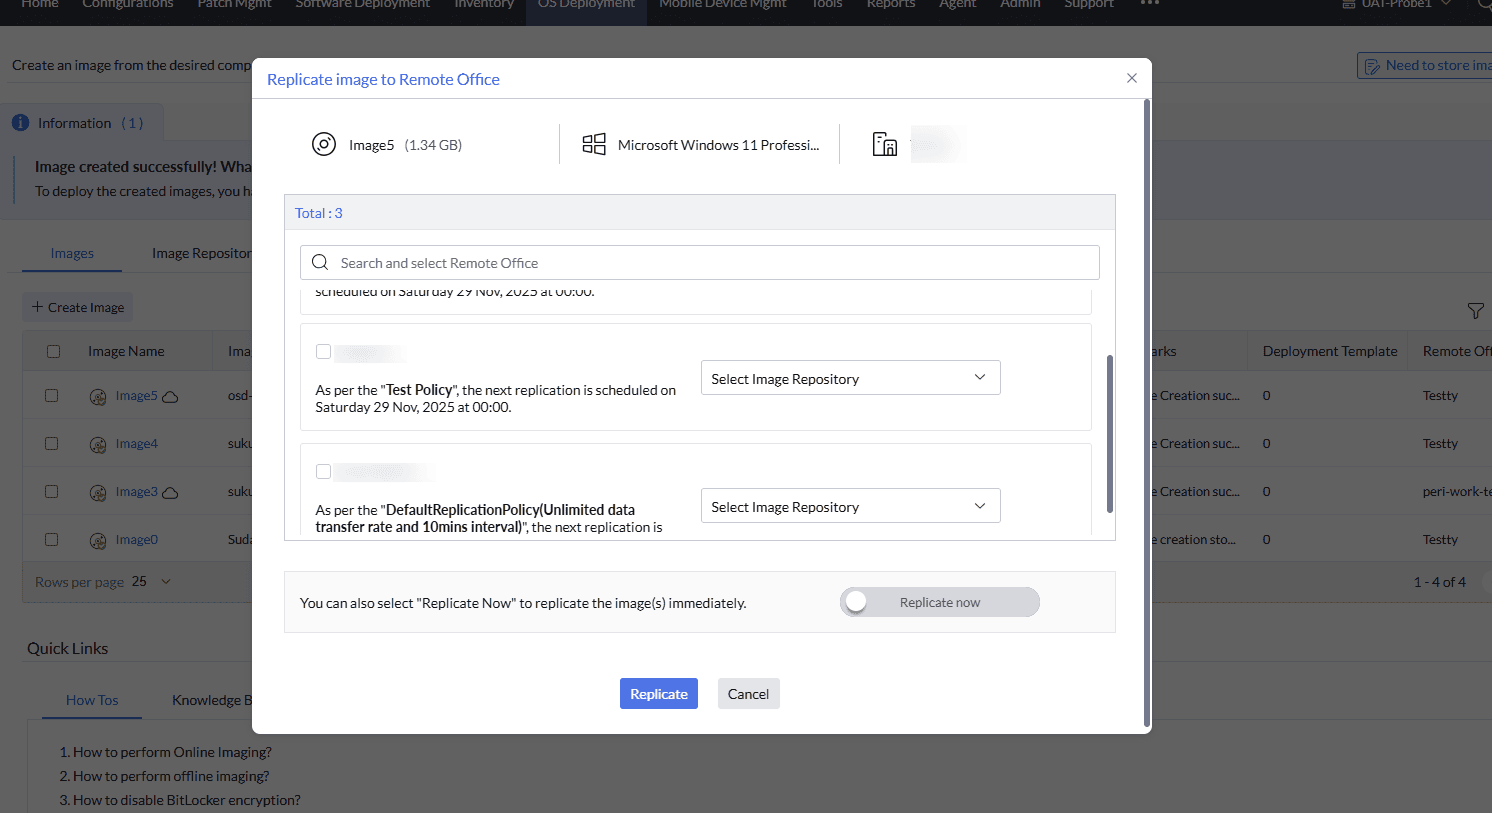
- From the list of remote offices, choose the target office.
- Select the image repository in the target office.
- Click Replicate to begin replication. Image will be replicated based on the replication policy you have selected while configuring OS deployment settings.
- Enable Replicate Now if you want replication to occur immediately.
Replication via Remote Office View
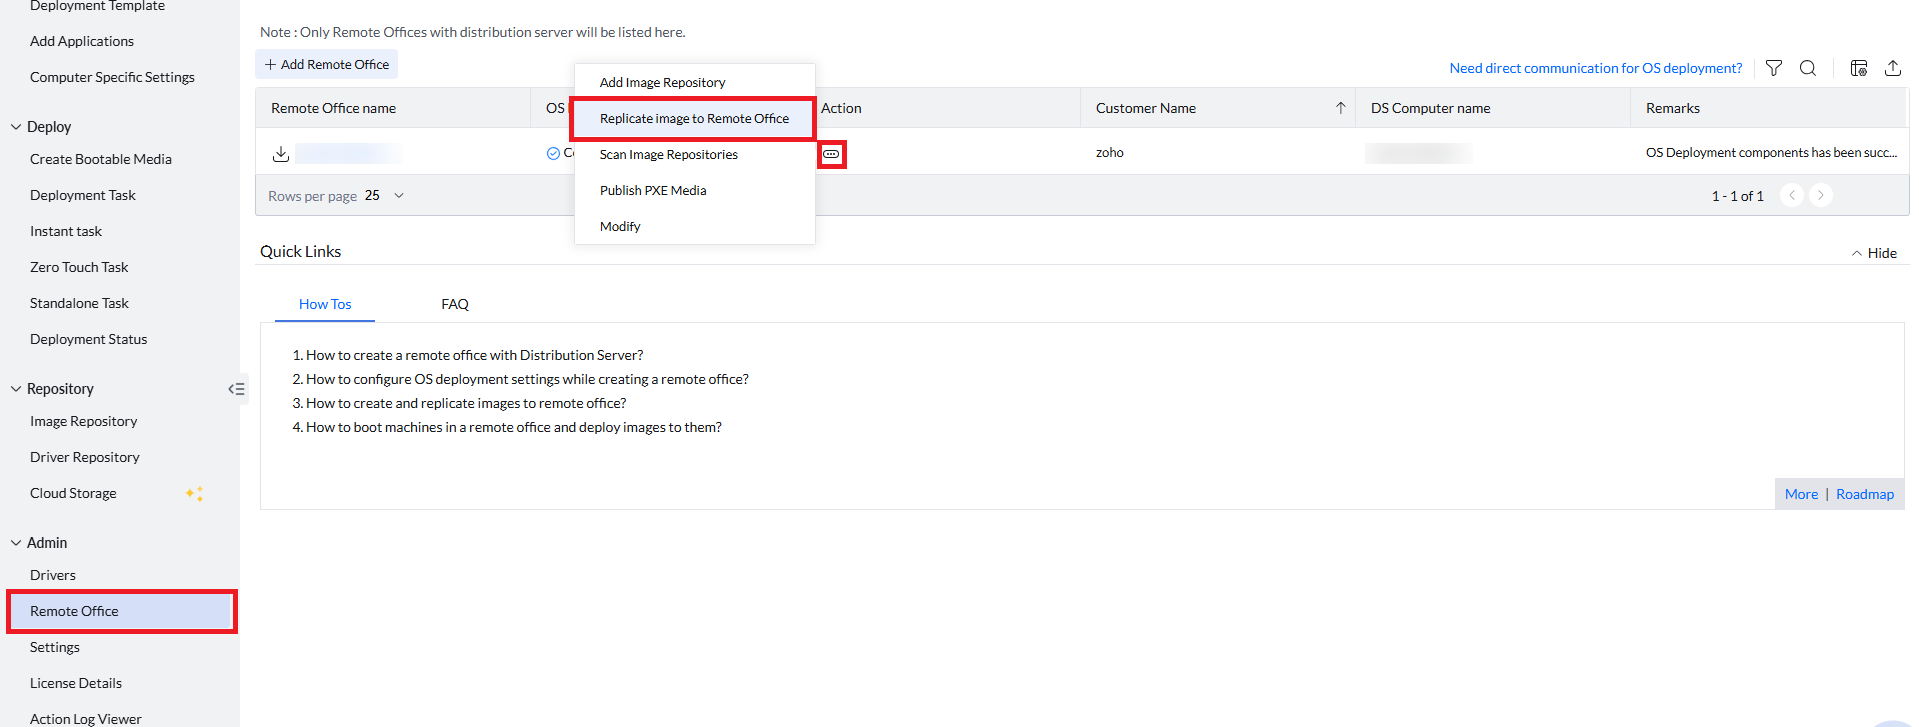
- Under the Admin tab, select Remote Office and view the list of remote offices.
- Click on Actions for the remote office you want to replicate the image.
- Select Replicate Image to Remote Office.
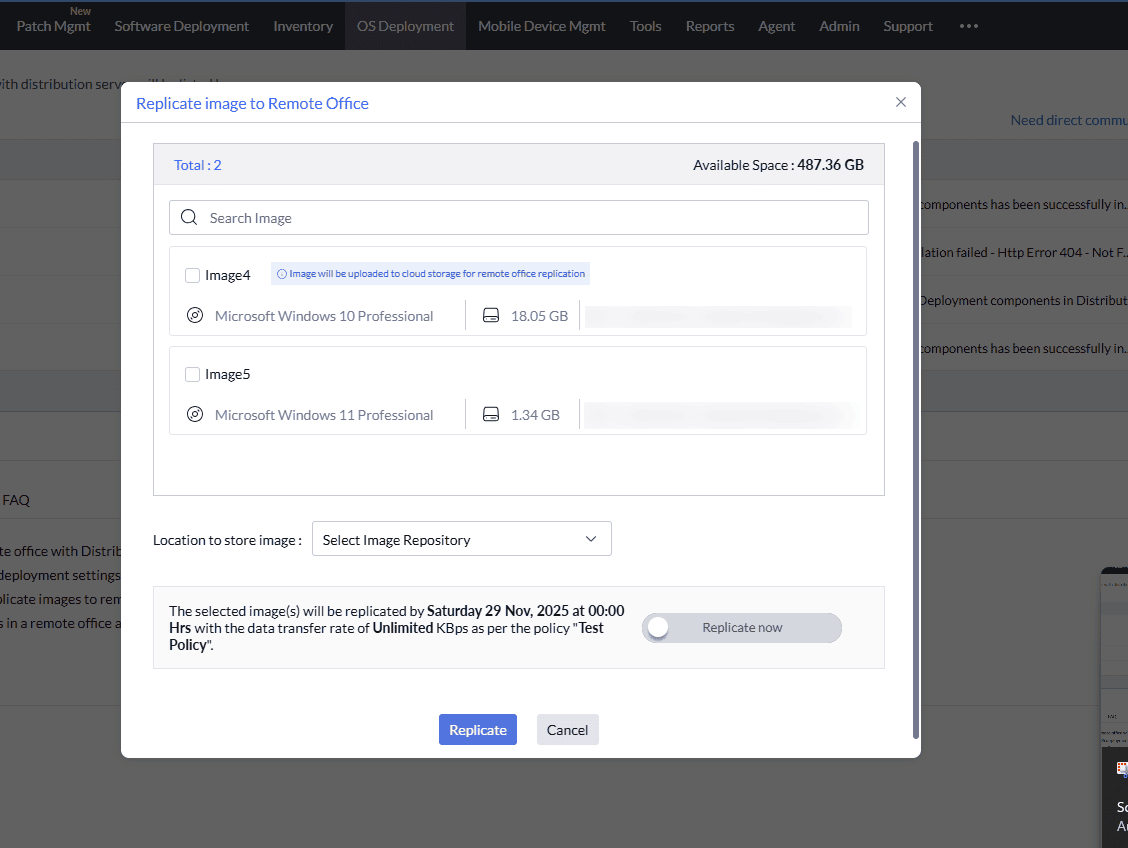
- All the available images created in the non selected remote office will be listed now. Select the images which you want to replicate to the remote office and select the image repository available in the remote office to store the replicated images.
- Click Replicate to begin replication. Image will be replicated based on the replication policy you have selected while configuring OS deployment settings.
- Enable Replicate Now if you want to replicate immediately.
Replication via Remote Office Details view
- Go to the Remote Office details view.
- Click “Replicate Image” and select the images you want to replicate.
- All the available images created in the non selected remote office will be listed now. Select the images which you want to replicate to the remote office and select the image repository available in the remote office to store the replicated images.
- Click Replicate to begin replication. Image will be replicated based on the replication policy you have selected while configuring OS deployment settings.
- Enable Replicate Now if you want replication to start immediately.
After replication is complete, the replicated images can be used in deployment tasks and templates for OS deployment in the remote offices.
Uploading Images to Cloud Storage
You can upload images to cloud storage from the following views:
- Cloud Storage view
- Create Image view
- Remote Office details view
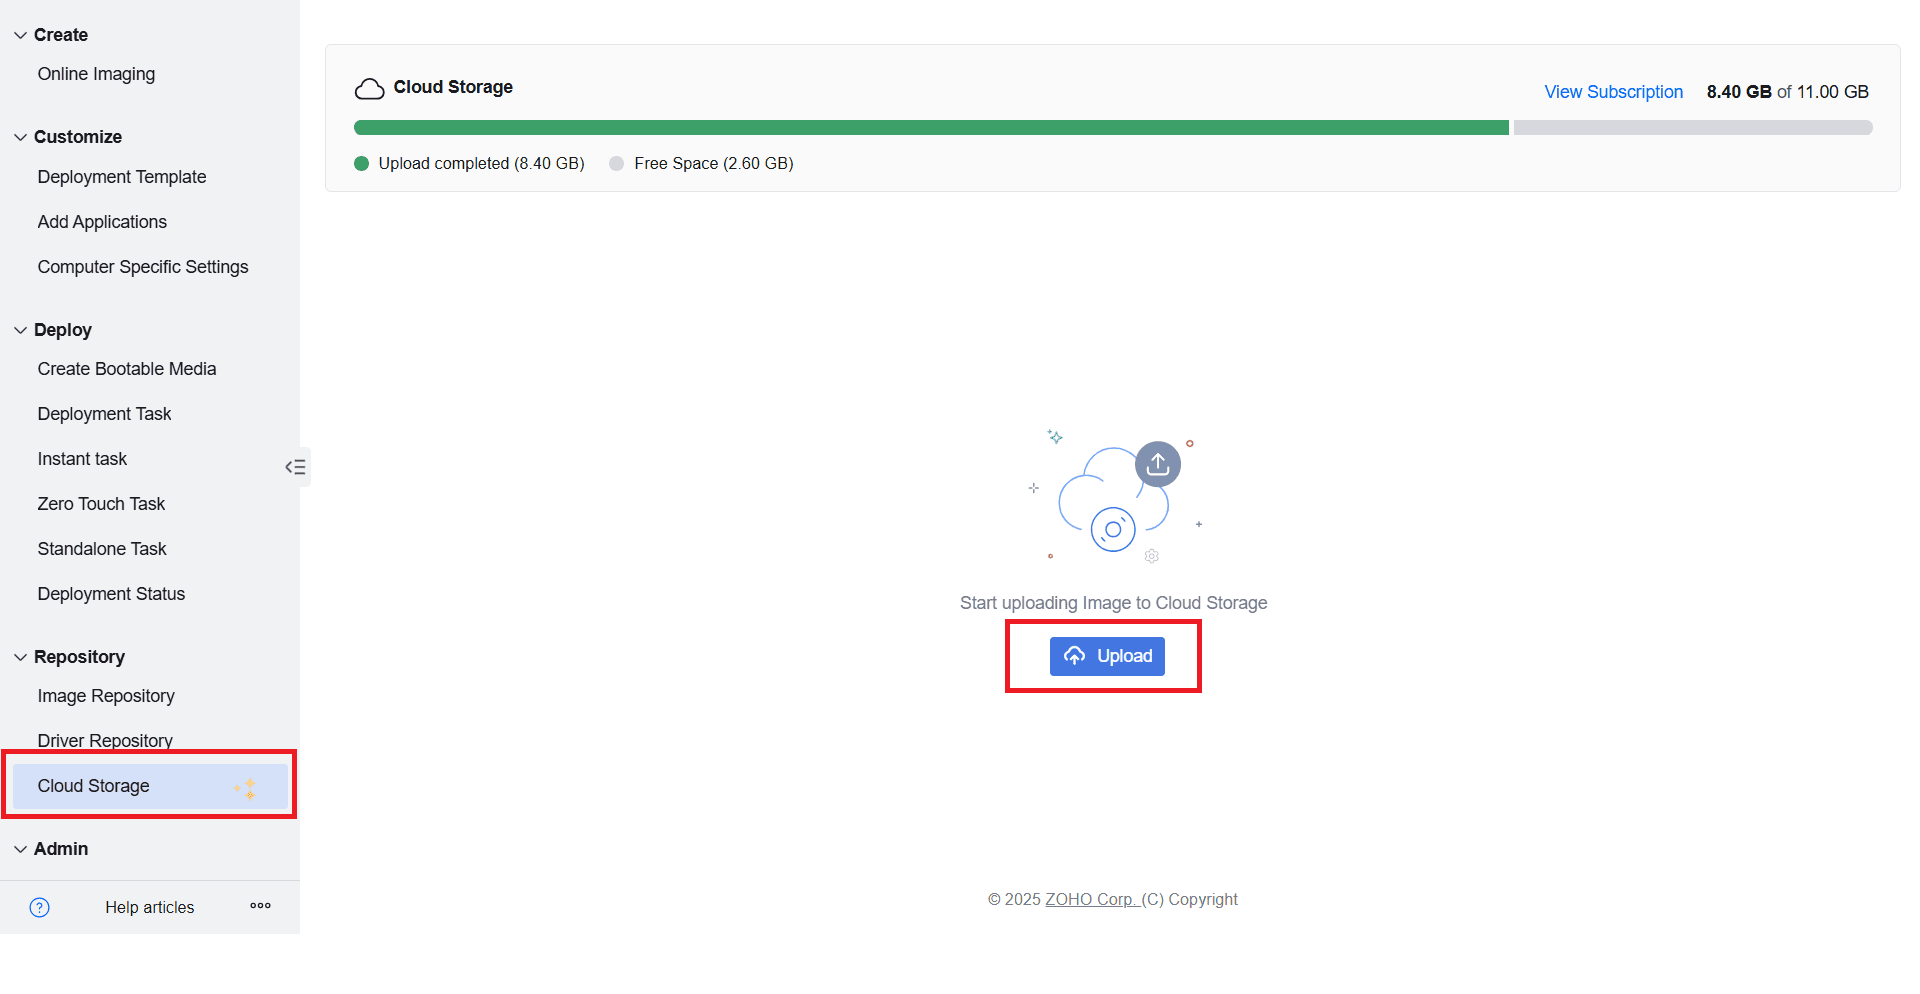
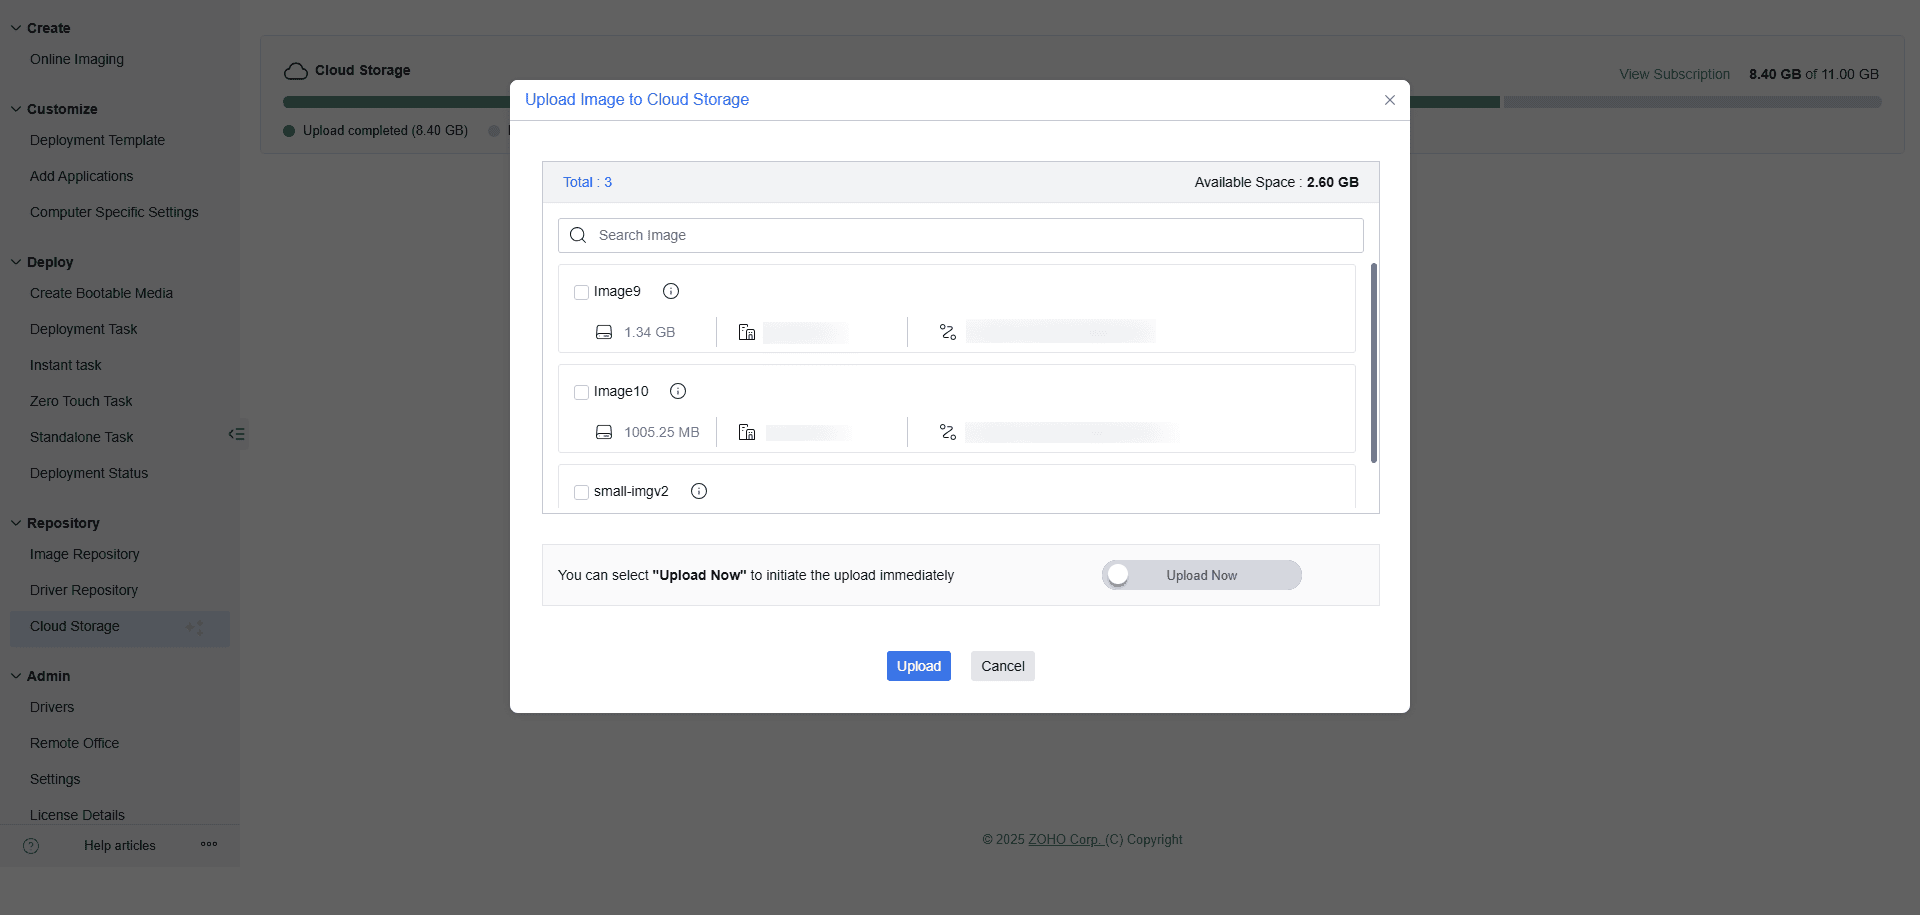
Cloud Storage View
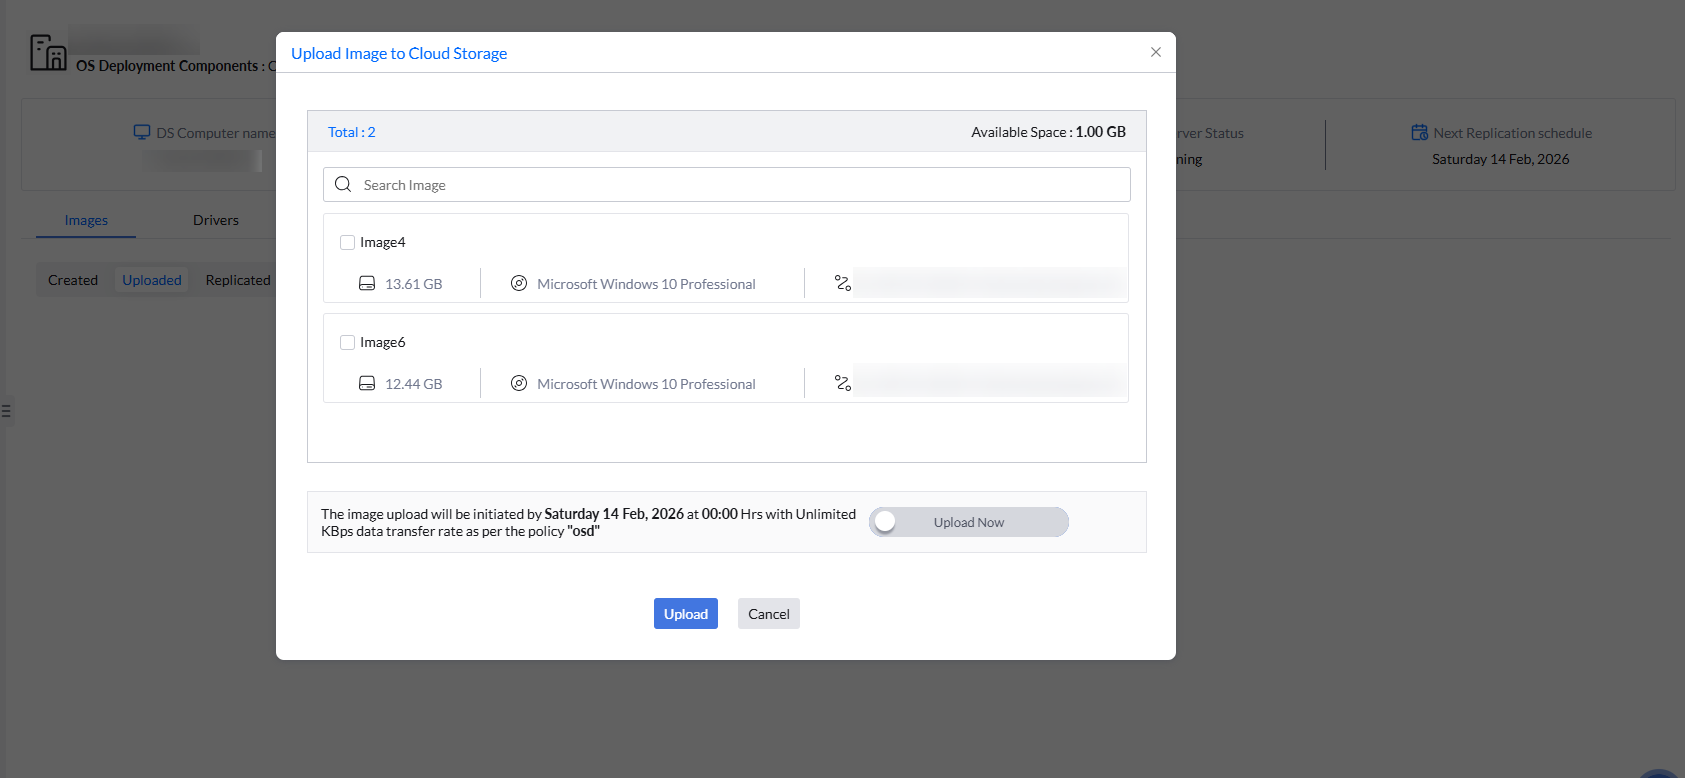
- Go to the Cloud Storage tab under Repository.
- Click “Upload”, then select the required image from the list of all available images in the Remote Office.
- Choose Upload to upload the image.
- If required, enable Upload Now to bypass the schedule and upload immediately.
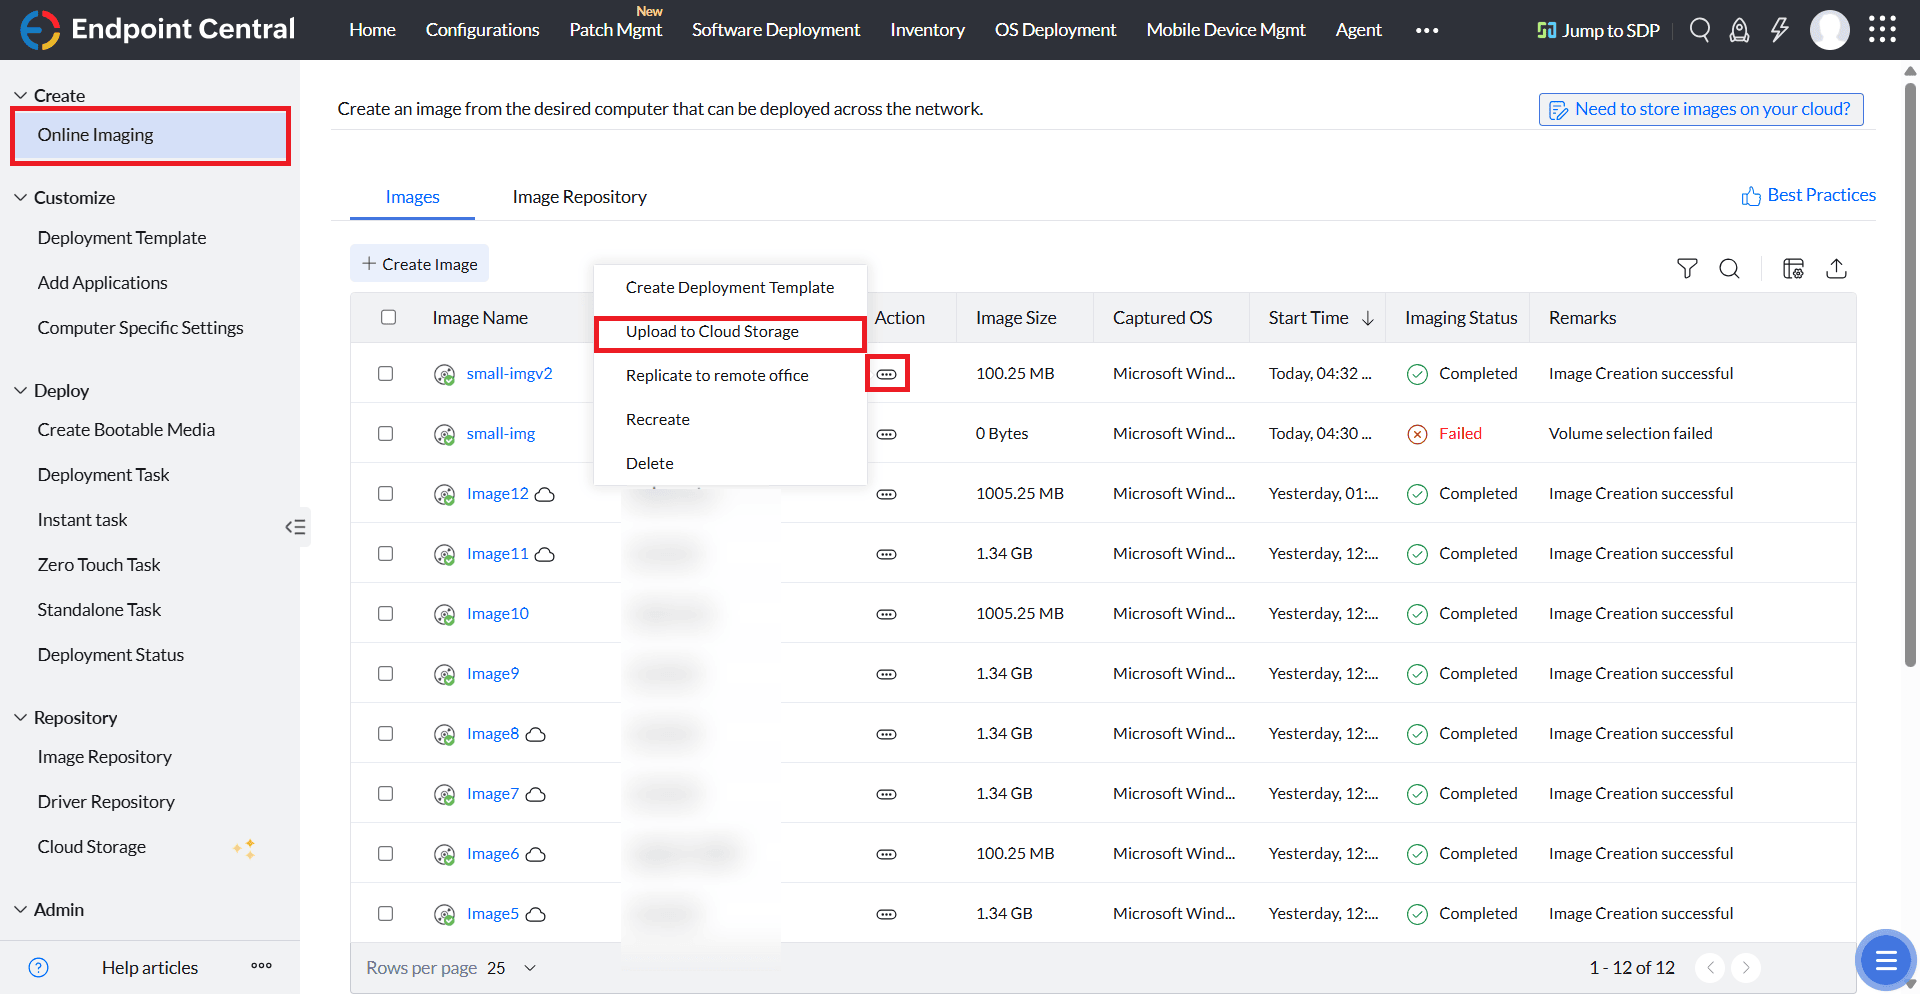
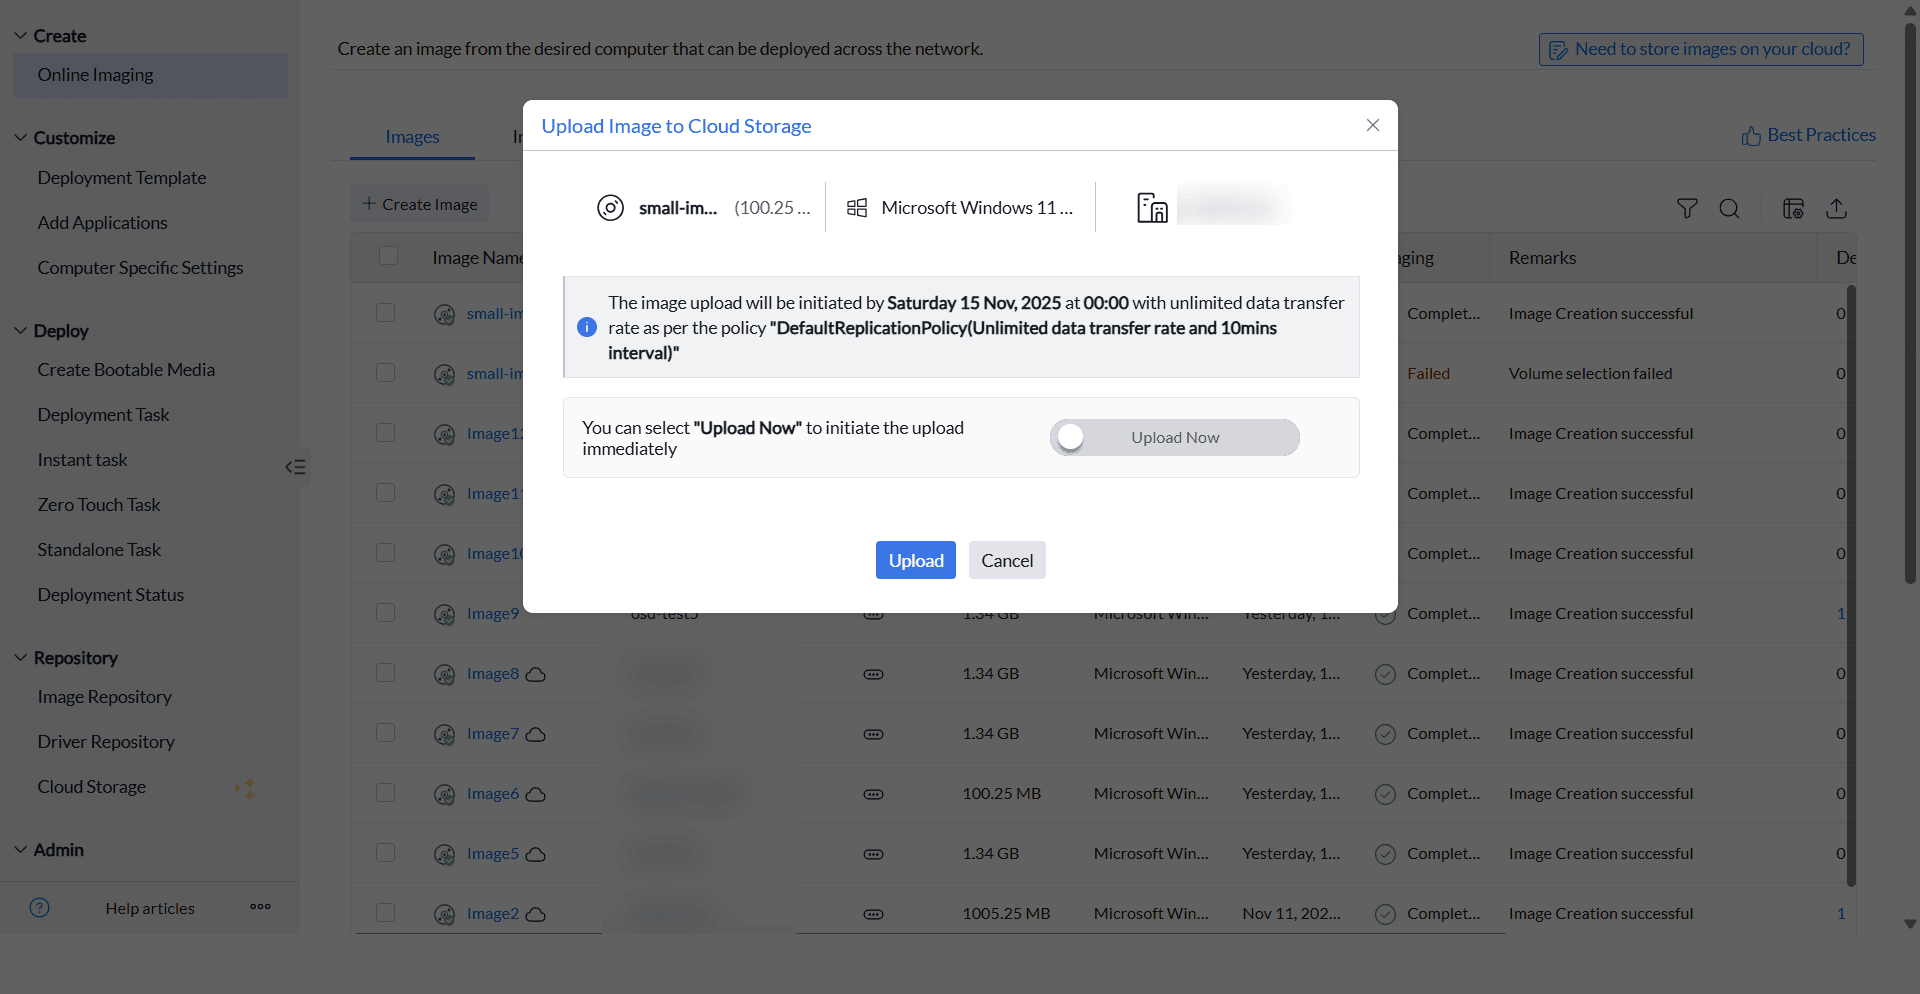
Create Image View
- Go to the Create tab and select Online Imaging to view all created images.
- Click Actions next to the image you want to upload.
- Select Upload to Cloud Storage.
- Choose Upload to start uploading. Image will be uploaded based on the replication policy you have selected while configuring OS deployment settings.
- Enable Upload Now if you want to upload immediately.
Remote Office Details View
- Go to the Remote Office details view of the target office.
- Under the Images tab, go to the Uploaded tab.
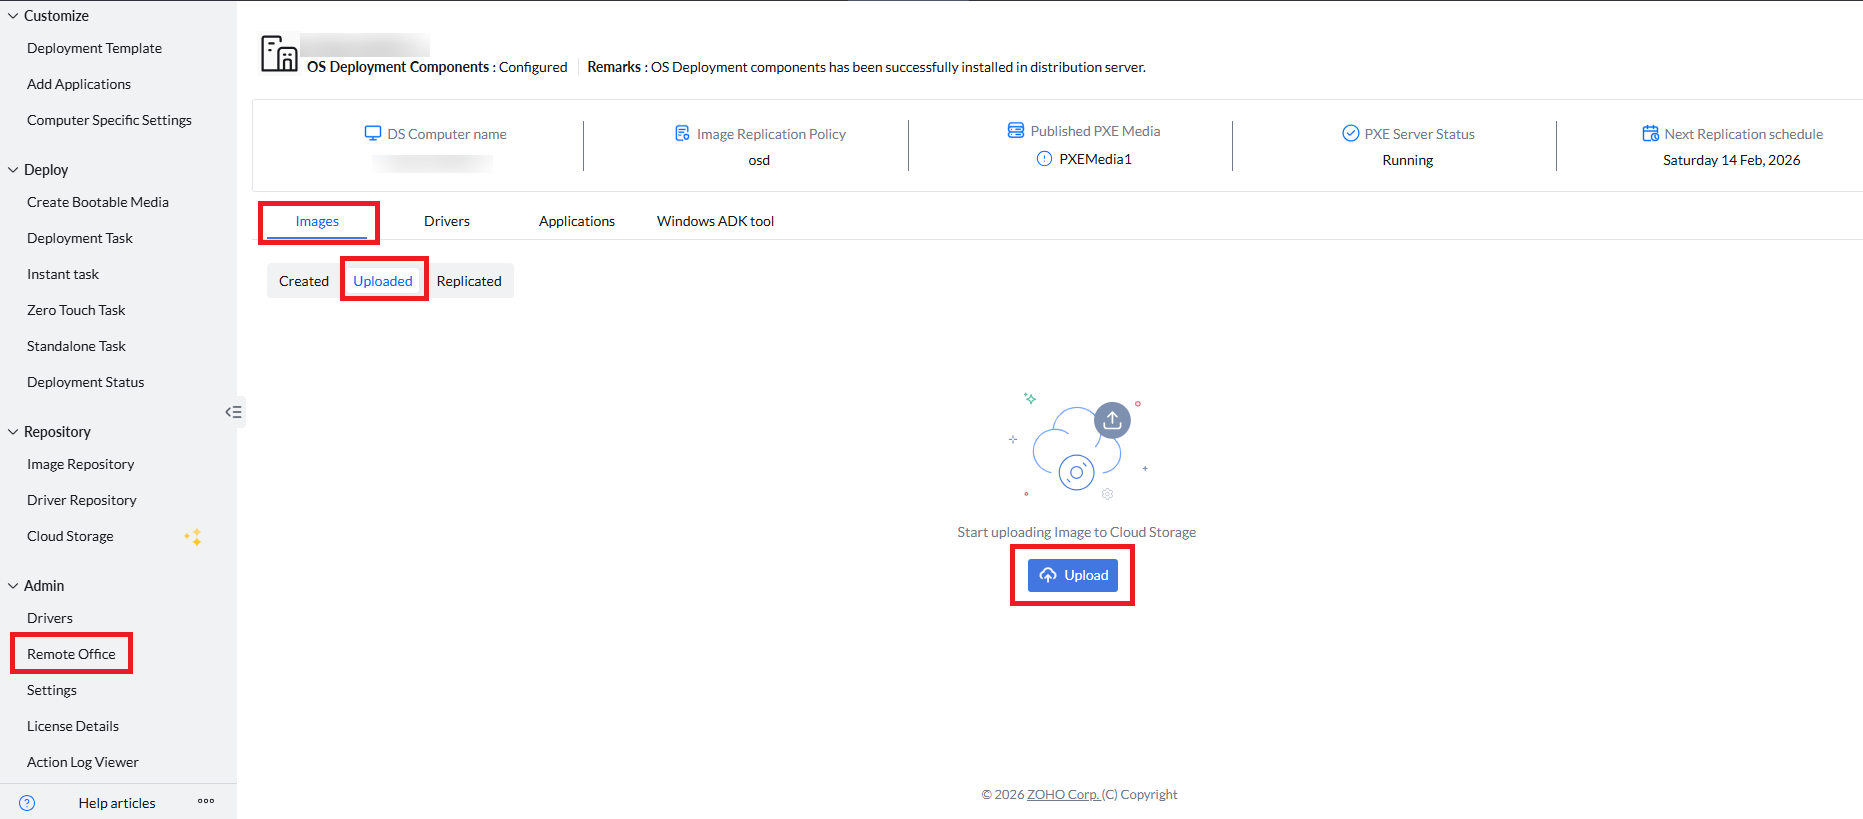
- Click “Upload” and select the image file.
- Choose Upload to start uploading. Image will be uploaded based on the replication policy you have selected while configuring OS deployment settings.
- If required, enable Upload Now to upload immediately.
Manual Image Replication
You can manually replicate images by copying the image file from one remote office image repository to another configured remote office repository. During the next scheduled replication cycle, the console detects the copied image and updates the repository accordingly.
Manual image replication can also be used to transfer images directly between remote offices without uploading them to the cloud.
Refer to this document to learn more about manual image replication.