# Patch Self-Service Portal
Last Updated On: 14 Jul 2026
9 minutes read
## Introduction
In large organizations, patching critical machines and servers is essential, but limited maintenance windows can cause downtime and productivity loss. The Self Service Portal simplifies patch deployment by allowing admins to publish updates for users and server owners to install as needed. For servers, where uptime is crucial, IT admins can deploy patches during scheduled downtime via the portal, reducing disruptions.
In medical institutions with critical machines like CT and MRI scanners, patching is challenging due to the need for continuous operation. An efficient approach is to let technicians manage patching through the Self Service Portal. Patches are published directly to portals of these machines, and technicians can schedule downtime during off-hours to deploy them, ensuring timely updates while minimizing disruption to patient care and daily operations.
**Applies to:**
- Windows
- Linux
## Publishing patches to Self Service Portal
Admins can publish the patches to Self Service Portal on the Endpoint Central server by **Manual Deployment** or **Automate Patch Deployment** based on the organization's needs. The published patches are then listed on the Self Service Portal in the Endpoint Central's agent tray. Users and server owners can then decide to patch their machines based on their requirements.
### Manual Deployment
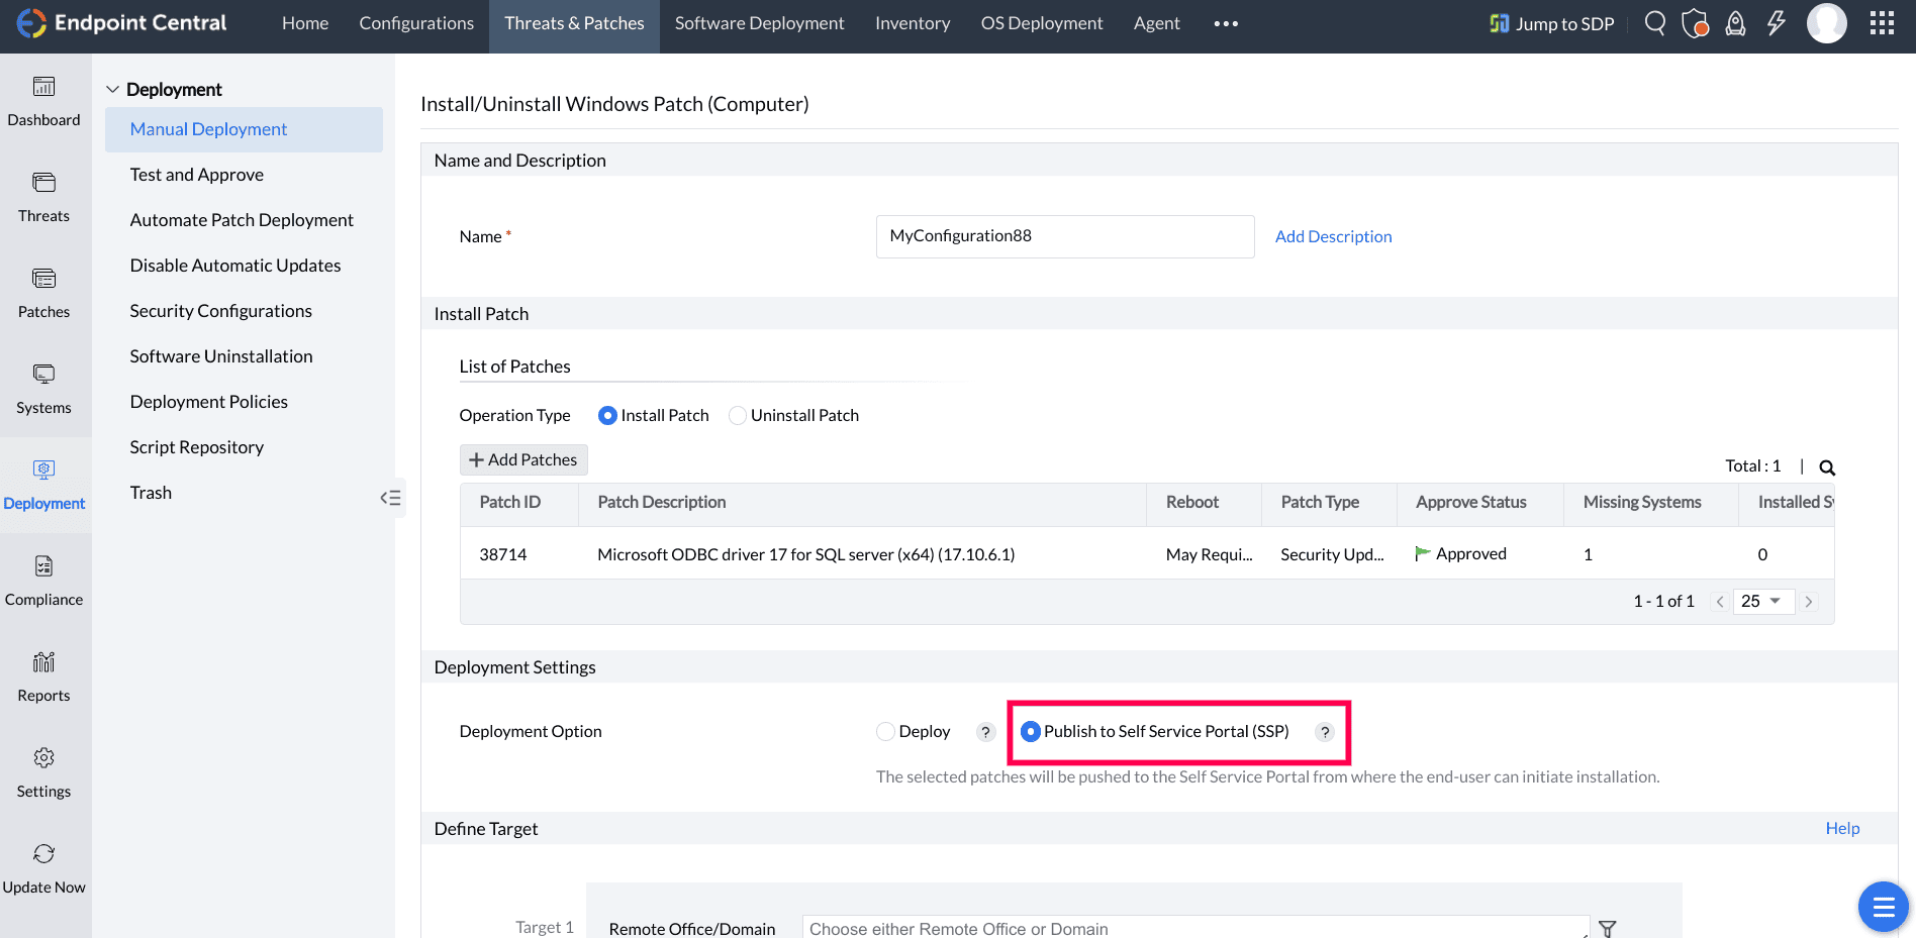
To publish patches to Self Service Portal using Manual Deployment, click on **Threats & Patches → Patches → Missing Patches**. In the Missing Patches tab, select the patches you want to deploy and click on **Install/Publish Patches**. You will be redirected to the **Install/Uninstall Patch** window.
In this window under **Deployment Option** in **Deployment Settings**, select **Publish to Self Service Portal (SSP)**.
Choose the other configurations as per your choice and click on **Deploy**. These selected patches will now be published to the Self Service Portal. To learn more about manual deployments refer to [this page](https://www.manageengine.com/products/desktop-central/help/patch-management/manual-deployment.html).
### Automate Patch Deployment
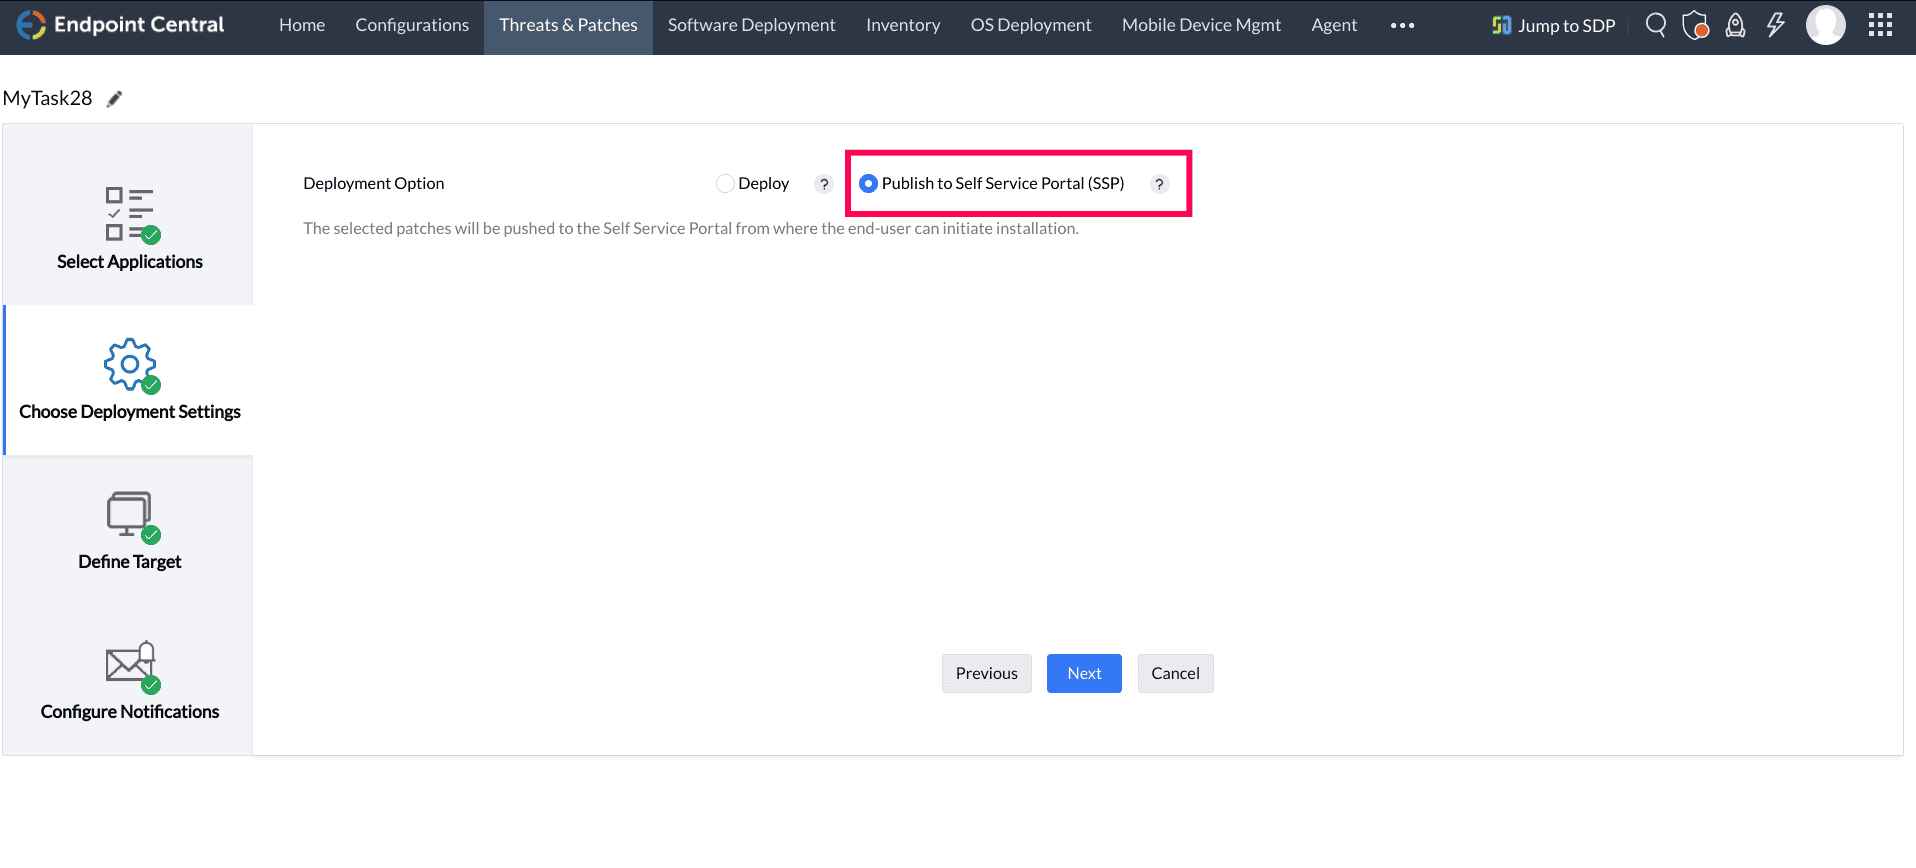
When you are creating an Automate Patch Deployment (APD) task, under **Select Applications** section, after you select the applications based on the updates and severities, click on **Next**.
In **Choose Deployment Option** settings, under **Deployment Option**, choose **Publish to Self Service Portal (SSP)** and click on **Next**. Configure the other options, define targets, and finish creating your APD task. The approved patches for the selected applications will now be published to the Self Service Portal automatically. To learn more about creating automate patch deployments, refer to [this page](https://www.manageengine.com/products/desktop-central/help/patch-management/apd.html).
**Note:** Self Service Portal is currently available for Windows and Linux.
## Accessing the Self Service Portal on Windows systems
- Go to **Admin tab → SoM Settings → Agent Settings → Agent Tray Icon**.
- Enable **Show Agent Icon** in the System Tray.
- Make sure **Show Self Service Portal Menu** is enabled.
- Click on **Save Changes**.
### Accessing the Agent Tray Icon
- Navigate to the system tray to locate the agent tray icon.
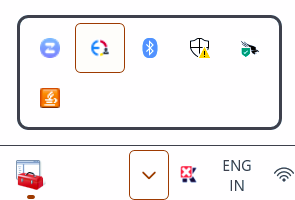
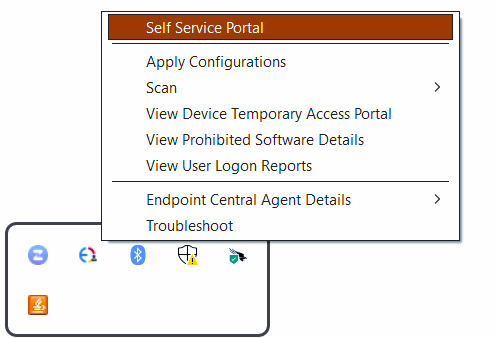
- Right-click on the icon and select the **"Self Service Portal"** option from the menu.
You can also access Self Service Portal from any one of the following methods:
1. Double clicking on the Self Service Portal shortcut from the desktop ([if enabled](https://www.manageengine.com/products/desktop-central/help/patch-management/patch-self-service-portal.html#settings)).
2. Choosing Self Service Portal from the start menu ([if enabled](https://www.manageengine.com/products/desktop-central/help/patch-management/patch-self-service-portal.html#settings)).
## Initiating the Self Service Portal on Linux systems
### GUI Mode
Perform the following actions from the system where the Linux agent is installed:
- Open the terminal and navigate to the directory containing the Endpoint Central agent binaries using the command: **cd /bin**
**Note:** The default installation location of the agent is:
```
cd /usr/local/manageengine/uems_agent/bin
```
- Run the Self-Service Portal startup script using the command:
```
sudo ./StartSelfServicePortal
```

### CLI Mode
To launch the Self Service Portal (SSP) in CLI mode, run the following command:
```
sudo ./SelfServicePortal
```
**Add `` in:**
```
sudo ./StartSelfServicePortal
```
**Note:** Providing arguments when running `SelfServicePortal` will start the application in CLI mode.
Available Commands in Self-Service Portal:
| Command | Description |
|---|---|
| `SelfServicePortal update` | Sync or refresh all patches |
| `SelfServicePortal list` | List all patches |
| `SelfServicePortal list -s` \| `--severity ` | List patches by severity |
| `SelfServicePortal list --security` | List security patches |
| `SelfServicePortal upgrade` | Upgrade all patches |
| `SelfServicePortal upgrade -s` \| `--severity ` | Upgrade patches by severity |
| `SelfServicePortal upgrade --security` | Upgrade security patches |
| `SelfServicePortal upgrade patch1 patch2` | Upgrade specific patches |
## Self Service Portal: End-user's console
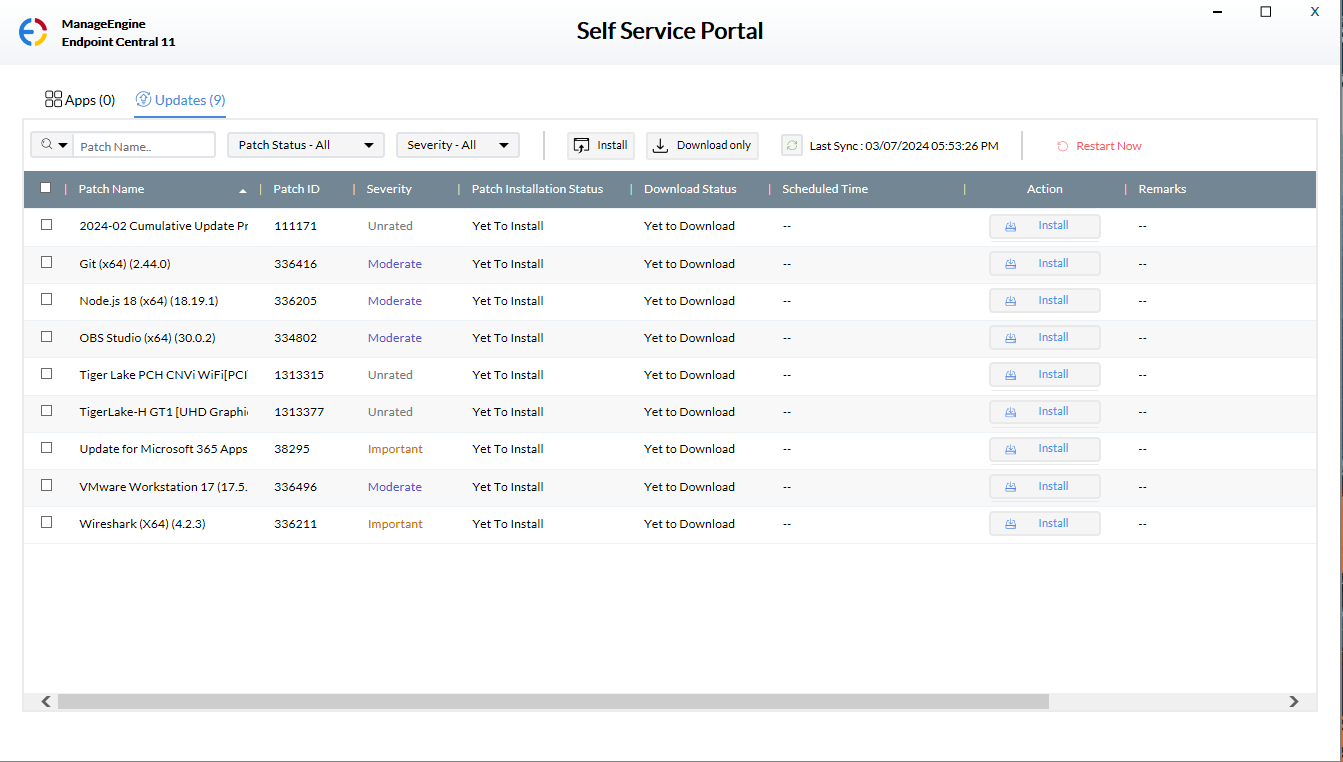
Once you have opened the Self Service Portal, click on **Updates**. You can see the patches that have been pushed to Self Service Portal listed. Once you click on **Install** beside that specific patch as per your convenience, that patch will be installed.
## Settings
If you want Self Service Portal to be added to the agent tray, start menu, or as a desktop shortcut:
Select **Threats & Patches → Settings → Self Service Portal Settings → Settings**, select where to display the portal, and then click on **Save**.
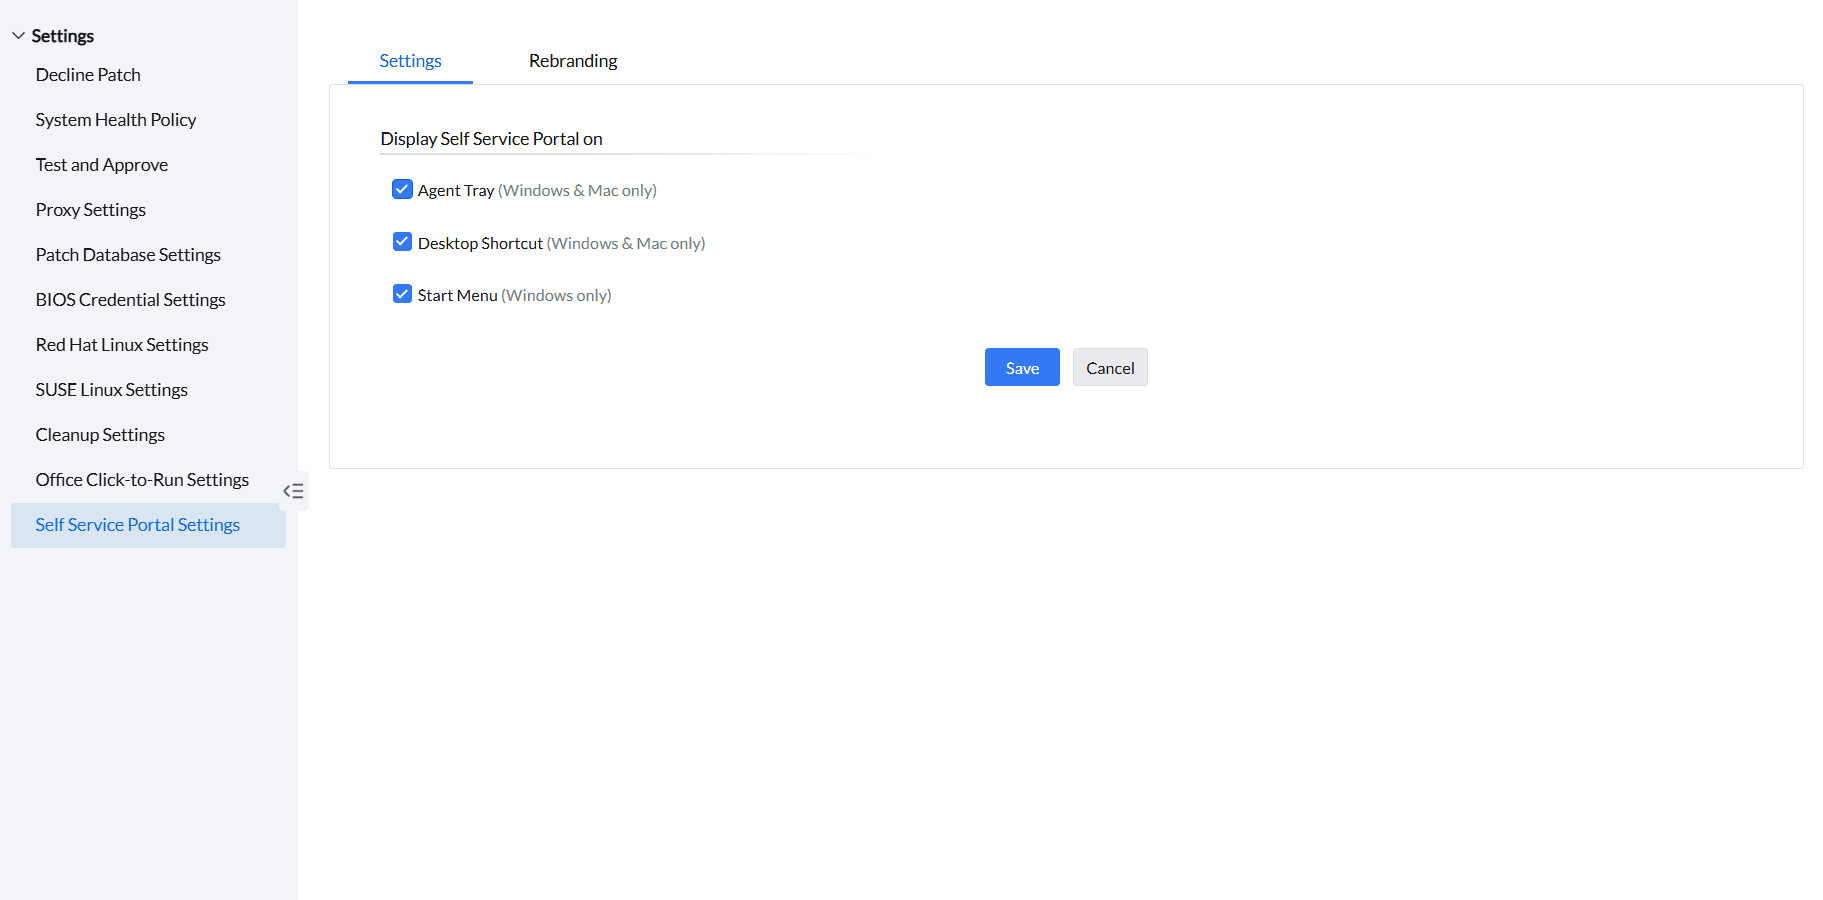
Once you have done this, on the target machine, the Self Service Portal will be added to the agent tray, start menu, and as a desktop shortcut once the patches are successfully published for the first time.
## Rebranding
You can customize the theme of the SSP application and replace the Endpoint Central logo or name with your company's logo or name. Additionally, you can change the header and table colors to match your company's branding. Rebranding the application makes it easier for users to identify the software as part of their IT team’s tools, encouraging its adoption and use.
To rebrand the Self Service Portal, click on **Threats & Patches → Settings → Self Service Portal Settings → Rebranding**.
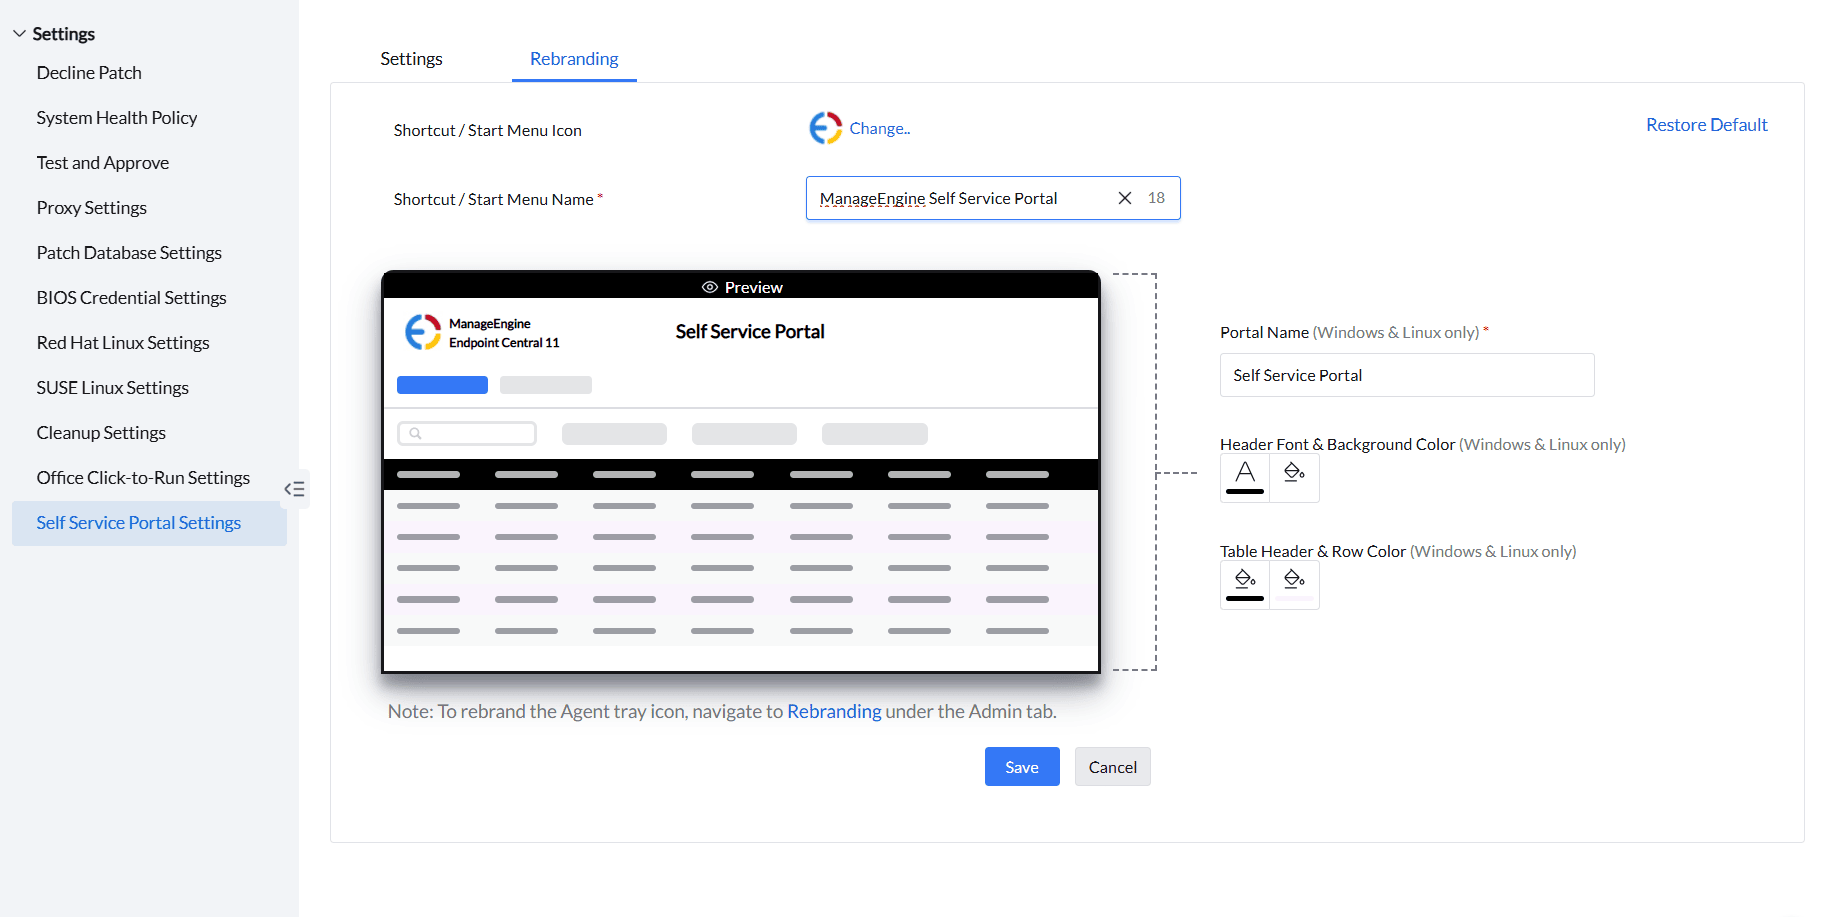
Once there, you can change the icons, colors, and names as per your choice and click on **Save**.
If you have any further questions, please refer to our [Frequently Asked Questions](https://www.manageengine.com/products/desktop-central/help/patch-management/patch-faq.html#pddfaq) section for more information.