Support Log Upload
To ensure a smooth log upload process for customers whenever an issue occurs on their endpoint for troubleshooting and analysis, a new feature called "Upload Logs" has been introduced in Endpoint Central. With the introduction of this new feature, you no longer need to manually collect log files from each user device when an issue arises. Instead, you can go to the Endpoint Central web console and report the issue you are facing. A ticket will be automatically created and linked to the issue you have described.
After that, you can choose the type of issue you are facing from a list of predefined issues, each with templates carefully tailored to common scenarios in Endpoint Central. The log files relevant to the selected issue will be automatically chosen for upload. You can also specify which devices (endpoints) were affected by the issue. This feature allows you to track the log upload in real time and check whether the raised ticket has been resolved.
This new feature also saves time for customers who need to submit log files from all affected devices, making it a hassle-free experience for any user facing an issue.
Table of Contents
- User Consent Policy
- Log Upload Mechanism
- Automatic upload of logs
- Manual upload of logs
- Configuring Log Upload Settings
- Uploading logs directly from endpoints
User Consent Policy
All the logs that will be collected from endpoints will be stored in the Zoho Bonitas server for 25 days, after which they will be deleted permanently from the cloud. For the EU region, the logs that are collected will be stored in the EU cloud data center for 25 days.
Log Upload Mechanism
Logs can be uploaded manually and automatically from the console. The key point to understand here is logs can also be uploaded directly from endpoints where the issue has occurred or from the console where the target endpoints can be mentioned in which the described issue has occurred.
Automatic upload of logs
Prerequisites:
If you have configured a proxy server, make sure to whitelist the below mentioned domains:
bonitas.zohocorp.com and creator.zoho.com and bonitas.zohocorp.eu (if you are from the EU region)
Please click here to know more about all the domains that need to be whitelisted.
To know more about configuring a proxy server, click the link here.
To upload logs from the product automatically:
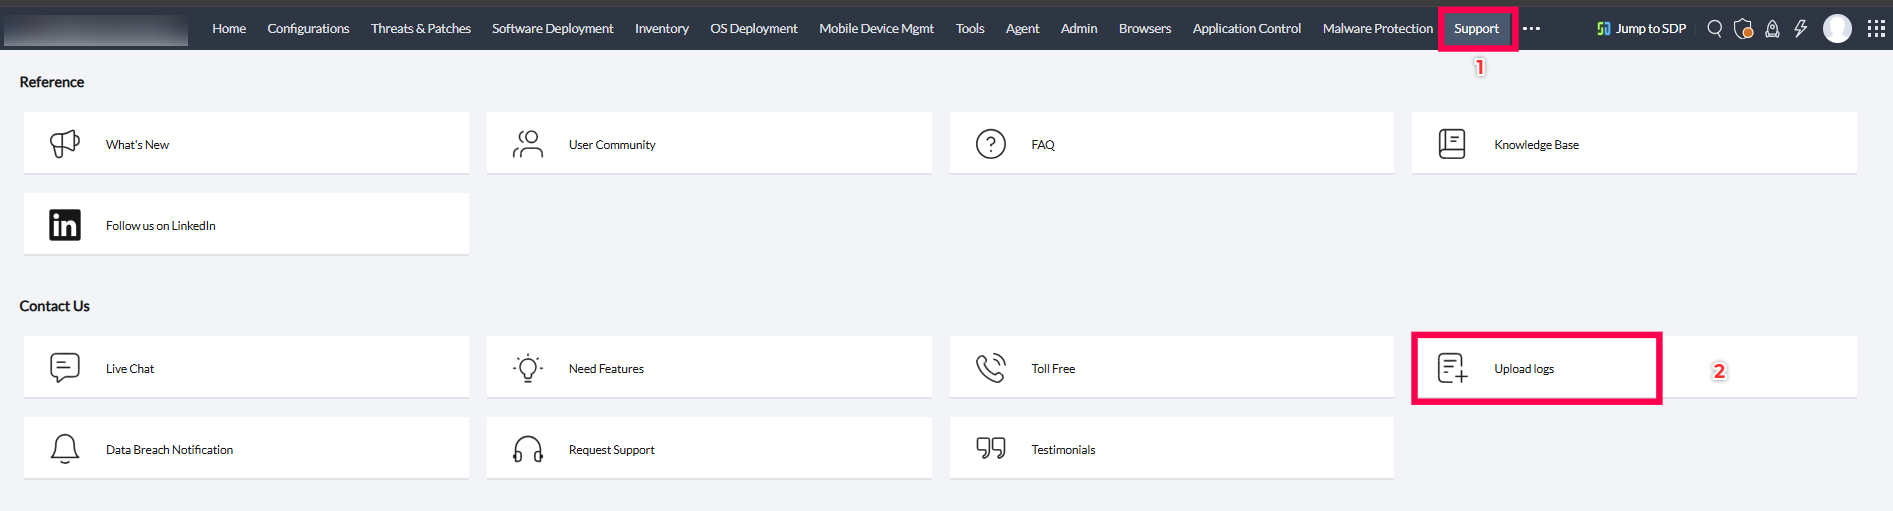
- Open the Endpoint Central web console → Navigate to Support → Upload Logs
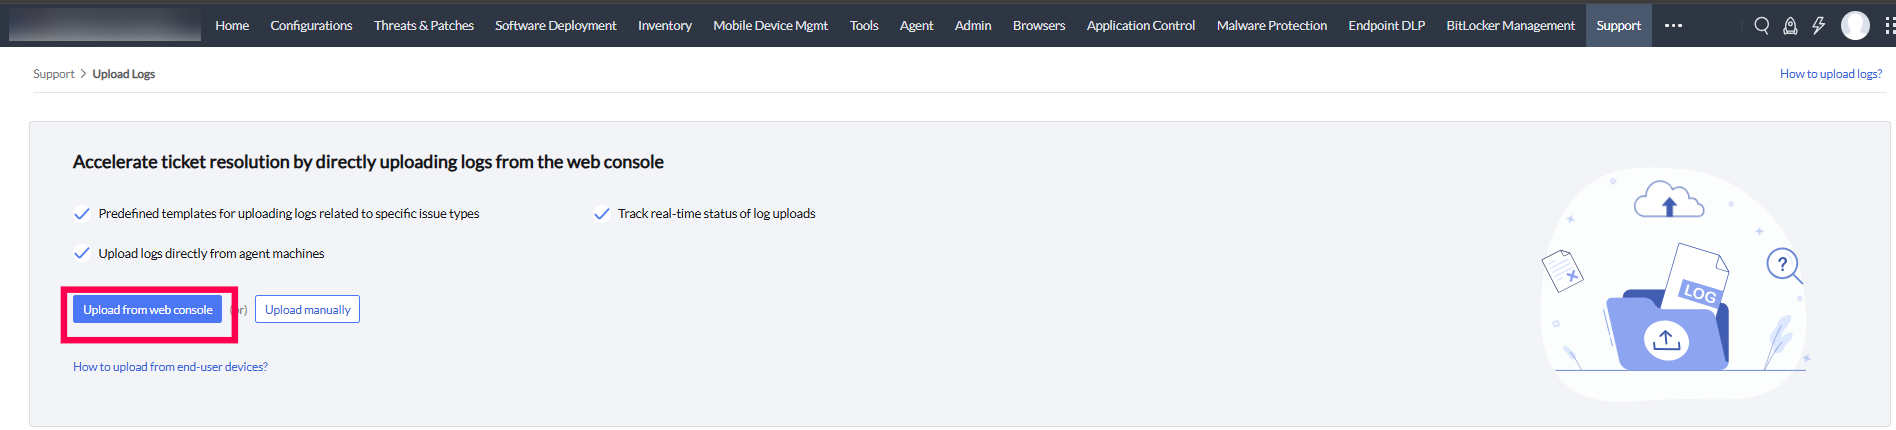
- You will be navigated to the Issue Summary page. Here, click Upload Logs and select the Automatic Upload option.
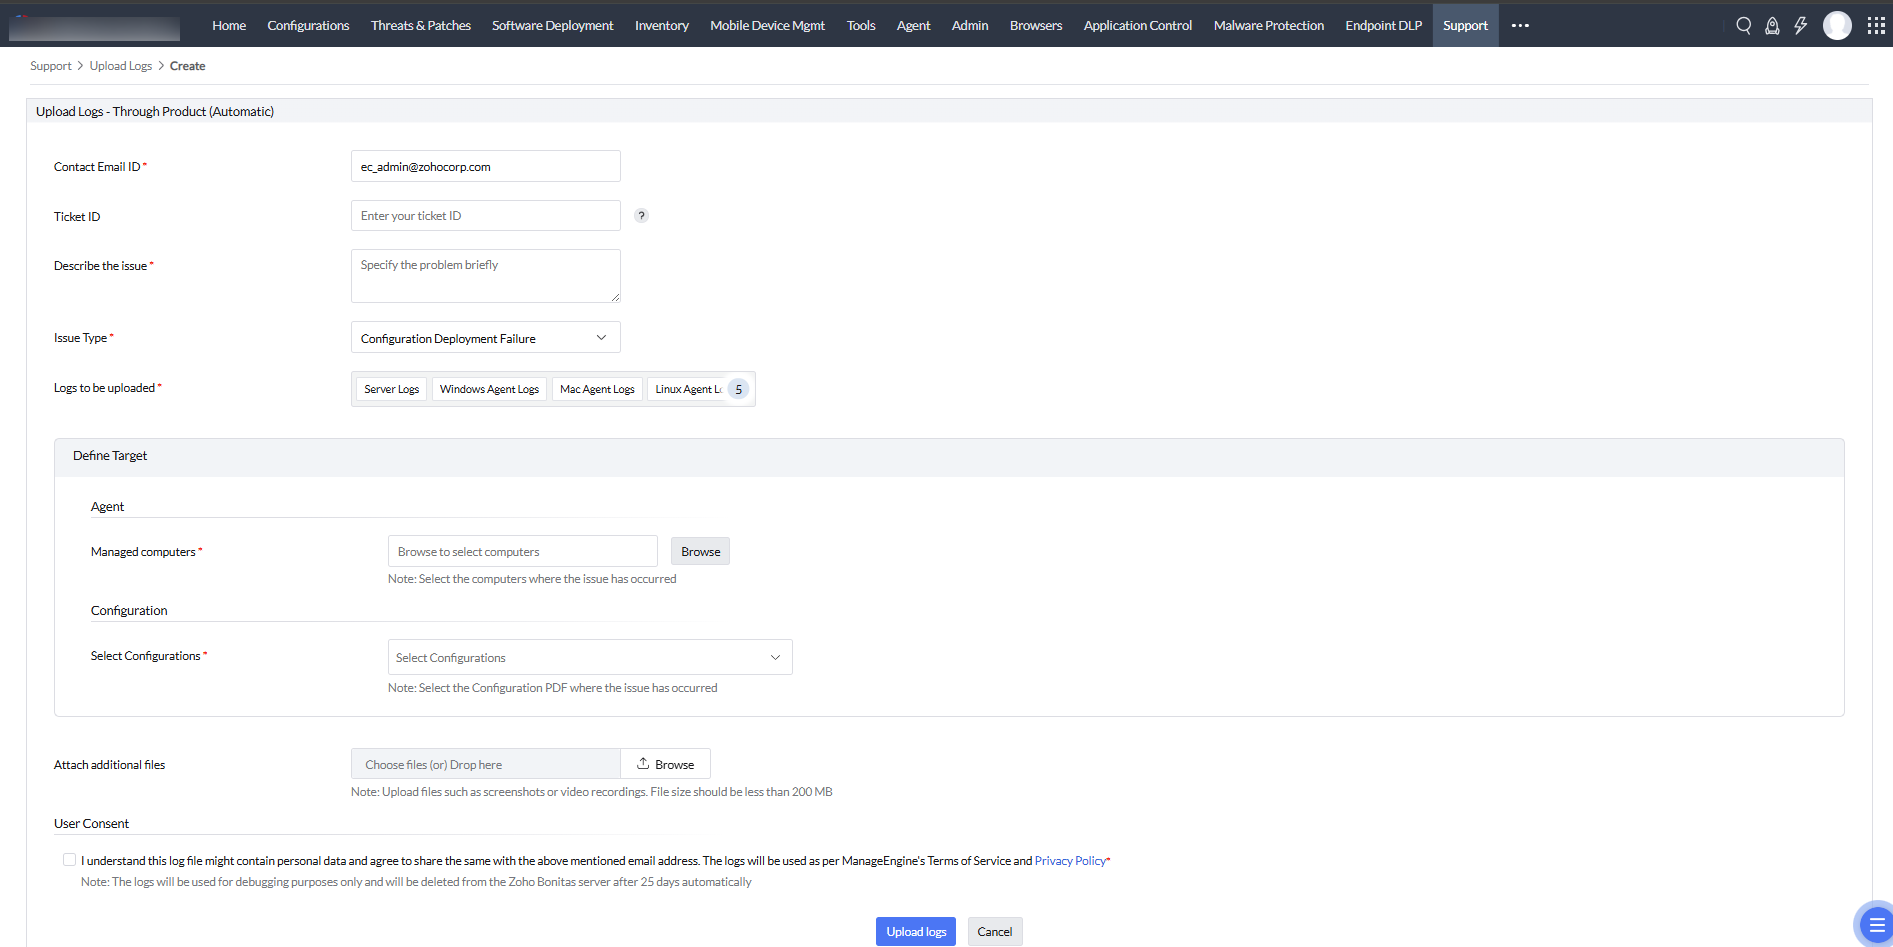
- Enter the Contact Email ID and Ticket ID.
Note:If you have a ticket ID related to the issue you're currently facing, you can enter it. If this is your first time facing the issue and you don’t have a ticket ID, you can skip this option, and a new ticket ID will be generated for you.
- Describe the issue.
- Select the issue type and you'll see a list of all the logs that will be uploaded.
- Define Target. Enter the details specific to the logs you have uploaded. These are the following details that need to be entered:
- For Web console logs, choose the HAR logs to be uploaded followed by console logs.
- For Agent logs, select the computers where the issue has occurred.
- For MDM agent logs, select the mobile devices where the issue has occurred.
- For Distribution Server logs, select the remote offices where the issue has occurred.
- For Configurations logs, select the configuration PDF's where the issue has occurred.
Note: If the Agent/Distribution server is not reachable, the logs will be uploaded once communication between the Agent/Distribution Server and the Server is restored.
- Attach additional files if required and give user consent. You can attach images or videos in the following supported formats: TIF, PJP, APNG, XBM, JXL, SVGZ, JPG, JPEG, ICO, TIFF, GIF, SVG, JFIF, WEBP, PNG, BMP, PJPEG, AVIF, PDF, MP4, AVI, MOV, MKV, FLV, WEBM, WMV, MPEG, M4P, and M4V.
- Click Upload Logs and all the logs will be uploaded to the server. Click Upload logs again to give confirmation.
Manual upload of logs
- Open the Endpoint Central web console
- Navigate to Support → Upload Logs
- Click Upload Logs again and select Manual upload
- Select the product name
- Enter the Ticket ID and password
- Select the modules where you're experiencing the issue.
- Specify your email address
- To receive notifications, please provide an email address where you would like to be notified
- Add any comments if required
- Click add files to add new files
- Click Upload
- Select files for log analysis, debugging, and migration
- Alternatively, you can also send the logs manually to the support team directly. To know more, visit this link.
Configuring Log Upload Settings
To configure log upload settings, follow the steps mentioned below:
- In the Endpoint Central server web console, navigate to Support > Upload Logs. The issue summary page will be displayed. On the top right corner of the page, click Log upload settings.
- Select the option to allow endpoints with internet accessibility, including agent machines, Secure Gateway Server, and Distribution Server, to directly upload log files to the support team for faster analysis and resolution.
- Select the option to restrict bandwidth usage for log uploads, if you want to set restrictions for bandwidth consumption while uploading logs.
- You can also select the retry interval for failed log uploads
- Finally you can also configure Log Cleanup Settings to clear resolved logs/issues after a configurable number of days automatically. You can only clear up issues from the console, when they are marked as resolved. To do so, navigate to Support → Upload issues → Issue Status and finally mark the issue as resolved.
- Click Save.
Uploading logs directly from endpoints
Logs can be directly uploaded from agent machines using the agent tray icon when there is no central server accessibility.
If you have internet connectivity but cannot access the Central Server, follow the steps mentioned below:
- Go to the Agent tray icon on your endpoint and navigate to Agent Troubleshoot> Upload logs.
- The Upload Logs Summary will be displayed. Click Upload Logs.
- Enter the contact Email ID
- Specify the Ticket ID
- Describe the issue
- Select the Issue Type
- Tick the User Consent checkbox
- Click Upload Logs.
If the agent machine is in a closed network, you can either archive and upload the logs or configure a proxy. The steps for each method are mentioned as follows:
If you want to archive and upload the logs manually, follow the steps mentioned below:
- Go to the Agent tray icon > Agent troubleshoot > Upload logs
- Click Upload Logs in the Upload Logs Summary dialog box.
- The user will be given two options: one to configure a proxy and another to manually upload the archived logs. Choose the Archive and Upload Logs Manually option.
- Select the issue type and click Archive Logs.
- The log collection process will be initiated.
- After the logs are archived, go to https://bonitas.zohocorp.com/ to upload the archived file.
- Select the product as Endpoint Central
- Specify the ticket ID, if you have received one previously for the specific issue you are encountering.
- Add modules and specify the Contact Email ID
- Explain the problem that you have encountered in a comment
- Proceed to upload the collected logs.
If you want to upload logs by configuring a proxy server, follow the steps mentioned below:
- Go to the Agent tray icon on your endpoint and navigate to Agent Troubleshoot > Upload logs.
- The Upload Logs Summary dialog box will be displayed. Click Upload Logs
- Click the Configure Proxy option to upload the logs.
- Set up a proxy to connect to the Zoho Bonitas Server and select Proxy type as Configure Manually.
- Enter the Proxy Type
- Specify the HTTP Proxy Host and HTTP Proxy Port details
- Enter the Username and Password
- Click Save and the Proxy details will be saved successfully.
- Click Return to Summary
- Enter the contact Email ID
- Specify the Ticket ID
- Describe the issue
- Select the Issue Type
- Tick the User Consent checkbox
- Click Upload Logs.