- Related Products
- Log360
- AD360
- ADManager Plus
- ADAudit Plus
- ADSelfService Plus
- Exchange Reporter Plus
 Click here to expand
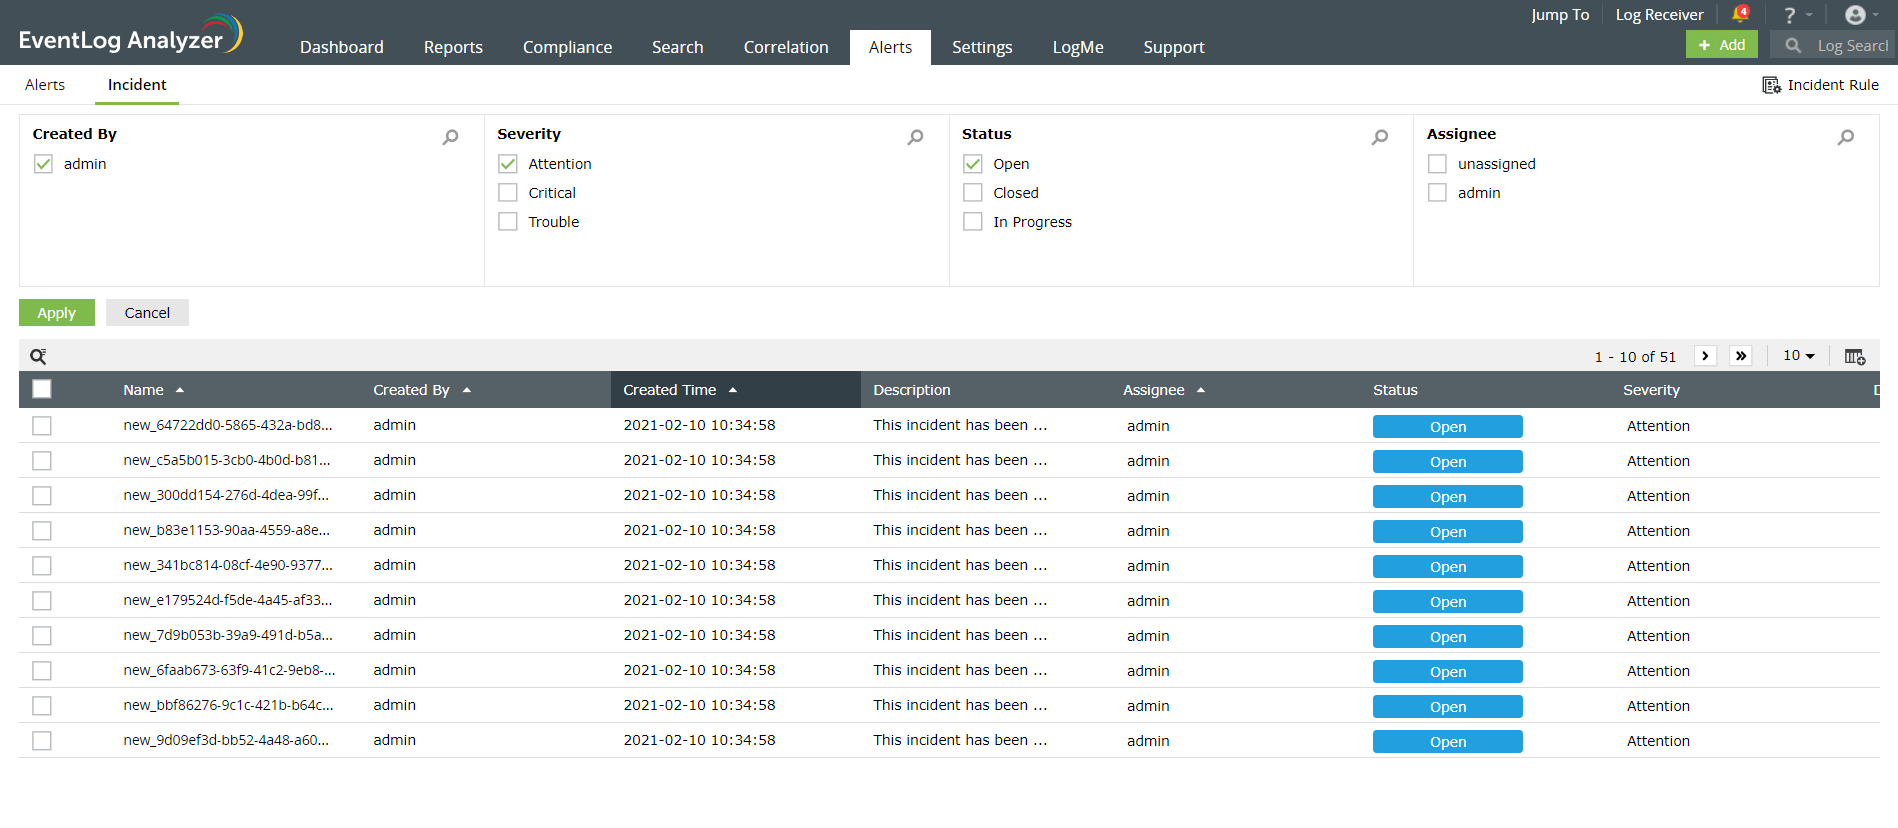
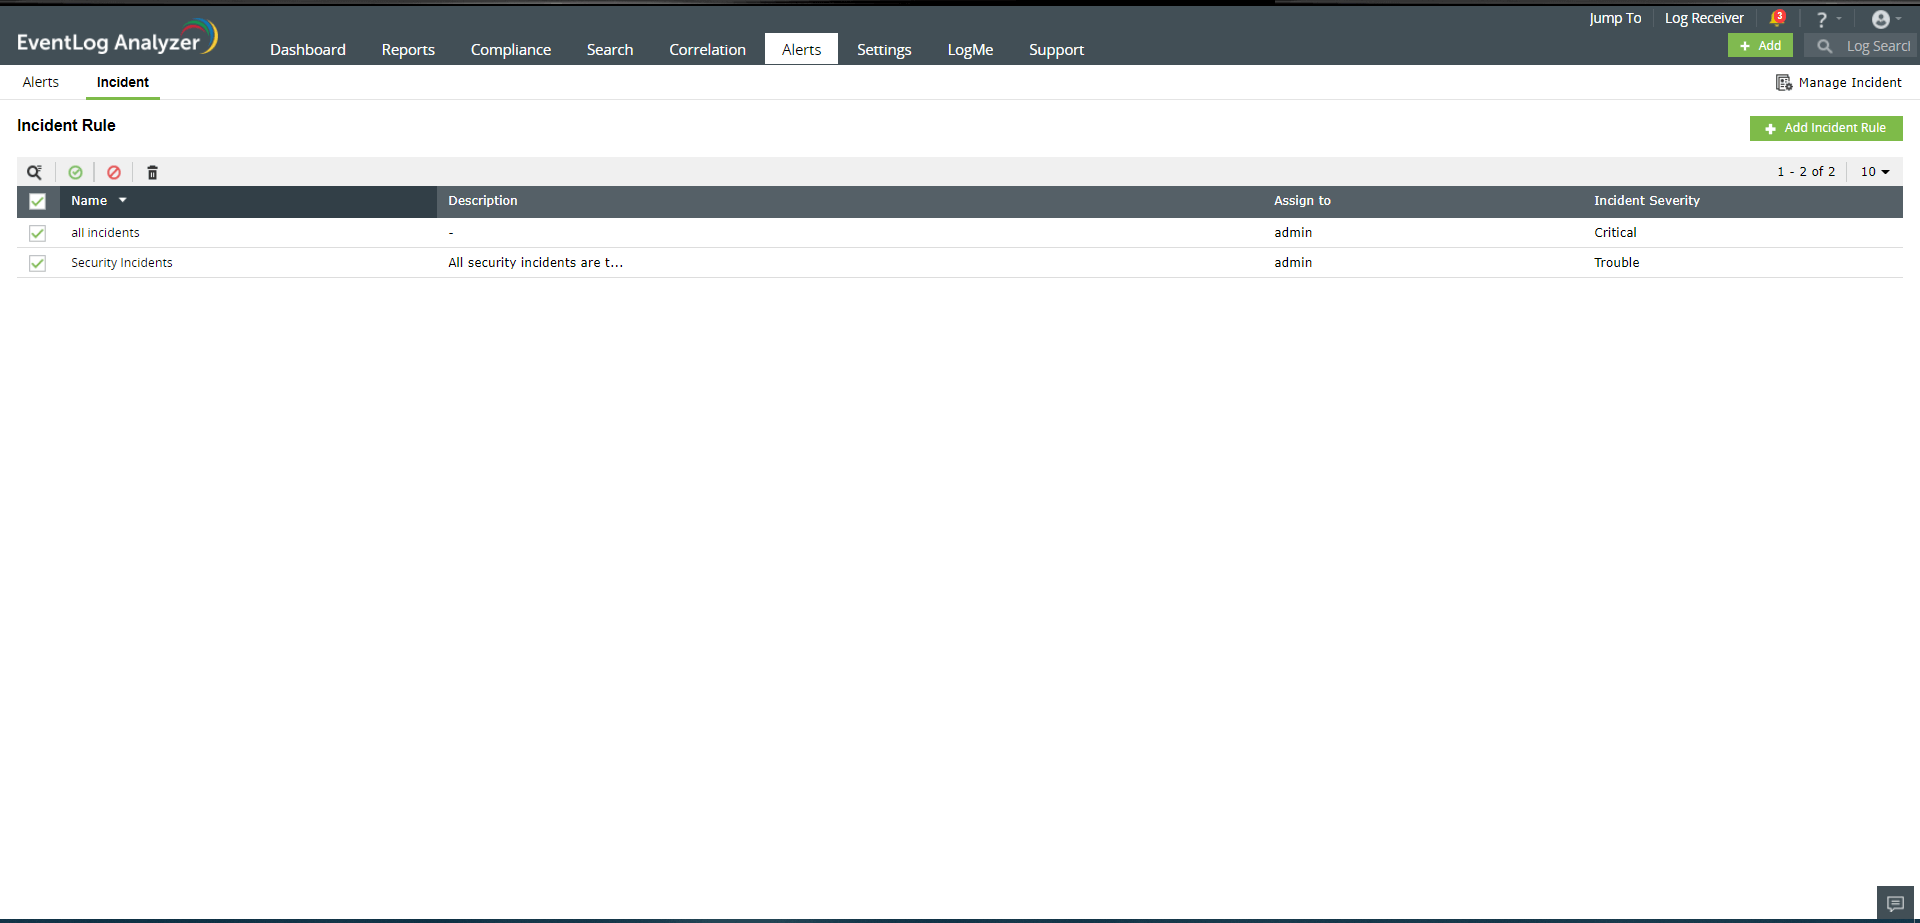
EventLog Analyzer helps you streamline the process of managing and investigating security incidents.. You can track the status of security incidents by navigating to the Alerts tab → Incident.
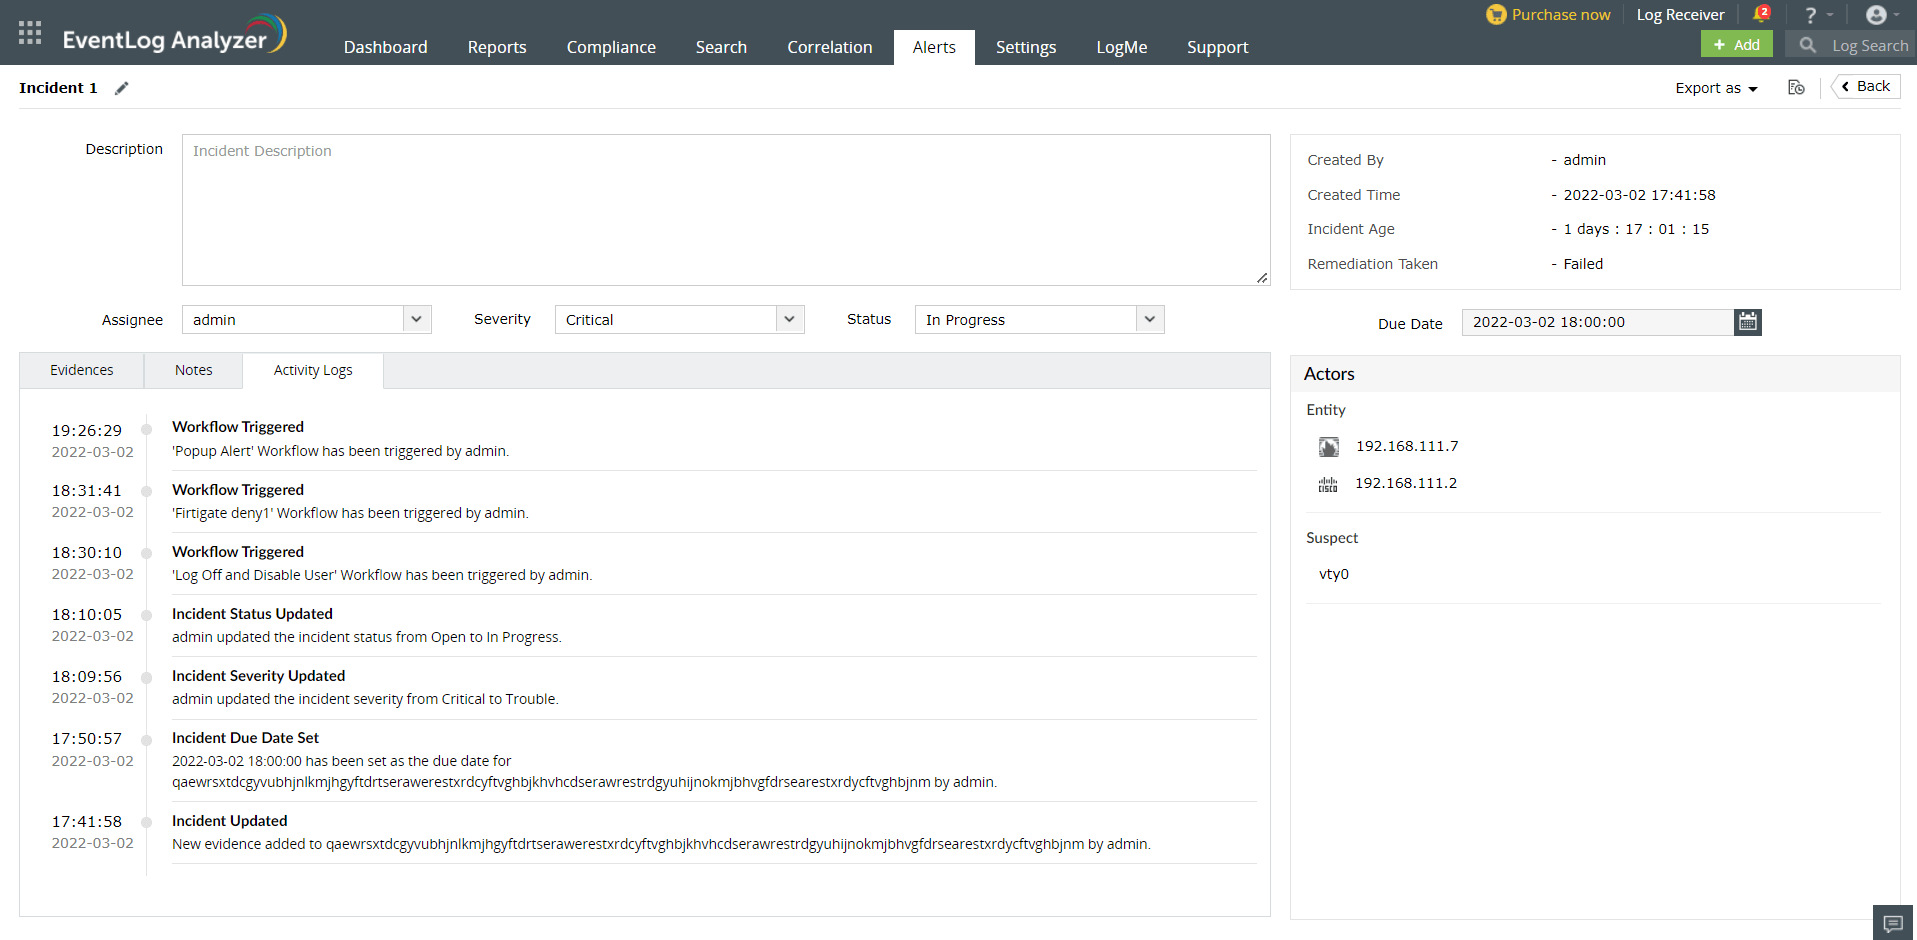
In the Incident page, you can view the list of all incidents in your network along with crucial information such as the assignee, status, and severity. You can click on any incident to view and edit the incident's name, description, assignee, status, and severity. The Evidence and Notes tab display the list of evidence and notes attached to an incident. The Activity Logs page records and displays the events pertaining to the creation, modification, and deletion of incidents.
The incident page displays details such as the age of the incident, who created it, and when it was created. The Actors widget contains the list of users, entities, services, and processes responsible for the incident to help the assignee quickly investigate the incident and take remedial action.
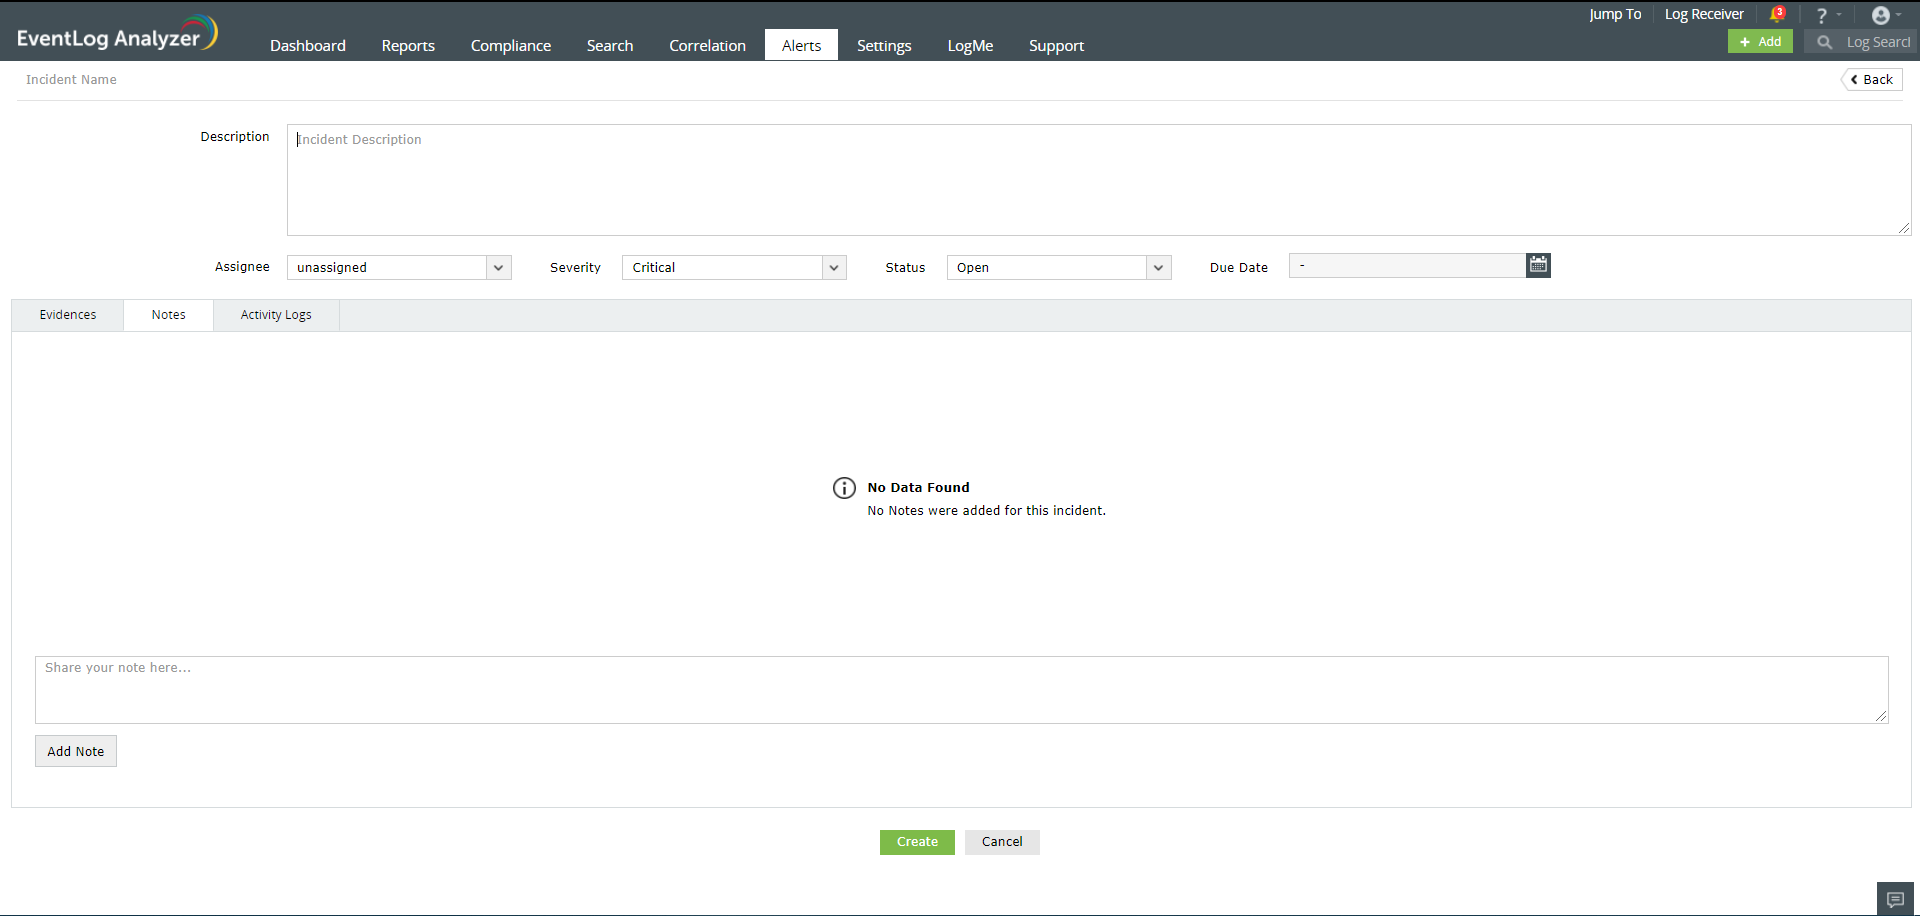
You can create an incident in EventLog Analyzer by navigating to the Alerts tab → Incident → +Add Incident.
You can view the incident creation event being logged in the Activity Logs pane.
In EventLog Analyzer, you can map a triggered alert as an incident, assign a security technician to respond to the incident, and track its status by following the steps given below:
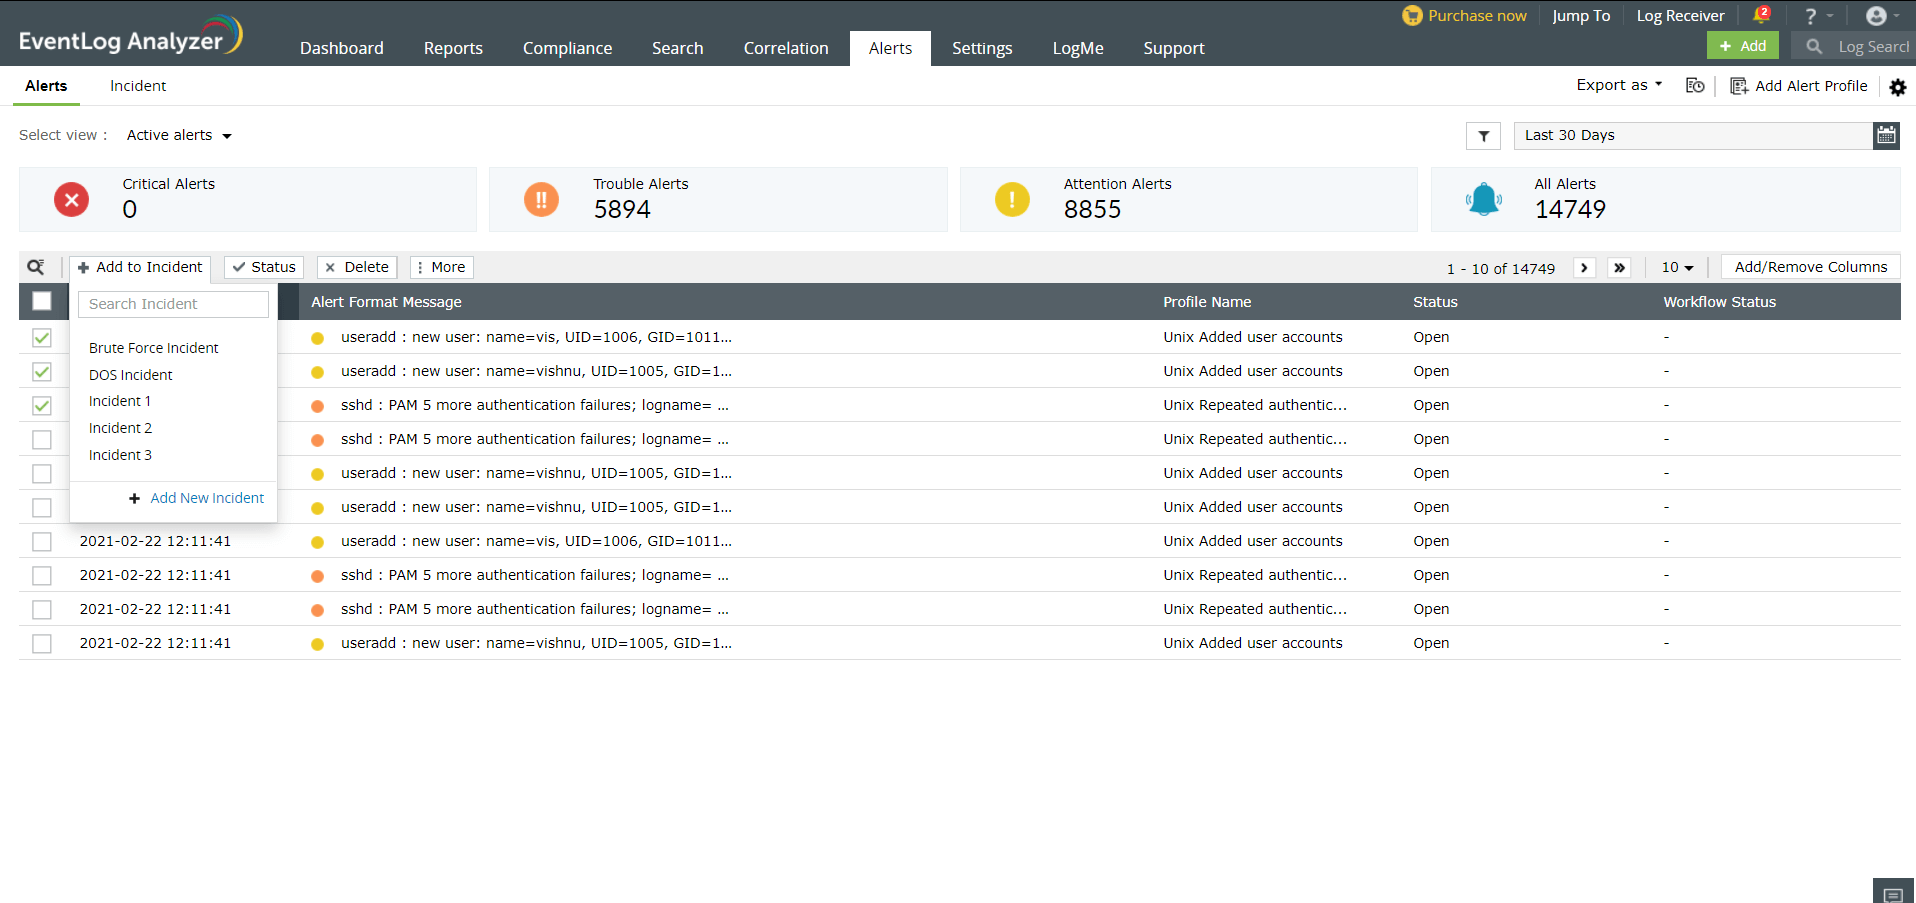
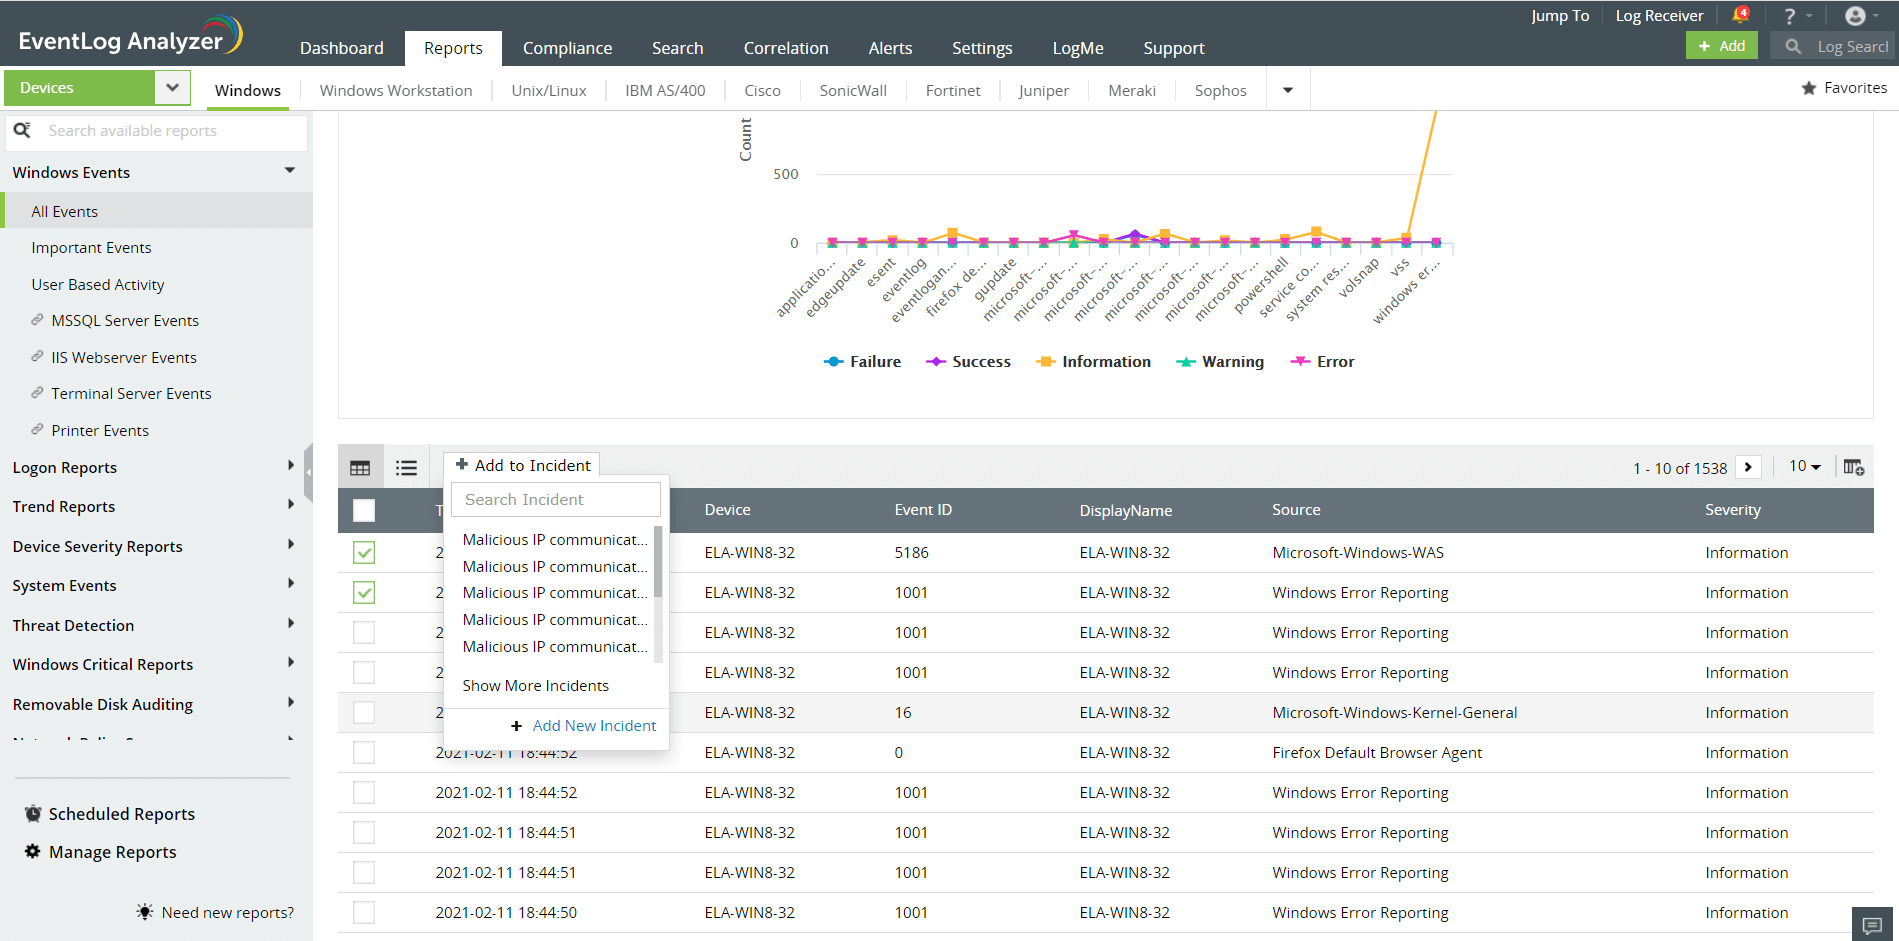
You can also add an alert as evidence to an incident by selecting the alert, clicking on the +Add to Incident button, and selecting the required incident from the list displayed. The alert can now be viewed under the Evidence tab of the selected incident.
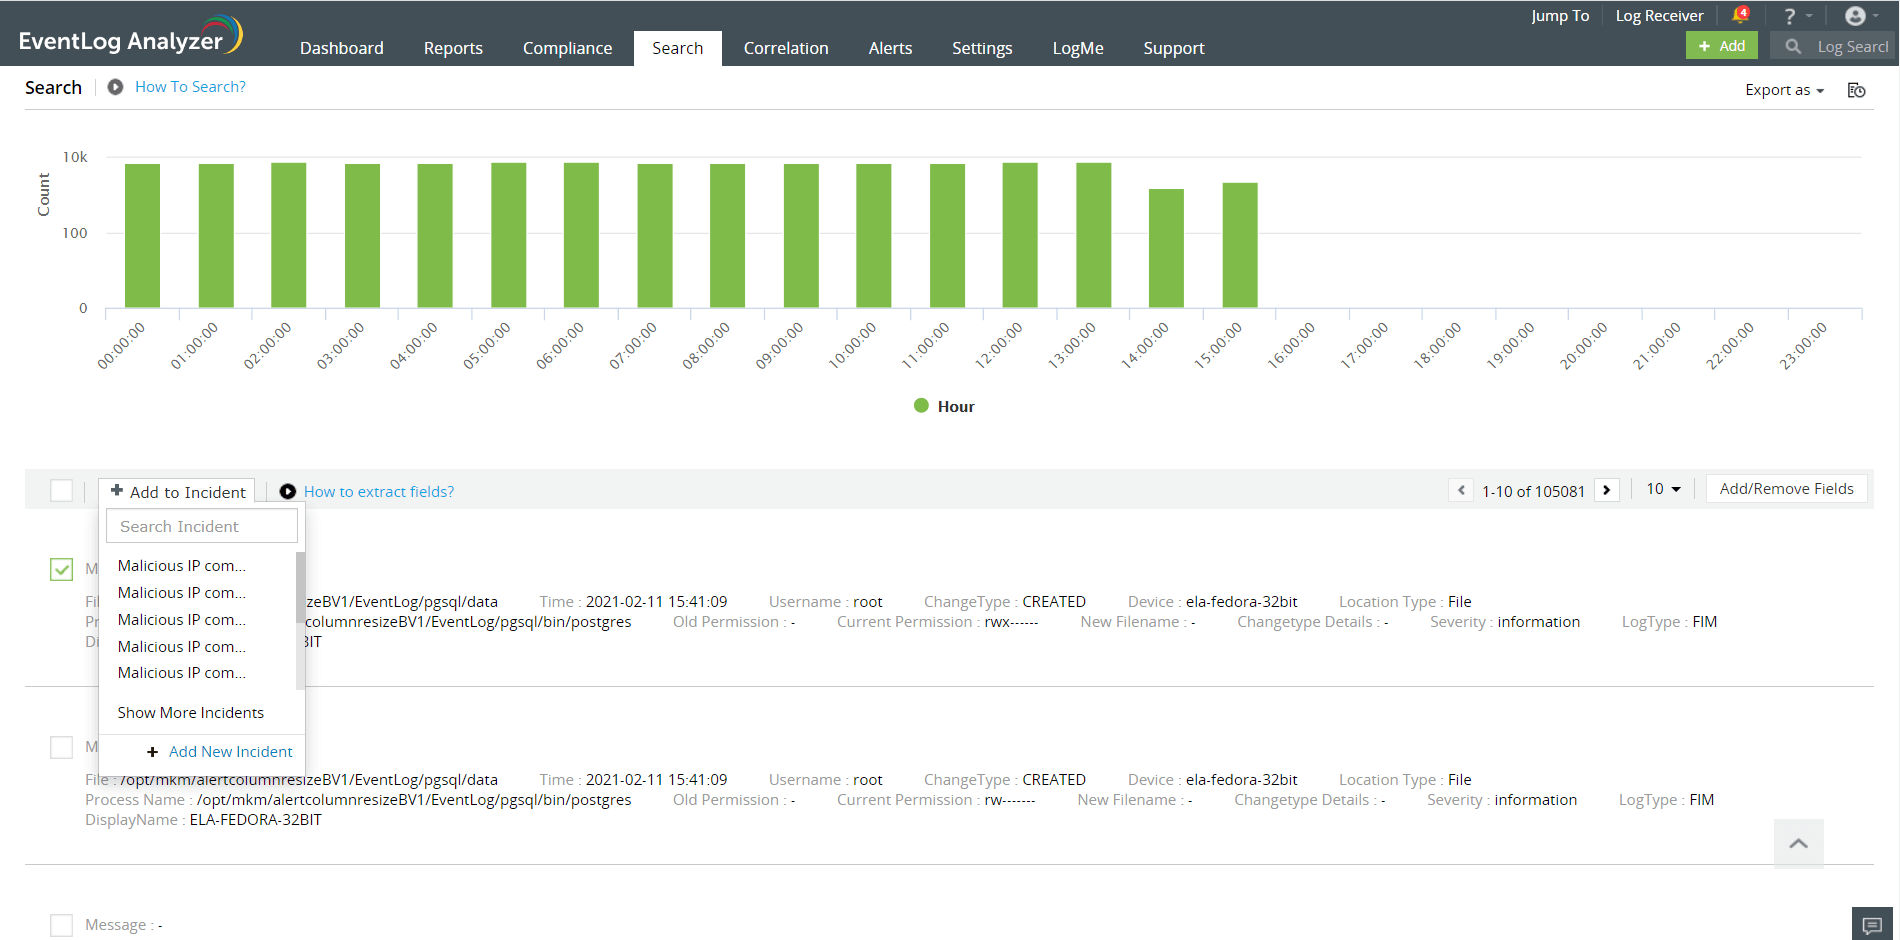
EventLog Analyzer allows you to map search results as incidents to help you backtrack an attack and conduct root cause analysis by following the steps given below:
You can now view the search results added as evidence under the Evidence tab of the incident.
If anomalies are detected in a report, you can further investigate the deviant events specified in the report by mapping those events as incidents and thoroughly examining them by assigning a dedicated IT security professional. You can map reported events as incidents by following the steps given below:
You can now view the events of the report listed under the Evidence tab of the selected incidents.
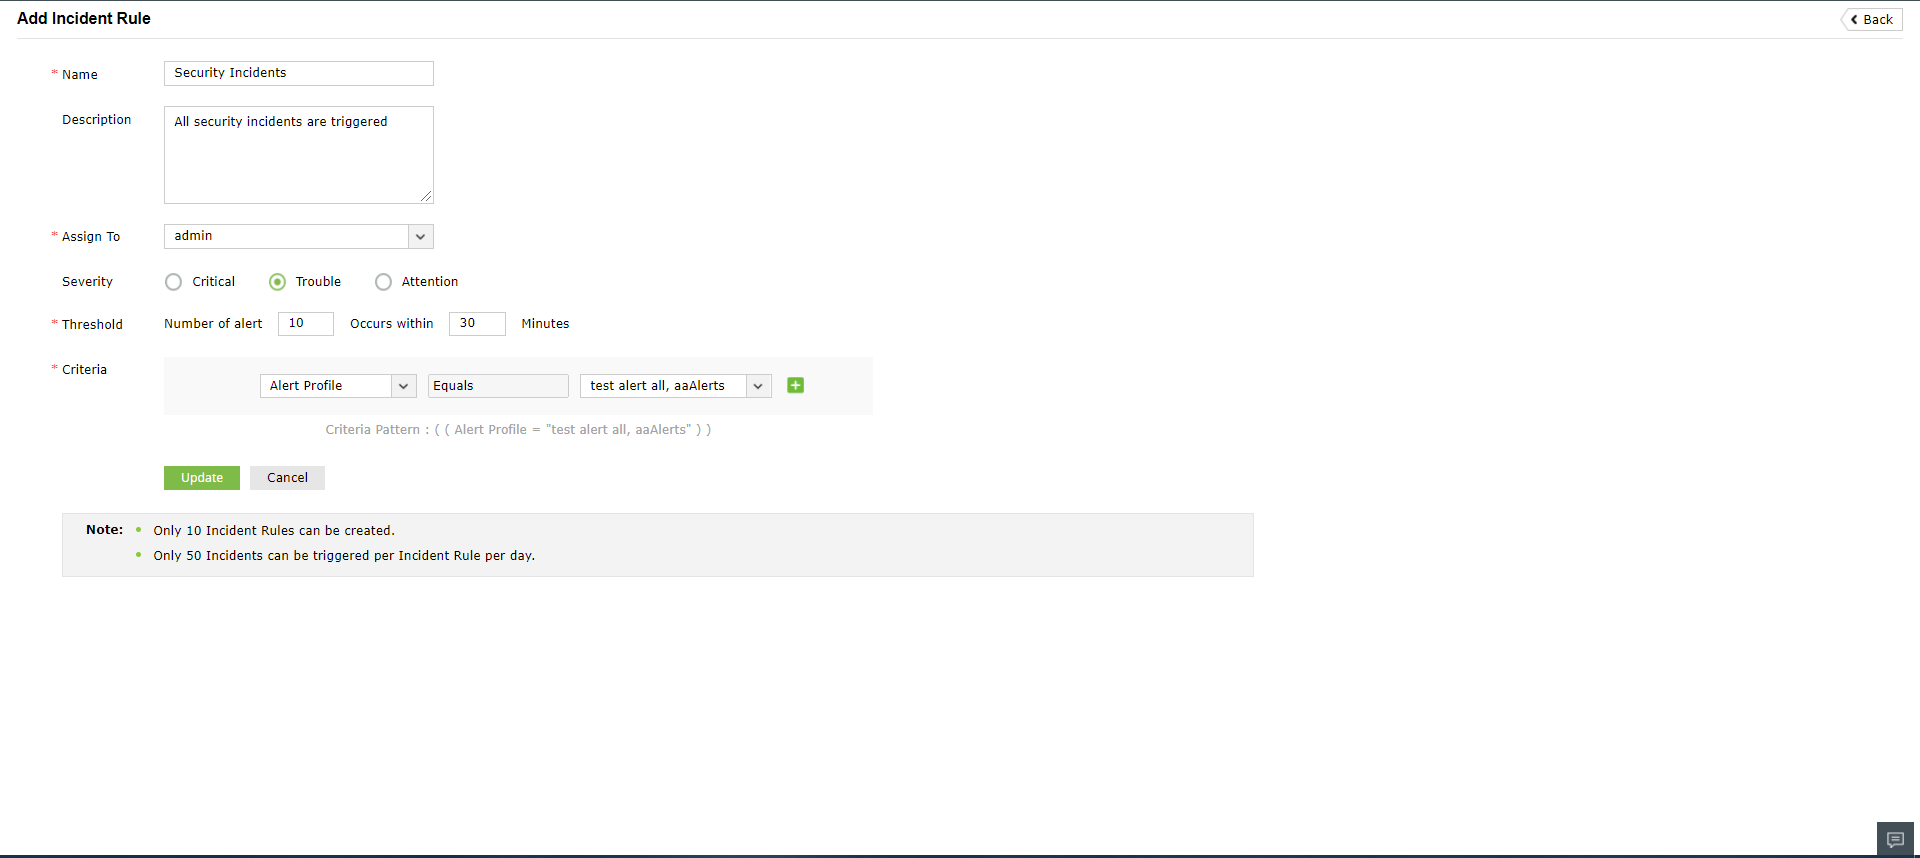
You can configure pre-defined incident rules for devices, device groups, and alert profiles to automatically create incidents when a specific number of alerts get triggered within a specified time span.
Steps to create an incident rule
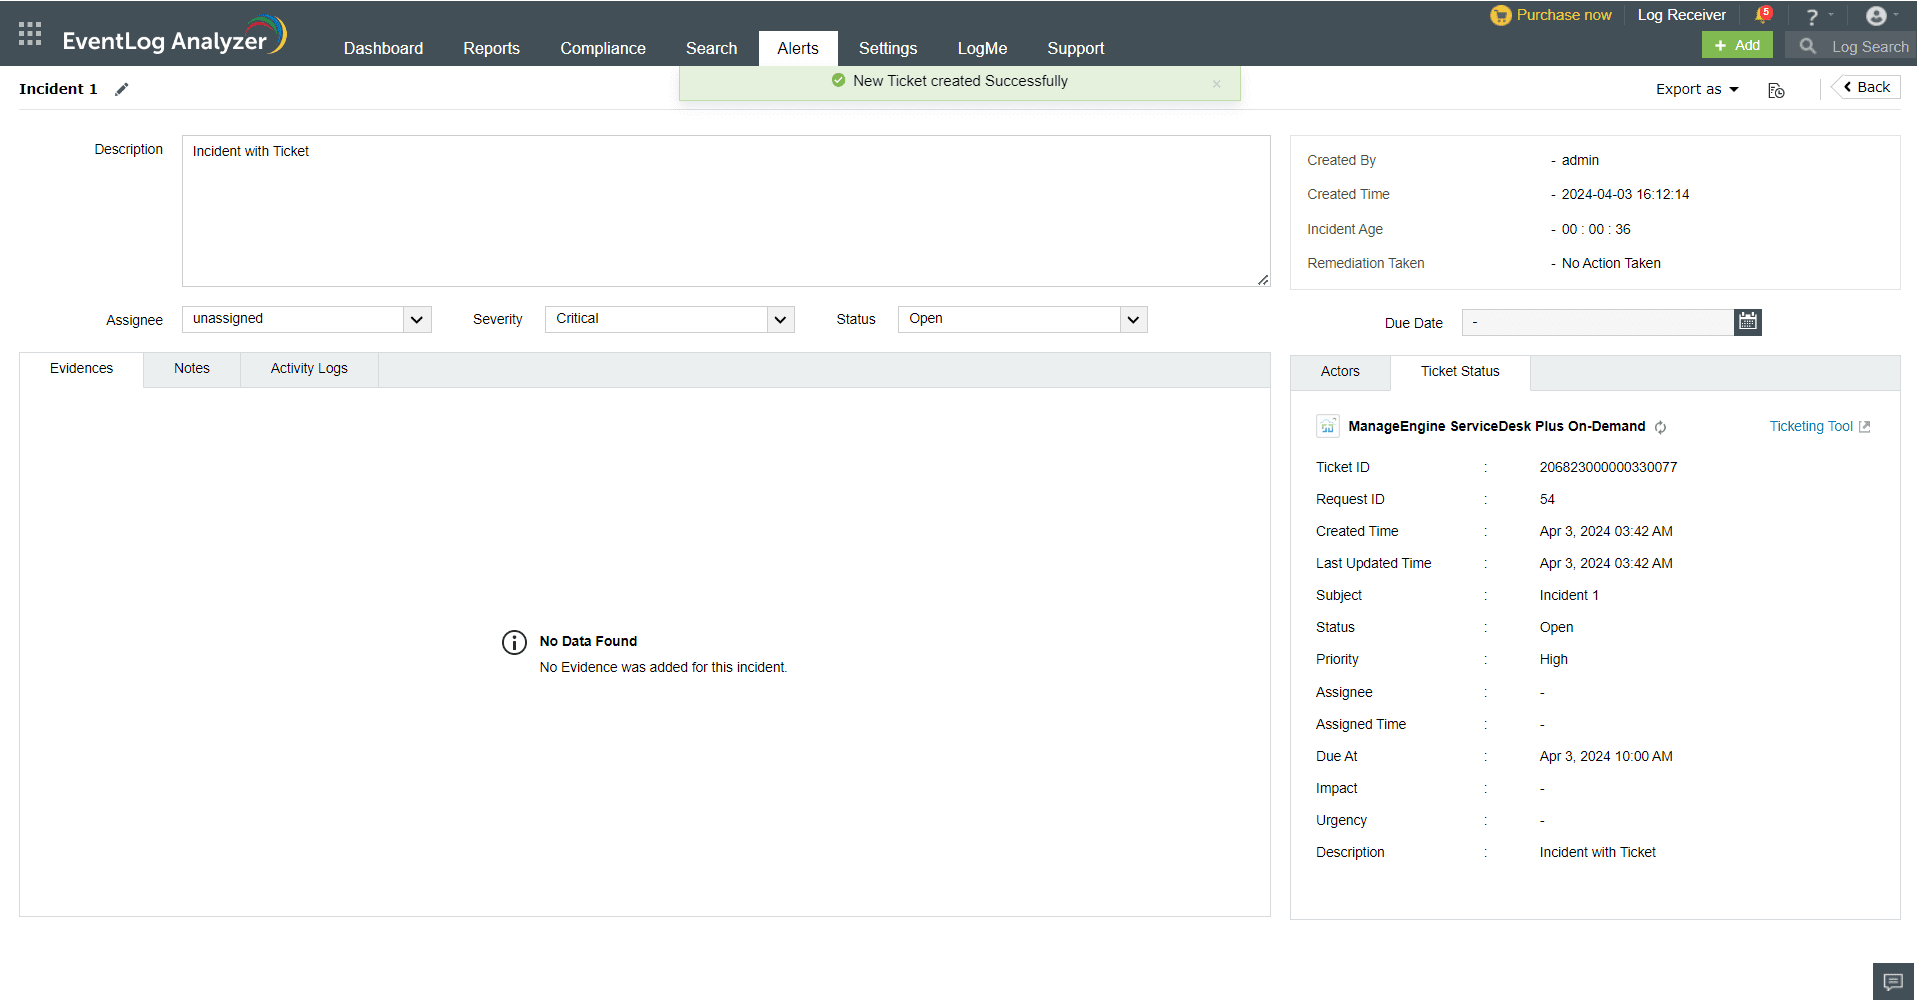
You can click on the Incident name to edit the name, description, assignee, severity, and status of the incident. You can view the Evidence, Notes, Activity Logs, and Actors of the incident. Additionally, you can also view who created the incident, when it was created, and the age of the incident in this page.

Note: You can create up to 10 incident rules in your EventLog Analyzer instance. The solution is capable of triggering up to fifty incidents per incident rule in a day.
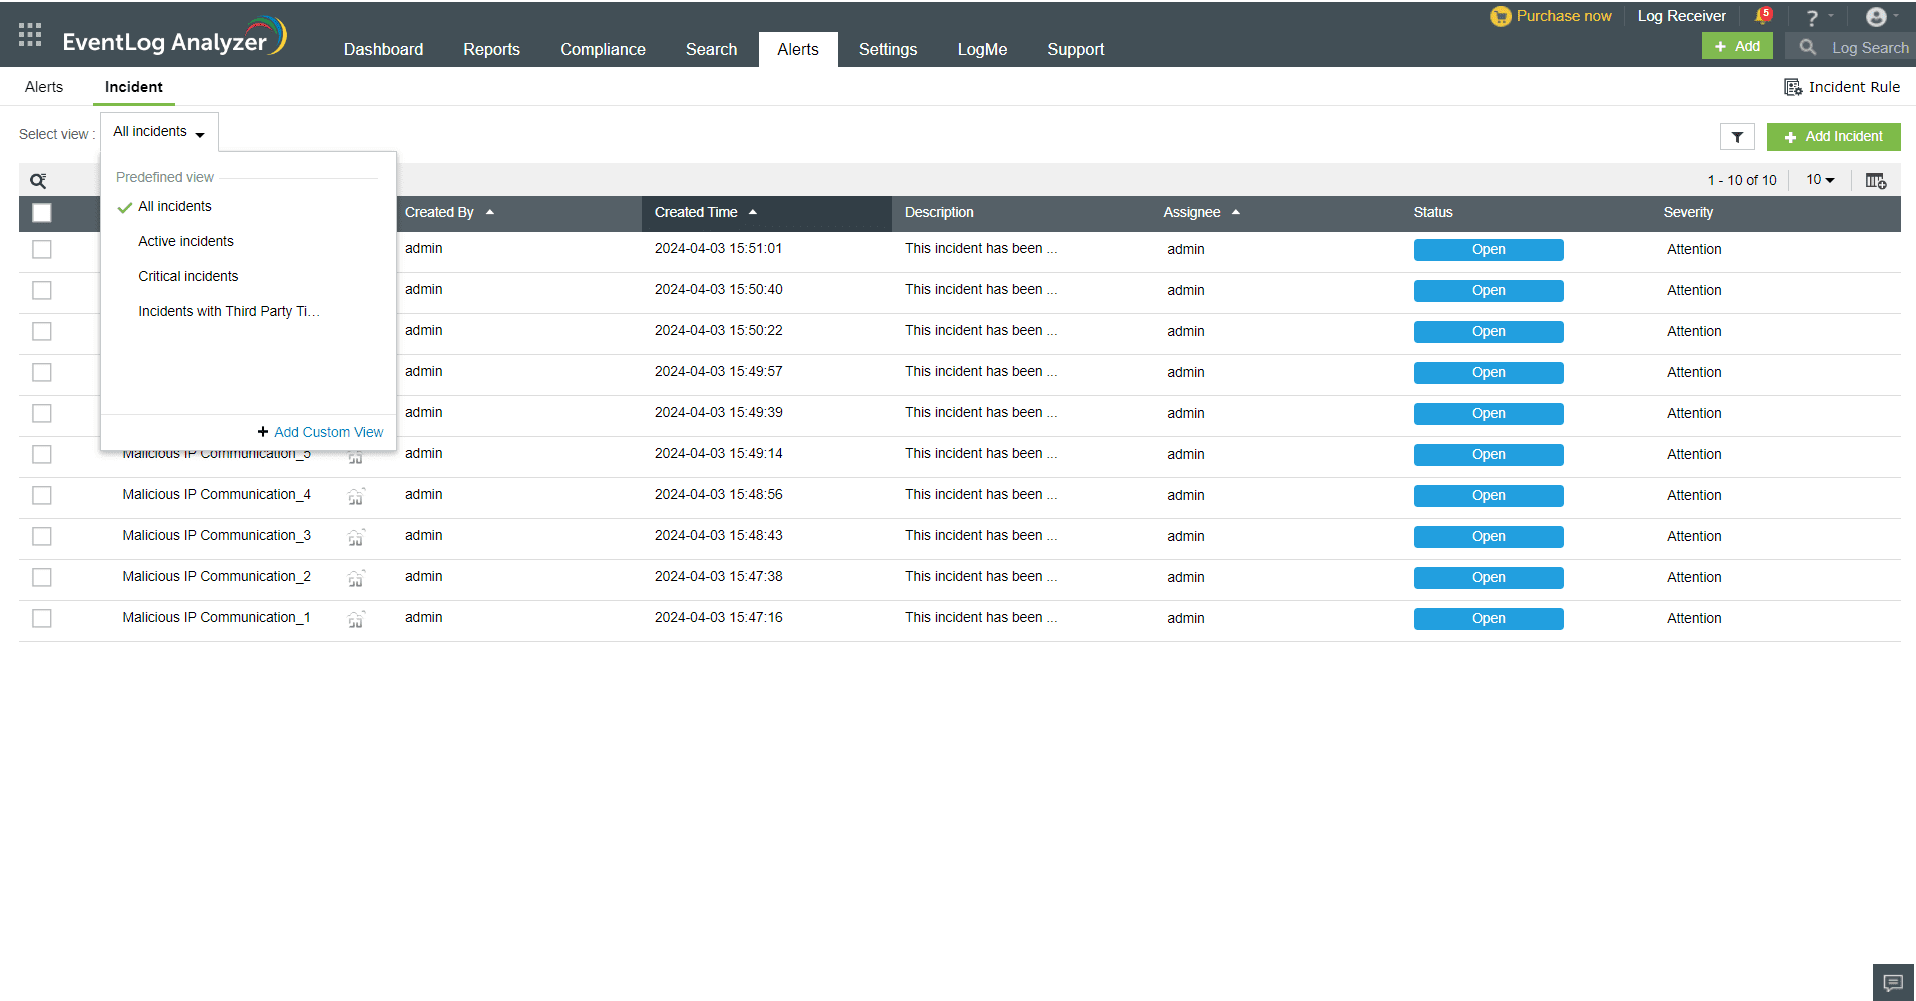
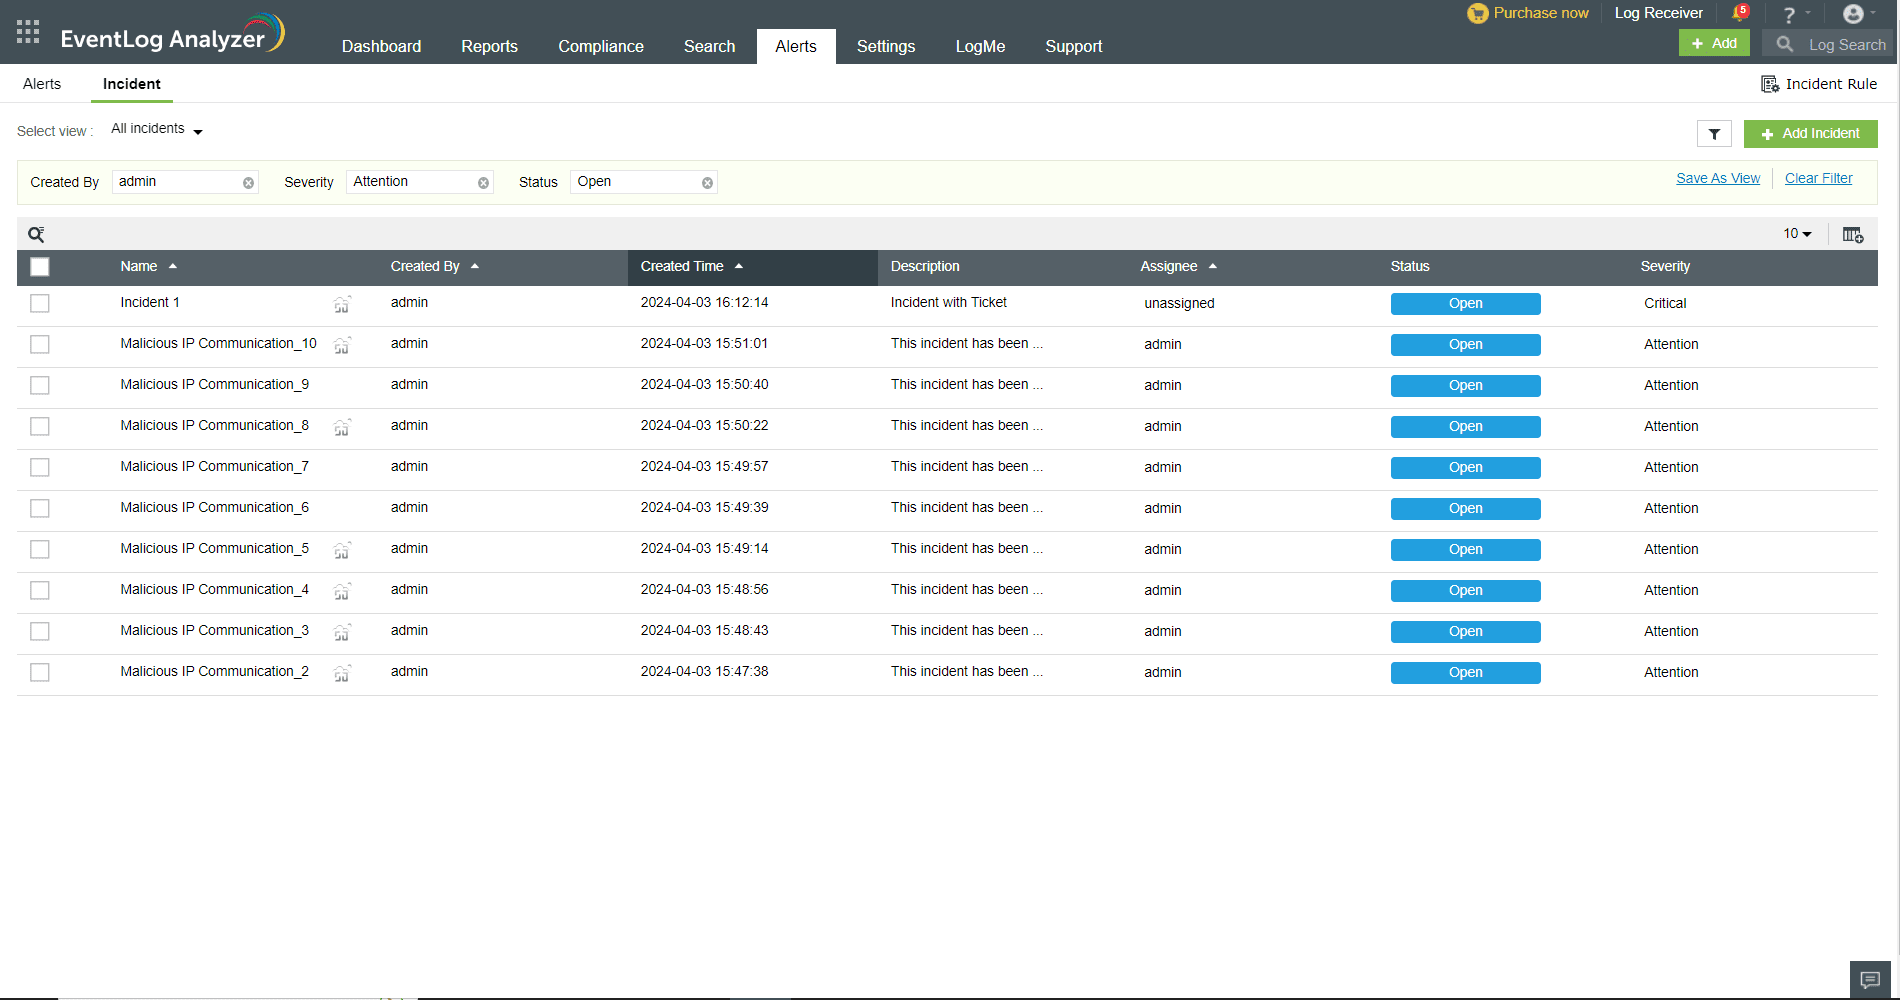
You can view the incidents under various categories, such as All incidents, Active incidents, Critical incidents, and Incident with third-party ticketing tool by selecting the required view from the Select View drop-down menu. You can also create custom views by configuring a filter for the type of incidents you want to view.
Apply the filter and click the Save as View link to enter a name for the view and click Save. Custom views are personal to the users who created them and can be viewed only by them. You can edit and delete the custom view by hovering your mouse pointer over the created view in the Select View drop-down menu.
In the Incident Rule page, you can select incidents to enable, disable, and delete them.
To run a workflow for an incident,

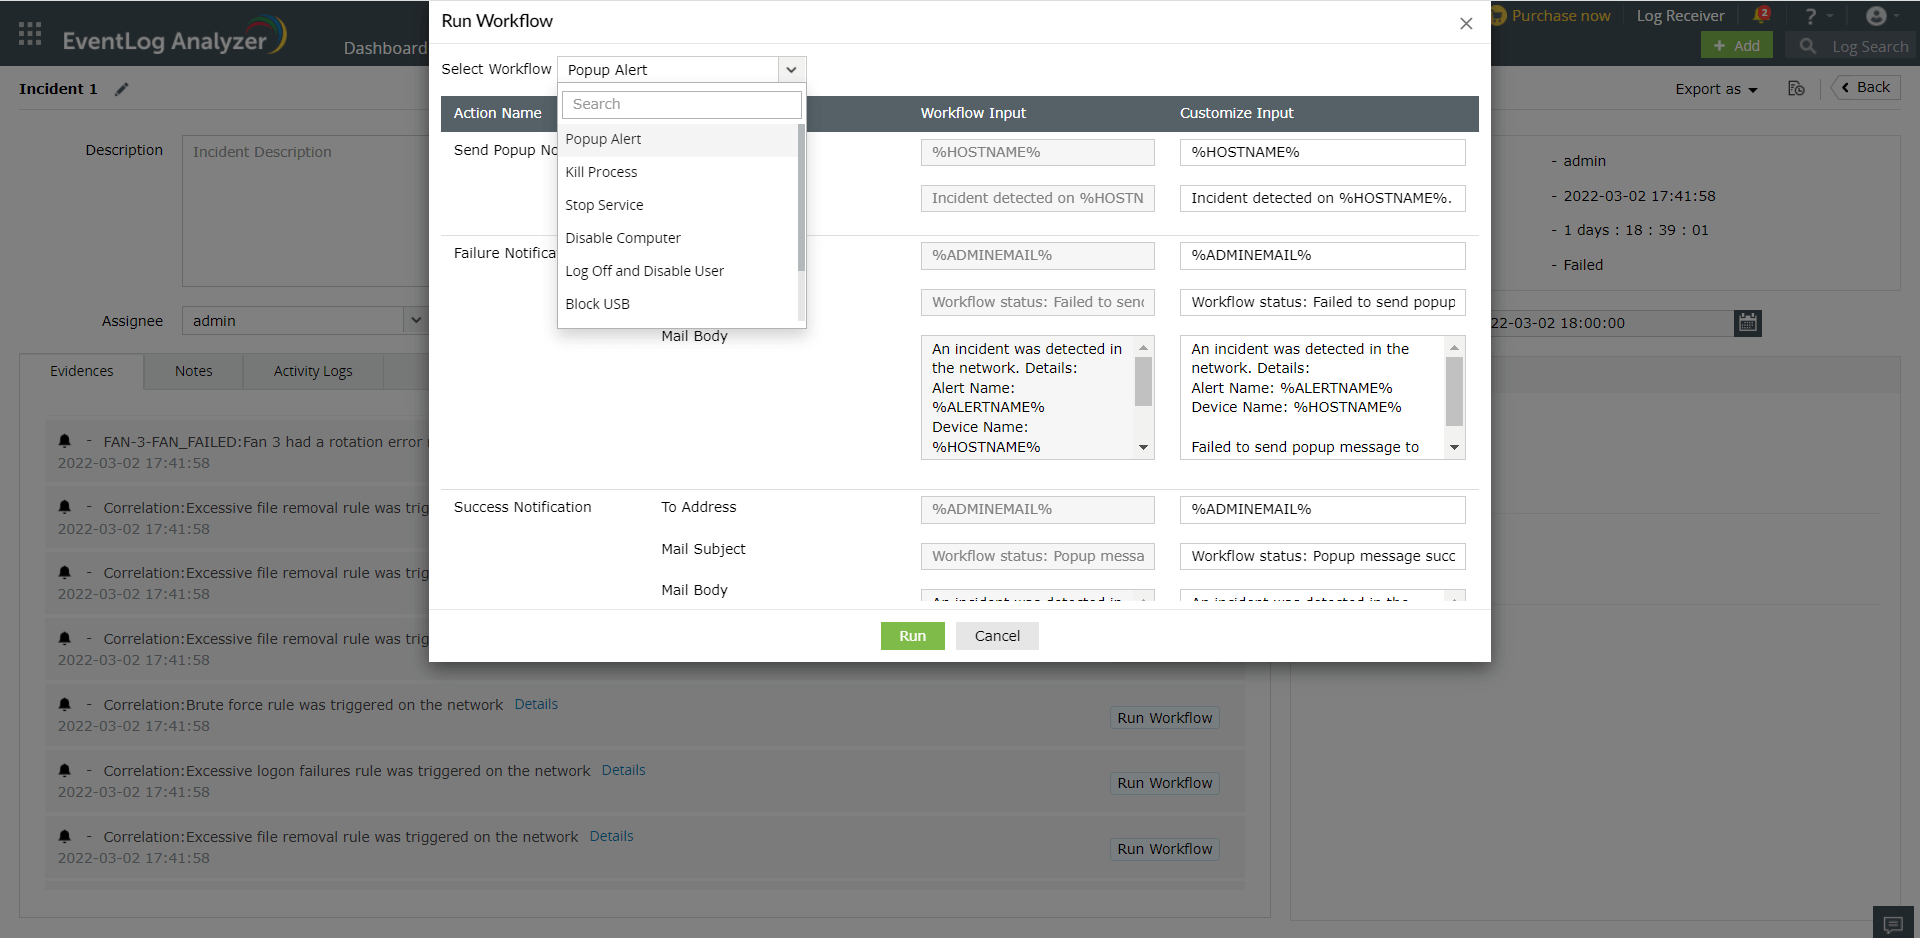
The status of the workflow will be displayed under Remediation Taken in the top-right corner. The same will be recorded in the exported report.
To create a ticket for an incident,
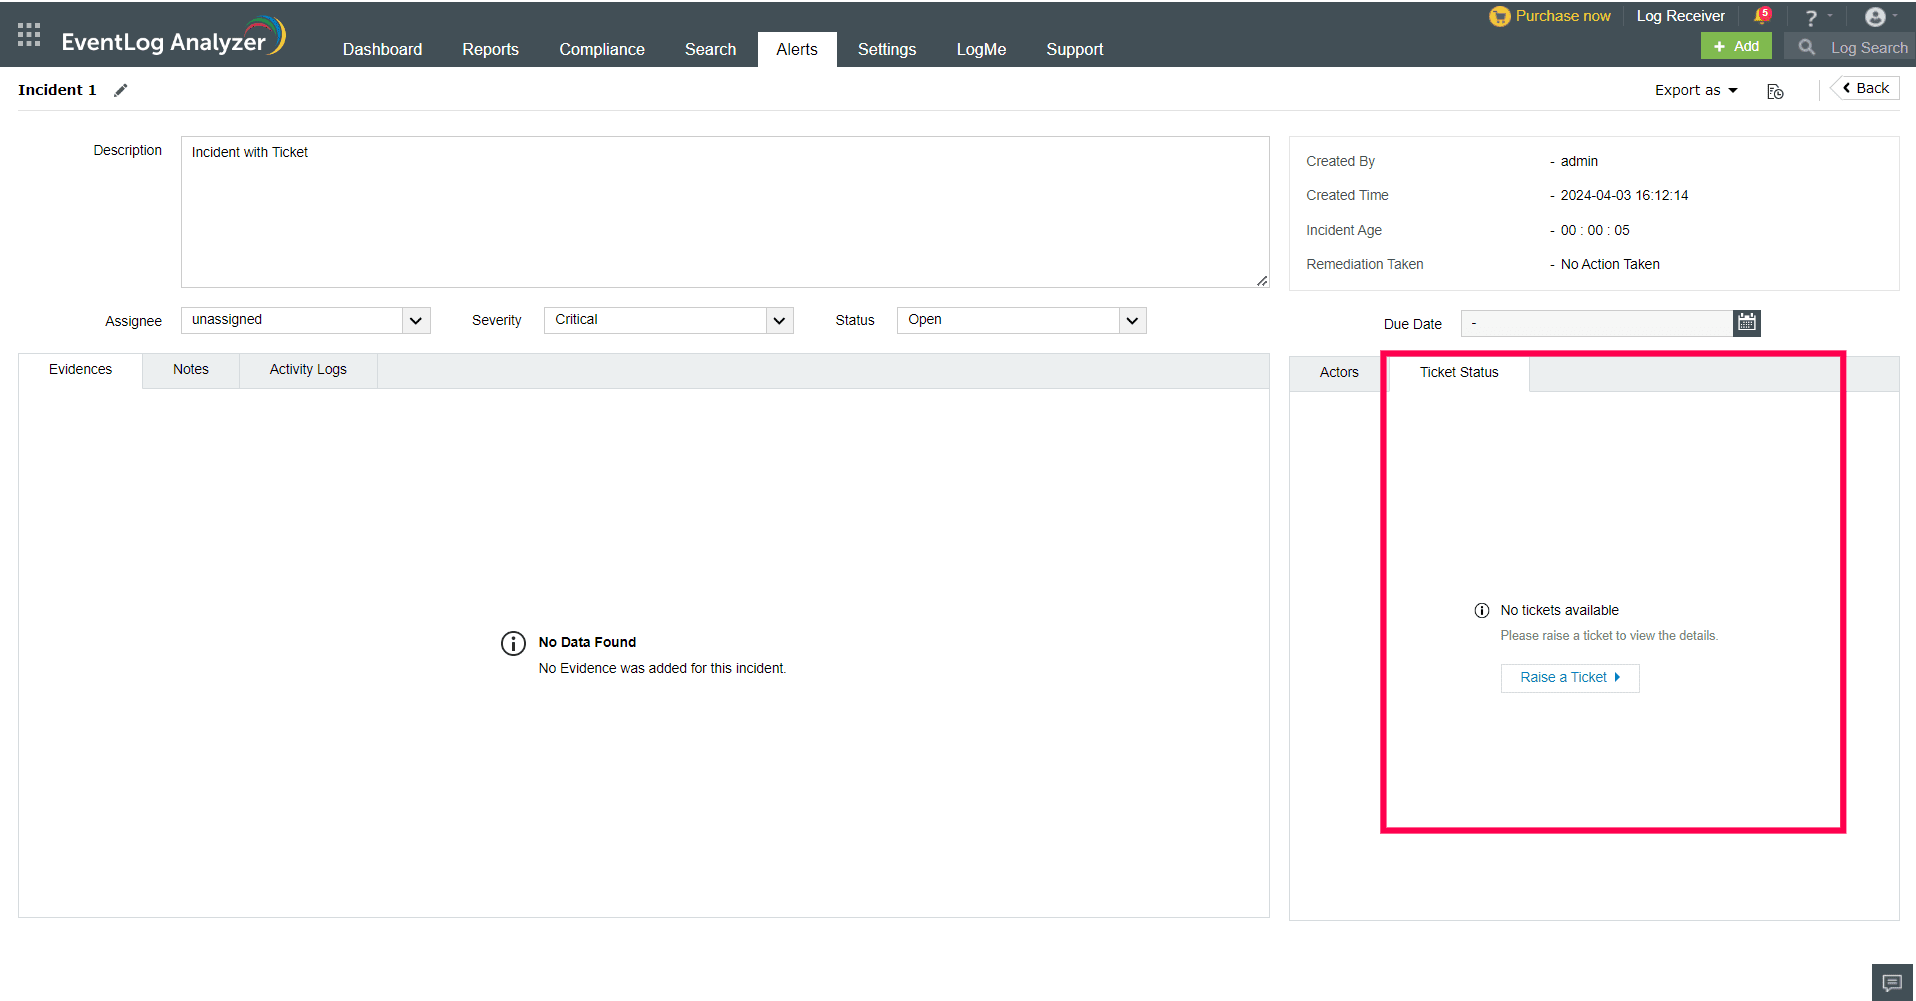
Note: Bidirectional synchronization is only available if the EventLog Analyzer app is installed in the ticketing tool. If not yet installed, follow the steps at this link to install the EventLog Analyzer app.
Understanding how incident statuses and severities in EventLog Analyzer correspond to those in various ticketing tools is crucial for seamless integration and efficient incident management.
The table below outlines the mapping between EventLog Analyzer incident statuses and the corresponding statuses in different ticketing tools:
| Tool | EventLog Analyzer - Incident Status | Ticketing Tool - Ticket Status |
| Kayako |
|
|
| Zendesk |
|
|
| ServiceNow |
|
|
| Freshservice |
|
|
| Jira Cloud |
|
|
| Jira Service Desk |
|
|
| ServiceDesk Plus Cloud |
|
|
| ServiceDesk Plus |
|
|
| ServiceDesk Plus MSP |
|
|
The following table illustrates how incident severities are mapped between EventLog Analyzer and various ticketing tools:
| Tool | EventLog Analyzer - Incident Severity | Ticketing Tool - Ticket Severity |
| Kayako |
|
Impact:
|
| Zendesk |
|
Priority:
|
| ServiceNow |
|
Priority:
|
| Jira Cloud |
|
Priority:
|
| Freshservice |
|
Priority:
|
| Jira Service Desk |
|
Priority:
|
| ServiceDesk Plus Cloud |
|
Priority:
|
| ServiceDesk Plus |
|
Priority:
|
| ServiceDesk Plus MSP |
|
Priority:
|
| AlarmsOne |
|
Priority:
|
By aligning incident statuses and severities between EventLog Analyzer and your ticketing tools, you can ensure consistent communication and efficient incident resolution across platforms.
Copyright © 2020, ZOHO Corp. All Rights Reserved.