☰
Exchange Reporter Plus' Report Configuration option gathers data from the event logs, parses the information, and presents it in the form fo neat, easily understandable reports. These insightful reports help you to see beyond raw data and makes analysis easy. You can perform the following function using the Report Configuration option:
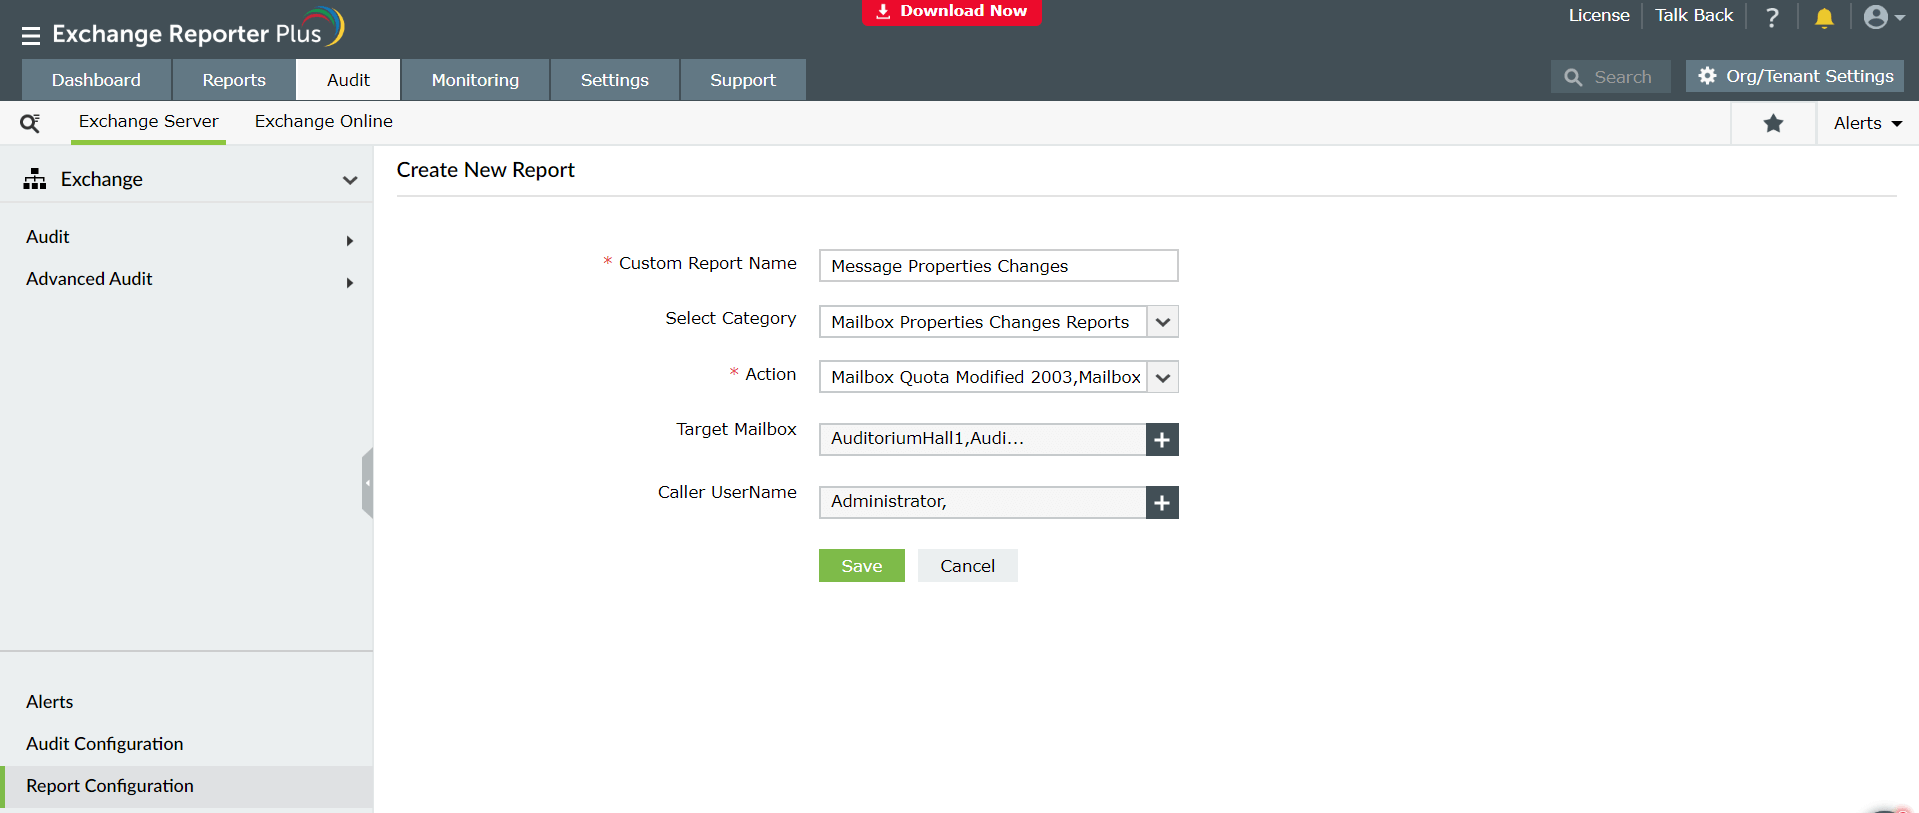
In addition to the pre-configured reports offered by Exchange Reporter Plus, new reports can also be added for auditing. To add a new report:
You can edit and modify the reports configured as and when required. You can:
Disabled or inactivated reports will not work. That means users cannot generate these reports. If an already scheduled report is disabled, the report will not be generated. The disabled report can be enabled at any time.
To edit the configured reports:
To delete a configured report:
The existing reports can be scheduled as follows:
Note: Apart from these, you also have the Action Configuration option using which you can customize the actions (apart from the offered ones) that you want to audit in your Exchange environment. Using this option, you can make sure you know about every change, even the small ones.
Copyright © 2024, ZOHO Corp. All Rights Reserved.
 ADManager Plus
 ADAudit Plus
 ADSelfService Plus
 M365 Manager Plus