Migration from PostgreSQL database to Microsoft SQL Server
Exchange Reporter Plus comes bundled with a PostgreSQL database to store reporting, monitoring, and auditing data. The solution also supports Microsoft SQL Server and enables you to migrate from the built-in PostgreSQL to Microsoft SQL database. This section will walk you through the database migration process.
Supported versions of Microsoft SQL Server: 2008 R2, 2012, 2014, 2016, 2017, and 2019.
Prerequisites for the migration process
In the Microsoft SQL Server used for migration, make sure that the following conditions are satisfied:
- The SQL Server browser must be up and running.
- For SQL Server Network Configuration, TCP/IP protocol must be enabled.
- All the client protocols must be enabled.
- Microsoft SQL Server access is delegated to a user with sysadmin and db_owner permissions at the server and database levels respectively.
Refer to Appendix A for configuring prerequisites 1, 2, and 3. Refer Appendix B for configuring prerequisite 4.
Migrating from PostgreSQL to Microsoft SQL
Migrating data from Exchange Reporter Plus’ PostgreSQL database to Microsoft SQL consists of the following steps:
- Backing up the Exchange Reporter Plus database
- Migrating PostgreSQL data to Microsoft SQL
Step 1: Backing up the Exchange Reporter Plus database
Note: This step is not required if you are migrating the database of a freshly installed Exchange Reporter Plus instance.
- Stop Exchange Reporter Plus (this is essential before performing the backup).
- If Exchange Reporter Plus is running as an application, click the Windows icon. Search for Exchange Reporter Plus, and choose Stop Exchange Reporter Plus.
- If Exchange Reporter Plus is running as a service, click the Windows icon. Search for Services. In the window that appears, choose ManageEngine Exchange Reporter Plus, and select Stop the service on the left side.
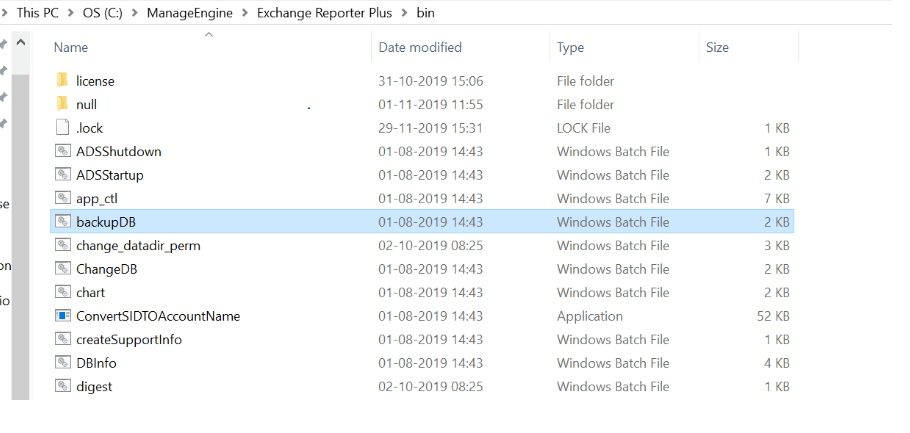
- Navigate to <Exchange Reporter Plus installation directory>\bin.
Note: By default, Exchange Reporter Plus is installed at: C:\Program Files\ManageEngine\Exchange Reporter Plus.
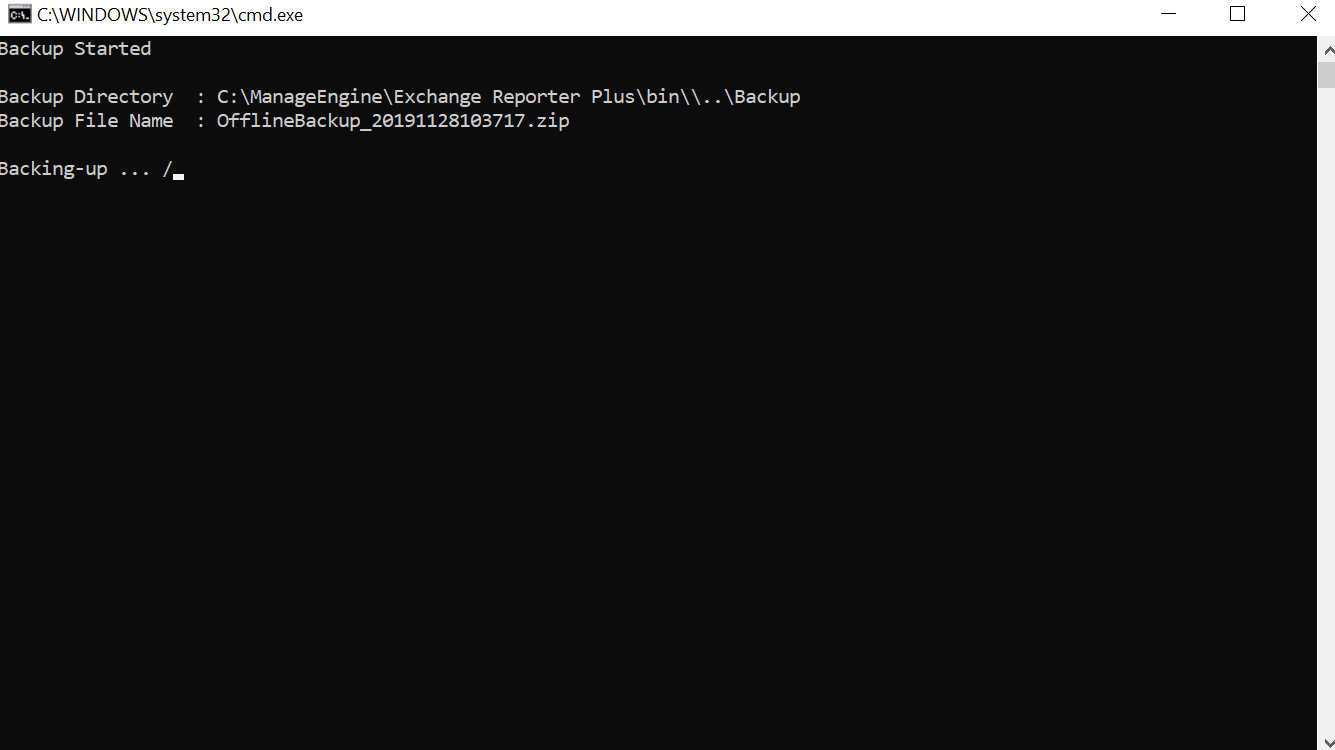
- Run the backupDB.bat (Windows Batch) file as an administrator. Do not terminate until the process is finished.
- Data in the default database of Exchange Reporter Plus will be backed up and stored under <Exchange Reporter Plus installation directory>\backup\OfflineBackup_<Backup Time>.
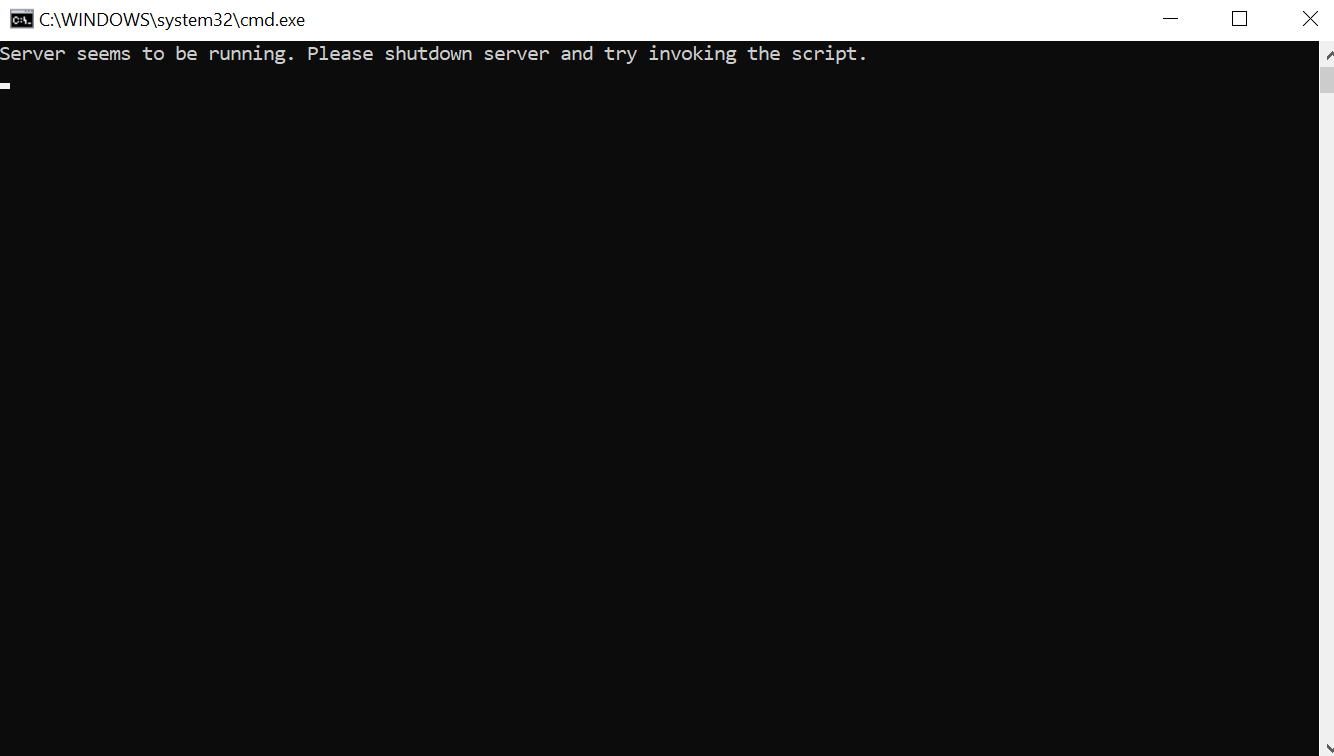
Note: If the below error shows up while running the backupDB file, double-check that the product has been stopped before proceeding.
Step 2: Migrating PostgreSQL data to Microsoft SQL
- If Microsoft SQL Server is installed in a remote computer, install the necessary command line utilities and native clients as per your requirements, then proceed to the next step.
Note: The links provided below will redirect you to the main Microsoft SQL feature pack page. From there, download the corresponding command line utilities, native clients, and ODBC Driver as per the Microsoft SQL Server version and CPU type of the machine where Exchange Reporter Plus is installed. The command line utilities have the term sqlcmdlnutils or mssqlcmdlnutils in them, and the native client file can be found under the name sqlncli.
| SQL Server version |
Command line utilities (sqlcmdlnutils or mssqlcmdlnutils) |
Native client (sqlncli) |
ODBC driver (msodbcsql) |
| 2008 R2 |
Download |
Download |
Not needed |
| 2012 |
Download |
Download |
Not needed |
| 2014 and 2016 |
Download |
Not needed |
Download |
| 2017 and 2019 |
Not needed |
Not needed |
Download |
Note: The native client version, the command line utilities version, and ODBC driver version have to be the same as the Microsoft SQL version to which the DB or data is to be moved.
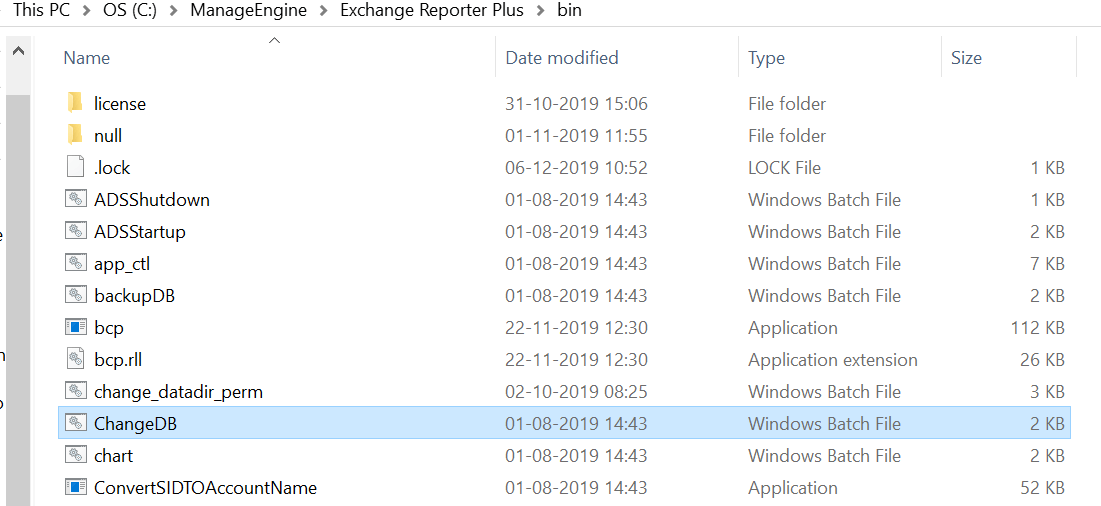
- Copy the following files to <Exchange Reporter Plus installation directory>\bin folder.
- bcp.exe: <MicrosoftSQL installation directory>\Tools\Binn\bcp.exe
- bcp.rll: <MicrosoftSQL installation directory>\Tools\Binn\Resources\1033\bcp.rll
- Stop Exchange Reporter Plus (this is essential before performing migration).
- If Exchange Reporter Plus is running as an application, click the Windows icon. Search for Exchange Reporter Plus, and choose Stop Exchange Reporter Plus.
- If Exchange Reporter Plus is running as a service, click the Windows icon. Search for Services. In the window that appears, choose ManageEngine Exchange Reporter Plus, and select Stop the service on the left side.
- Navigate to <Exchange Reporter Plus installation directory>\bin.
- Run the ChangeDB (Windows batch file) as an administrator. In the Database Setup Wizard that appears, select Server Type as Microsoft SQL Server.
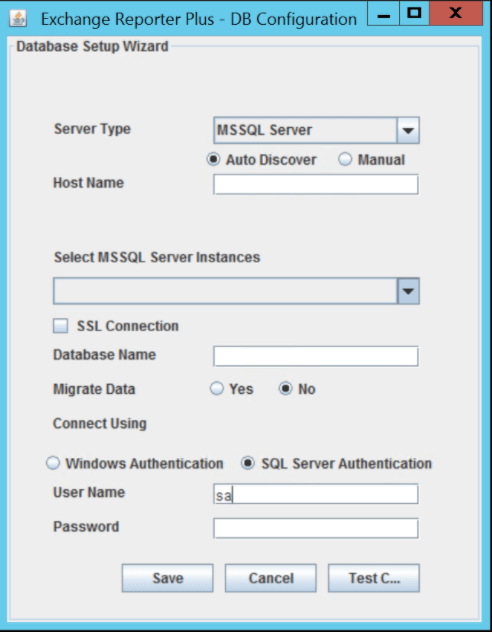
- Enter the Host Name, Database Name, and Port number of Microsoft SQL Server.
Note: If you want to enable SSL Connection to secure the Microsoft SQL migration, then make sure you have followed all the steps given in this guide.
- Select Yes beside Migrate Data to migrate with data intact. This makes a copy of all the data (eg. reports previously generated) in the Microsoft SQL database to which you are migrating. If you'd like a fresh installation with no data in place after migration, choose No.
Note: Data will remain in the default PostgreSQL database even after the migration regardless of the option you choose. However, only the Microsoft SQL database will be active and used.
- Select the SQL Server instance from the list of available instances.
- Select the Authentication type.
- If you choose Windows Authentication, provide the Domain Name, User Name, and Password of the user account that has access to the server.
- If you choose SQL Server Authentication, provide the User Name and Password of the user who has access to Microsoft SQL Server.
- Click on Test Connection to check the status. If the connection fails, try reentering the correct credentials and establishing the connection again.
- Click Save.
- Start the Exchange Reporter Plus server/service to work with Microsoft SQL Server as the database.
Appendix A
Configuring Microsoft SQL Server
Note: If you already have a functional Microsoft SQL Server instance, then this step is not required. Follow the steps below to configure a freshly installed Microsoft SQL Server instance:
- Open SQL Server Configuration Manager. (You can also run compmgmt.Microsoftc in Command Prompt).
- Go to SQL Server Services → SQL Server Browser. Make sure the SQL Server browser is running.
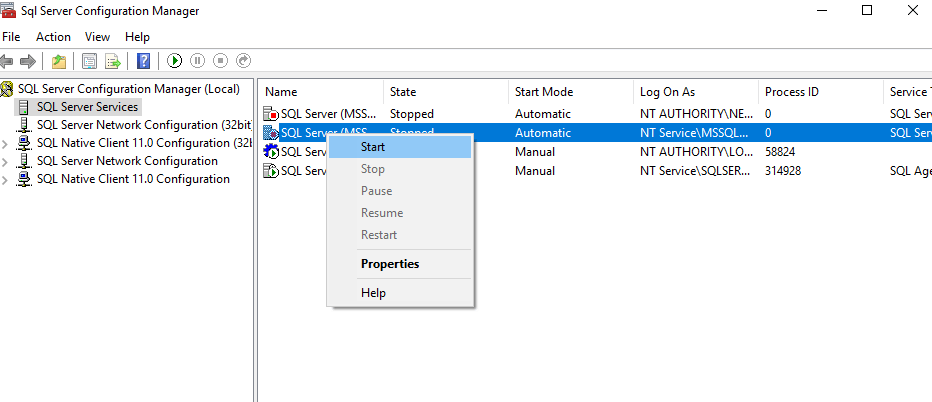
- Go to SQL Server Network Configuration, and double-click Protocols for <Instance _Name>.
- Click on the TCP/IP protocol, and enable it.
- Restart the SQL Server Service for the changes to take effect.
Note:: SQLEXPRESS is the instance name provided while configuring Microsoft SQL Server in general, however, it can be changed. SQLEXPRESS will be used hereafter in the document.
- Go back to SQL Server Configuration Manager. In the left pane:
- Navigate to SQL Server Network Configuration < Protocols for SQLEXPRESS, and enable all the protocols.
- Navigate to SQL Native Client Configuration < Client Protocols, and enable all the protocols.
Appendix B
Delegating Microsoft SQL Server access to users
It is necessary to add a login for users to access the configured Microsoft SQL Server instance either using Windows Authentication or SQL Server Authentication. It is not, however, mandatory to create a new login. You can use existing service accounts, too. If there are none, then follow the steps given below to create a New Login and equip the user with the necessary permissions.
- Log in to SQL Server Management Studio.
- In the left pane, navigate to Machine Name > SQLEXPRESS > Security > Logins.
- Right-click Logins, and select New Login.
- Provide a Login Name, and choose whether to use Windows Authentication or SQL Server Authentication.
- If you choose Windows Authentication, enter the Windows NT name of the user to whom access must be granted.
- If you choose SQL Server Authentication, you will be prompted to create a new user by entering a User Name and Password.
- The new user must have the sysadmin role in the server level and db_owner role in the database level. Follow these steps to provide the sysadmin and db_owner role permissions:
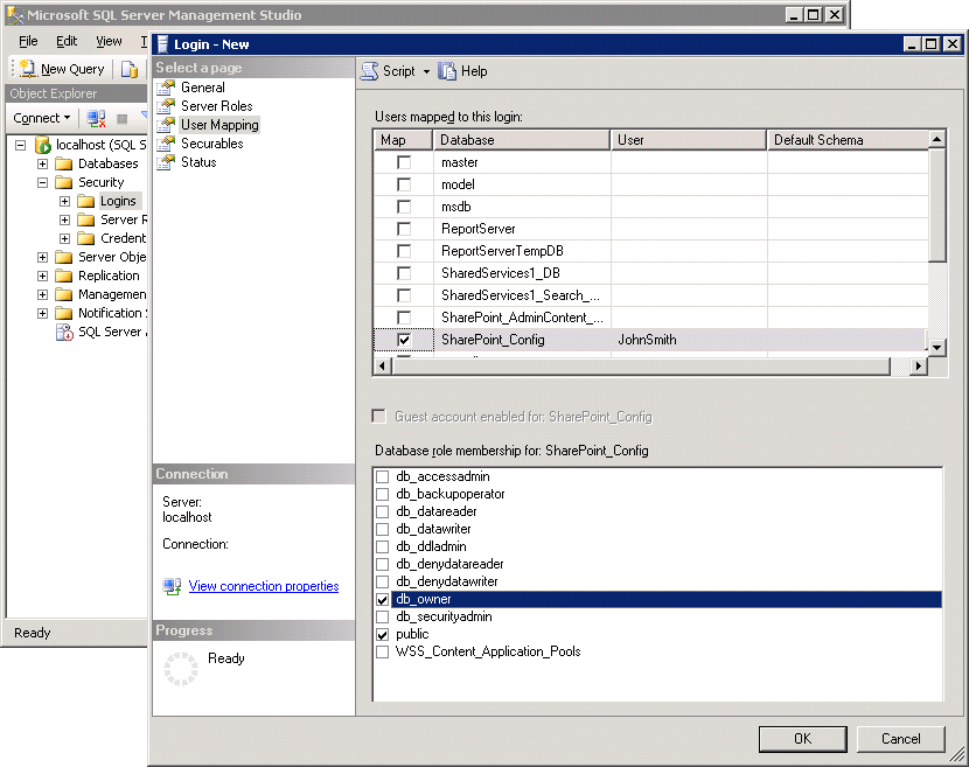
- Navigate to Machine Name → SQLEXPRESS → Security → Logins. Right-click on the user, then select Properties.
- Go to Server Roles, check the box next to sysadmin, and click OK.
- Go to User Mapping in the left pane. In the Users mapped to this login list, check your preferred database, and in the Database role membership for list, select db_owner, and click OK.
Note: For details about user roles, refer to the documents in the following links:
For Server-Level Roles: http://Microsoftdn.microsoft.com/en-us/library/Microsoft188659.aspx
For Database-Level Roles: http://Microsoftdn.microsoft.com/en-us/library/Microsoft189121.aspx
In general, the configured account needs any one of these three sets of privileges to complete the migration process successfully.
| SQL Server version |
Required database role |
Required permissions |
| Set 1 |
db_owner |
Not required |
| Set 2 |
db_datareader, db_datawriter, db_ddladmin, db_backupoperator |
Not required |
| Set 3 |
db_ddladmin |
ALTER ANY TABLE, ALTER ANY AGGREGATE, ALTER ANY DEFAULT, ALTER ANY FUNCTION, ALTER ANY PROCEDURE, ALTER ANY QUEUE, ALTER ANY RULE, ALTER ANY SYNONYM, ALTER ANY TYPE, ALTER ANY VIEW, ALTER ANY XML SCHEMA COLLECTION, ALTER ANY REFERENCES, CONTROL ON CERTIFICATE::[ZOHO_CERT] TO [user], CONTROL ON SYMMETRIC KEY::[##Microsoft_DatabaseMasterKey##] TO [user], CONTROL ON SYMMETRIC KEY::[ZOHO_SYMM_KEY] TO [user] |
Important: Please note that you must have the db_owner permission while migrating PostgreSQL to Microsoft SQL for the first time. After a successful migration, you can revoke the db_owner permission for the account, and provide set 2 or set 3 permissions.
 ADManager Plus
 ADAudit Plus
 ADSelfService Plus
 M365 Manager Plus