Reporting in Exchange Reporter Plus
Reporting is one among the three major functions offered by Exchange Reporter Plus. It offers more than 450 reports on Exchange Server, Exchange Online, and Skype for Business. Refer to the pages under the respective titles to get a gist of the reports available under each section. This page will walk you through the following topics:
Generating reports in Exchange Reporter Plus
This topic describes in general the procedures involved in generating a report under any of the categories above.
- Click on the Reports tab.
- You can switch between the Exchange Server, Exchange Online, and Skype server tabs as needed.
- The categories of reports are displayed on the left side of the page. Choose a suitable report category and one of the available reports.
- In the page that appears, enter the Organization for which you want to generate the report, and provide other inputs required, such as name of the server or mailbox.
- Enter the time period for which you want to generate the report.
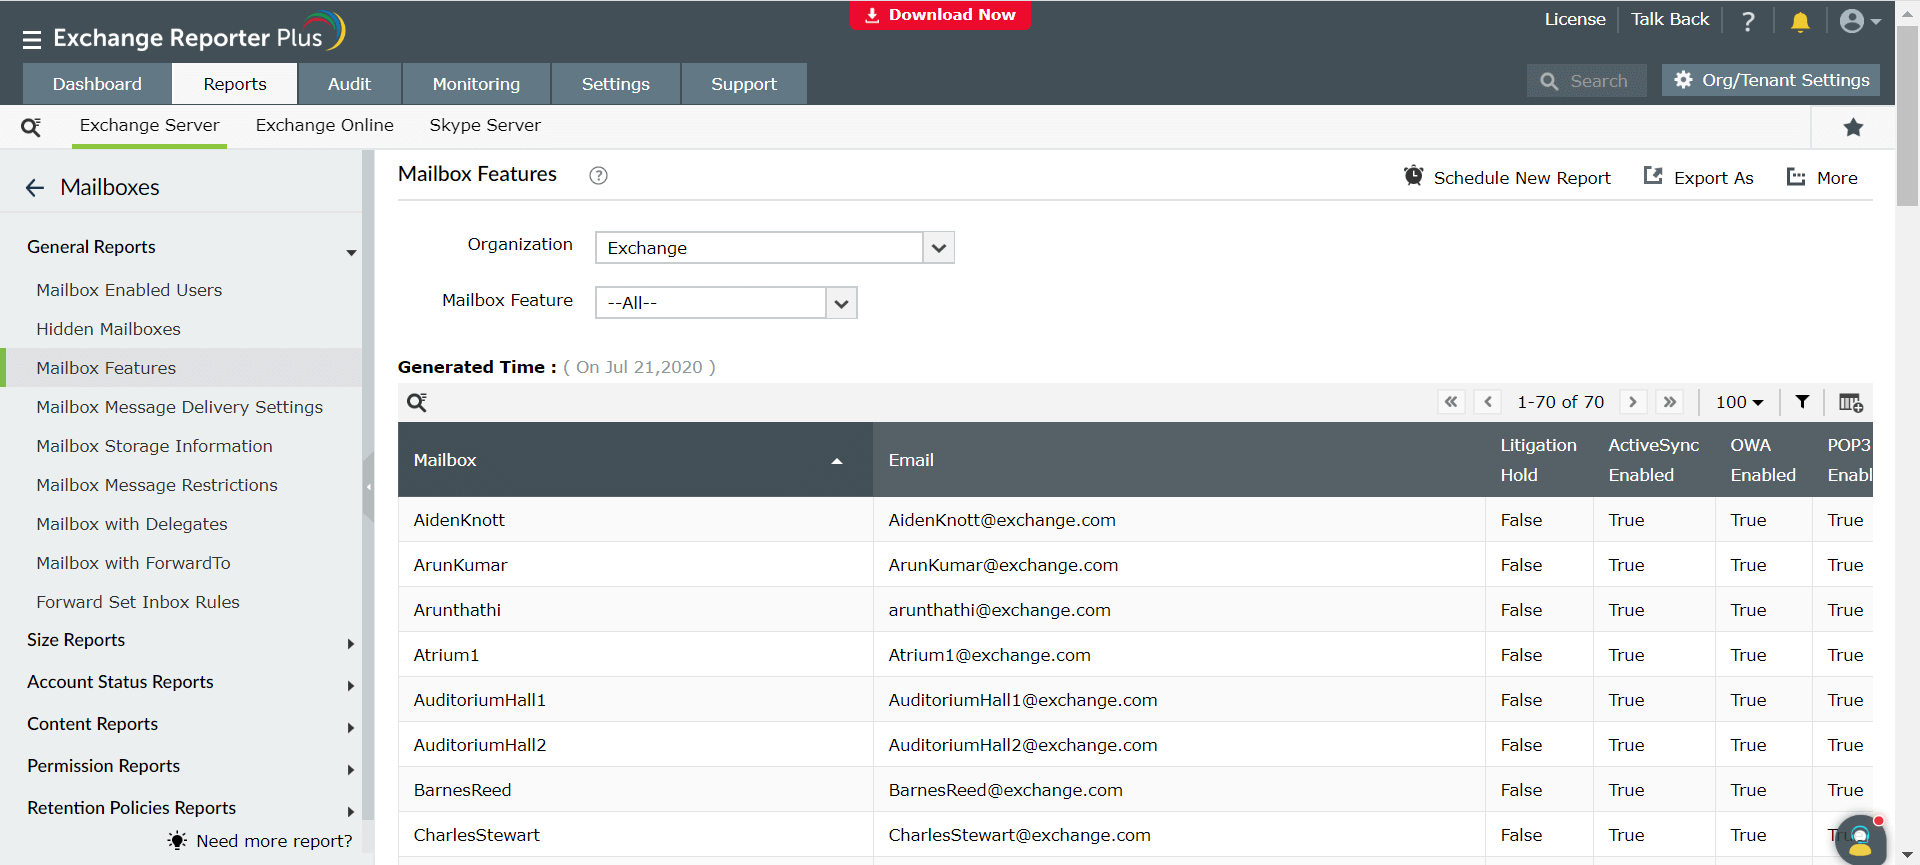
You can further customize the report generated using the options mentioned below.
Creating custom reports using Exchange Reporter Plus
You can create customized reports in Exchange Reporter Plus as per your requirements. Follow the steps below to create a new report:
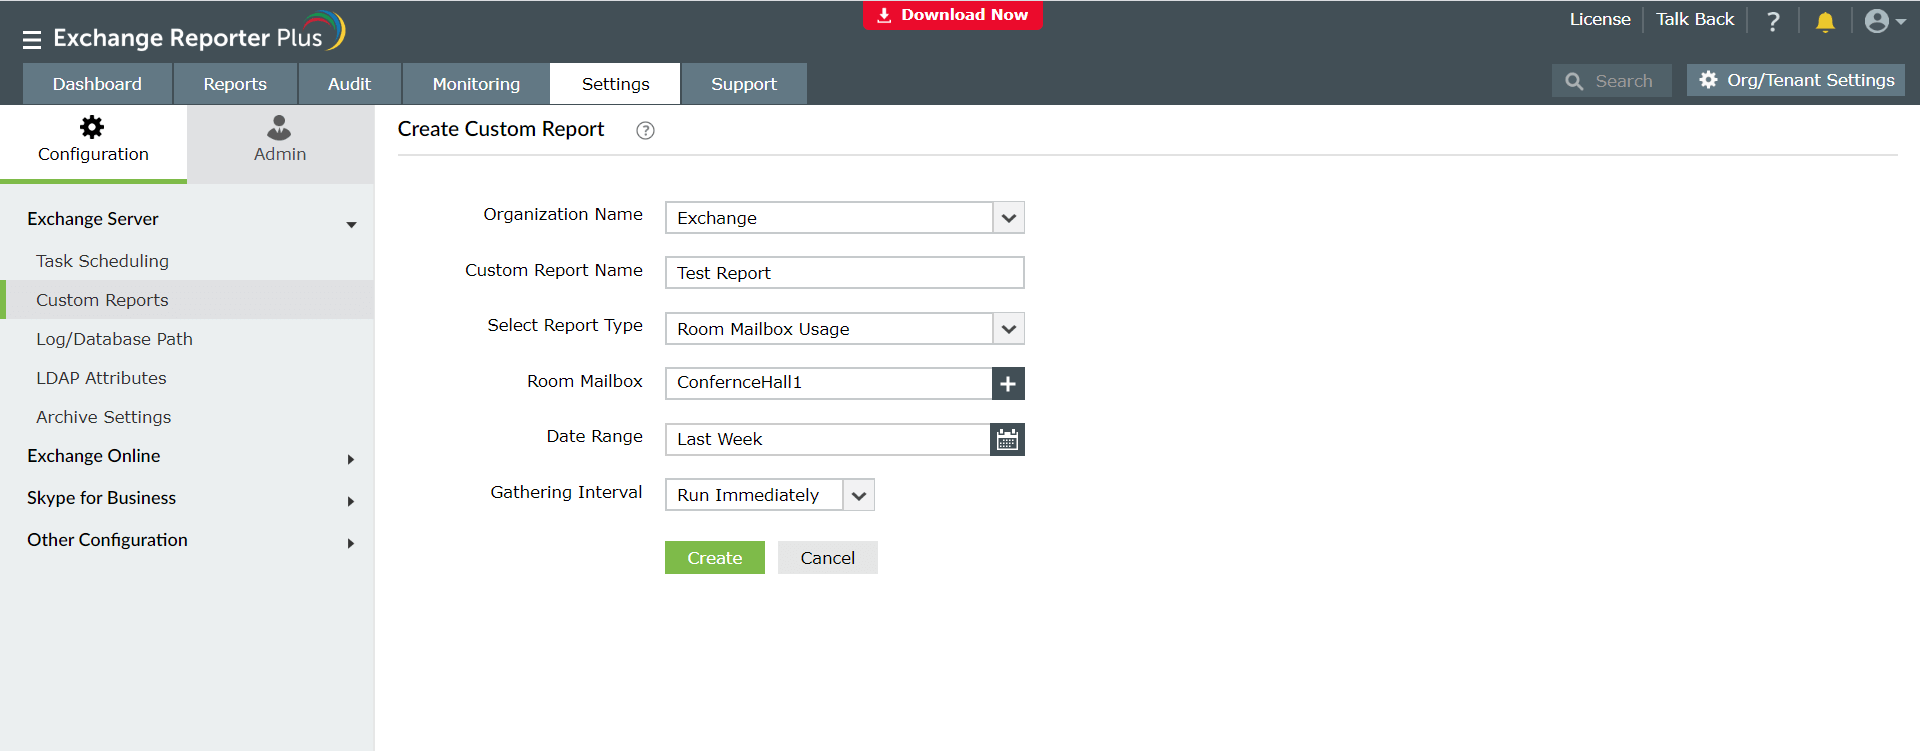
- Click on the Reports tab.
- Select Create New Report in the top-right corner.
- On the page that appears, enter a name for the custom report and organization.
- Select the Report Type and enter the details of the mailbox object for which you are generating the report.
- Fix a regular time interval for data gathering.
- Click Create.
Scheduling reports in Exchange Reporter Plus
You can generate Exchange Server, Exchange Online, and Skype for Business Server reports during set intervals and have them emailed to the stakeholders in your organization on a regular basis using the Schedule Reports option available in Exchange Reporter Plus. Follow the steps below to schedule reports:
- Click on the Reports tab.
- Select Schedule Reports in the top-right corner.
- Click Create New Schedule.
- On the page that appears, choose the category of the report you want to schedule (i.e. Exchange Server or Exchange Online).
- Enter a name for the scheduled report, the organization you want to generate the report for, and the report category.
- Select one or multiple report(s) from the list of available reports.
- Set the frequency for report generation.
- Select the default storage path and the format in which you want the report to be sent.
- Under Email scheduled report, configure the mail server to which you want the emails to be sent.
- Click Save.

Reporting features
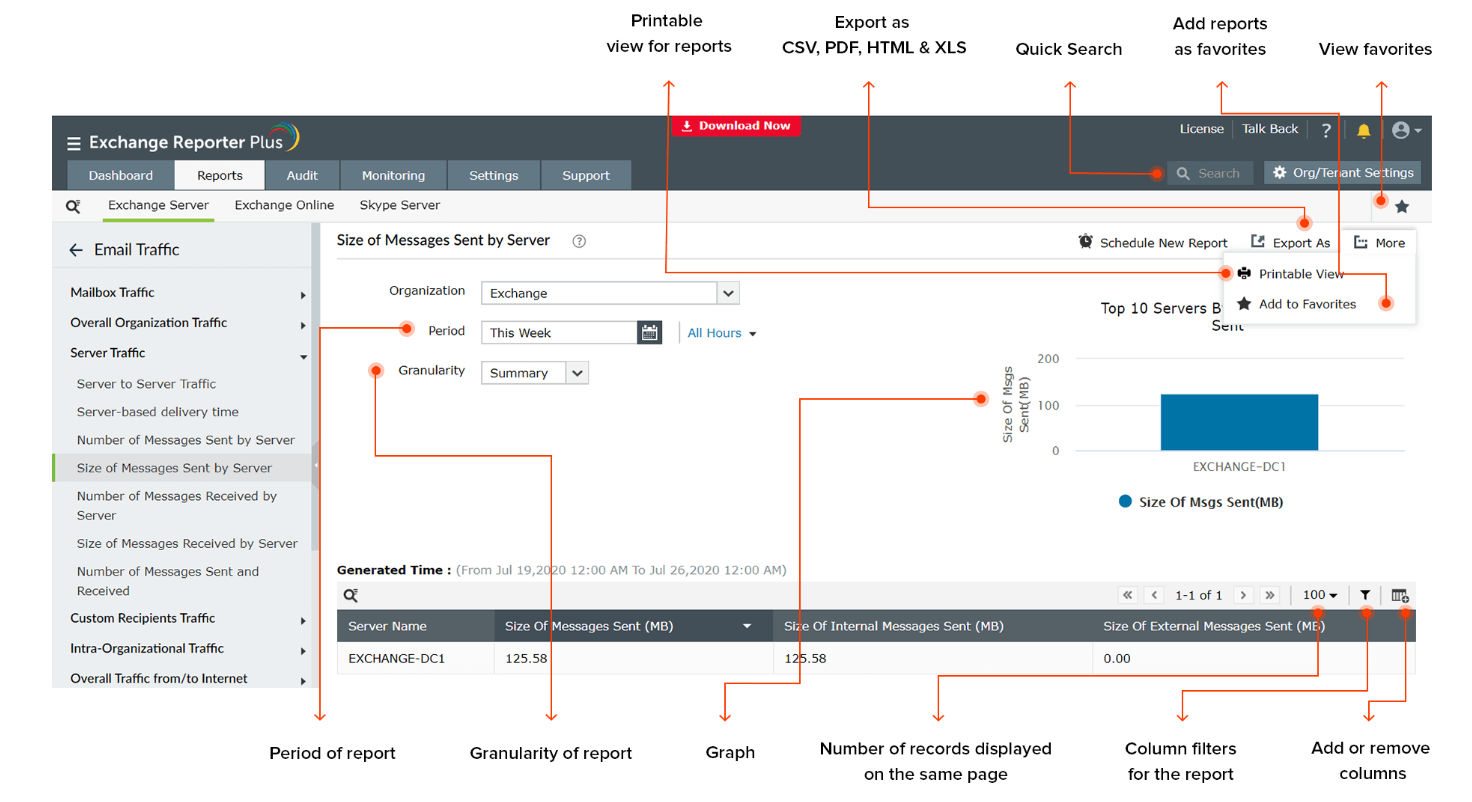
The reports in Exchange Reporter Plus provide several features to give administrators an enhanced experience while handling data.
- View reports in your desired time zone by setting the Default Time Zone.
- Export reports to CSV, PDF, XLS, XLSX, and HTML formats.
- Print reports.
- Add a report as a favorite and access it easily by clicking on the star icon in the top-right corner.
- View reports for selected date or period.
- View traffic details on a Summary, Daily, or Hourly basis.
- Leverage graphs and dashboards that highlight important aspects for most of the reports.
- Search for a specific report using the Quick Search.
- Include or exclude report columns using the Add/Remove Columns option.
- Select the number of records that should be shown on a single page.
- Use the filter option to customize the reported entities.
 ADManager Plus
 ADAudit Plus
 ADSelfService Plus
 M365 Manager Plus