# Installation and Startup
NetFlow Analyzer is available for Windows and Linux platforms. For information on supported versions and other specifications, look up [System Requirements](https://www.manageengine.com/products/netflow/help/system-requirements-netflow.html).
## Installing NetFlow Analyzer
**Windows:**
1. Download [NetFlow Analyzer for Windows](http://www.netflowanalyzer.com/download.html)
2. Double-click it to start installation. Follow the instructions as they appear on screen to successfully install NetFlow Analyzer on to your machine. NetFlow Analyzer supports both, PostgreSQL and MSSQL as database. Select the database and click Next.
**Linux:**
1. Download [NetFlow Analyzer for Linux](http://www.netflowanalyzer.com/download.html)
2. Assign **execute** permission using the command:
`chmod a+x ManageEngine_NetFlowAnalyzer_xxxx.bin`
where `ManageEngine_NetFlowAnalyzer_xxxx` is the name of the downloaded BIN file.
3. Execute the following command:
`sudo ./ManageEngine_NetFlowAnalyzer_xxxx.bin`
4. Follow the instructions as they appear on the screen to successfully install NetFlow Analyzer on to your machine.
## Installing Linux using Console mode/ Silent mode
This is a quick walk-through of the console mode installation of NetFlow Analyzer on a Linux box - an easy thing to do if you are working on a Windows box and want to install on a remote Linux system.
Step 1: Execute the binary with administrator privileges (sudo) and **-i console** option.
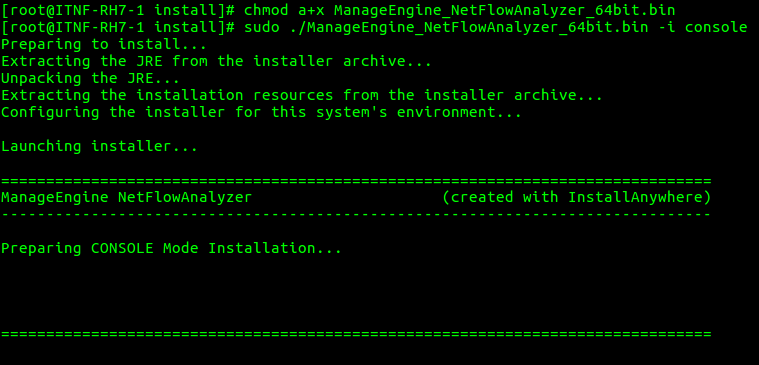
Step 2: Go through the license agreement and enter 'Y' to proceed. You can register for technical support by providing the required details. (Name, E-mail ID, Phone, Company Name)
Step 3: Select the location
Step 4: Choose the installation directory
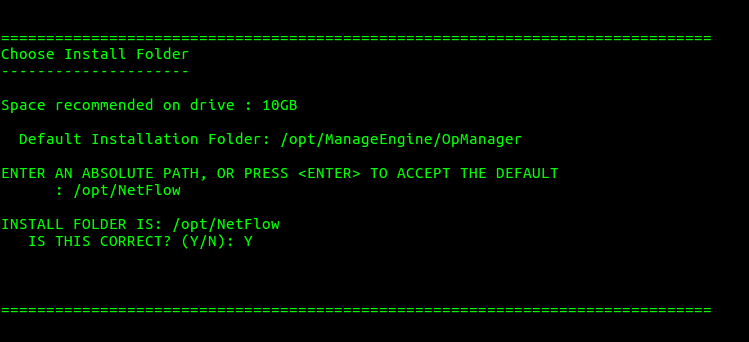
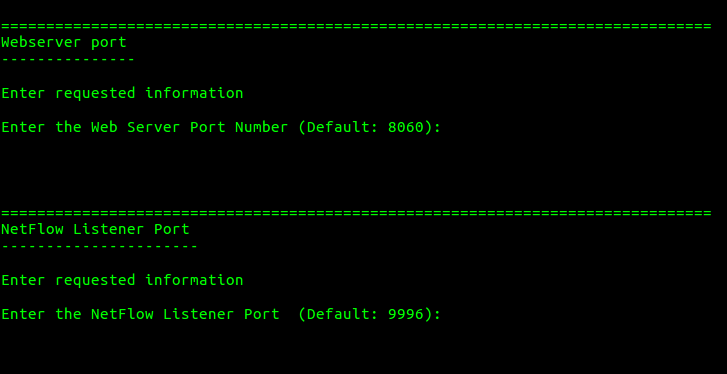
Step 5: Configure the Webserver and Listener Ports.
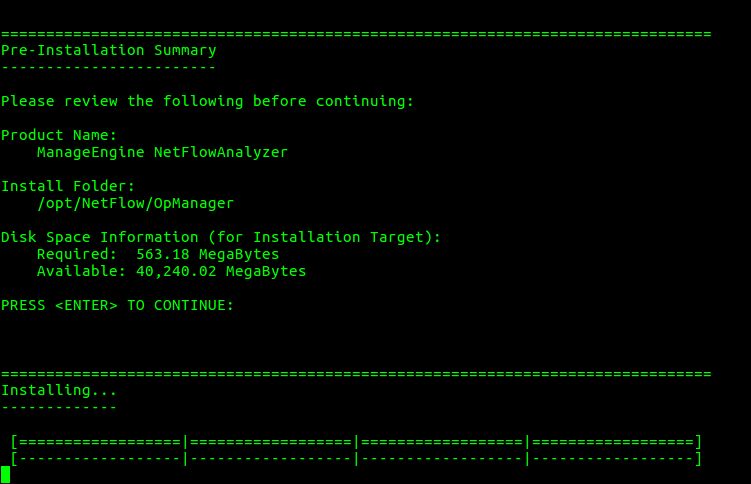
Step 6: Verify the installation details and press 'Enter' to complete the installation.
| | |
|---|---|
|  | During installation if you get an error message stating that the temp folder does not have enough space, try executing this command with the -is:tempdir option, where is the absolute path of an existing directory.
`sudo ./ManageEngine_NetFlowAnalyzer_xxxx.bin -is:tempdir`
For non-x11 machines, use the following command:
`sudo ./ManageEngine_NetFlowAnalyzer_xxxx.bin -i console` |
Once you have successfully installed NetFlow Analyzer, start the NetFlow Analyzer server by following the steps below.
## Installing NetFlow Analyzer on Linux with MSSQL database
From version 12.8.330, MSSQL database is supported for Linux setups. As of now MSSQL database cannot be configured directly from the installation wizard for NetFlow Analyzer's Linux installation. Instead, perform a default installation with PgSQL database in Linux environment and then migrate the database to MSSQL.
**Note:** MSSQL database is not included with the setup for Linux installations.
### Steps to migrate to MSSQL DB
After installing, follow the below steps before starting the product, to migrate from PgSQL to MSSQL database in Linux installations.
1. **Step 1:** In terminal, go to `/bin` directory and execute the **DBConfiguration.sh** file.
2. **Step 2:** Provide the SQL server details with the DB name.
3. **Step 3:** Leave the **Migrate data from existing database** option **unchecked.**
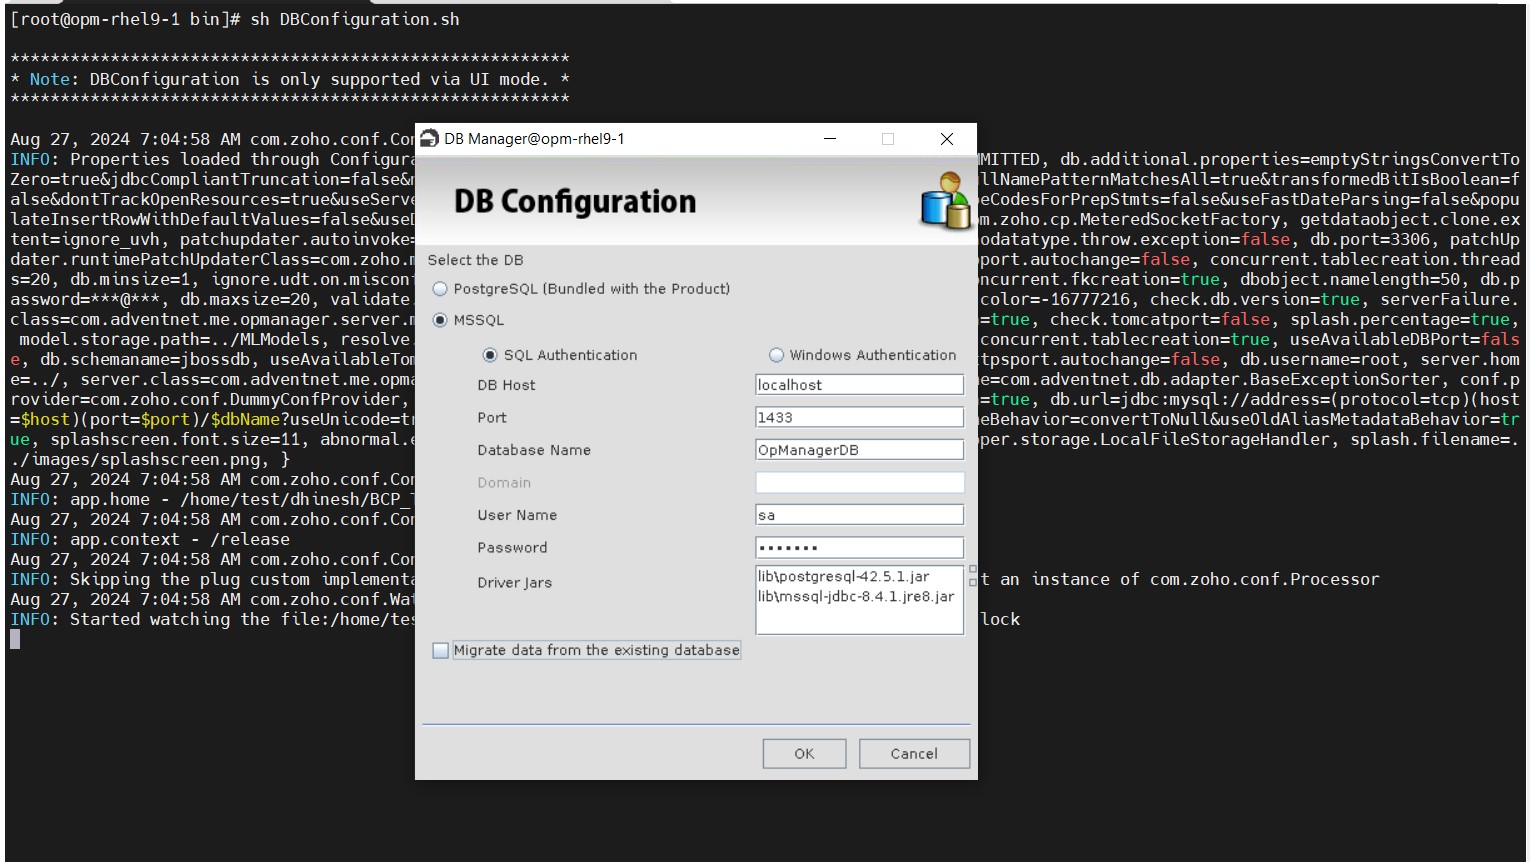
4. **Step 4:** Then, click OK to start migration.
A success message will be displayed in a dialog box after the migration is successful.
**Note:**
- The DBConfiguration.sh file can be executed either directly from the Linux machine or from X11 enabled environments.
- Executing DBConfiguration.sh from the console mode is currently not supported.
- For BCP utility details, please refer [this link.](https://www.manageengine.com/products/netflow/help/system-requirements-netflow.html#bcp)
## Installing Netflow Analyzer with Kingbase DB
...
## Starting NetFlow Analyzer
**Windows:**
Click on **Start > Services > start the ManageEngine NetFlow Analyzer** to start the service.
**Linux:**
Navigate to the `/bin` directory and execute the **./StartOpManagerServer.sh** file.
When the server is started, a command prompt window opens up showing startup information on several modules of NetFlow Analyzer. Once all the modules have been successfully created, the following message is displayed:
Server started.
Please connect your client at http://localhost:8060
The default port is 8060 and it will be replaced by the port you have specified as the web server port during installation.
## Starting as Service
**Windows:**
If you have chosen the **Start as Service** option during installation, NetFlow Analyzer will run as a service on Windows.
**Linux:**
1. Login as root user.
2. Navigate to the `bin` directory.
3. Execute the linkAsService.sh file
4. Then execute the command **systemctl start NetFlow Analyzer service**
This starts NetFlow Analyzer as a service on Linux.