How to Download & Boot Windows 11 using ISO File?
The Windows 11 ISO file is required to create bootable media that can be used to boot target computers into Windows 11. Windows 11 offers several advantages such as Android application support, faster resets, improved security, and enhanced performance.
It is recommended to upgrade to Windows 11, and the following sections explain how to download the Windows 11 ISO and boot machines into Windows 11.
Follow the steps below to download the Windows 11 ISO:
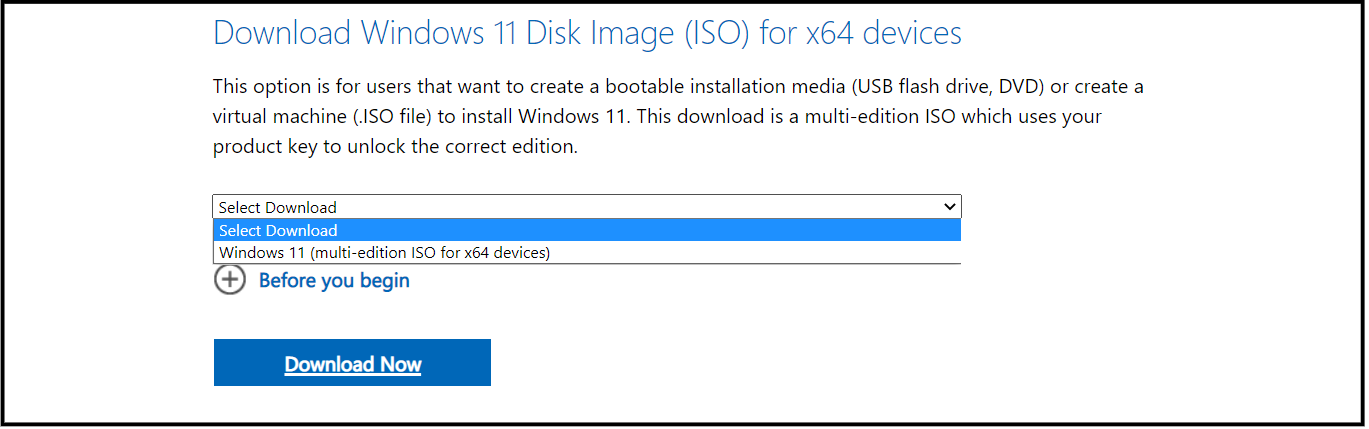
- Go to the Download Windows 11 Disk Image (ISO) for x64 devices section on the Microsoft website.
- Select Windows 11 (multi-edition ISO for x64 devices) and click Download Now.
- After validation, you will be prompted to select the product language. Choose the desired language and click Confirm.
- Click the 64-bit Download button to complete the download.


After downloading, you can use the ISO file to install Windows 11 on target computers. However, this installation method cannot be customized for specific organizational needs.
OS Deployer enables customization of the Windows 11 installation — including application setup, naming conventions, user profiles, and more — and supports zero-touch deployment to multiple systems simultaneously.
The first step is to image a Windows 11 machine with the required applications and configurations to create a Windows 11 ISO image. This can be done using either online or offline imaging methods.
The image will be stored in the image repository, from where target computers can retrieve it for deployment. You can deploy the image directly or schedule it using a deployment task.
The next step is to create a Windows 11 bootable ISO file with the WinPE tool and necessary network and hard disk drivers. The bootable media can then be used to deploy Windows 11 on target computers.
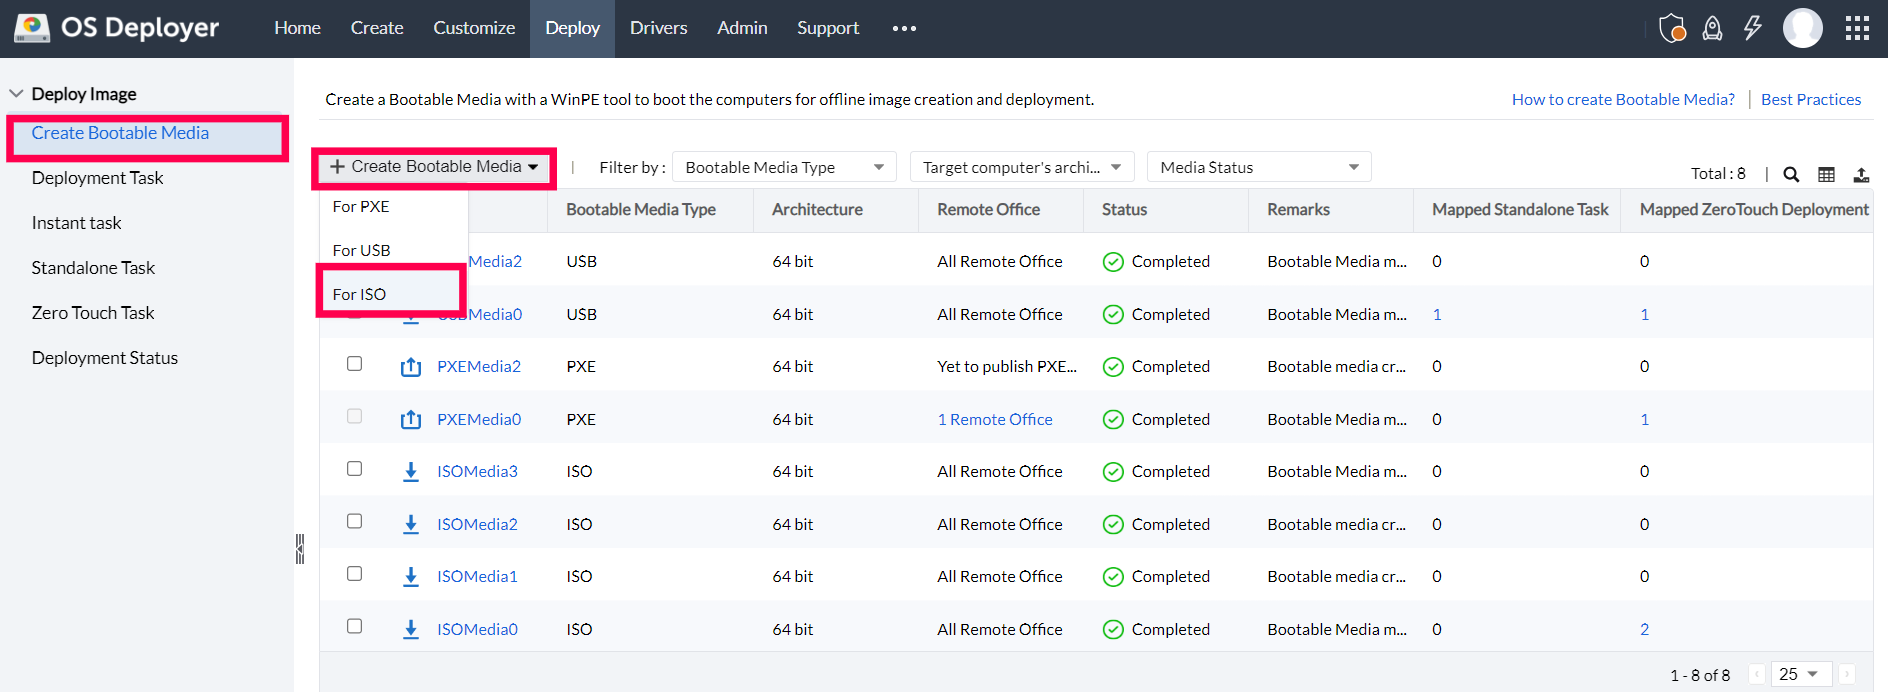
- Under the Deploy tab, click Create Bootable Media under the Deploy Image section. Then choose the For ISO option.
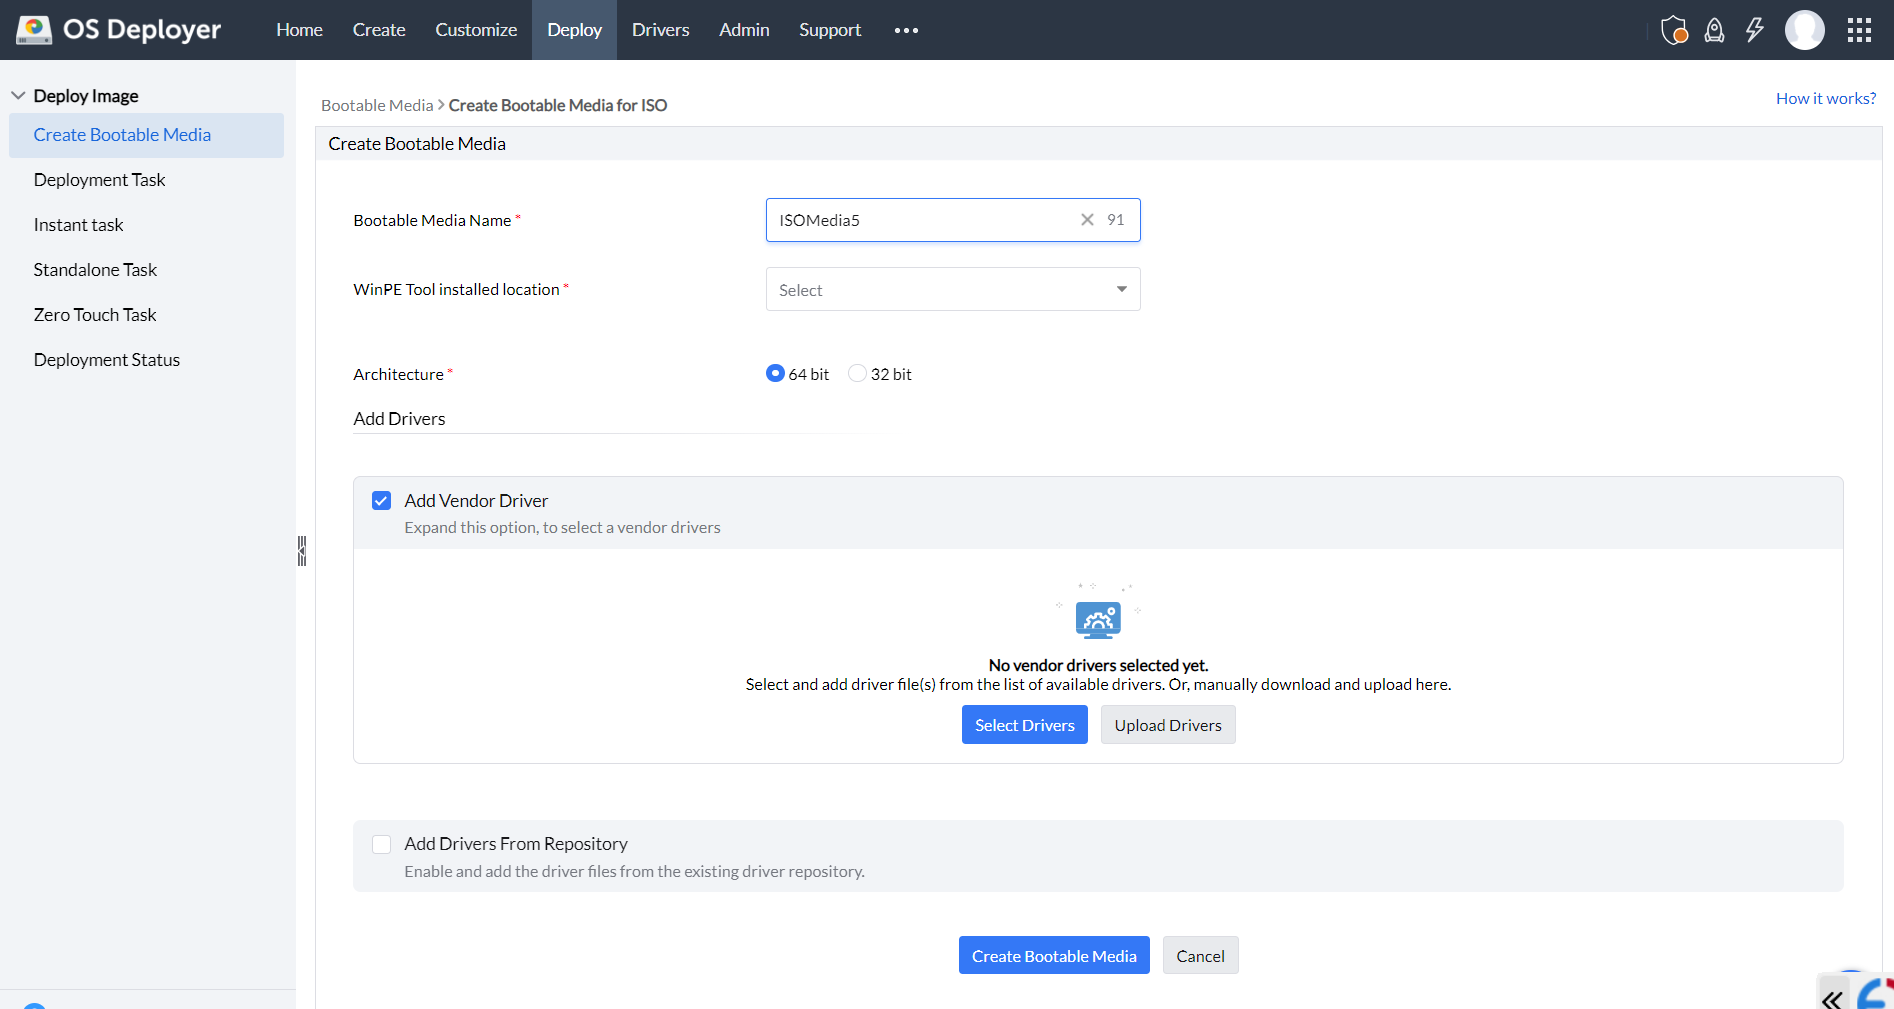
- Enter a name for the bootable media.
- Select the WinPE tool installation location. If it’s not installed, download and install it manually or automatically.
- Choose the architecture of the target computers (32-bit or 64-bit).
- Add required drivers from vendor sources or from the existing driver repository.
- To add vendor drivers:
- Option 1: Selecting vendor drivers (recommended)
- Click Select drivers to view and download available vendor drivers.
- Drivers will be automatically fetched from vendor websites and added to the media.
- Option 2: Uploading vendor drivers
- If the server does not have internet access, use Upload drivers to add offline driver files.
- Official driver links are provided for Dell, Lenovo, and HP.
- Download and upload the drivers manually to include them in the media.
- Option 1: Selecting vendor drivers (recommended)
- To add drivers from the repository:
- Enable Add drivers from repository → Select network & hard disk drivers.
- Search for required drivers by hardware ID, storage type, or manufacturer.
- Select the drivers and click Save.
- Click Create Bootable Media to finalize the process.
Once the bootable media is created, download the Windows 11 ISO by navigating to Action → Download Media. The ISO file can then be burned or copied to a CD, DVD, or USB using third-party software.
The final step is to boot target computers using the downloaded Windows 11 ISO file.
- Insert the CD/DVD containing the ISO into the target computer.
- Open the Boot Order menu and select the CD/DVD drive from either LEGACY BOOT or UEFI BOOT.
- Choose the appropriate boot option based on your image configuration.
- For virtual machines, upload the ISO directly to perform imaging and deployment.
 Yes No