Additional Fields
Use Additional Fields in Password Manager Pro to attach any extra information about keys and certificates stored in the repository. There are four types of fields to create: Character, Numeric, Date and Email. Once an additional field is created, the default value assigned to it will be applied to all entries in SSH Keys and Certificates tabs and will be visible to all users. Therefore, it is ideal to use additional fields for assigning common attributes such as organization name, or email address. Also, the Column Chooser icon helps you organize columns and additional fields in SSH Keys and Certificates tab views, and in Reports and Dashboard tab views.
Below are the operations you can perform on additional fields:
- Creating an additional field
- Displaying an additional field
- Editing an additional field
- Resetting an additional field
- How to show/hide fields using the column chooser?
1. Creating an Additional Field
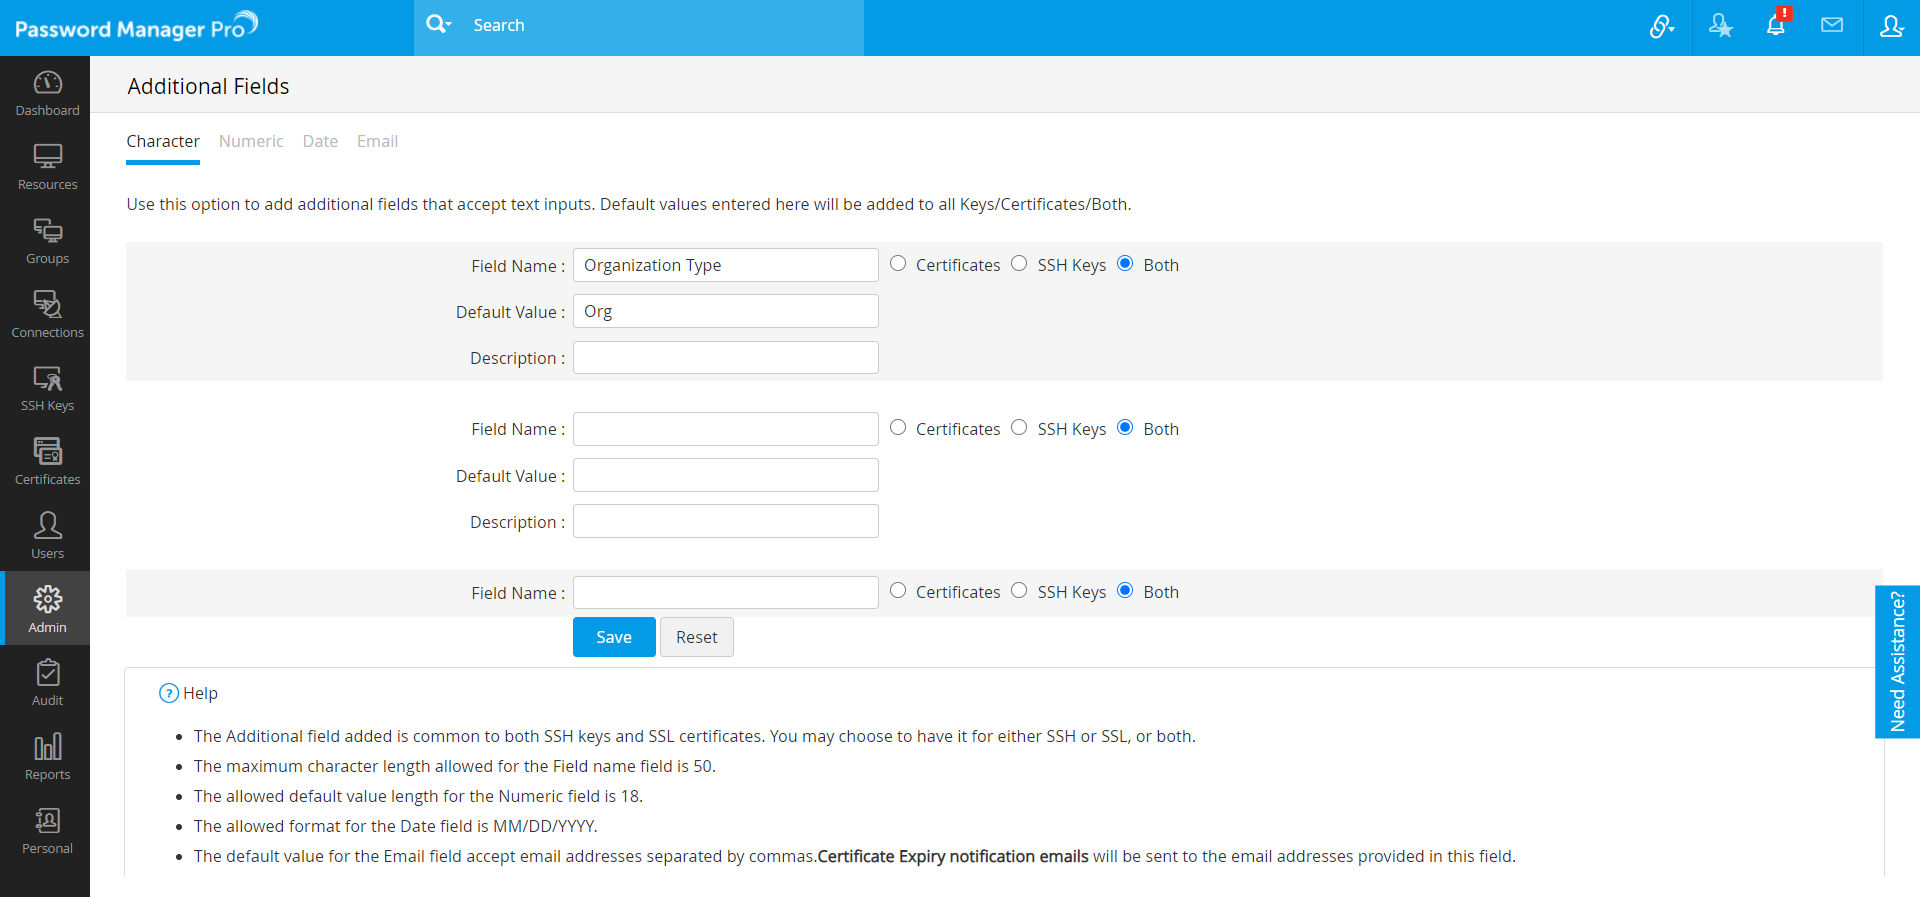
Follow the below steps to create additional fields that will apply to both keys and certificates tabs.
- Navigate to Admin >> SSH/SSL Config >> Additional Fields.
- Create a new additional field for any of the below mentioned field types:
- Character: To store text inputs
- Numeric: To store numerical inputs
- Date: To store date and time inputs
- Email: To store relevant email addresses
- Add the Field Name, Default Value, Description. Select SSH Keys or Certificates tab to add the additional field to either of the tabs. To add the field to both tabs, select Both and click Save.
- To view the newly created additional field under the SSH Keys or the Certificates tab, click the column chooser icon (
 ) from the top bar.
Note: Certificate Expiry Notification emails are sent to the email addresses specified in additional fields of the type Email. These notification emails will be customized according to the format configured for notifications under Admin >> SSH/SSL Config >> Notification Settings and Admin >> SSH/SSL Config >> Schedules.
2. Displaying an Additional Field
When you create an additional field of the type Character/Numeric/Date/Email, the field is added to both SSH keys and Certificates tabs immediately. Follow the below steps to display an additional field:
- Navigate to SSH Keys or Certificates tab.
- Click the column chooser icon (
 ) from the top bar.
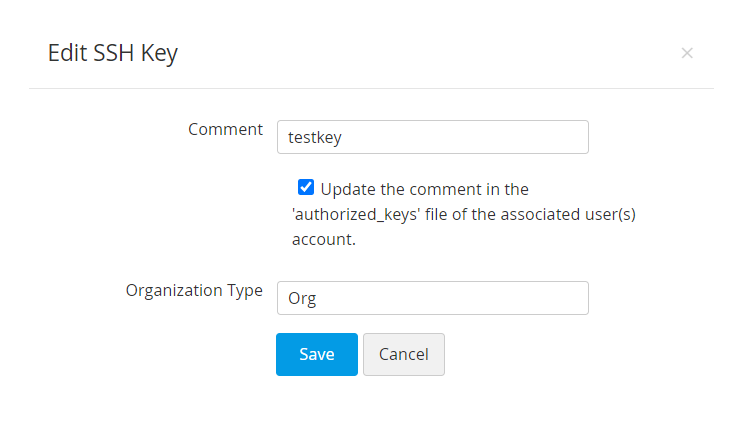
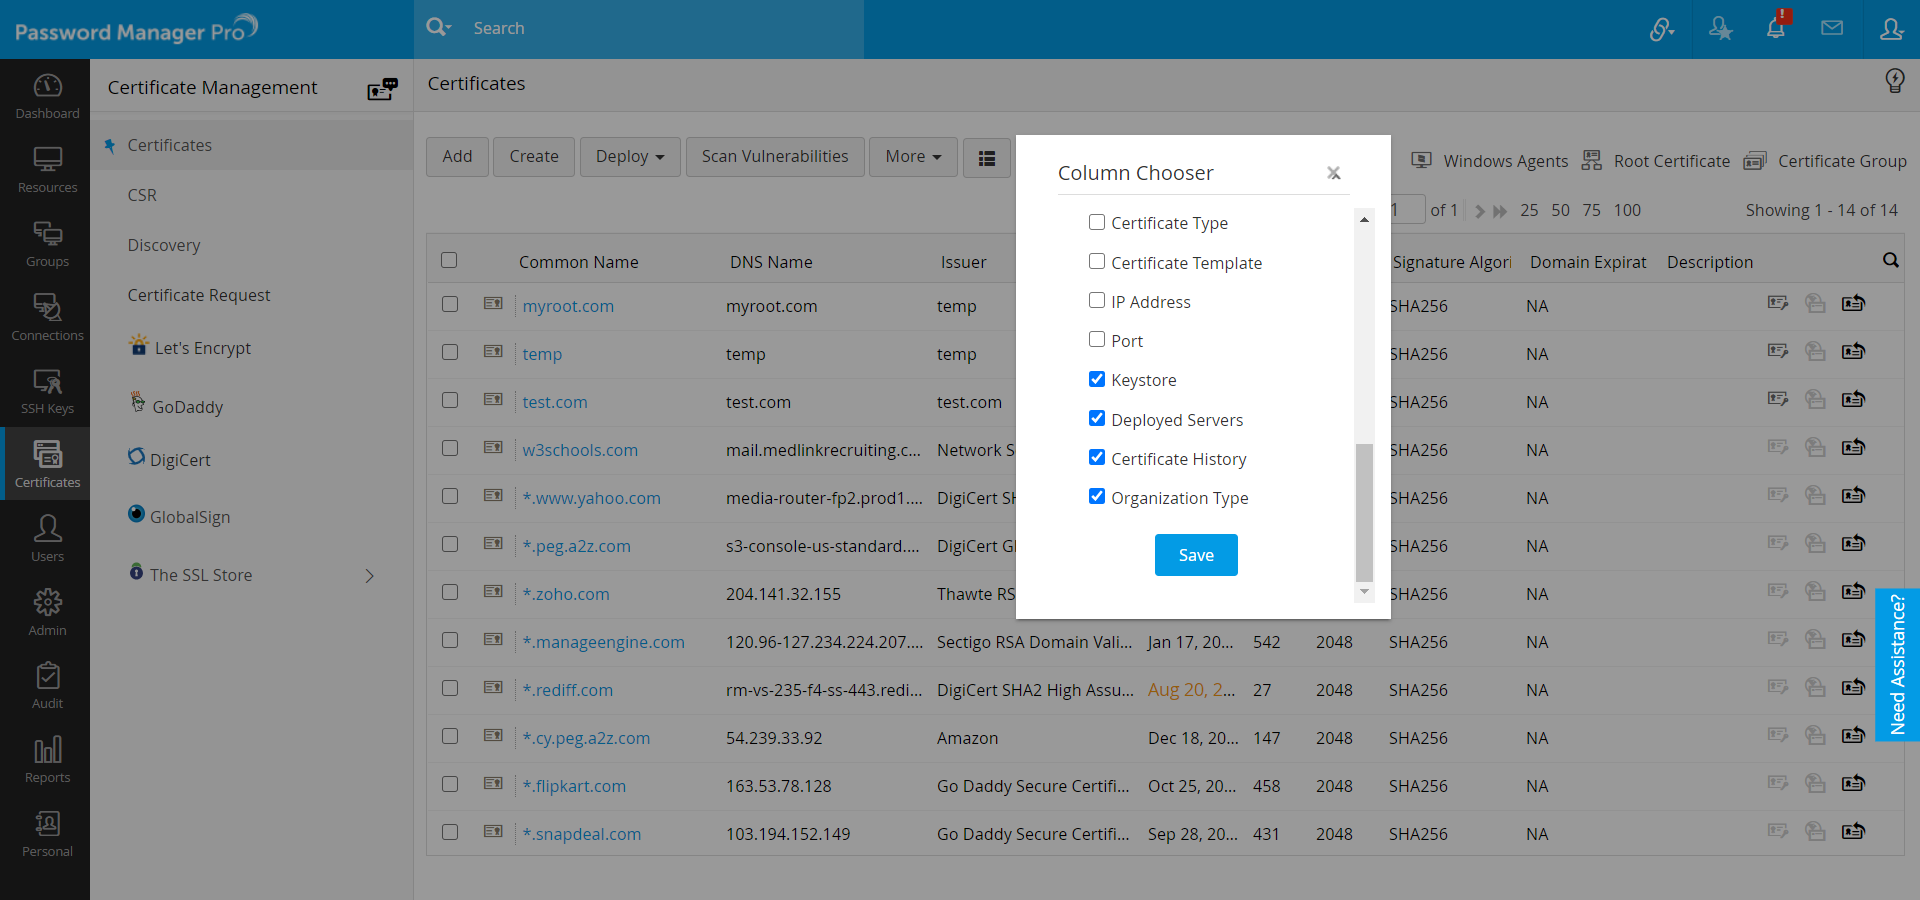
 - In the column chooser pop-up, select the checkbox beside the additional field you added and click Save. Now, the additional field and the default value added during its creation will be displayed among the other fields. The same field value will be applied to all entries in the Keys and Certificate repository but the value can be edited and customized using the Edit option.
3. Editing an Additional Field
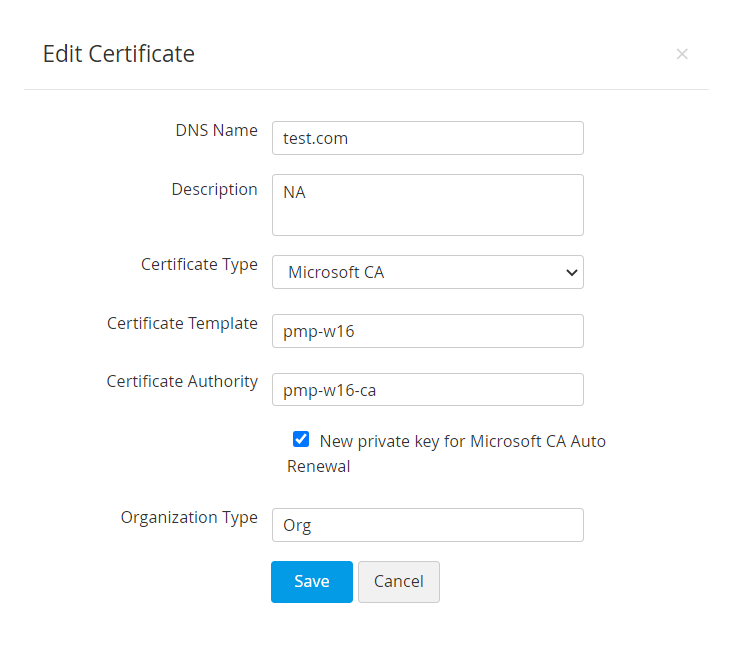
Once a default value for the additional field is added, the same value will be applied to all the certificate and key entries in the Certificates and SSH Keys tabs respectively. To change the field value for a particular certificate, follow the below steps:
- Navigate to SSH Keys or Certificates tab.
- Select a particular certificate and click Edit from the More drop-down in the top bar.
- In the Edit Certificate window, edit the value and click Save. This value will be updated for the selected certificate alone.
- To edit additional fields in bulk for a number of keys/certificates at a time, select all required keys or certificates and click More >> Edit. In the Edit window, add new values for the additional fields. The same values will be added for all the selected keys/certificates.
- To edit additional fields for certificate groups, go to Certificates >> Certificate Group. Select the required groups and click Edit Additional Field.
4. Resetting an Additional Field
Follow the below steps to reset the additional fields and remove any previously added ones:
- Navigate to Admin >> SSH/SSL Config >> Additional Fields.
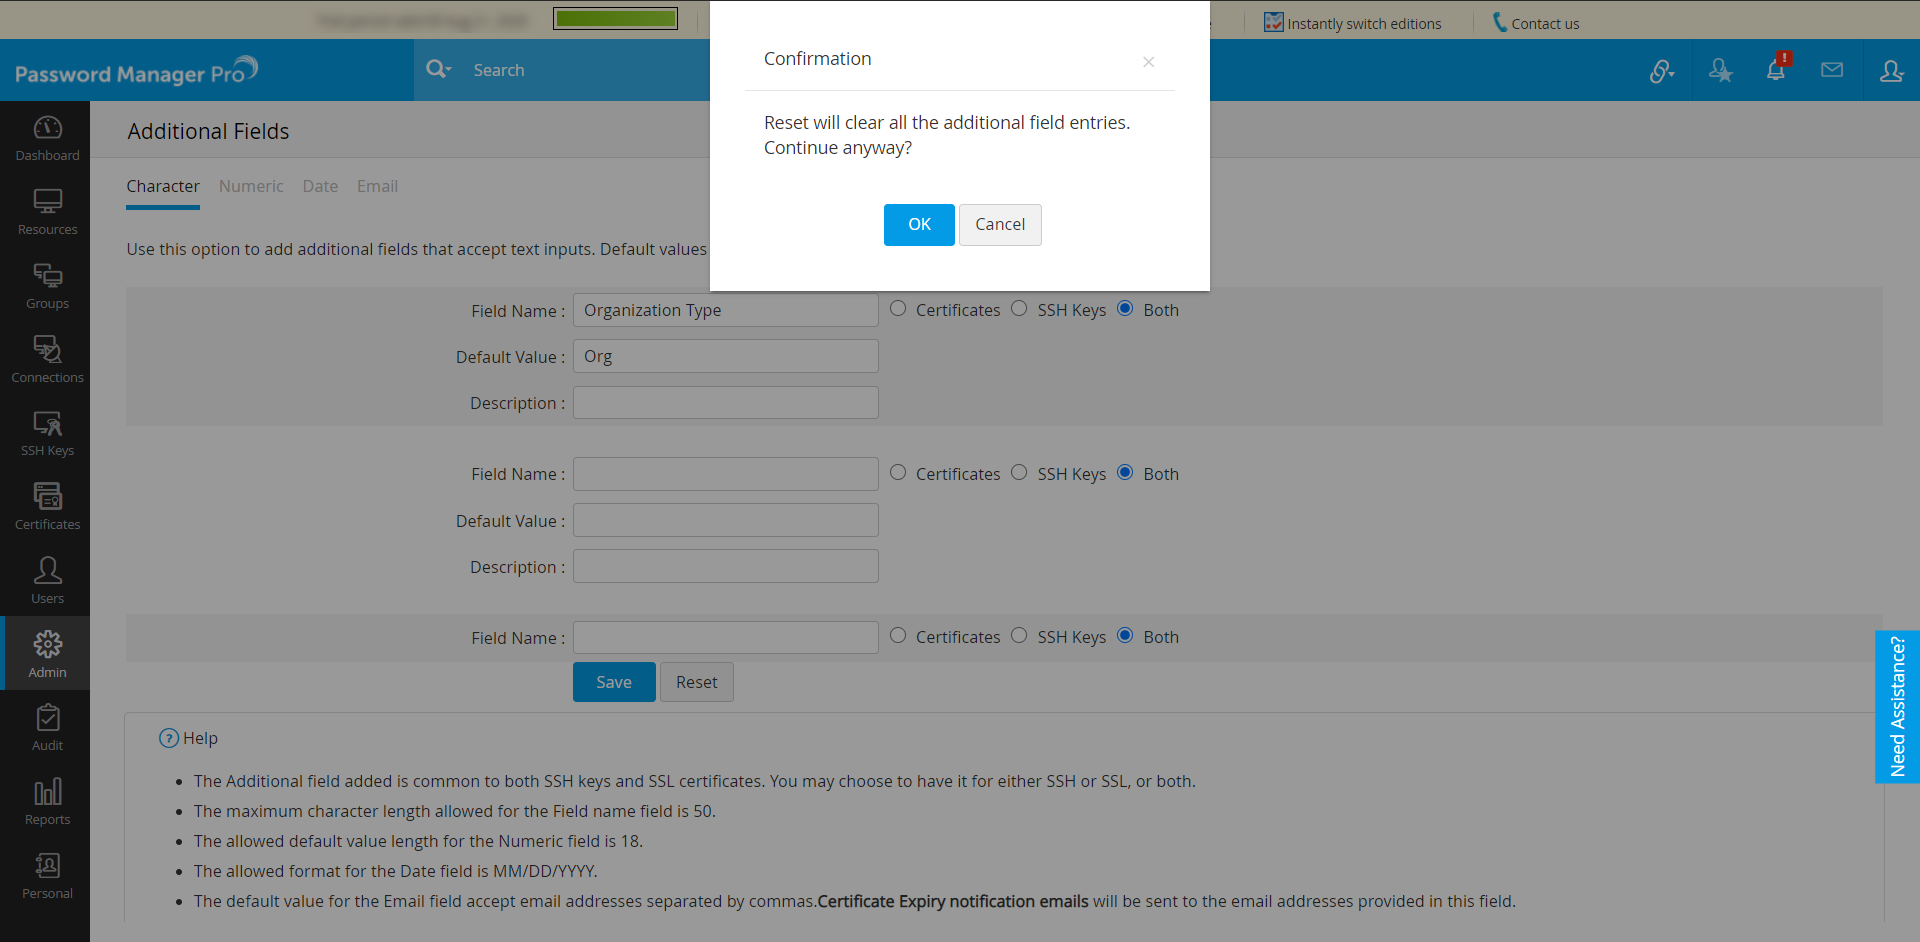
- Click the Reset option available at the bottom of the page. In the pop-up that opens, confirm the reset by clicking OK. This process will delete the additional fields from both the SSH Keys and SSL Certificates tab.
- To delete only selected additional fields, remove the field name, default value and description manually and click Save.
5. How to Show/Hide Fields using the Column Chooser?
Using the Column Chooser icon (![]() ), organize the columns and choose to show or hide both the default and additional fields as per your requirement. The Column Chooser icon helps declutter the columns in the following tabs: SSH Keys, Certificates, Reports and Dashboard.
), organize the columns and choose to show or hide both the default and additional fields as per your requirement. The Column Chooser icon helps declutter the columns in the following tabs: SSH Keys, Certificates, Reports and Dashboard.
In the Reports tab, the Column Chooser is available for selected reports, namely the following:
- SSL Certificates Report
- SHA1 Certificate Report
- Let's Encrypt Certificates Report
- SSL Vulnerability Report
- PrivateKey Report
- Certificate Renewal
In the Dashboard tab, the Column Chooser is available for the following views in the Keys Dashboard: SSH Keys and SSL Certificates.
Note: Column chooser customization is unique to an individual user, therefore the changes in arrangement or visibility of columns made by one user will not be applied to another user.
Follow the below steps to show or hide any column from the tab view:
- Click the Column Chooser icon to display all the available column names.
- Unselect the checkboxes beside the column names that you want to hide from the tab view. You can choose to hide even the default columns in this way.
- Apart from the show/hide option, you can change the sort order of the columns. To do so, simply click the column and drag and drop where required.
- All the additional fields created for SSH Keys and SSL Certificates will also be listed under Admin >> Settings >> Privacy Settings, along with the default column values. Select the checkboxes beside the column/field names to hide or mask the corresponding data from the exported reports.
