Managing Resource Types
Password Manager Pro supports certain resource types by default. In addition, you can add as many custom resource types as you require. Manage the resource types in Password Manager Pro from both the Resources tab and the Admin console. Add, edit, delete and customize the resource types based on your requirements. You can also add custom icons for the resource types. The various categories of resource types supported by Password Manager Pro and the operations that can be performed on them are discussed in this document.
Note: You cannot delete the default resource types, but can edit their attributes to fit your requirements.
- Resource Type Categories
- Adding a Resource Type
- Editing a Resource Type
- Bulk Editing Resource Types
- Enabling Resource Filters
- Deleting a Resource Type
1. Resource Type Categories
Operating Systems
- HPUX
- Windows
- Windows Domain
- Linux
- Mac
- Solaris
- HP Unix
- IBM Aix
Cisco Devices
- Cisco Management Integration Center
- Cisco Catalyst
- Cisco SG300
- Cisco UCS
- Cisco Wireless LAN Controller
- Cisco IOS
- Cisco Pix
- Cisco Cat OS
- Cisco Nexus OS
Database Servers
- MS SQL
- MySQL
- Sybase ASE
- Oracle DB server
- PostgreSQL
Note: If you need to manage a new database resource with customized attributes (custom driver JAR and connection properties), Password Manager Pro lets you create a new resource type with the customized attributes accompanied by adding the relevant database resources.
For steps on how to create, configure, and manage custom database resource types and resources, click here.
Network Devices
- ASA Firewall
- Audiocode
- Brocade
- Brocade VDX
- Brocade SAN Switch
- Checkpoint Firewall
- Extreme Networks
- F5
- Fortinet
- Fortigate Firewall
- Fortimail
- Fujitsu Switch
- Gigamon
- H3C
- HMC
- HP Printer
- HP Onboard Administrator
- HP Virtual Connect
- Huawei
- HP Procurve
- Juniper
- Juniper Netscreen ScreenOS
- HP iLO
- Mikrotik
- Opengear
- Orange Firewall
- Palo Alto Networks
- Pfsense
- Routerboard
- Ruijie
- Sonicwall
- TPLINK
- VMWare VCenter
- Citrix Netscaler SDX
- Citrix Netscaler VPX
- Magento
- Netapp 7Mode
- Netapp CDot
File Stores
- File Store
- Key Store
- License Store
Cloud Services
- WebLogic
- AWS IAM
- Google apps
- Rackspace
- Microsoft Azure
- Salesforce
- Azure App
Others
- Website accounts
- LDAP Server
- VMWare ESXi
- IBM AS400
- Oracle XSCF
- Oracle ALOM
- Oracle ILOM
- Aruba ATP
- AVAYA-GW
- FortiManager-FortiAnalyzer
- Nortel
2. Adding a Resource Type
- Navigate to Admin >> Customization >> Resource Types or Resources >> Resource types.
- In the Resource Types window that pops up, click the "Add" option to open up the Add Resource Type pop-up box.
- Here, enter a name for the new resource type.
- Enter a name for the new resource type. Click Browse to choose your own icon for the new resource type you are adding. If you do not add a custom icon, then a default icon will be set by Password Manager Pro.
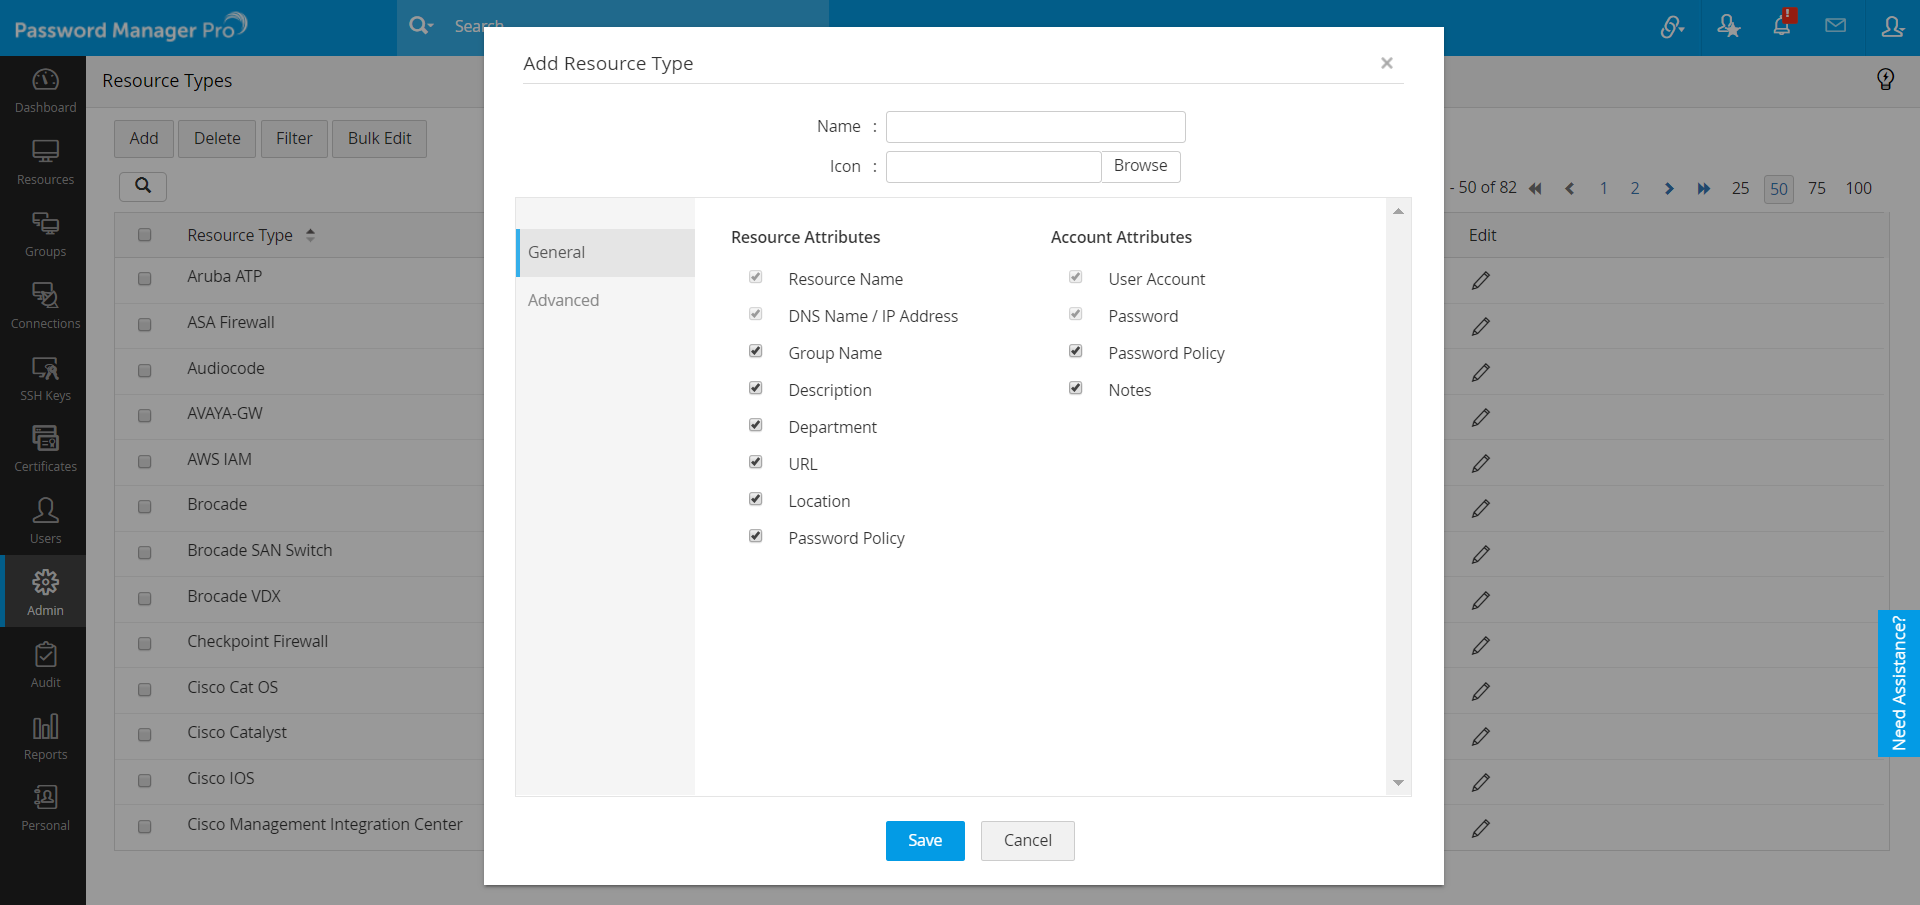
- Use the General tab to choose Resource and Account attributes based on the requirements of your new resource type.
- Use the Advanced tab to choose the type of password reset method you want to set for your resource type. You have the following options to choose from:
- Existing Resource Type
- Password Reset Plugin
- SSH Command Sets
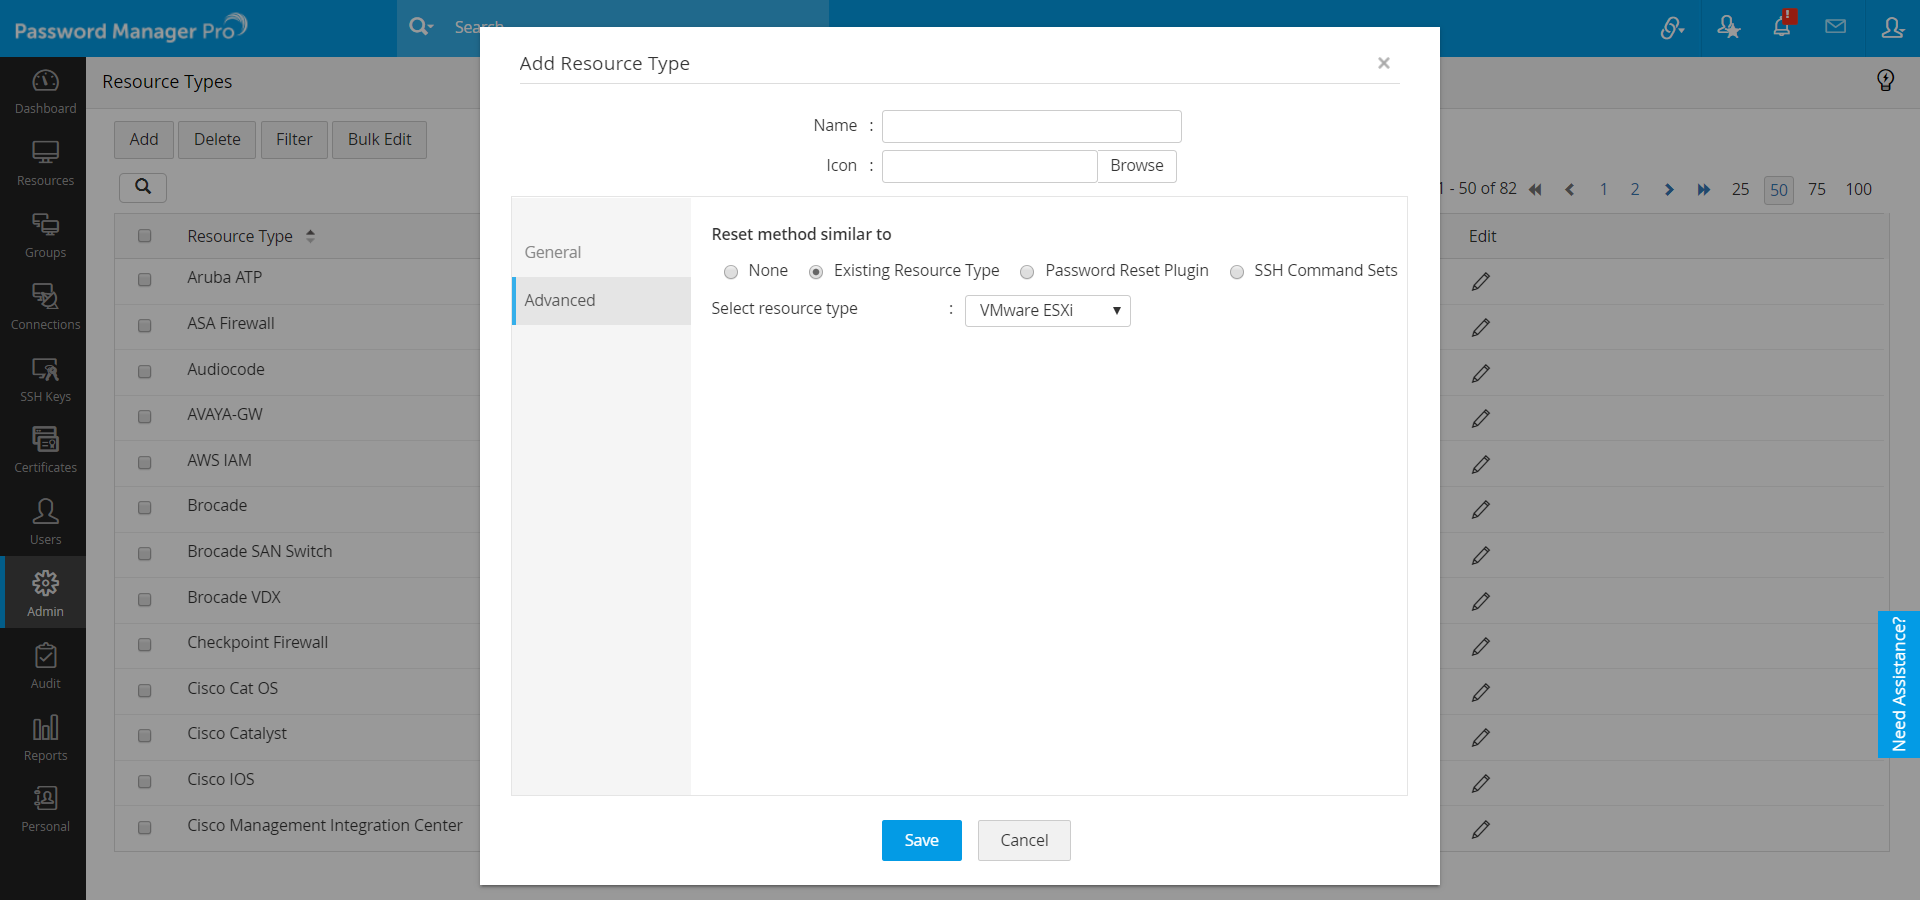
- You may choose the Existing Resource Type option if the resource type you are adding is similar to an existing resource type, such as a variation of a network device like Cisco or HP. This will enable Password Manager Pro to associate similar actions with your custom resource type.
- Furthermore, users have the flexibility to choose any resource type from the database servers category and tailor it according to their needs. You can even create a NoSQL server or other SQL server that supports JDBC with custom database attributes. The customized values will be applied during password reset, password verification, account discovery, and SQL autologon session processes. To learn how to create and configure custom database resource types, click here.
- Choose the Password Reset Plugin option if you have already created a plugin from the Admin console. Click here for more information on the password reset plugins.
- Choose the SSH Command Sets option for network devices that need a custom set of commands to perform password reset. Click here for more information on SSH Command Sets.
- Click Save to apply your changes.
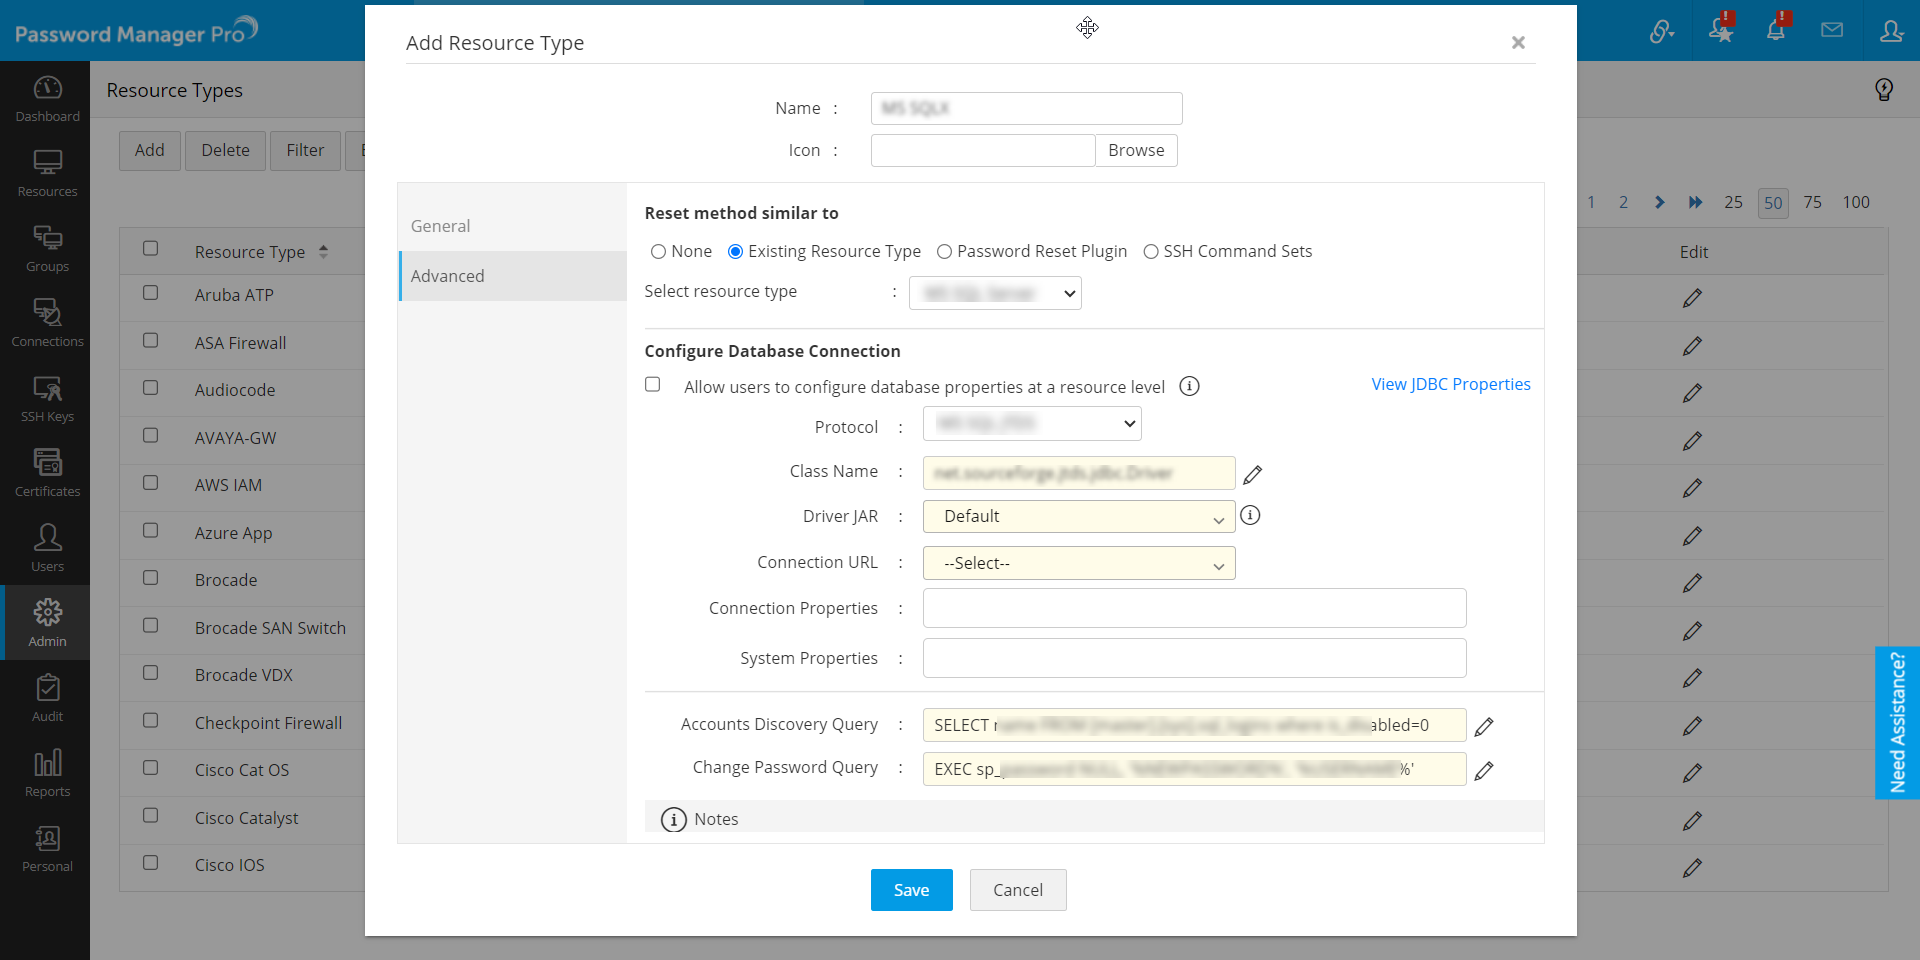
Note: Please exercise caution while validating all the configured values for database connection. Misconfigured values may lead to SQL Injection and other security breaches.
Note: An approval request will be sent to the users (administrators/privileged administrators/custom users) who have the Manage Custom Database Connections privilege for creating the new customized database resource types with custom configuration for connection.
3. Editing a Resource Type
- Navigate to Admin >> Customization >> Resource Types.
- To edit attributes of a single resource type, click the Edit icon against the said resource type.
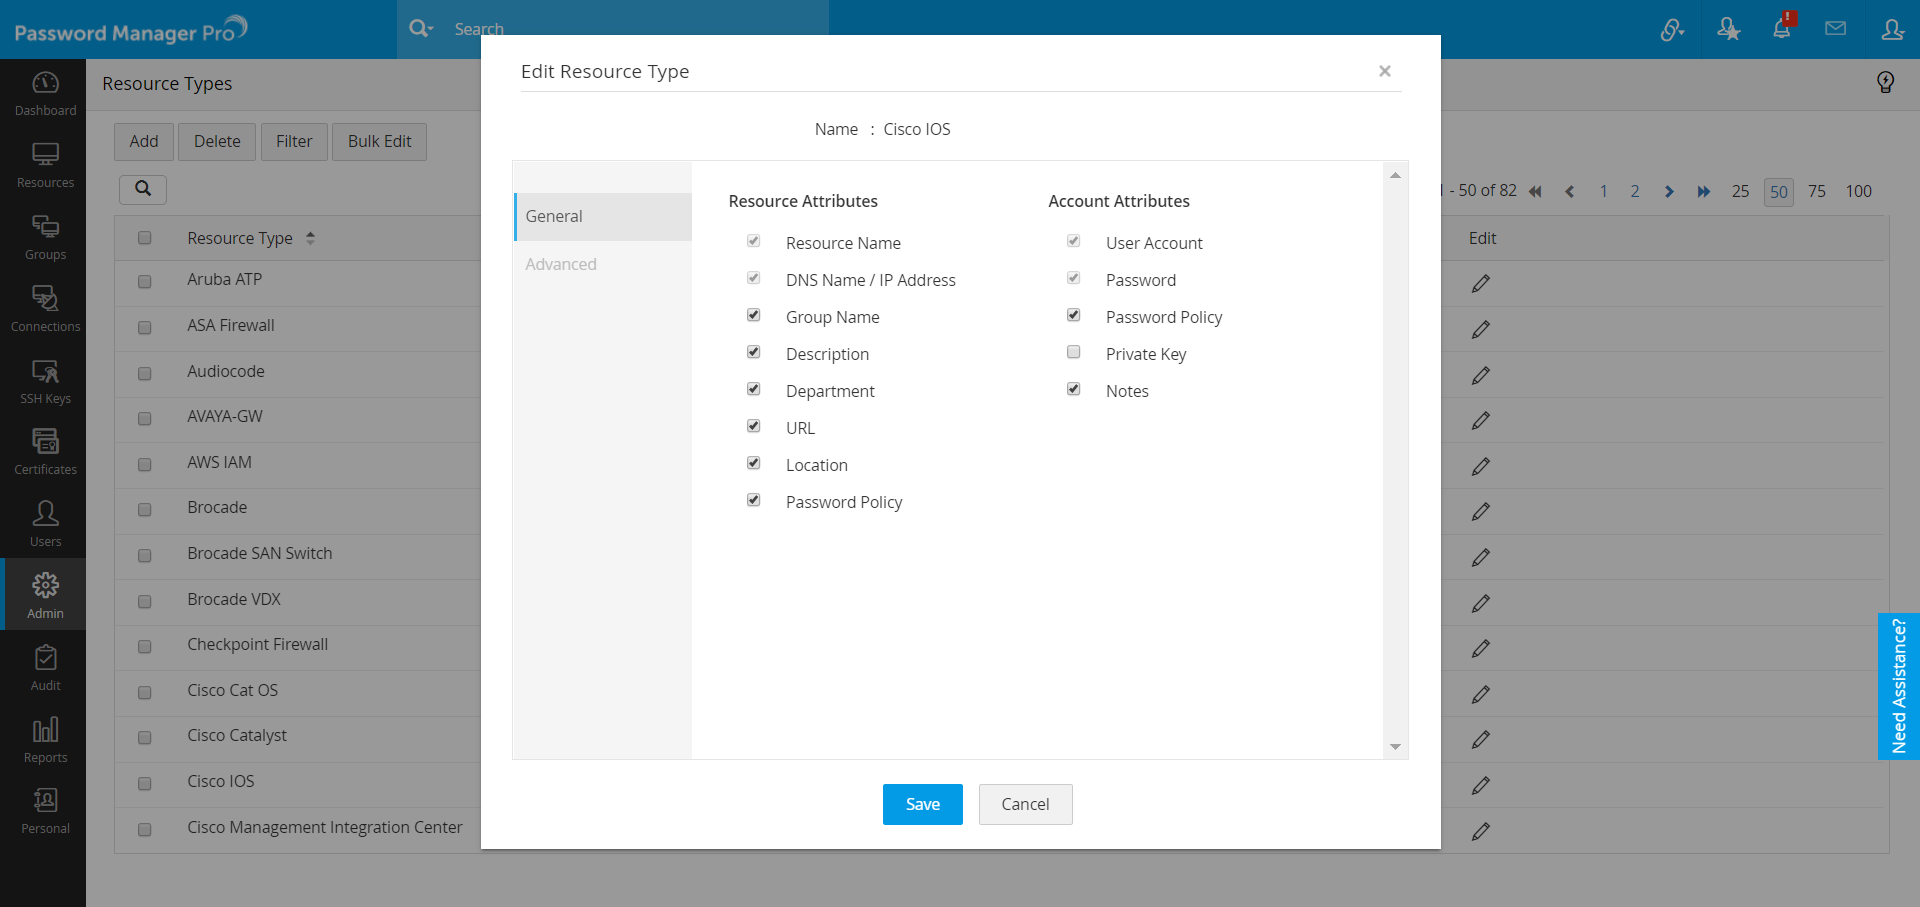
- In the pop-up box, you can select or deselect the basic resource and account attributes as per your requirement. The Advanced tab will be disabled for edits. Click Save to save the changes.
4. Editing Resource Types in Bulk
- Navigate to Admin >> Customization >> Resource Types.
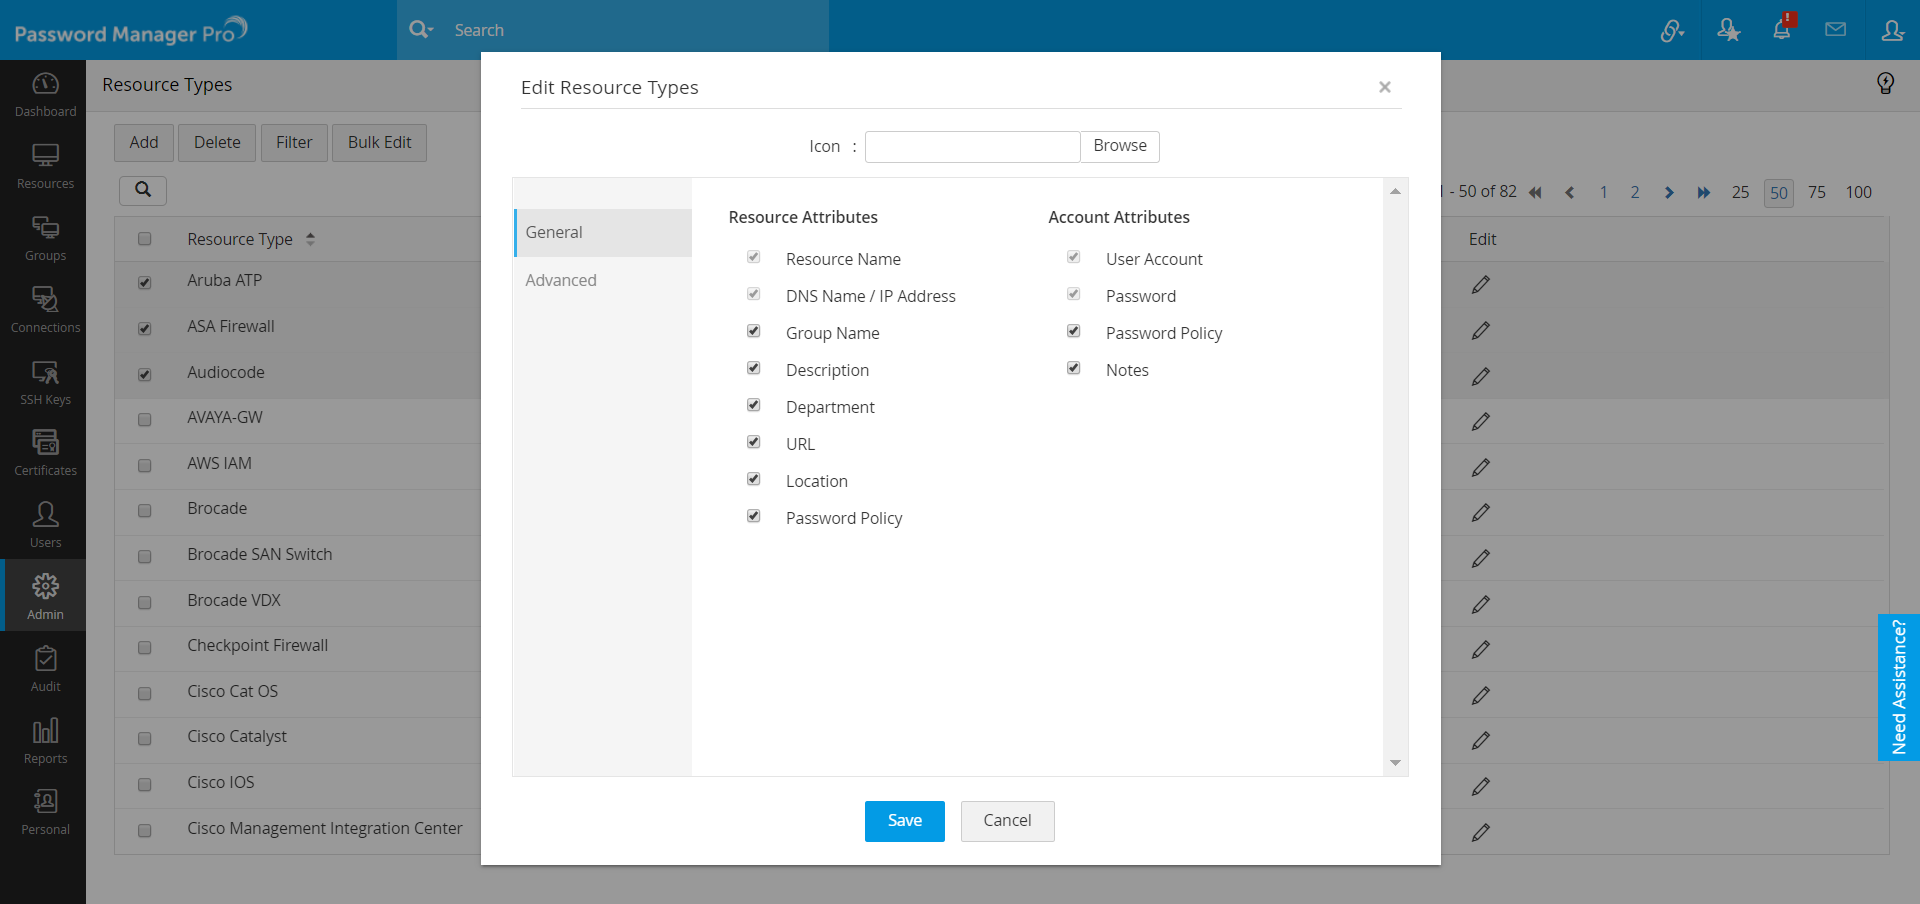
- Select one or more resources and then click Bulk Edit.
- In the pop-up box, you can choose the resource and account attributes based on the resource type by checking the boxes based on your requirement. Here, you can also upload a new icon of your choice for the selected resource types and save the changes.
Note: Default resource types cannot be customized.
5. Enabling Resource Types Filter
You can enable the Filter option to help you filter the various types listed in the Resource Types window and display only the required ones in the Add Resource drop-down list.
- Navigate to Admin >> Customization >> Resource Types.
- To enable resource types filter, click the Filter option.
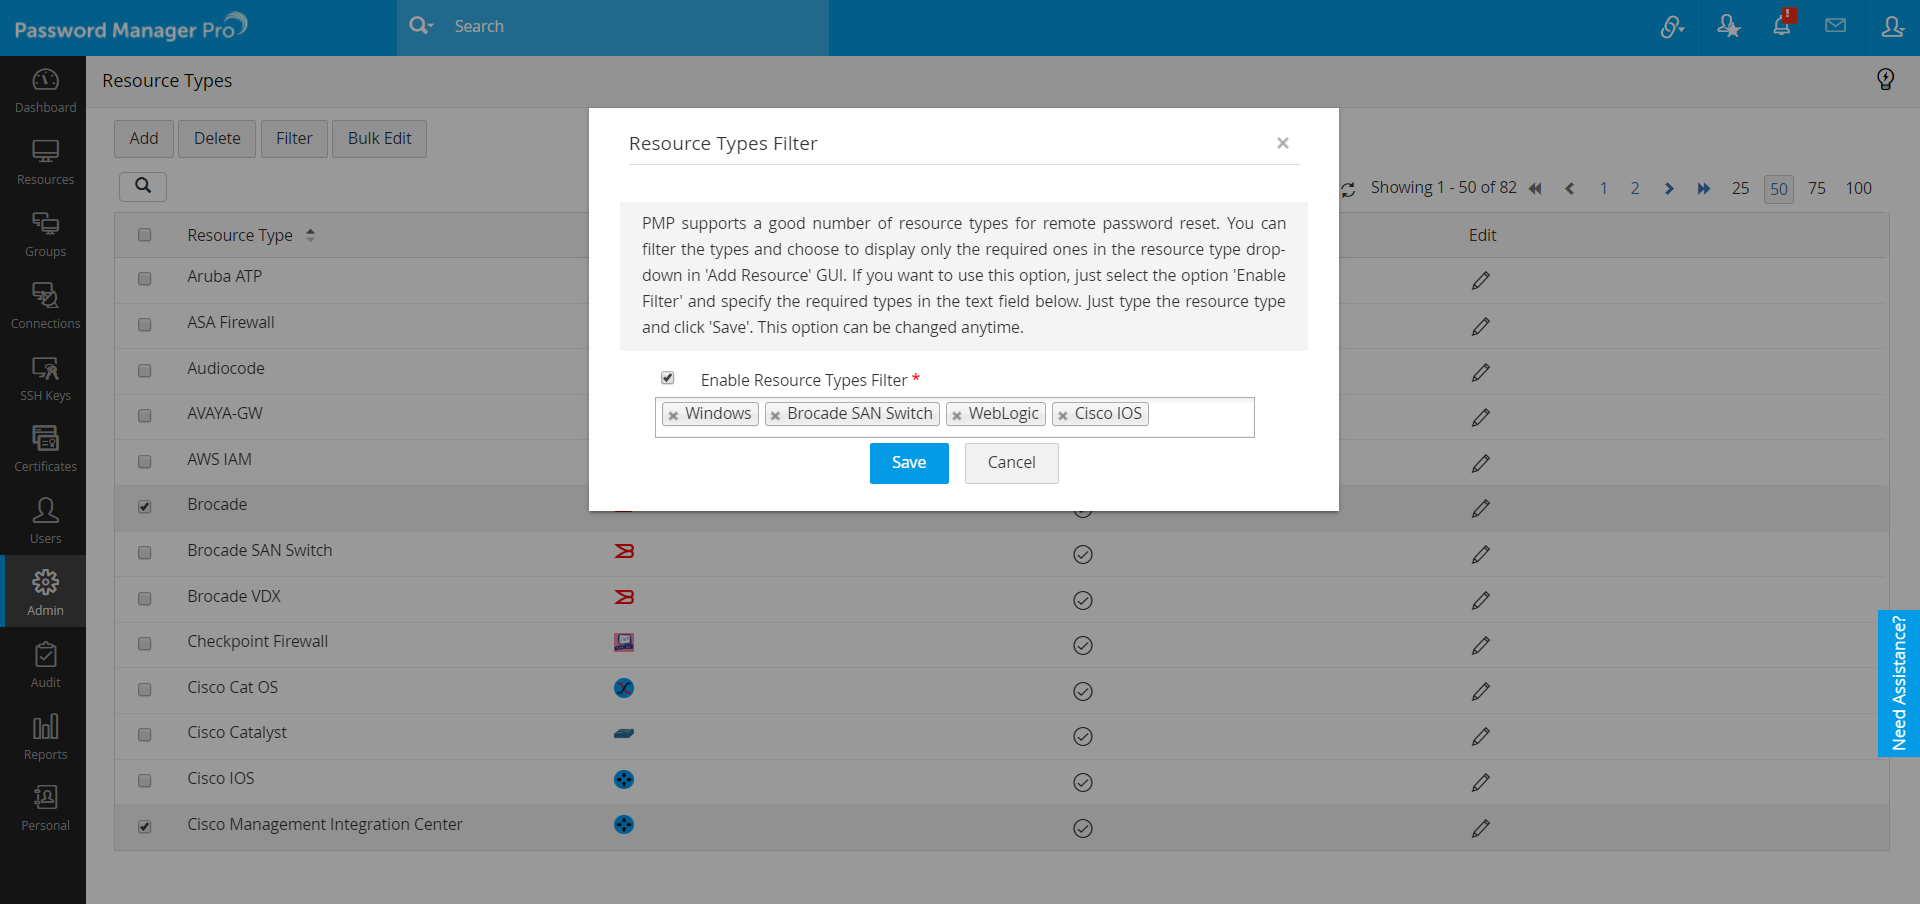
- In the pop-up box, select the checkbox Enable Resource Types Filter, then in the text field below, specify the resource types that you want to be displayed and save the changes.
6. Deleting a Resource Type
- Navigate to Admin >> Customization >> Resource Types.
- Select the resource type that is to be deleted and then click Delete; confirm delete by clicking OK in the pop-up dialog box.