Windows Scheduled Tasks Password Reset
Password Manager Pro can be scheduled to reset passwords on windows for improved security.
Steps Required
- Prerequisites
- Workflow
2.1 Add Domain Controller as a Resource with Resource Type WindowsDomain
2.2 Add Domain Admin Account and Scheduled Tasks
2.3 Add Domain Member Servers as New Resources and Create Resource Group
2.4 Configure Windows Scheduled Tasks Remote Password Reset
2.5 Associate Resource Groups for the Scheduled Tasks and Verify Supported Scheduled Tasks
- Viewing Scheduled Tasks Status
1. Prerequisites
The following are mandatory:
- Microsoft .Net framework 4.5.2 or above must be installed.
- Microsoft Visual C++ 2015 redistributable must be installed.
- Windows scheduled task reset is supported only for V2
- When Password Manager Pro is installed and run in one operating system (for eg: Windows server 2016), then the scheduled task password cannot be reset for the scheduled tasks running in lower OS versions (for eg: Windows server 2008 and below).
2. Workflow
2.1 Add domain controller as a resource with resource type WindowsDomain
- Navigate to "Resources" tab.
- Click on "Add Resource" button, and select "Add Manually" from the dropdown.
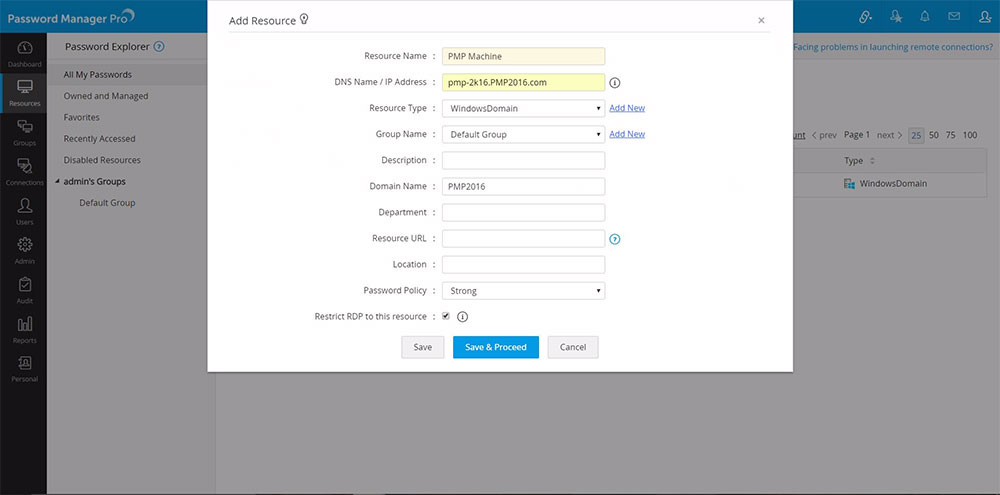
- In the pop-up form that opens, add the Domain Controller - PMP Machine as a new resource with 'Resource Type' as Windows Domain.
- Fill in the other details such as DNS name and Domain name.
- Click "Save & Proceed".
2.2 Add domain admin account and scheduled tasks
- Navigate to "Resources tab".
- Click the "Resource Actions" icon against the newly added resource and select "Add Accounts" from the drop down list.
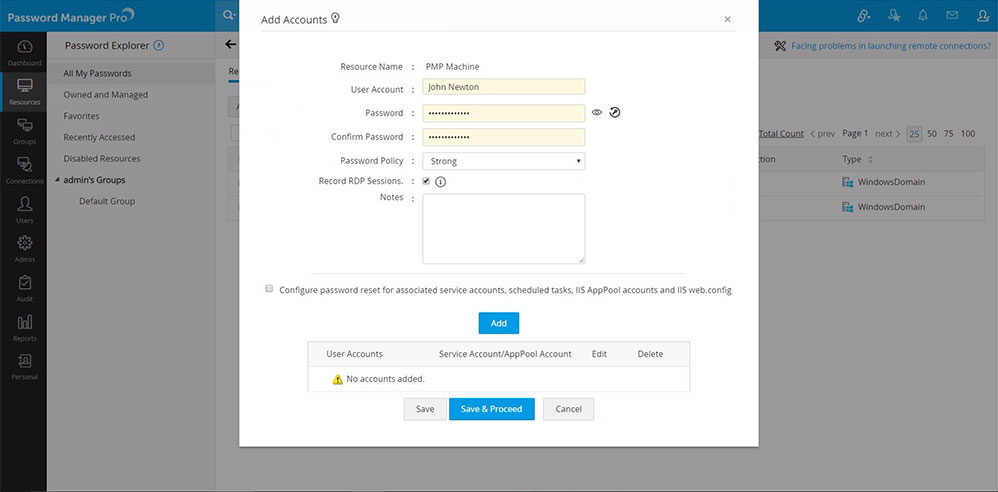
- In the pop-up form that opens, add the domain administrator account and click "Add".
- Then, continue to add the user accounts in the same way. When you are done, click "Save".
2.3 Add domain member servers as new resources and create resource group
Continue adding the other member servers of the domain - Win1, Win2, Win3, and Win4 as new resources in the same way as explained above.
- Navigate to "Resources" tab.
- Click "Add Resources" button and add the member servers.
- Now, go to "Groups" tab and click on "Add group" button and select 'Static Group' from the drop down.
- In the pop-up form that opens, name the group as RG1,provide description and select a password policy for the group. Click 'Save and proceed'
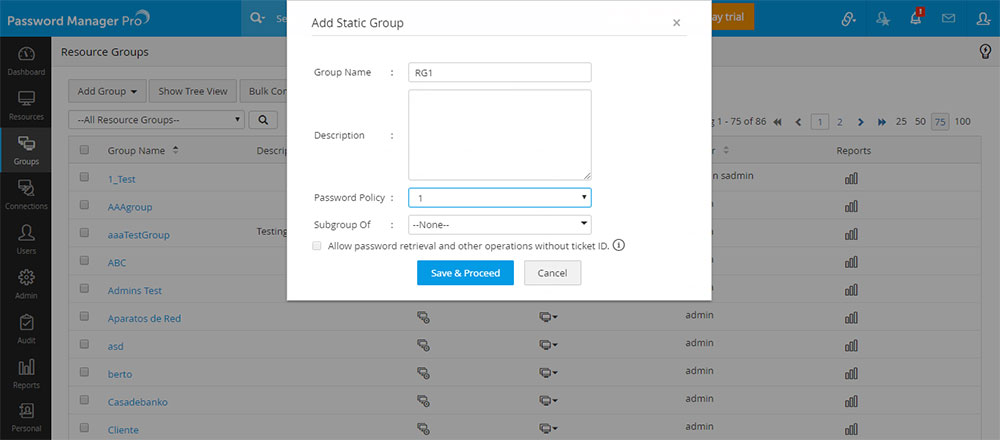
- Now, locate desired resources and click 'Add to group' against them.
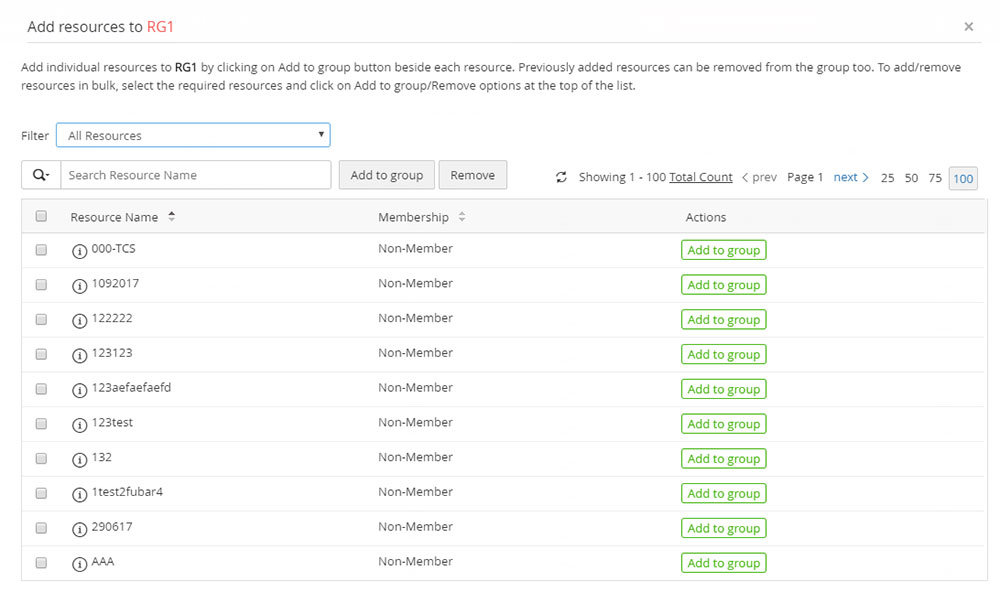
- Click 'Save'.
Alternate step: Automated discovery of resources and associated accounts
Instead of manual addition explained in Step 3, you can also discover the required resources and groups in your domain by following the steps given below:
- Navigate to "Resources" tab.
- Select 'Discover Resources' given at the top of the resources list.
- Supply your domain details (PMPDC) in the 'Windows' screen and click 'Fetch Groups and OUs'.
- From the enumerated list, select the Groups or OUs that you would like to import.
- Hit 'Import'. This will fetch your Groups/OUs and list them under 'Groups', in this case.
- The member servers in the imported Groups/OUs will also be listed individually under 'Resources' along with their respective local accounts.
2.4 Configure Windows scheduled tasks remote password reset
Instead of manual addition explained in Step 3, you can also discover the required resources and groups in your domain by following the steps given below:
- Navigate to "Resources" tab.
- Click the "Resource Actions" icon against the WindowsDomain resource and select "Configure password reset" from the drop down.
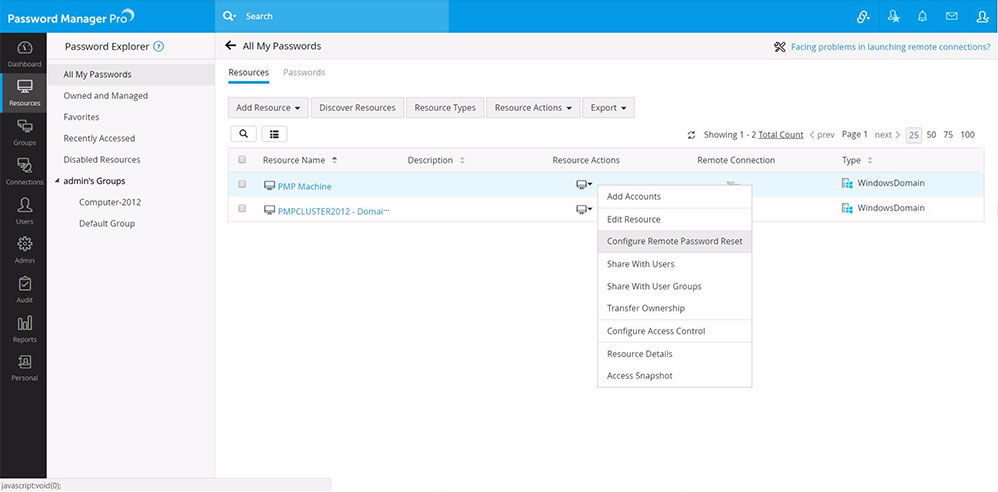
- In the pop-up form that appears, select the 'Domain Admin' account as the 'Administrator Account'
- Click "Save".
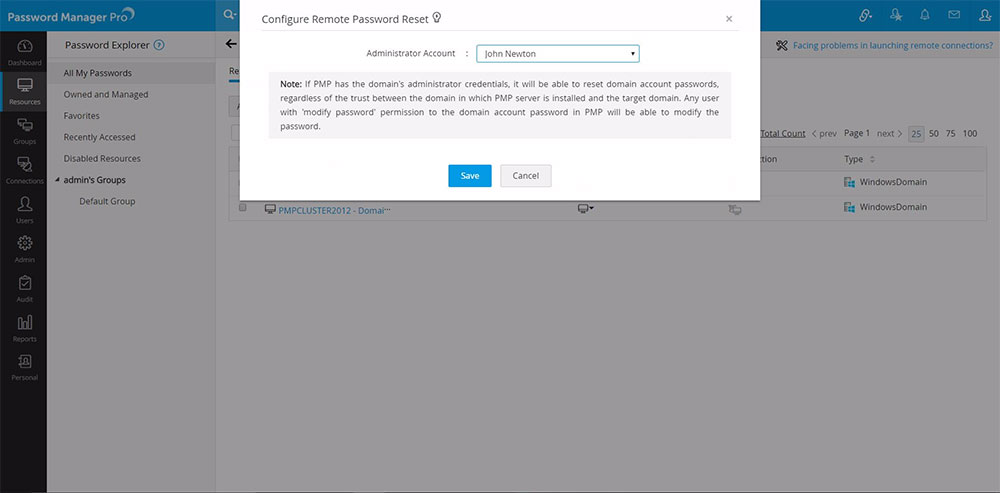
2.5 Associate resource groups for the scheduled tasks and verify supported scheduled tasks
- Click on the WindowsDomain resource name.
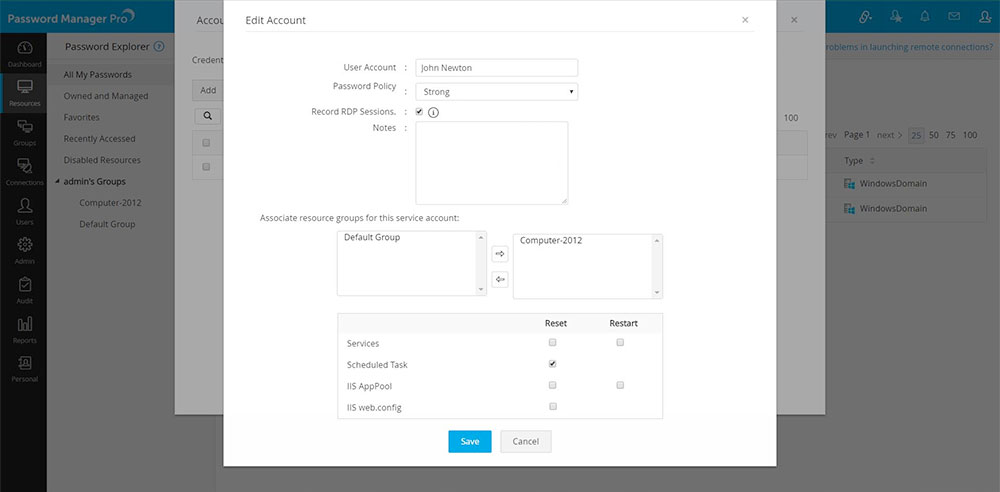
- In the UI that opens, click the "Account Actions" icon against the scheduled task account and then select "Edit Account" from the drop down.
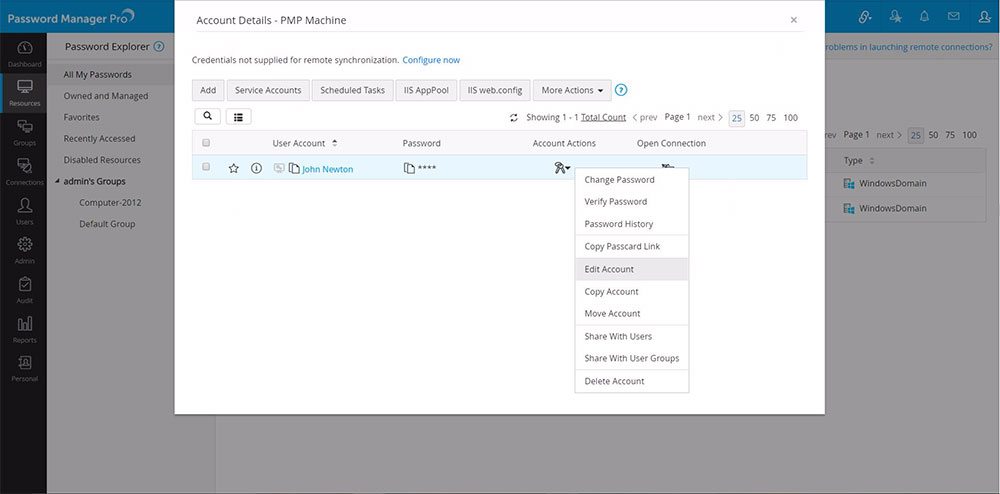
- In the pop-up form that appears, associate resource groups for this scheduled tasks account by moving desired groups to the other box on the right side.
- Check the checkbox for scheduled task account which you added in the 'Windows Domain' resource and click on the scheduled task account tab-> select Supported scheduled tasks tab.
- Scheduled tasks which uses this domain accounts as log on accounts will be listed. When you reset the password, it will be updated for the accounts used in the scheduled tasks running in the remote machine as well.
3. Viewing Scheduled Tasks Status
For any windows domain account (for which you have enabled Windows scheduled tasks reset), you can view the list of associated scheduled tasks and information on Windows scheduled tasks password reset.
To view this information,
- Go to "Resources" tab and click the name of the resource.
- In the UI that opens, select the domain account of the resource for which you wish to know the status of scheduled tasks password reset and click "Scheduled Tasks" button at the top of the list of accounts.
- In the dialog box that opens, switch to "Scheduled Tasks Status" tab.
