Configuring SAML SSO for 15Five
These steps will guide you through setting up the single sign-on functionality between ADSelfService Plus and 15Five
Prerequisite
- Log in to ADSelfService Plus as an administrator.
- Navigate to Configuration → Self-Service → Password Sync/Single Sign On → Add Application, and select 15Five from the applications displayed.
Note: You can also find 15Five application that you need from the search bar located in the left pane or the alphabet wise navigation option in the right pane.
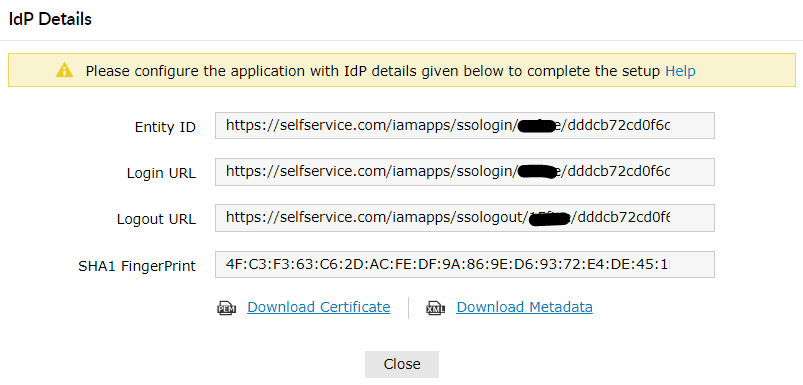
- Click IdP details in the top-right corner of the screen.
- In the pop-up that appears, Download the metadata file by clicking on the Download Metadata .
15Five (Service Provider) configuration steps
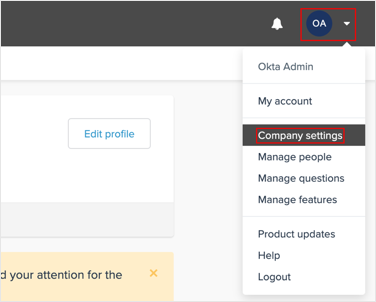
- Login to 15Five with an administrator’s credentials.
(https://<subdomain>.15five.com/saml2/sso/config/) - Click on the Profile icon → Company Settings.
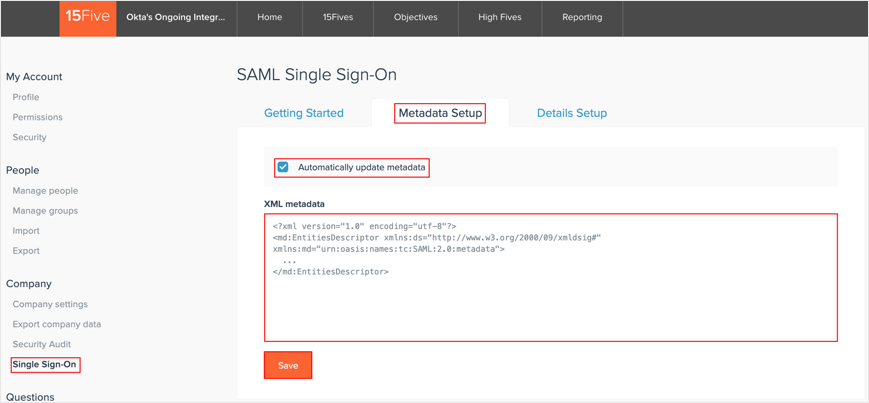
- Go to Company → Single Sign-on.
- In the Metadata setup tab, select the Automatically update metadata option.
-
Open the downloaded metadata file (from the prerequisite), copy it, and paste it in the XML metadata field.
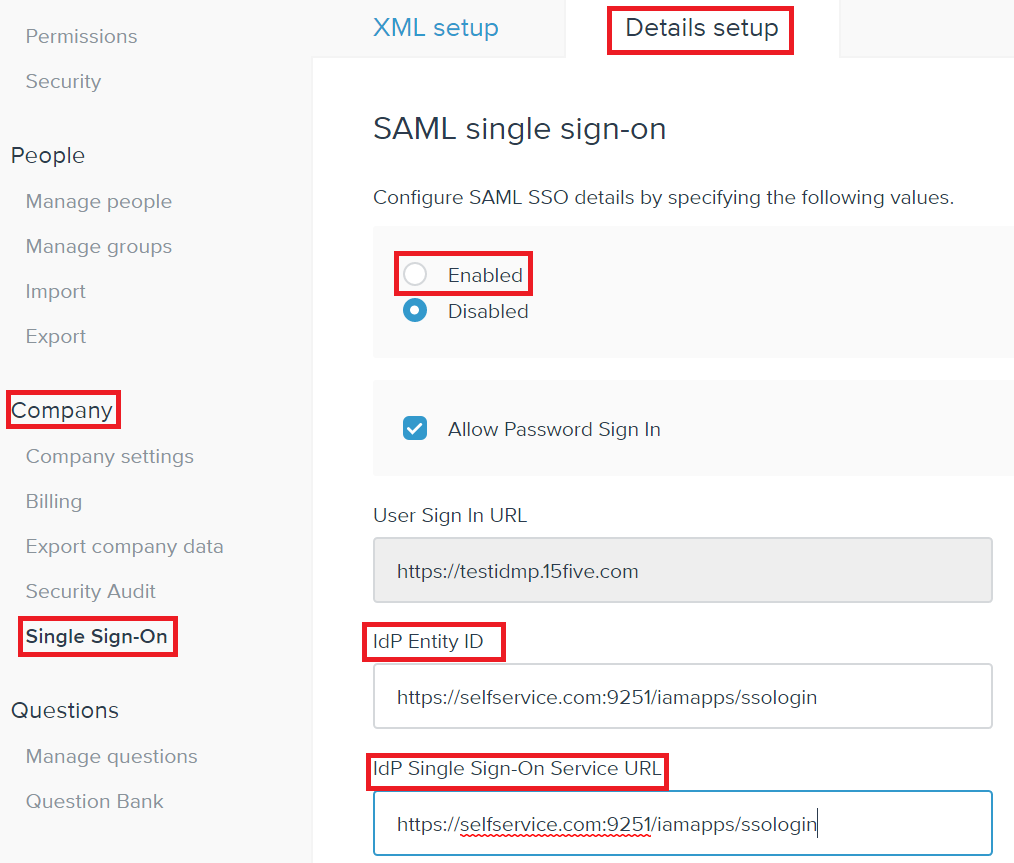
- Go to the Details Setup tab, and
- Select the SAML Single Sign-On Enabled option.
- IdP Entity ID and IdP Single Sign-On Service URL: These fields are auto-populated from the metadata file you saved in step 5
- Click Save.
- Under Details Setup, enable SAML.
- You can save the configuration.
ADSelfService Plus (Identity Provider) configuration steps
- Now, switch to ADSelfService Plus’ 15Five configuration page.
- Enter the Application Name and Description.
- In the Assign Policies field, select the policies for which SSO need to be enabled.
Note: ADSelfService Plus allows you to create OU and group-based policies for your AD domains. To create a policy, go to Configuration → Self-Service → Policy Configuration → Add New Policy.
- Select Enable Single Sign-On.
- Enter the Domain Name of your 15Five account. For example, if you use johndoe@15five.com to log in to 15Five, then 15five.com is the domain name.
- Enter the sub-domain name of your 15Five portal in the SP Identifier field. Example format: https://<sp_identifier>.15five.com
- Enter the Assertion Consumer Service URL provided by your application service provider in the Assertion Consumer Service URL field. If required, click the + button next to the text field to add multiple Assertion Consumer URLs. These values can be found in the application's SSO configuration page or metadata. Please reach out to your application's support team if you are having trouble locating the Assertion Consumer Service URL in your application's user interface or metadata.
- In the Name ID Format field, choose the format for the user login attribute value specific to the application.
- Click Add Application.
Note: Use Unspecified as the default option if you are unsure about the format of the login attribute value used by the application
Note: For 15Five, single sign-on is supported for SP and IDP initiated flow.