How To
Examples
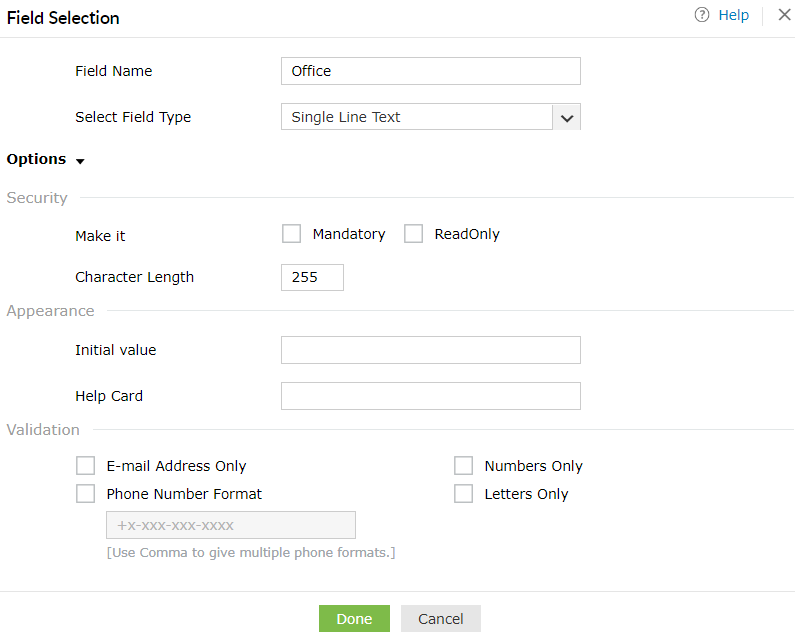
How to set a field as Single Line Text?
-
"Drag and Drop" the desired field into the layout creation area.
-
Select "Single Line Text" field type from the Drop-Down menu.
-
To set Security, check against "Mandatory" or "Read only".
-
Set Character Length.
-
Set Appearance
-
Initial Value (Provide input that will appear as default text).
-
Help Card(Text you enter acts as a tooltip, when the end user moves the mouse on the icon).
-
Click on Done.
How to set a field as Multi Line Text?

-
"Drag and Drop" the desired field into the layout creation area.
-
Select "Multi Line Text" field type from the Drop-Down menu.
-
To set Security, check against "Mandatory" or "Read only".
-
Set Appearance
-
Initial Value (Provide input that will appear as default text).
-
Help Card(Text you enter acts as a tooltip, when the end user moves the mouse on the icon).
-
Click on Done.
How to set a field as Drop-Down Box?
-
"Drag and Drop" the desired field into the layout creation area.
-
Select "Drop-Down Box" field type from the Drop-Down box.
-
Enter your options in "Enter Choices" field.
-
To set Security, check against "Mandatory" or "Read only".
-
Set Appearance
-
Help Card(Text you enter acts as a tooltip, when the end user moves the mouse on the icon).
-
Click on Done.
How to set a field as Check Box?

-
"Drag and Drop" the desired field into the layout creation area.
-
Select "Check Box" field type from the Drop-Down menu.
-
Enter your options in "Enter Choices" field.
-
To set Security, check against "Mandatory" or "Read only".
-
Set Appearance
-
Help Card(Text you enter acts as a tooltip, when the end user moves the mouse on the icon).
-
Click on Done.
-
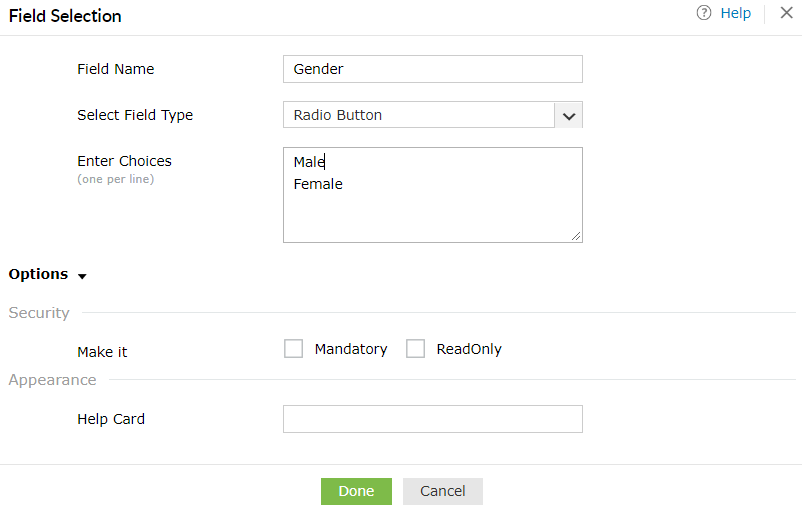
"Drag and Drop" the desired field into the layout creation area.
-
Select "Radio Button" field type from the Drop-Down menu.
-
Enter your options in "Enter Choices" field.
-
To set Security, check against "Mandatory" or "Read only".
-
Set Appearance
-
Help Card(Text you enter acts as a tooltip, when the end user moves the mouse on the icon).
-
Click on Done.
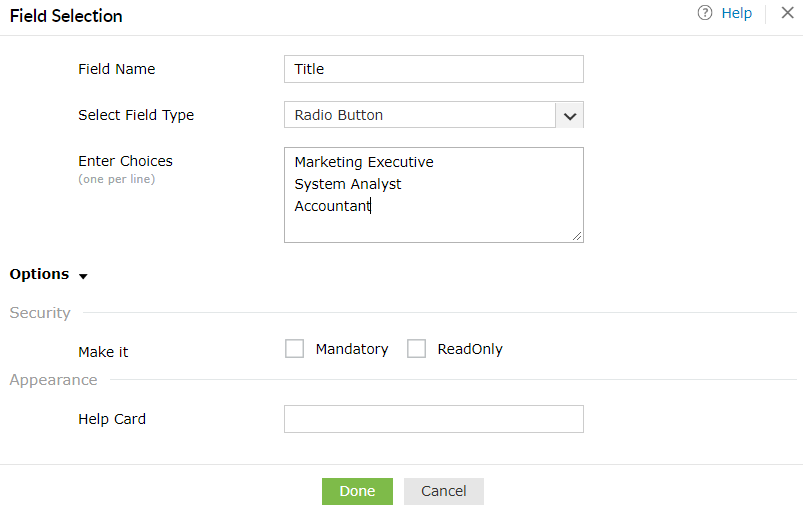
Example to Customize the Title Attribute
-
"Drag and Drop" the Title attribute into the layout creation area.
-
Select "Radio Button" field type from the Drop-Down menu.
-
Enter your options in the "Enter Choices" field (as shown in the above figure).
-
To set Security, check against "Mandatory" or "Read only".
-
Set Appearance
-
Help Card(Text you enter acts as a tooltip, when the end user moves the mouse on the icon).
-
Click on Done.
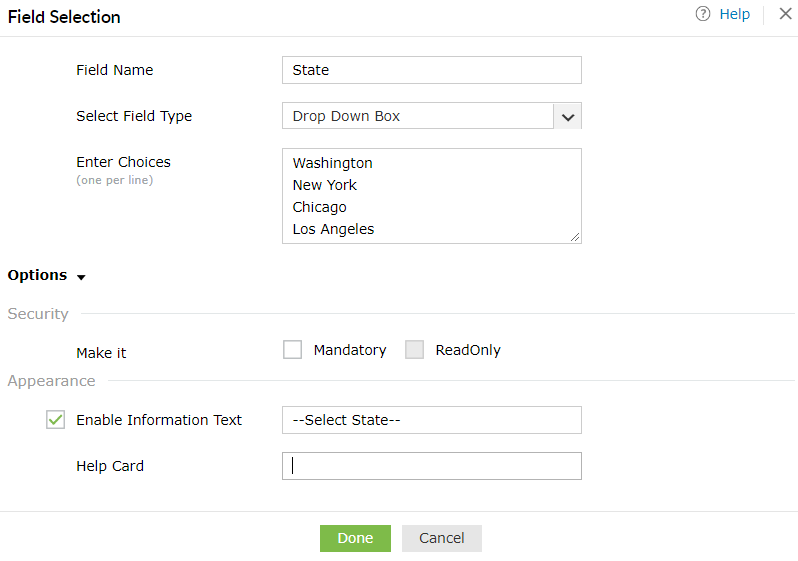
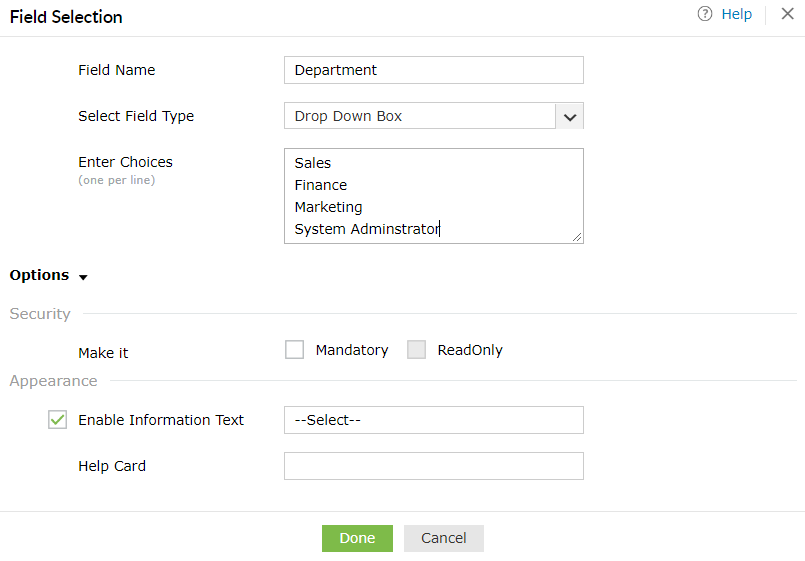
Example to Customize the Department Attribute
-
"Drag and Drop" the Department attribute into the layout creation area.
-
Select "Drop Down Box" field type from the Drop-Down menu.
-
Enter your options in the "Enter Choices" field (as shown in the above figure).
-
To set Security, check against "Mandatory" or "Read only".
-
Set Appearance
-
Help Card(Text you enter acts as a tooltip, when the end user moves the mouse on the icon).
-
Click on Done.
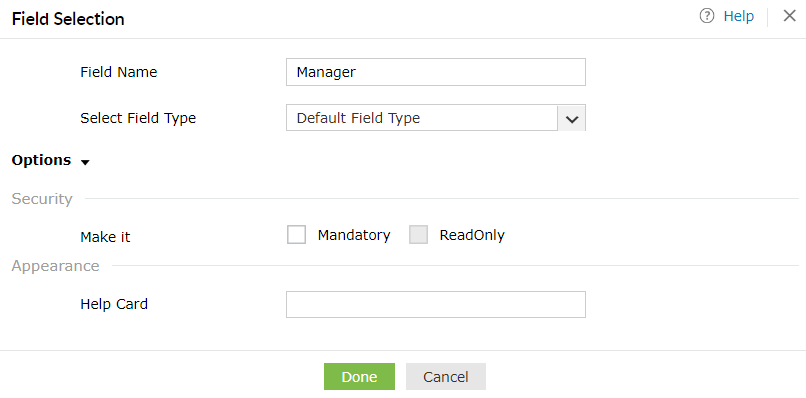
Example to Customize the Manager Attribute
Default Field Type:
-
"Drag and Drop" the Manager attribute into the layout creation area.
-
"Default Field Type" option is preselected in the Drop Down menu.
-
To set Security, check against "Mandatory" or "Read only".
-
Set Appearance
-
Initial Value (Provide input that will appear as default text).
-
Help Card(Text you enter acts as a tooltip, when the end user moves the mouse on the icon).
-
Click on Done.
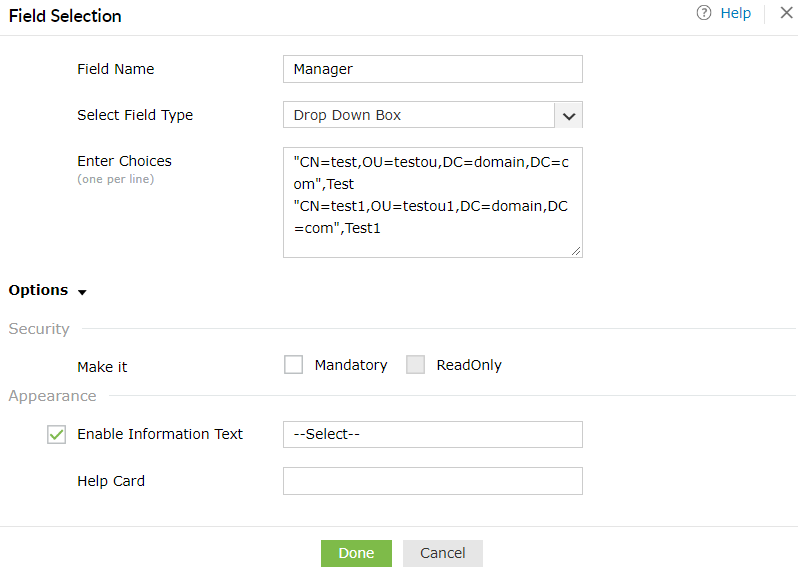
Drop Down Box:
-
"Drag and Drop" the Manager attribute into the layout creation area.
-
Select "Drop Down Box" field type from the Drop-Down menu.
-
Enter your options in the "Enter Choices" field (as shown in the above figure).
-
To set Security, check against "Mandatory" or "Read only".
-
Set Appearance
-
Help Card(Text you enter acts as a tooltip, when the end user moves the mouse on the icon).
-
Click on Done.