Password Synchronization with ServiceNow
Steps to configure ServiceNow accounts with ADSelfService Plus
Important: Install the Password Sync Agent to synchronize native password changes and resets.
- Log into ADSelfService Plus admin console with admin credentials.
- Navigate to Configuration → Self-Service → Password Sync/ Single Sign On.
-
Select the ServiceNow application.
Note: You can also find ServiceNow application that you need from the search bar located in the left pane or the alphabet wise navigation option in the right pane.
- Enter the Application Name and Description.
- In the Instance Name, enter the instance name from the instance URL of the ServiceNow account.(Example: https://<Instance Name>.service-now.com/)
-
In the Assign Policies field, select the policies for which password sync need to be enabled.
Note: ADSelfService Plus allows you to create OU and group-based policies for your AD domains. To create a policy, go to Configuration → Self-Service → Policy Configuration → Add New Policy.
- Select Enable Password Sync.
- Type the User Name and Password of the ServiceNow account in the respective fields. If the user account does not have read and write privileges to either sys_user.user_password or sys_user.locked_out, they must be provided manually.
- Click Add Application.
A. Privileges required to change password
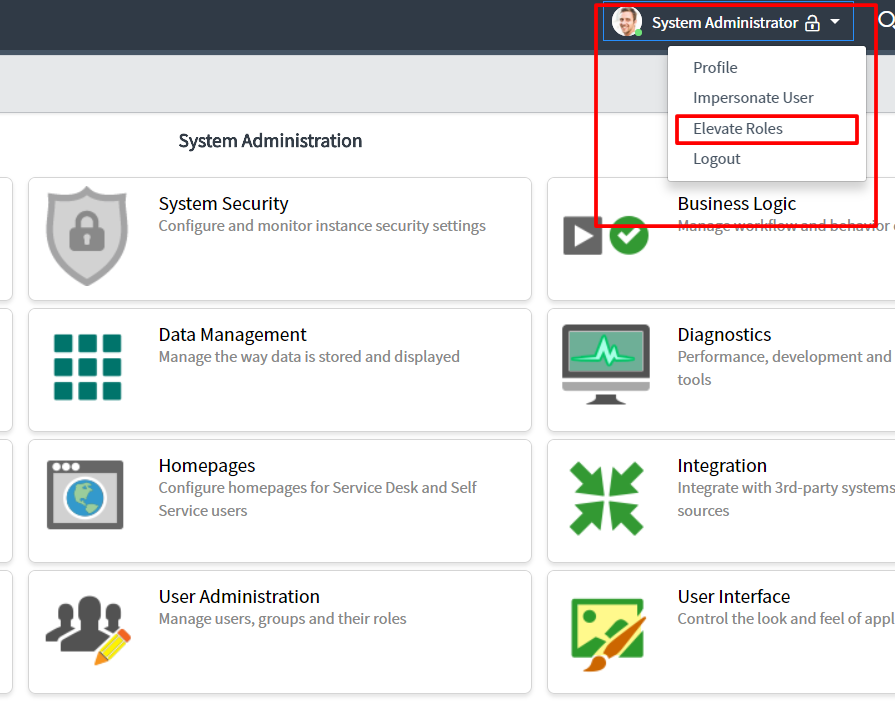
- Login to the ServiceNow web-console with admin credentials.
-
From the System Administrator drop-down box, select Elevate Roles.
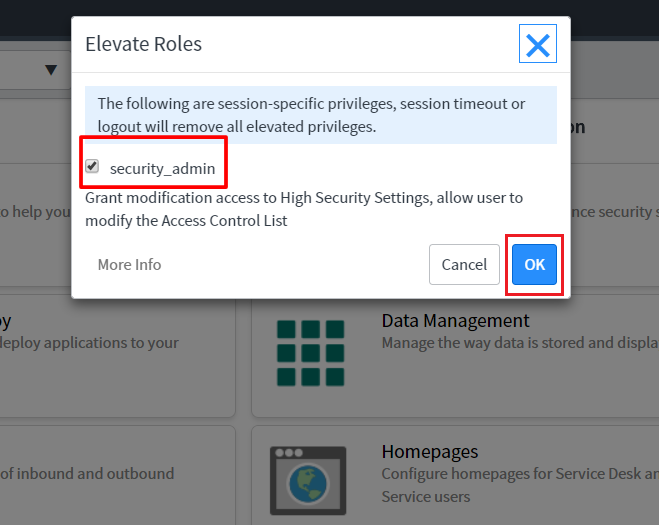
-
Select the security_admin option and click OK.
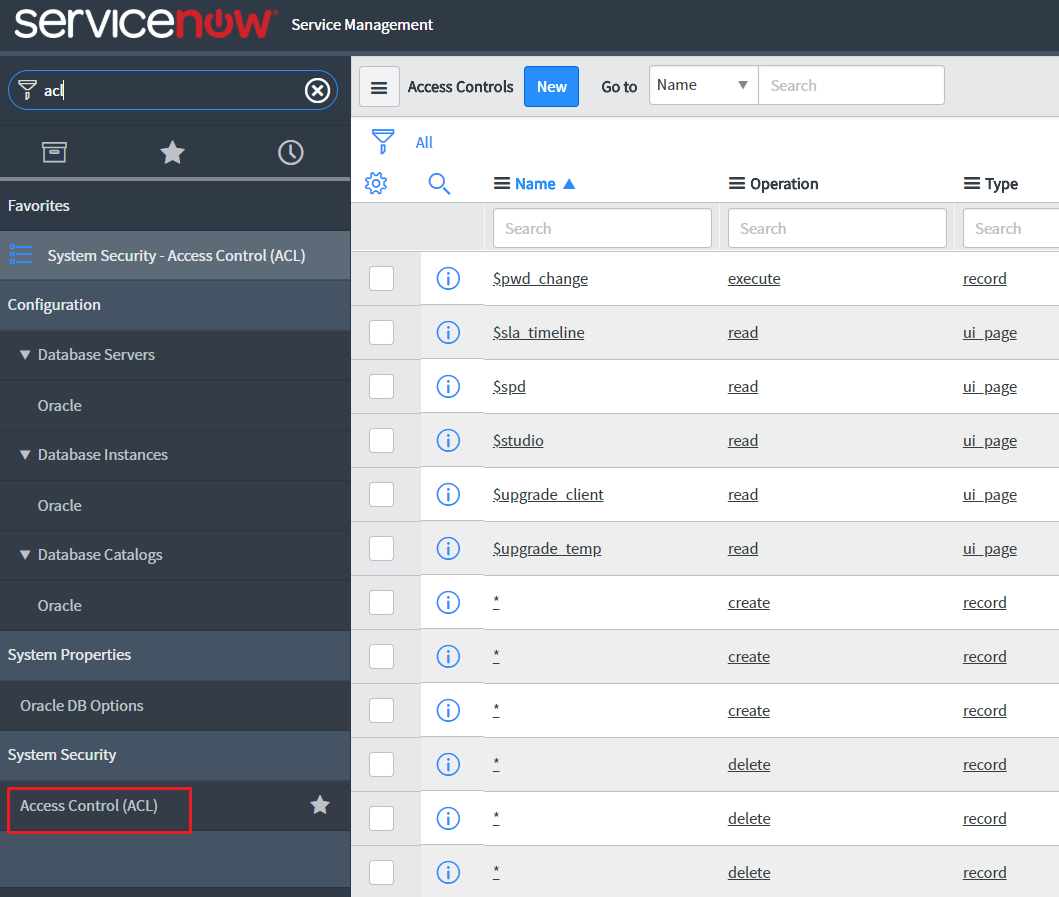
-
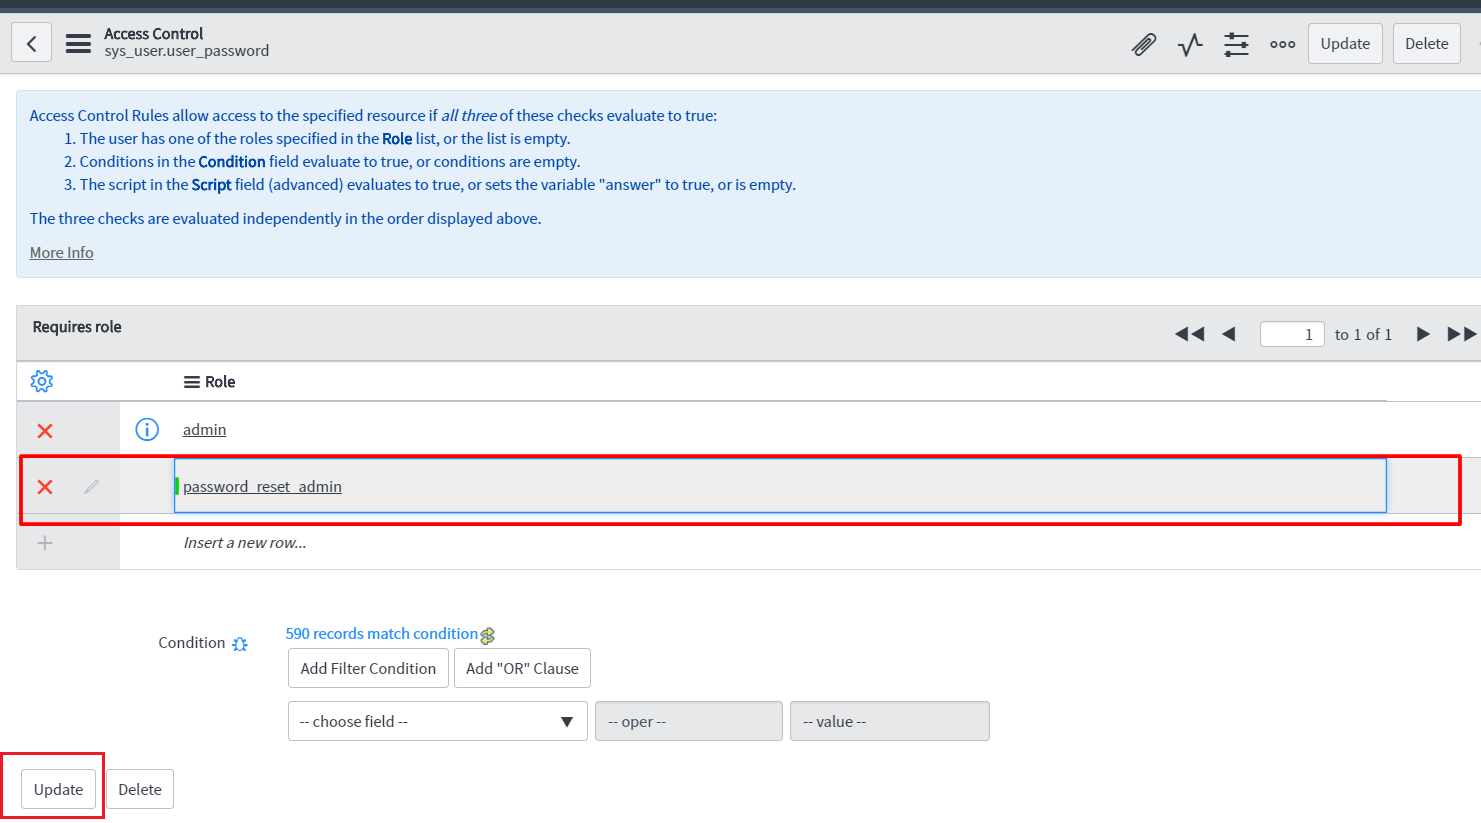
Now select the Access Control tab from the System Security module.
-
In the Search field of the Name module, type sys_user.user_password. From the list displayed, select the sys_user.user_password field with read operation.
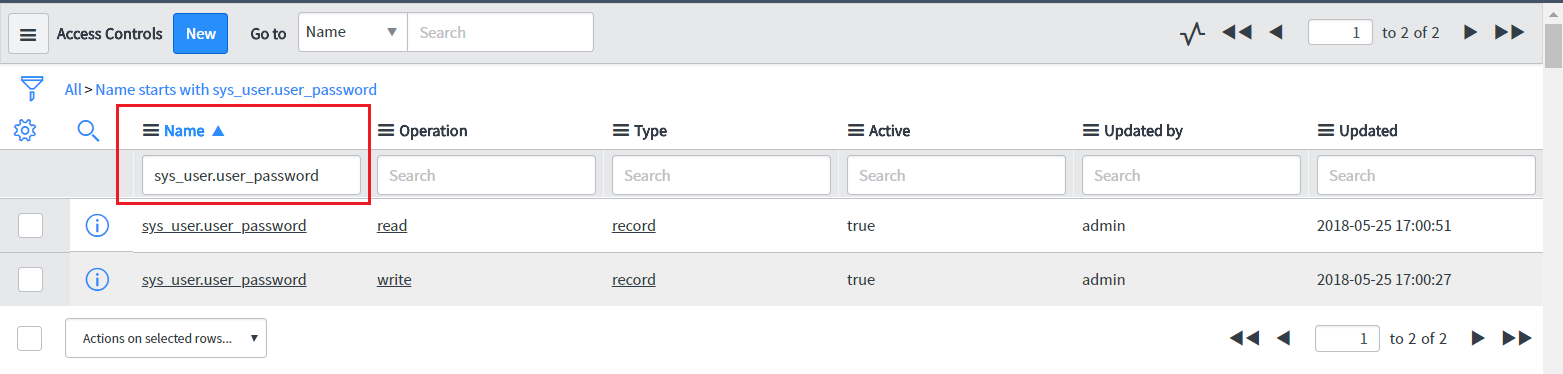
-
Click Insert a new row to add a new role. Click Update.
- Back in the Search list, select the sys_user.user_password field with write operation. Add a new role by selecting Insert a new row and Update the changes.
B. Privileges required to unlock account
- In the Search field of the Name module, type sys_user.locked_out. From the list displayed, select the sys_user.locked_out field with read operation. Add a new role by selecting Insert a new row and Update the changes.
- Back in the Search list, select the sys_user.locked_out field with write operation. Add a new role by selecting Insert a new row and Update the changes.
Users with the privileged roles can now configure password synchronization between ServiceNow and Active Directory in ADSelfService Plus.